Sponsor Authentication with OTP
Introduction
One method of authentication within captive portals is sponsor-based authentication, where users are granted access by a sponsor. In this document, we will discuss the setup and configuration of sponsor authentication with one-time passwords (OTPs) using the Flora template in Meraki hardware or the Raga template in Kloudspot Gateway hardware.
Template Customization
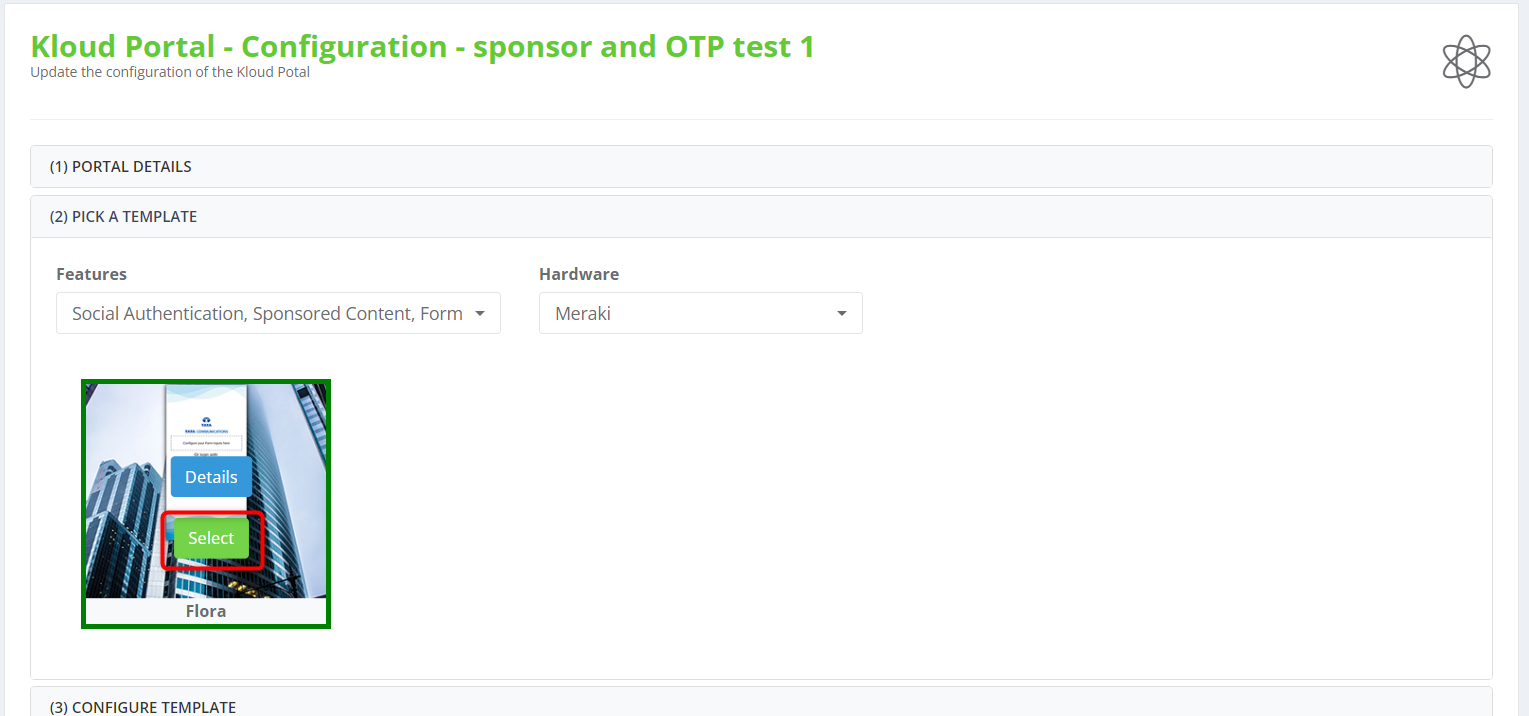
- Choose the Flora template for Meraki hardware or the Raga template for Kloudspot Gateway hardware. For a detailed walkthrough on customizing templates, please refer to the “Customizing Captive Portal Templates” section.
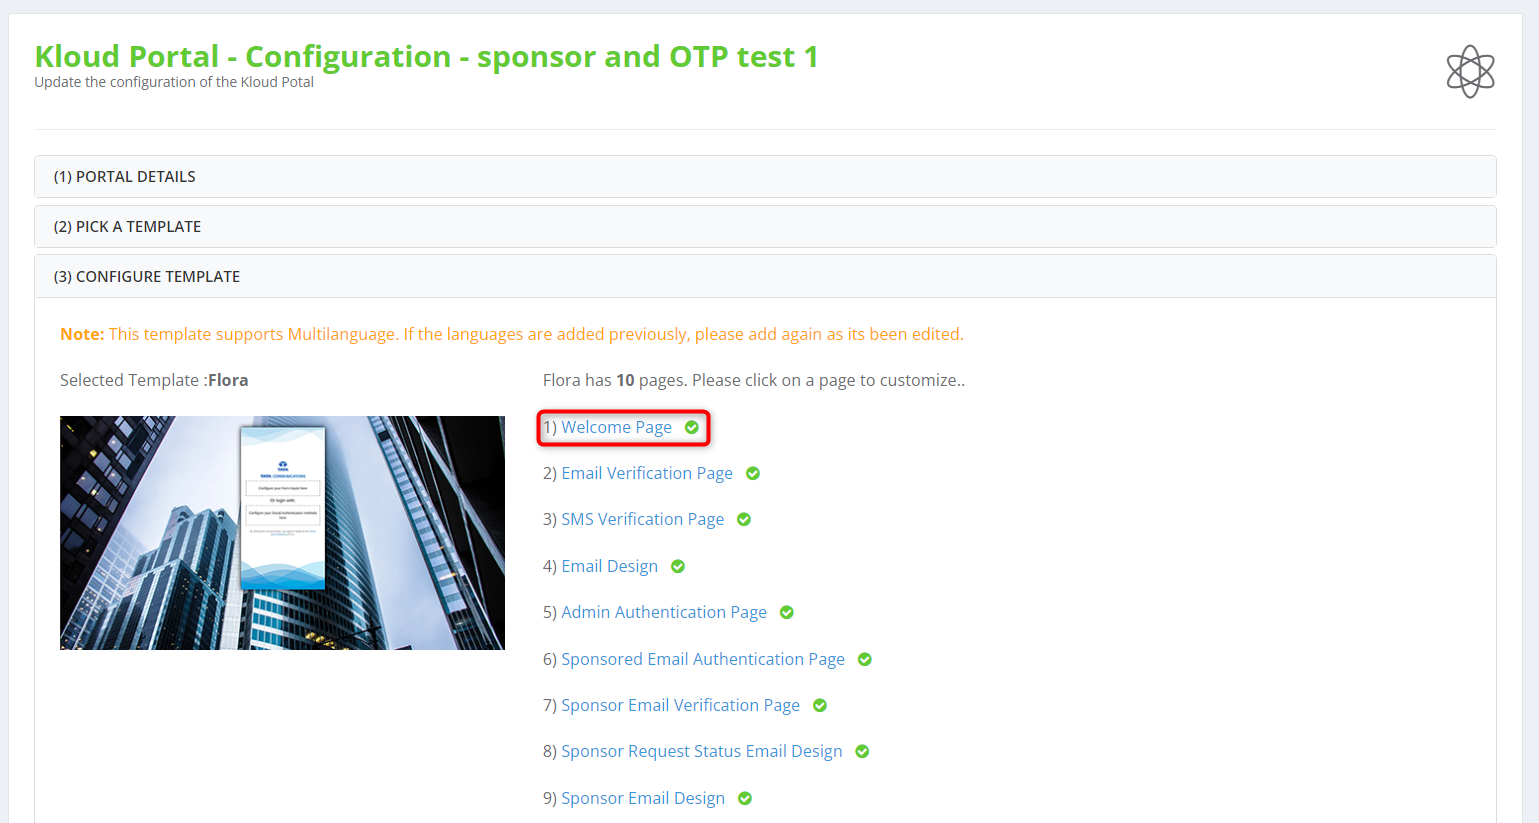
- Access the welcome page in the template configuration section.
-
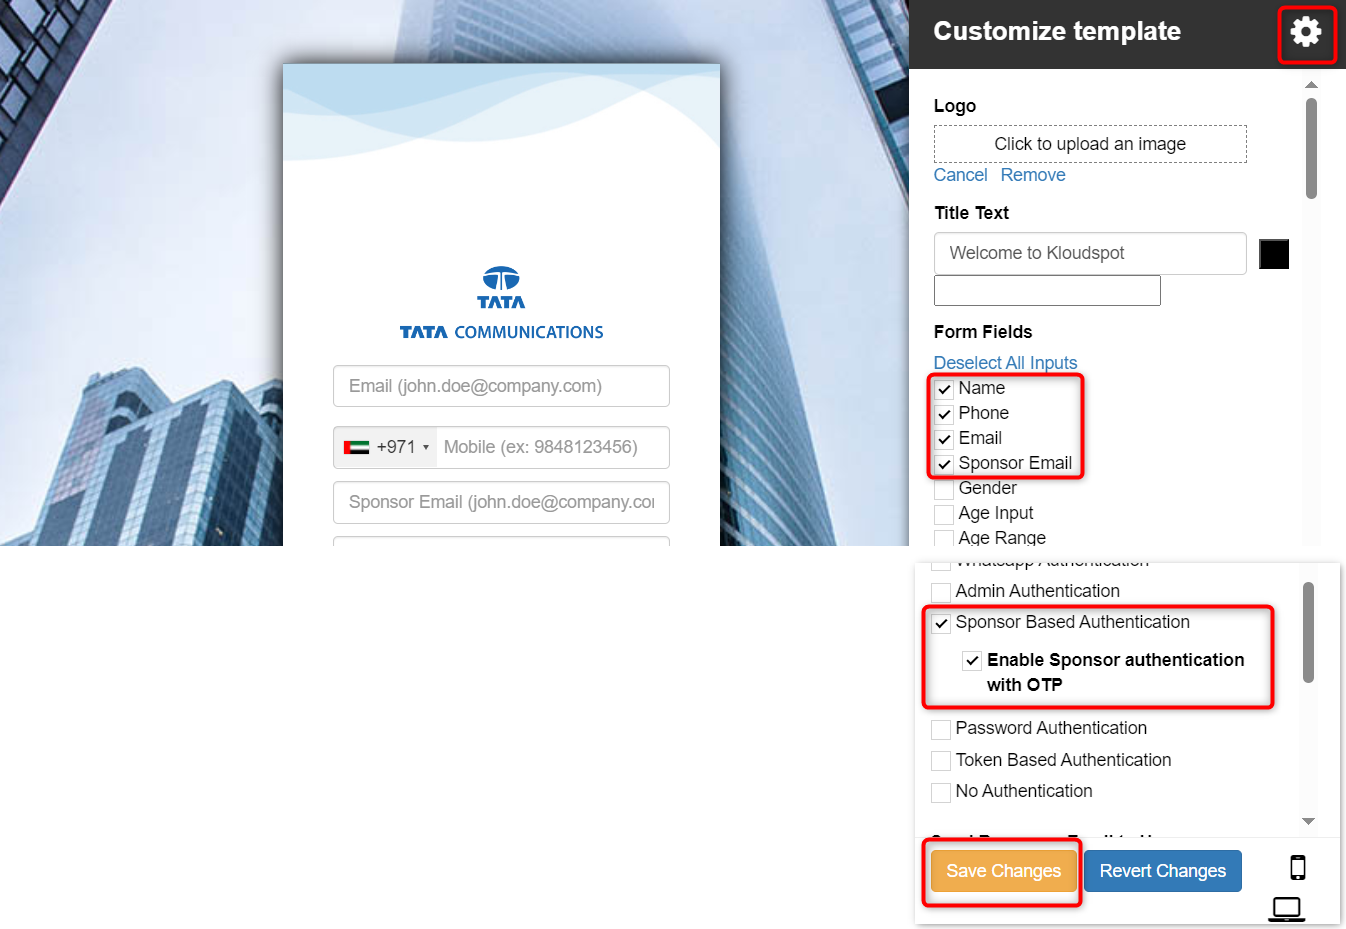
Click on the settings button.
-
Select the following form fields: Name, Phone, Email, Sponsor Email, and WI-FI Access Period.
Note: WI-FI Access Period is optional but recommended for better control over access duration.
-
Scroll down and check the Sponsor Based Authentication checkbox.
-
Check the Enable Sponsor authentication with OTP option.
Note: If you only want Sponsor Based Authentication, you do not need to check the Sponsor authentication with the OTP.
-
Adjust other configurations as necessary.
-
Click the Save changes button.
-
To learn more about template customization, refer to the Customizing Captive Portal Templates section.
-
After customizing the portal as per your requirement click on Save button and save.

Assigning the Captive Portal to Access Point
-
Follow the guidelines provided in the Assign a Guest Portal to the Access Point section to assign the customized captive portal to the access point.
Note: The captive portal’s expiration time will coincide with the access point’s expiration time if the WI-FI Access Period check box is not checked.
Add Sponsored Email or Domain
-
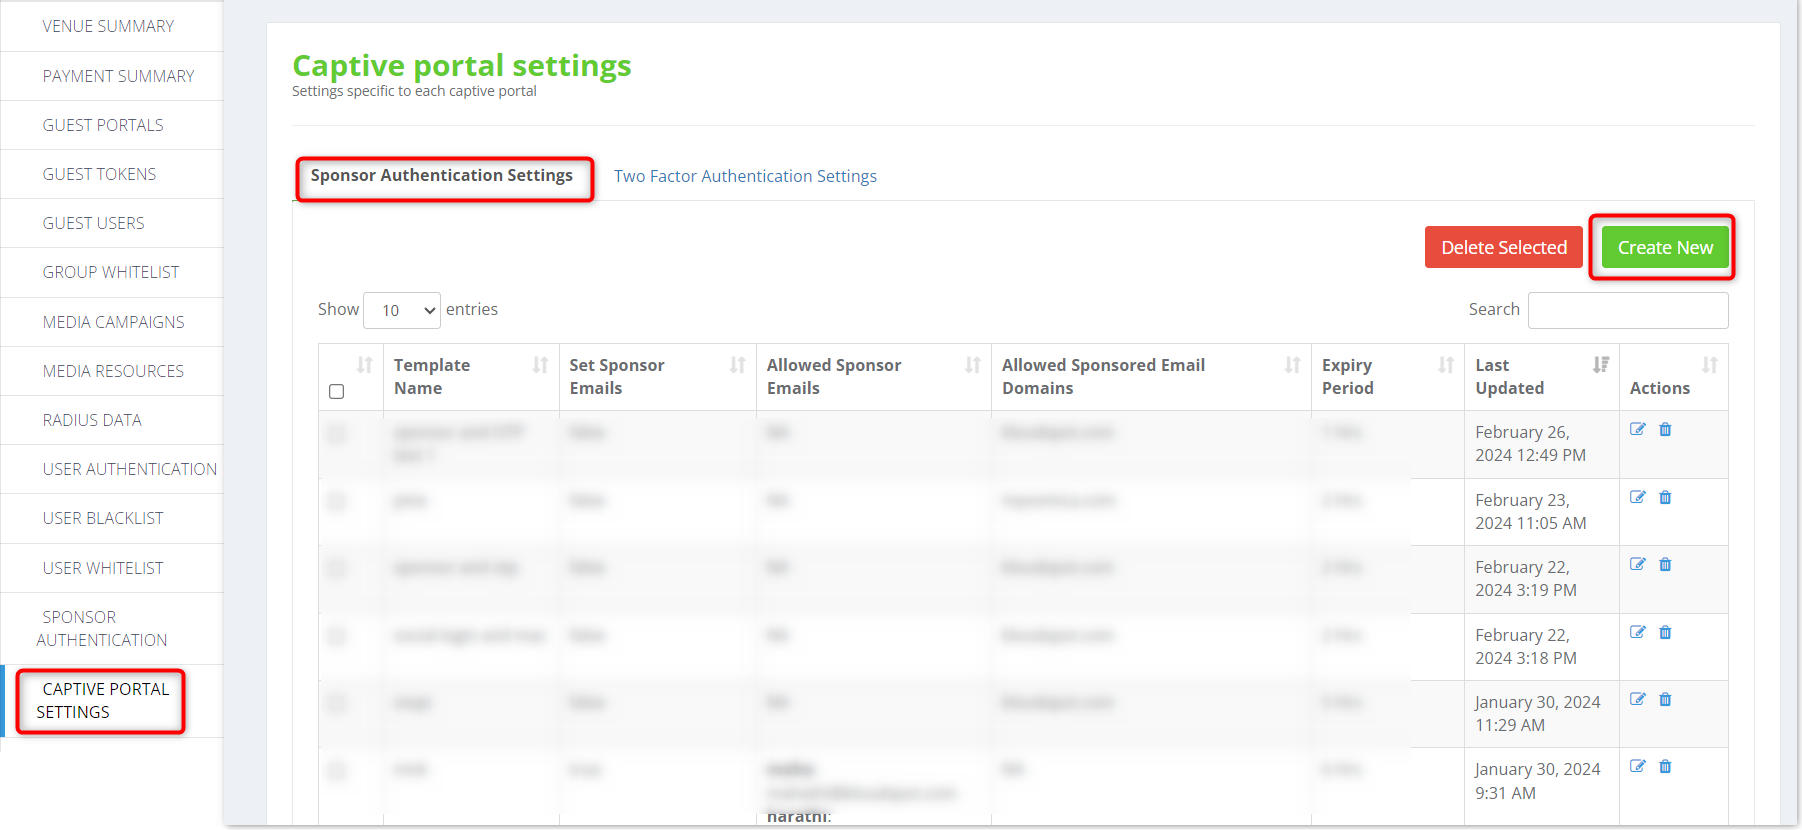
Access captive portal settings.
-
Go to Sponsor Authentication Settings tab.
-
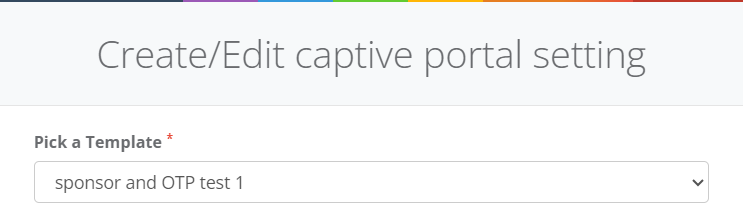
Click on the Create new button.
- Select the previously created template.
-
Choose one of the following options:
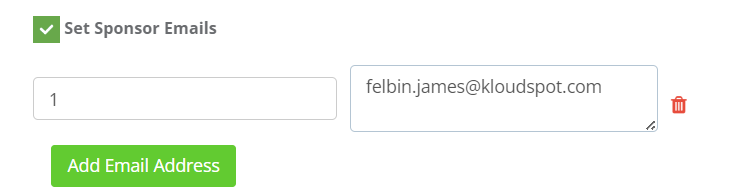
a. Enter the sponsor’s email address directly:
- Check the Set Sponsor Emails checkbox.
- Click on the Add email address button.
- Enter sponsor name and email.
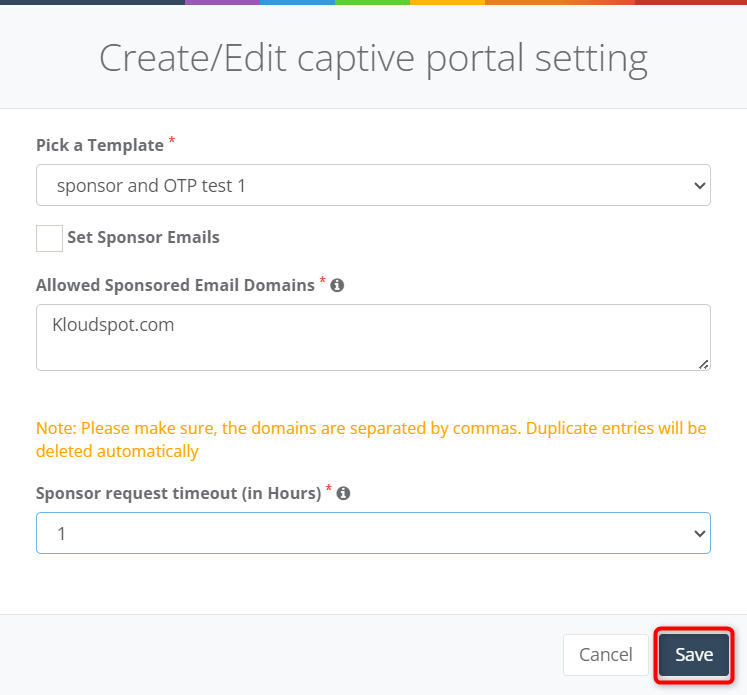
b. Provide Sponsor’s Email Domains:
- Enter email domains, separating multiple domains with commas.

-
Set the timeout duration for sponsor requests.
-
Click the Save button to save the changes.
Testing
-
Now that the captive portal is configured, it’s essential to test it to ensure proper functionality. Test the captive portal by accessing the network and initiating the sponsor authentication process.
-
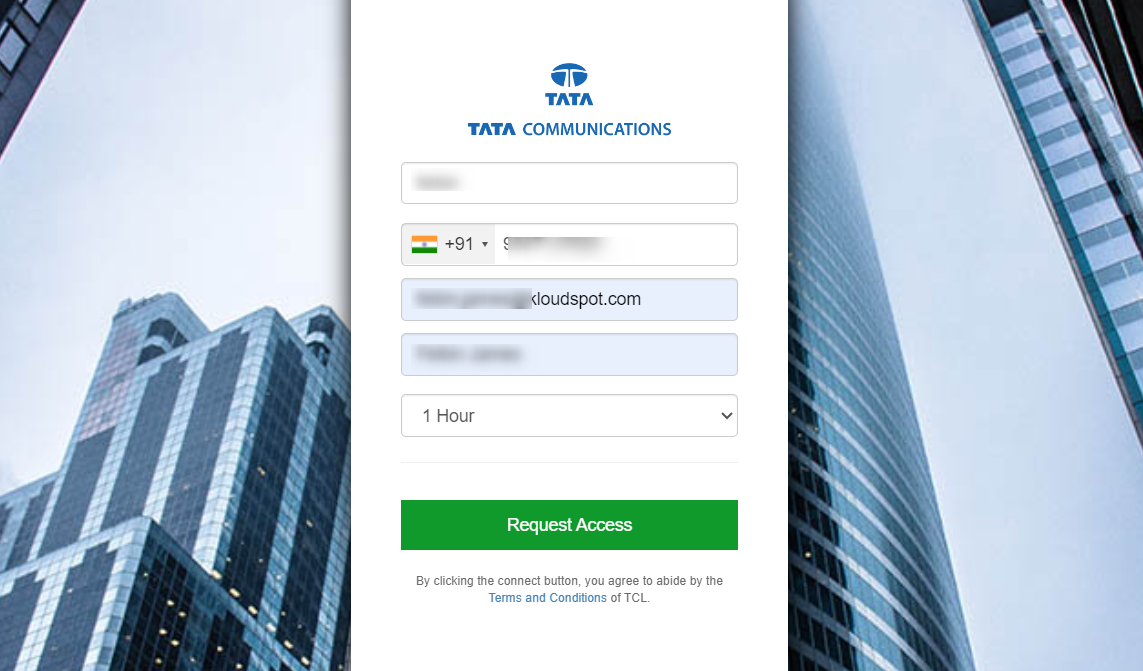
On the captive portal login page, enter the user’s email ID, phone number, sponsor’s email, name, Wi-Fi expiration time and click on the Request Access button.
Note: The Wi-Fi expiration time dropdown is only available if the WI-FI Access Period field is checked.
- Authentication mail will be sent to the sponsor immediately.
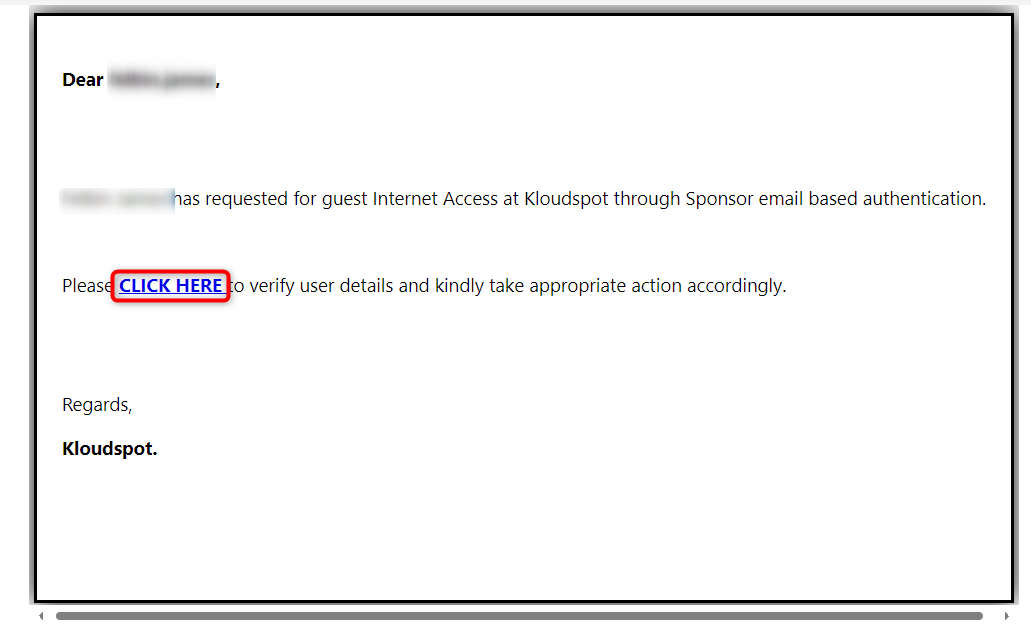
- The sponsor can approve or decline it.
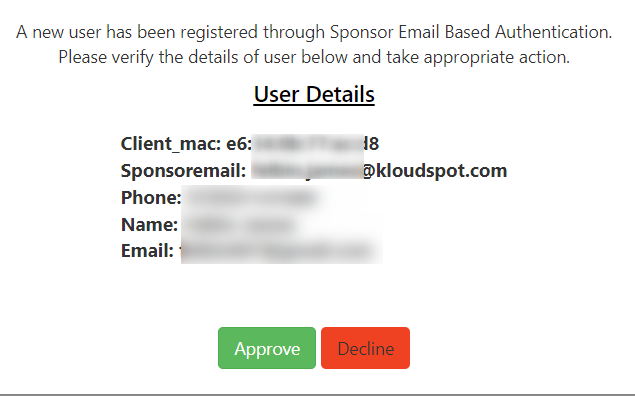
- Once approved, the user can use the internet.
