Okta Authentication for Captive Portal
Overview
This technical documentation guides you through the process of configuring Okta authentication for a Captive Portal using the Pine template on EnGenius hardware. Follow the steps outlined below to seamlessly integrate Okta for social login on your captive portal.
Template Customization with Pine Template
-
This feature is compatible with the Pine template on EnGenius hardware.
-
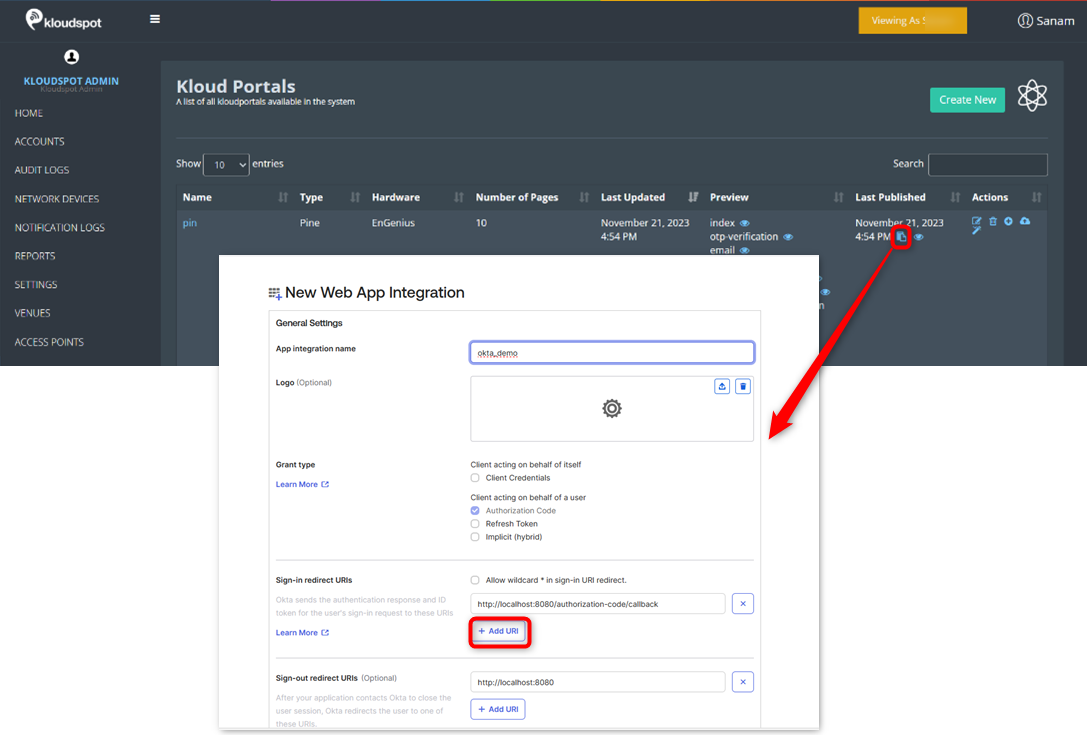
To start the configuration, Okta should be integrated with KloudManage, refer to the Okta Authentication section to know how to do it.
-
For detailed instructions on customizing templates, refer to the Customizing Captive Portal Templates section.
-
In this case, proceed by selecting the Pine template using the designated button.
-
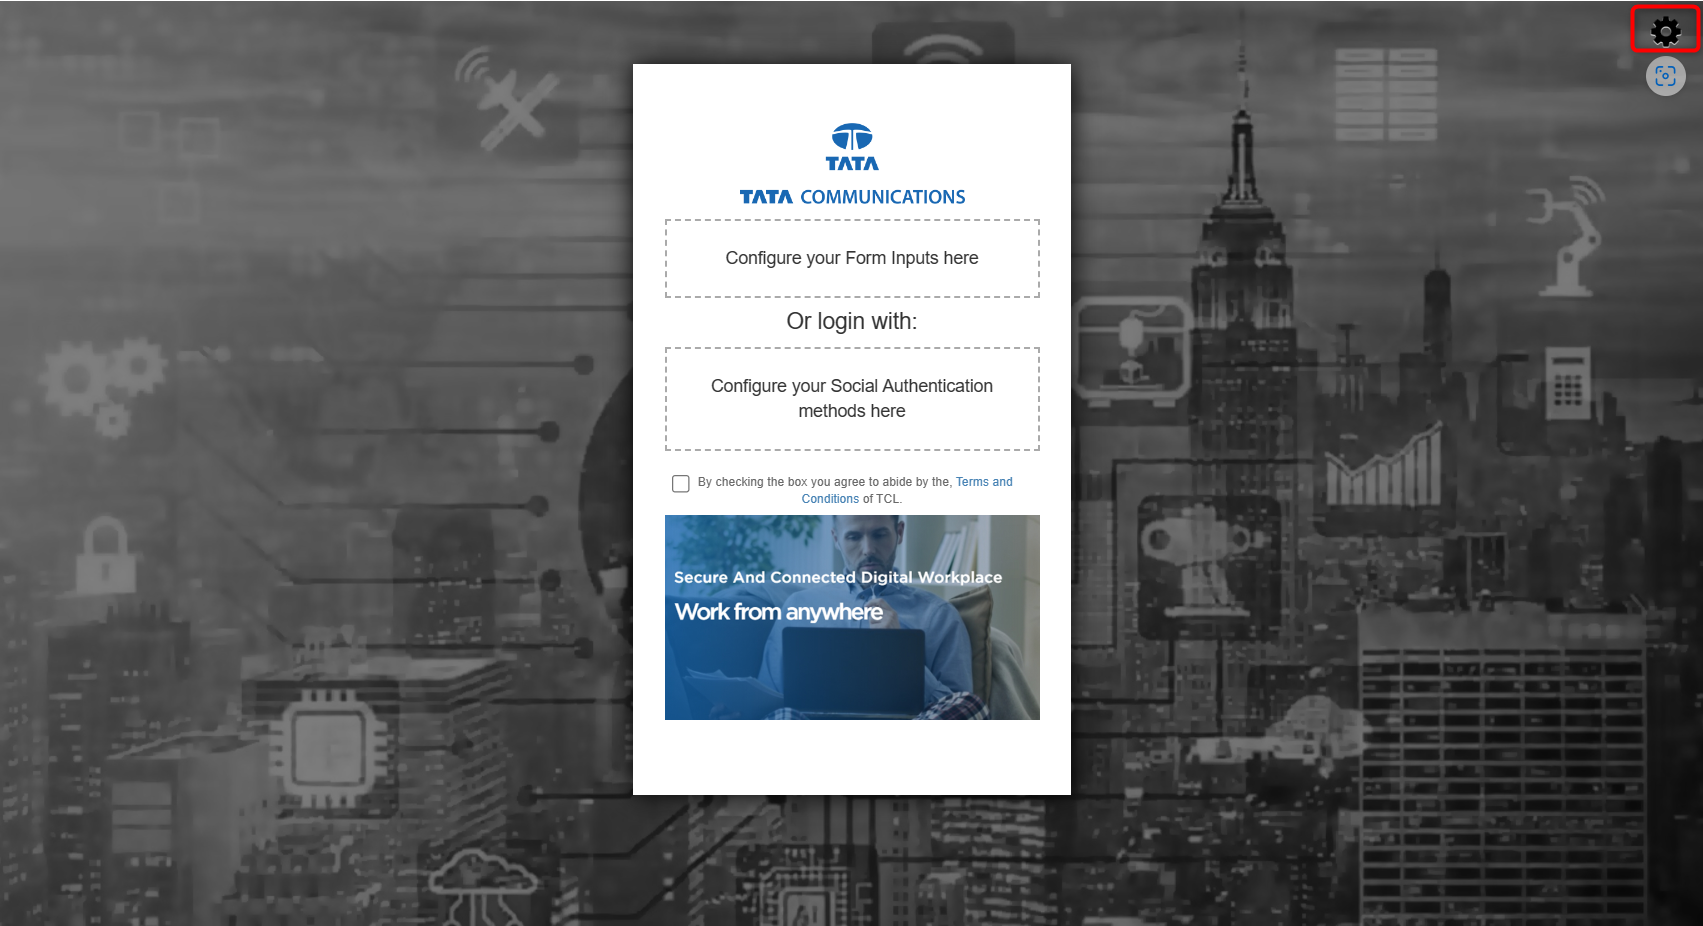
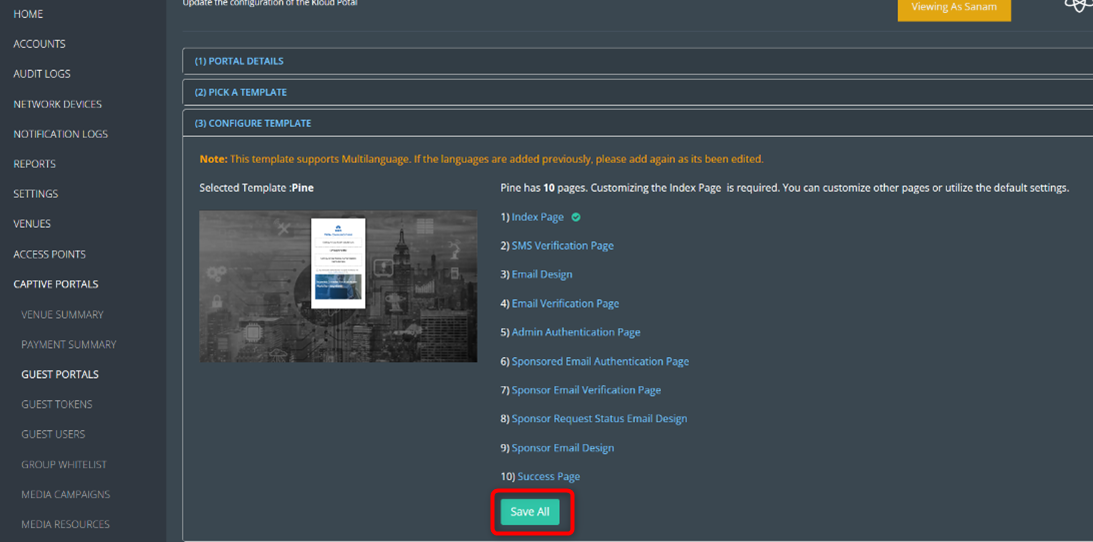
On the Configure Template page, click on the Index Page.

- Click on the settings button to customize the Index page.
-
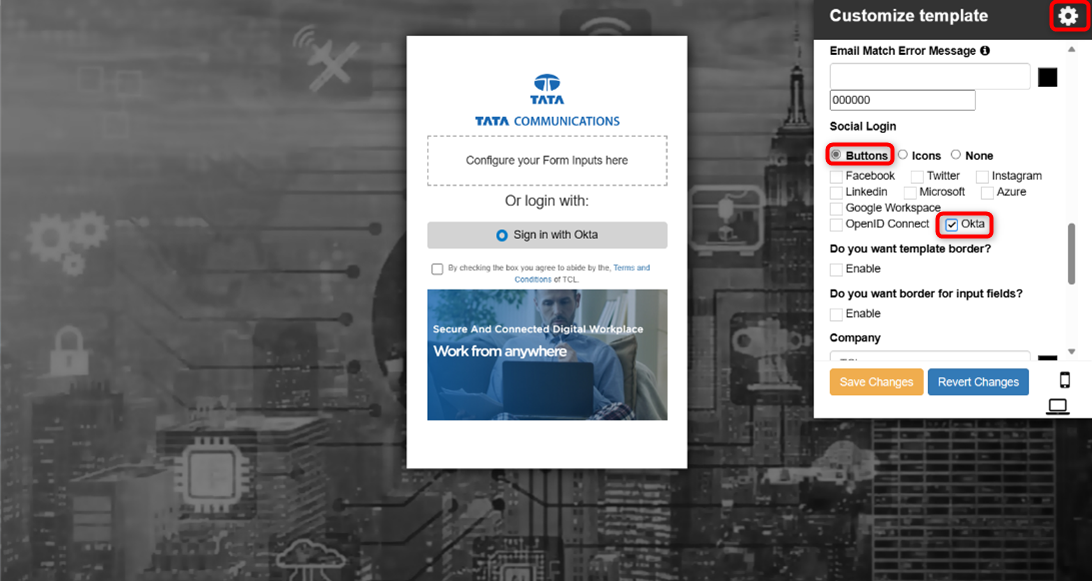
In the settings window, select Okta as the form of social login.
-
Adjust other configurations as needed.
-
Click the Save Changes button.
-
To further customize the template, refer to the Customizing Captive Portal Templates section.
-
After customizing the portal, click on the Save All button to save your guest portal.
Assigning the Captive Portal to Access Point
Follow the instructions in the Assign a Guest Portal to the Access Point section to assign the created captive portal to the access point.
Add Redirect URI to Okta
- Add the redirect URL of your captive portal to the Okta App. Refer to the Okta Authentication document for detailed instructions.
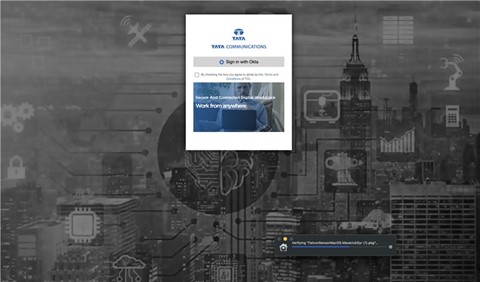
- Once the above steps are completed, users can log in to the captive portal using Okta.