“In addition to the basic configurations, this section provides detailed insights into the finer aspects of captive portal customization. It offers a comprehensive exploration of the diverse settings that allow you to fine-tune your portal according to specific requirements. By delving into these additional settings, you can maximize the potential of your captive portal customization.”
Subsections of Other authentications for captive portal
Two-factor authentication with MAC address
Introduction
This document describes how to create a two-factor authentication system that uses MAC address identification along with OTP, email, or token-based authentication methods. By incorporating MAC authentication into the login process, this method improves security and access control in captive portal systems.
Mac address and SMS authentication - This is a two-step verification process. First, it verifies the device’s MAC address, then sends an OTP via SMS to authenticate the user’s mobile phone number.
Mac address and Email authentication - This is a two-step verification process. Initially, it authenticates the device’s MAC address and subsequently sends an authentication email to verify the user’s email address.
Mac address and token authentication - This is a two-step verification process. It starts by authenticating the device’s MAC address, followed by the use of a token for further authentication.
Getting Started
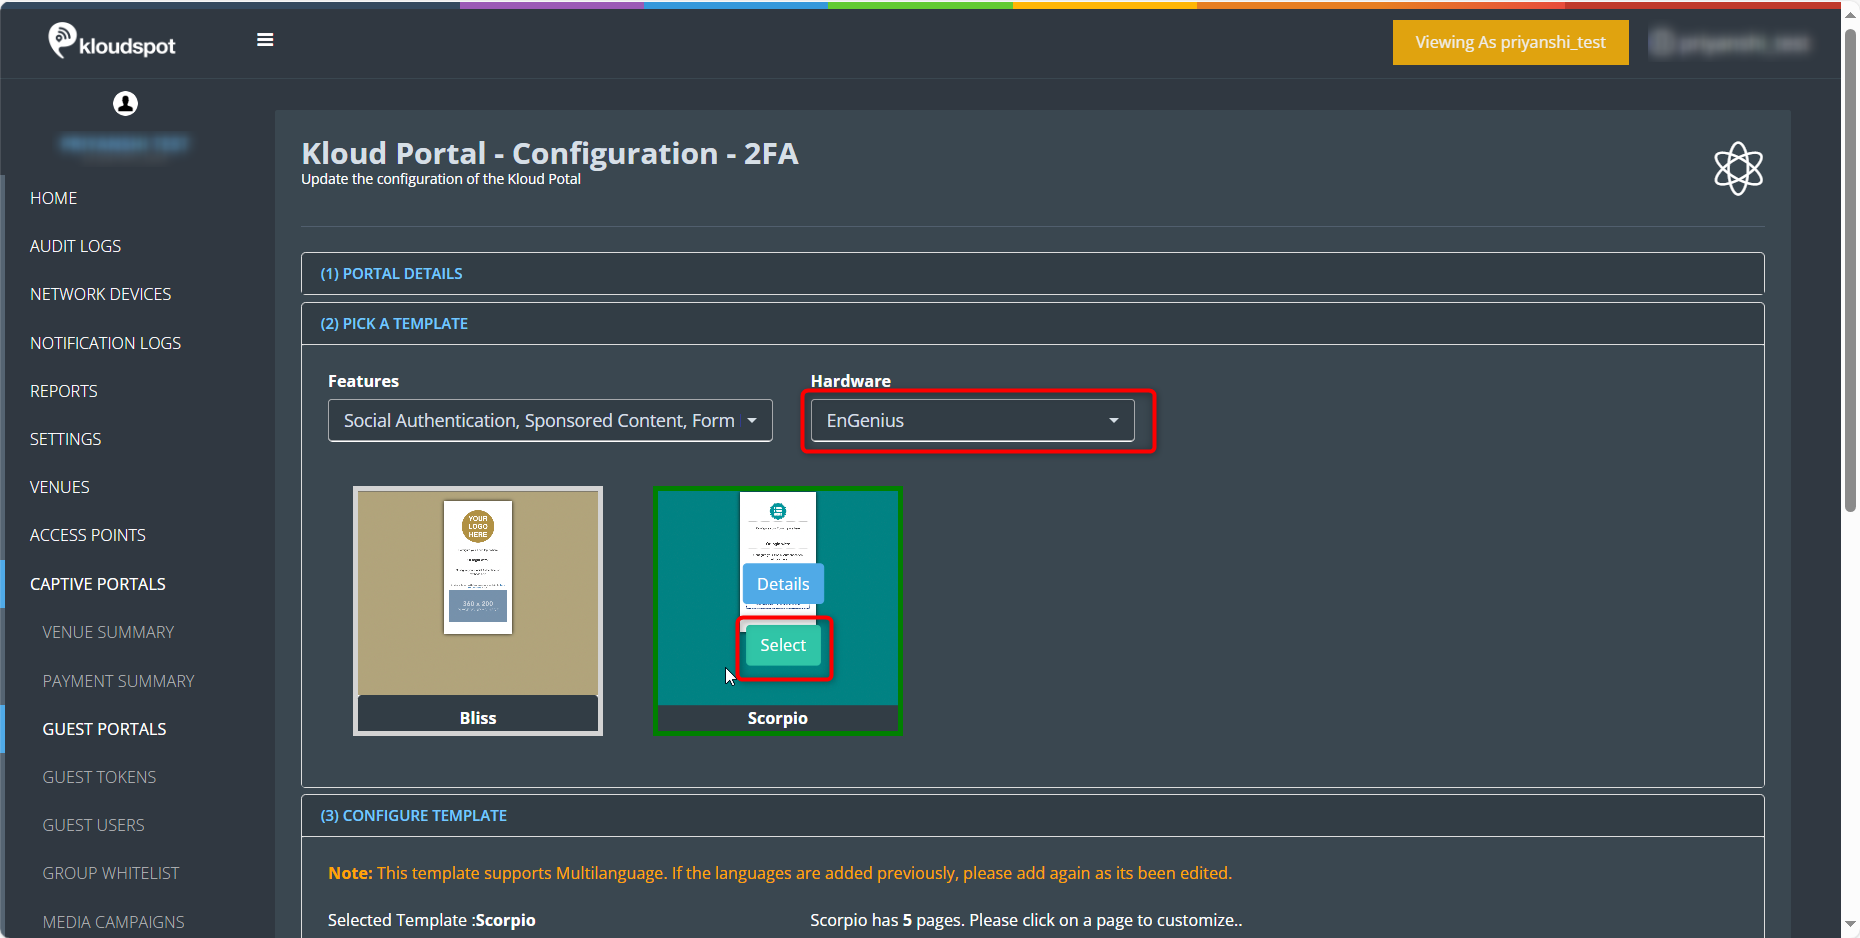
This feature is specifically designed for use with the Scorpio template on EnGenius hardware. For detailed instructions on customizing templates, refer to the “Customizing Captive Portal Templates” section.
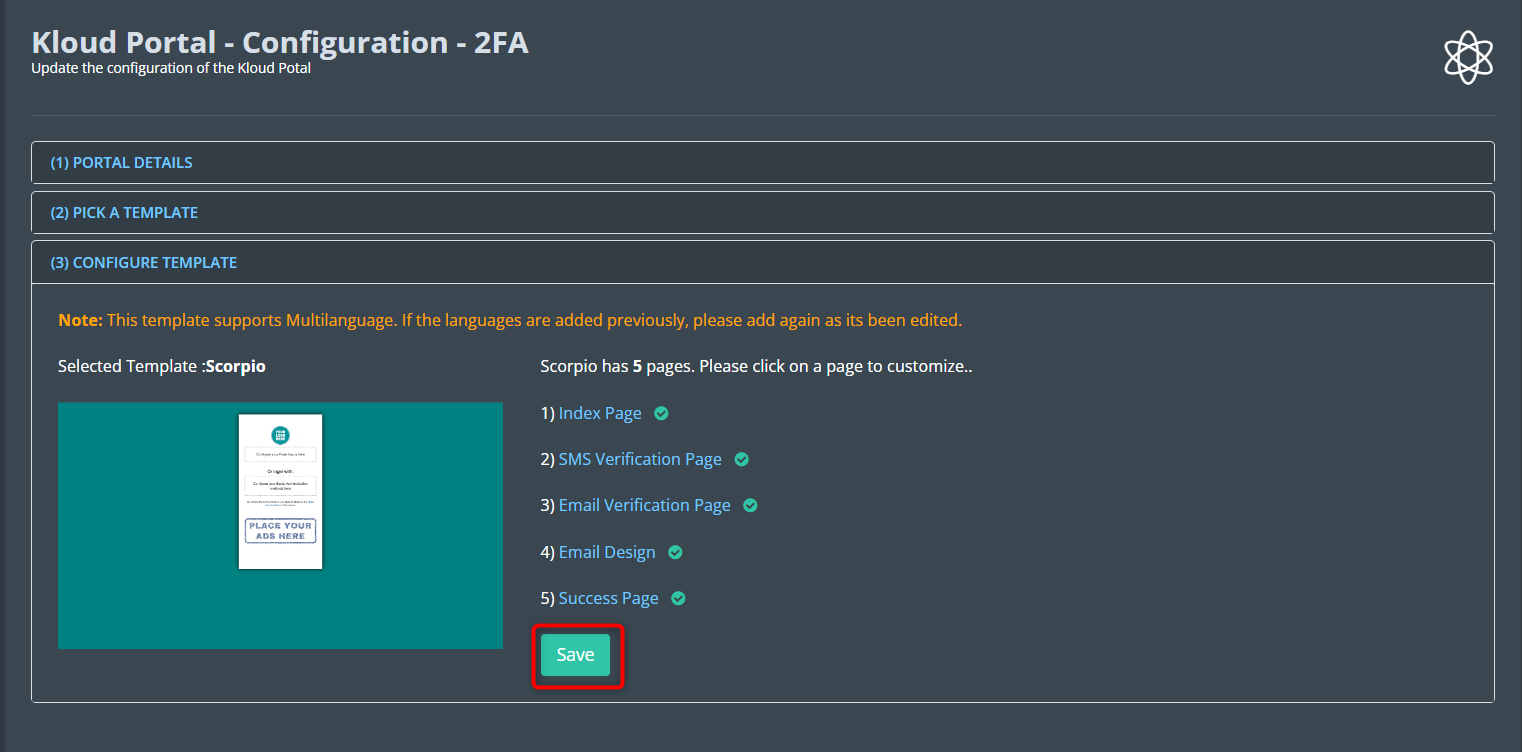
Begin by selecting the Scorpio template using the designated button.
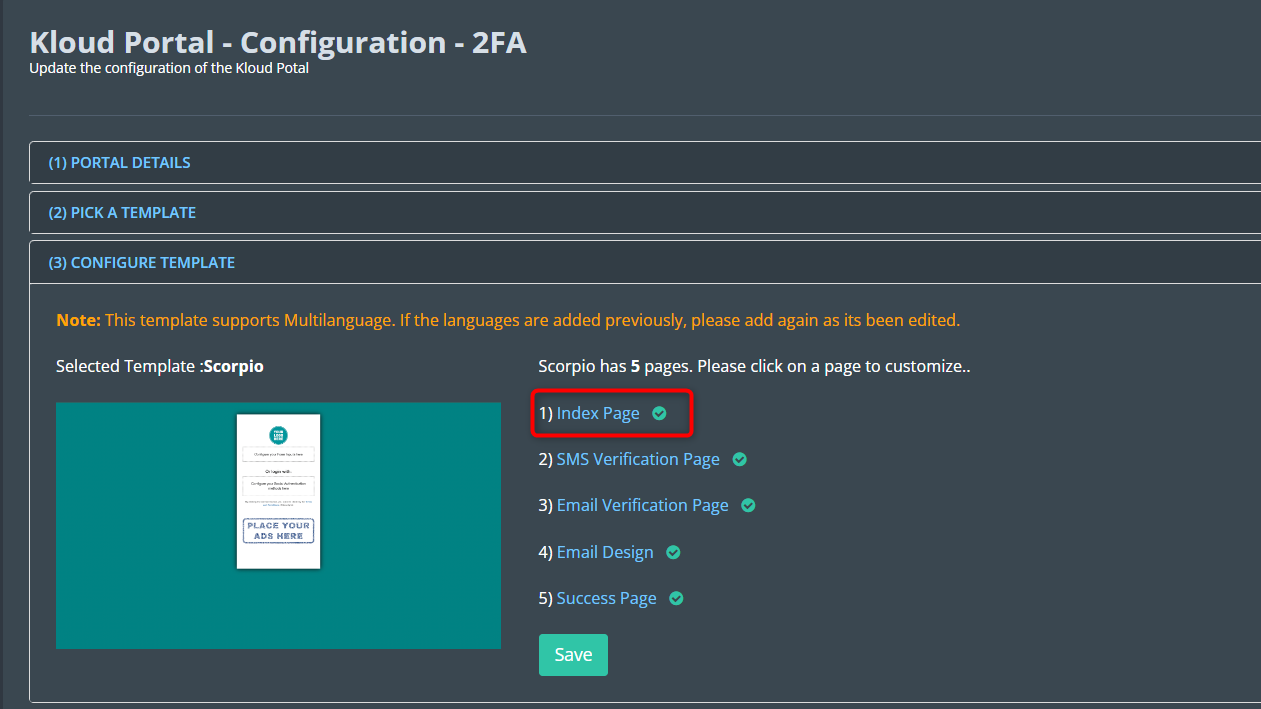
On the “Configure Template” page, navigate to the “Index Page” section.
Click on the settings button to customize the Index page.
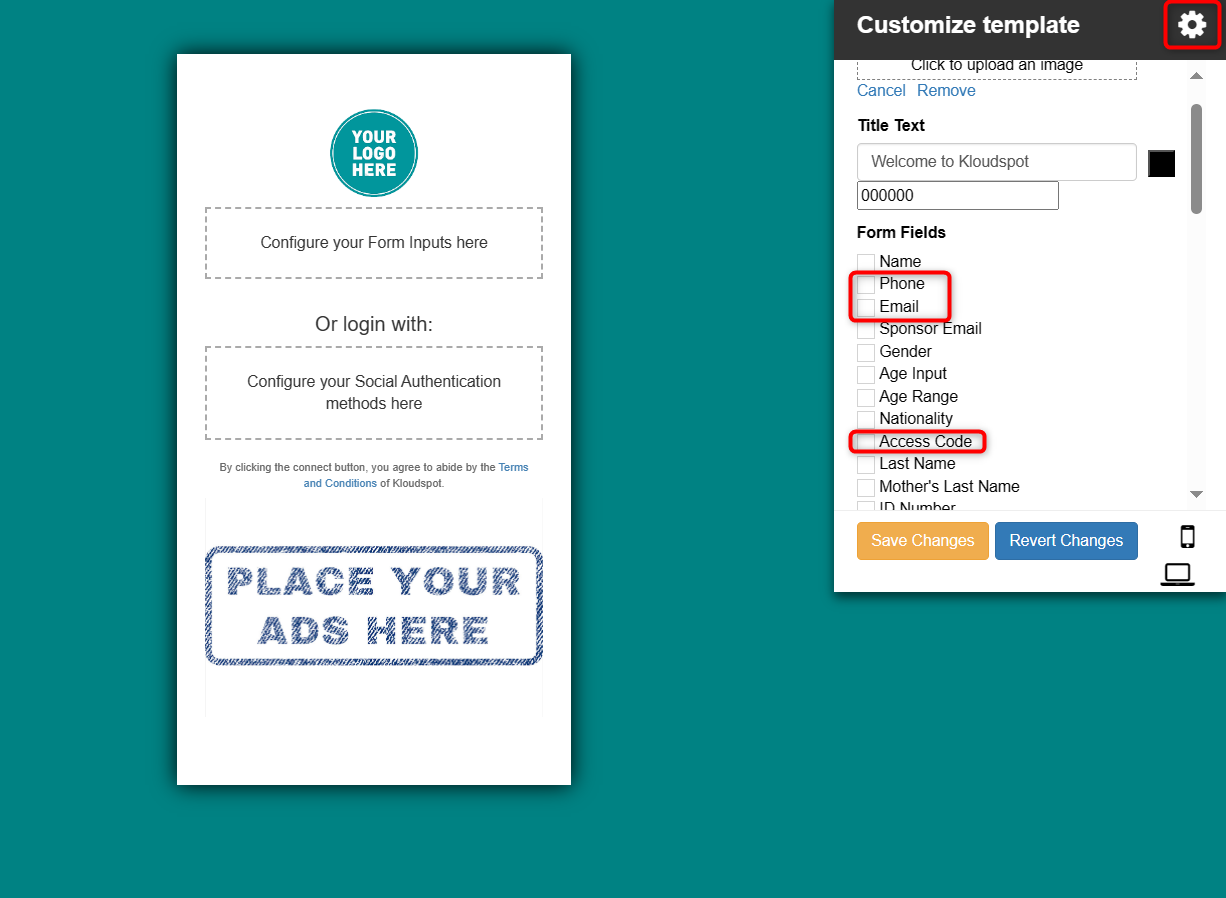
The form fields to select will vary based on the two-factor authentication method you wish to use..
For SMS authentication, select the Phone field.
For email authentication, select the Email field.
For token-based authentication, select the Access Code field.
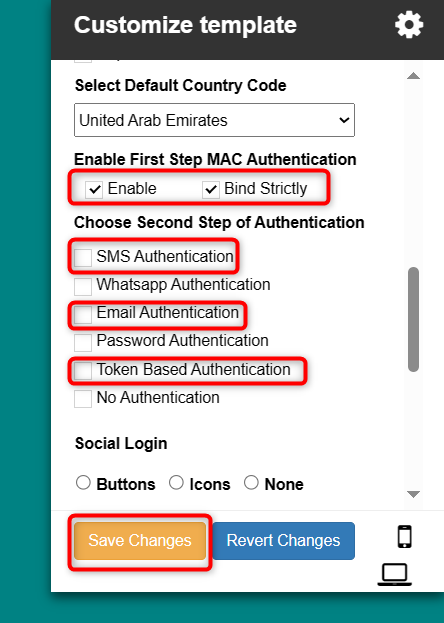
In the “Enable First Step MAC Authentication” section, ensure that both the Enable and Bind Strictly checkboxes are checked.
Enable: Activates First Step MAC Authentication.
Bind Strictly: Enabling this option associates a specific MAC address with a second-step authentication method. Then, the user can only log in using the information provided in the two-factor authentication settings.
Then select the Second Step of Authentication. Select SMS, Email, or Token Based authentication as per your requirement.
Adjust any additional configurations as needed, then click “Save Changes” to apply the settings.
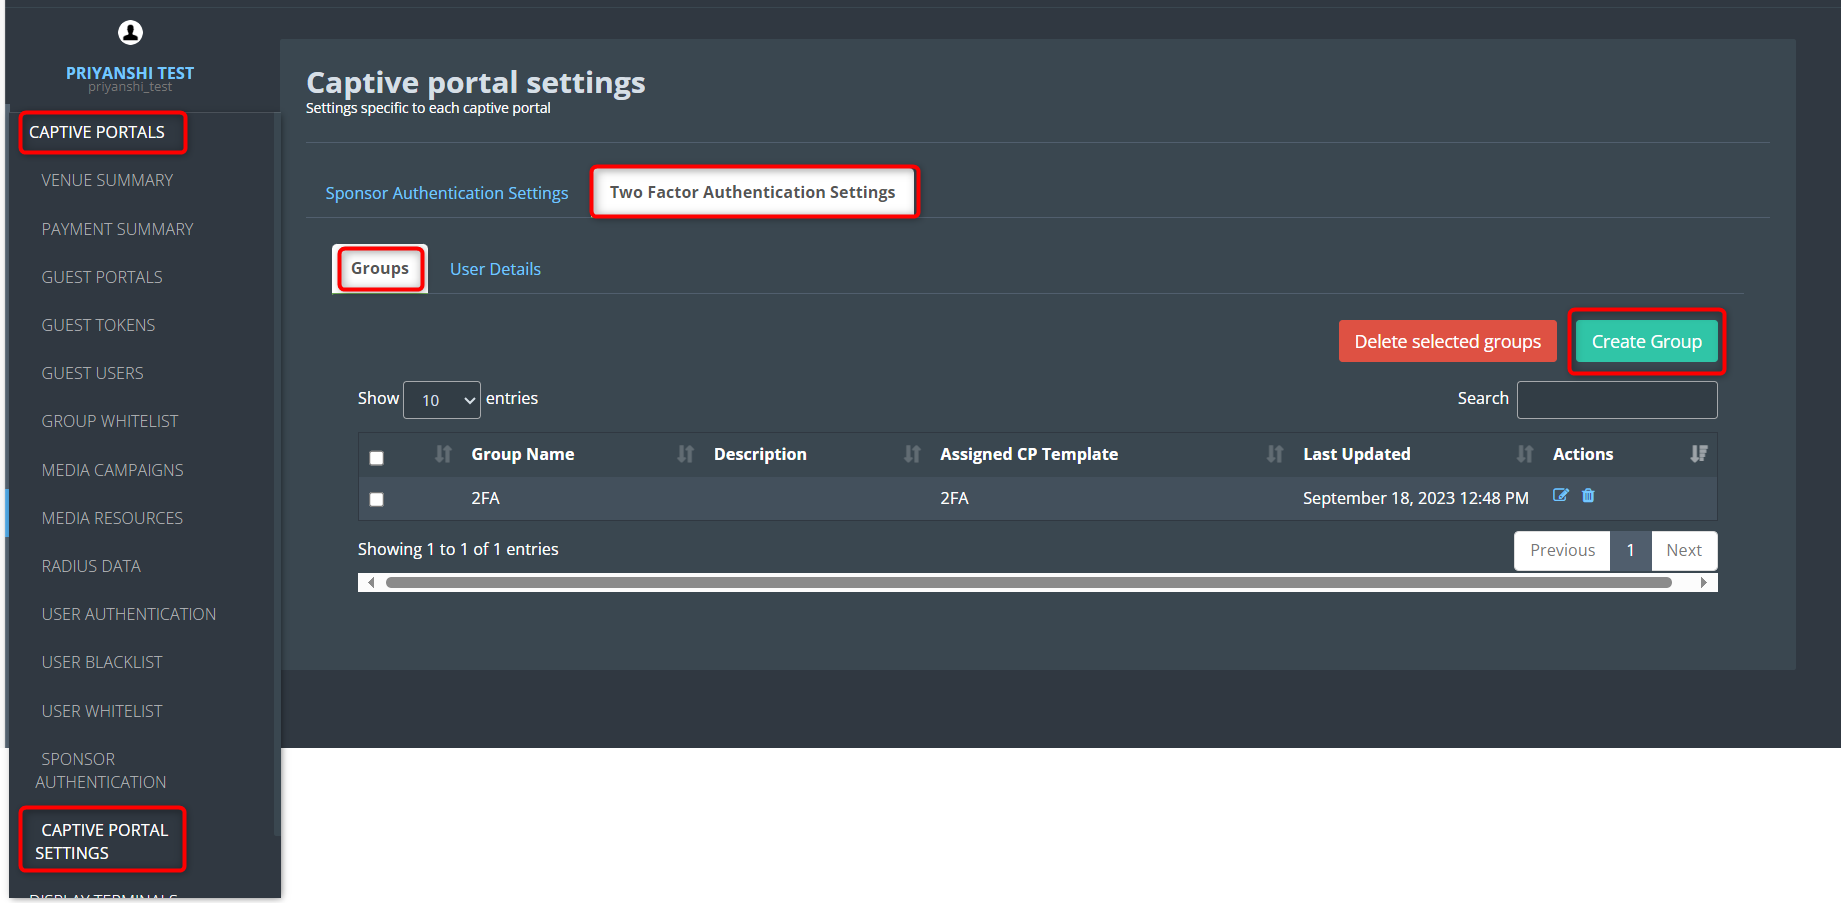
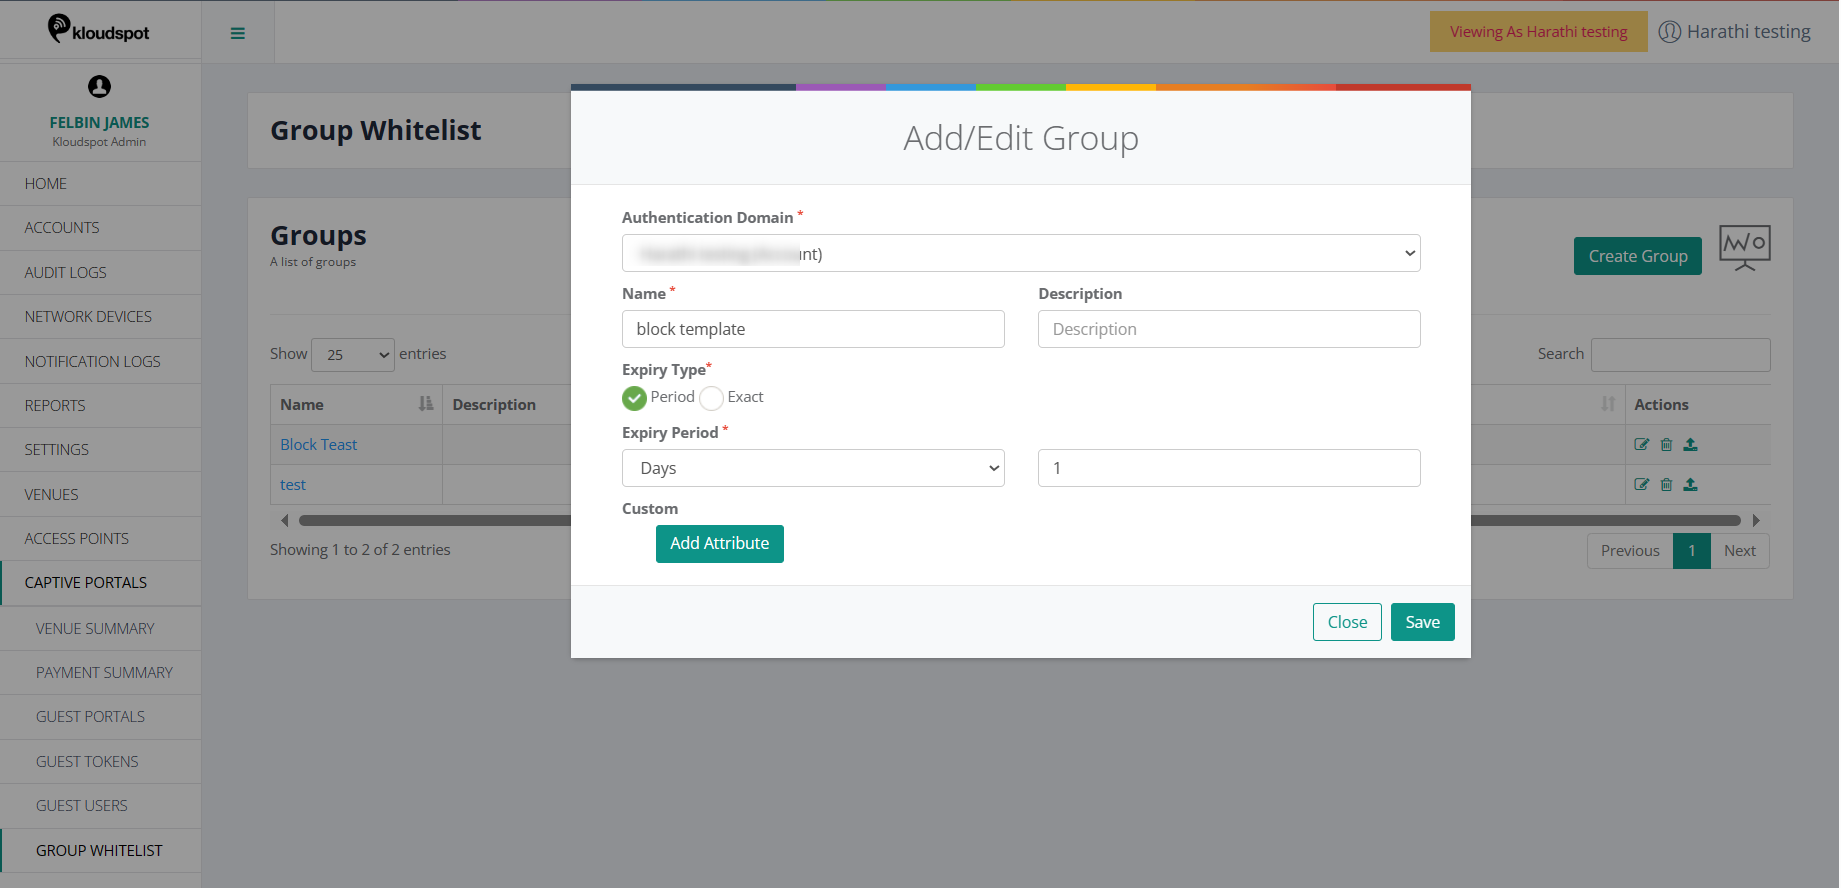
Navigate to Captive Portals > Captive Portal Settings > Two Factor Authentication Settings > Group.
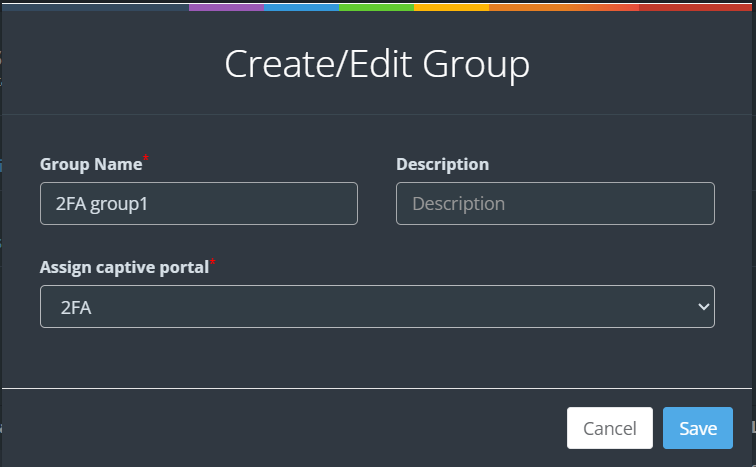
Click on Create Group and define a new group. In the “Assign Captive Portal” column, select the previously configured captive portal.
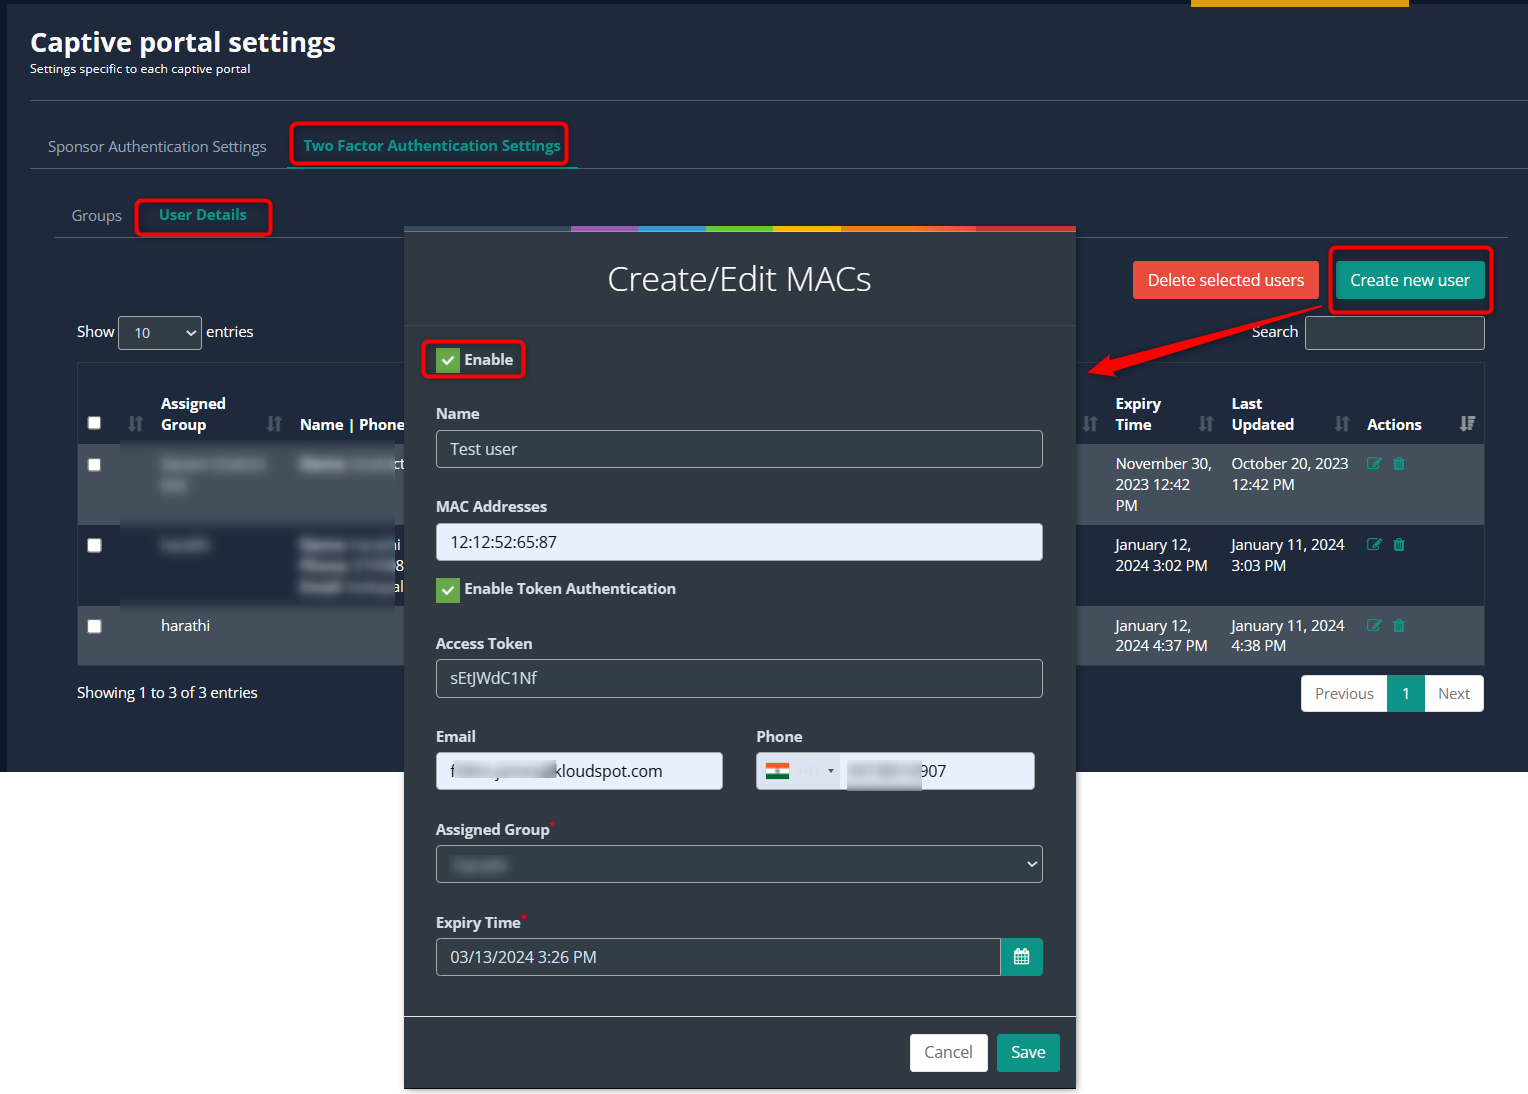
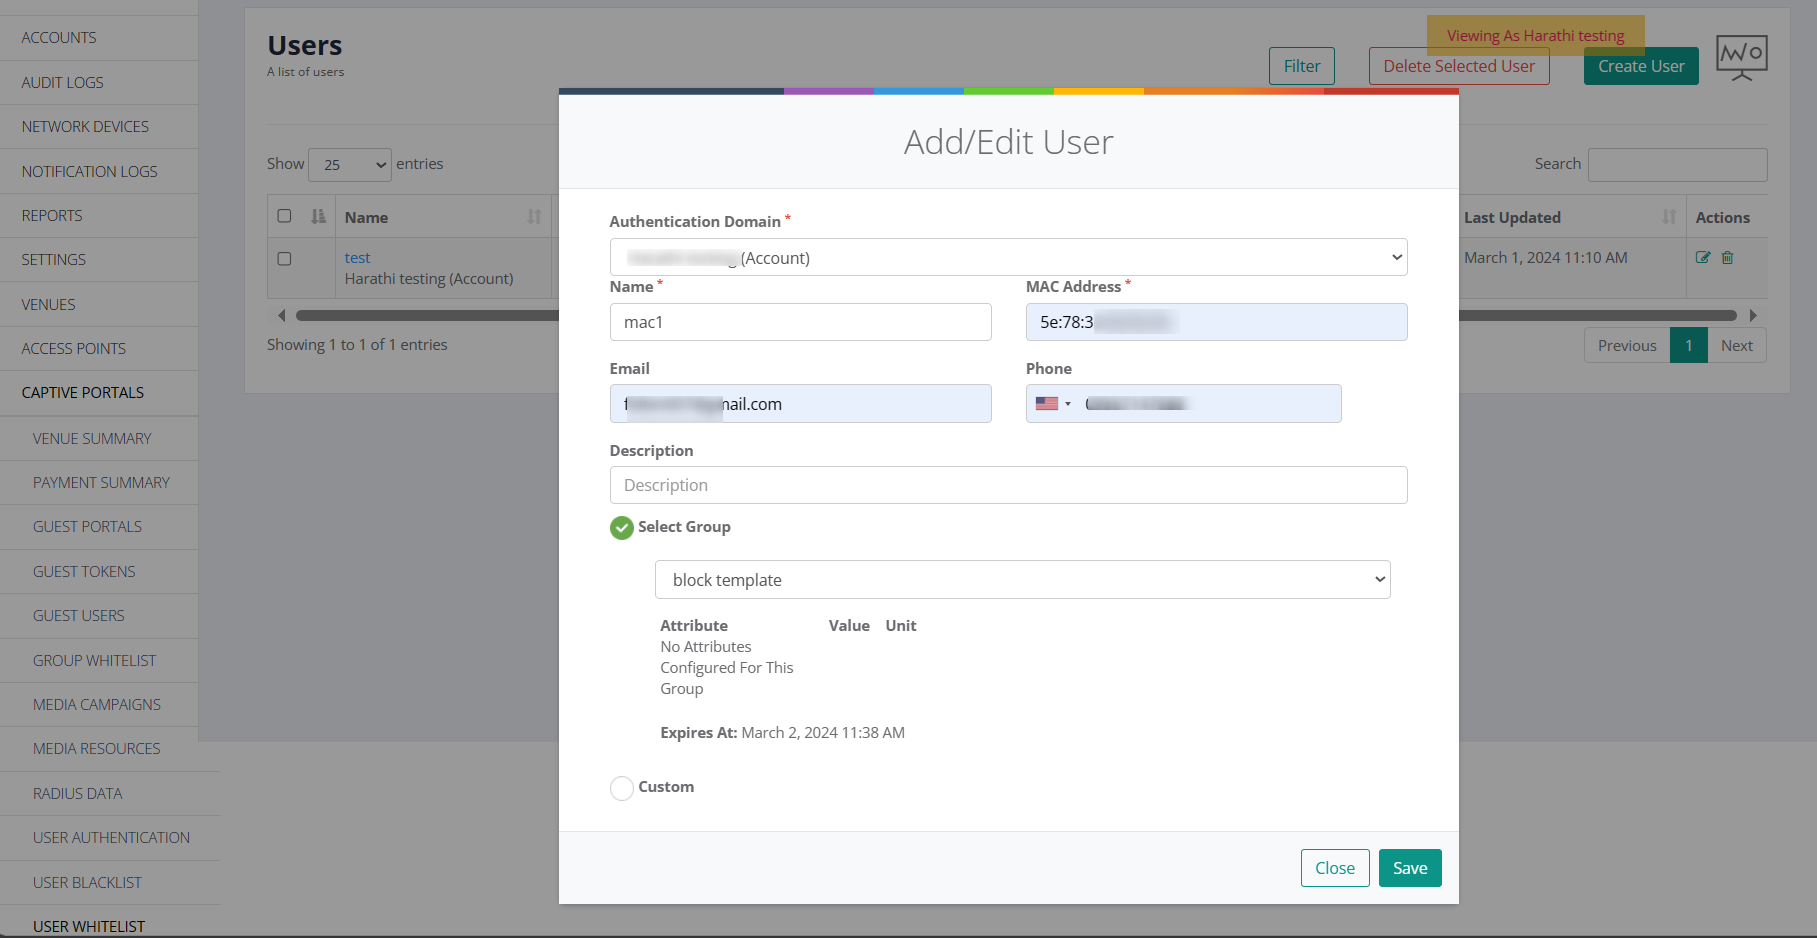
Once the group is created, proceed to add user details. Click on the User Details tab and then click on the Create New User button to add a new user.
In the popup window that open, Enable the user by checking the Enable checkbox and provide the required information.
When adding a user, ensure to provide relevant information based on the configured two-factor authentication method:
Name: User’s name.
MAC Address: MAC address of the user’s device.
Enable Token Authentication: Enable this option for token-based authentication.
Access Token: Upon enabling token authentication, an access token will be generated. This token is linked to the associated MAC address and grants access to the captive portal.
Email: User’s email address for email authentication.
Phone: User’s phone number for OTP authentication.
Assigned Group: Select the group created earlier from the dropdown list.
Expiry Time: Set the duration for which the user can access the internet via the captive portal.
Click Save to save the user.
Conduct thorough testing of the captive portal to ensure proper functionality of MAC Authentication. In case of any issues, refer back to the outlined steps for troubleshooting.
Azure Authentication for Captive Portal
Overview
This technical documentation guides you through the process of configuring Azure authentication for a Captive Portal using the Soul template on Meraki hardware. Follow the steps outlined below to seamlessly integrate Azure for social login on your captive portal.
Template Customization with Soul Template
This feature is compatible with the Soul template on Meraki hardware.
To start the configuration, “Azure” should be integrated with Kloud Manage, and refer to the Microsoft Authentication section to know how to do it.
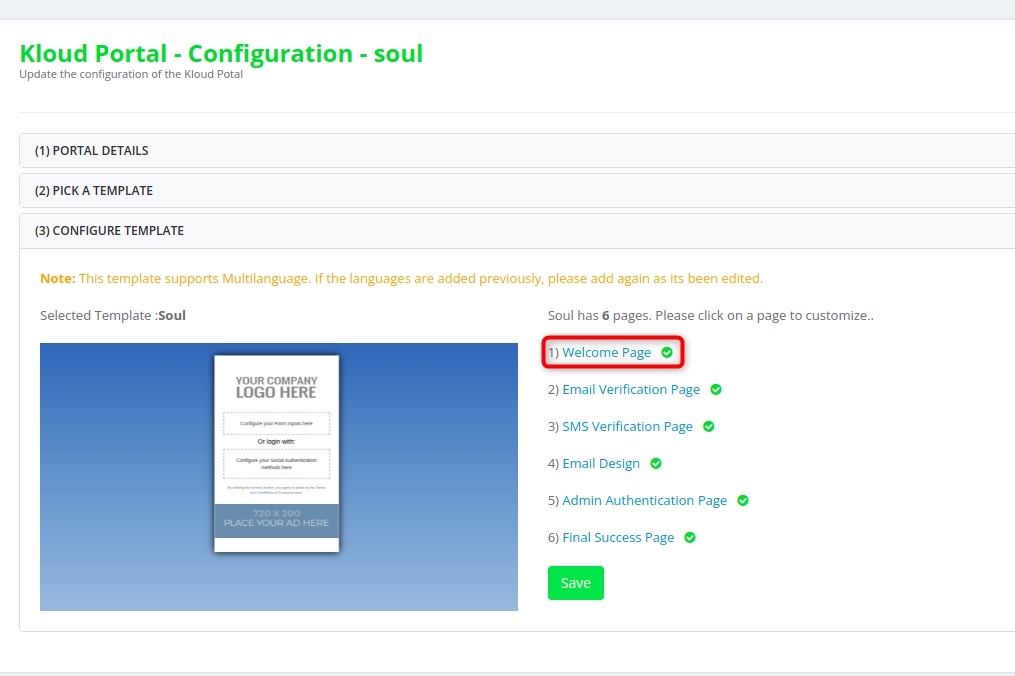
In this case, proceed by selecting the Soul template using the designated button.
On the “Configure Template” page, click on the Welcome Page button.
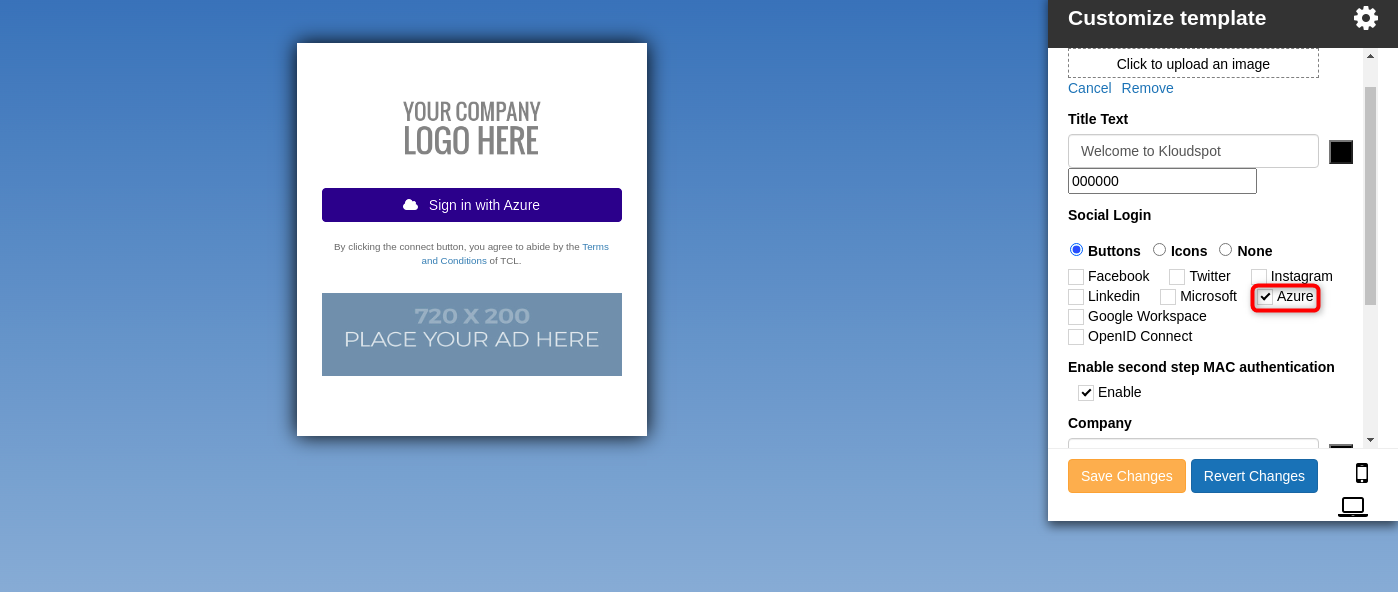
Click on the settings button to customize the Index page.
In the settings window, select Azure as the form of social login. If second step mac authentication is needed, please check enable second step mac authentication checkbox.
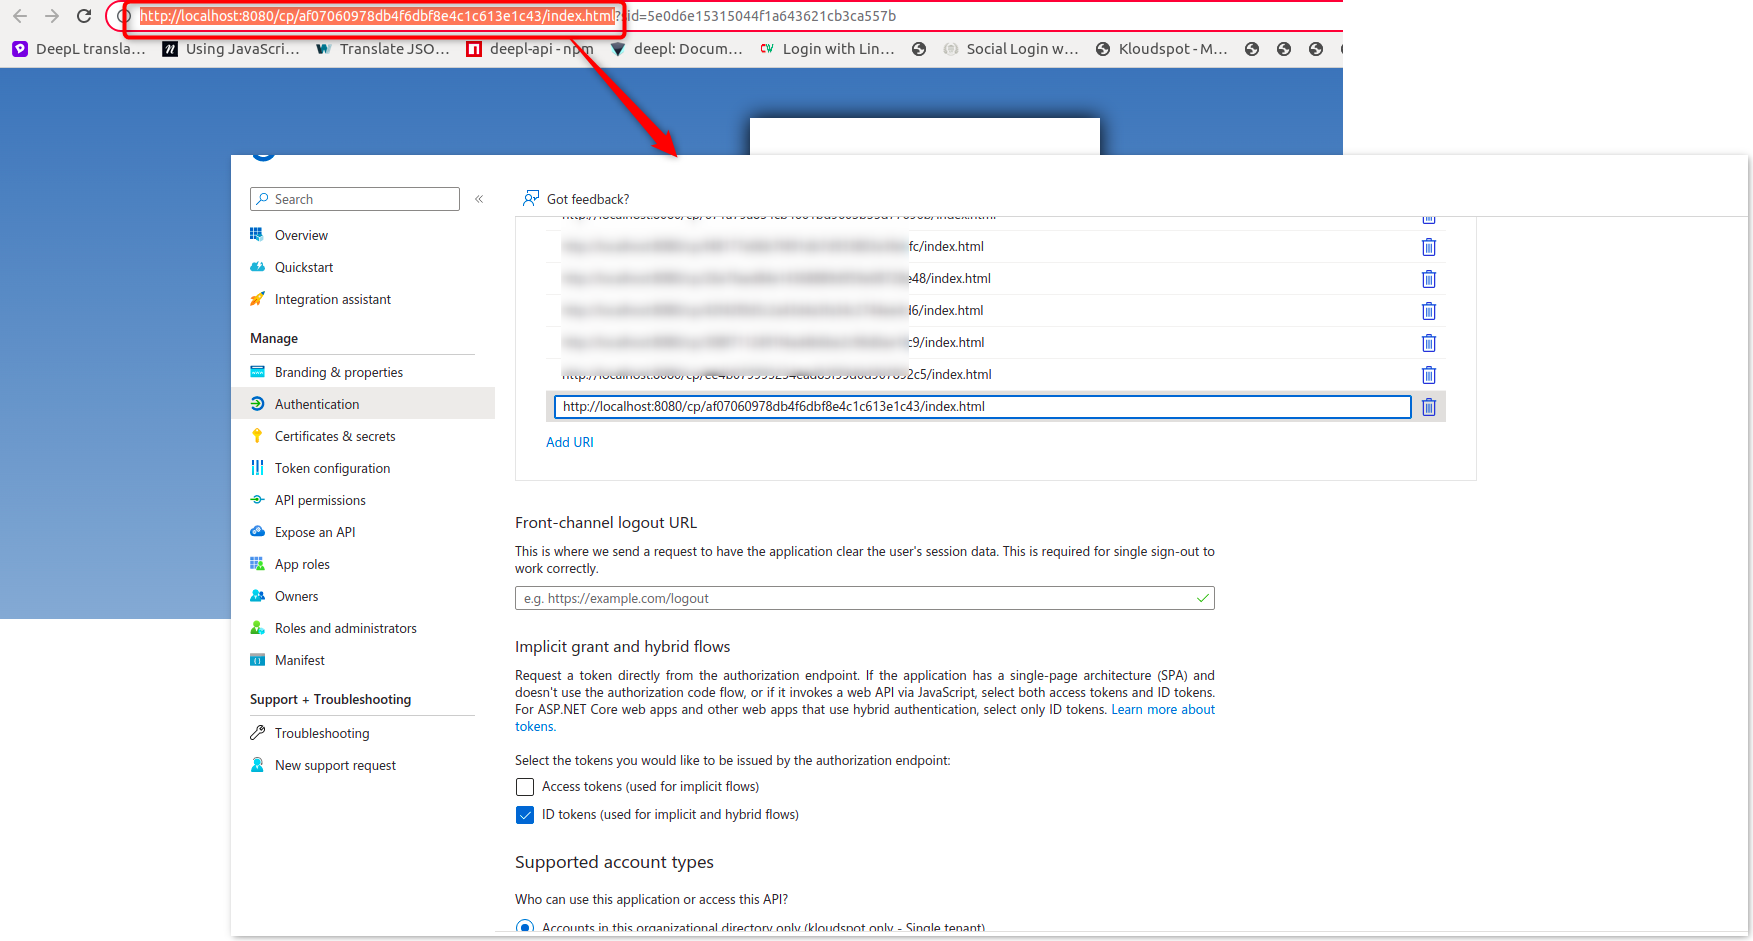
Add the redirect URL of your captive portal to the Azure portal. Refer to the Add Redirect URI section in the Microsoft Authentication documentation for detailed instructions.
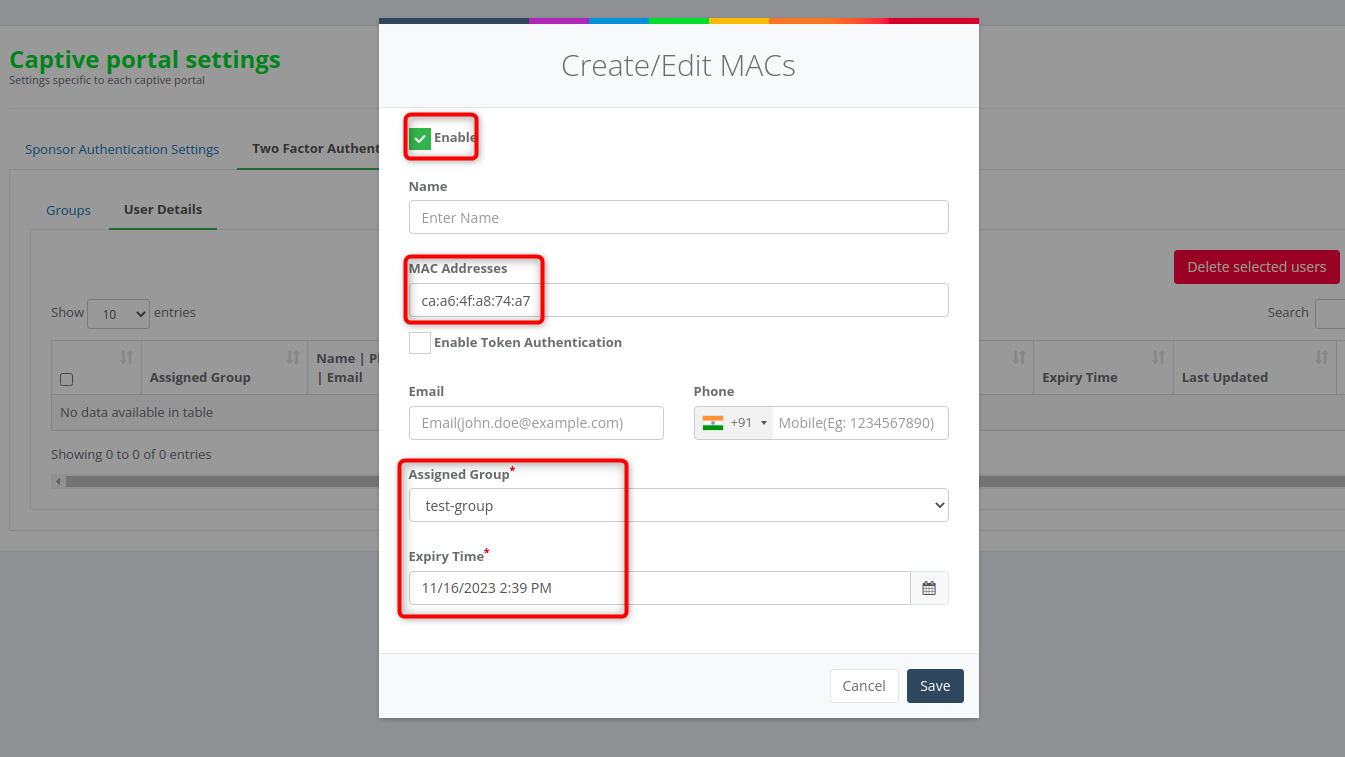
Creating a Two-Factor Authentication Group
In case of a MAC address not found error, create a group.
Only adding the MAC address is necessary for this Azure authentication.
Assign the user to the created group. Also, you can add expiry time also.
Save the changes.
Multiple MAC addresses can be added in this manner.
Once the above steps are completed, users can log in to the captive portal using Azure authentication.
Okta Authentication for Captive Portal
Overview
This technical documentation guides you through the process of configuring Okta authentication for a Captive Portal using the Pine template on EnGenius hardware. Follow the steps outlined below to seamlessly integrate Okta for social login on your captive portal.
Template Customization with Pine Template
This feature is compatible with the Pine template on EnGenius hardware.
To start the configuration, Okta should be integrated with KloudManage, refer to the Okta Authentication section to know how to do it.
For detailed instructions on customizing templates, refer to the Customizing Captive Portal Templates section.
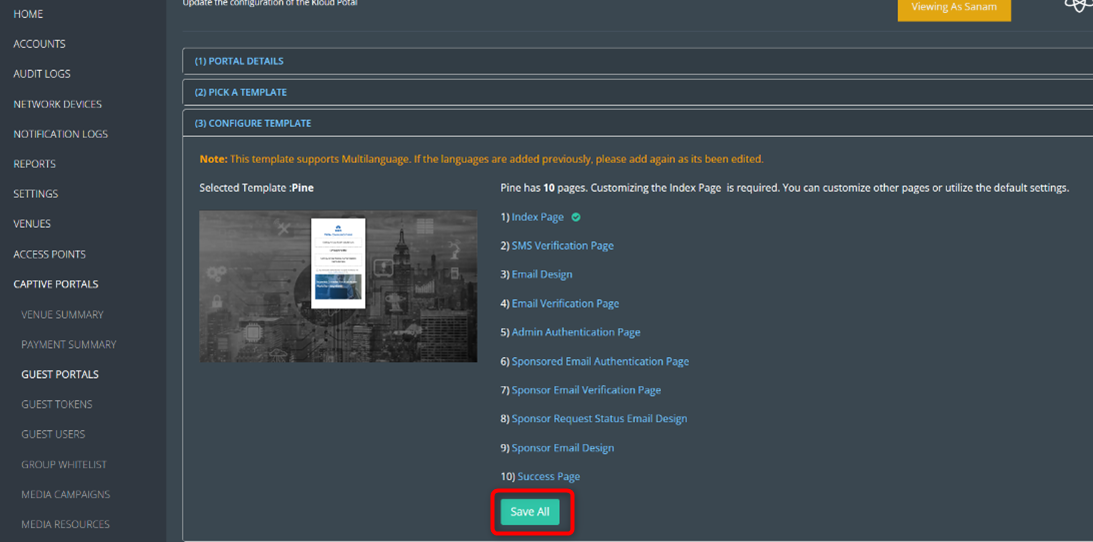
In this case, proceed by selecting the Pine template using the designated button.
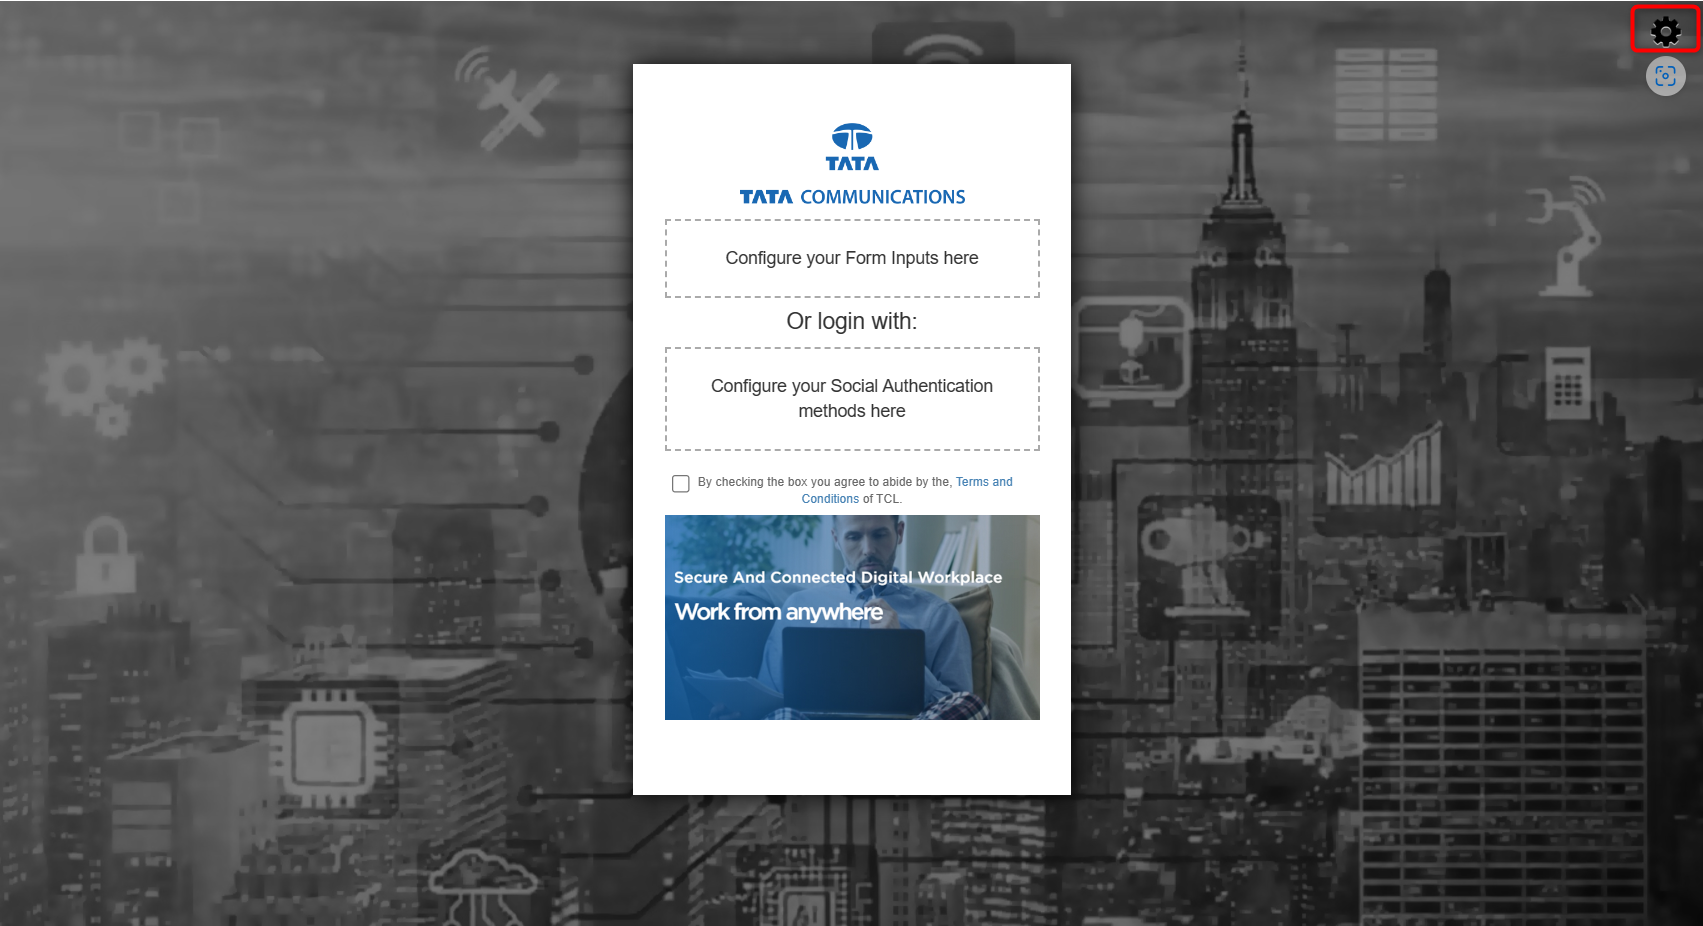
On the Configure Template page, click on the Index Page.
Click on the settings button to customize the Index page.
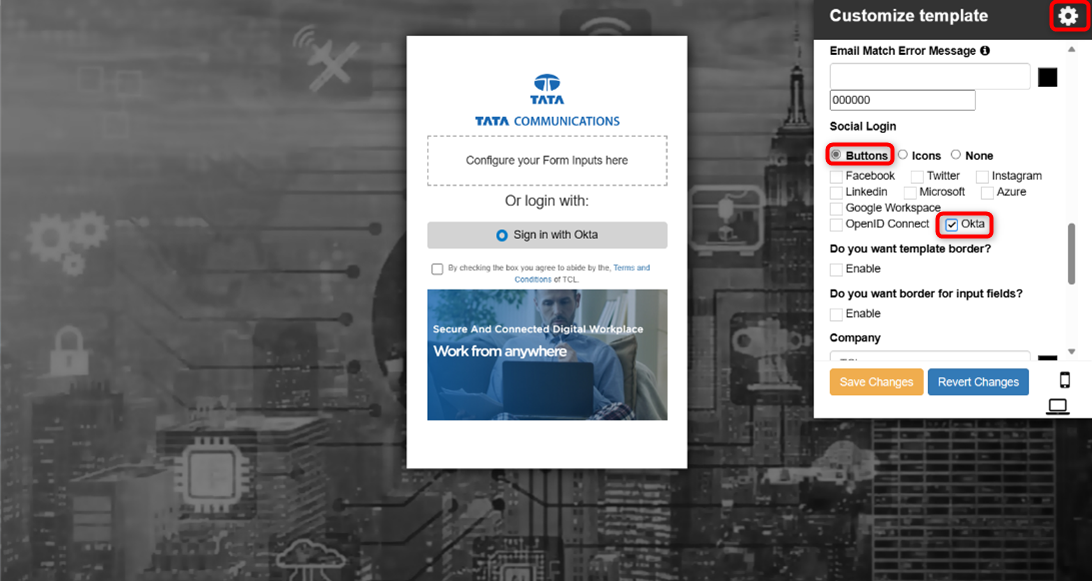
In the settings window, select Okta as the form of social login.
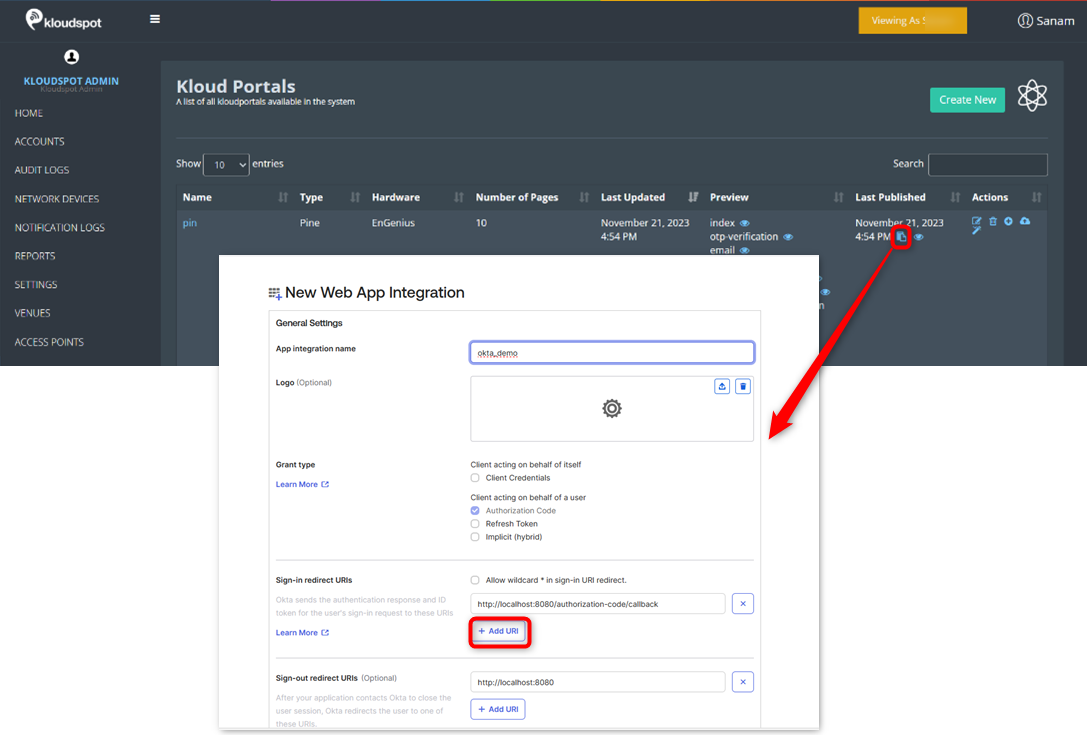
Add the redirect URL of your captive portal to the Okta App. Refer to the Okta Authentication document for detailed instructions.
Once the above steps are completed, users can log in to the captive portal using Okta.
Sponsor Authentication with OTP
Introduction
One method of authentication within captive portals is sponsor-based authentication, where users are granted access by a sponsor. In this document, we will discuss the setup and configuration of sponsor authentication with one-time passwords (OTPs) using the Flora template in Meraki hardware or the Raga template in Kloudspot Gateway hardware.
Template Customization
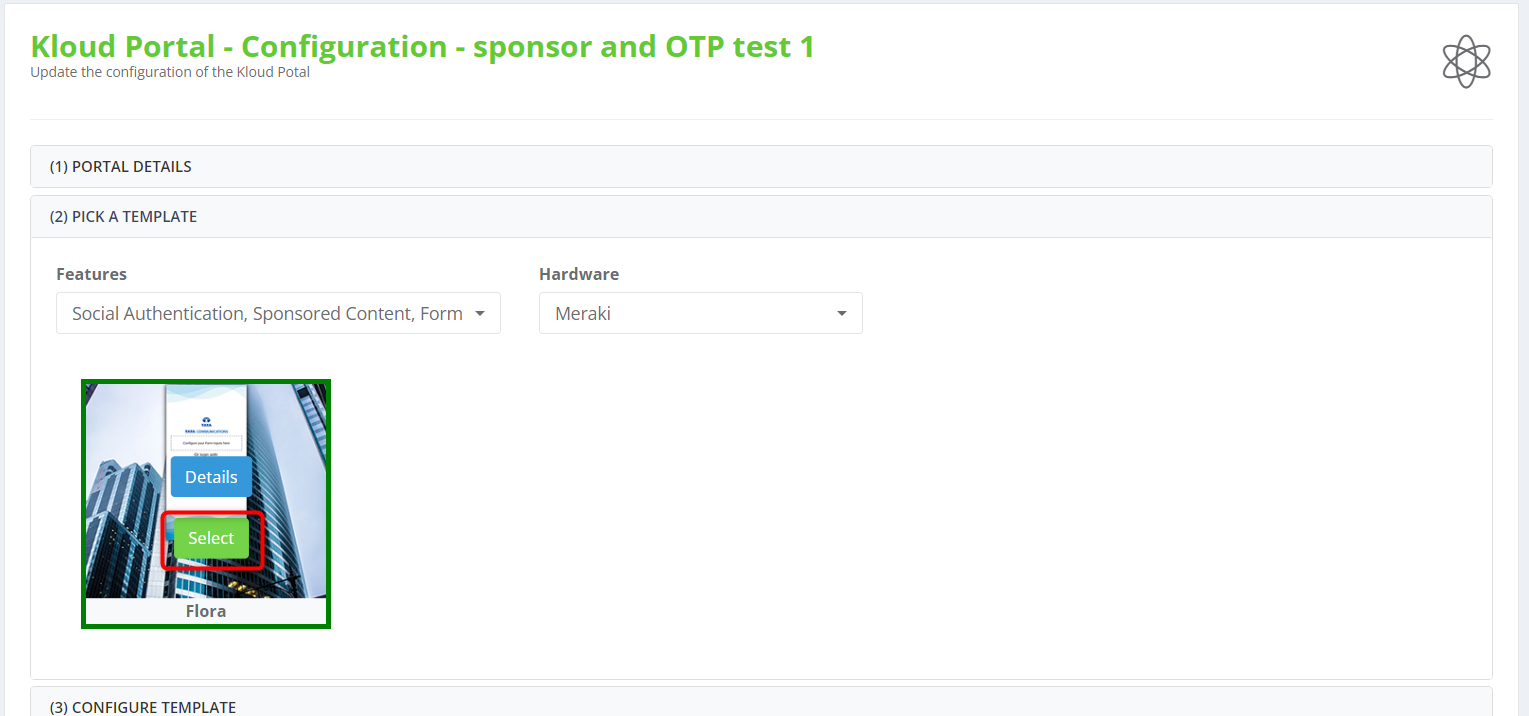
Choose the Flora template for Meraki hardware or the Raga template for Kloudspot Gateway hardware. For a detailed walkthrough on customizing templates, please refer to the “Customizing Captive Portal Templates” section.
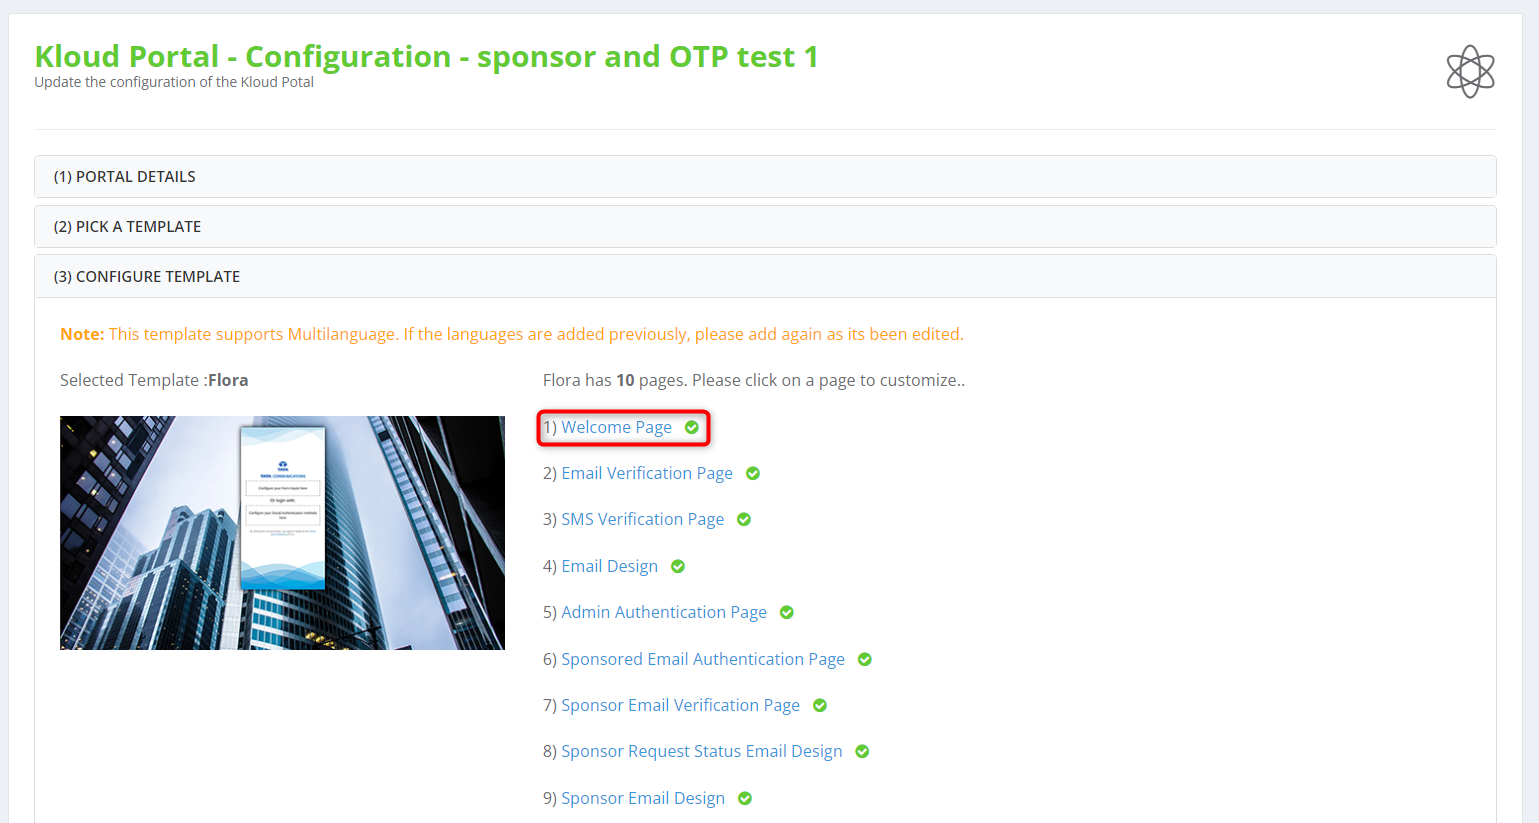
Access the welcome page in the template configuration section.
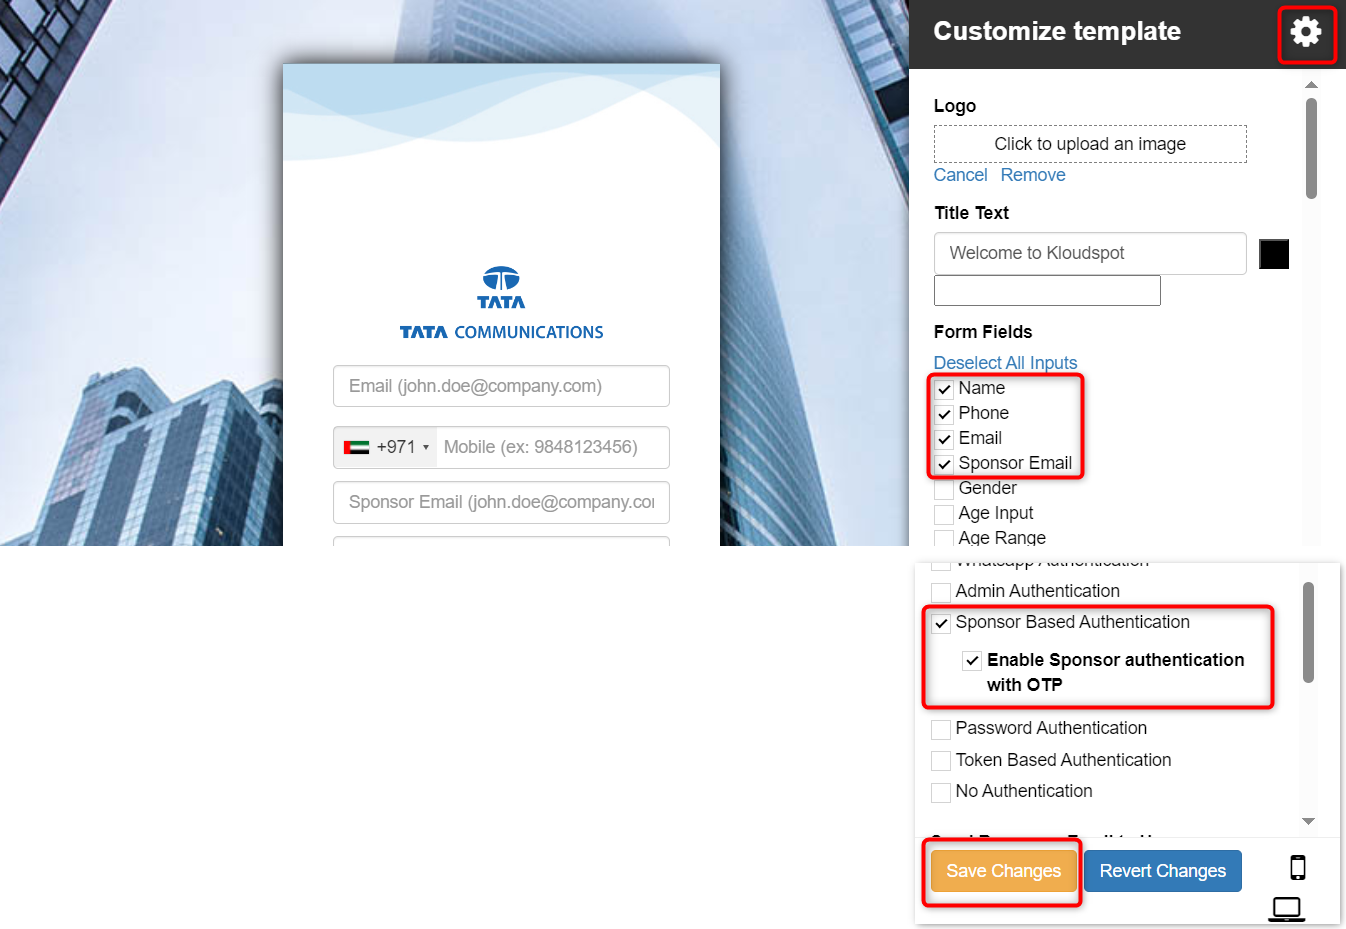
Click on the settings button.
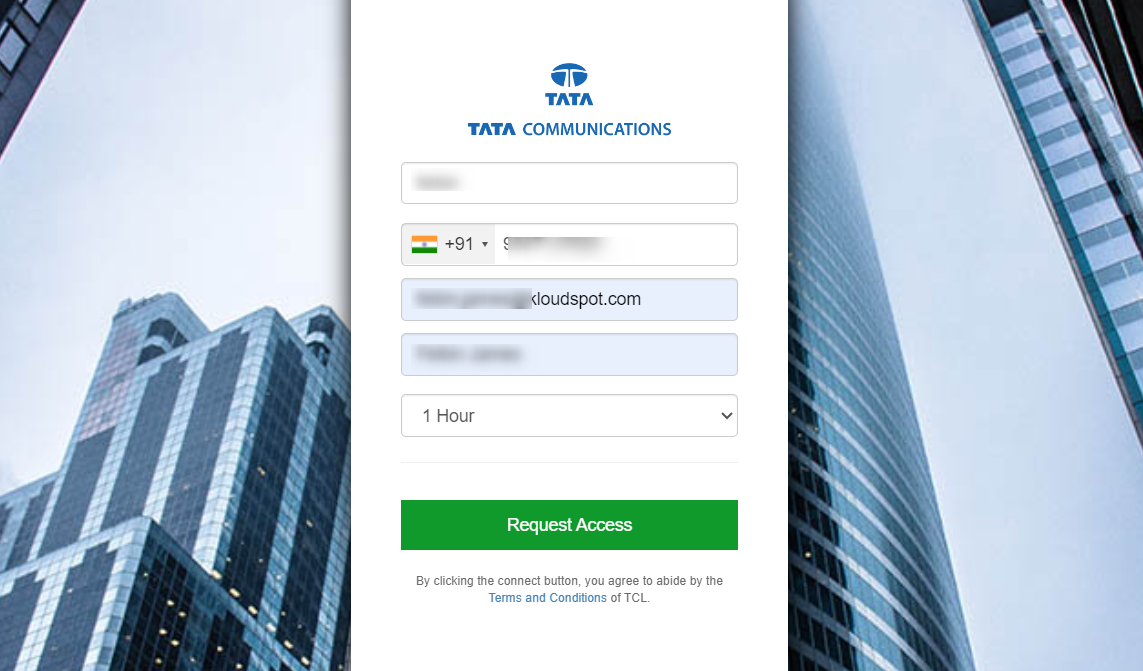
Select the following form fields: Name, Phone, Email, Sponsor Email, and WI-FI Access Period.
Note: WI-FI Access Period is optional but recommended for better control over access duration.
Scroll down and check the Sponsor Based Authentication checkbox.
Check the Enable Sponsor authentication with OTP option.
Note: If you only want Sponsor Based Authentication, you do not need to check the Sponsor authentication with the OTP.
Note: The captive portal’s expiration time will coincide with the access point’s expiration time if the WI-FI Access Period check box is not checked.
Add Sponsored Email or Domain
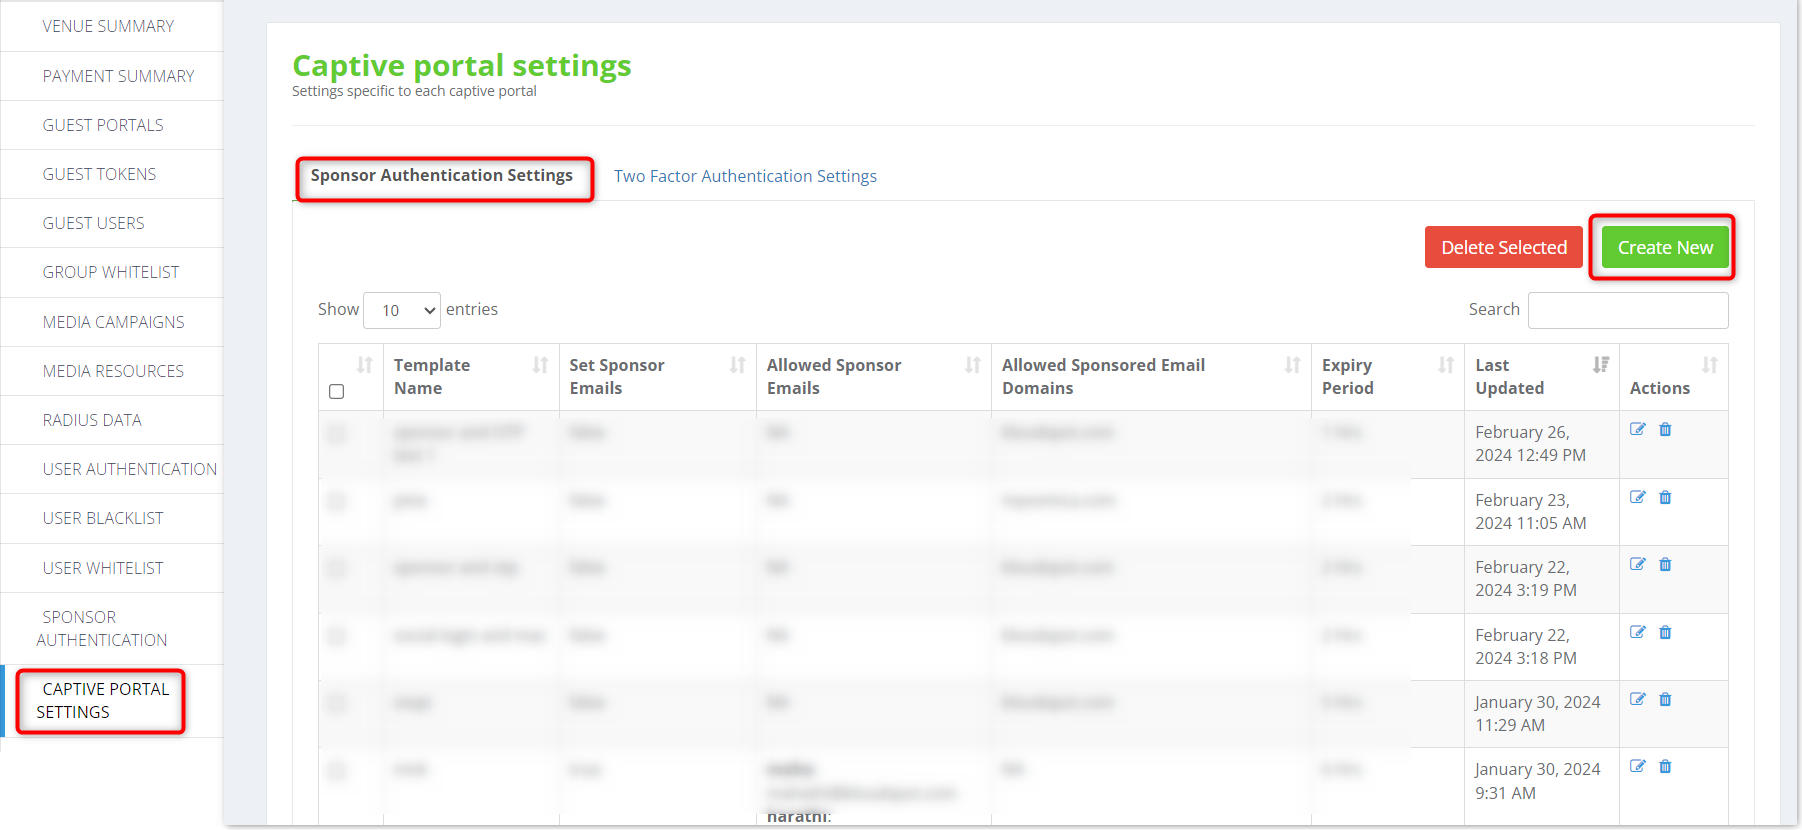
Access captive portal settings.
Go to Sponsor Authentication Settings tab.
Click on the Create new button.
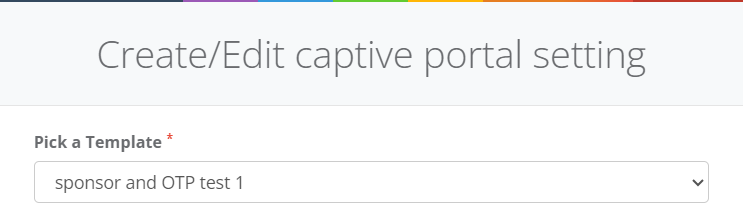
Select the previously created template.
Choose one of the following options:
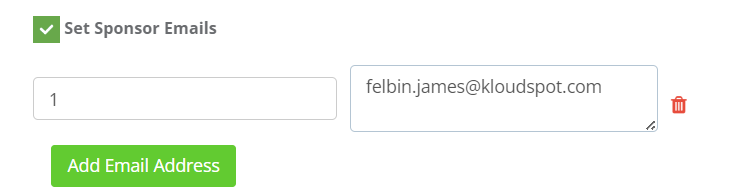
a. Enter the sponsor’s email address directly:
Check the Set Sponsor Emails checkbox.
Click on the Add email address button.
Enter sponsor name and email.
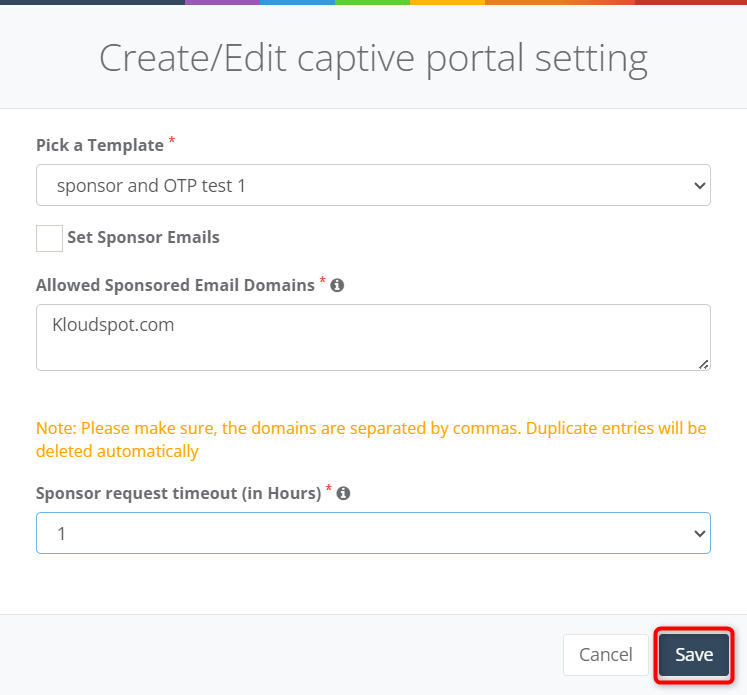
b. Provide Sponsor’s Email Domains:
Enter email domains, separating multiple domains with commas.
Set the timeout duration for sponsor requests.
Click the Save button to save the changes.
Testing
Now that the captive portal is configured, it’s essential to test it to ensure proper functionality. Test the captive portal by accessing the network and initiating the sponsor authentication process.
On the captive portal login page, enter the user’s email ID, phone number, sponsor’s email, name, Wi-Fi expiration time and click on the Request Access button.
Note: The Wi-Fi expiration time dropdown is only available if the WI-FI Access Period field is checked.
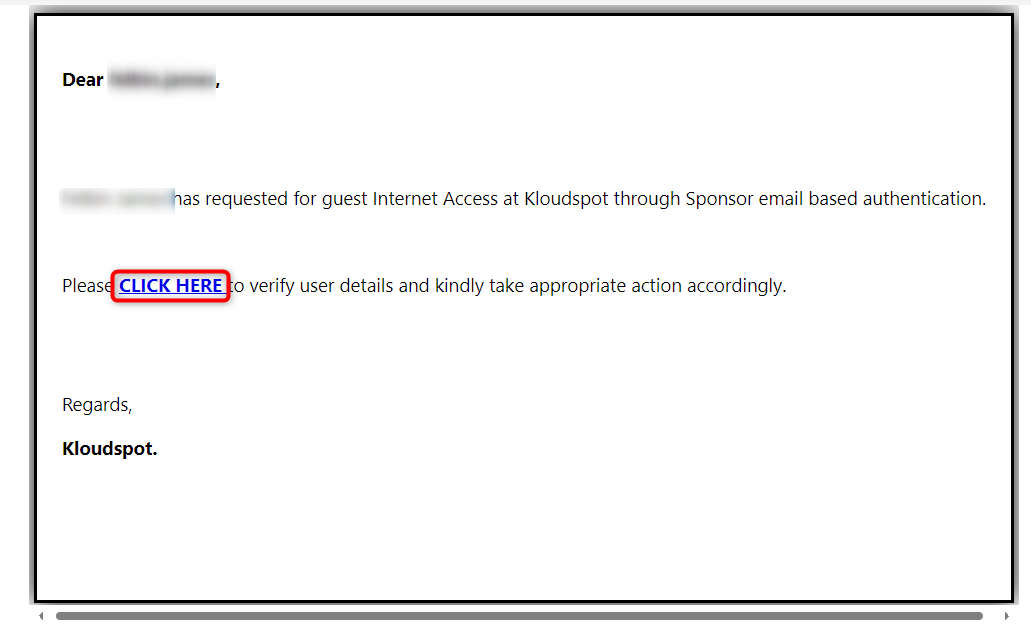
Authentication mail will be sent to the sponsor immediately.
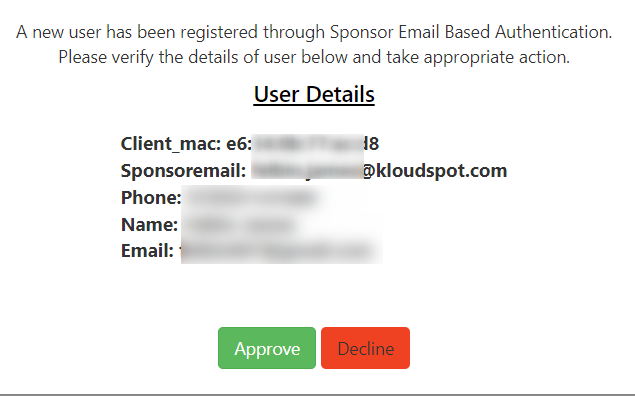
The sponsor can approve or decline it.
Once approved, the user can use the internet.
MAC Authentication
Introduction
This technical document provides step-by-step instructions for configuring Captive Portal MAC Authentication using EnGenius hardware and Block template. Captive Portal MAC Authentication allows access to the internet only to users whose MAC addresses are whitelisted.
Template Configuration
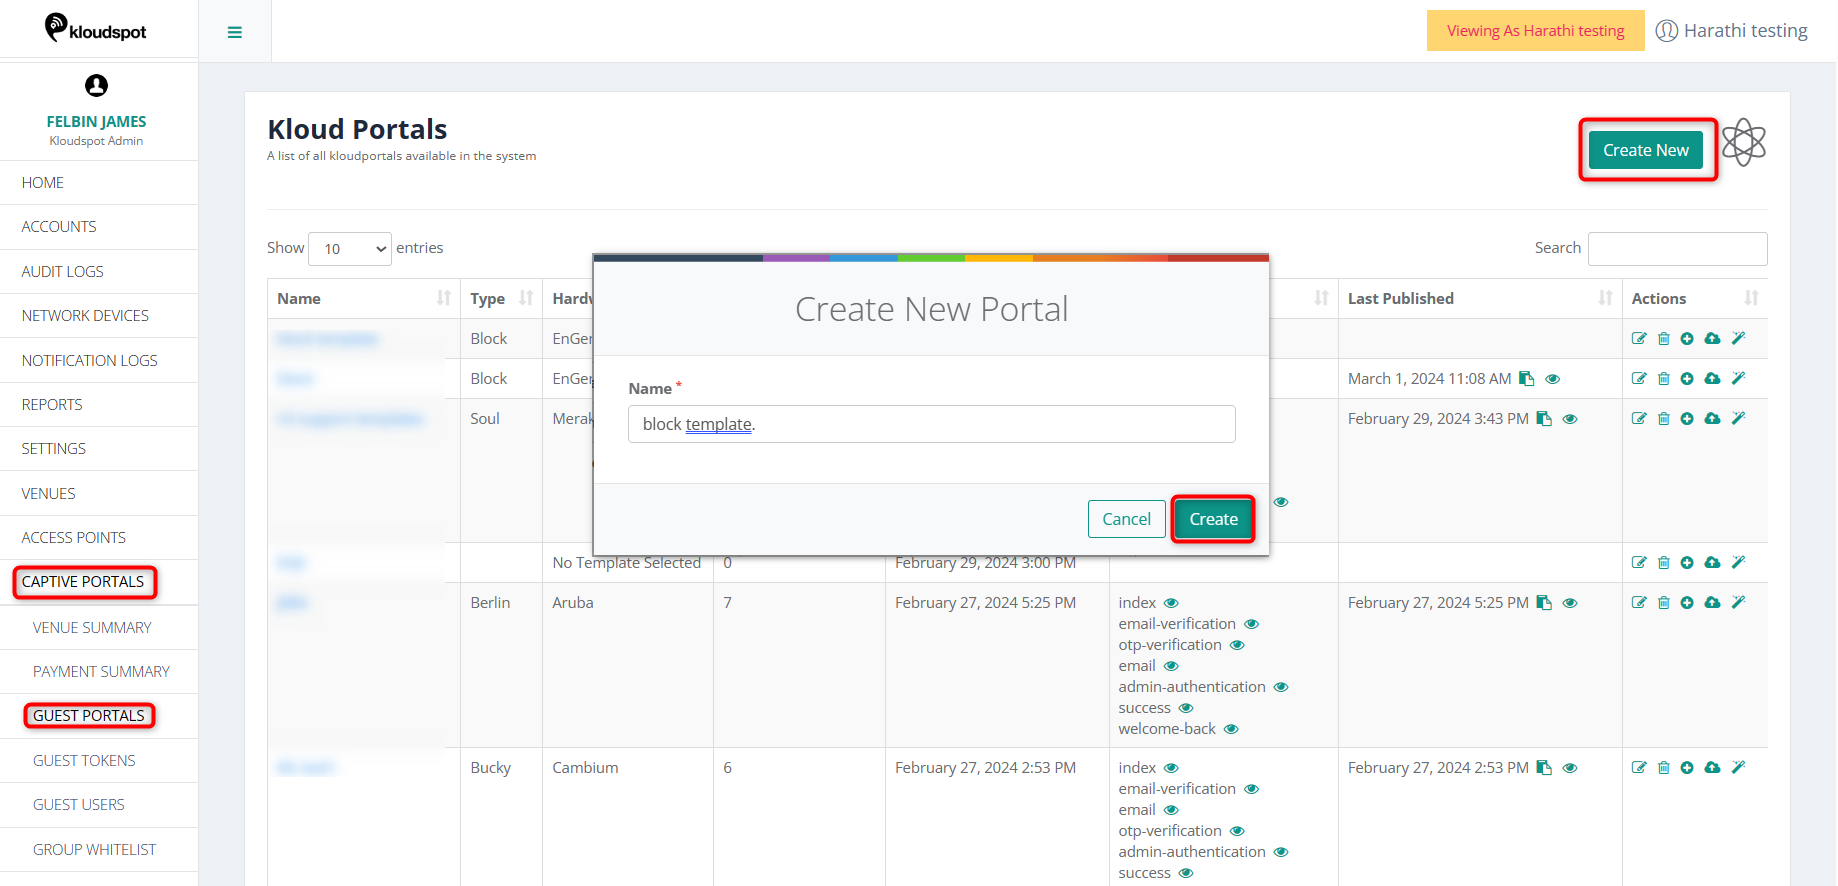
Navigate to Captive Portal > Guest Portals > Create New.
Enter captive portal name and click on Create.
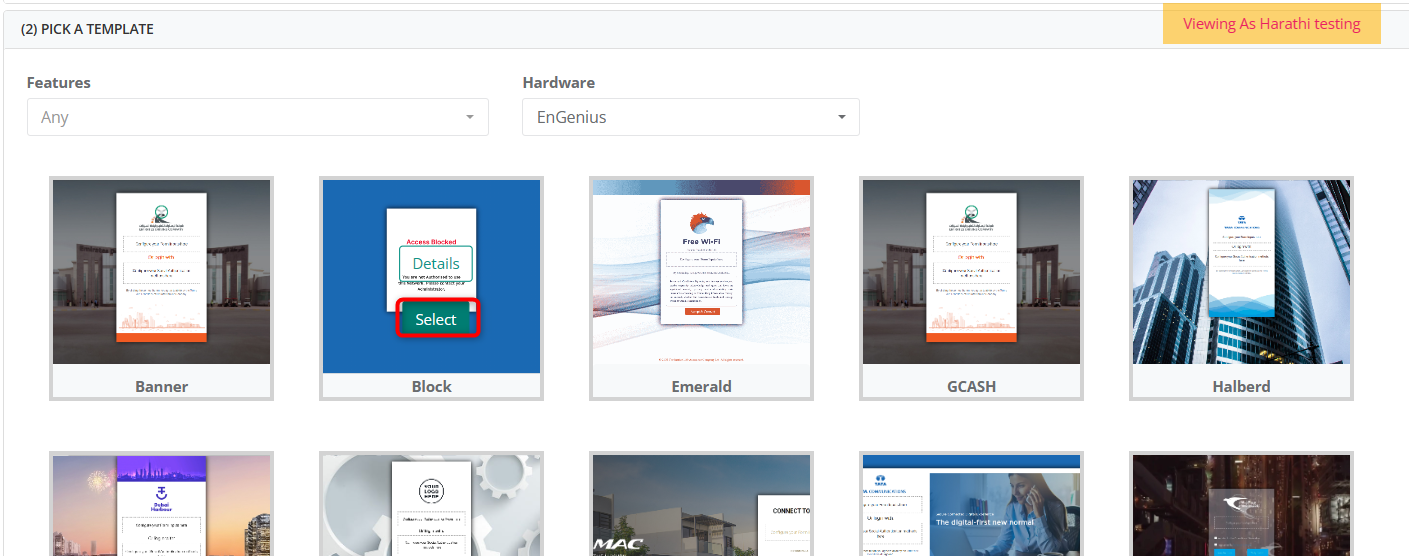
Choose the Block Template from EnGenius Hardware.
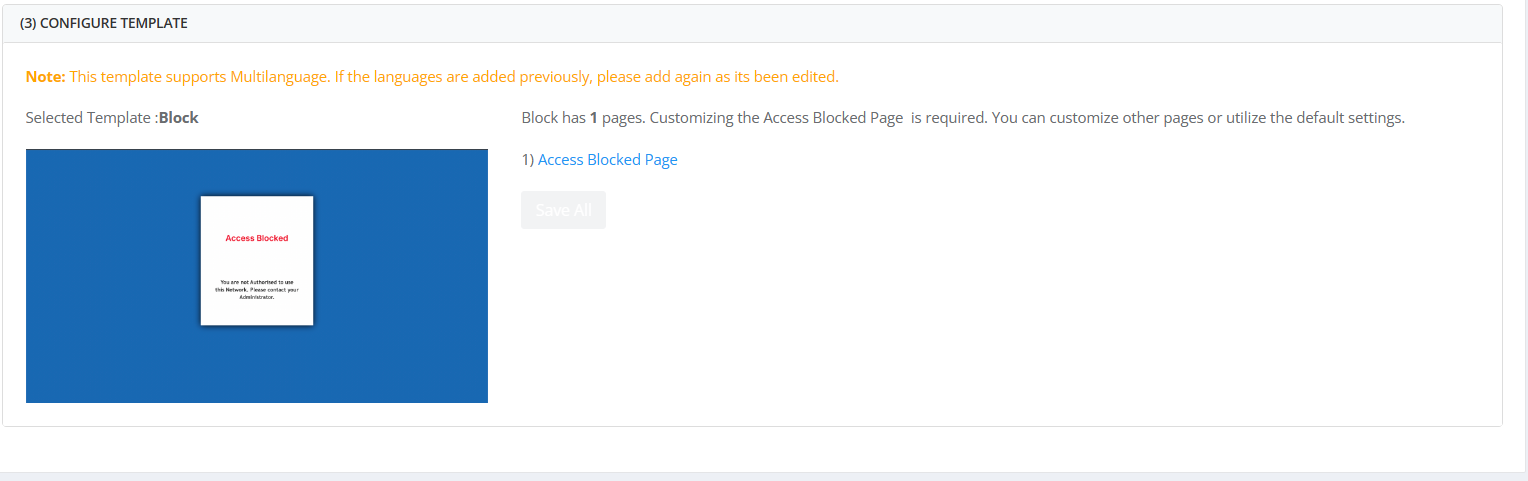
Navigate to the Access Blocked Page within the template configuration section.
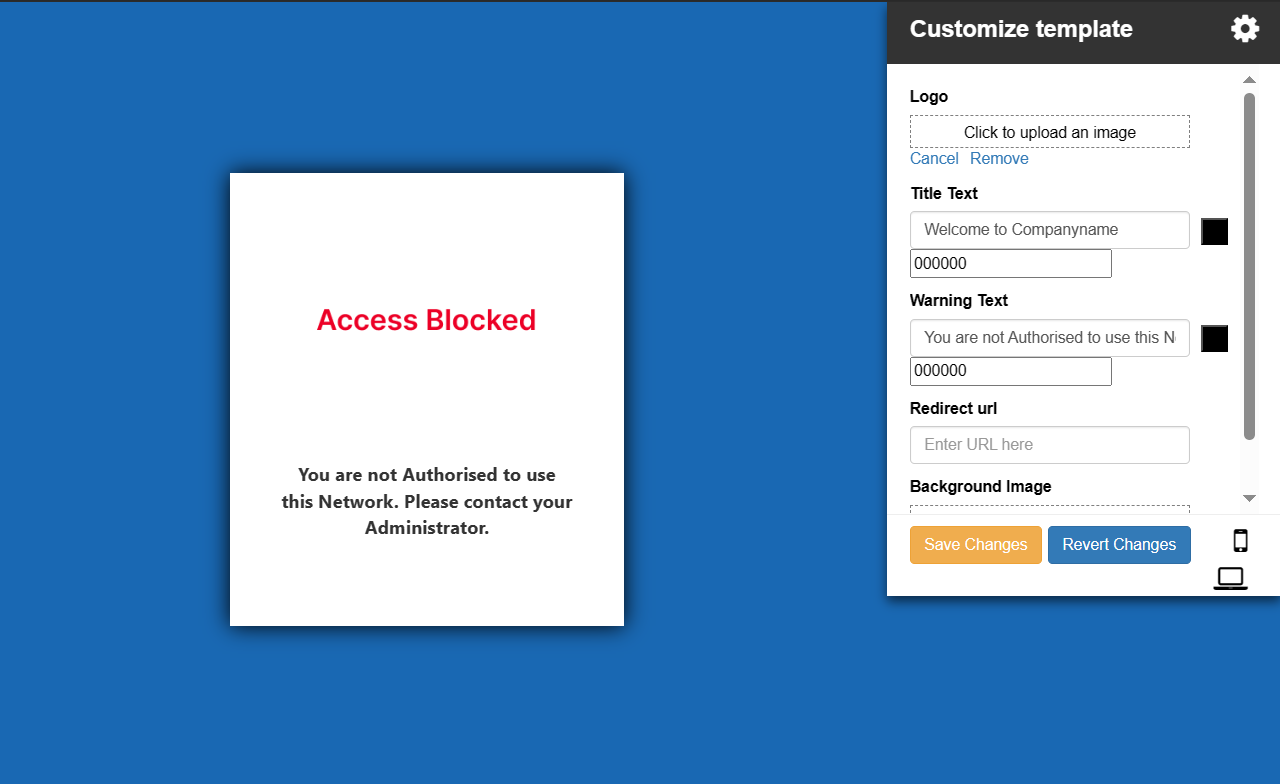
Click on the settings button.
Configure the following parameters as per your requirements:
Logo
Title Text
Warning Text
Redirect URL
Background Image
Once configured, click on the Save Changes button to apply the settings.
Finally, click the Save All button to save the template.
Assigning the Captive Portal to Access Point
After creating and configuring the template, the next step is to assign it to an access point.