Two-factor authentication with MAC address
Introduction
This document describes how to create a two-factor authentication system that uses MAC address identification along with OTP, email, or token-based authentication methods. By incorporating MAC authentication into the login process, this method improves security and access control in captive portal systems.
Mac address and SMS authentication - This is a two-step verification process. First, it verifies the device’s MAC address, then sends an OTP via SMS to authenticate the user’s mobile phone number.
Mac address and Email authentication - This is a two-step verification process. Initially, it authenticates the device’s MAC address and subsequently sends an authentication email to verify the user’s email address.
Mac address and token authentication - This is a two-step verification process. It starts by authenticating the device’s MAC address, followed by the use of a token for further authentication.
Getting Started
-
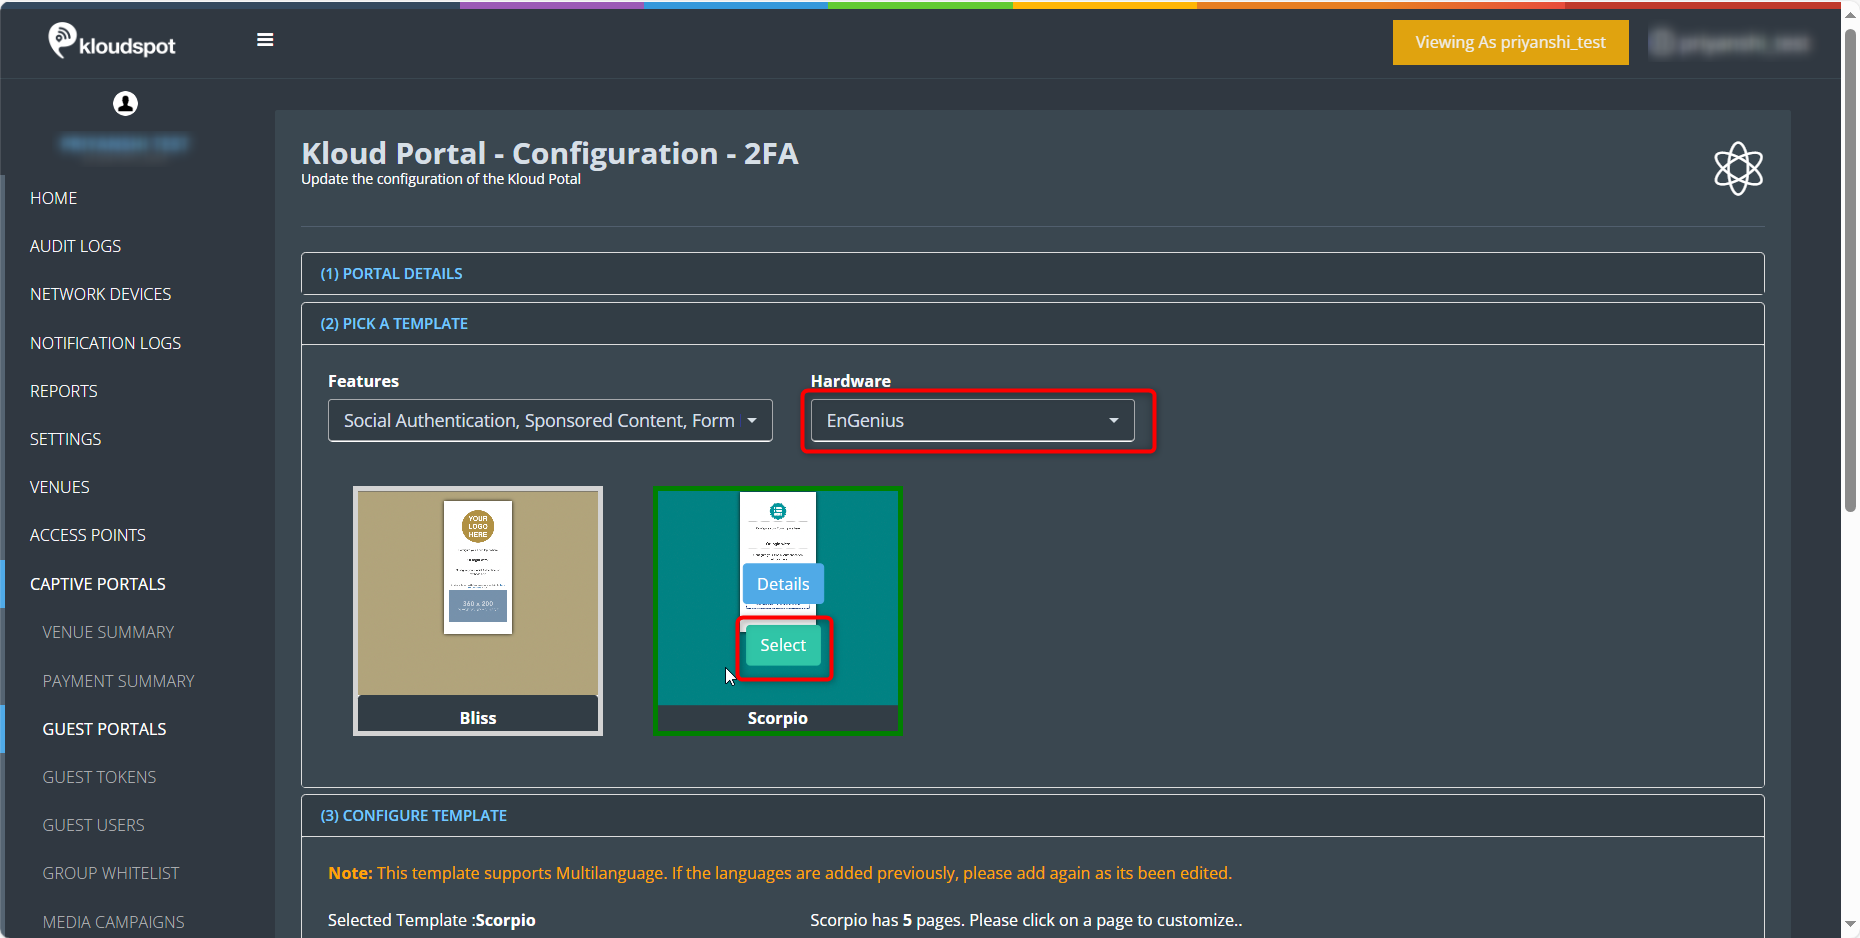
This feature is specifically designed for use with the Scorpio template on EnGenius hardware. For detailed instructions on customizing templates, refer to the “Customizing Captive Portal Templates” section.
-
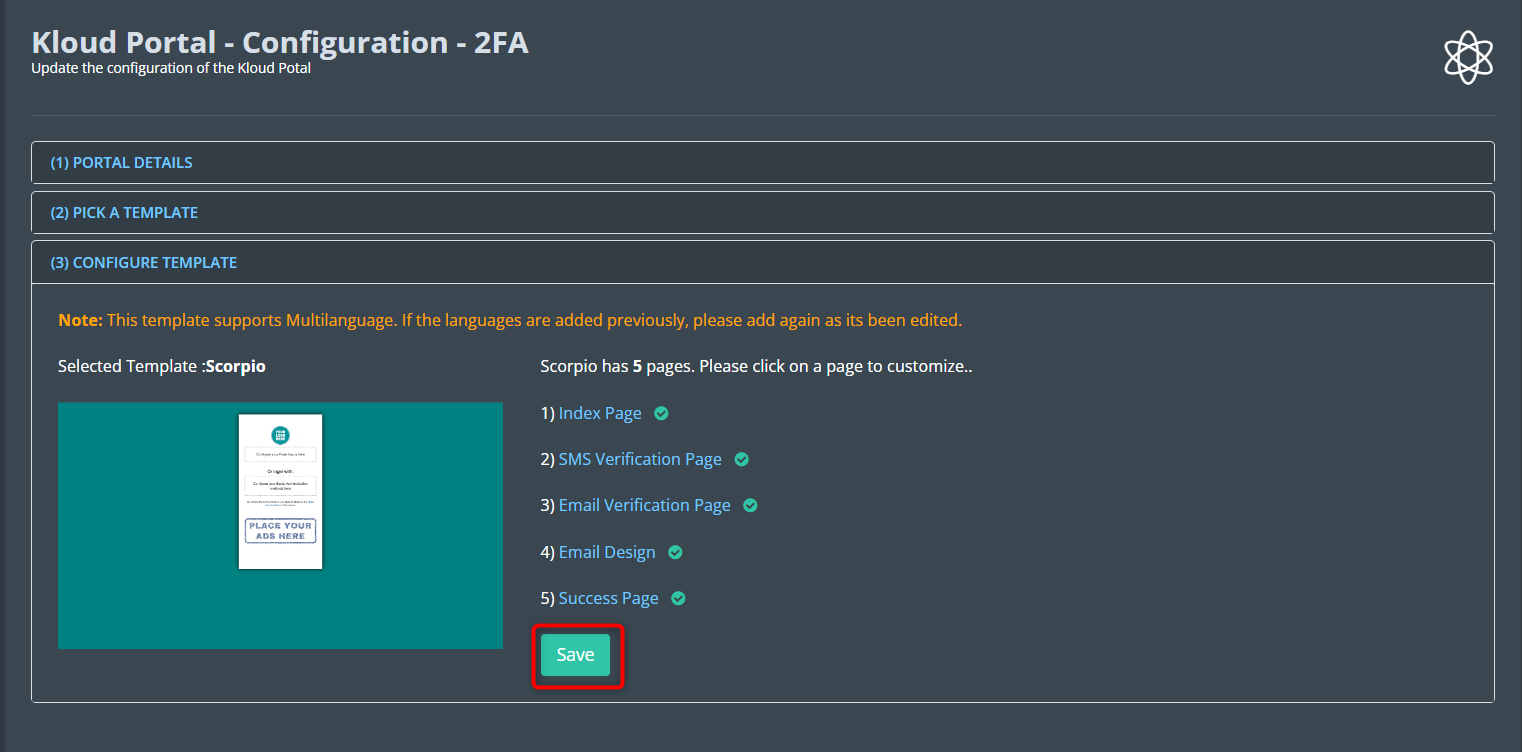
Begin by selecting the Scorpio template using the designated button.
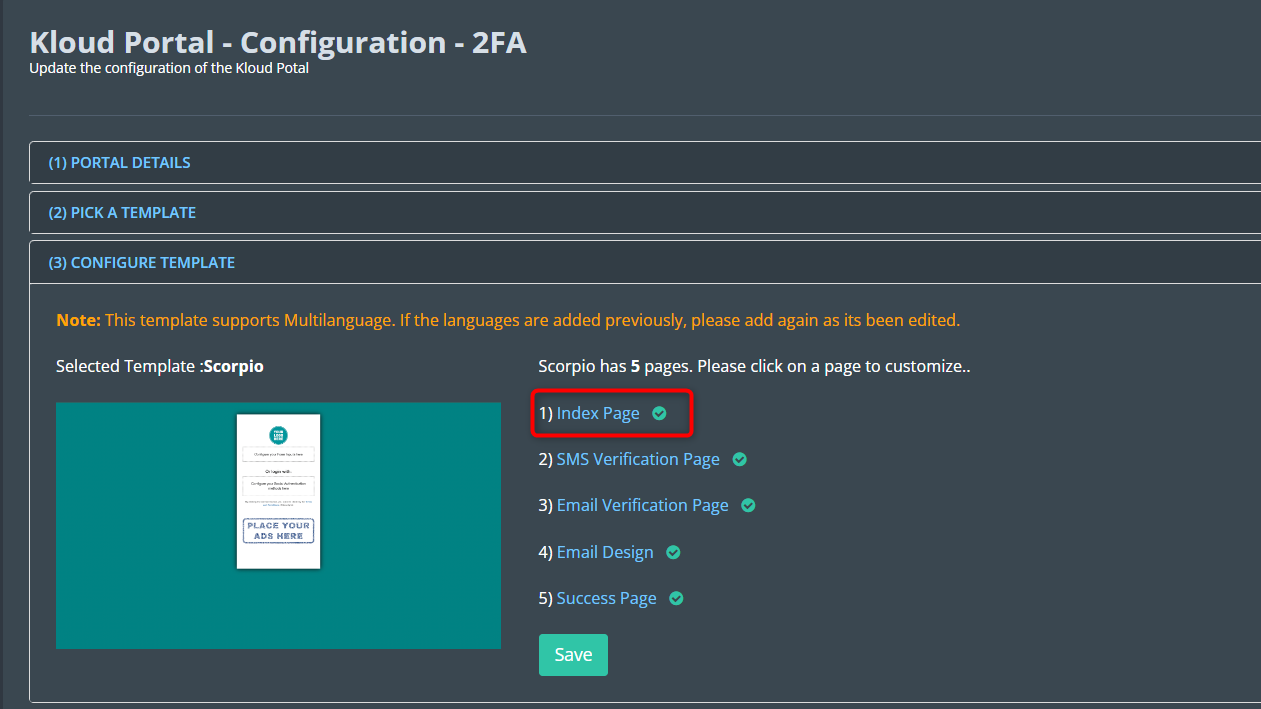
- On the “Configure Template” page, navigate to the “Index Page” section.
-
Click on the settings button to customize the Index page.
-
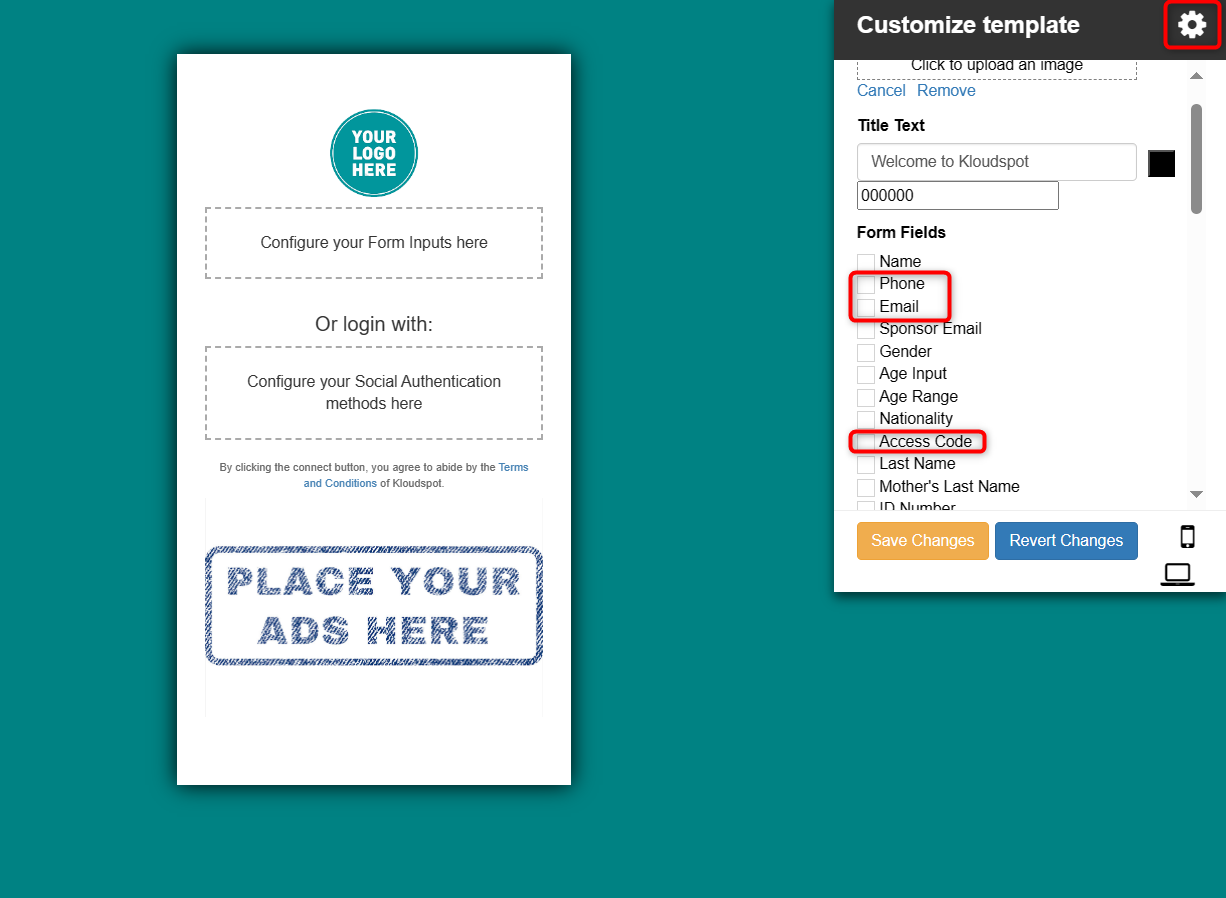
The form fields to select will vary based on the two-factor authentication method you wish to use..
- For SMS authentication, select the Phone field.
- For email authentication, select the Email field.
- For token-based authentication, select the Access Code field.
-
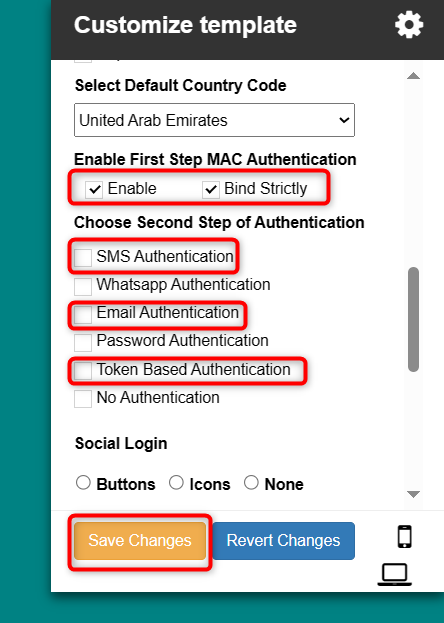
In the “Enable First Step MAC Authentication” section, ensure that both the Enable and Bind Strictly checkboxes are checked.
- Enable: Activates First Step MAC Authentication.
- Bind Strictly: Enabling this option associates a specific MAC address with a second-step authentication method. Then, the user can only log in using the information provided in the two-factor authentication settings.
-
Then select the Second Step of Authentication. Select SMS, Email, or Token Based authentication as per your requirement.
-
Adjust any additional configurations as needed, then click “Save Changes” to apply the settings.
-
For further guidance on template customization, refer back to the “Customizing Captive Portal Templates” section.
-
Once customization is complete, click Save to save the changes.
Assigning the Captive Portal
- Assign the configured captive portal to the relevant access point. Refer to the “Assign a Guest Portal to the Access Point” section to know how to do this.
Creating a Two-Factor Authentication Group
- Navigate to Captive Portals > Captive Portal Settings > Two Factor Authentication Settings > Group.
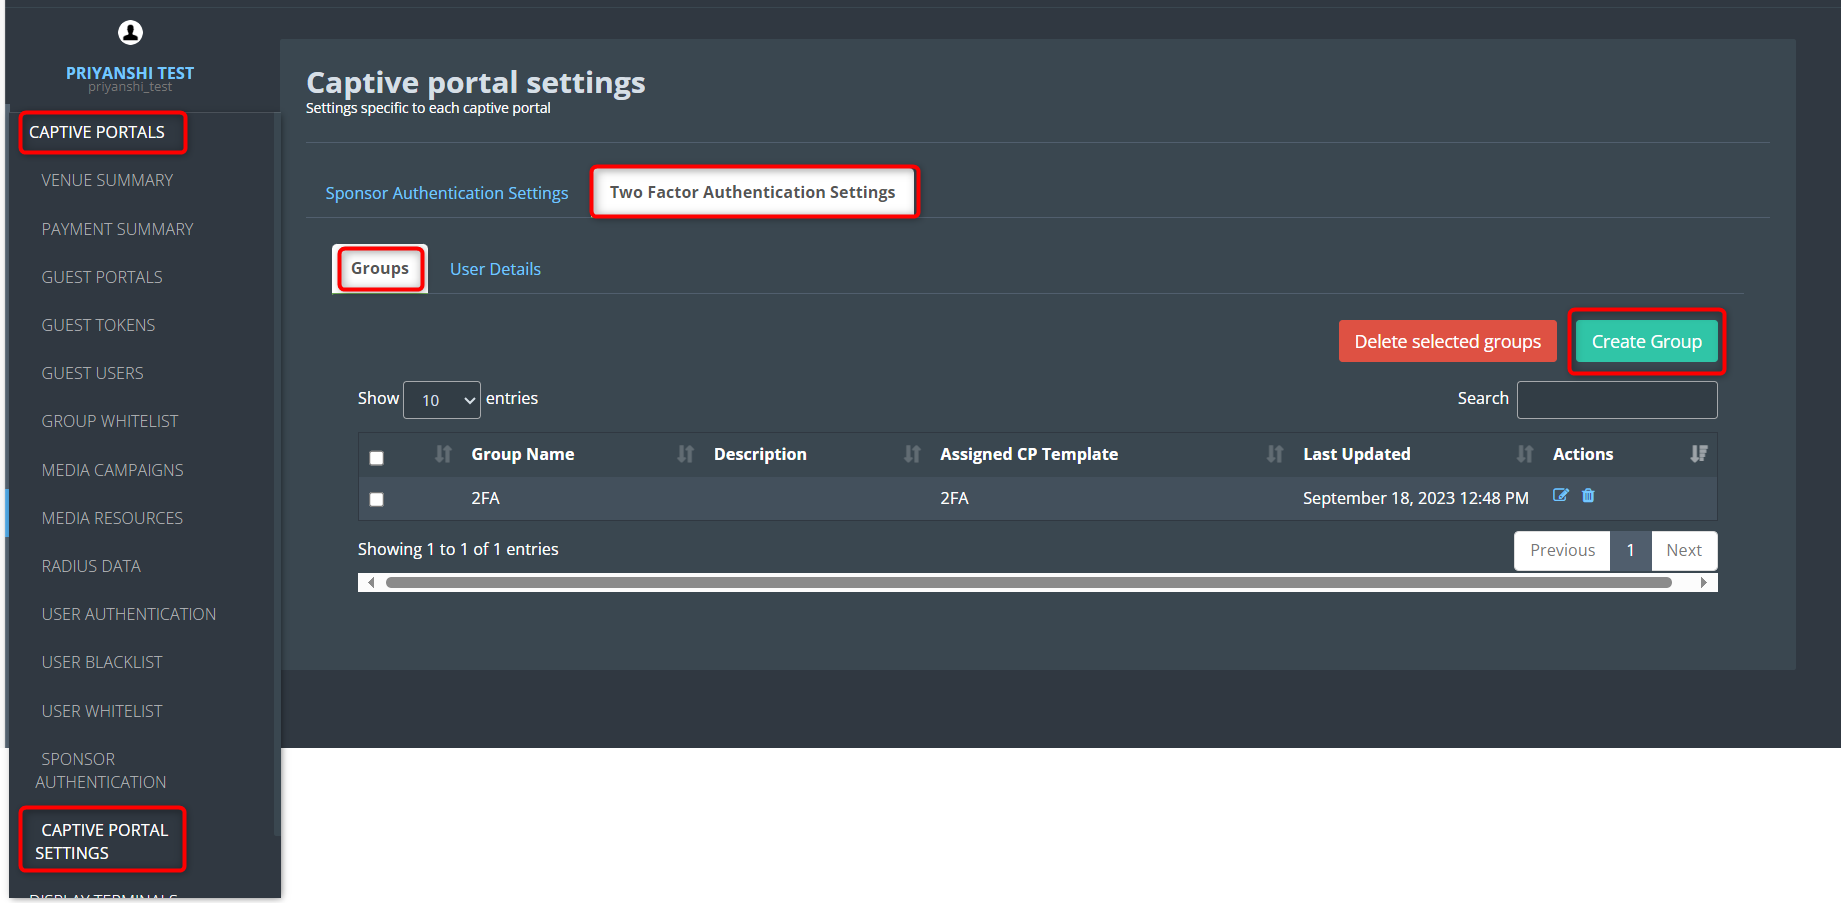
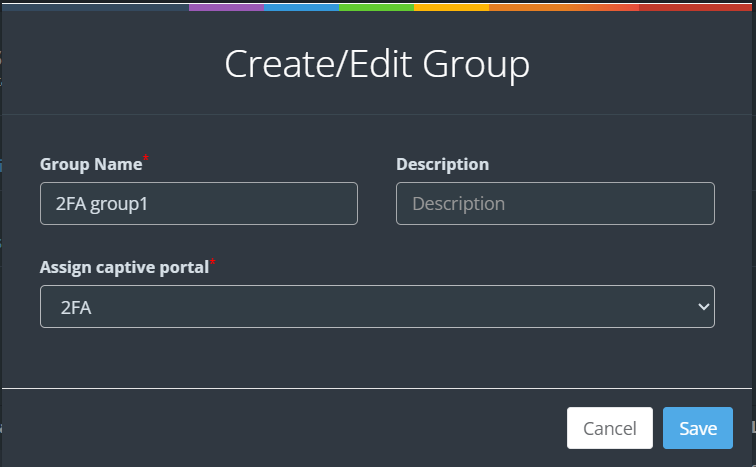
- Click on Create Group and define a new group. In the “Assign Captive Portal” column, select the previously configured captive portal.
-
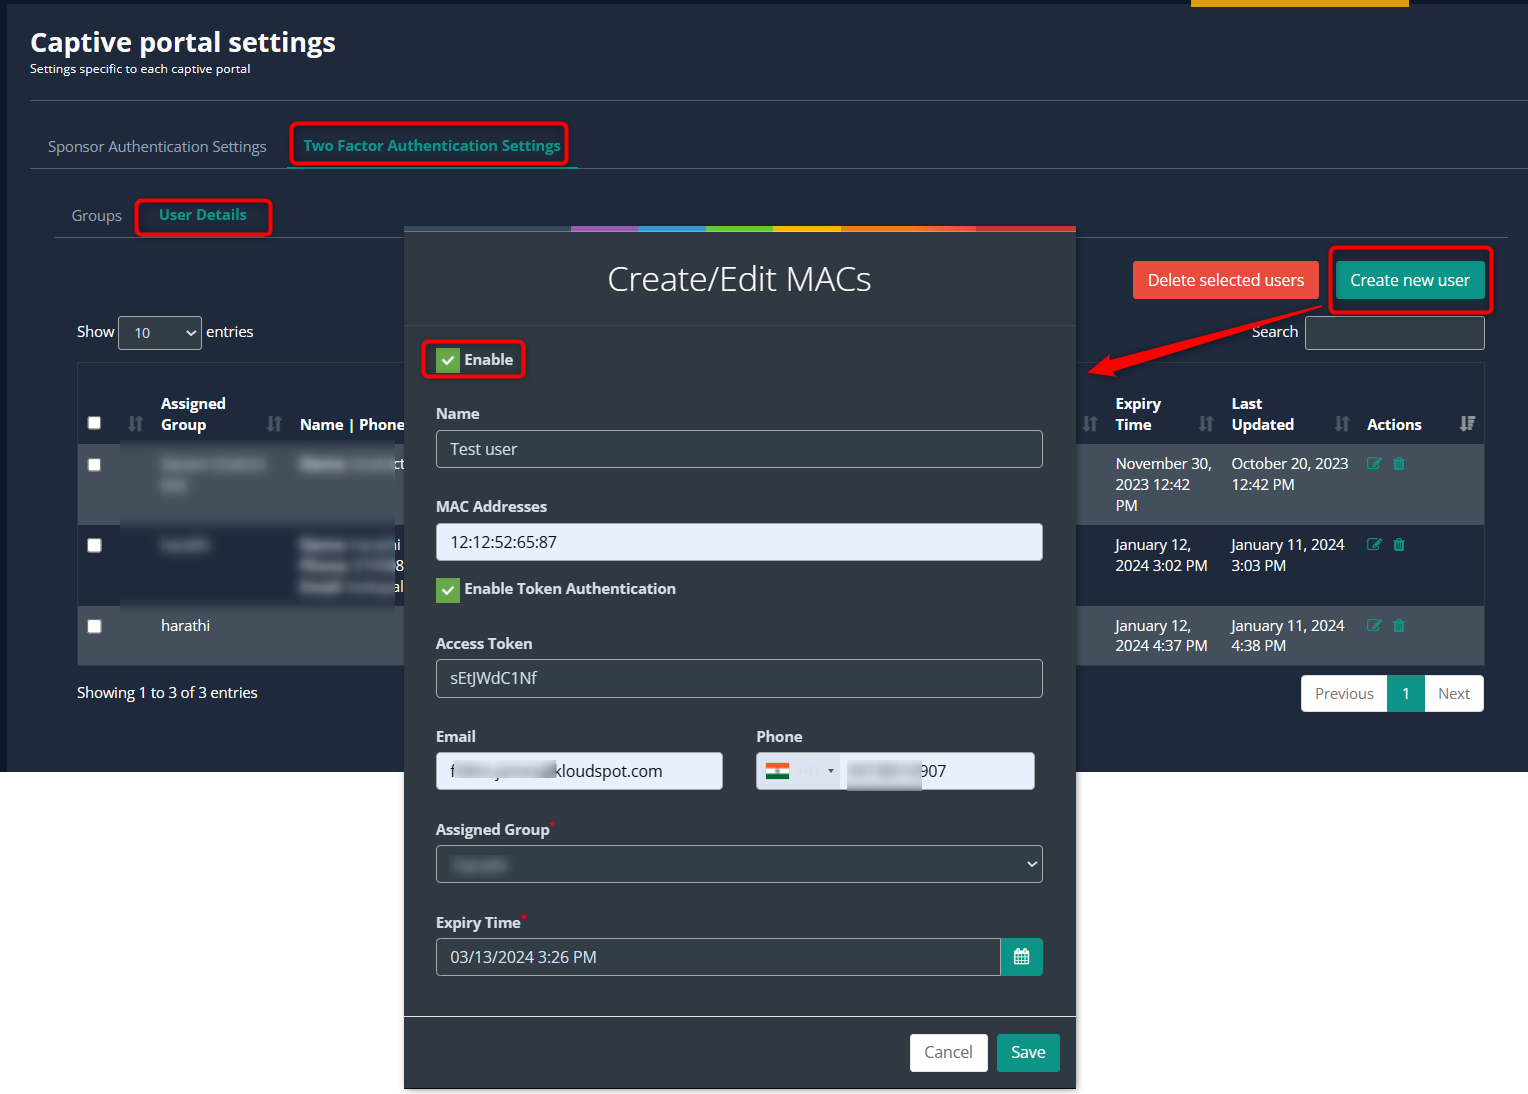
Once the group is created, proceed to add user details. Click on the User Details tab and then click on the Create New User button to add a new user.
-
In the popup window that open, Enable the user by checking the Enable checkbox and provide the required information.
-
When adding a user, ensure to provide relevant information based on the configured two-factor authentication method:
- Name: User’s name.
- MAC Address: MAC address of the user’s device.
- Enable Token Authentication: Enable this option for token-based authentication.
- Access Token: Upon enabling token authentication, an access token will be generated. This token is linked to the associated MAC address and grants access to the captive portal.
- Email: User’s email address for email authentication.
- Phone: User’s phone number for OTP authentication.
- Assigned Group: Select the group created earlier from the dropdown list.
- Expiry Time: Set the duration for which the user can access the internet via the captive portal.
-
Click Save to save the user.
- Conduct thorough testing of the captive portal to ensure proper functionality of MAC Authentication. In case of any issues, refer back to the outlined steps for troubleshooting.