Subsections of Guest Management
Create Guest Users
1. In this section, we delve into the crucial process of generating guest user accounts within your captive portal. Creating guest users is a fundamental step with multifaceted benefits.
By crafting individualized guest accounts, you gain control over access, ensuring that only authorized individuals can connect to your network. This level of control enhances security and provides a more personalized experience for your guests.
Moreover, guest user creation empowers you with the ability to monitor and track network usage, fostering accountability and compliance. Additionally, this feature streamlines the authentication process for your guests, ensuring a seamless and secure connection.
2. To facilitate this process, it’s necessary to include fields for entering a user ID and password on the guest portal’s welcome page. To learn how to design a welcome page with these elements, please consult the “Customizing Captive Portal Templates”
section for detailed instructions.
3. To create a guest user, Log in to your Kloud Manage account.
4. Then Navigate to CAPTIVE PORTAL > GUEST USERS > Add Guest user.
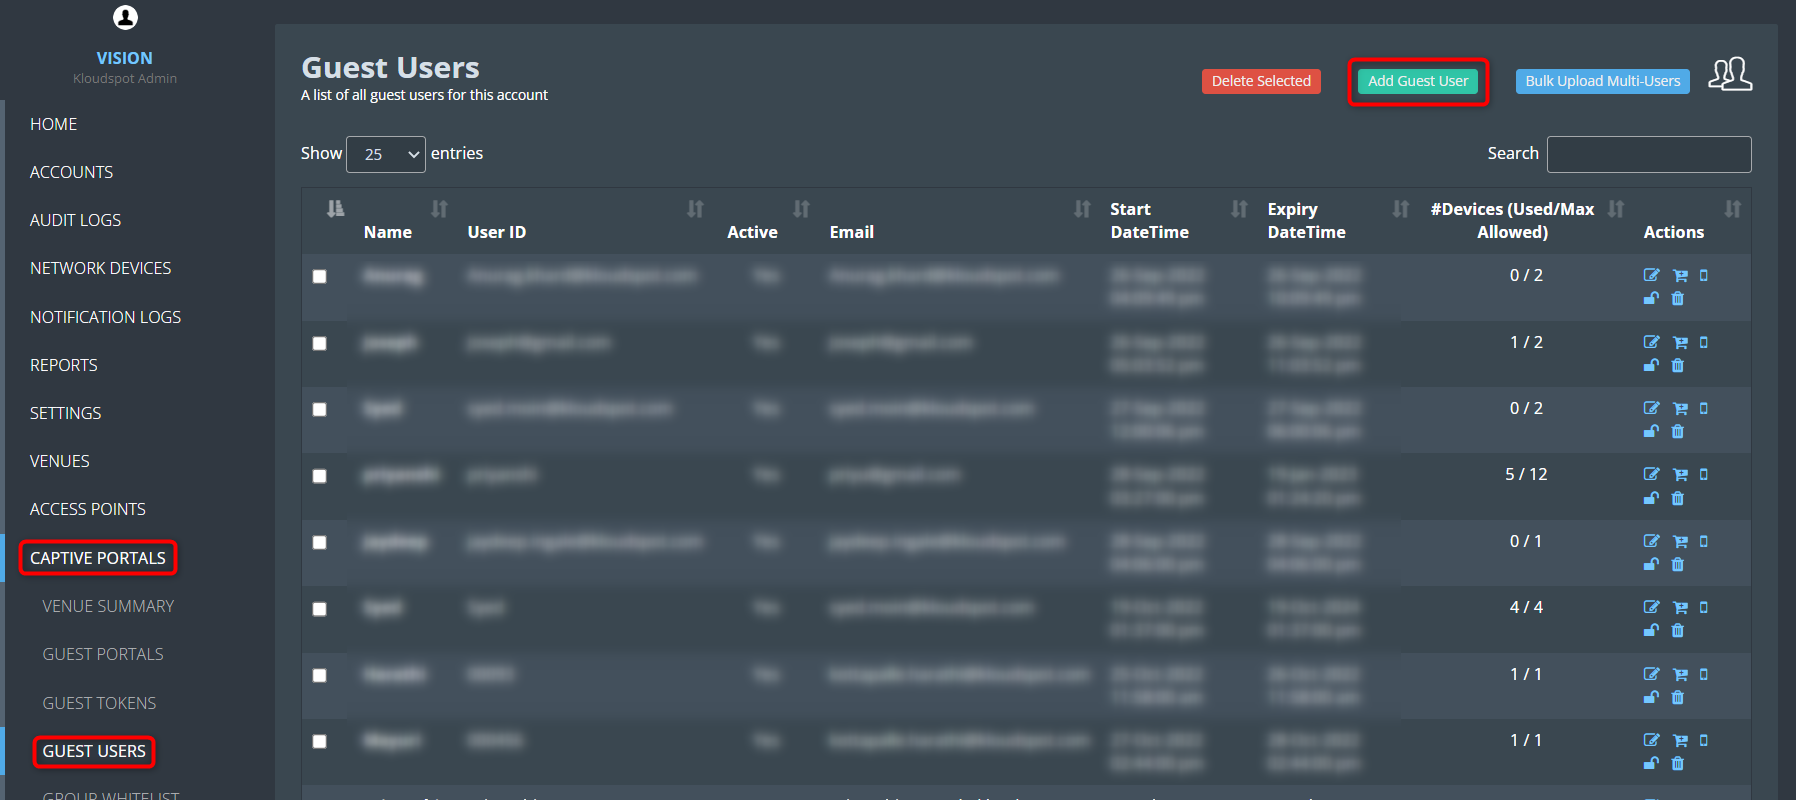

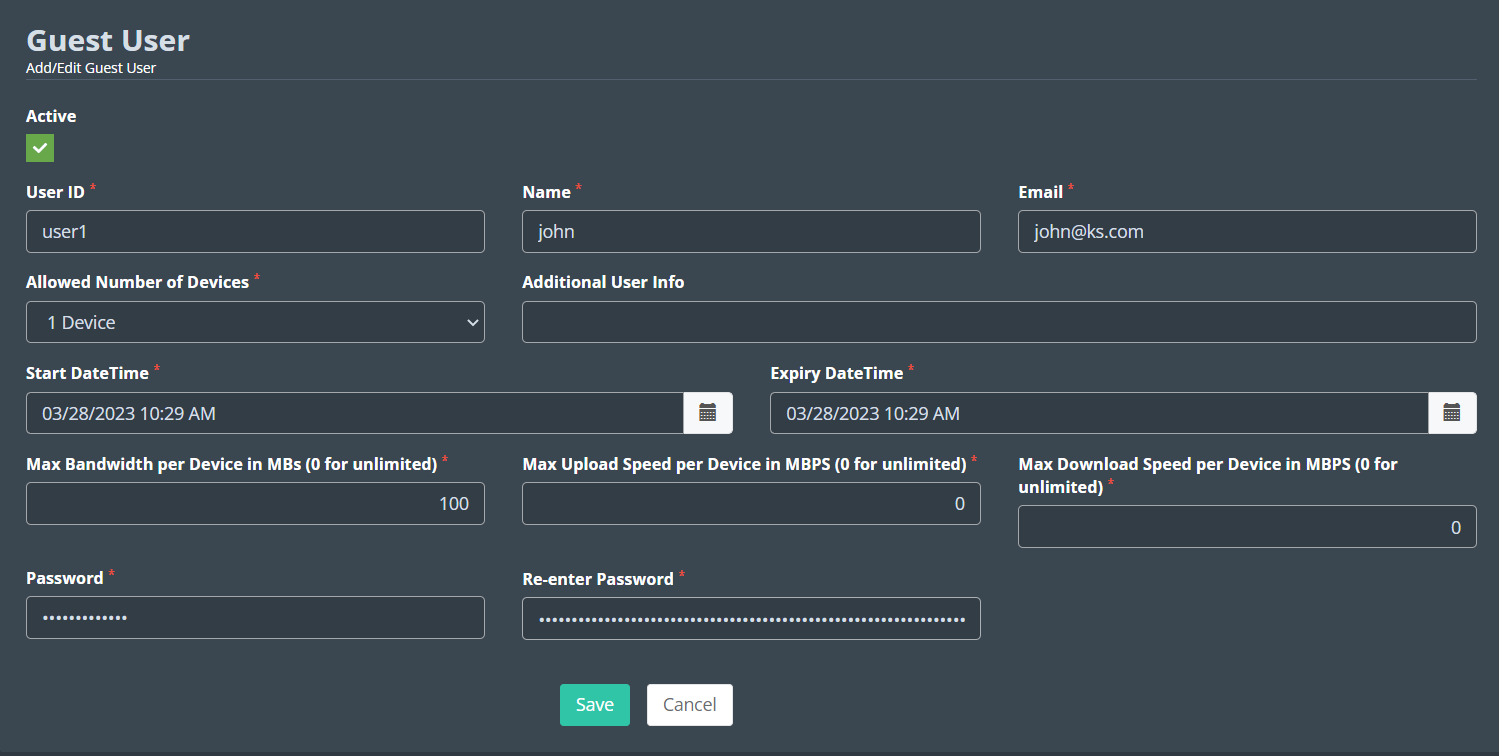
5. Fill in the following in the window that opens.
User ID: Enter the User ID that will help the user to log in.
Name: Enter the User’s name.
Email: Enter the User’s Email address.
Allowed Number of Devices: Enter the limit on how many devices this token
can be used on.
Additional User Info: Enter any additional information about the user
here. This is optional.
Max Bandwidth per Device in MBs (0 for unlimited): Enter the maximum
bandwidth available with this token.
Max Upload Speed per Device in MBPS (0 for unlimited): Enter the maximum
Upload Speed available with this token.
Max Download Speed per Device in MBPS (0 for unlimited): Enter the
maximum Download Speed available with this token.
Start DateTime: Select the date from when this token should be activated.
Expiry DateTime: Select the last date for which the token should be
active.
Password: Enter the password required to login to the user.
Re-enter Password: Re-enter the password.
6. Click on the Save button to save the guest user.
 7. If you want to add multiple users together, you can use the Bulk Upload
Multi-Users option.

 8. You can do more with the buttons below the action field.


1. Edit User details
2. Credit details
3. device details
4. Change the password
5. Delete the user
Approve or decline the user request
In cases where the chosen authentication method is “Verify by Admin Authentication,” guests entering the portal are required to provide their email ID and send an authentication request. In this section, we’ll explore the steps to either APPROVE or DECLINE these authentication requests.
Consult the “Customizing Captive Portal Templates
" section for instructions on incorporating the Admin Authentication method.
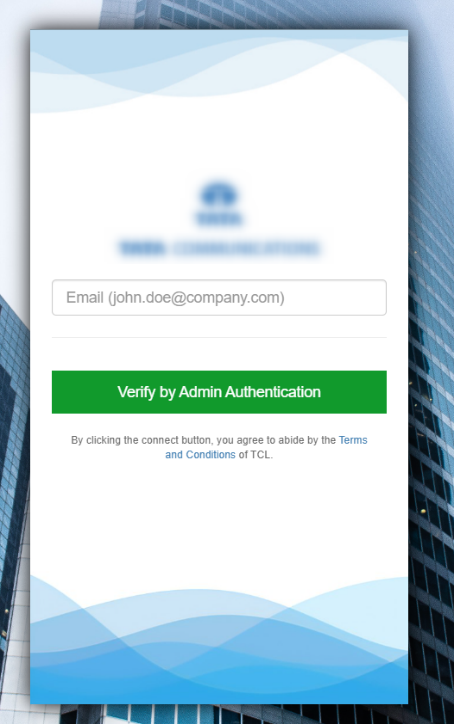
1. When you connect to Wi-Fi, the login page will appear.
2. Fill in the form field information. This will differ depending on the portal you enter.
3. Then click Verify by Admin Authentication button.
4. As soon as the user logs in, the CP_ADMIN and CP_USER will receive an
email, informing them that a new user request has arrived.
5. After the authentication process, the connection will be activated.

Approve a new user request.
1. If Admin Authentication is enabled in the authentication type. Each new user must be approved by the CP_ADMIN/CP_USER. Follow the steps described below to accomplish this.
2. Log in to your Kloud Manage
account.
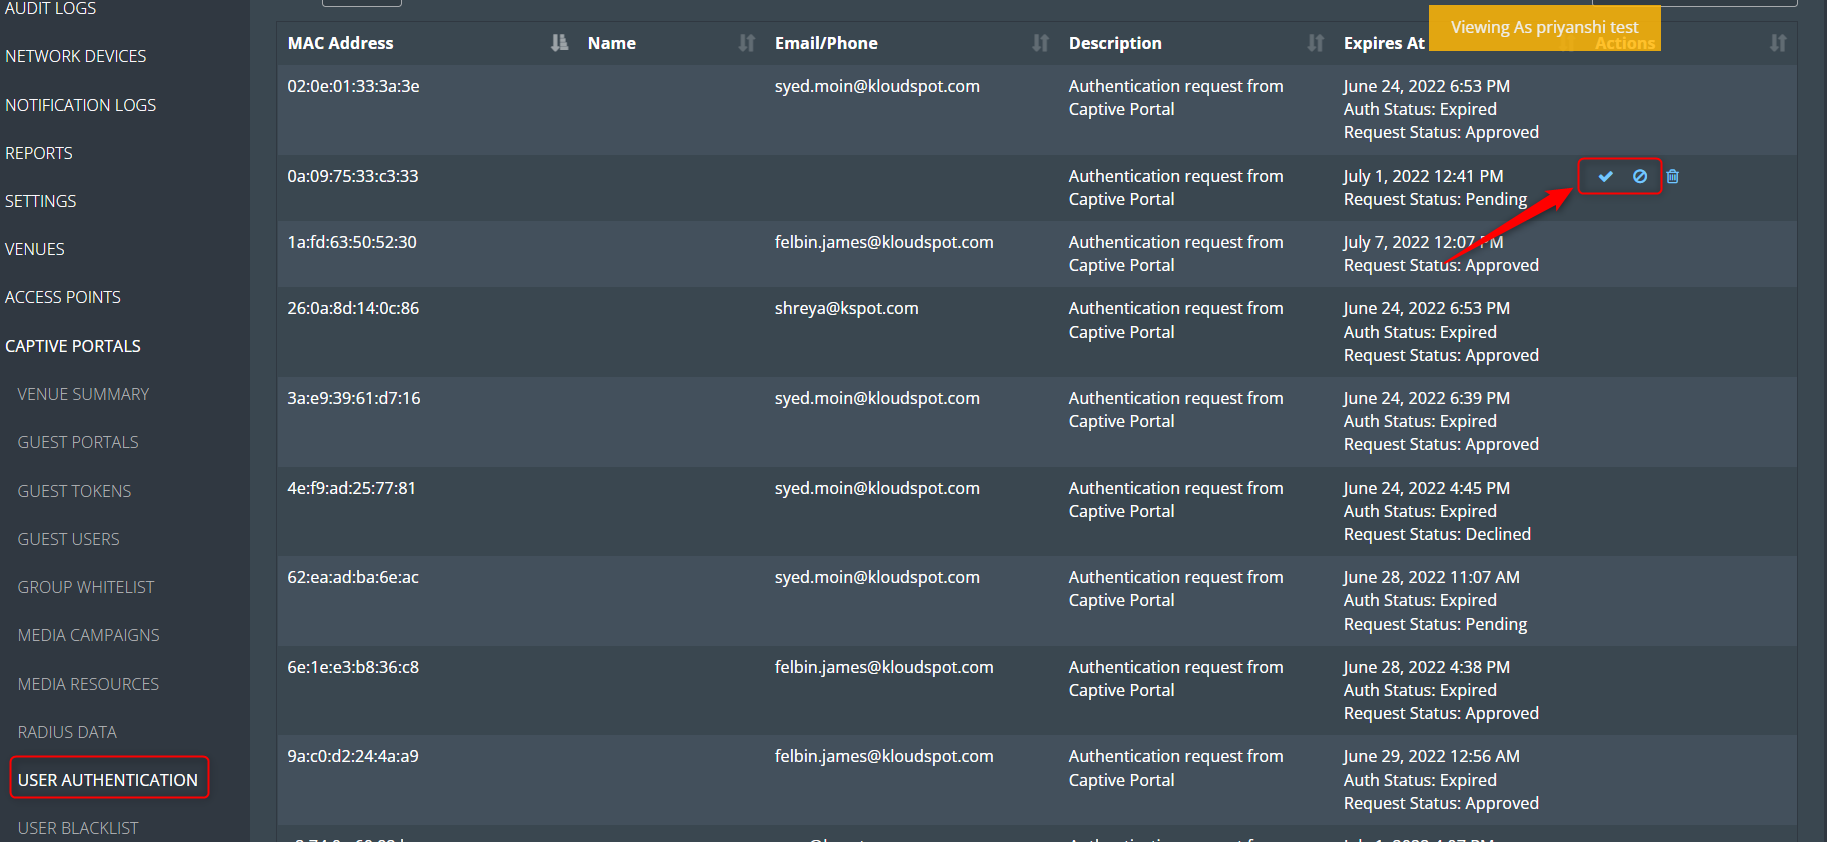
3. Then Navigate to CAPTIVE PORTAL > USER AUTHENTICATION.
4. The next window displays a list of all authentication requests. Here admin
can approve or decline as required.
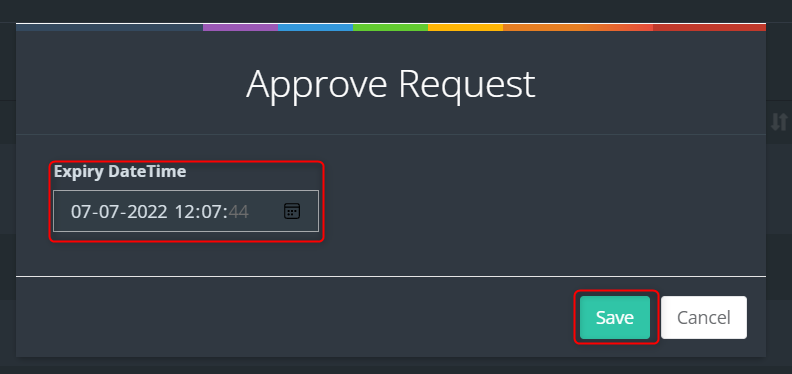
 5. After you approve, enter the user’s allotted time in the popup window that
appears and click the Save button. By default, one day is permitted. You
can edit it if you want to make changes.
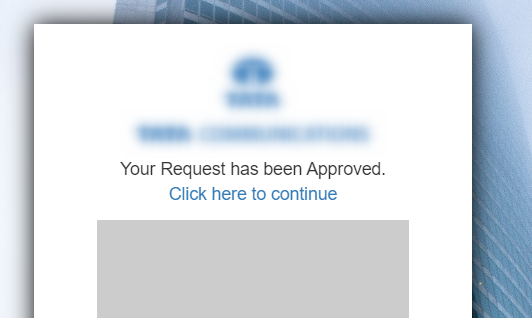
 6. The user will receive an approve/decline message after 1 minute of
approval/decline.
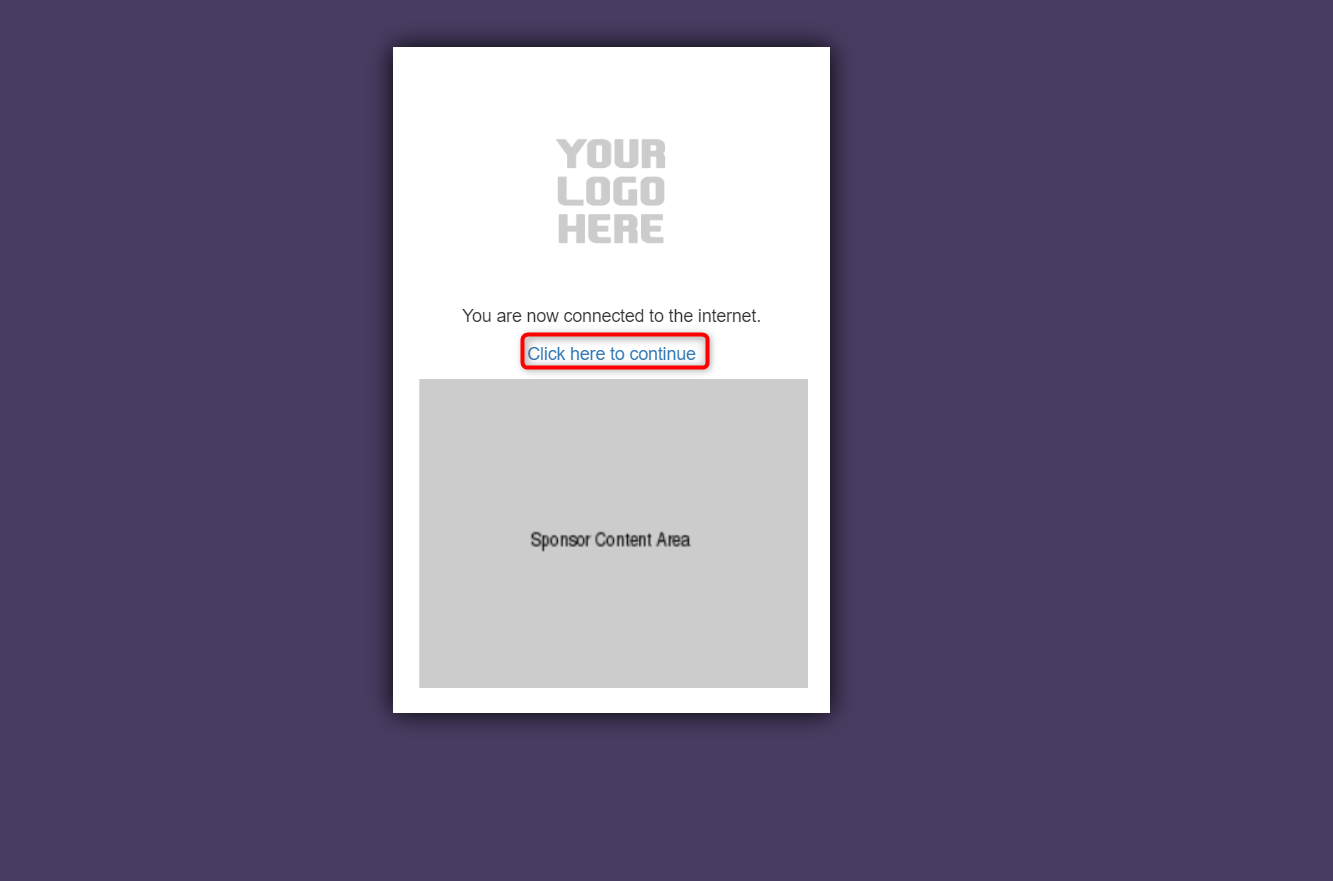
7. Then ‘ Click here to continue’ button and access the portal.

Create a user whitelist
1. This feature is particularly useful for scenarios where certain users, such as staff or trusted individuals, should have uninterrupted internet access without the need to authenticate through the captive portal. By creating a User Whitelist, you can streamline their connectivity experience while ensuring that others still go through the necessary authentication steps.
In this section, we will explore how to set up and manage a User Whitelist within your KloudPortal configuration.
2. To create a user whitelist, Log in to your Kloud Manage account.
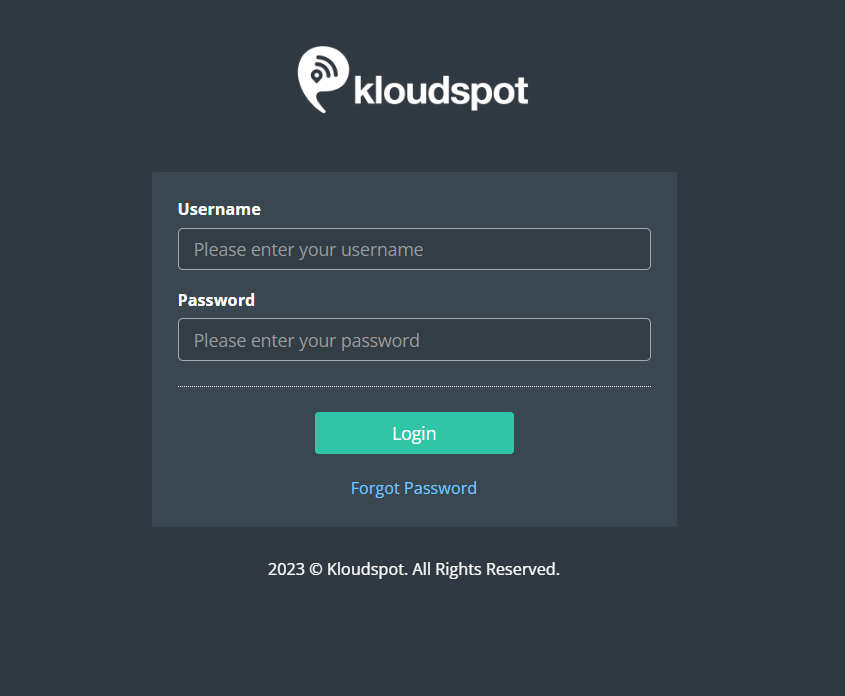
 3. Then Navigate to CAPTIVE PORTAL > USER WHITELIST > Create User.
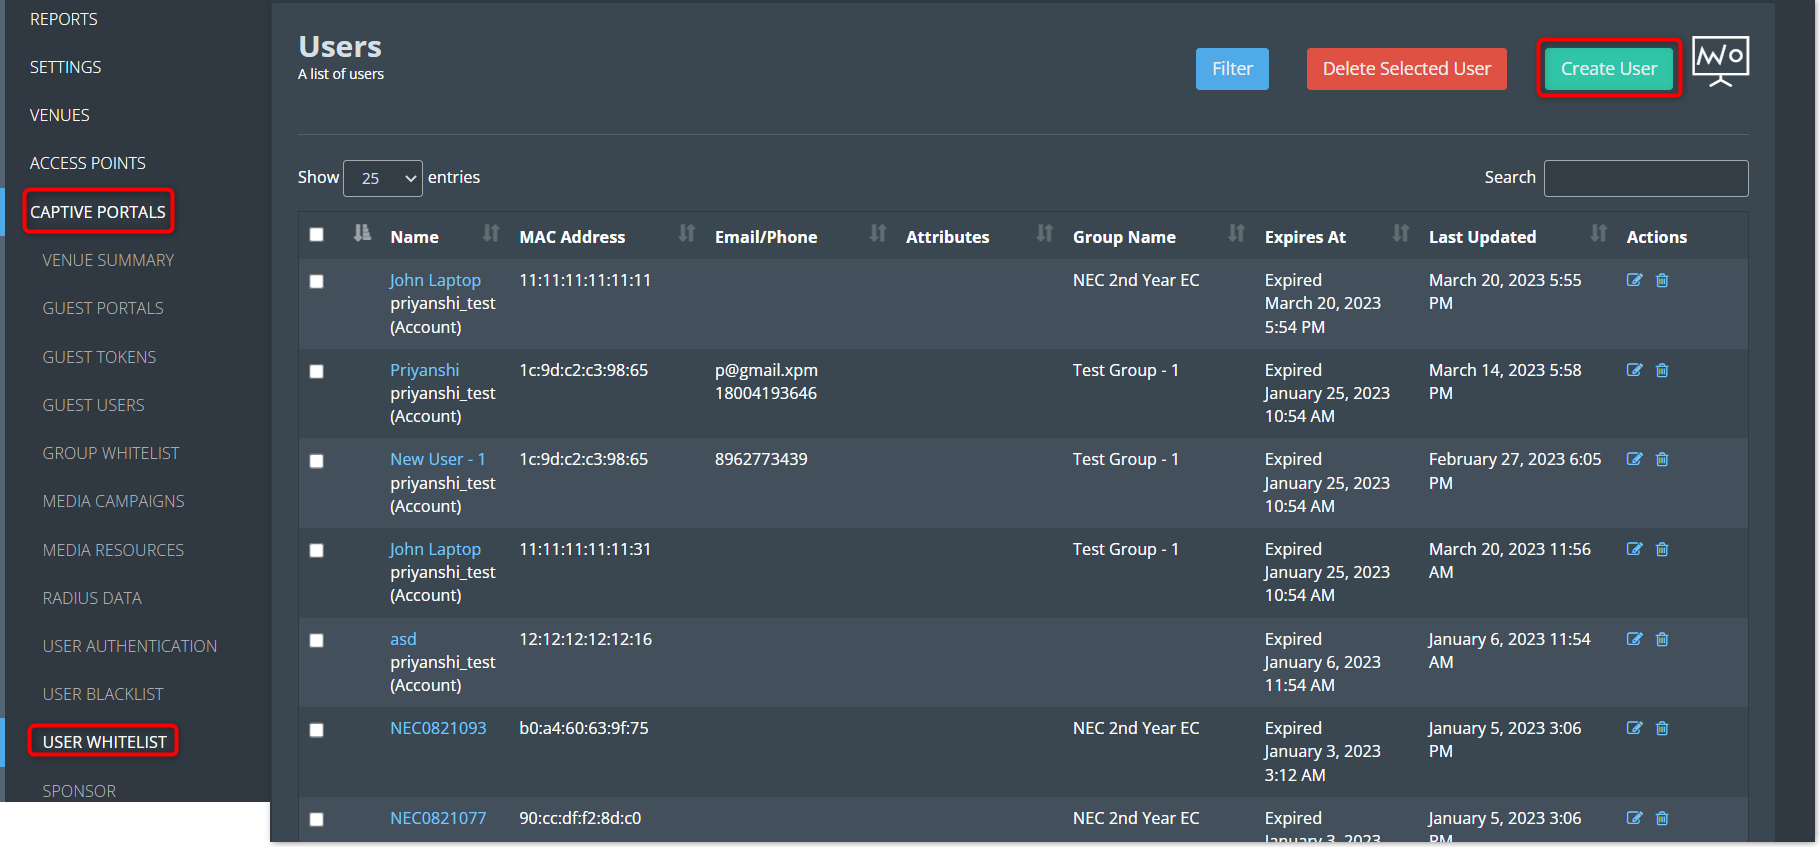
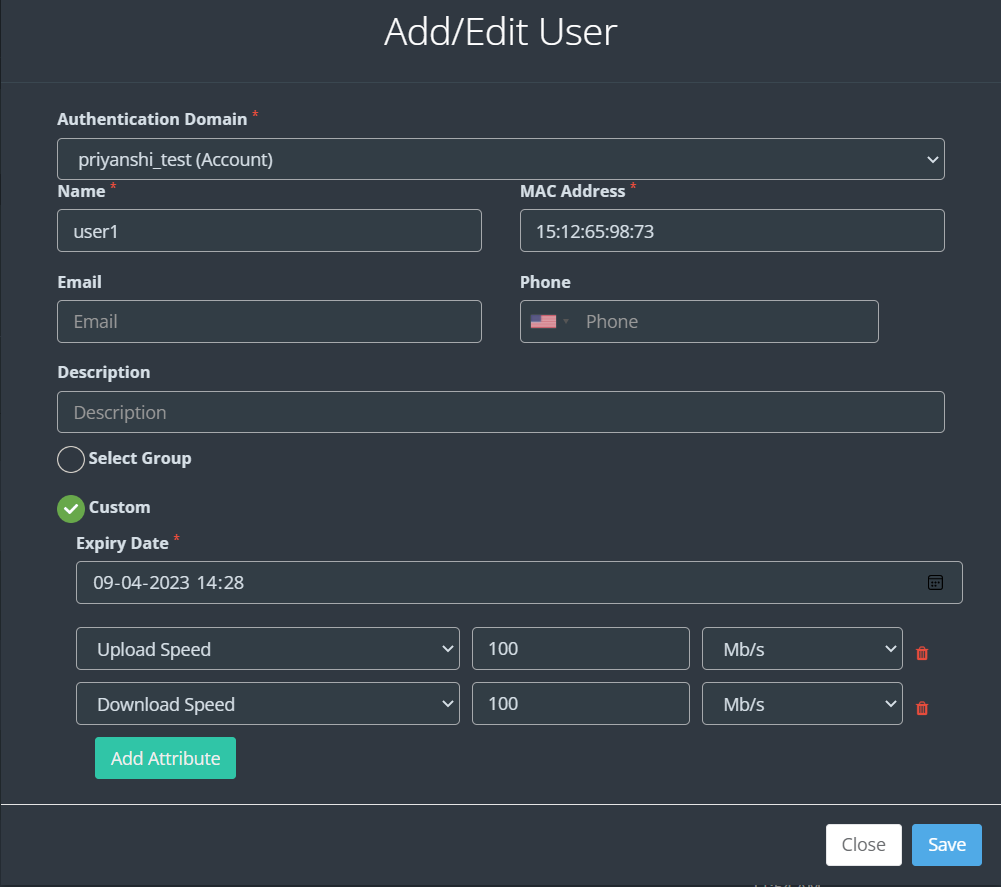
 4. Enter all the necessary information and click the Save button.
5. There are two choices available: either include this device in an existing
group or specify a custom expiration date. Choose any of these as per your
requirement.

Create a user blacklist
1. Creating a User Blacklist is a crucial aspect of network management, especially when you need to restrict specific users’ access to your network. Unlike the User Whitelist, which grants certain individuals uninterrupted internet access, the User Blacklist allows you to block or suspend access for specific users or devices.
In this section, we will delve into the process of setting up and managing a User Blacklist within your Kloud Portal configuration.
2. To create a user blacklist, Log in to your Kloud Manage account.
3. Then Navigate to CAPTIVE PORTAL > USER BLACKLIST > Create New.
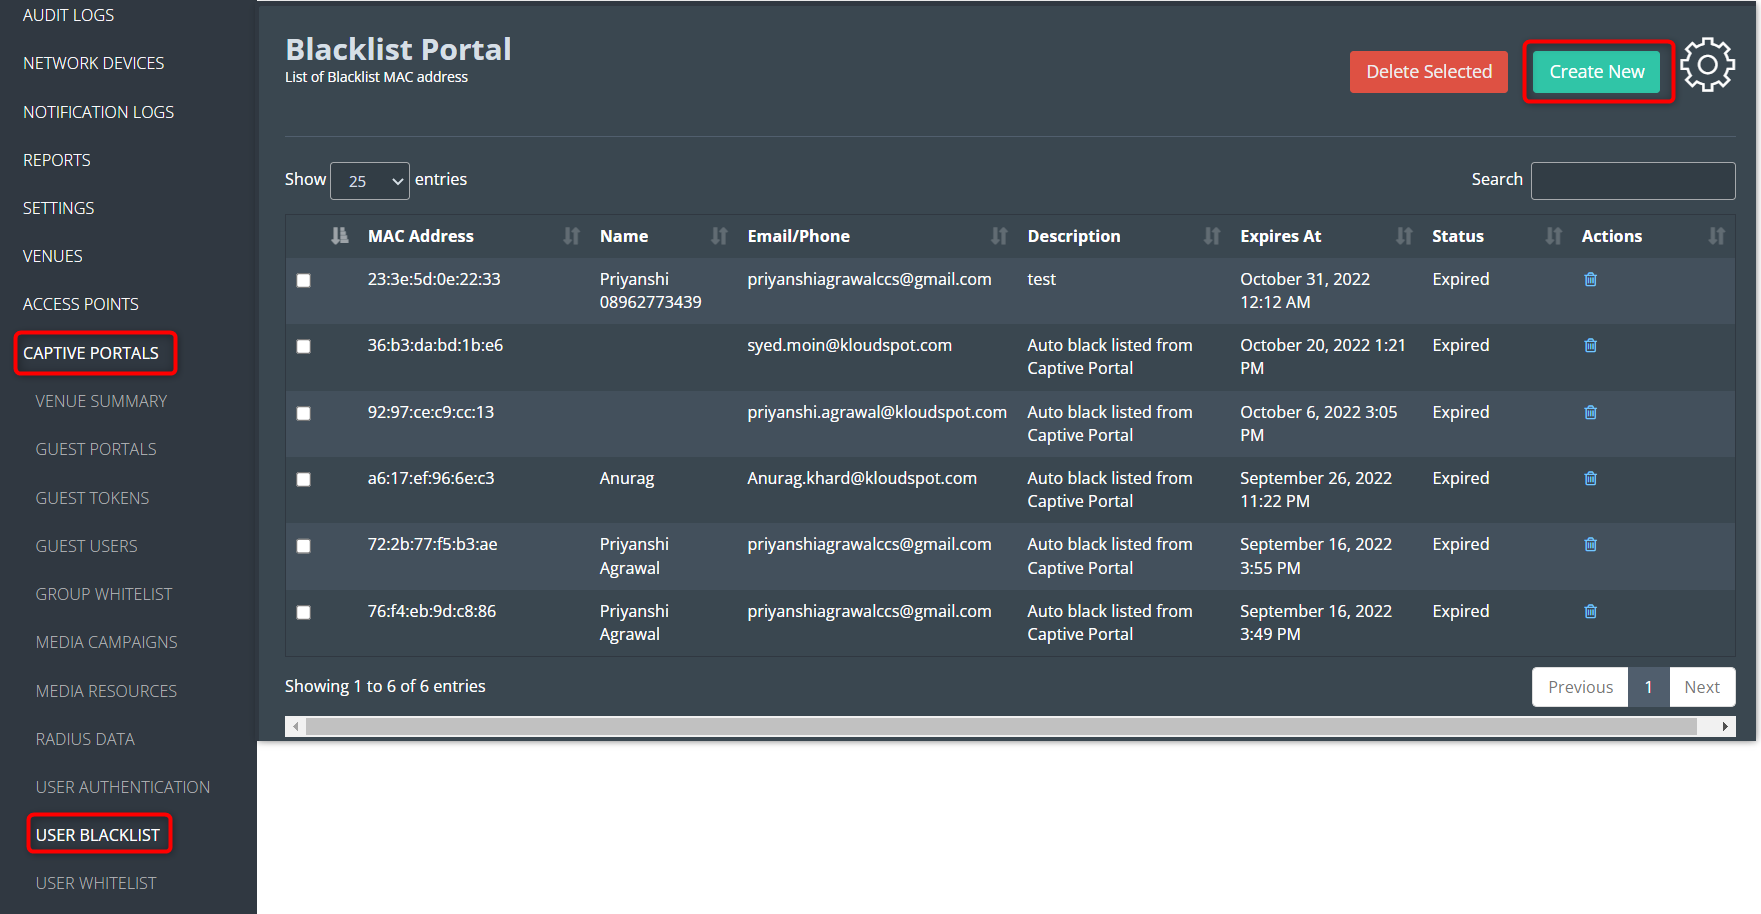
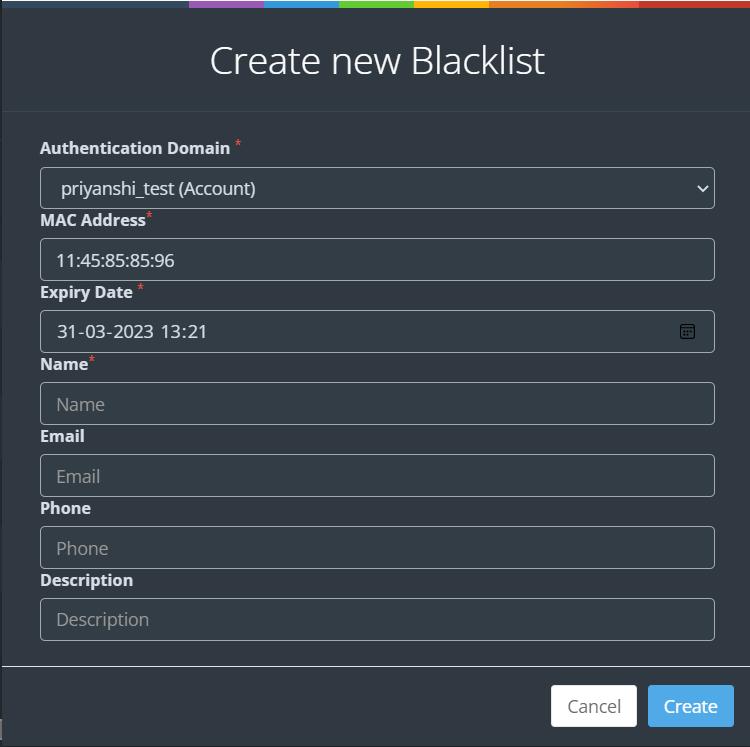
 4. Enter all the necessary information and click the Create button.

Create a Group Whitelist
The group whitelist feature is a way to allow a specific group of users to
bypass the captive portal login process and access the internet directly. This
feature can be useful in situations where certain users, such as employees or
trusted partners, need to have immediate access to the internet without having
to log in every time they connect to the network.
Create a group whitelist.
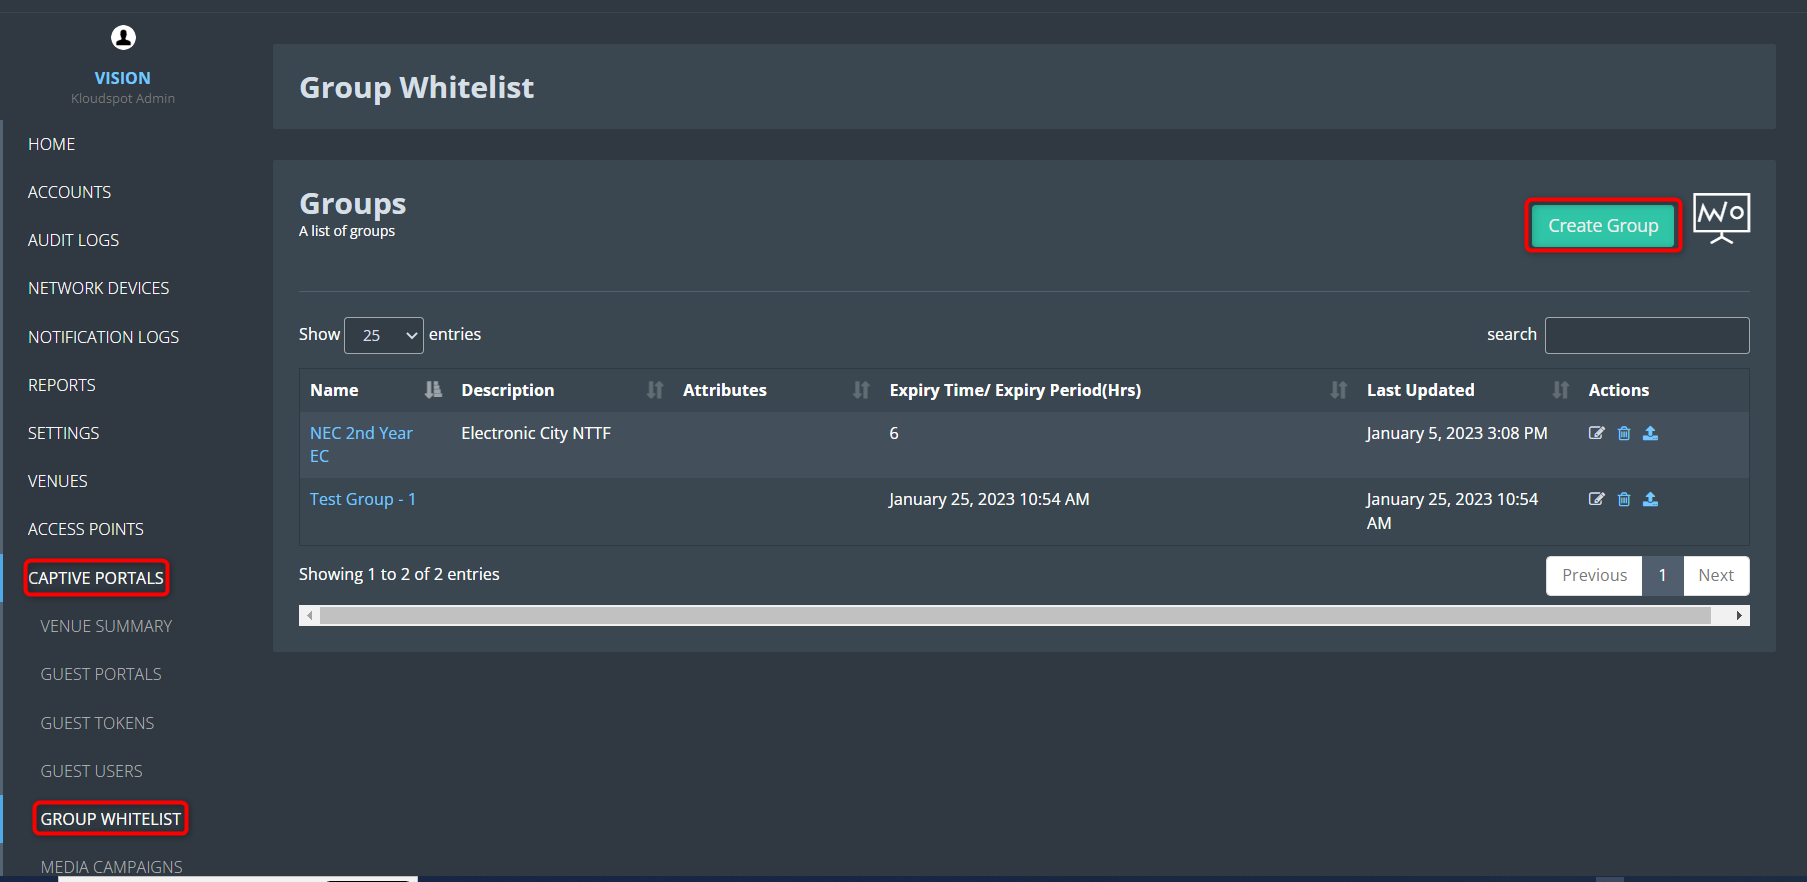
1. To create a Group whitelist, Log in to your Kloud Manage account.
2. Then Navigate to CAPTIVE PORTAL > GROUP WHITELIST > Create Group

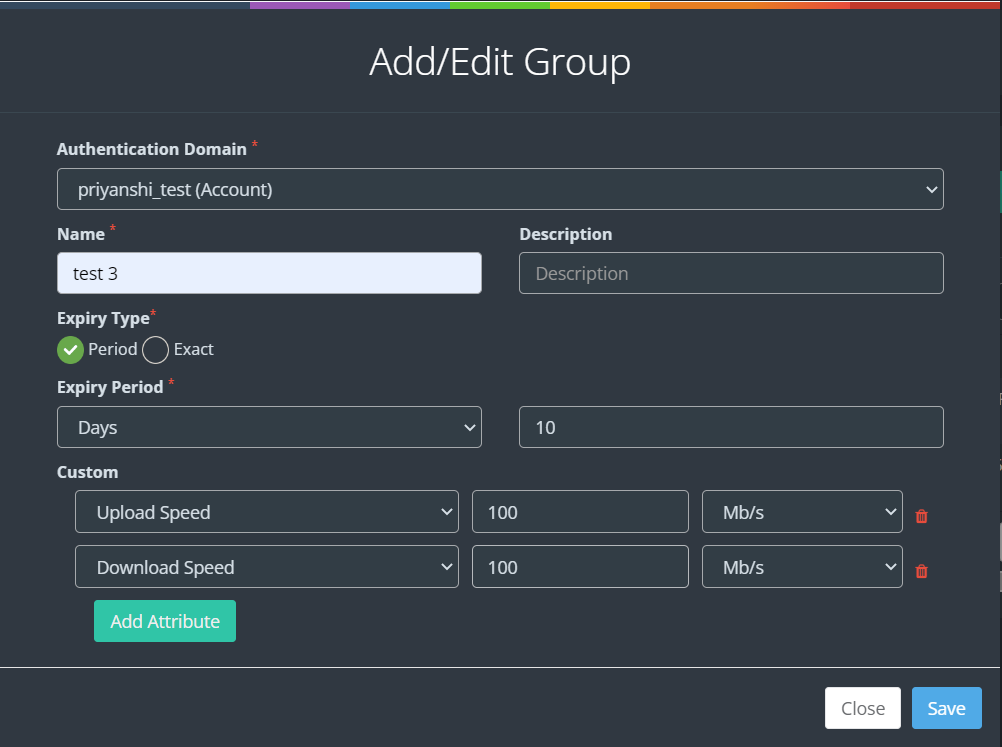
3. Fill in all the details and click the Save button.
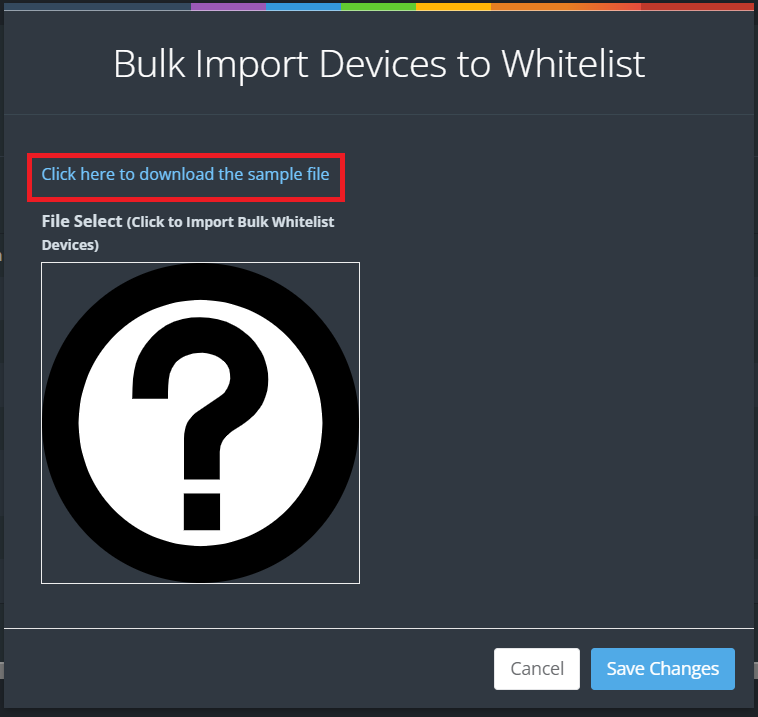
 4. Then click on the Upload Bulk Users CSV icon from the action column.

 5. In the window that opens, you can upload the CSV file.
6. Click on the " Click here to download the sample file " button to get
a sample of the CSV file.
 7. You can add the required information in the downloaded .csv file. Things
to keep in mind while adding information are given in the CSV file.

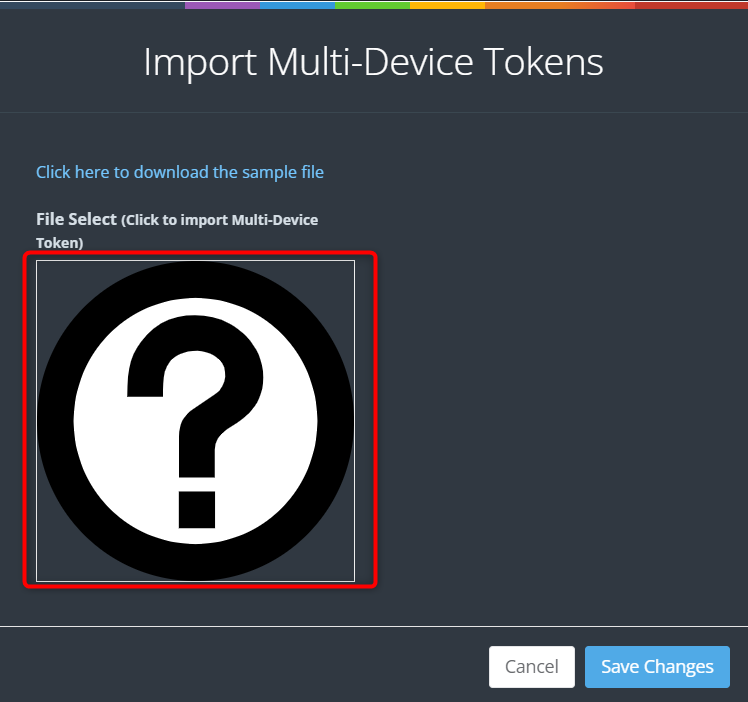
 8. Once the CSV file is ready, click on the question mark symbol in the popup
window. Then select the CSV file you saved and click on the Save Changes
button.

Create a guest token
1. A guest token serves as an exclusive identifier designed for individuals using a captive portal for their initial network access. It eliminates the necessity of entering a username and password, as the guest token serves as the primary login credential for users.
Furthermore, guest tokens can be customized to automatically expire either after a defined duration or when the user logs out. This functionality plays a vital role in enhancing network security by guaranteeing that access is restricted exclusively to authorized users, thereby safeguarding the network from unauthorized entry.
2. To create a guest token, Log in to your Kloud Manage account.
3. Then Navigate to CAPTIVE PORTAL > GUEST TOKENS > Add Multi-Device
Tokens.
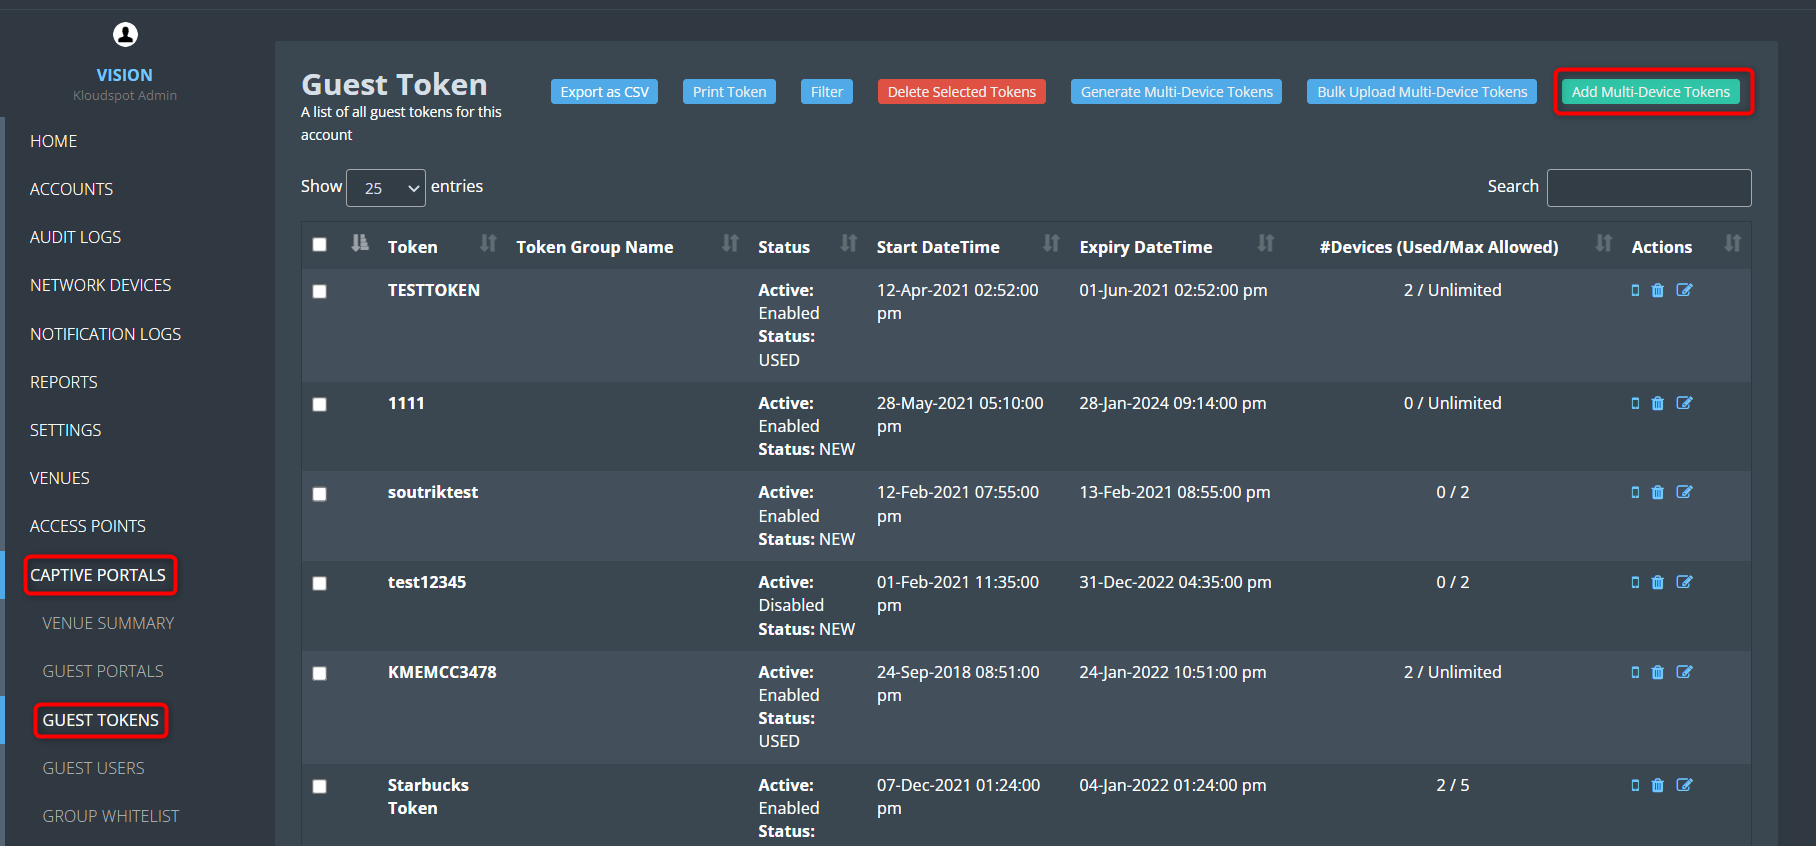
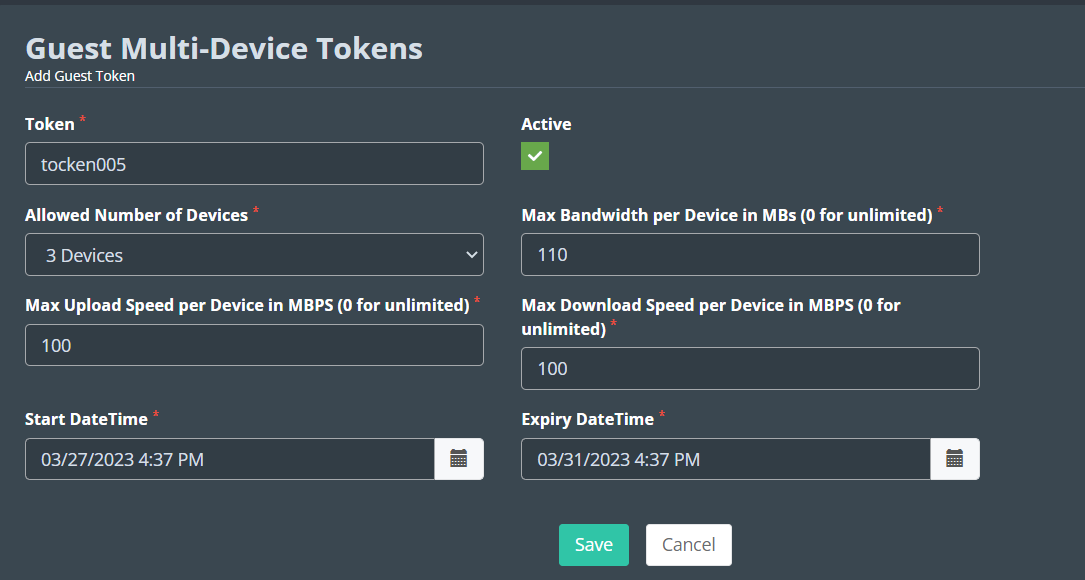
 4. Fill the following in the window that opens.
Check the Active checkbox to activate the token.
Token: Enter the token you want to create here. The user will log in
using this.
Allowed Number of Devices: Enter the limit on how many devices this token
can be used on.
Max Bandwidth per Device in MBs (0 for unlimited): Enter the maximum
bandwidth available with this token.
Max Upload Speed per Device in MBPS (0 for unlimited): Enter the maximum
Upload Speed available with this token.
Max Download Speed per Device in MBPS (0 for unlimited): Enter the
maximum Download Speed available with this token.
Start DateTime: Select the date from when this token should be activated.
Expiry DateTime: Select the last date for which the token should be
active.
5. Click the Save button to save the changes.
 6. You can download a CSV file that contains all the registered tokens by
clicking on the ‘ Export as CSV ’ button.
7. You can print all the tokens by clicking on the ‘ Print Token ’
button.
8. You can filter tokens on the basis of their status, Token Group Name, and
Start Date Time.

 9. If you want to generate tokens automatically then you can use the G
enerate Multi-Device Token option.
10. If you want to import multi-device tokens then you can use the B
ulk Upload Multi-Device Token option.


When utilizing Sponsor Email authentication in your portal, users are required to provide their email addresses, along with their sponsor’s email address, and then submit a request. Following this, both the administrator and the sponsor will expeditiously receive an email containing the authentication request. This section will provide comprehensive guidance on efficiently managing and responding to these authentication requests.
Consult the “Customizing Captive Portal Templates" section for instructions on incorporating the Sponsor Email authentication method.
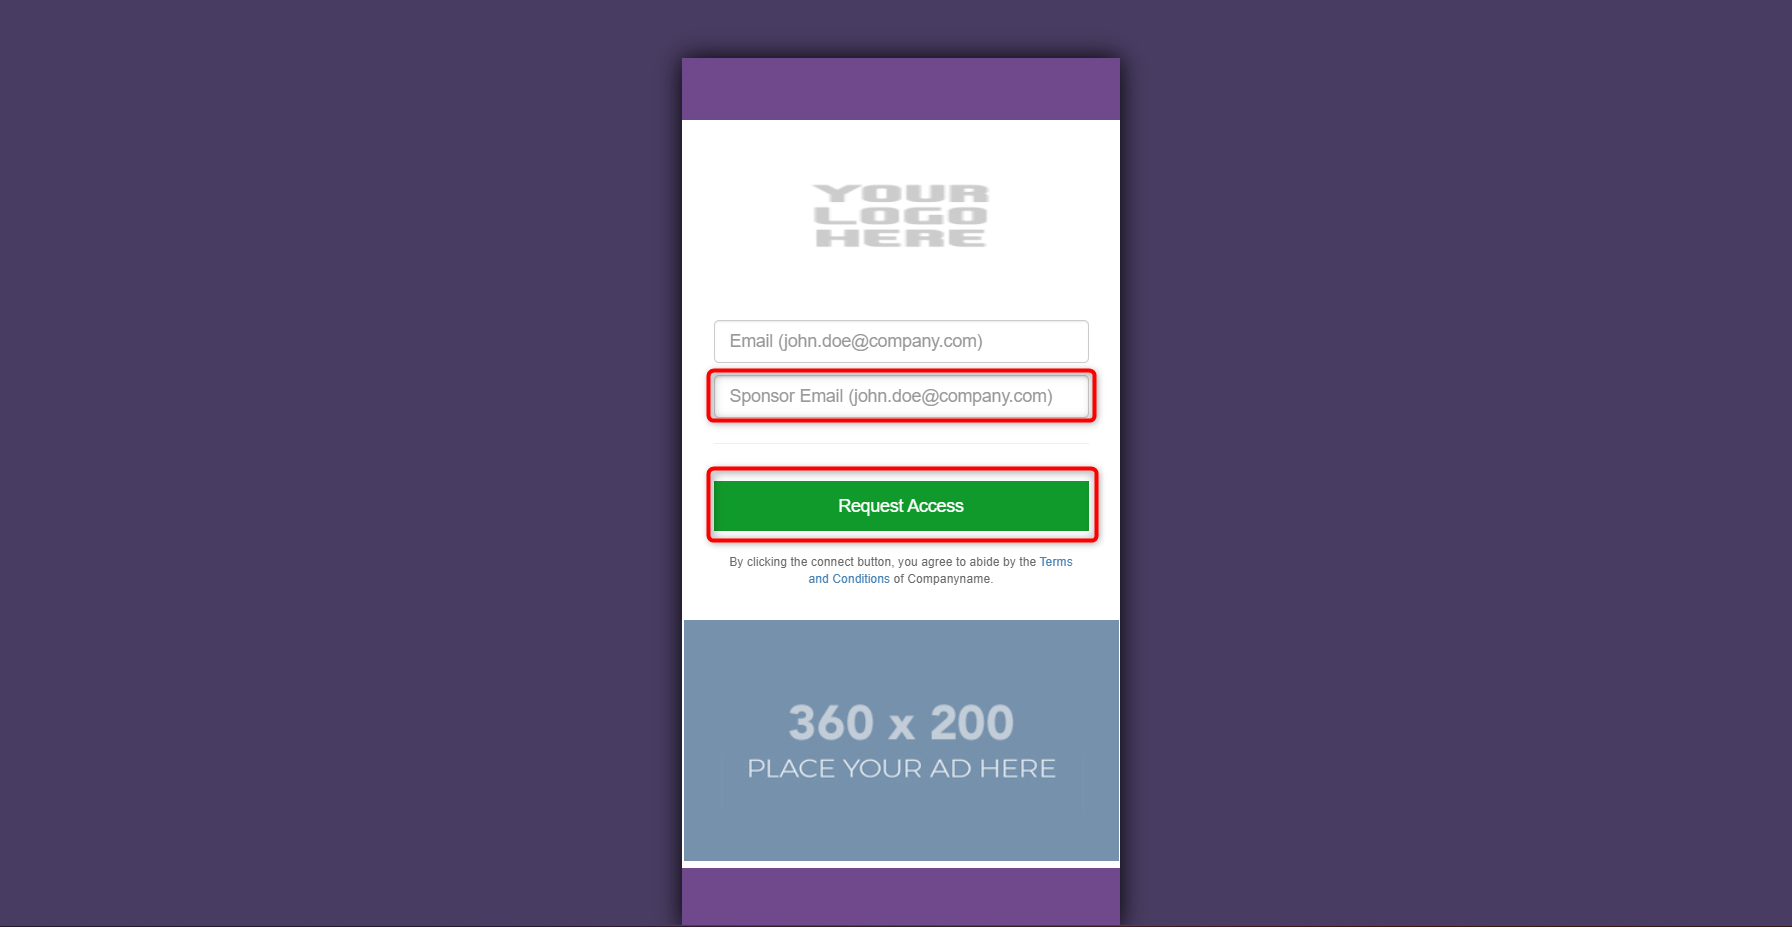
1. When a user enters the captive portal, they will be asked to enter the sponsor’s email id on the welcome page.
2. Enter the sponsor’s email address and click on the Request Access button.

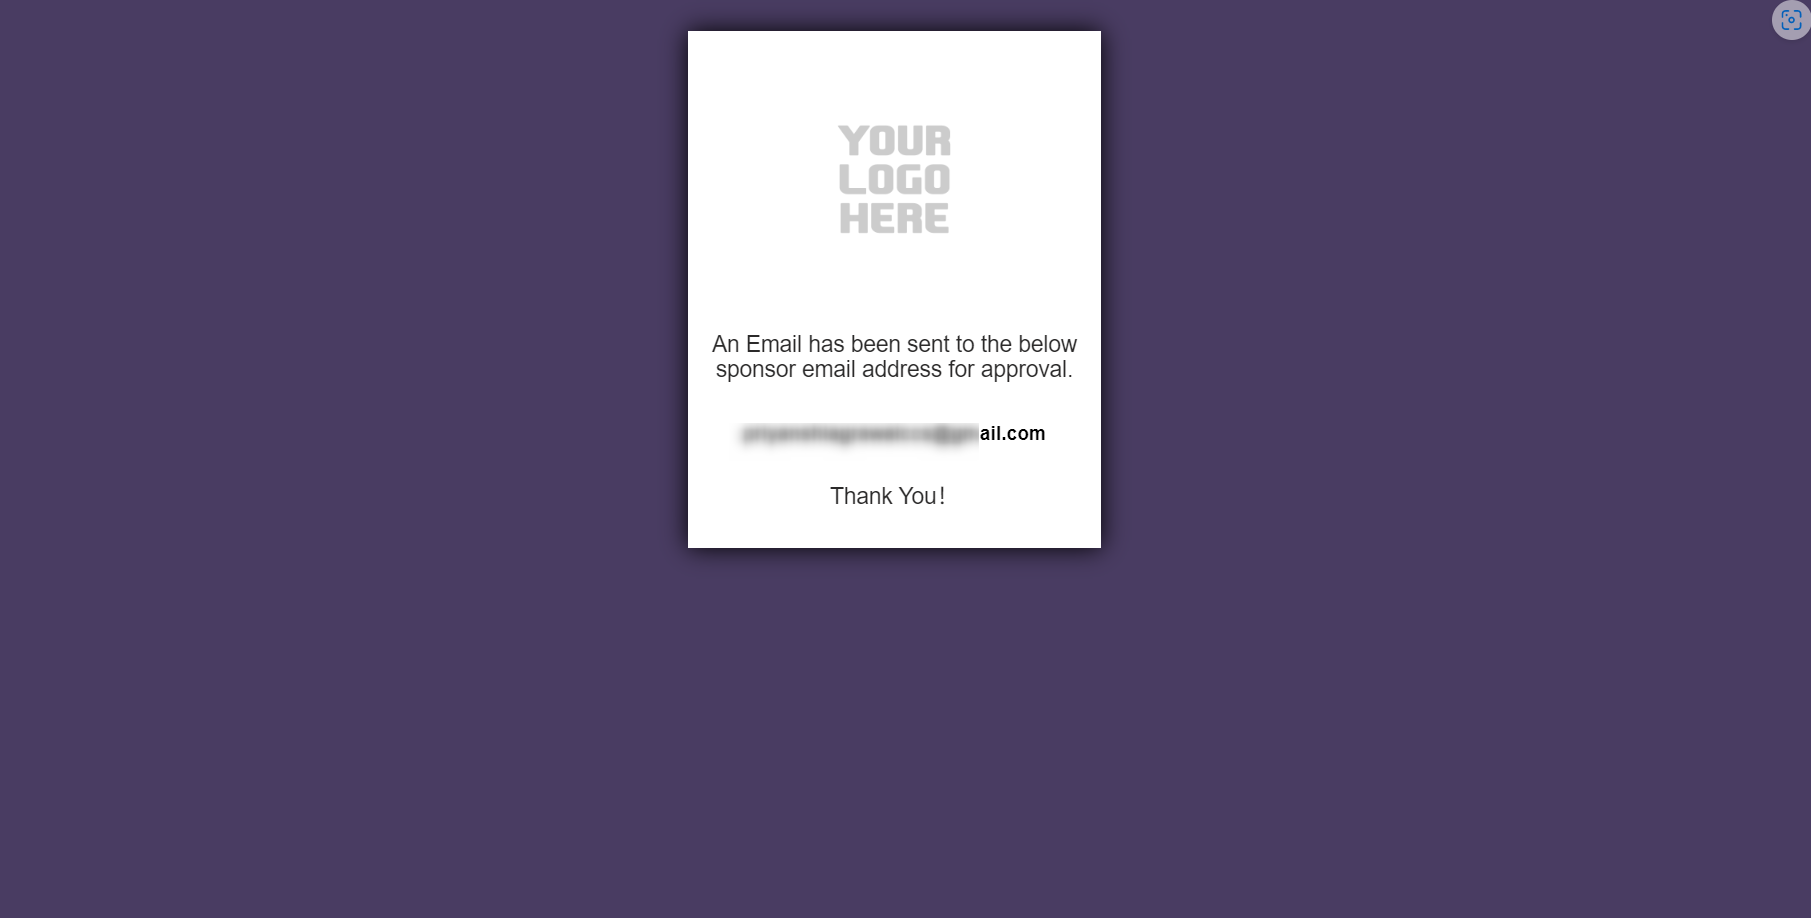
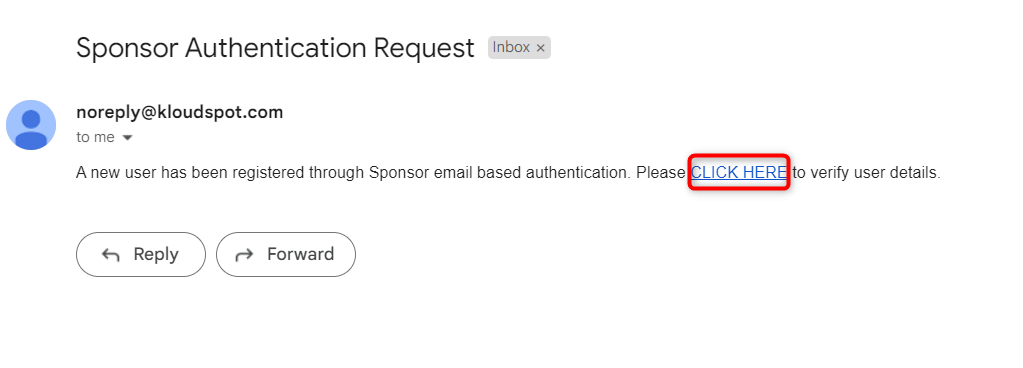
 3. The sponsor will receive the requested information via email immediately.
Click on the CLICK HERE button to access the approval page.
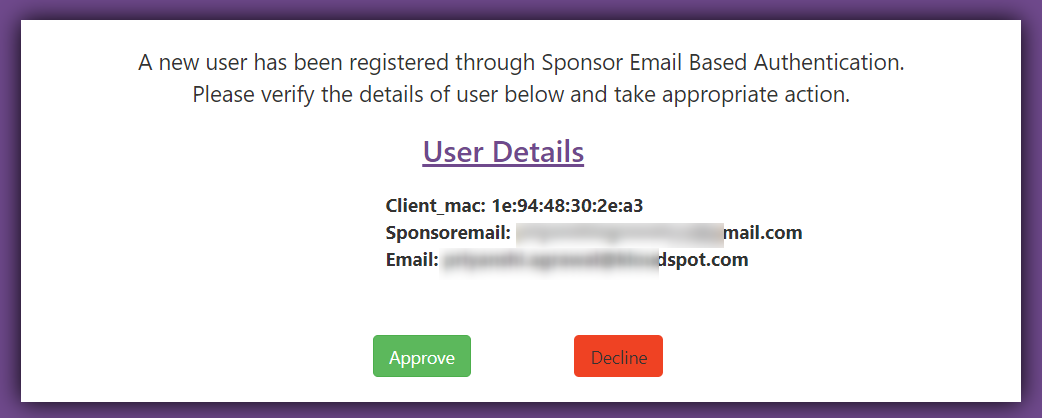
 4. Sponsor can give his response by clicking on the Approve/Decline
button in the window that opens.
 5. Once a response has been provided, the confirmation window will appear.

 6. If it is approved, the user will get an email informing about it.
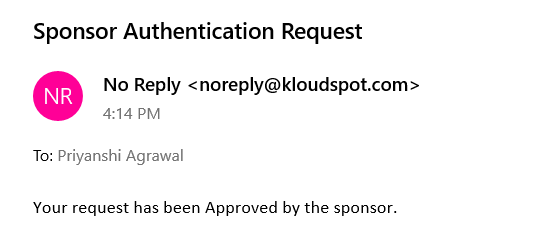
 7. Then the user can use the internet by clicking the C lick here to
continue button from the success page.
