Okta Authentication
Overview
Okta Authentication integration allows Captive Portal users to log in using their Okta account credentials. This document provides a step-by-step guide on how to integrate Okta Authentication into the KloudManage.
Prerequisites
Before starting the integration process, ensure that you have the following credentials:
-
KloudManage admin account credentials.
-
Okta developer account credentials.
Integration Steps
Obtaining Okta ID, Secret and Issuer
- Visit Okta Developer site and log in to your Okta developer account. If you don’t have an account yet, you have the option to sign up and create one.
-
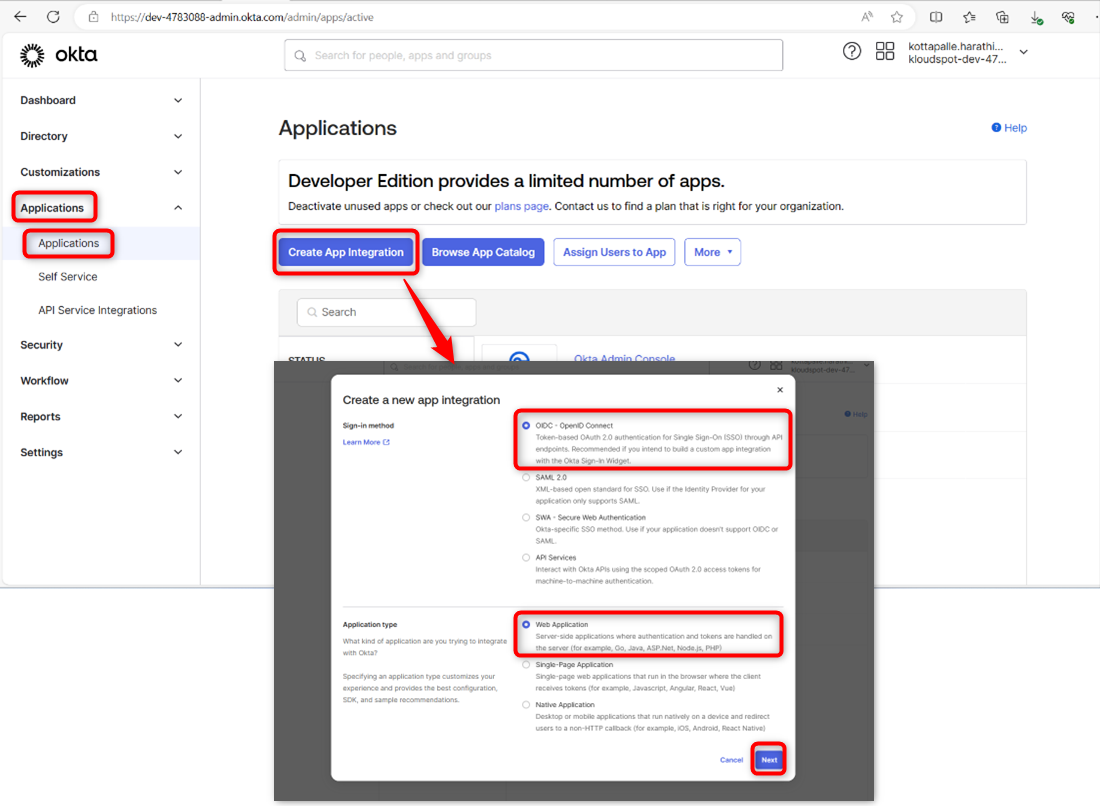
Create a new App Integration by navigating to Application > Create App Integration > OIDC-OpenID Connect > Web Application.
-
Click on the Next button.
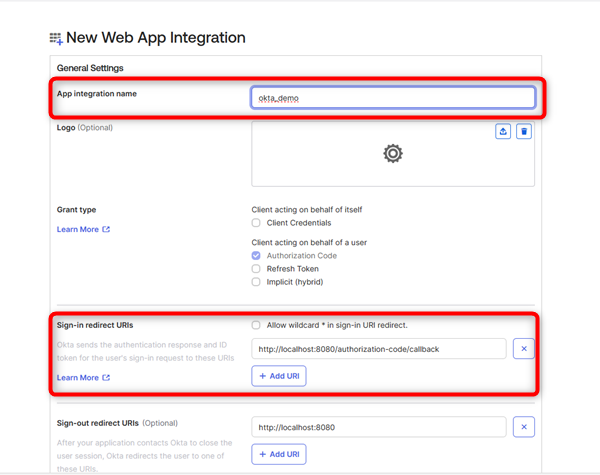
- Enter the following details in the New Web App Integration window:
-
App Integration Name: Enter a name for your app.
-
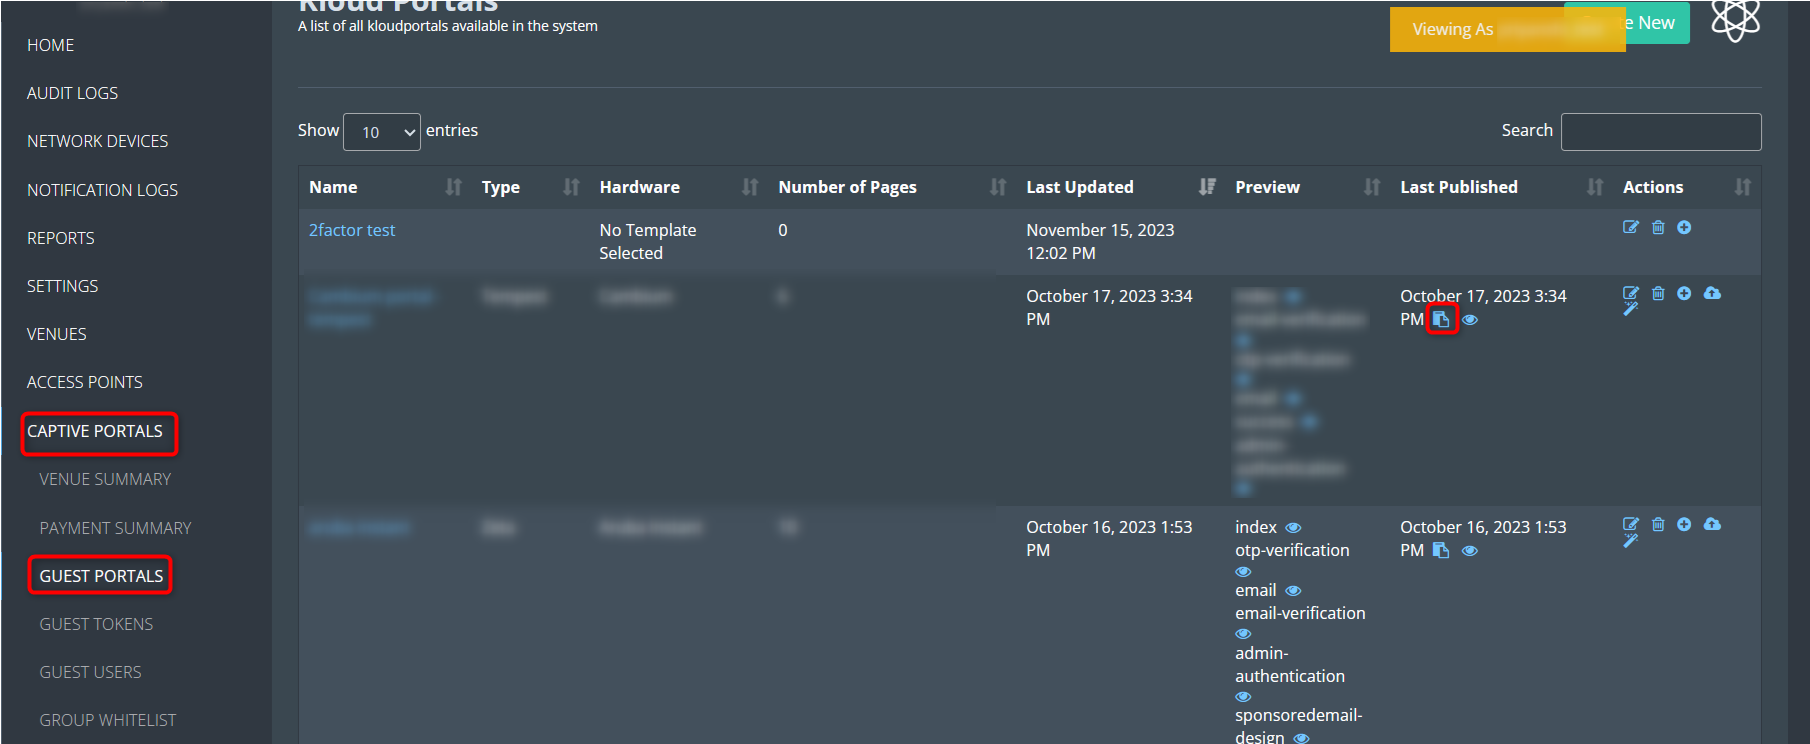
Sign-in Redirect-URI: This is the URL of the Captive Portal. To obtain this, log in to KloudManage and navigate to Captive Portal > Guest Portal. Copy the URL of the portal you want to add Okta SSO.
- Scroll down, check the Allow everyone in your organization to access checkbox, and click on the Save button. This is an optional step and can be selected as per your requirement.
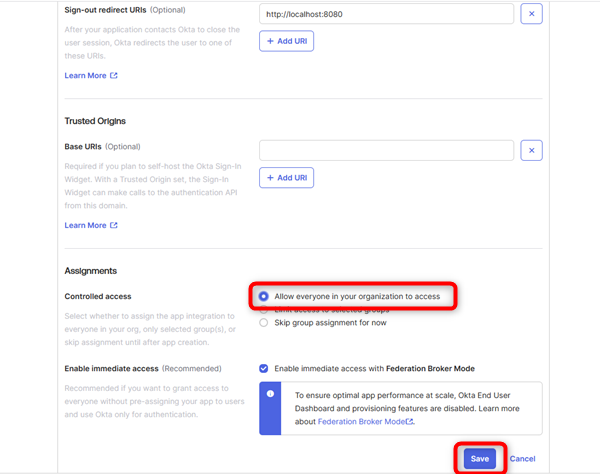
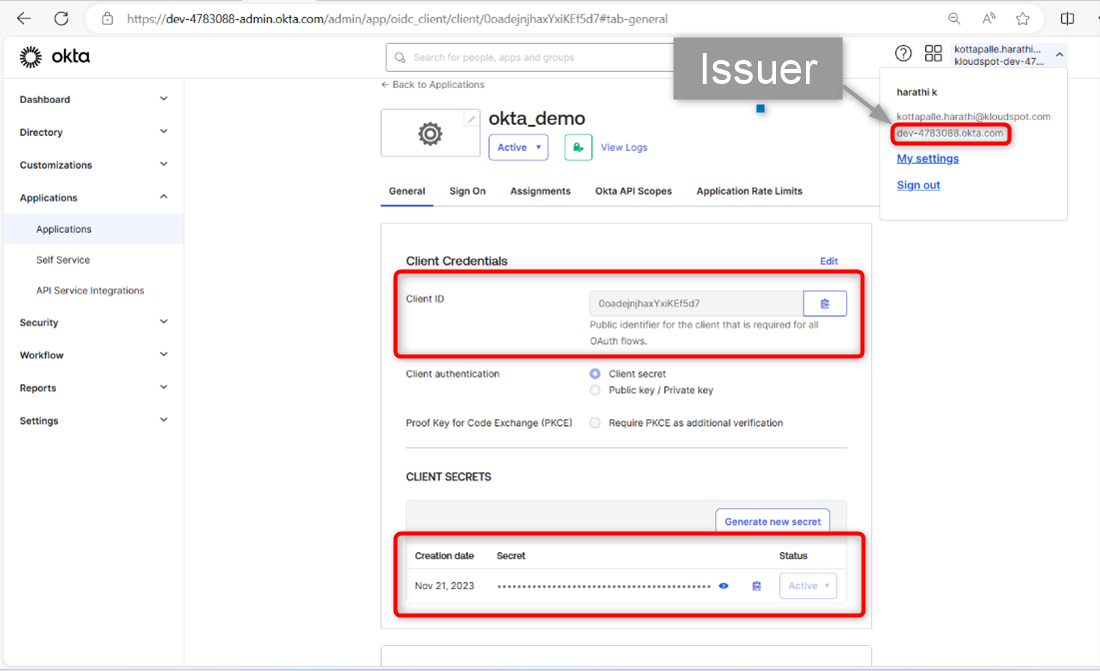
- Once saved, the App you created will open. Copy the Client ID, Client Secret, and Issuer from this page.
Configuring KloudManage with Okta Credentials
-
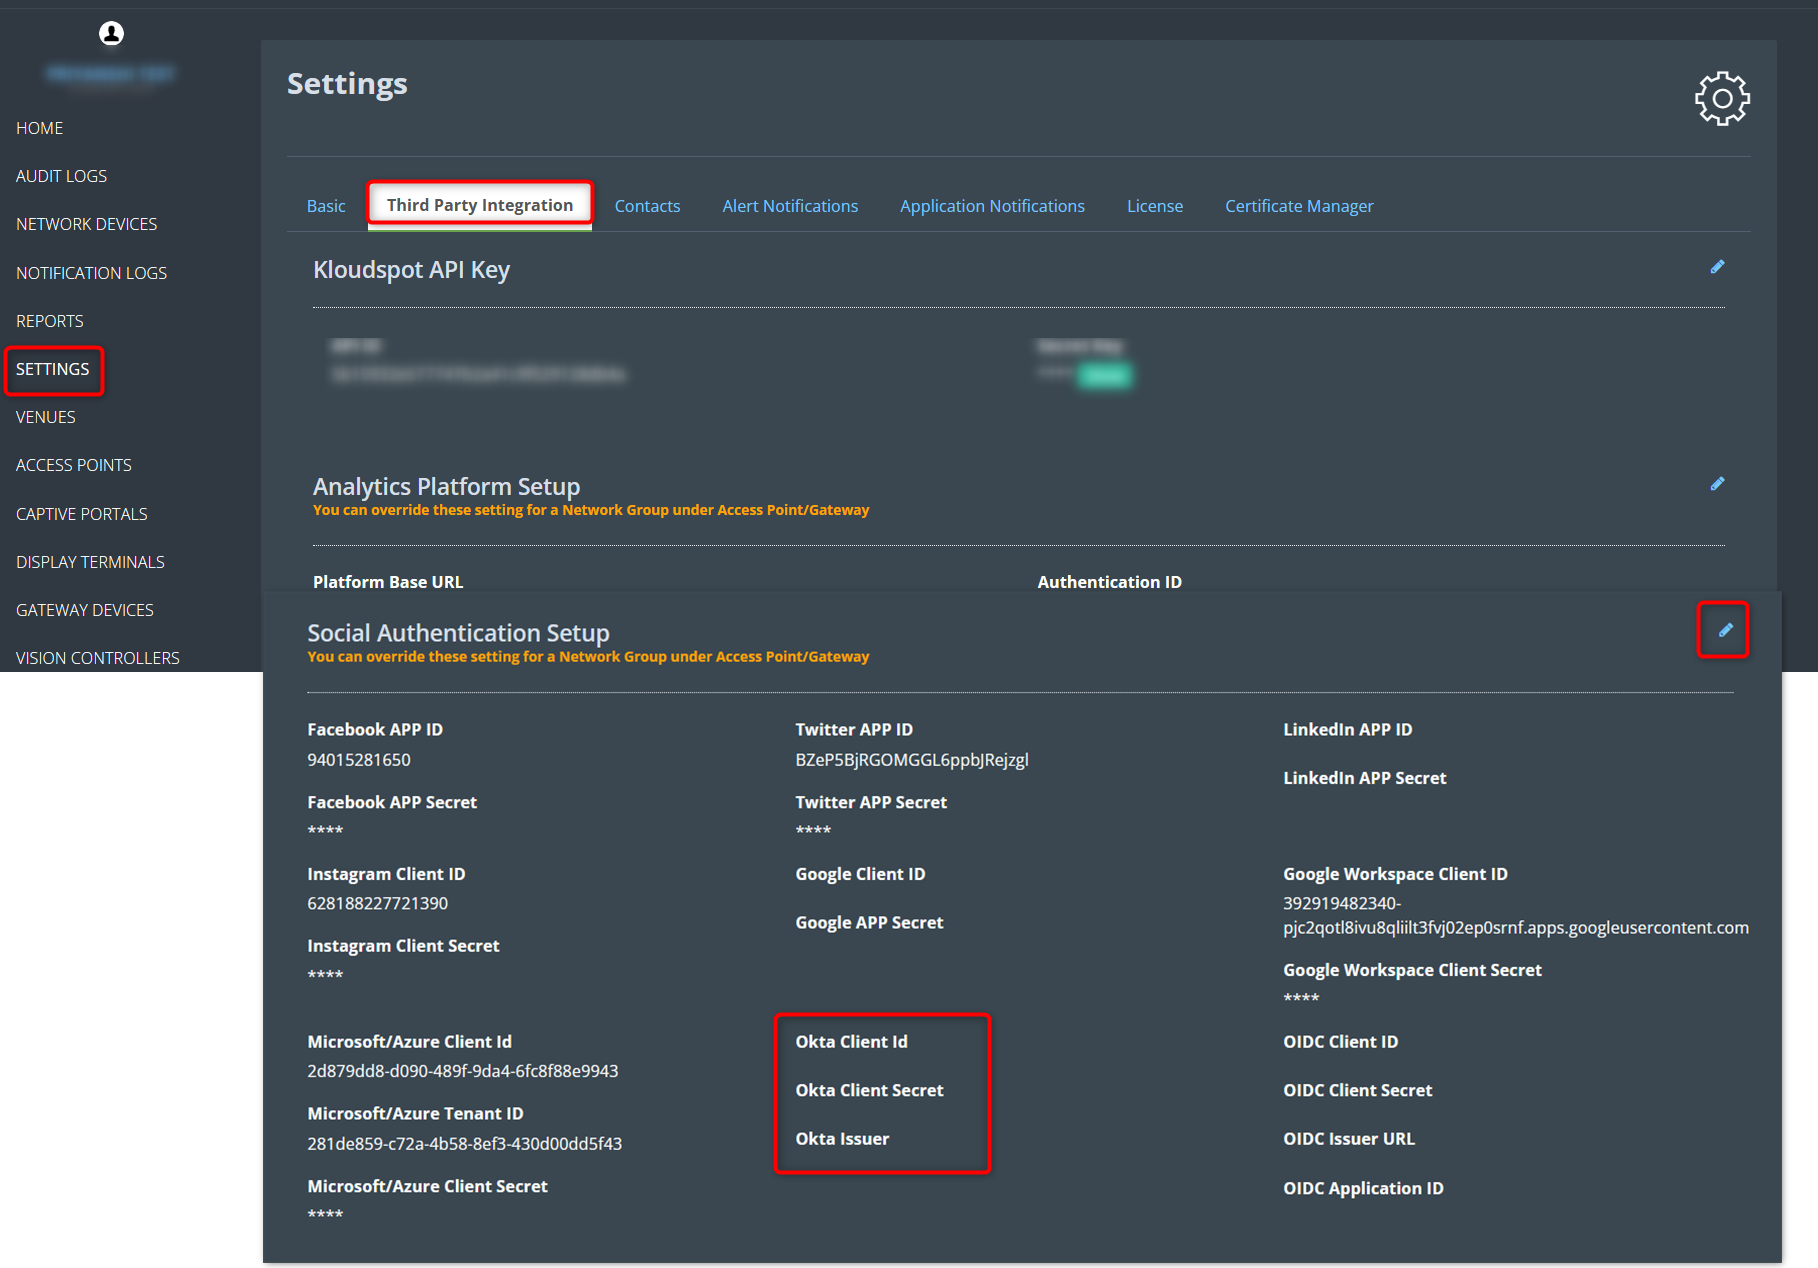
Navigate to Settings > Third-Party Integrations.
-
Scroll down to the Social Authentication Setup section.
-
Click on the Edit button.
-
Paste the Okta Client ID, Client Secret, and Issuer copied from the Okta App into their respective places.
-
Click on the Save Social Settings button to save the changes.
Logging in with Okta SSO
After completing the integration steps, users can log in to the Captive Portal using Okta Single Sign-On (SSO). The Okta SSO option should now be available on the Captive Portal login page.