Microsoft Authentication
You can access your captive portal with your Microsoft account credentials. To use this service, the KloudManage tool must be linked to a Microsoft Azure account. This document explains how to do so.
To Get Microsoft Credentials
1. To integrate Microsoft Azure into Captive Portal, you need 3 credentials.
- Microsoft Client ID
- Tenant ID
- Microsoft Client secret
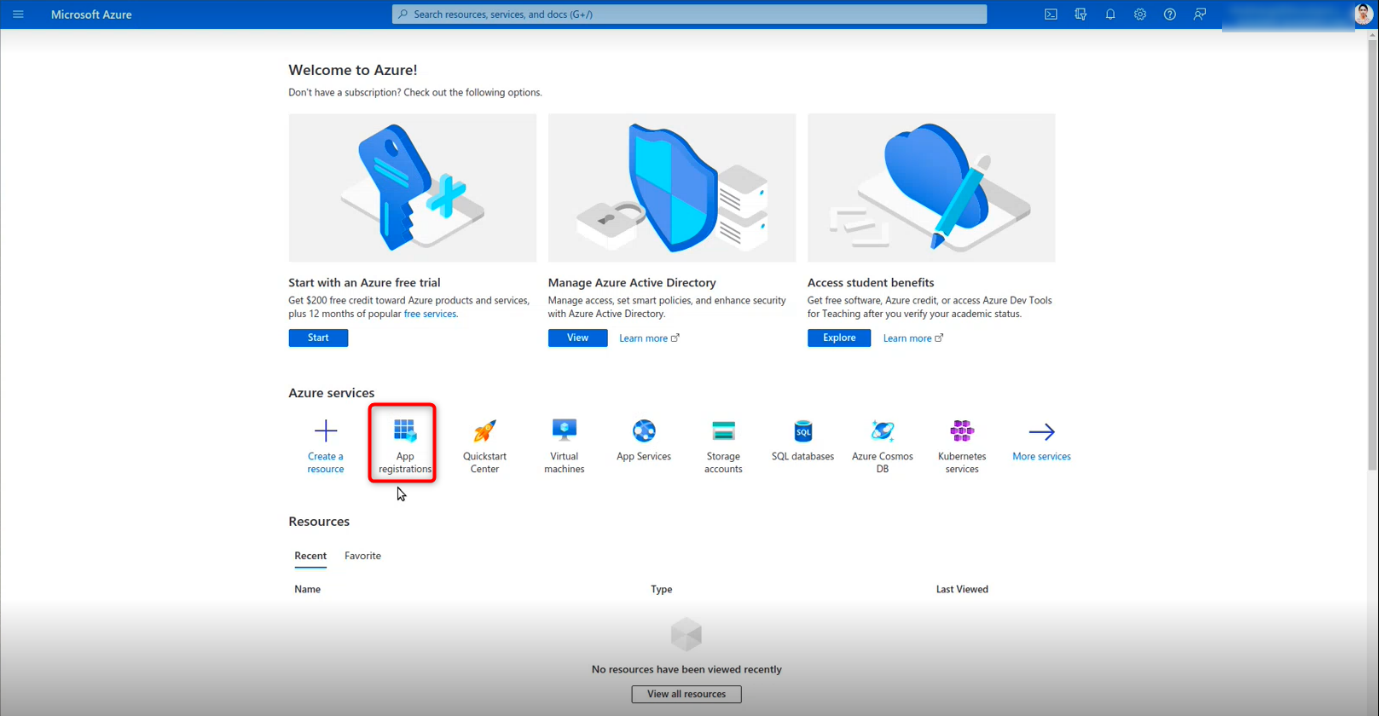
2. To get the credentials, click on the link given below and log in to Microsoft Azure.
https://azure.microsoft.com/en-us/#home
3. Click the App registration button on the Microsoft Azure Home page that appears.
 4. This will direct you to the App registration page. Here you click on the
New registration button.
4. This will direct you to the App registration page. Here you click on the
New registration button.
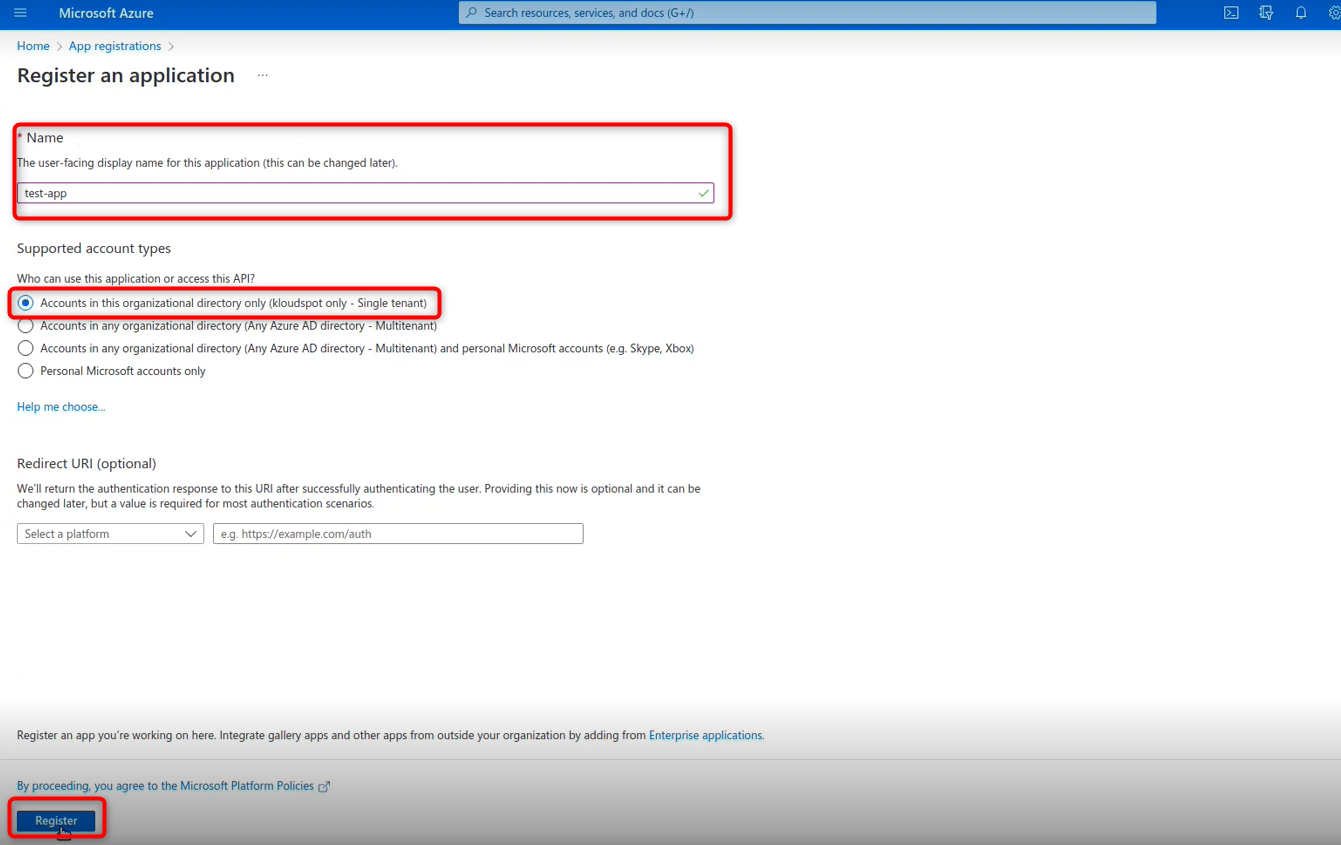
 5. Enter the App name , Select the Supported account type as a single
tenant. Then click the Register button.
5. Enter the App name , Select the Supported account type as a single
tenant. Then click the Register button.
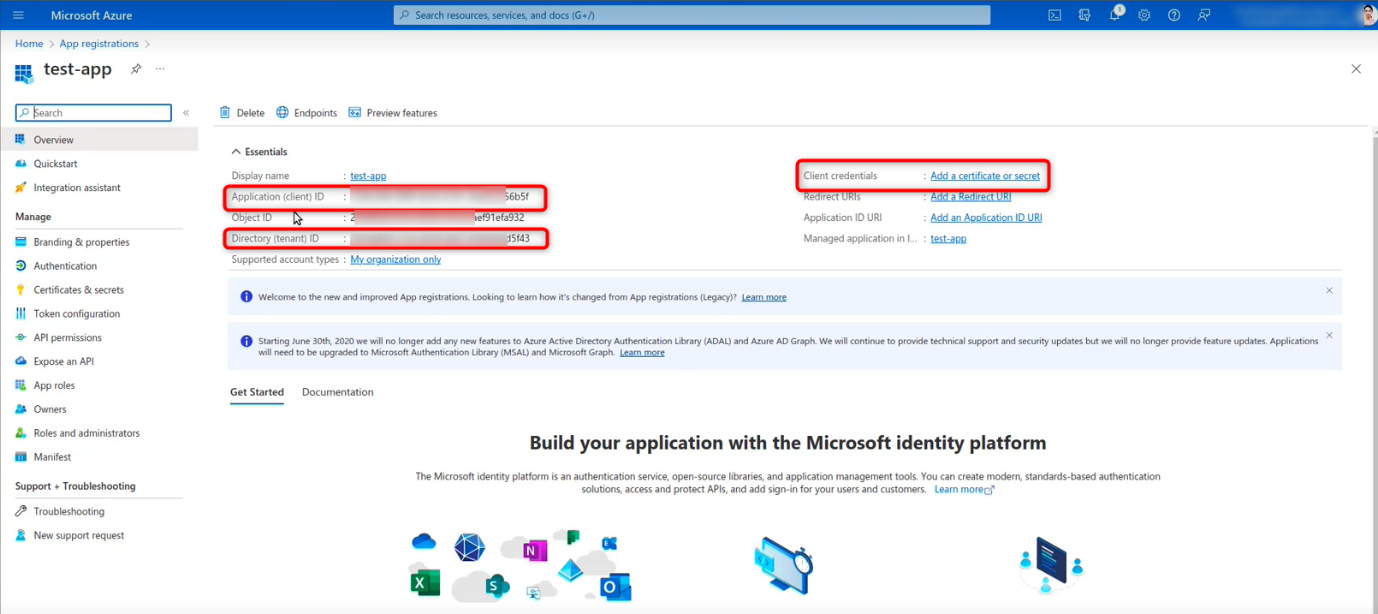
 6. The new app has been successfully registered. Copy the Application ID
and tenet ID from the overview window and paste them somewhere else for
later use
6. The new app has been successfully registered. Copy the Application ID
and tenet ID from the overview window and paste them somewhere else for
later use
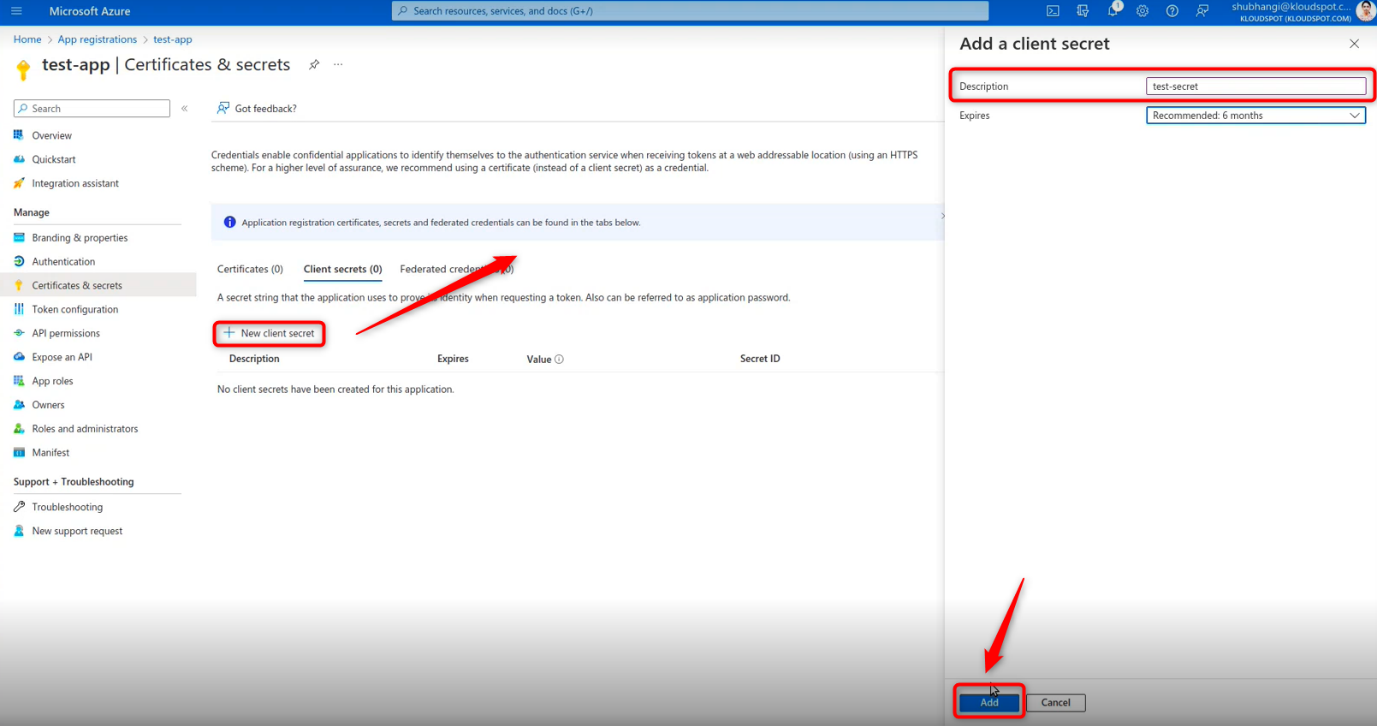
7. Then click on the Add a certificate or secret button to create a client secret.
 8. Click the New Client Secret button in the Certificates and Secrets
window that appears.
8. Click the New Client Secret button in the Certificates and Secrets
window that appears.
9. Enter the description in the popup that appears and click the Add button.
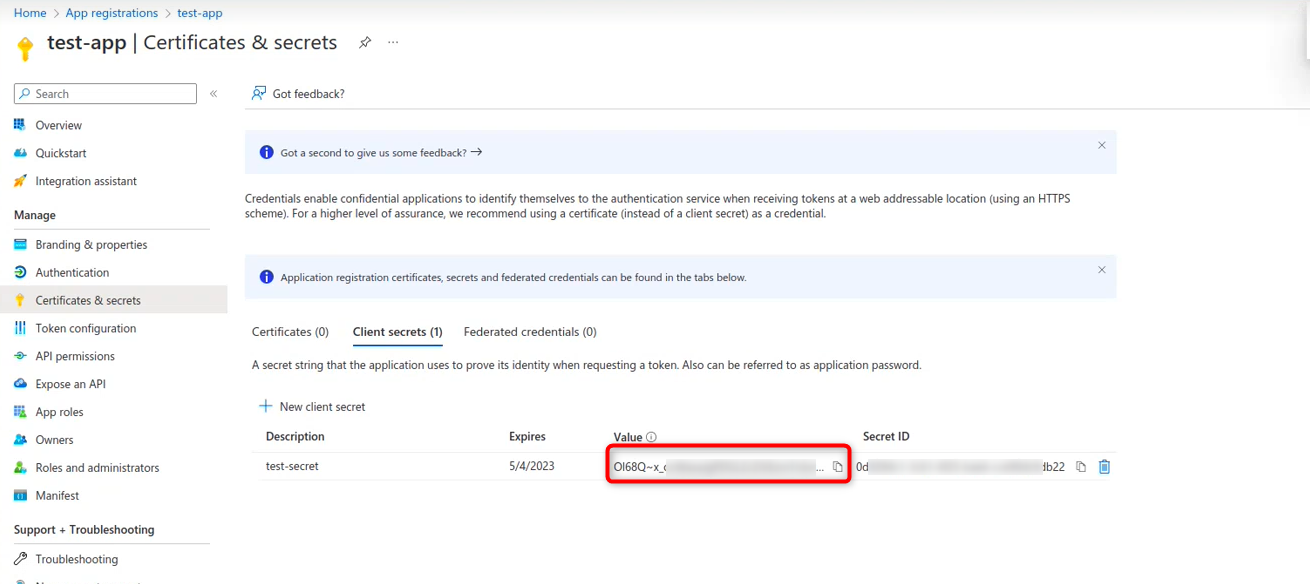
 10. New Client secret created successfully. Copy it and paste it
somewhere else for later use.
10. New Client secret created successfully. Copy it and paste it
somewhere else for later use.
Add credentials to the KloudManage tool
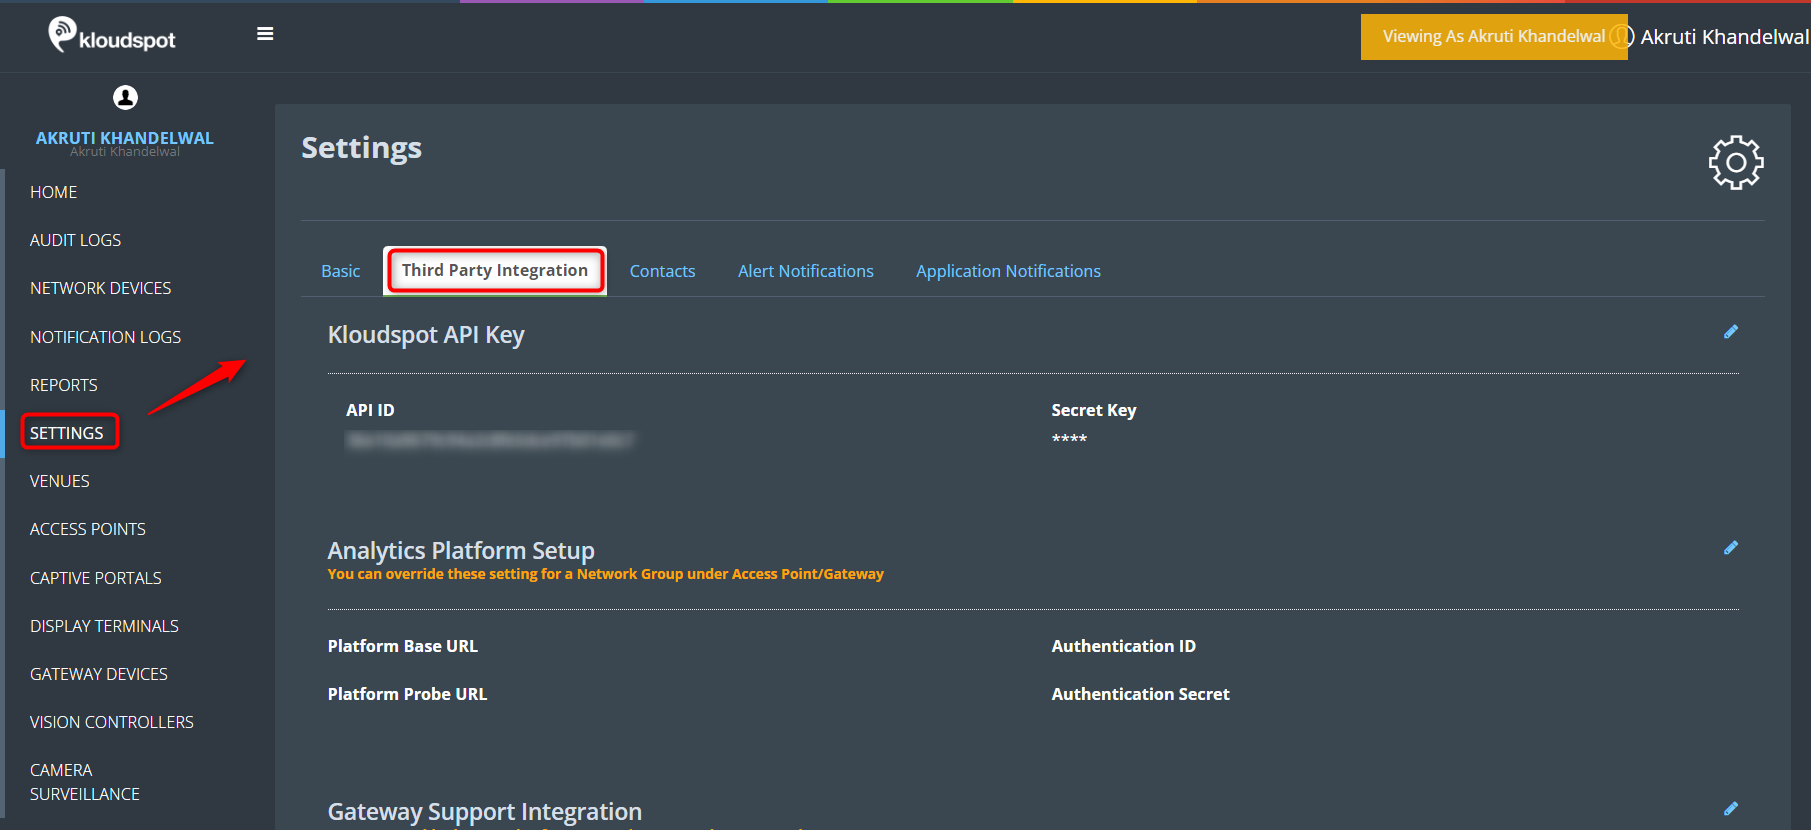
1. Log in to the KloudSpot network management tool. Then navigate to Settings > Third-party Integration.
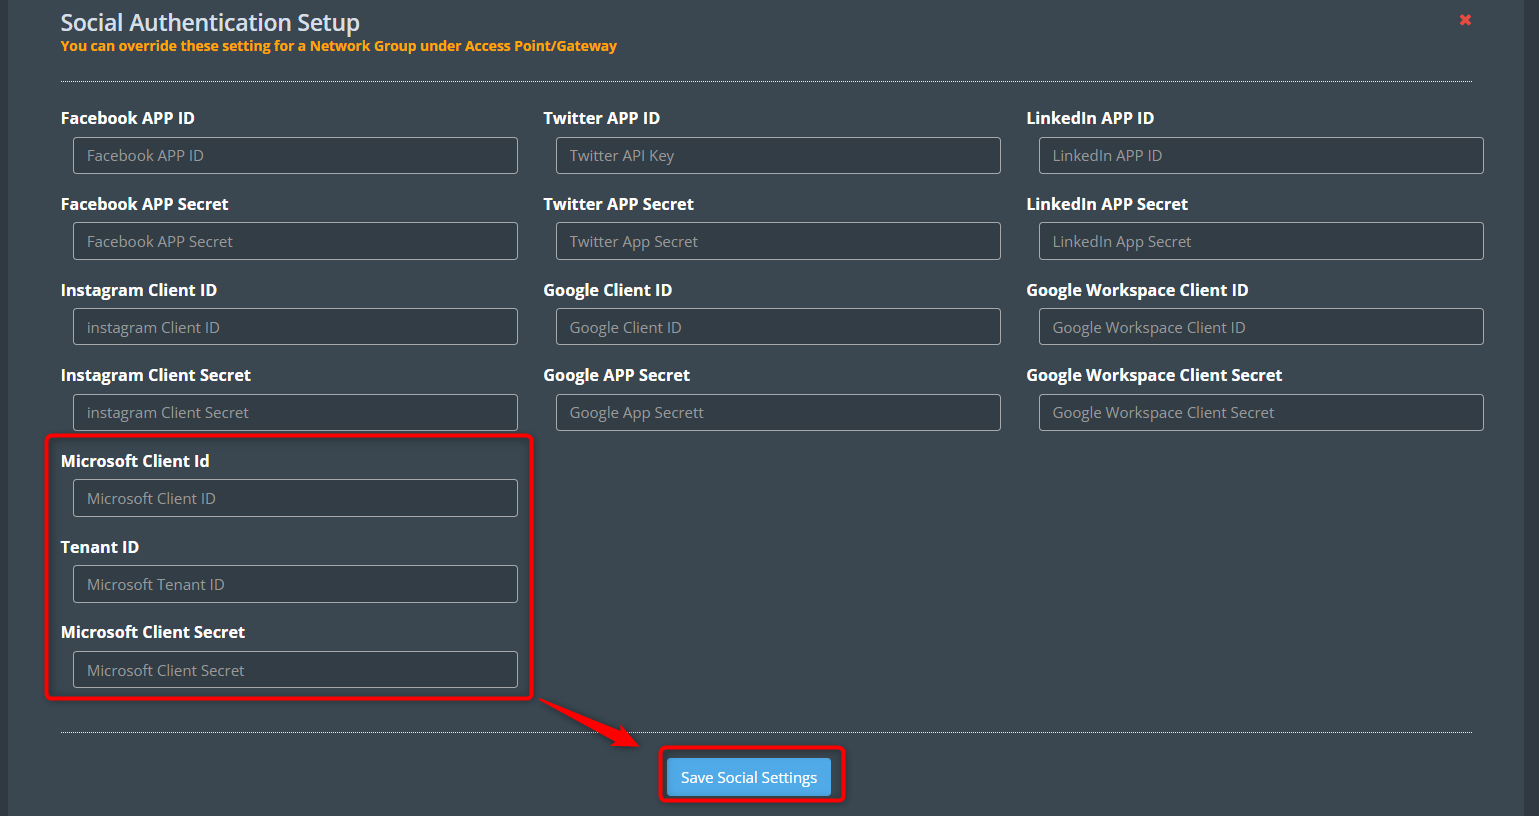
 2. Then scroll down to the Social Authentication Setup section. Paste the
Microsoft Client ID, Tenant ID, and Microsoft Client Secret in the
respective text boxes. Then click on the Save Social Settings button.
2. Then scroll down to the Social Authentication Setup section. Paste the
Microsoft Client ID, Tenant ID, and Microsoft Client Secret in the
respective text boxes. Then click on the Save Social Settings button.
3. Microsoft Azure credentials have been successfully added.
Authenticate the App.
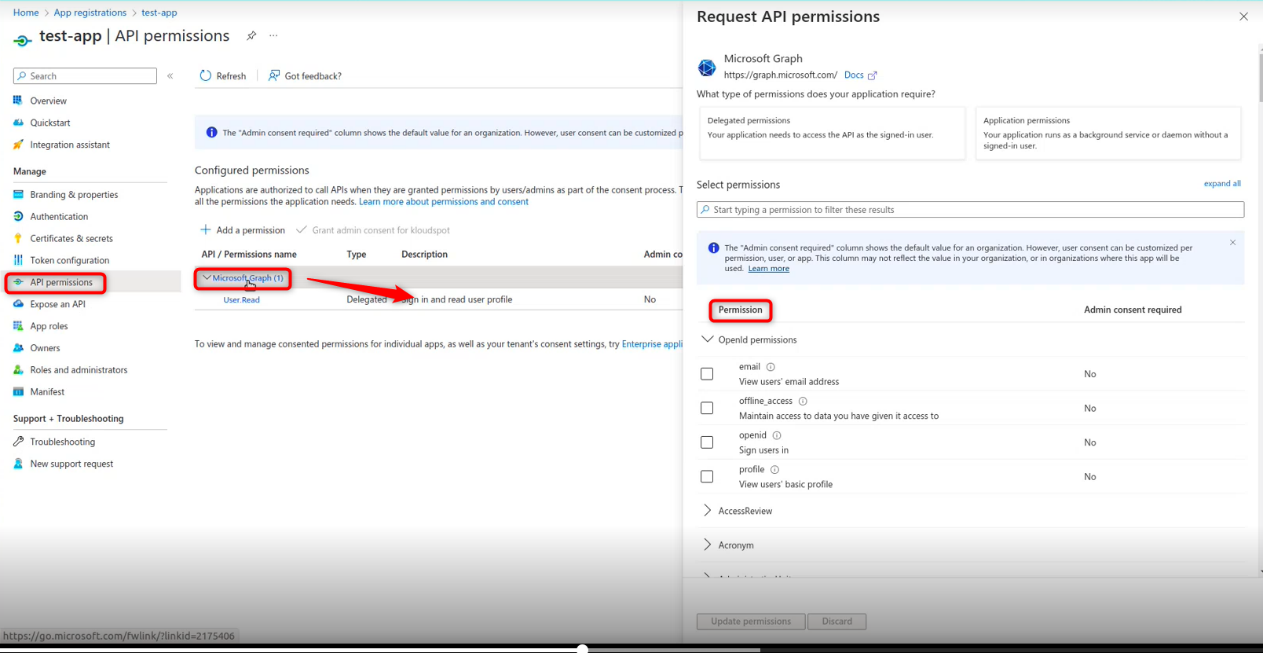
1. After generating the app, you need to grant the necessary permissions to it. For that, navigate to API permissions > Microsoft graph.
2. Then in the request API permissions window that opens, select the required permissions, and click the Update permissions button. Required permissions are listed below.
- Offline Access
- Open Id
- Profile
- User Read
- User ReadBasic All
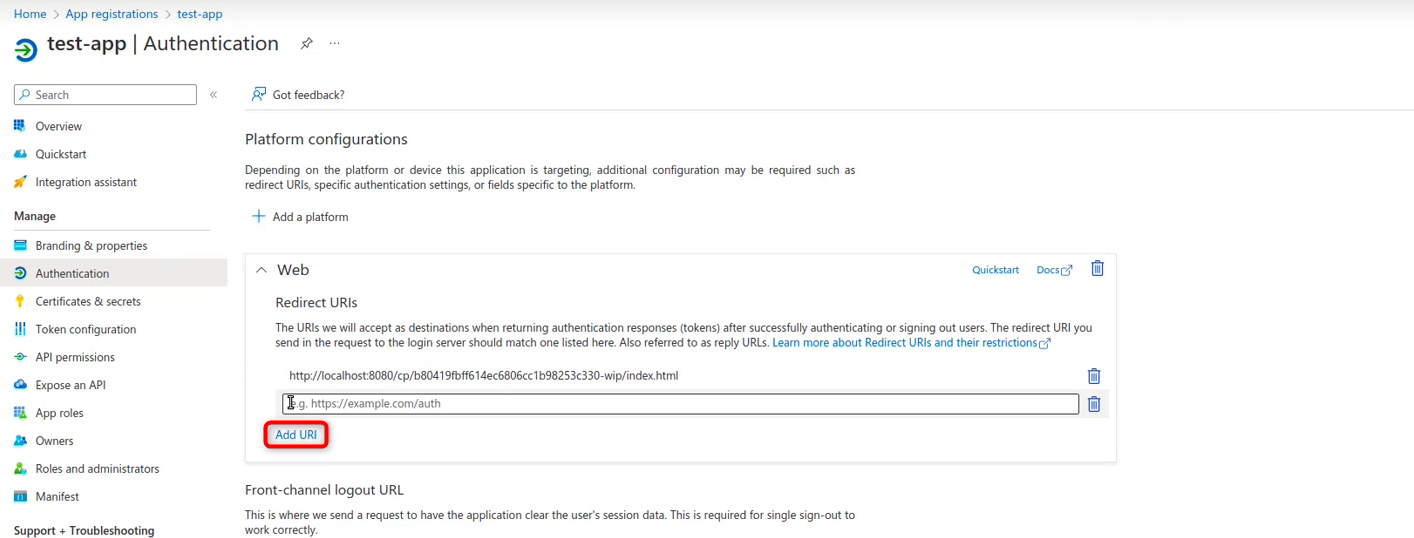
Add redirect URI
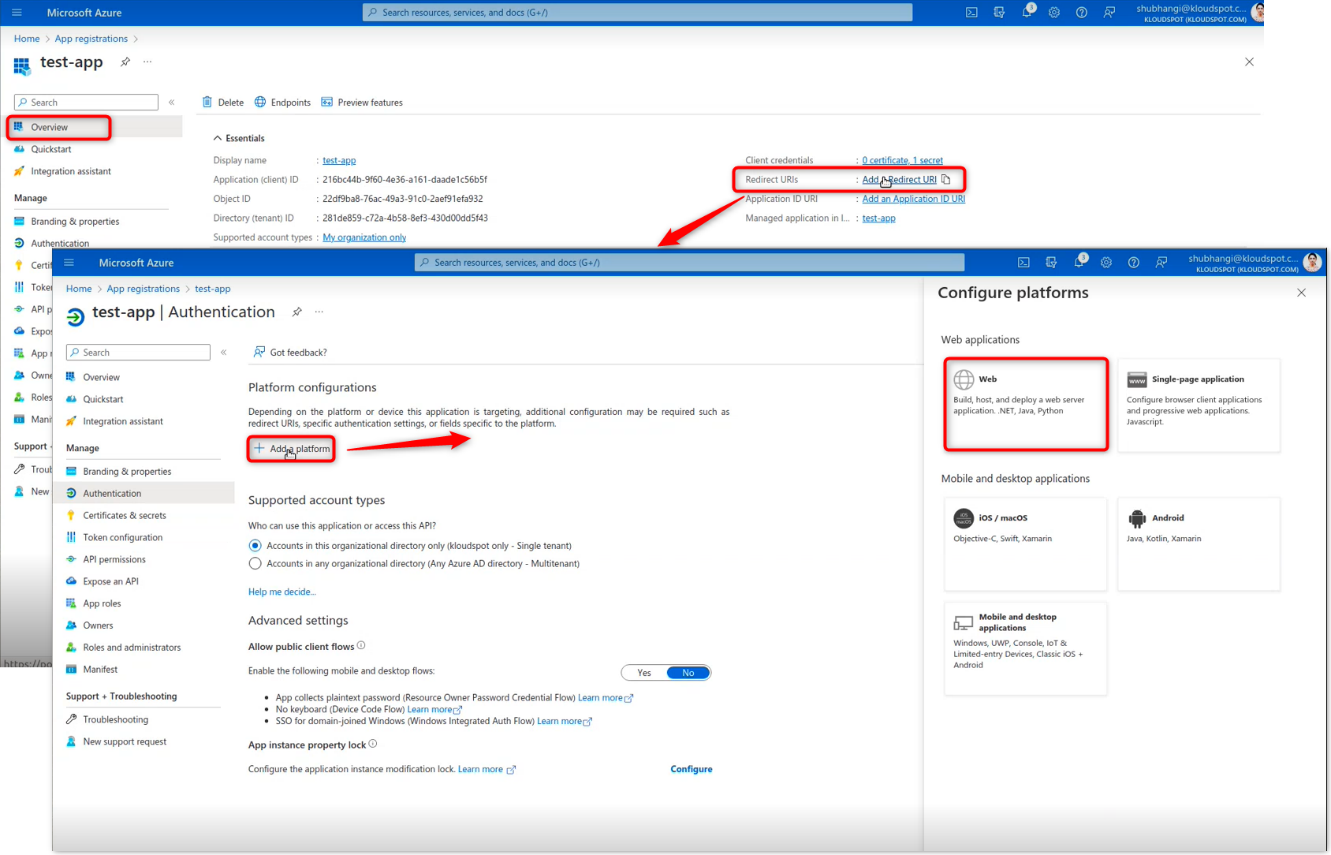
1. The final step of Microsoft Azure integration is to add the redirect URI. To do so, Navigate to Overview > Add a Redirect URI > Add platform > Web.
 2. On the configuration web page that appears, enter the captive portal’s URI
and check the ID tokens checkbox, then click on the configure button
to configure.
2. On the configuration web page that appears, enter the captive portal’s URI
and check the ID tokens checkbox, then click on the configure button
to configure.
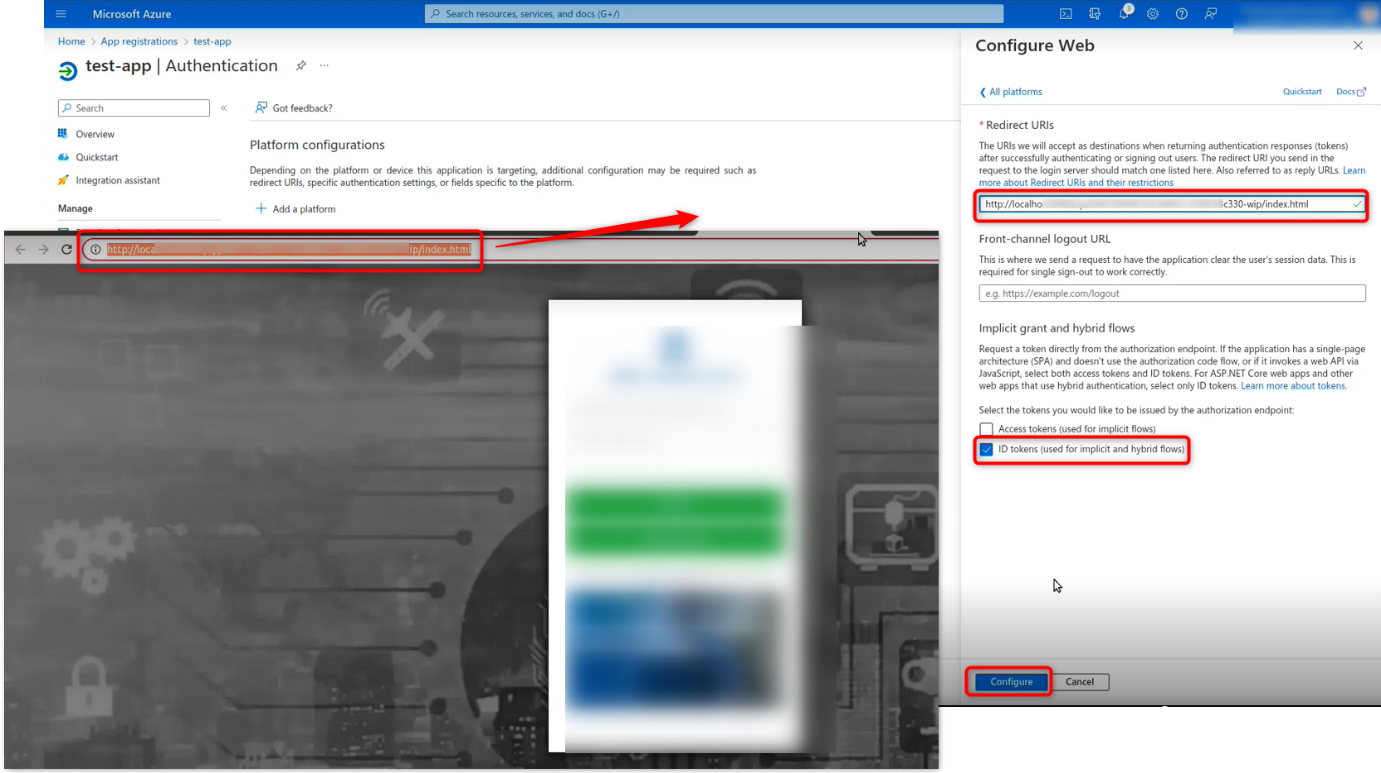 3. If you want to add more captive portal URIs, you can add them by clicking
the Add URI button.
3. If you want to add more captive portal URIs, you can add them by clicking
the Add URI button.