Media resources serve as the fundamental building blocks. These resources encompass a variety of content types, from static images and slideshows to dynamic elements like YouTube videos, Twitter feeds, Google ads, and even Survey Monkey surveys. This section will guide you through the process of seamlessly integrating these diverse media resources into your campaigns, ensuring your content engages and captivates your captive portal’s audience effectively.
1. Resources to run in a campaign can be called as media resources.
2. Log in to your Kloud Manage account.
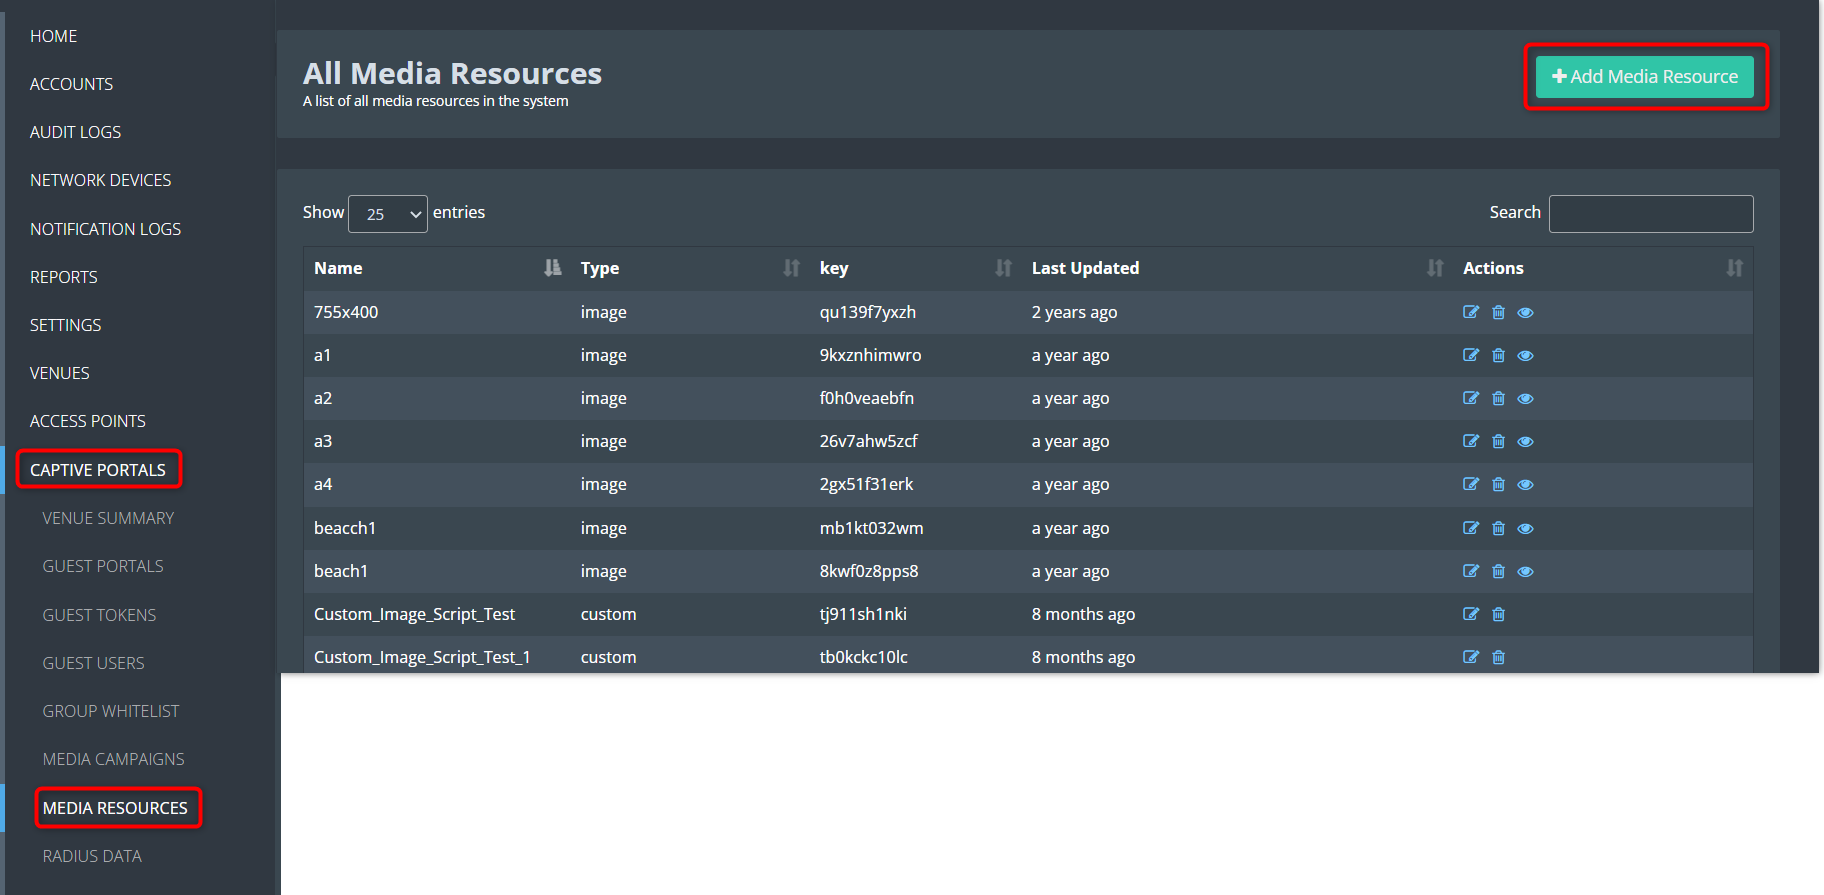
3. Then Navigate to CAPTIVE PORTAL > MEDIA RESOURCES > Add Media
Resources.
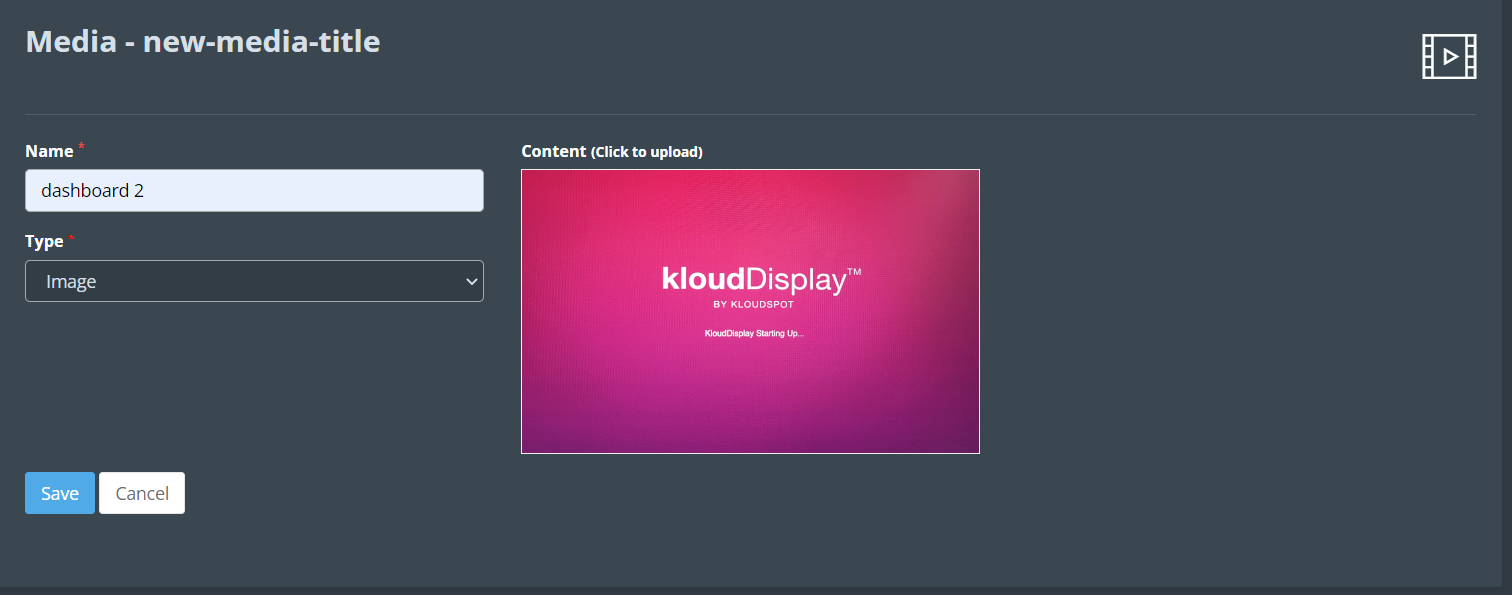
 4. Enter the resource name and select the media type from the drop-down.
5. Media types supporting Images, slideshows, and videos are static content
and YouTube, Twitter, google ads, and survey monkey are external content.
6. Custom content can also be included on the web page and will be presented
on the campaign.
7. Select the type, add the content, and click on the Save button.
 8. New added media resources will display on the table with some actions.
- Edit icon: allows the user to edit the resource.
- Delete icon: allows the s user to delete the added resource.
- Preview icon: allows the user to view the resource.
1. After adding your media resources, the next step is creating media campaigns. In this section, we’ll guide you through crafting effective campaigns that make the most of your resources. You’ll learn how to create engaging campaigns that leave a strong impression on your captive portal’s audience.
2. To set up a media campaign, it’s essential to begin by adding a media resource. You can find instructions on how to create a media resource in the “Media Resource” section.
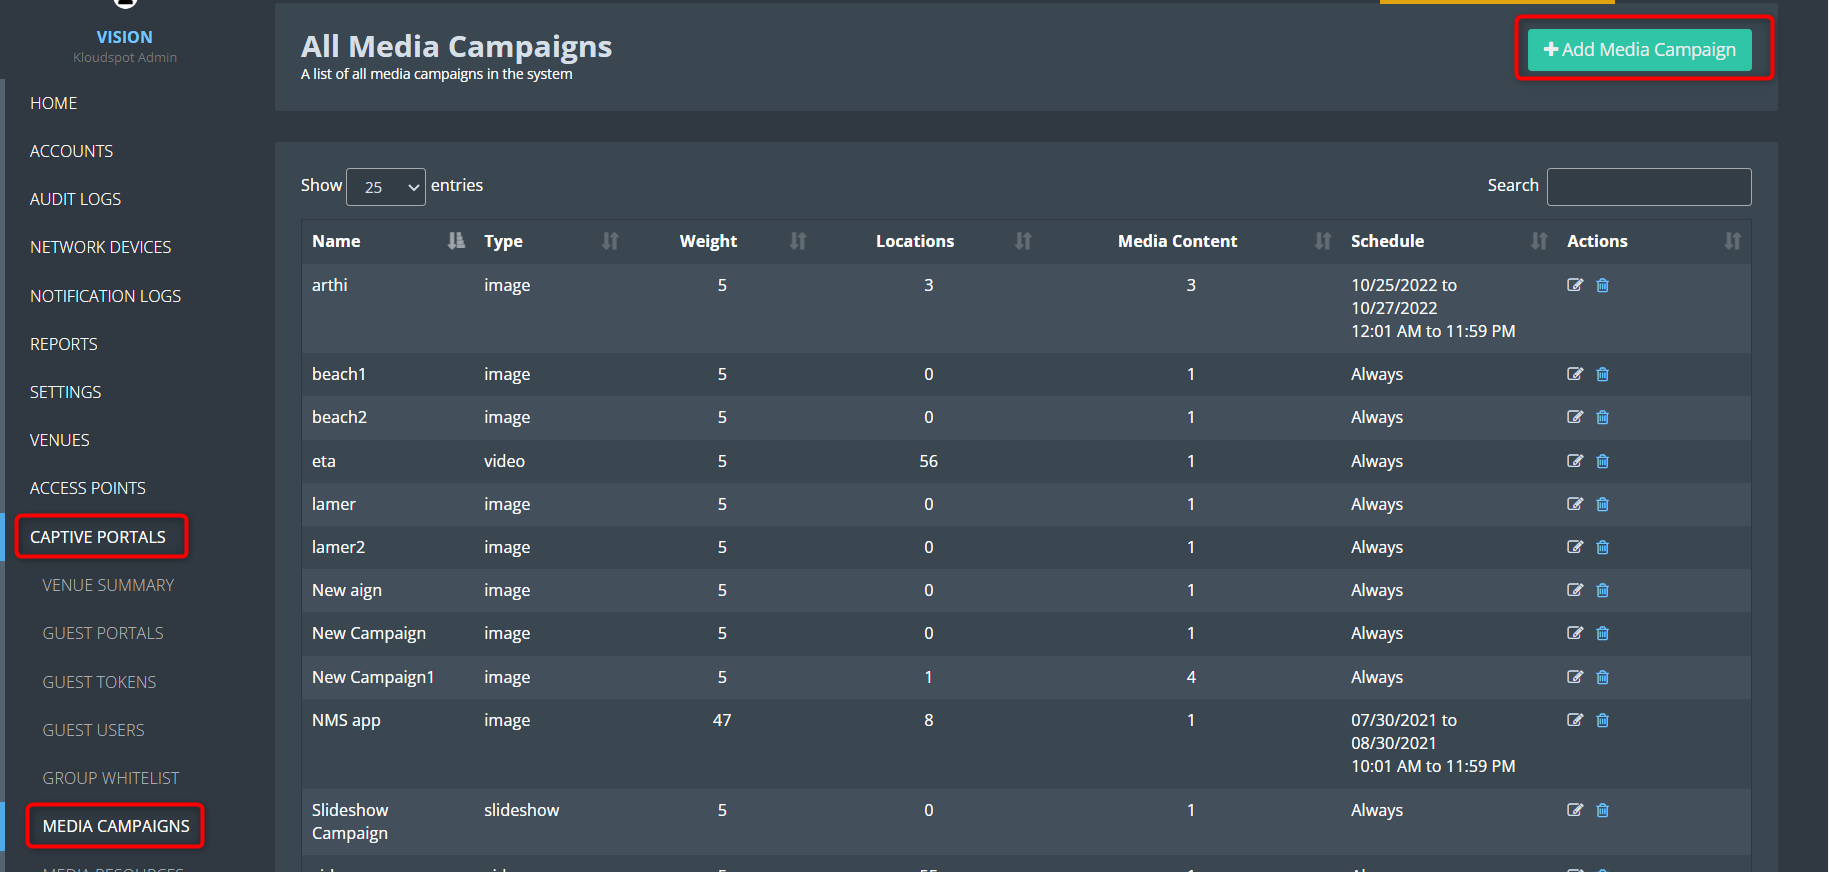
3. Log in to your Kloud Manage account.
4. Then Navigate to CAPTIVE PORTAL > MEDIA CAMPAIGN > Add Media Campaign.
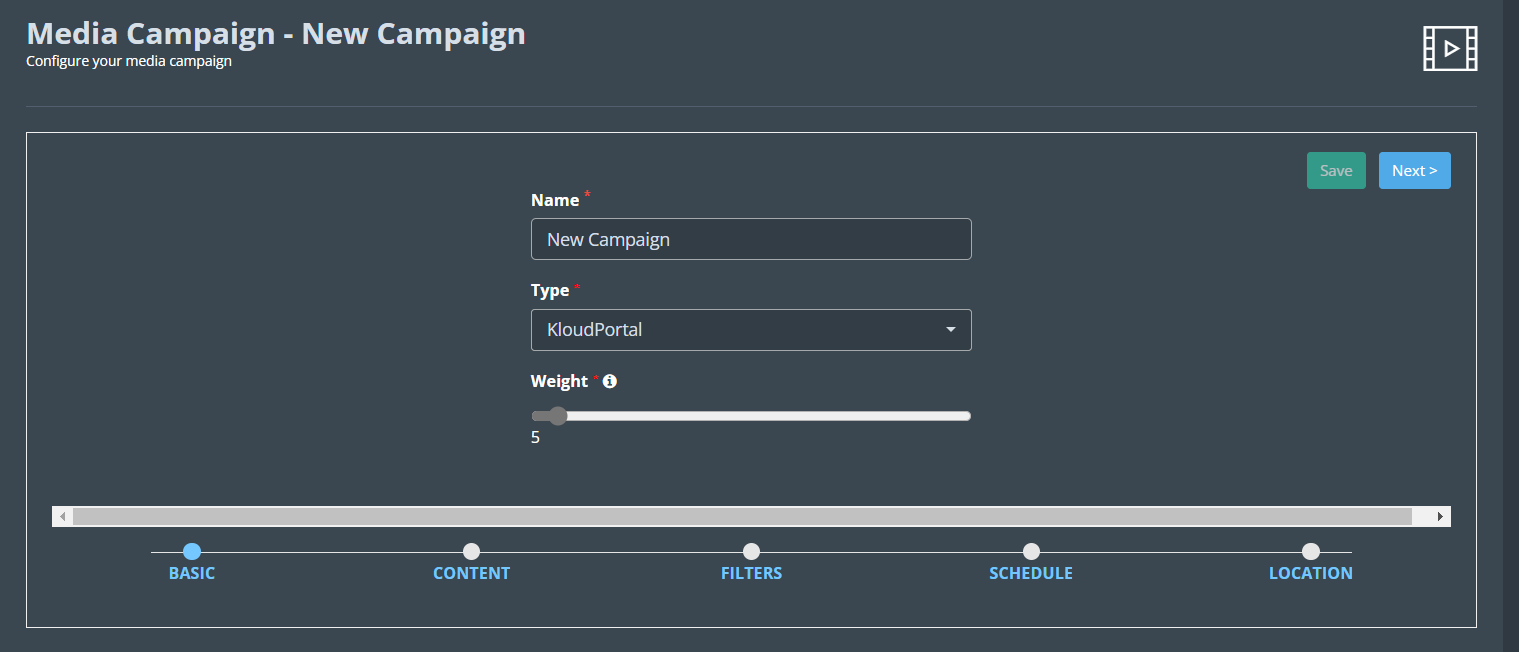
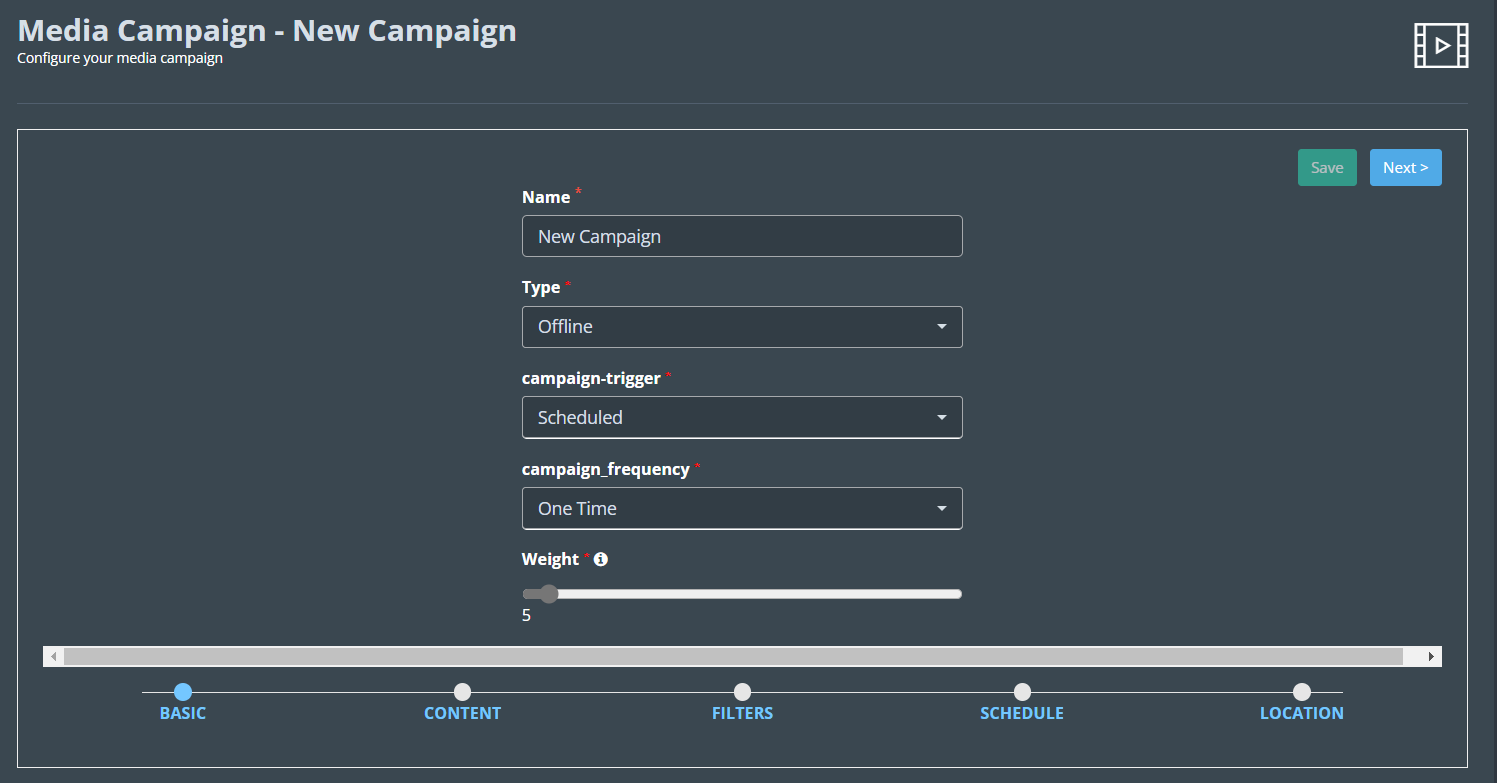
 Basic
Basic
1. Add a media name and select type, two types of media campaign options are provided which are online and offline.
2. Online campaign is referred to as the Kloud portal, and it runs only when the user is connected.
3. Offline type campaign runs after the user is logged in and got out of
network, so it is scheduled
4. Trigger condition and Campaign frequency can be selected depending upon
the user’s choice to run a campaign.
5. Select a weight to prioritize the run time of the campaign.
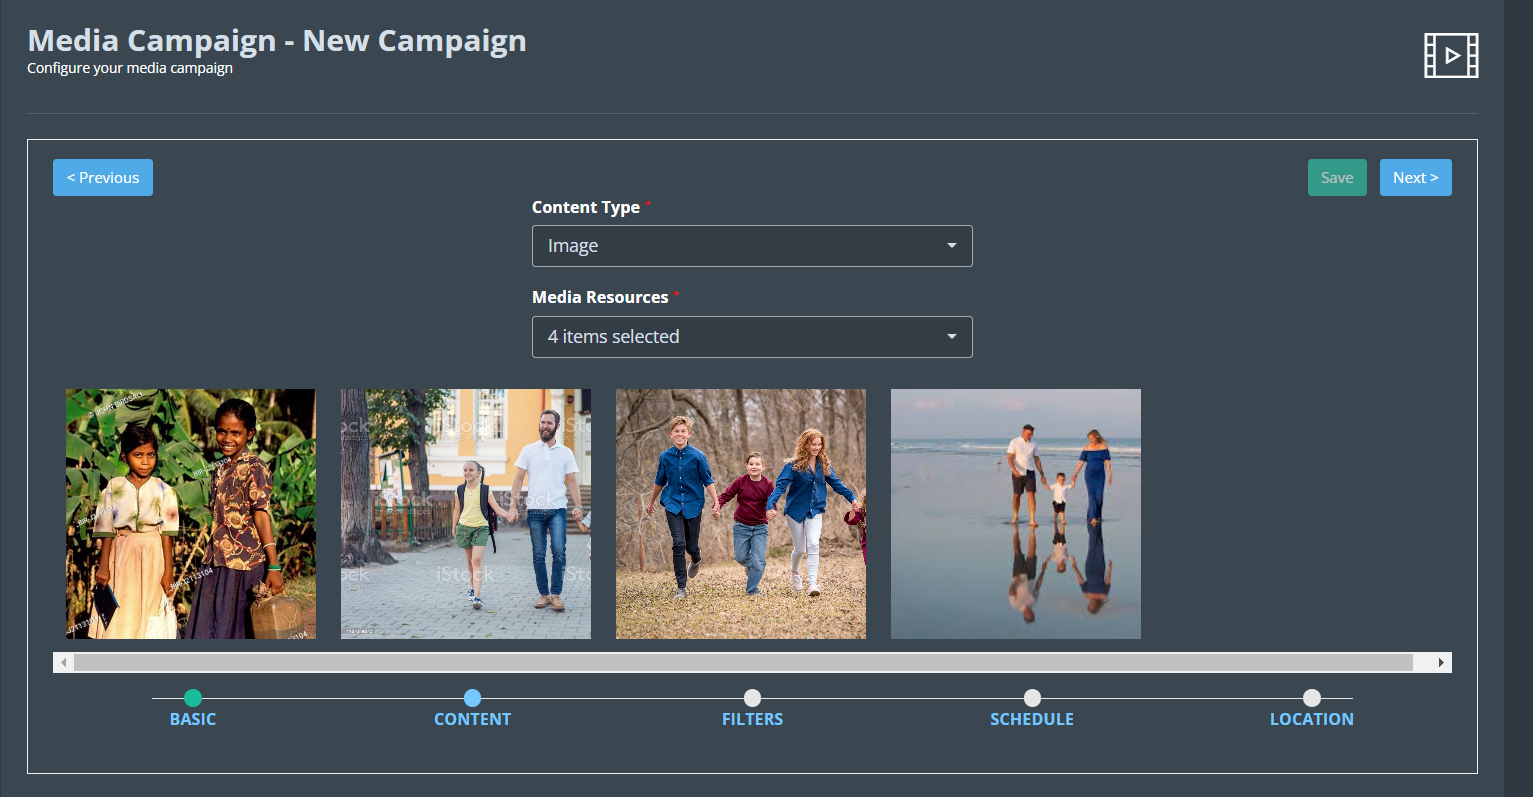
Content
1. Select Content Type and media Resources then click the Next button.
2. Content Type: it will only have static content images, slideshows, and
videos.
 Filter
1. Filters to run a campaign based on some attributes such as tags.
2. Enabled access points with some tags, so that campaign run on users who are connected to those ap’s and devices.
3. User can add more demographic options to run campaigns for specific users such as gender, age group, browser, devices, OS.
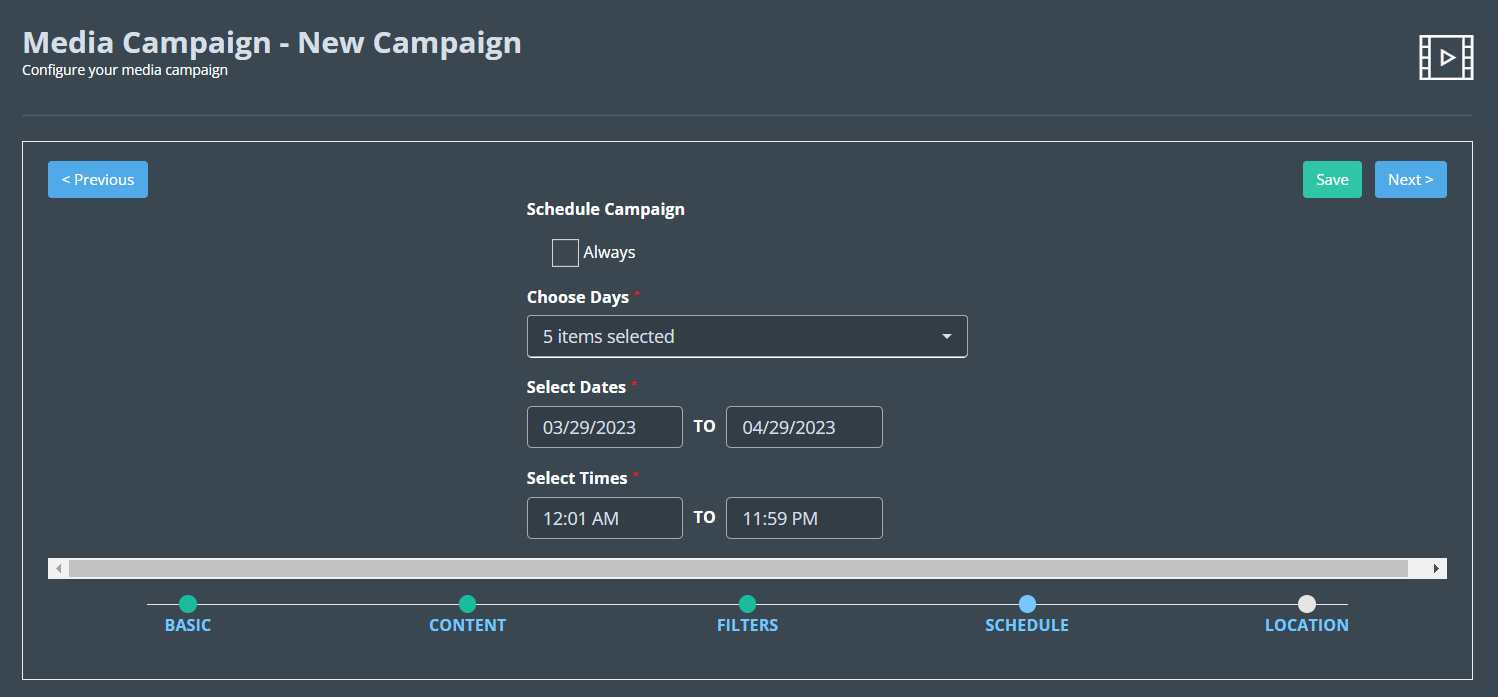
 Schedule Campaign
1. Users can schedule a campaign by selecting the day and time to run a campaign and can also opt for the always option.
2. The campaign will be different depending on when the user logs in
 Location
1. Campaigns will run on a selected location; the user can also select the zone and the particular devices for a campaign to run.
2. Click the Save button to save the campaign.
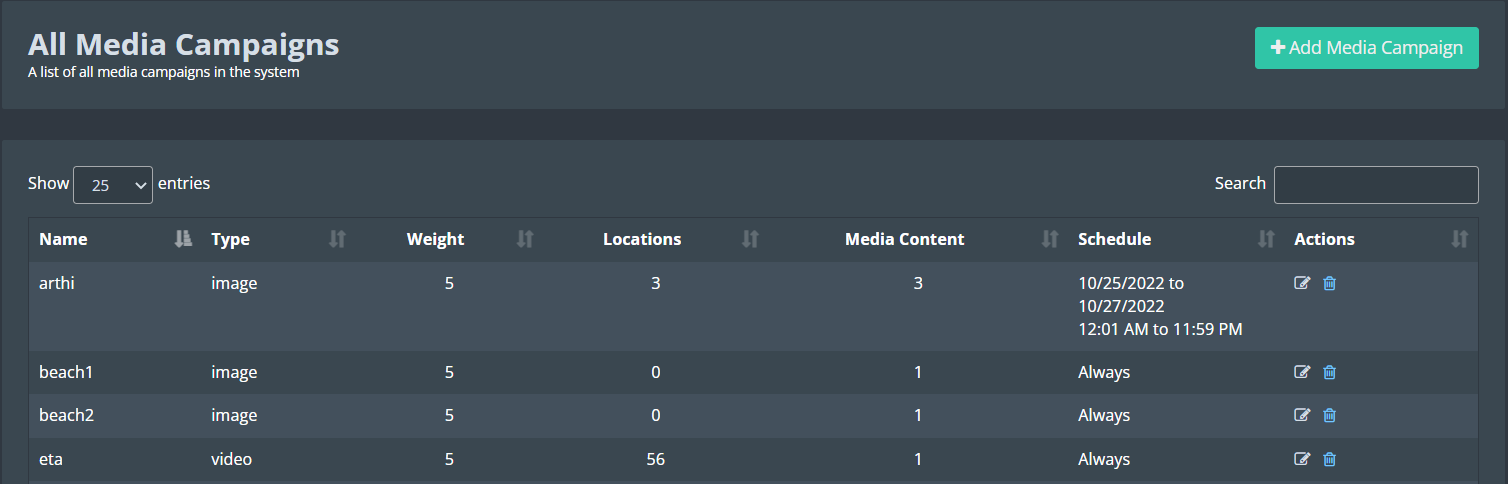
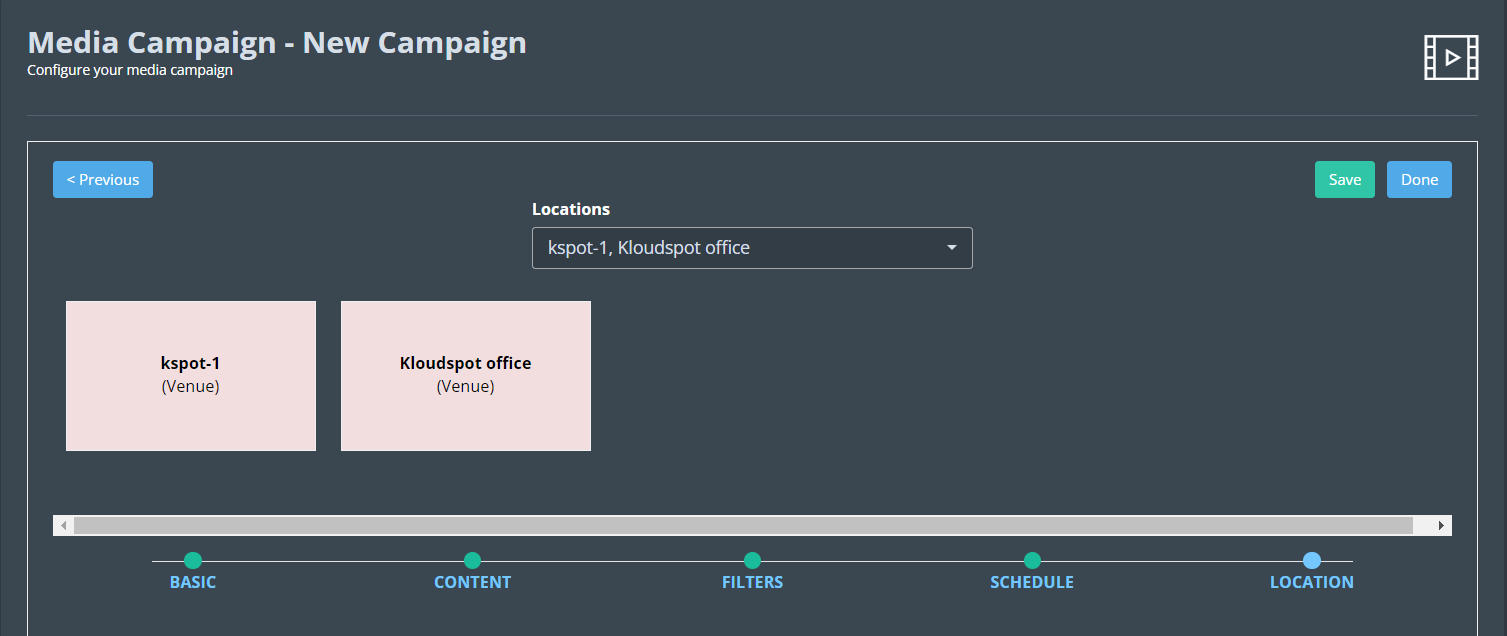 3. Once the campaign is created, it will be shown in the campaign list.
- Edit icon: Allows to edit the campaign.
- Delete icon: allows to delete the added campaign.