S10 device configuration
This document explains how to configure an S-10 device to Kloud management account. This is an IoT (Internet of Things) device. This allows for Bluetooth and WiFi probing.
Add a network device
1. The first step in configuring the S-10 device is to add a network device. To do so follow the steps below.
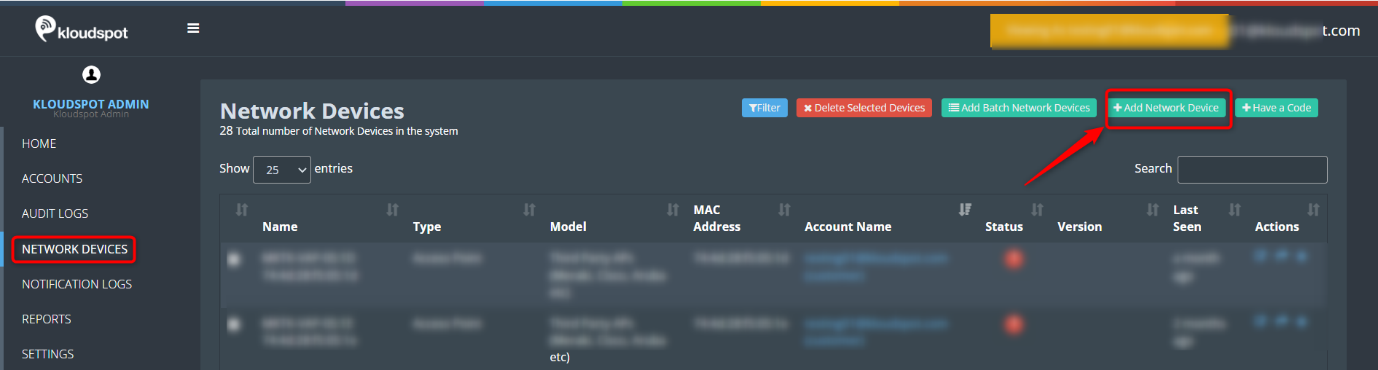
2. Log in to your Kloud manage account and then navigate to NETWORK DEVICES > Add Network Device.
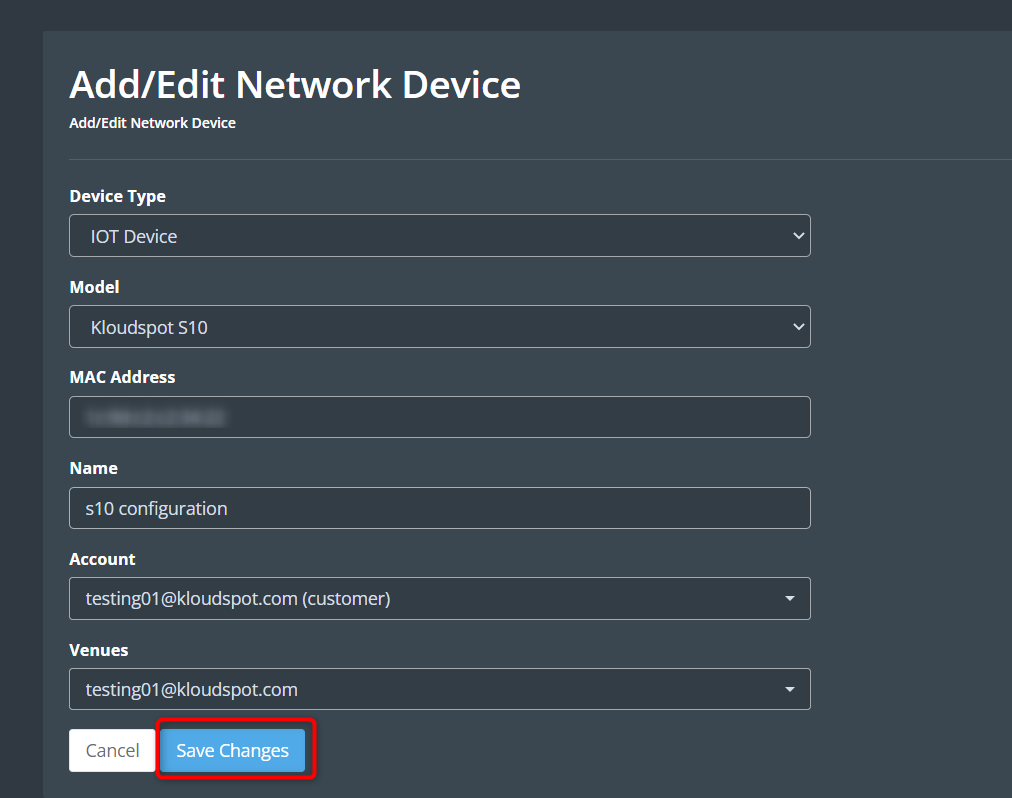
3. Enter the required information in the Add/Edit Network Device window that opens.
Device Type: Select the IoT device from the drop-down menu.
Model: Kloudspot S10.
Mac Address: Enter your device’s Mac address.
Name: Enter a name for your network device.
Account: Select your account and venues.
4. Click the Save Changes button to save the device.
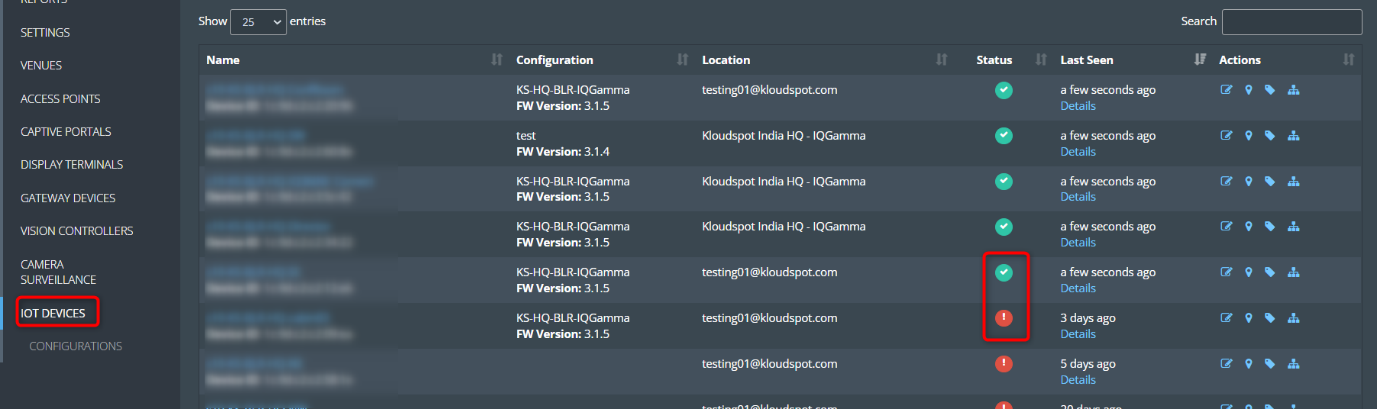
5. After you’ve added a network device, click the IoT DEVICE menu button to see if it’s online. If you see a green dot in the status column of the device you have added, the device is online. But if you see a red dot, it means that the device is offline.
Assign a network device to an IoT group
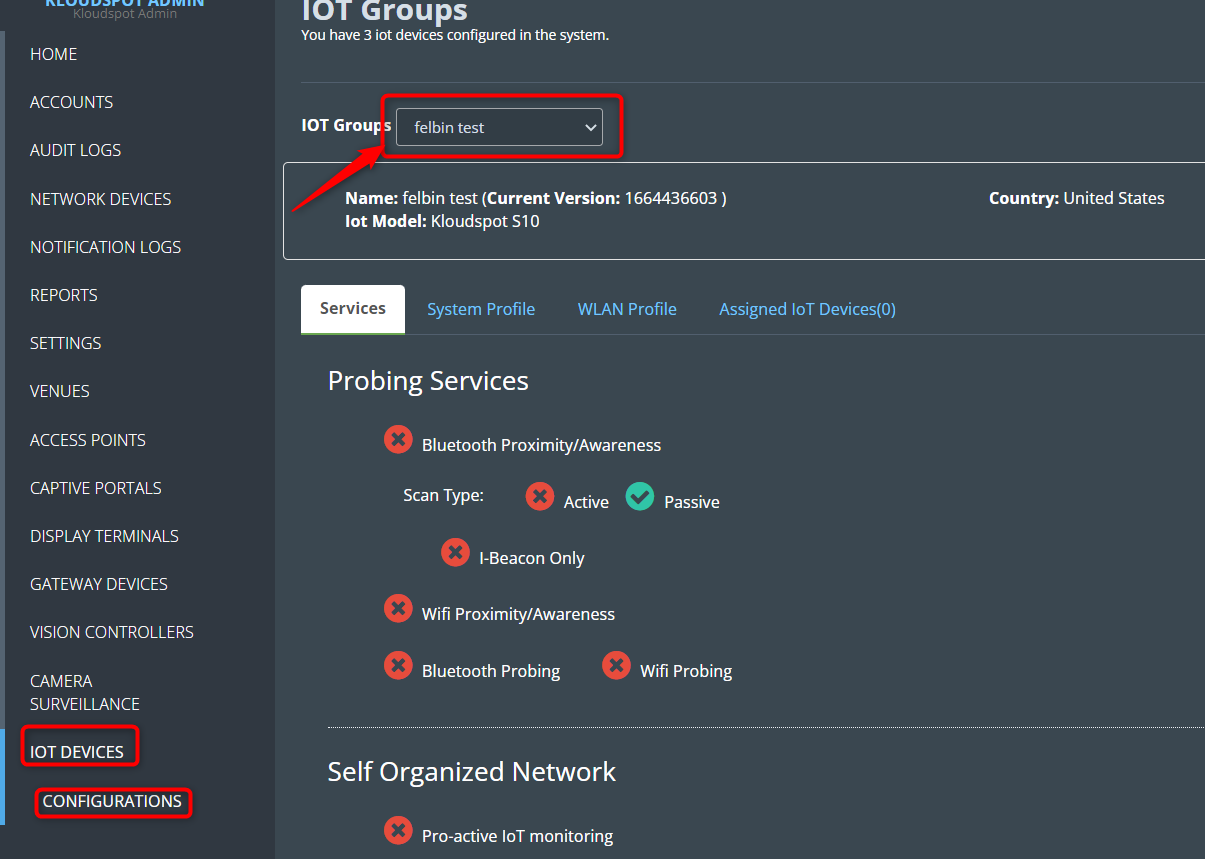
1. After adding the network device, the next step is to assign it to an IoT group. 2. To do so, navigate to IOT DEVICES > CONFIGURATIONS. and select the IOT group from the drop-down list.
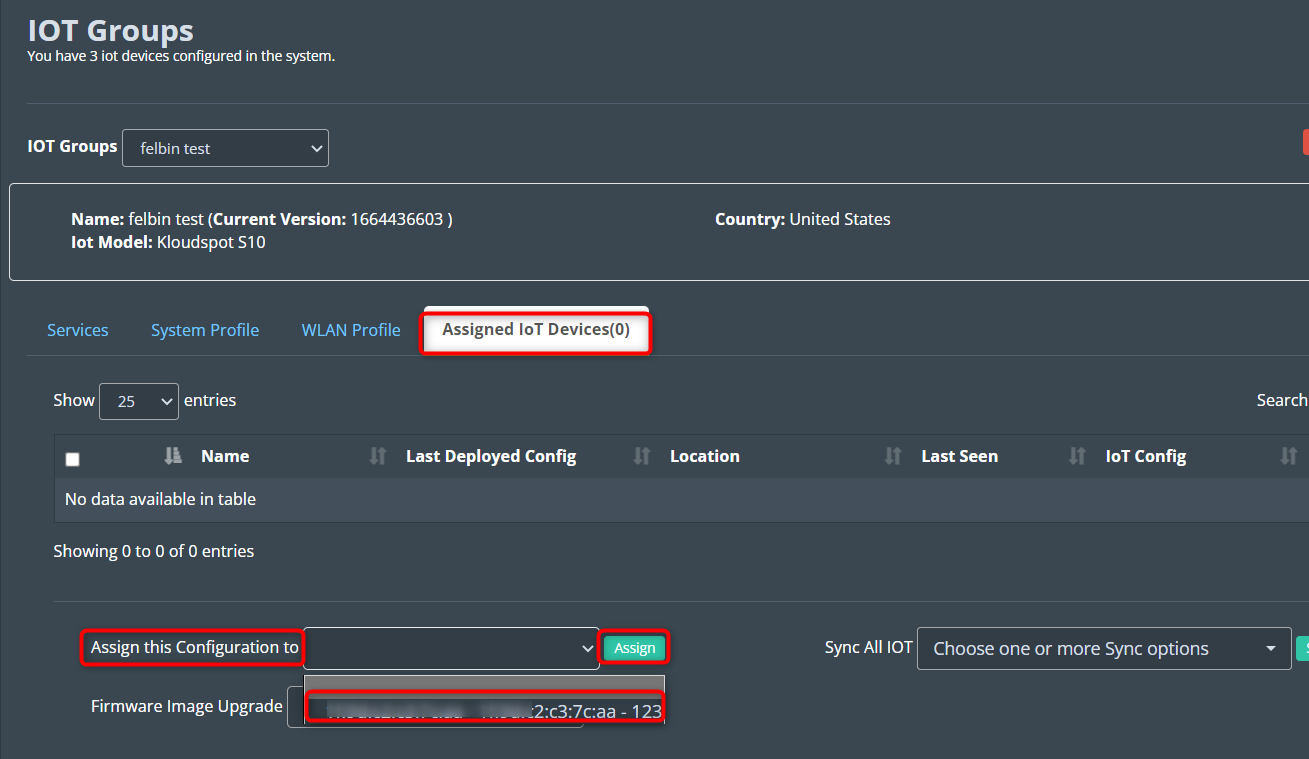
3. Then go to the Assigned IoT Devices tab.
4. Select the network device you added from the Assign this Configuration to drop-down list.
5. Then click on the Assign button.
6. Network device is added to an IoT group.

How to create an IoT group
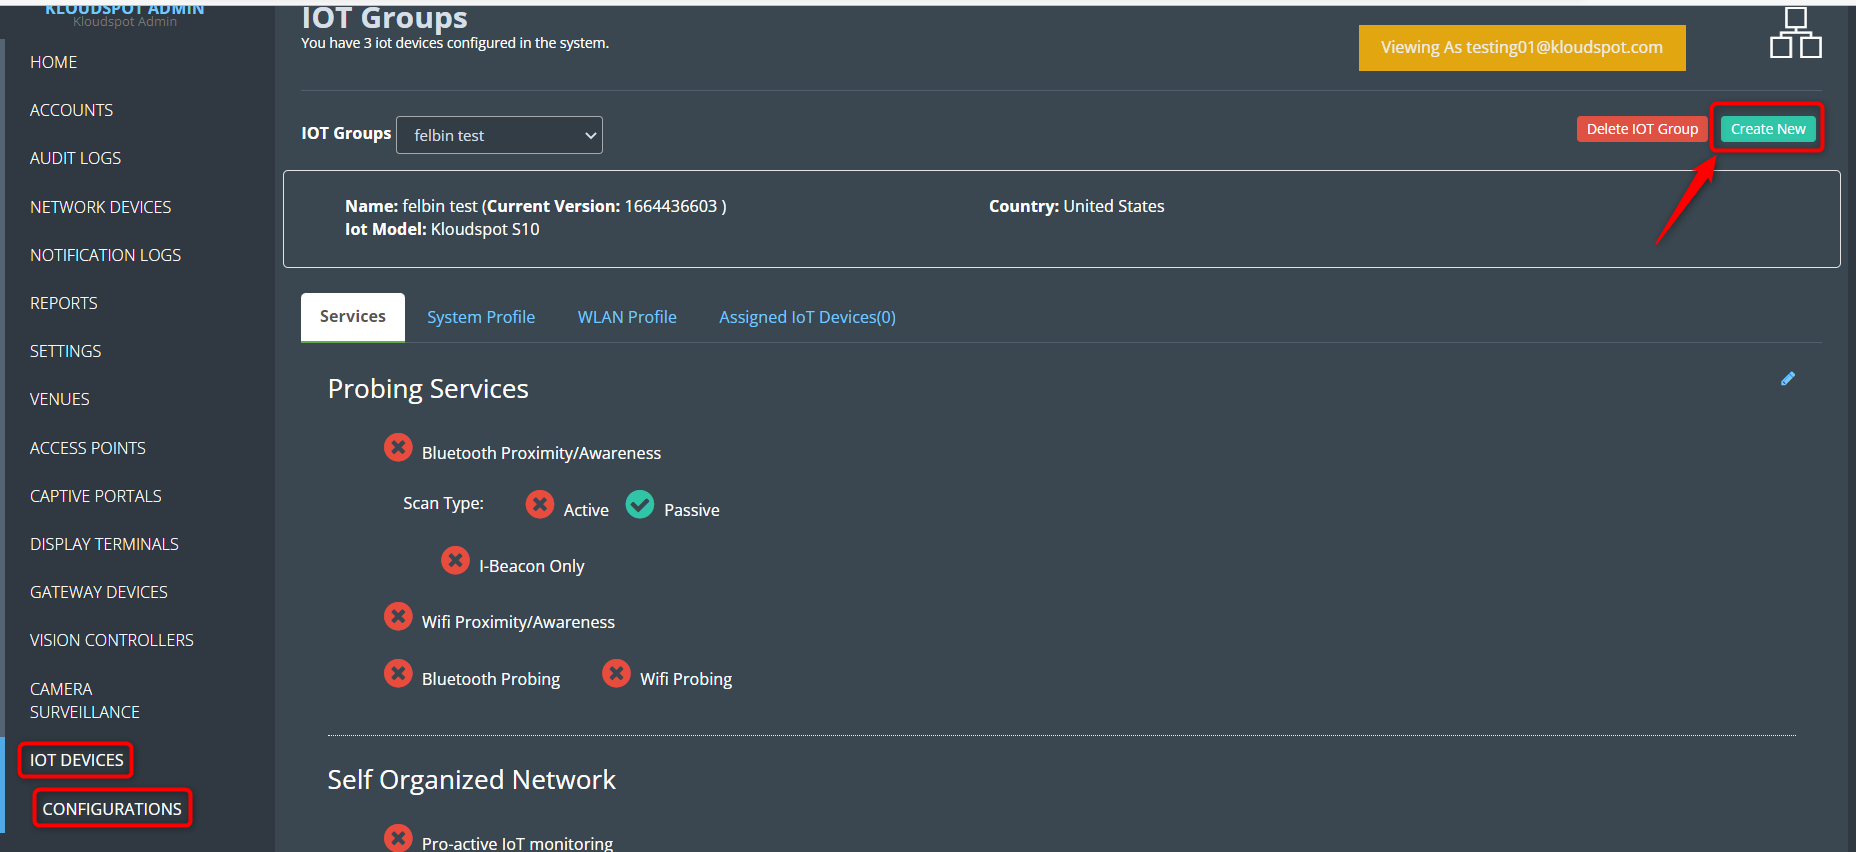
1. Navigate to IOT DEVICES > CONFIGURATIONS > Create New.
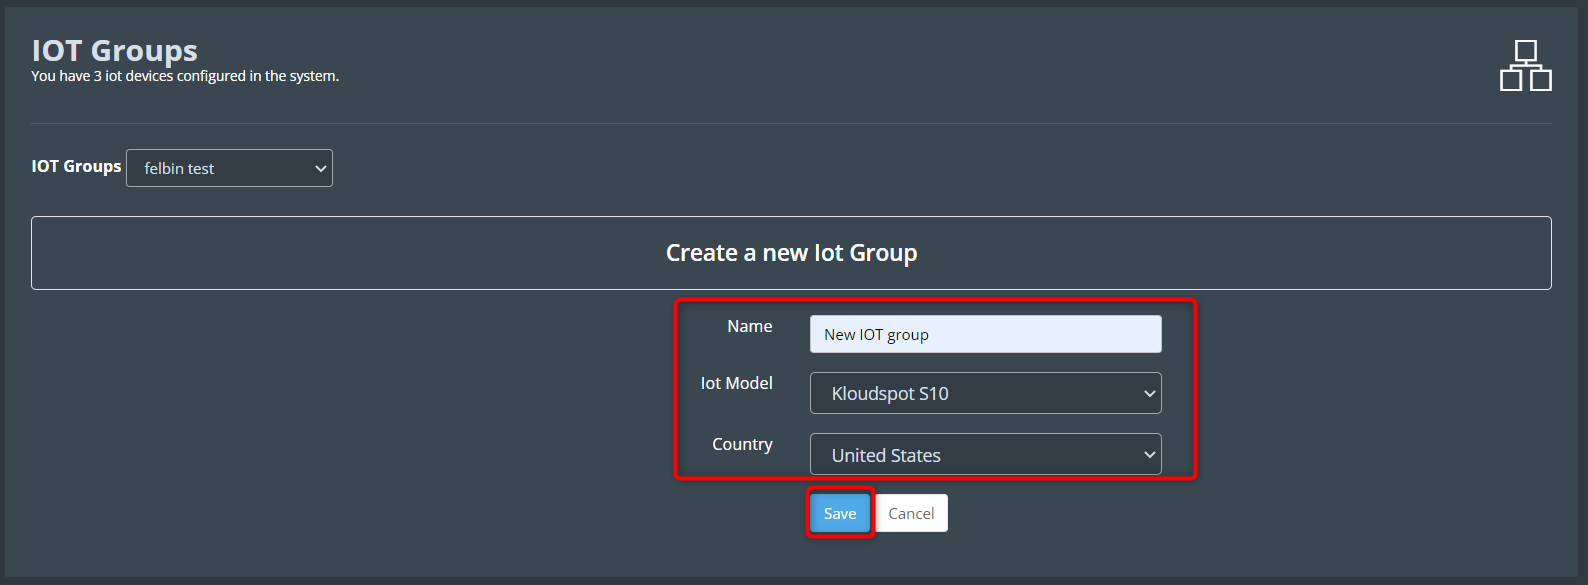
2. In the window that opens, enter the Name, Iot Model, and Country then click the Save button.
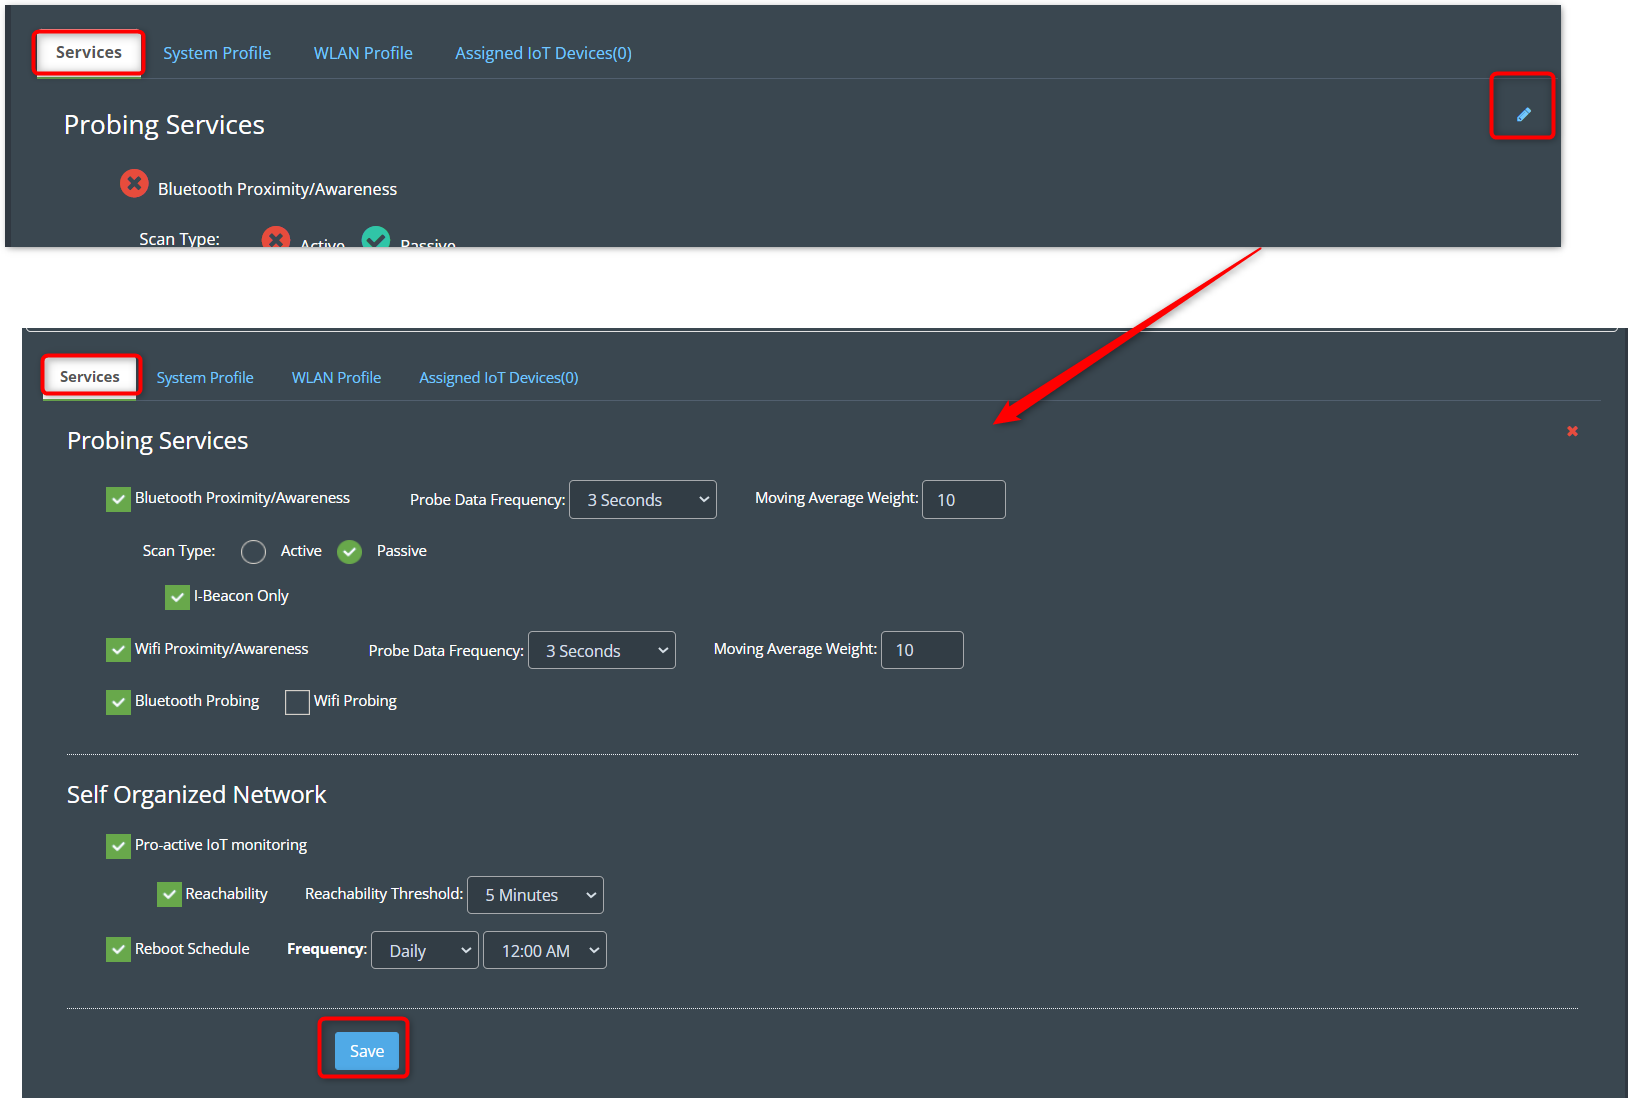
3. In the window that opens, click the Edit button to configure Probing Services and Self Organized Network on the Services tab. Then an editable window will open.
4. Check the checkboxes you want to enable and click the Save button.
Note: Bluetooth probing is only possible if the Bluetooth proximity/awareness check box is enabled. Similarly, wifi probing is only possible if Wifi proximity/awareness check box is enabled.
Bluetooth proximity/awareness: Decides whether to send data received via Bluetooth to kloudInsights.
Scan Type
Active: Information is updated frequently and sent immediately.
Passive: Information is provided only when we ask for it.
I-Beacon Only: This is for I-Beacon devices.
Wifi proximity/awareness: Decides whether to send data received via Wi-Fi to kloudInsights.
Bluetooth probing: Decides whether to send Bluetooth data from KloudInsights to NMS.
WiFi Probing: Decides whether to send Wi-Fi data from KloudInsights to NMS.
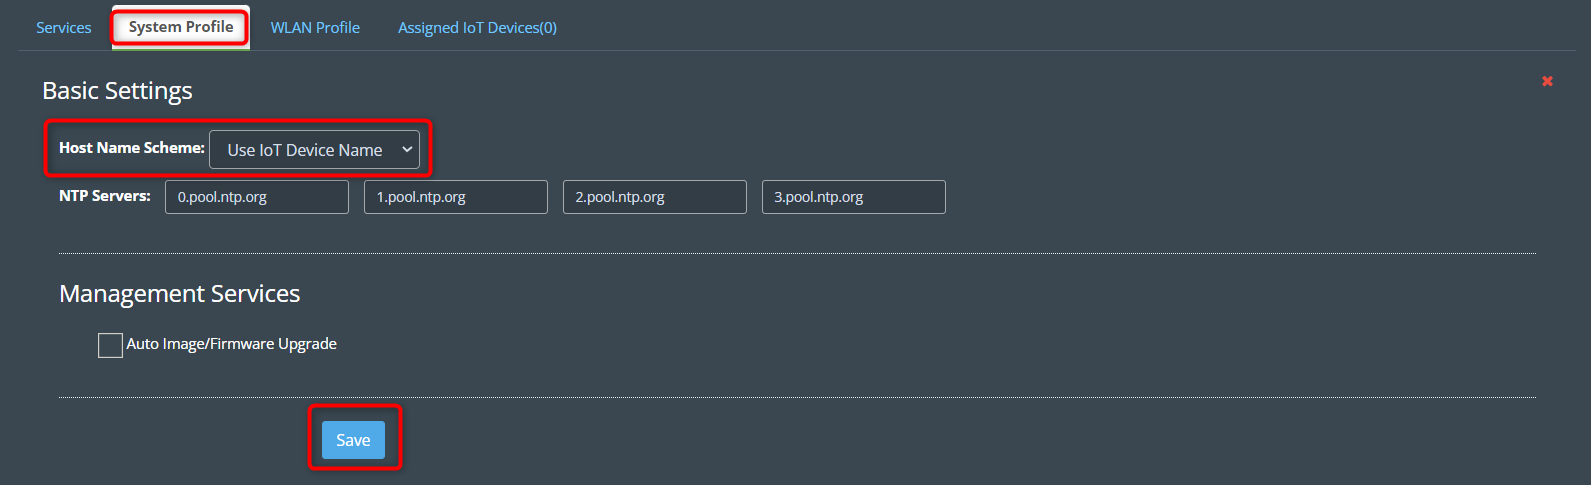
5. Then go to the System Profile tab and click on the Edit button. An editable window will open.
6. Make the necessary changes and click on the Save button.
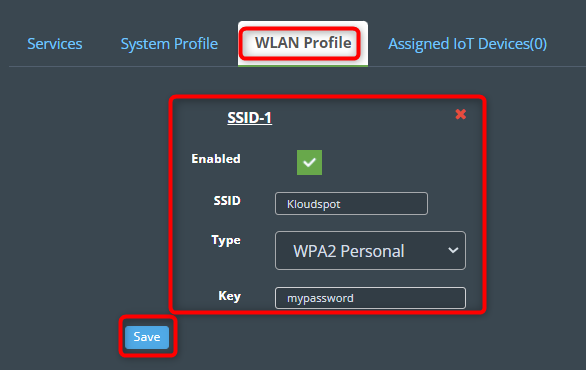
7. Next, go to the WLAN Profile tab and click on the Edit button. It helps to decide which network the device should connect to.
8. Check the Enabled check box. And enter your SSID name. Then select the Type as WPA2 Personal.
9. Then enter the key (password) and click on the Save button.
10. Finally, go to the Assigned IoT devices tab, select the network devices to be added from the drop-down list, and click the Assign button.
11. A new IoT group has been added successfully. As mentioned in step 10, other network groups can be added to this group.