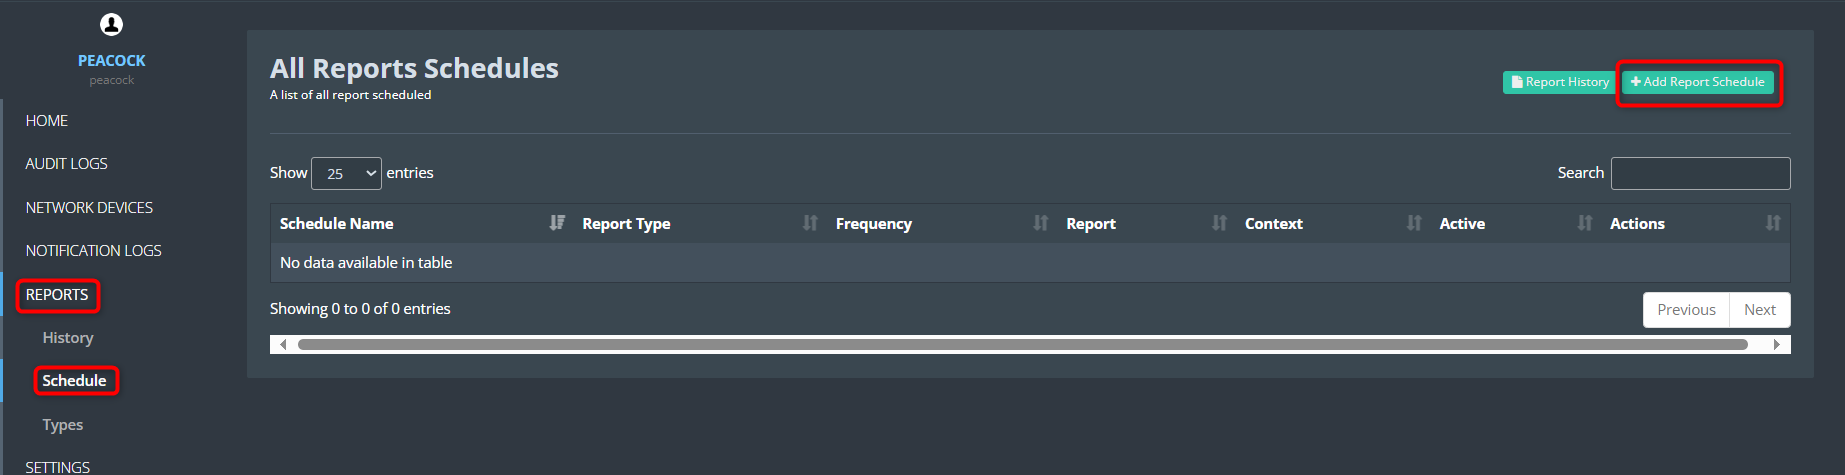
Reports

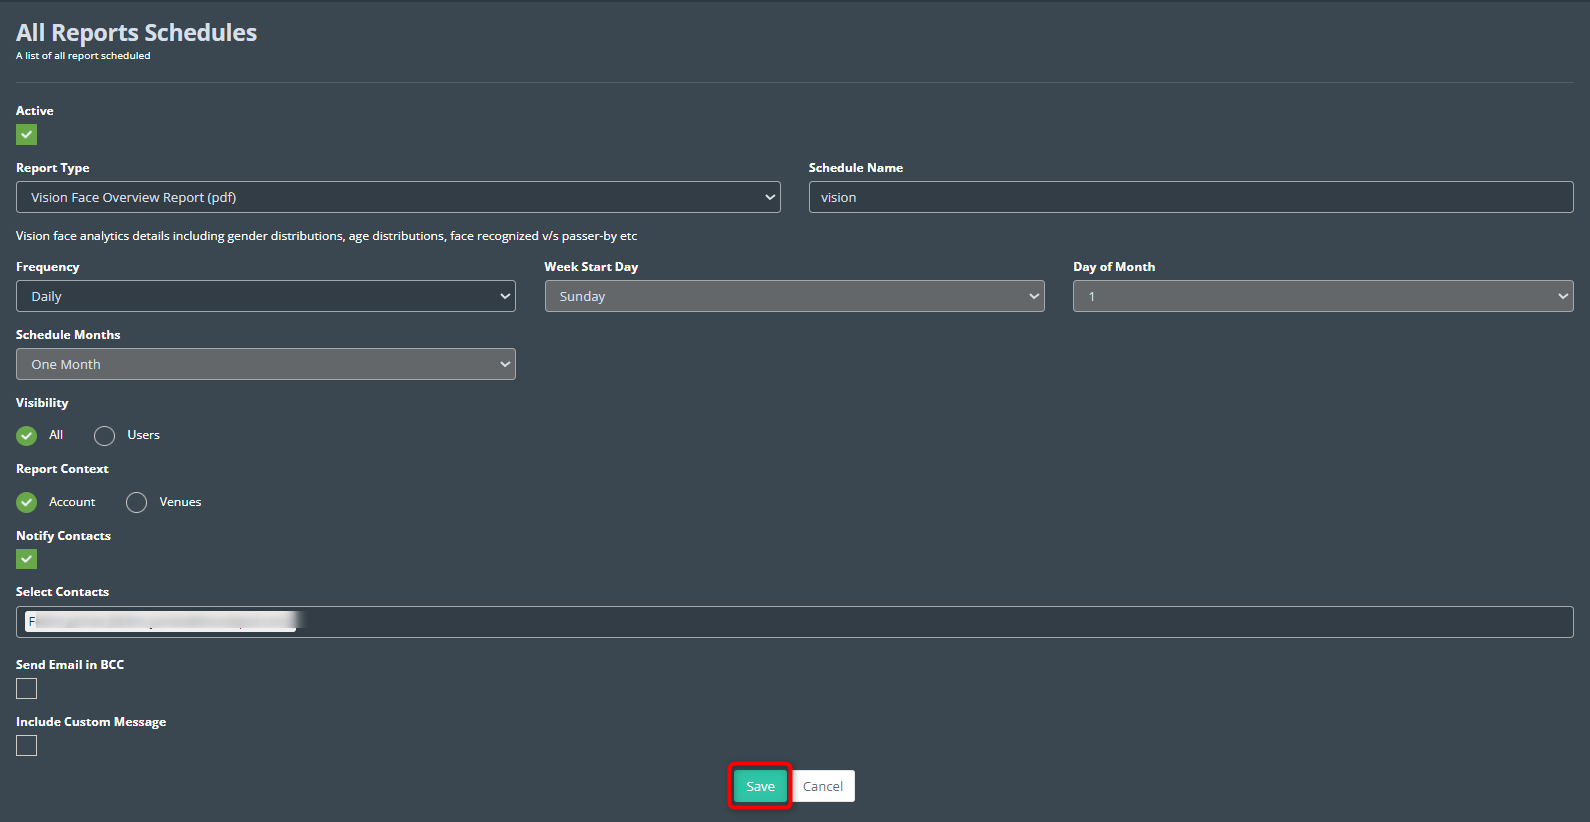
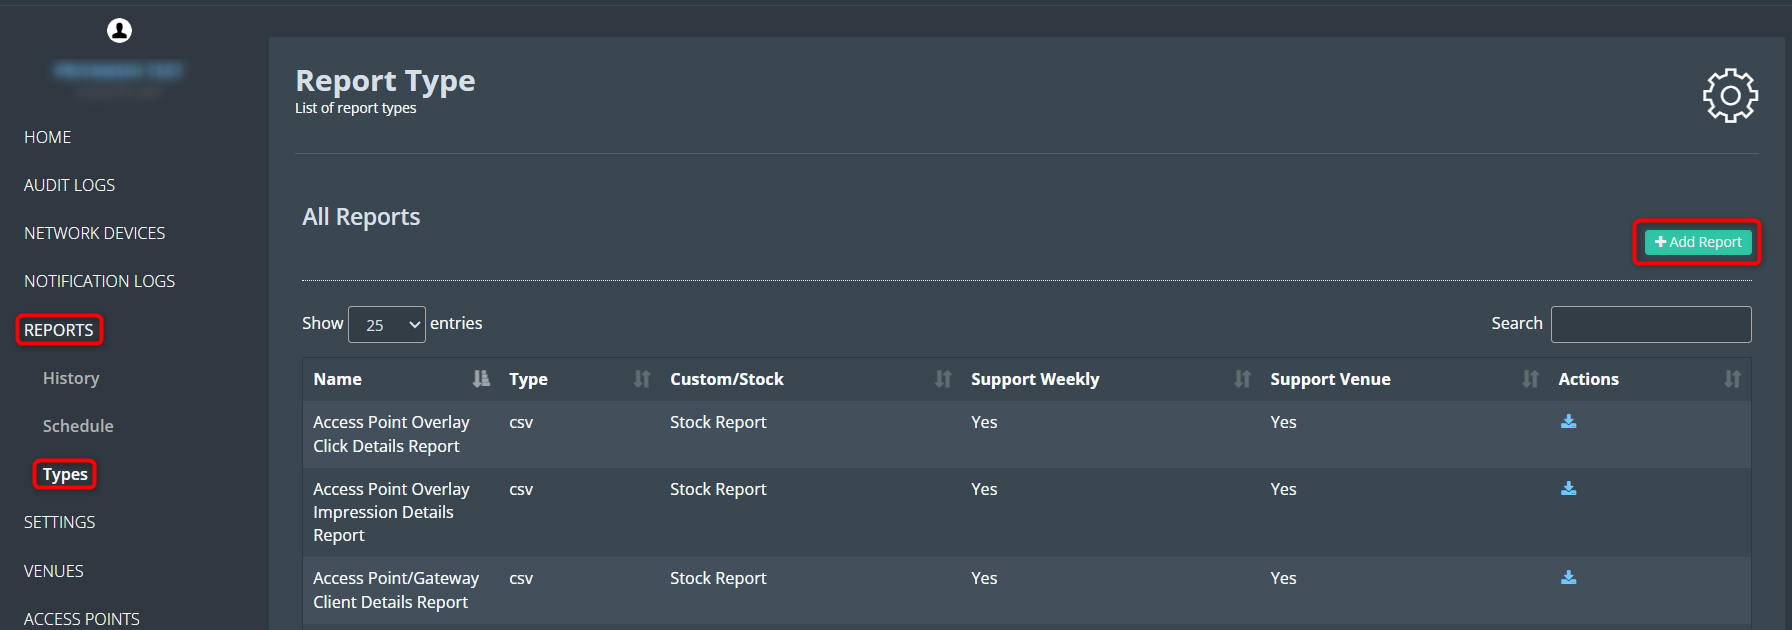
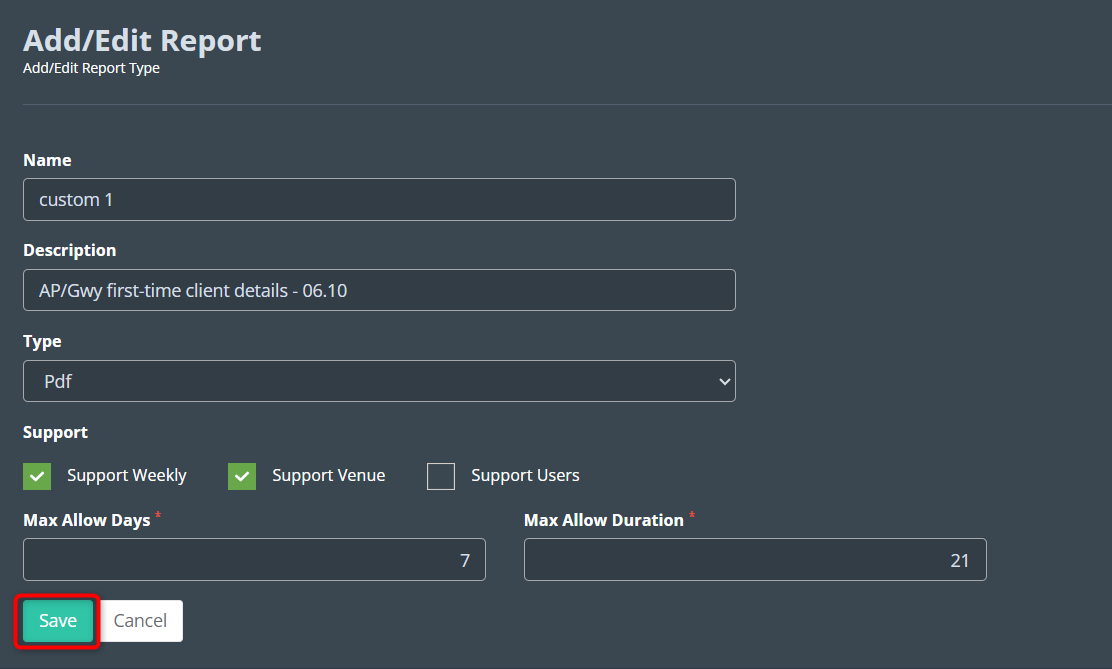
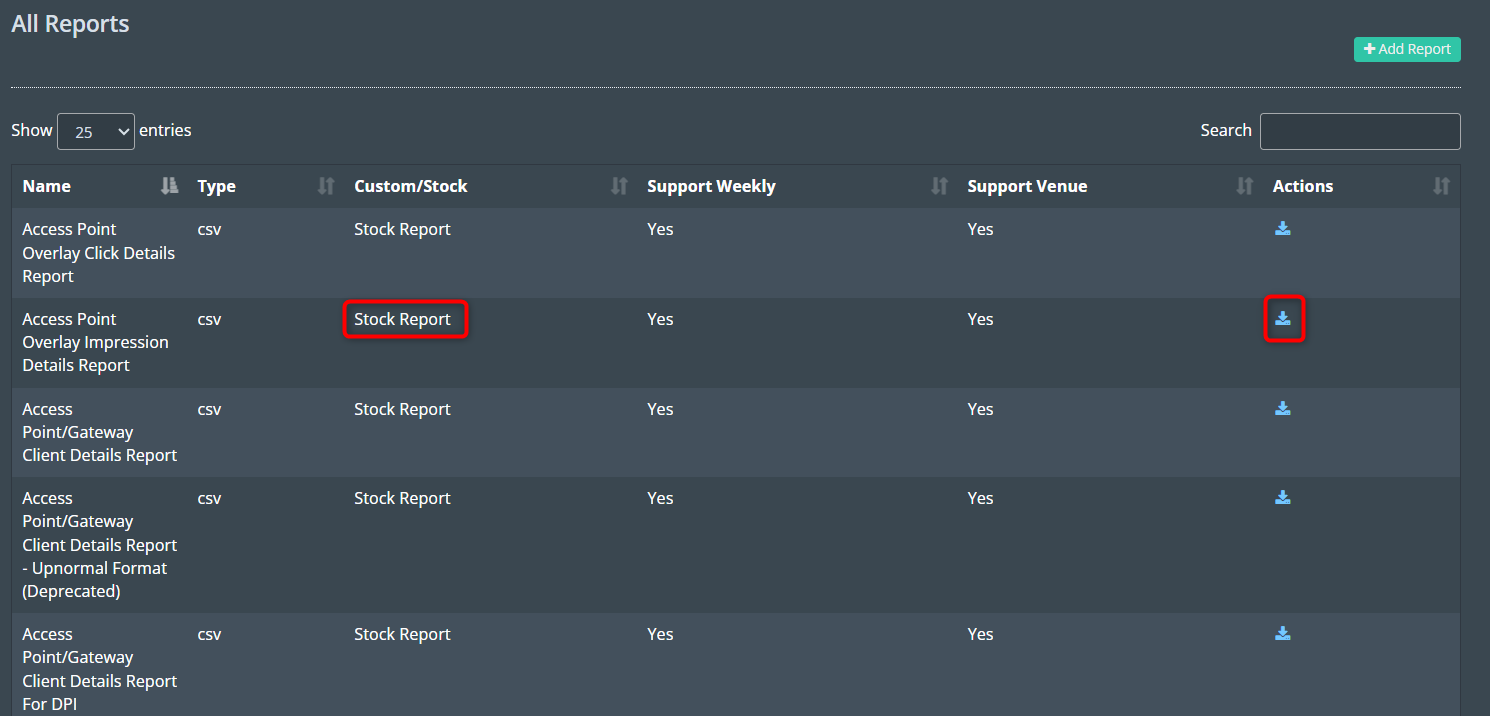
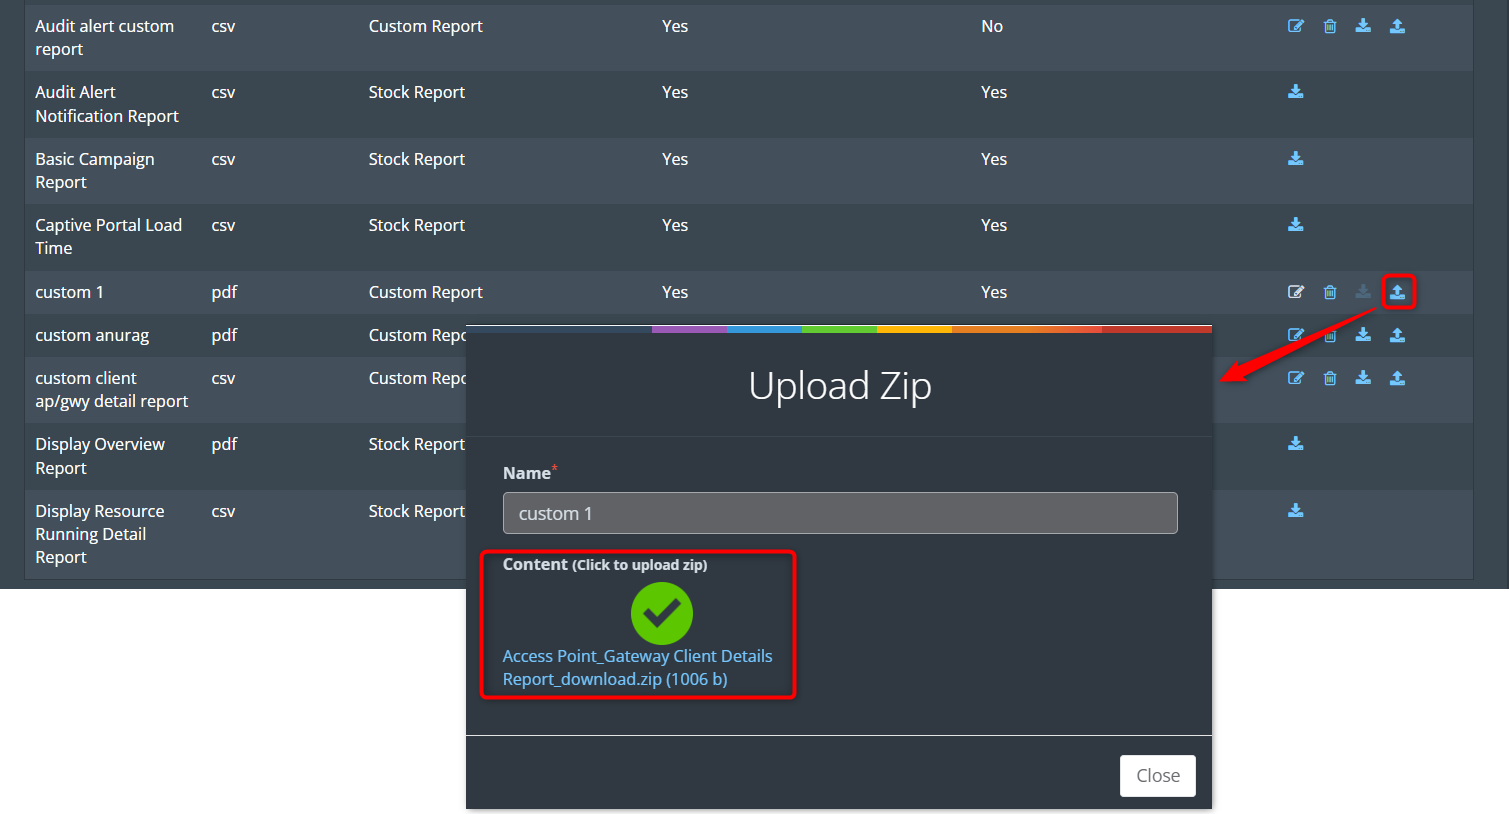
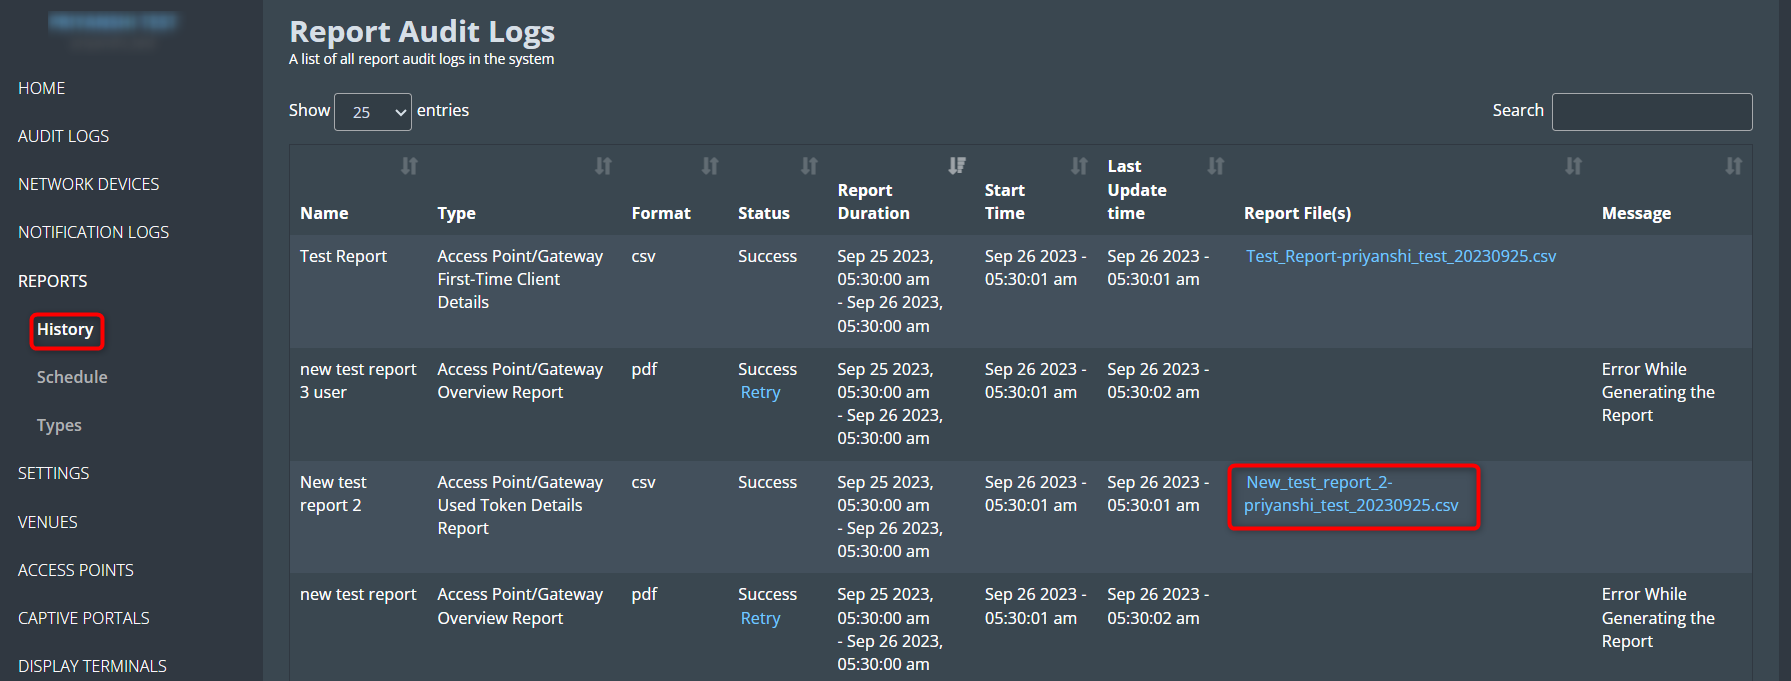
This report section tells you about reports and how to schedule them, make your own report types, and see the reports that have already been created. Different reports can be made based on the device you’re using. For instance, if you use KloudVision, you can make a report called “vision face overview.” This will give you the face analytics data report that was made at the time frame you choose.

Refer to the sections given below for more details.

Table of content

Subsections of Reports

Schedule a Report

  1. To create a new report, follow these steps:

  2. Navigate to Report > Schedule.

  3. In the window that opens, click on the + Add Report Schedule button.

  1. Enter the required information in the window that appears.

  2. Using this process, various report types, including access point/gateway, device, display, vision, captive portal, notification, and others, can be scheduled. For detailed instructions, please refer to the “Captive Portal Usage Report” document.

Create a Report Type

  1. Apart from the default stock report types, you have the option to create a custom report type. Follow these steps:

  2. Click on the Types button.

  3. In the window that opens, click on the Add Report button.

  1. Enter the Name, Description, Type, Support, and Duration in the Add/Edit Report window. Click on the “Save” button.
  1. Next, customers can download the stock reports and customize them according to their needs.

  2. Click on the download button in the action column to download.

  1. After downloading, the customized reports can then be uploaded into the custom reports that the user has created.

  2. Click on the upload button found in the action column of the custom report.

  3. In the popup window that opens, click on the Content button and upload the zip file that you have downloaded.

  4. Your custom report has been successfully added. You can now use this report type when scheduling a report.

View Report History

  1. If you wish to review the history of reports that have been created thus far, follow these steps:

  2. Click on the History menu.

  3. This action will open the Report Audit Logs window, where you can access information about previously generated reports.

  4. In the Report Audit Logs window, you will find a list of reports that have been generated. To download any of these reports, click on the link provided in the Report Files column.