Assigning and managing Network Devices
Once you have configured the Settings menu according to your requirements, you can start adding devices to KloudManage.
-
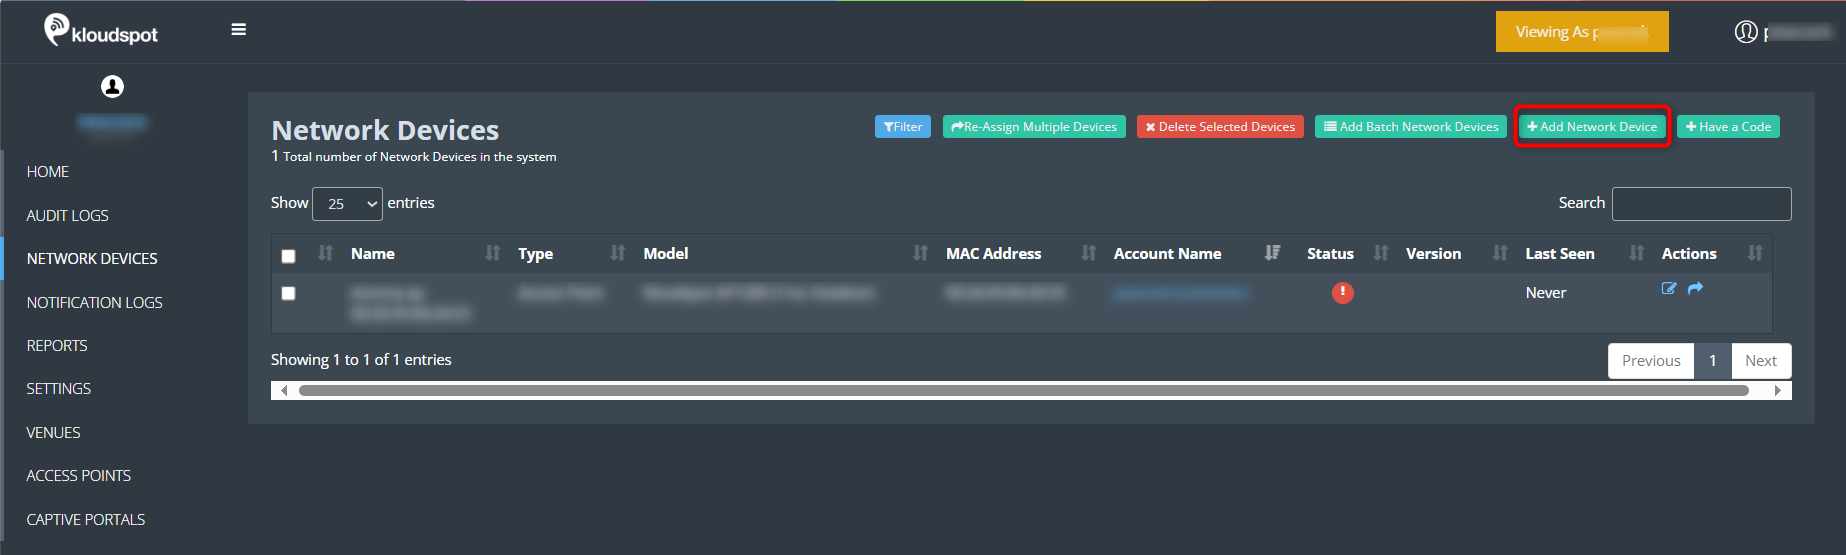
Navigate to the “Network Devices” menu. You will be directed to the Network Devices page, which displays the devices you have added.
-
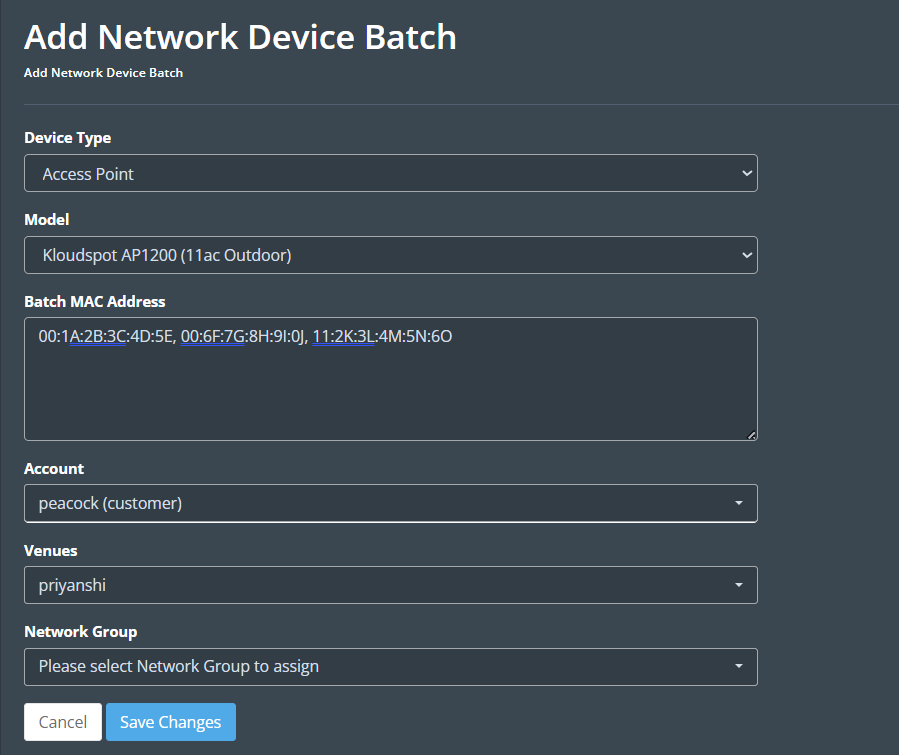
To add multiple devices simultaneously, you can use the “Add Batch Network Devices” option. It’s important to note that the device type should be the same when adding multiple devices together. Provide the Mac addresses of the devices you want to add, separating them with commas. For example: 00:1A:2B:3C:4D:5E, 00:6F:7G:8H:9I:0J, 11:2K:3L:4M:5N:6O.
-
Alternatively, you can use the “Add Network Device” option to add a device individually. Depending on the type of device you’re adding, refer to the respective sections for detailed instructions:
• Refer to the “Adding and Managing Display Terminal” section to add a KloudDisplay device.
• Refer to the “Add a Controller to KloudManage Software” section to add KloudVision or a combo device.
• Refer to the “Kloud Access Point” section to add an access point.
• Refer to the “NMS User Guide” to add a gateway device.
• Refer to the “Add a network device” section from the S10 Device Configuration guide to add the IOT device.
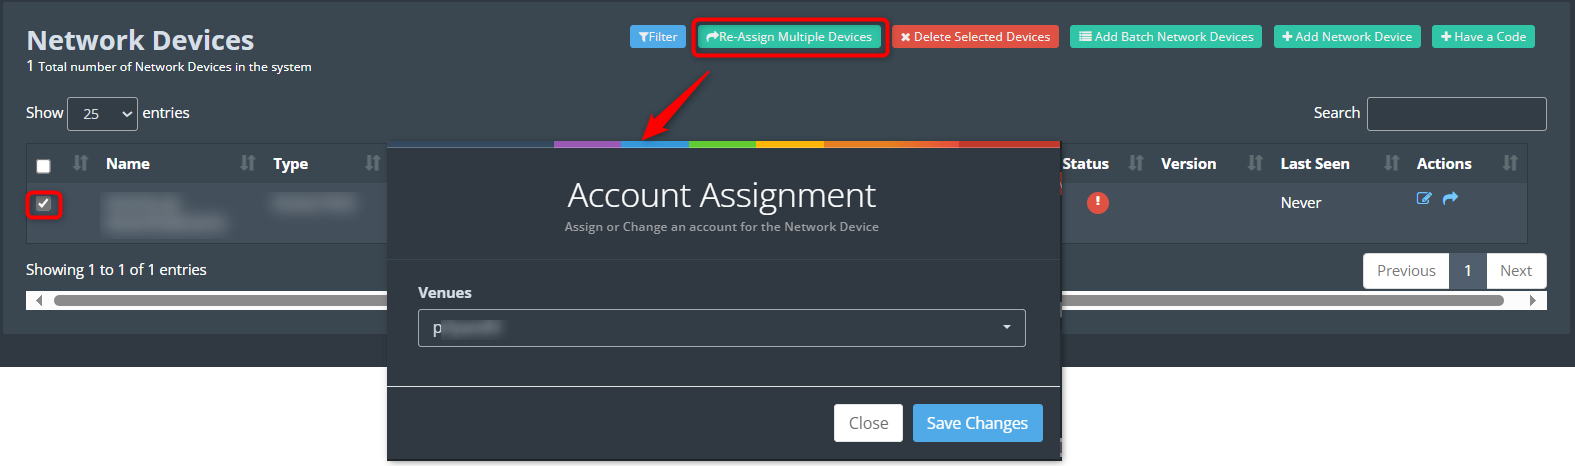
- If you need to change the location of multiple devices, select those devices and click on the “Re-Assign Multiple Devices” button to modify their location.
-
To add an Android TV, click on the “Have a Code” button. In the popup window that appears, enter the Hosting Platform, Orientation, Rotation, TV Code, Name, Account, and Venues. Finally, click on the “Save Changes” button.
Note: The Android Studio application issues an 8-digit code called the TV Code during installation.
