Third-Party Integrations
-
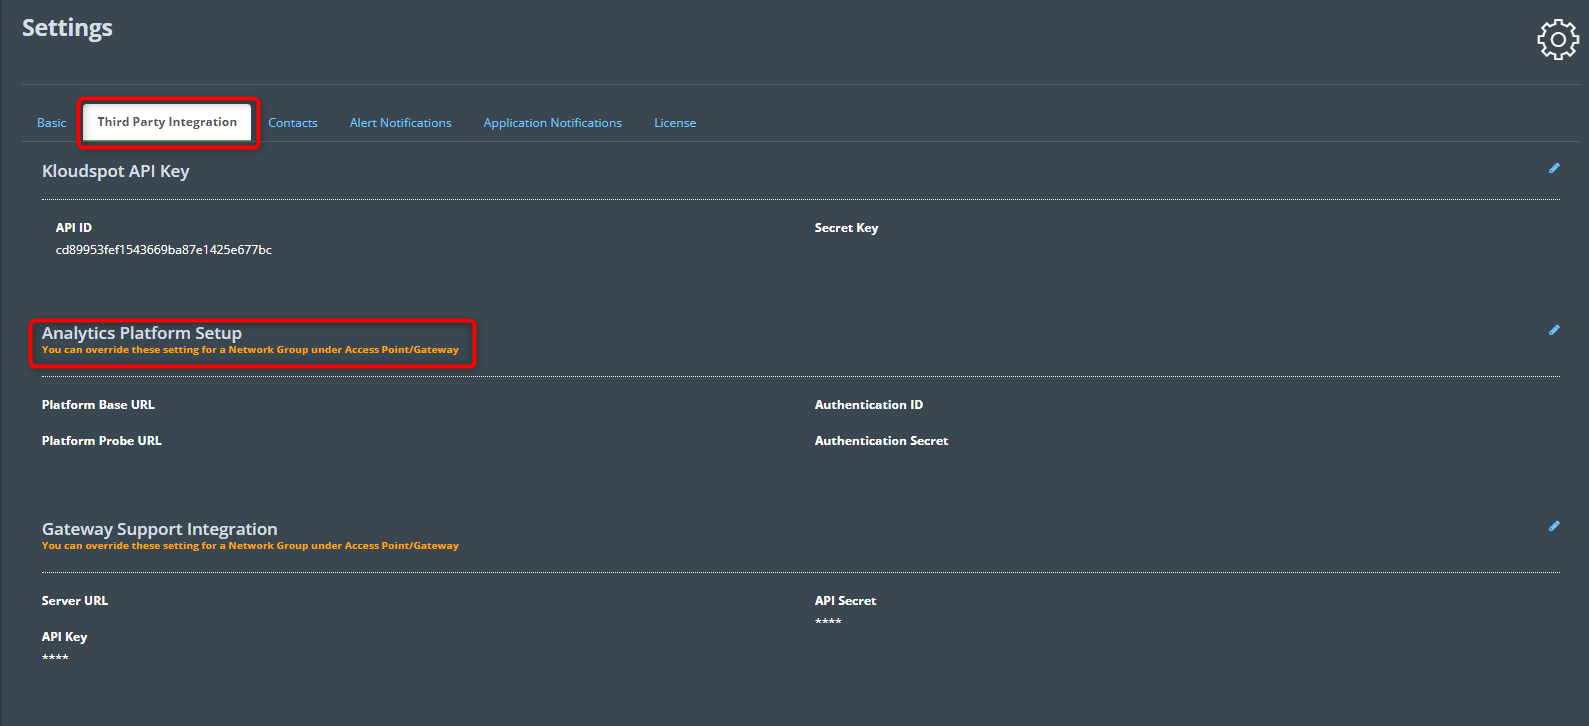
In the Third-Party Integrations tab, you can connect various third-party applications to your KloudManage.
-
Add integrations as per your specific requirements. For example, to connect KloudDisplay or KloudVision with the KloudInsights application, utilize the “Analytics Platform Setup” option.
-
Refer to the Integration with Kloudinsights section for guidance on integrating KloudVision with KloudInsight.
GateWay Support Integration
-
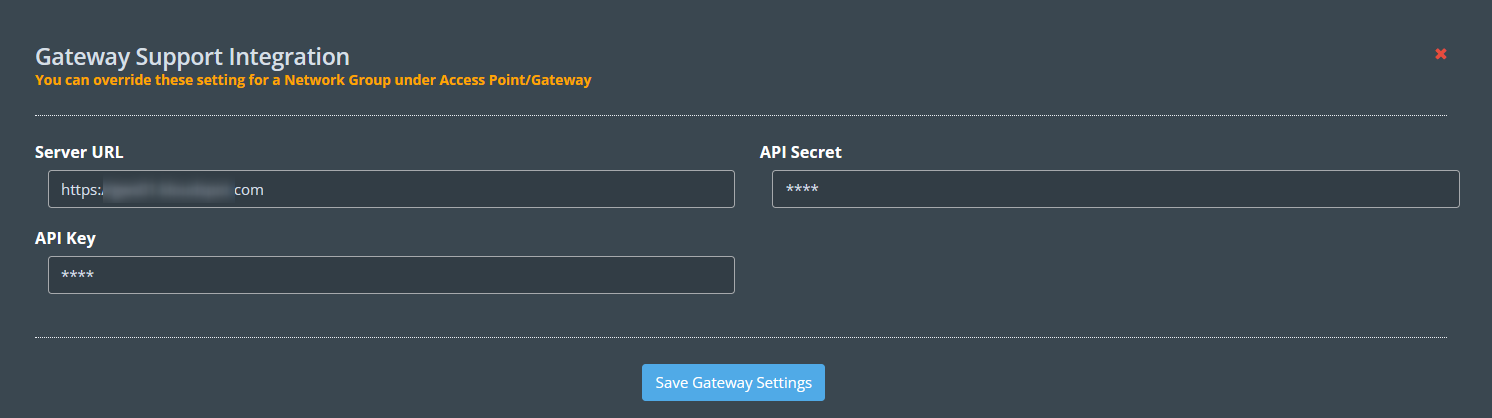
If you want to integrate Gateway devices with KloudManage, you can configure the Gateway support integration section.
-
Navigate to the Gateway Support Integration section.
-
Click on the Edit button to initiate the configuration process.
-
Provide the necessary information obtained from your Gateway provider:
- Server URL
- API Secret
- API Key
-
After entering the required details, click on the Save Gateway Settings button to store the configured settings.
Merakki Dashboard Integration
-
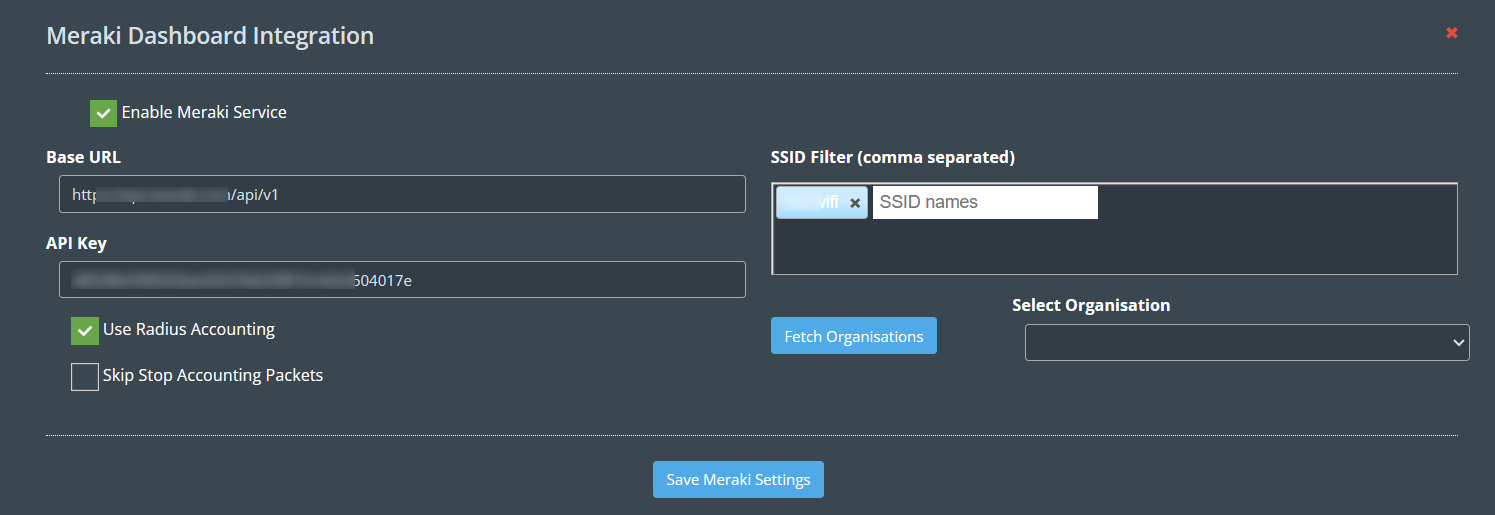
KloudManage supports the integration of Meraki Access Points for comprehensive network management. Follow the steps below to integrate the Meraki dashboard seamlessly.
-
Navigate to the Meraki Dashboard Integration section.
-
Click on the Edit button to begin the integration process.
-
Check the Enable Meraki service checkbox to activate the integration.
-
Provide the following information sourced from the Meraki dashboard:
- Base URL
- API Key
- SSID
-
Check the Use Radius accounting checkbox to track user login information and data usage.
-
Check the necessary settings related to stop accounting packets if required.
-
Click on the Fetch Organization button to retrieve organizational information.
-
Select the desired organization from the dropdown list.
-
After configuring the settings, click on the Save Meraki Settings button to store the integration details.
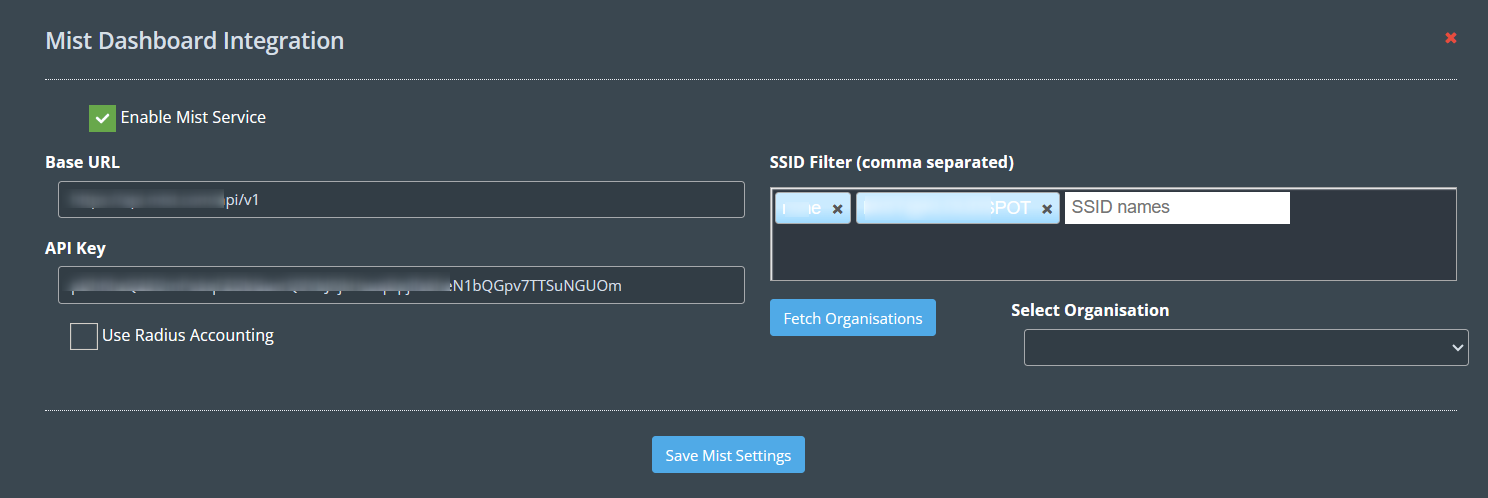
Mist Dashboard Integration
-
KloudManage supports the integration of Mist Access Points for comprehensive network management. Follow the steps below to integrate the Mist dashboard seamlessly.
-
Navigate to the Mist Dashboard Integration section.
-
Click on the Edit button to begin the integration process.
-
Check the Enable Mist service checkbox to activate the integration.
-
Provide the following information sourced from the Mist dashboard:
- Base URL
- API Key
- SSID
-
Check the Use Radius accounting checkbox to track user login information and data usage.
-
Click on the Fetch Organization button to retrieve organizational information.
-
Select the desired organization from the dropdown list.
-
After configuring the settings, click on the Save Mist Settings button to store the integration details.
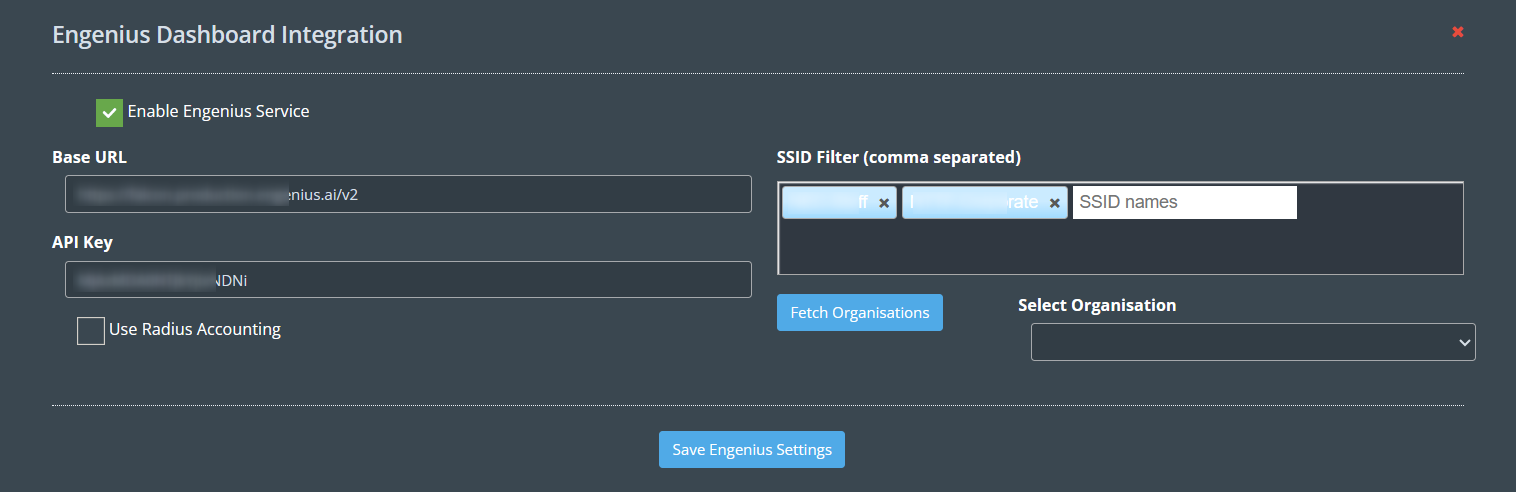
Engenius Dashboard Integration
-
KloudManage supports the integration of Engenius Access Points for comprehensive network management. Follow the steps below to integrate the Mist dashboard seamlessly.
-
Navigate to the Engenius Dashboard Integration section.
-
Click on the Edit button to begin the integration process.
-
Check the Enable Engenius service checkbox to activate the integration.
-
Provide the following information sourced from the Engenius dashboard:
- Base URL
- API Key
- SSID
-
Check the Use Radius accounting checkbox to track user login information and data usage.
-
Click on the Fetch Organization button to retrieve organizational information.
-
Select the desired organization from the dropdown list.
-
After configuring the settings, click on the Save Engenius Settings button to store the integration details.
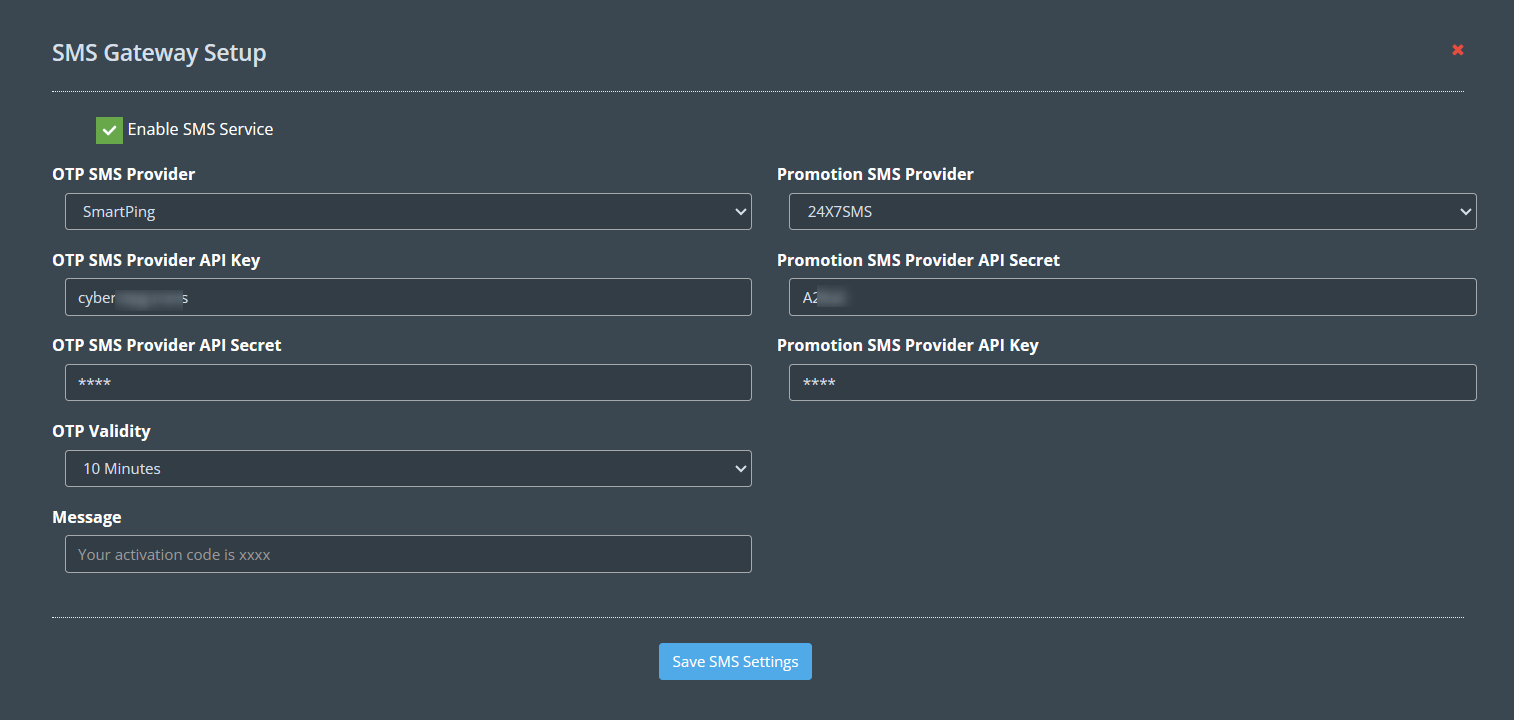
SMS Gateway Setup
-
Configure the SMS Gateway Setup in KloudPortal to enable the sending of OTPs and success messages to users. Follow the steps below to integrate your SMS provider details seamlessly.
-
Navigate to the SMS Gateway Setup section within KloudManage.
-
Click on the Edit button to start configuring the SMS Gateway Setup.
-
Check the Enable SMS service checkbox to activate the SMS integration.
-
Choose the OTP SMS provider’s name from the dropdown list.
-
Provide the necessary details from your SMS provider:
- API Key
- API Secret
- OTP Validity
-
In the Message column, type the desired message to be sent with the OTP.
-
If needed, set up promotional SMS using the same procedure.
-
Click on the Save SMS Settings button to store the configured SMS Gateway settings.
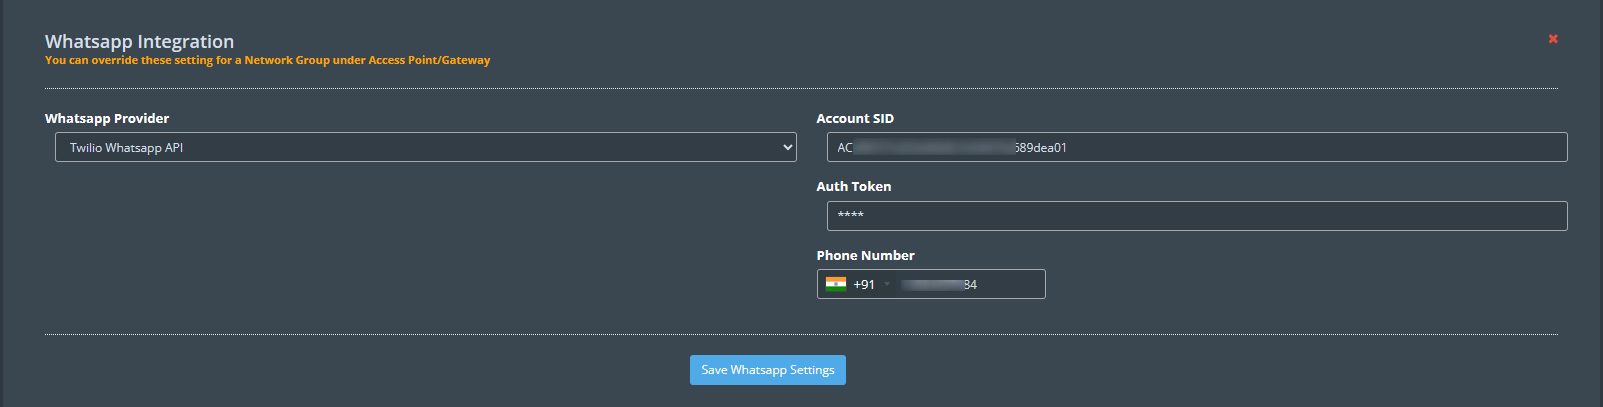
Whatsapp Integration
-
To receive notifications, integrate WhatsApp with KloudManage. You can also activate WhatsApp authentication for the captive portal. To easily configure WhatsApp integration, follow these steps:
-
Navigate to the WhatsApp Integration Setup section.
-
Click on the Edit button to integrate WhatsApp.
-
Choose the WhatsApp provider’s name from the dropdown list. At present, there are two available providers: Chat API and Twilio WhatsApp API.
-
Provide the necessary details from your WhatsApp provider:
- Account SID
- Auth Token
- WhatsApp Phone Number
-
Refer WhatsApp Integration guide to know how to get WhatsApp credentials.
-
Click on the Save WhatsApp Settings button to store the configured WhatsApp settings.
TikTok Integration
- To add TikTok as a resource in KloudDiaplay, you must first integrate TikTok with kloudManage. Refer to the TikTok Integration document for details on how to do this. You will then be able to display the videos you have published to TikTok on KloudDisplay.

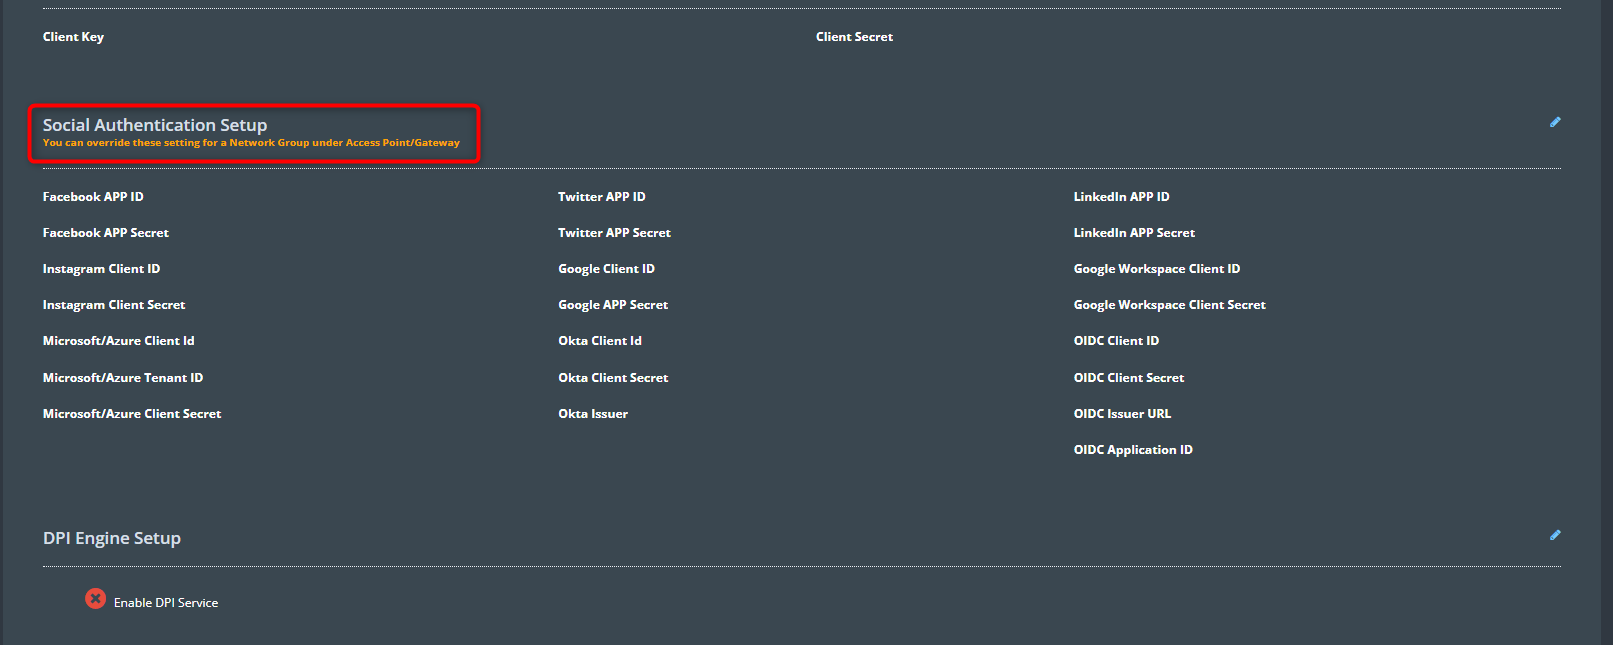
Social Autentication Setup
-
To integrate authentications in KloudPortal, use the Social Authentication Setup option.
a. Refer to the Facebook Authentication section to add Facebook authentication.
b. Refer to the Twitter authentication section to add Twitter authentication.
c. Refer to the LinkedIn Authentication section to add LinkedIn authentication.
d. Refer to the Microsoft Authentication section to add Microsoft/Azure authentication.
e. Refer to the Google Workspace OAuth 2.0 Authentication section to add Google authentication.
f. Refer to the Okta Authentication section to add Google authentication.
Email Setup
-
Configure email settings in KloudManage to receive alerts, OTPs, and enable captive portal authentication. You have the option to use KloudSpot’s Email service or integrate information from another third-party provider. Follow the steps below for a seamless Email Setup.
-
Navigate to the Email Setup section.
-
Click on the Edit button to start configuring the Email Setup.
-
Check the Enable Email checkbox to activate the Email setup.
-
If using KloudSpot’s Email service:
a. Check the Use Kloudspot Service checkbox.
b. Click on the Save button.
c. Enter a test email ID and verify functionality.

-
If using a third-party service
a. Uncheck the Use Kloudspot service checkbox.
b. Enter the following details from your service provider:
- Host Name
- Port
- Username
- Password
- From Email
- Email Sender Name
-
If not using SSL, uncheck the Use TLS/SSL checkbox.
-
Click on the Save button to store the configured Email settings.
-
Test the setup by entering a test email ID.

Display Setup
-
Player Cache Cleaner will be enabled by default in the Display Setup section. With this, your KloudDisplay player cache will be cleared in a certain time.
-
If you want to disable it, click on the edit button and uncheck it.
-
If you want to share your virtual display with a third-party IP, you can add that IP here.
-
Click on the Save Display Settings button to store the configured Display settings.

MYSQL Integration
-
Integrate KloudPortal with a MYSQL database to allow users to log in to the captive portal using their credentials stored in the MYSQL database. Follow the steps below to configure MYSQL integration in KloudManage:
-
Navigate to the MYSQL Integration section.
-
Click on the Edit button to start configuring MYSQL integration.
-
Provide the following MYSQL details:
- MYSQL Username
- MYSQL Password
- JDBC URL
- Configure Query:
-
In the Query column, enter the following SQL query:
SELECT * FROM radcheck WHERE username={uname} AND value={pass}; -
This query is used to retrieve user information based on the provided username and password.
-
Click on the Save mysql Settings button to store the configured MYSQL integration settings.

Payment Gateway Integration
-
Integrate the Cashfree Payment gateway with KloudManage to facilitate seamless payment transactions. Follow the steps below to configure Payment Gateway Integration:
-
Navigate to the Payment Gateway Integration section.
-
Click on the Edit button to start configuring Payment Gateway Integration.
-
Provide the following Cashfree Payment gateway details:
- API Key
- API Secret
- Version
-
Click on the Save Payment Gateway Settings button to store the configured Payment Gateway settings.

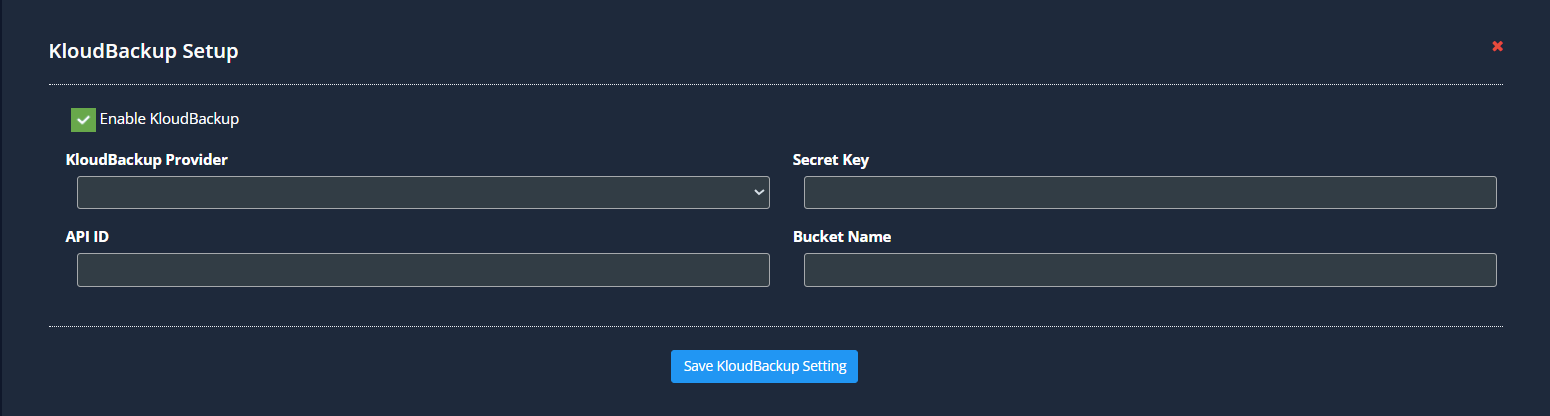
KloudBackup Setup
-
KloudBackup Setup allows you to securely backup the settings and data of KloudManage, ensuring data protection and disaster recovery capabilities.
-
Click on the Edit button associated with KloudBackup.
-
Check the checkbox labeled Enable KloudBackup to activate this feature.
-
Choose the desired KloudBackup provider from the available options.
-
Enter the Secret Key, API ID, and Bucket Name required for authentication with the selected KloudBackup provider.
-
After entering the necessary credentials, click on the Save KloudBackup Settings button to apply the configuration.
GCash Integration
-
Integrate the GCash Payment gateway with KloudManage to facilitate seamless payment transactions. Follow the steps below to configure GCash Integration:
-
Navigate to the GCash Integration section.
-
Click on the Edit button to start configuring GCash Integration.
-
Provide the following GCash Payment gateway details:
- API Key
- API Secret
- Merchant Account
-
Click on the Save GCash Payment Gateway Settings button to store the configured Payment Gateway settings.

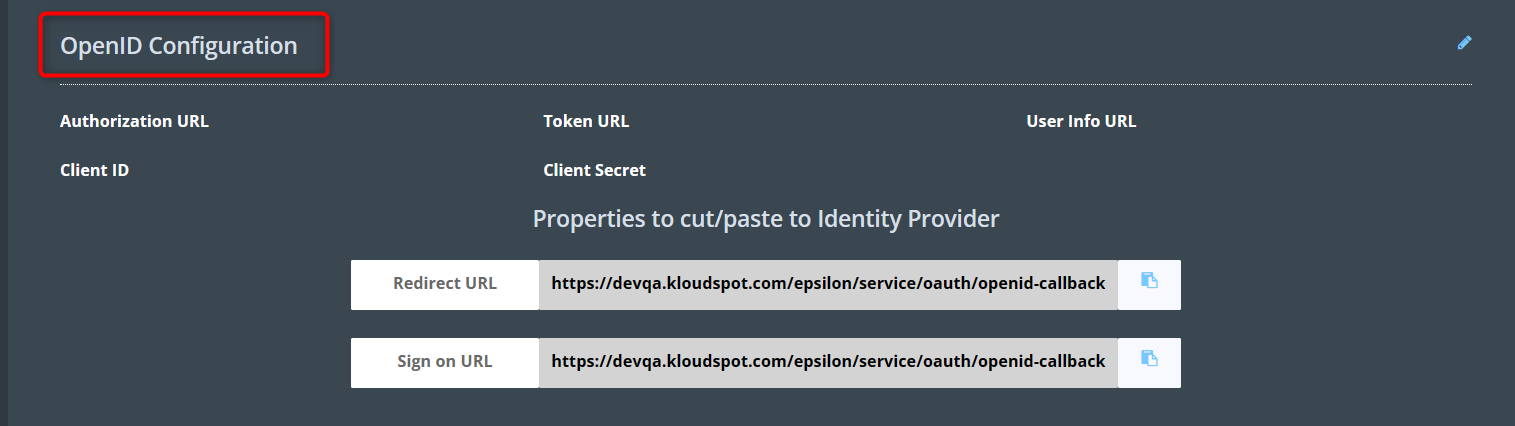
OpenID Connect configuration
- To access your KloudManage account via OpenID Connect, it is necessary to configure Okta OpenID Connect with KloudManage. Consult the OpenID Connect configuration section for detailed instructions on setting up this integration.
User Details Masking Configuration
-
The User Details Masking Configuration feature is designed to enhance privacy and security for captive portal users. By enabling this feature, sensitive information of captive portal users can be masked, providing an added layer of protection against unauthorized access.
-
To do so, click the Edit button, then select the Enable connected users status checkbox, and finally, click the Save configuration button.

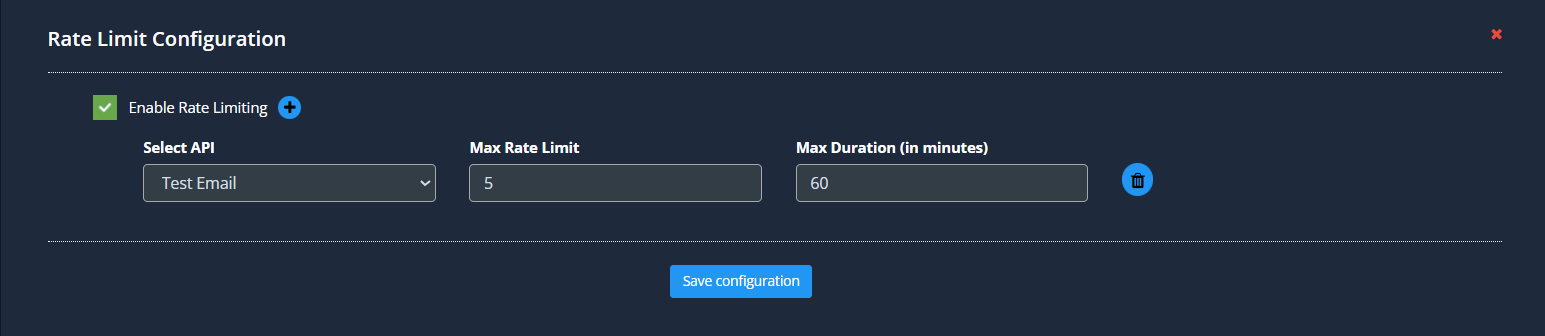
Rate Limit Configuration
-
Rate Limit Configuration allows you to control the rate of incoming requests to specific APIs, thereby managing the traffic flow and preventing potential overload situations.
-
To configure. click on the Edit button associated with Rate Limiting.
-
Check the checkbox labeled Enable Rate Limiting to activate this feature.
-
After enabling Rate Limiting, click on the Add Entry button.
-
Select the API for which you want to add rate limit. (e.g., Contact, Test Email, Post API, Get API, Put API, Delete API)
-
For selected API, enter the desired maximum rate limit and the maximum duration (in minutes) for which this rate limit applies.
-
Once you have configured the rate limit for the desired API, click on the Save configuration button to apply the changes.
Note: Based on this example, only 5 test emails can be sent in 60 minutes.