KloudBot Configuration
Introduction
1. In this document we are going to discuss how to build a kloudBot application and how to upload it to the Teams application.
2. We are using Microsoft azure portal for this.
3. Log in to your Microsoft Azure portal using the URL given below
Create an Azure bot
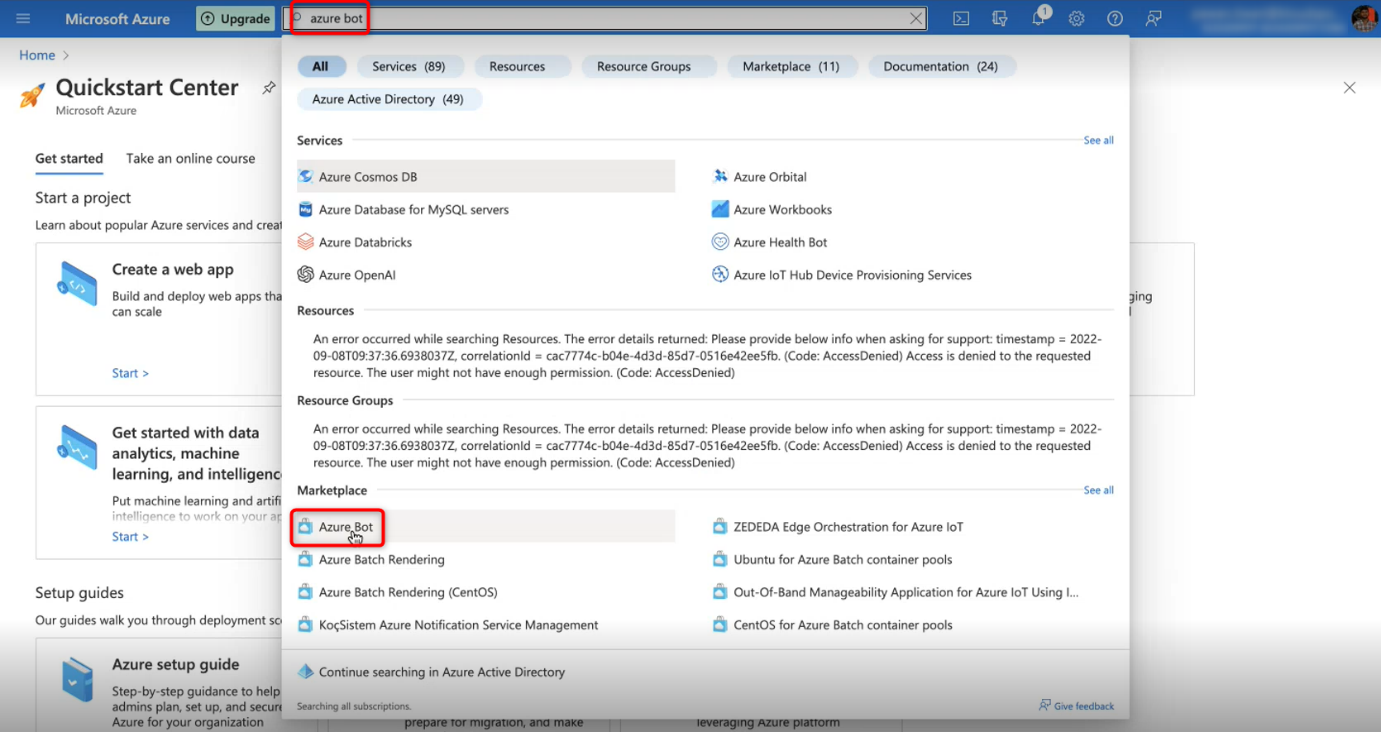
1. Once logged in to Microsoft Azure. Search for Azure Bot in the search bar on the home page.
2. Select the Azure Bot option from the search result.
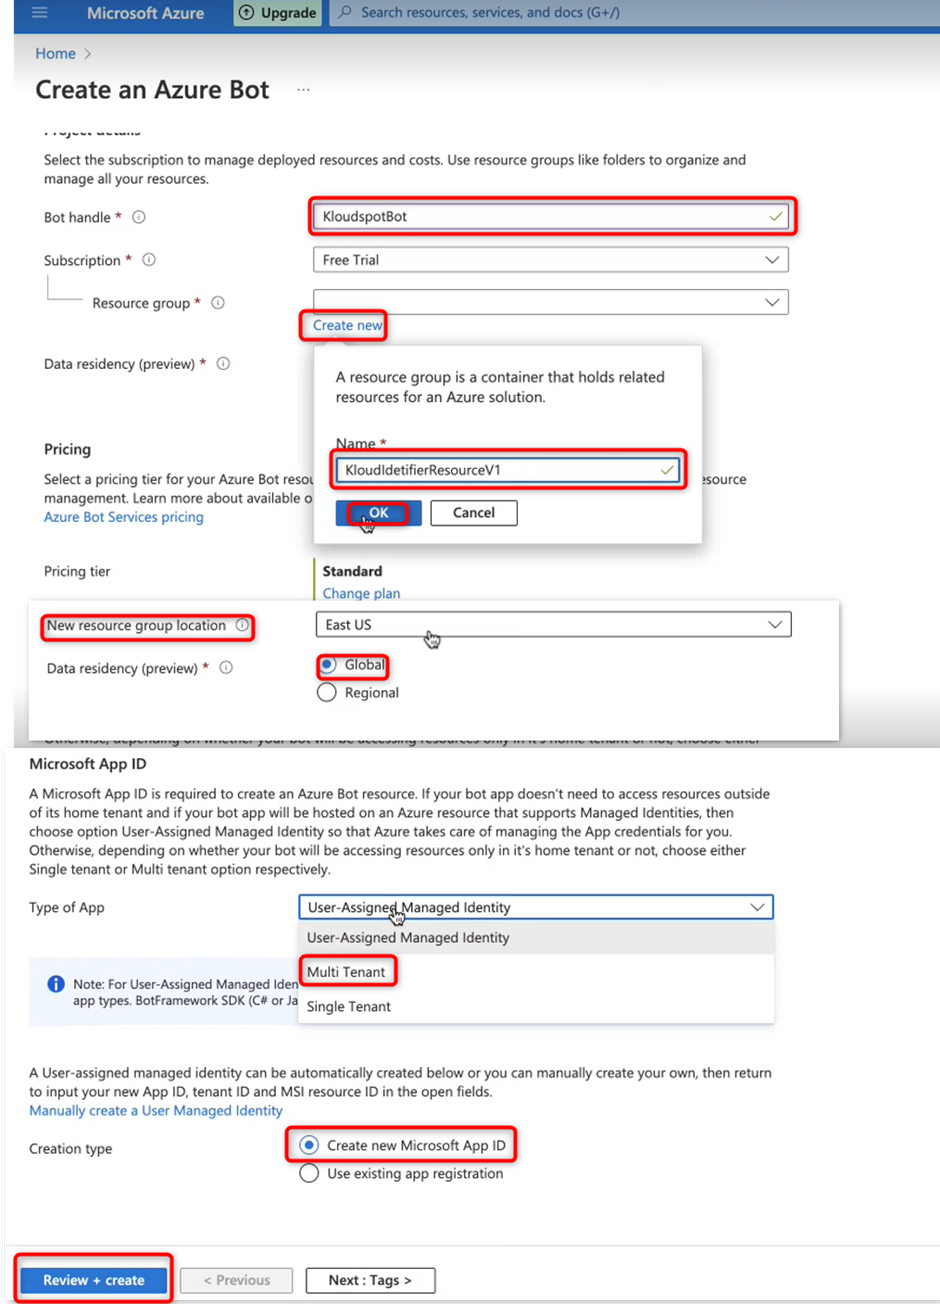
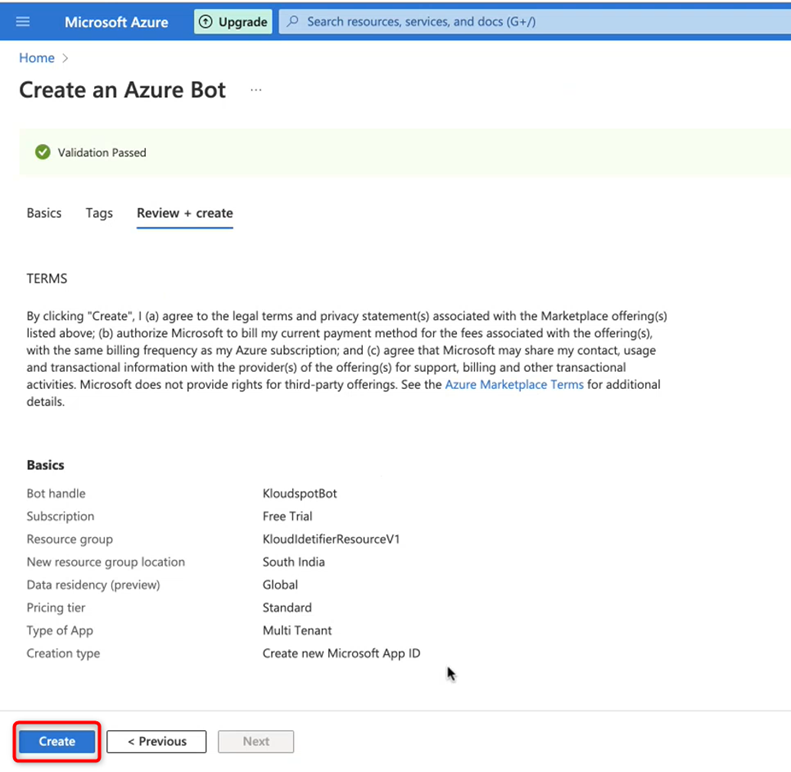
3. Then fill in the information in the window that opens as shown in the picture and click the Review + create button.
4. You can select a resource group location according to your location.
5. On the next page, make sure the information entered is correct and click the Create button.
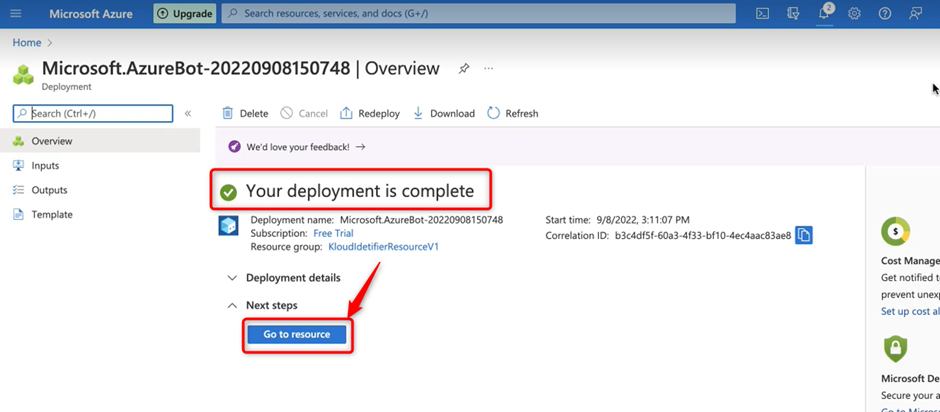
6. After a short loading, you will get the message your deployment is complete.
7. Then click on Go to resource button to open the resource.
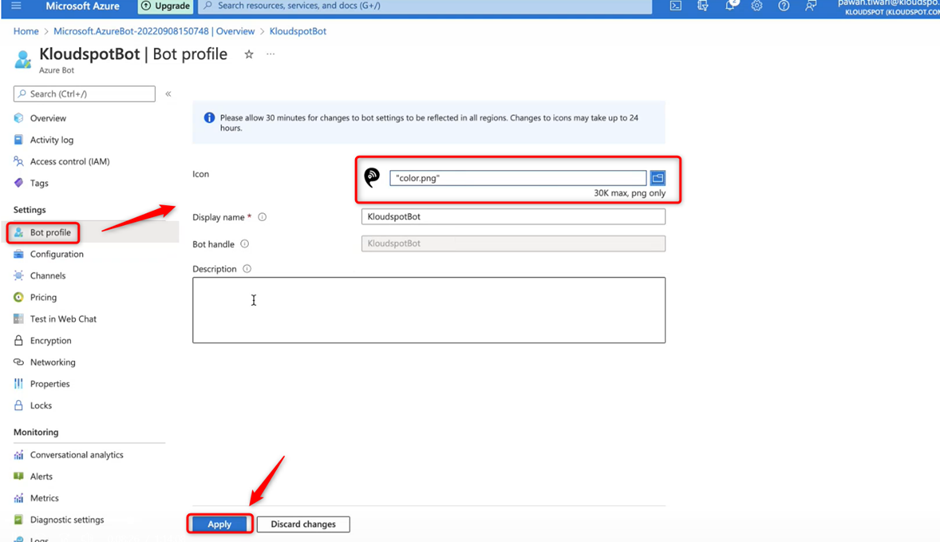
8. Then add an Icon in the Bot profile menu and click Apply button.
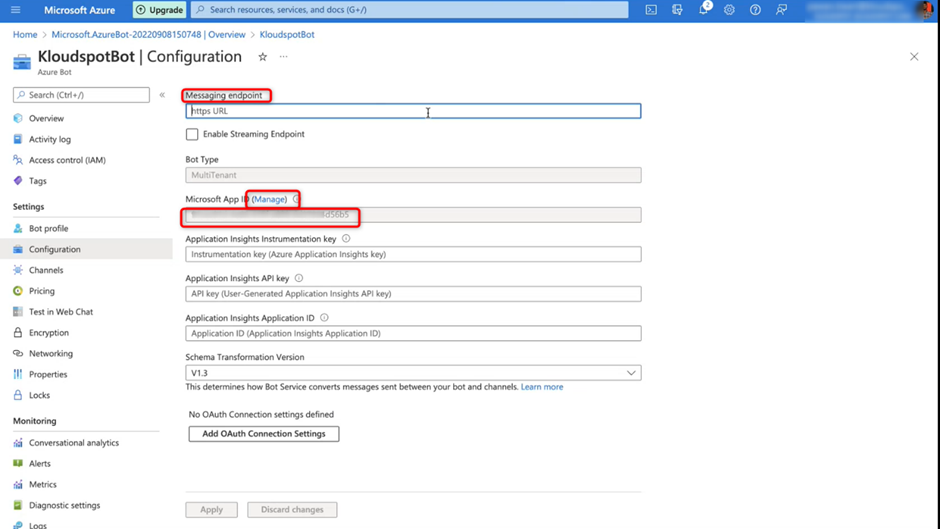
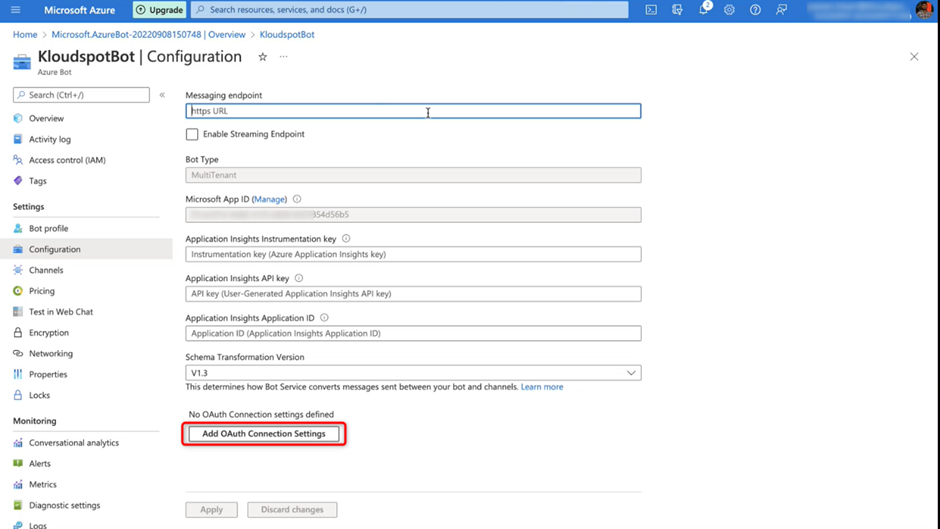
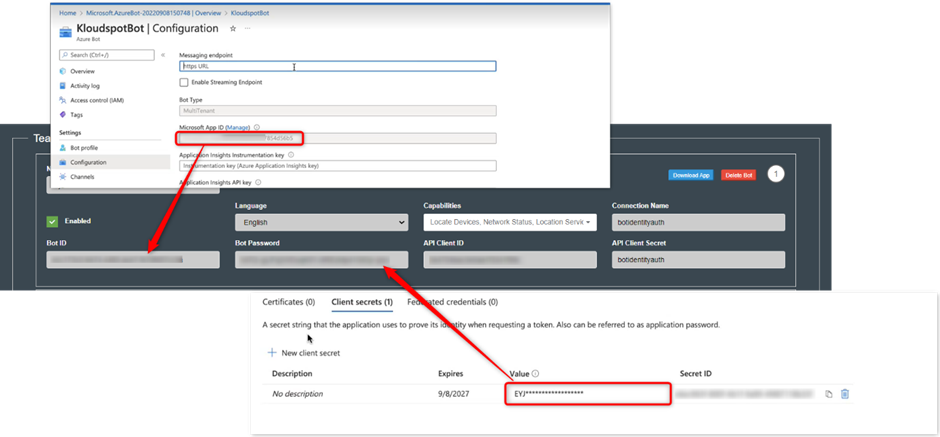
9. Then go to the Configuration menu and fill in all the information.
- Messaging endpoint: This is the URL from Kloud insights. Now leave it blank. Check the Configure the KloudBot in KloudInsights. section to know more about this.
10. Then click on the Manage button. It will guide you to the certificates and secret page. Here you can create a new client secret.
11. The App ID will be generated automatically in the Microsoft App ID column.
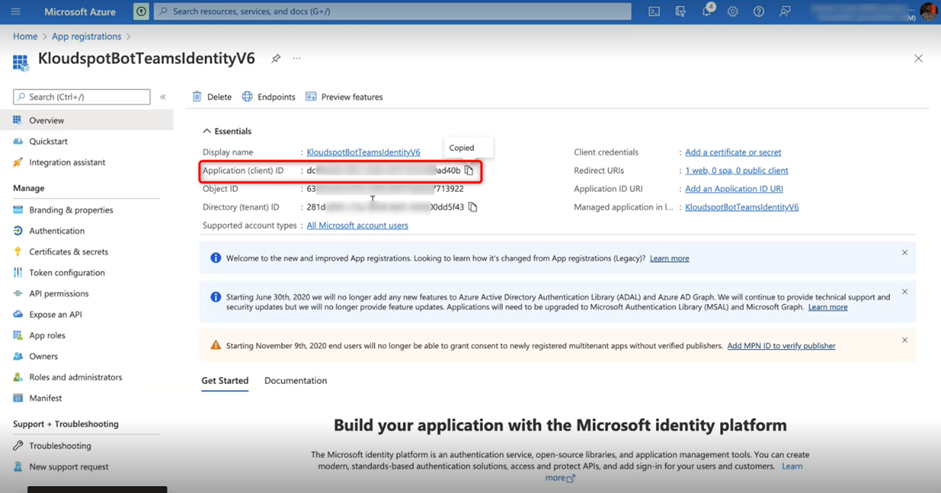
Note: The App ID will need to be entered into KloudInsights later, so copy and paste it somewhere for later use.
12. Create a new client secret by clicking on the +New Client secret button.
13. Then enter a description and choose an expiry month. Then press the Add button.
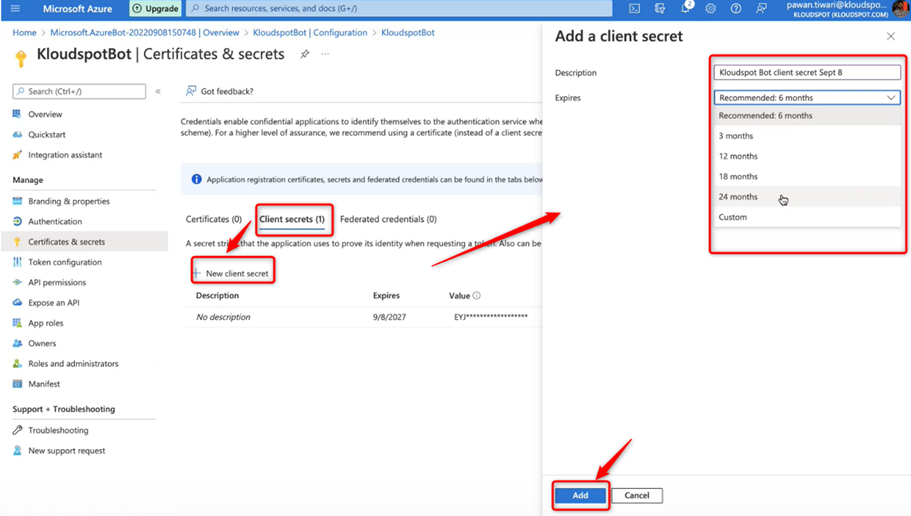
14. New client secret is created successfully.
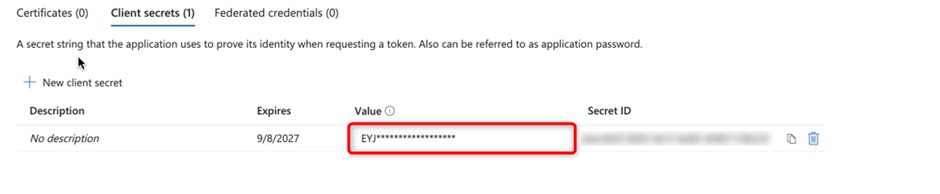
15. Then copy the Value from the new client secret and paste it somewhere else for later use.
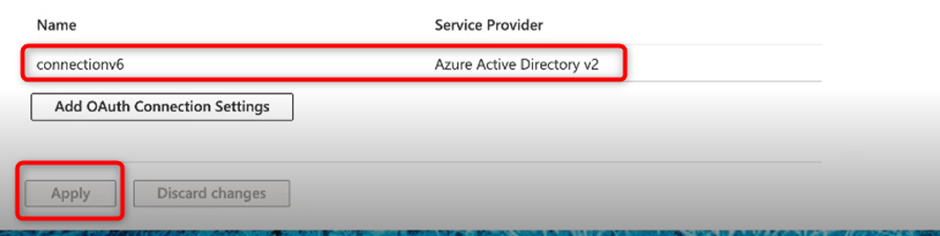
16. Next click on the Add OAth Connection Settings.
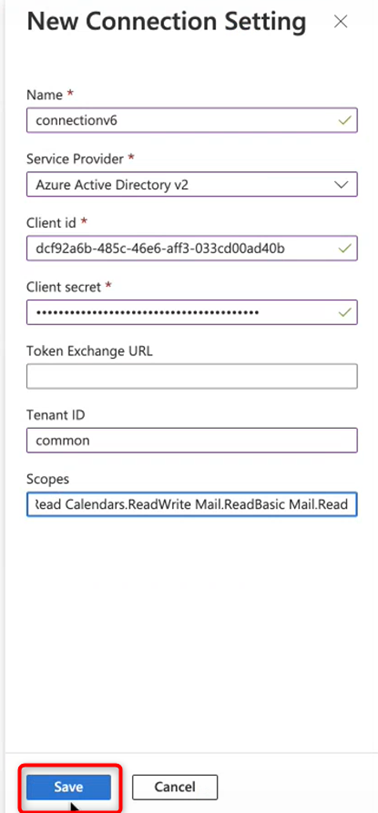
17. On the new connection settings page that opens, enter the Name and select Azure Active Directory v2 as the service provider.
18. Copy and paste the Client ID and Client secret received while registering the app here. Client ID and Client secret are obtained from the App. Check the Register an App section to know how to get it.
19. Tenant Id will be common.
20. Copy and paste the following scopes in the scope column.
User.Read User.ReadBasic.All Calendars.Read Calendars.ReadWrite Mail.ReadBasic Mail.Read
21. Then click the Save button.
22. New Oath connection is added successfully.
23. Click the Apply button to save the changes.
Register an App
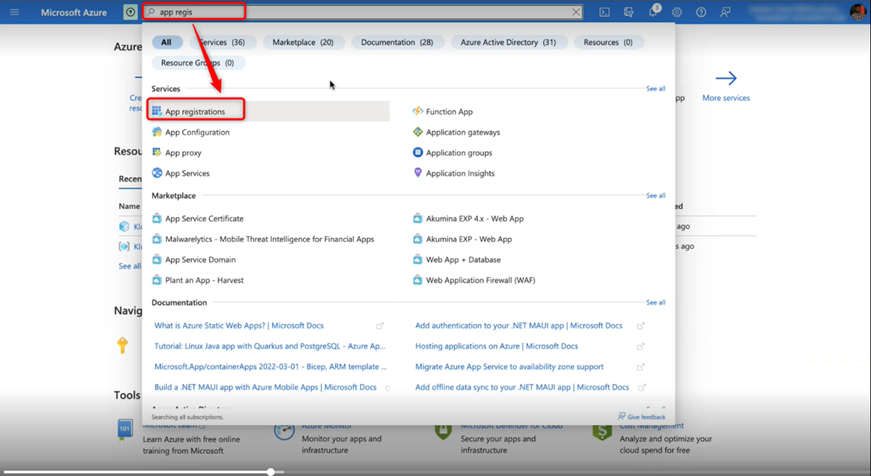
1. Search for App registration in the search bar on the home page.
2. Select the App registration option from the search result.
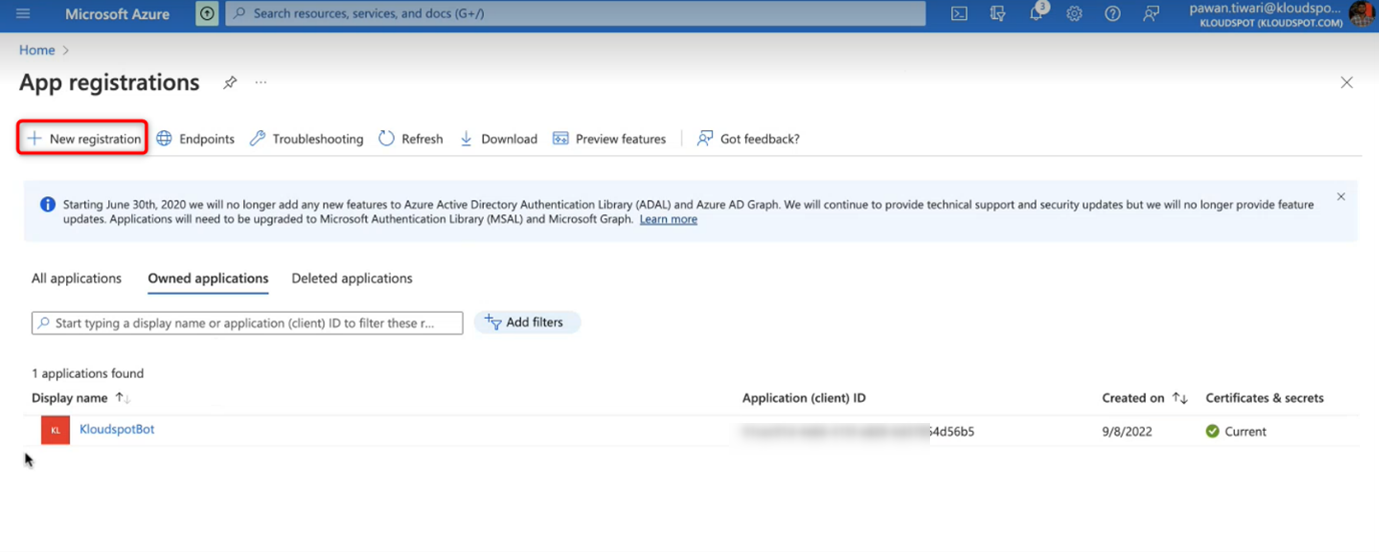
3. Click on the +New Registration button in the window that opens.
4. Then enter Name, Supported account type, Redirect URL and click the Register button.
-
Name: You can set the app name.
-
Supported account type: Select the third option as given in the image.
-
Redirect URL: The URL below can be added in the Redirect URL column.
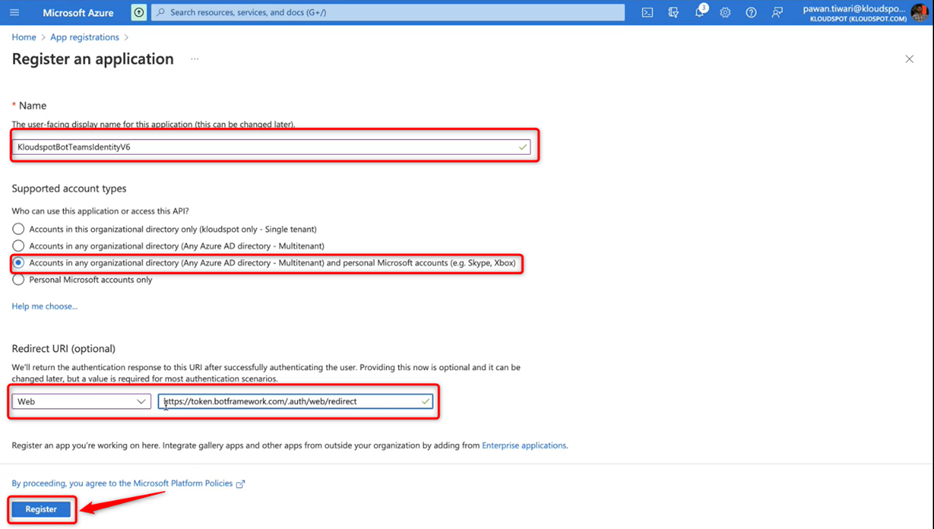
5. Application (Client) ID can be obtained from the window that opens immediately after registration. Copy it and paste it somewhere for later use.
Create a new client secret
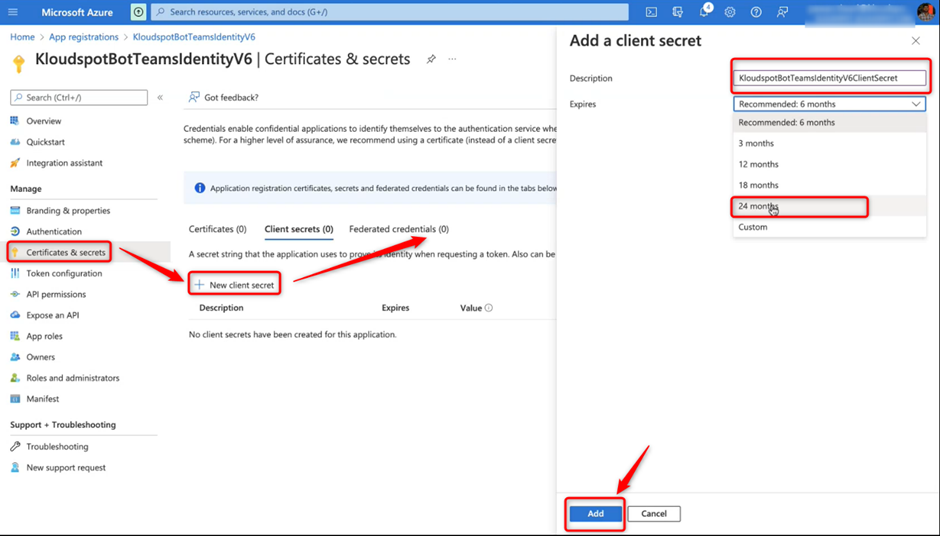
1. Next, we need the client secret, for that, navigate to Certificates and secrets > + New client secret.
2. Then enter a description and choose an expiry month. Then press the Add button.
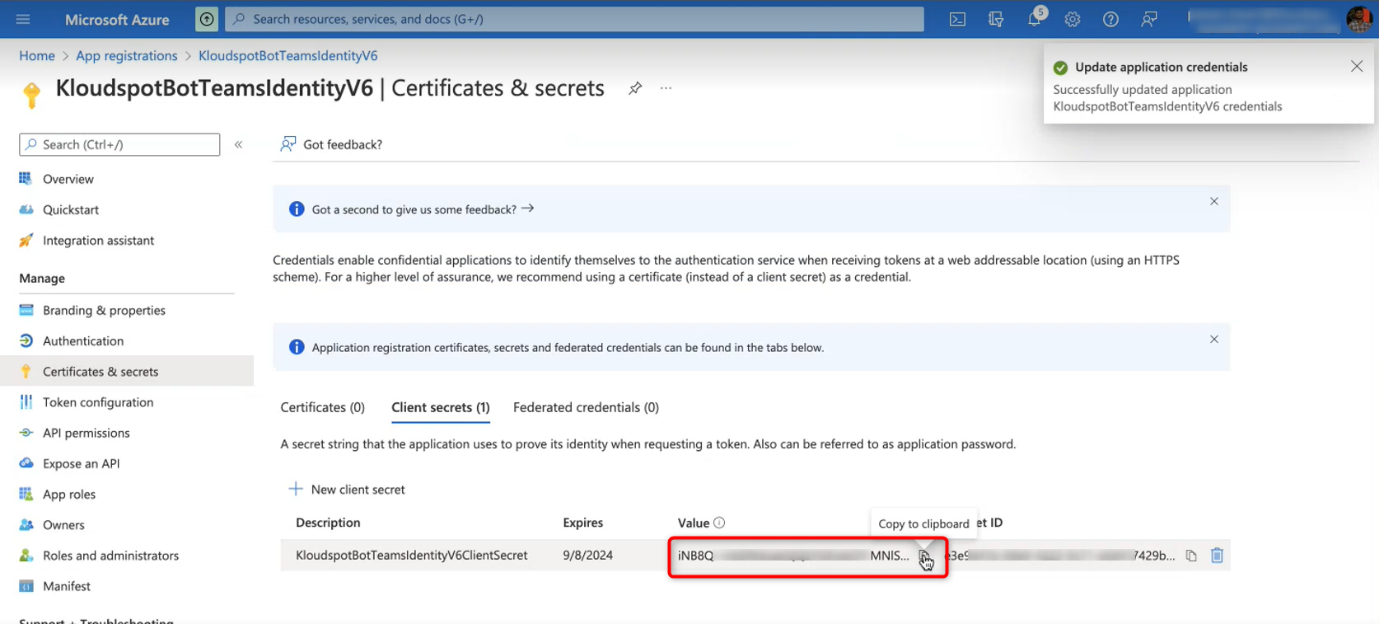
3. Then copy the Value from the window that opens and paste it somewhere else for later use. This is the secret key.
Add an API permission
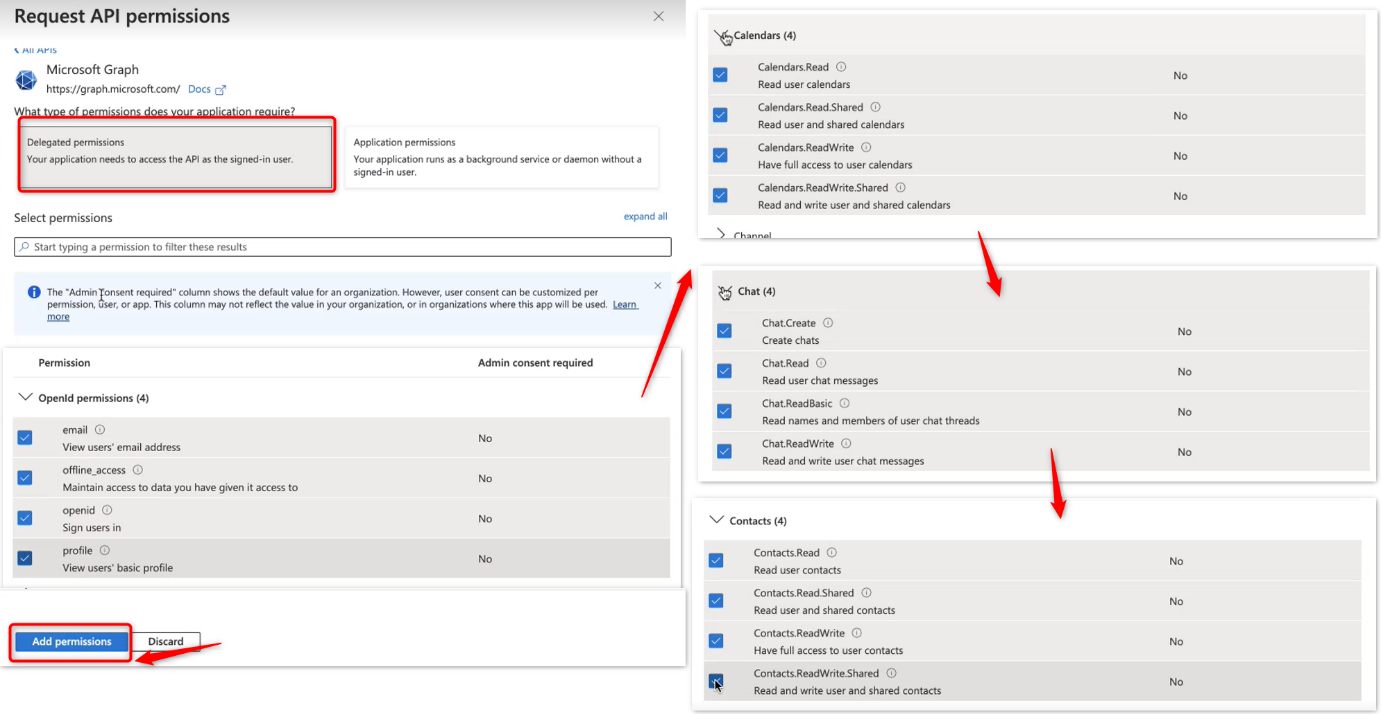
1. Next, API permissions should be given to the application by navigating to API permissions > +Add a permission > Microsoft graph.
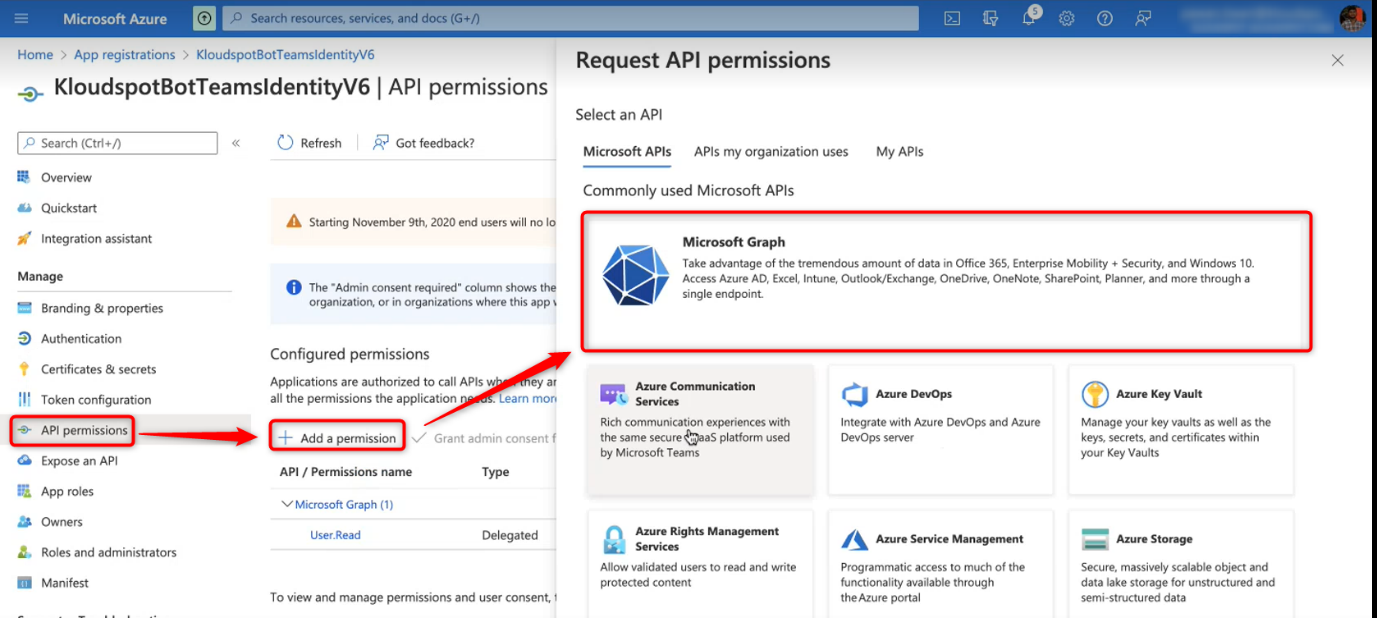
2. Under the Delegated permissions window, allow all the permissions in the OpenId permissions, calendars, chat, and contacts sections as shown in the figure.
3. Then click on the Add permissions button.
Set App Id URI
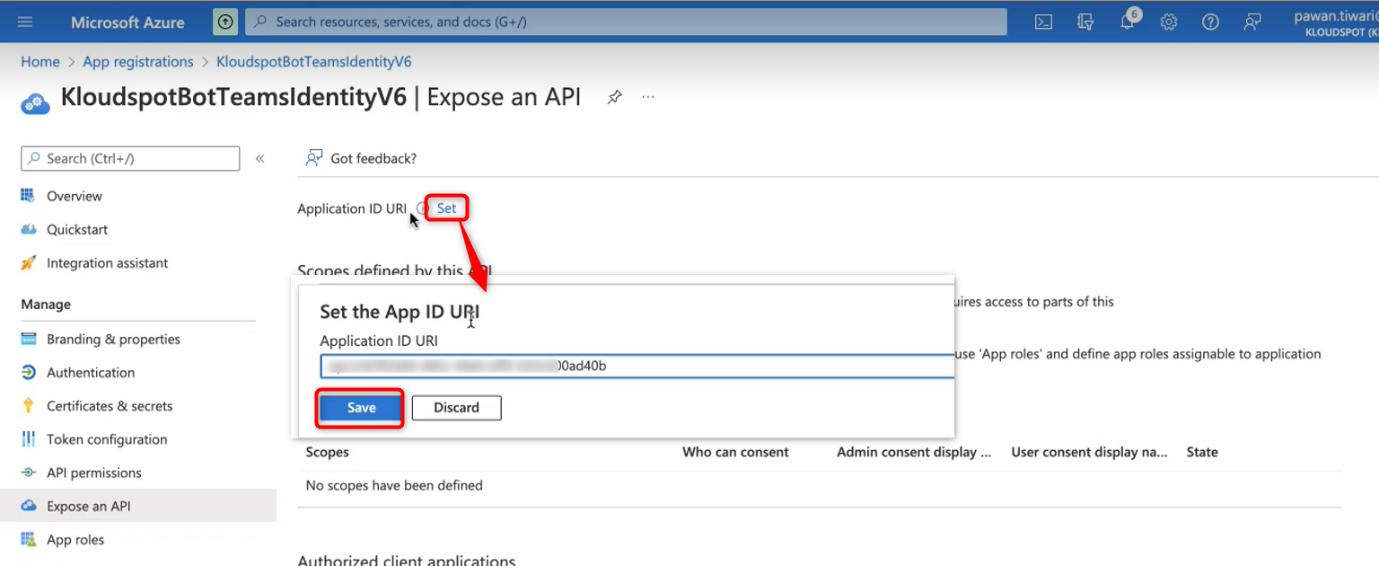
1. Click the Set button from the Expose an API window to generate the App ID URI.
2. Click the Save button to save the Application ID URI.
Add a scope
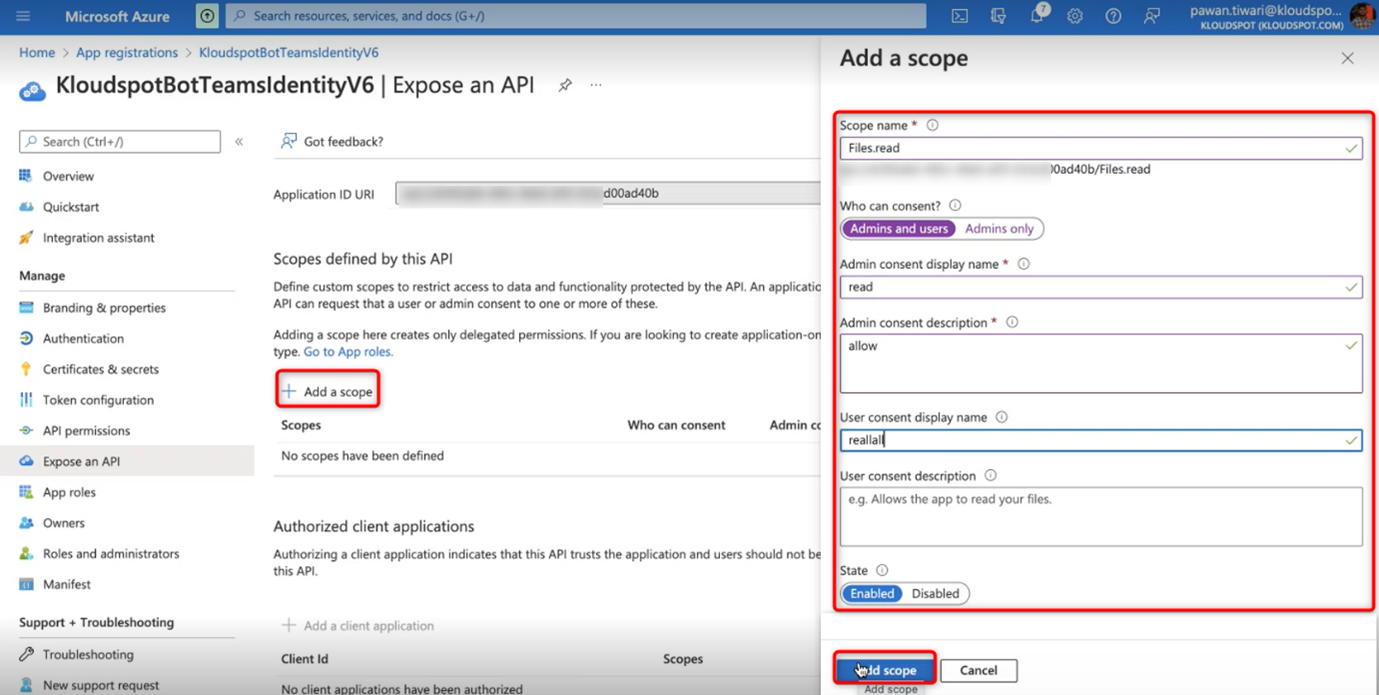
1. Navigate to Expose an API > +Add Scope to add a new Scope. Then fill the Add a scope window as shown in the figure. Then click the add scope button to save the scope.
Configure the KloudBot in KloudInsights.
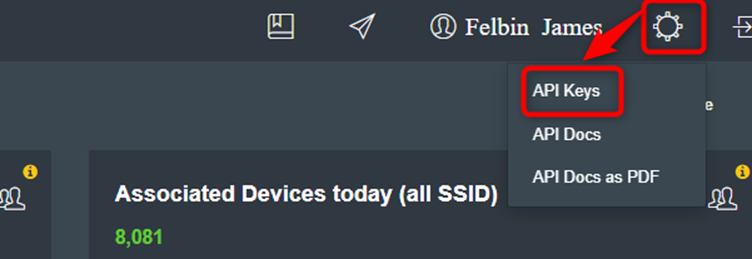
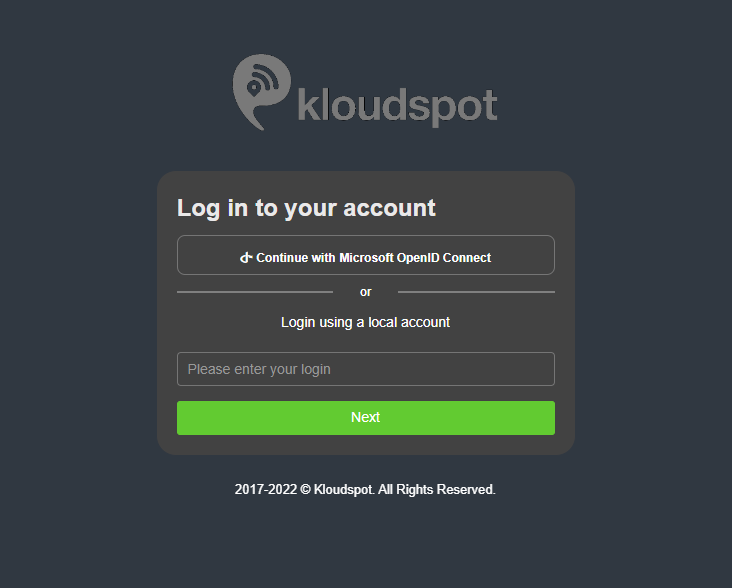
1. log in to KloudInsights and Navigate to settings >API Keys.
2. In the API Keys window that opens, click on the +New API Key button.
3. In the popup window, select Administrator from the Role list and click the Add Key button.
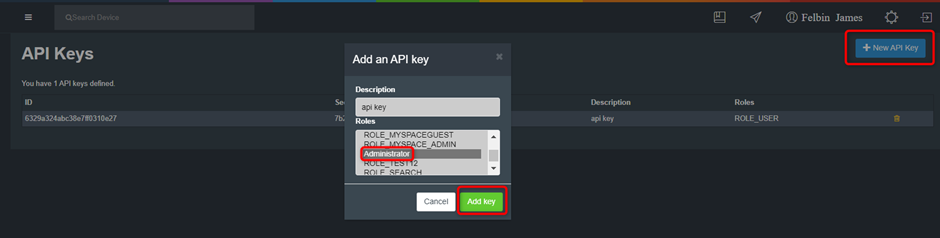
4. New ID and Secret key are created. Then copy the ID and Secret key from the API Keys and paste it somewhere else for later use.

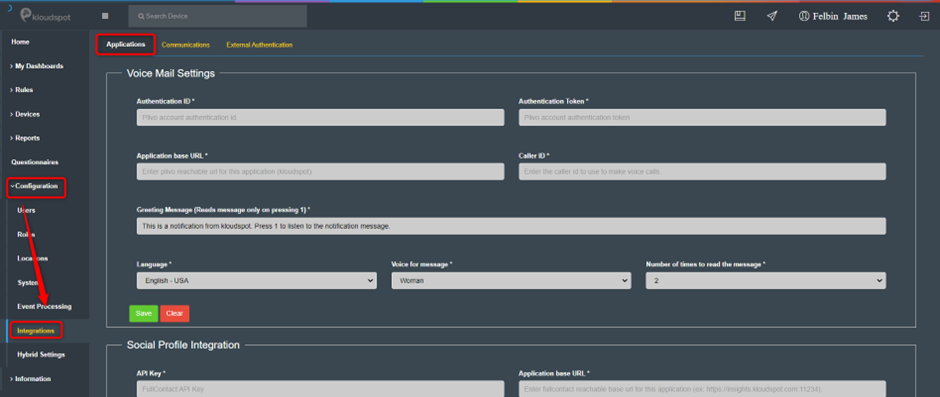
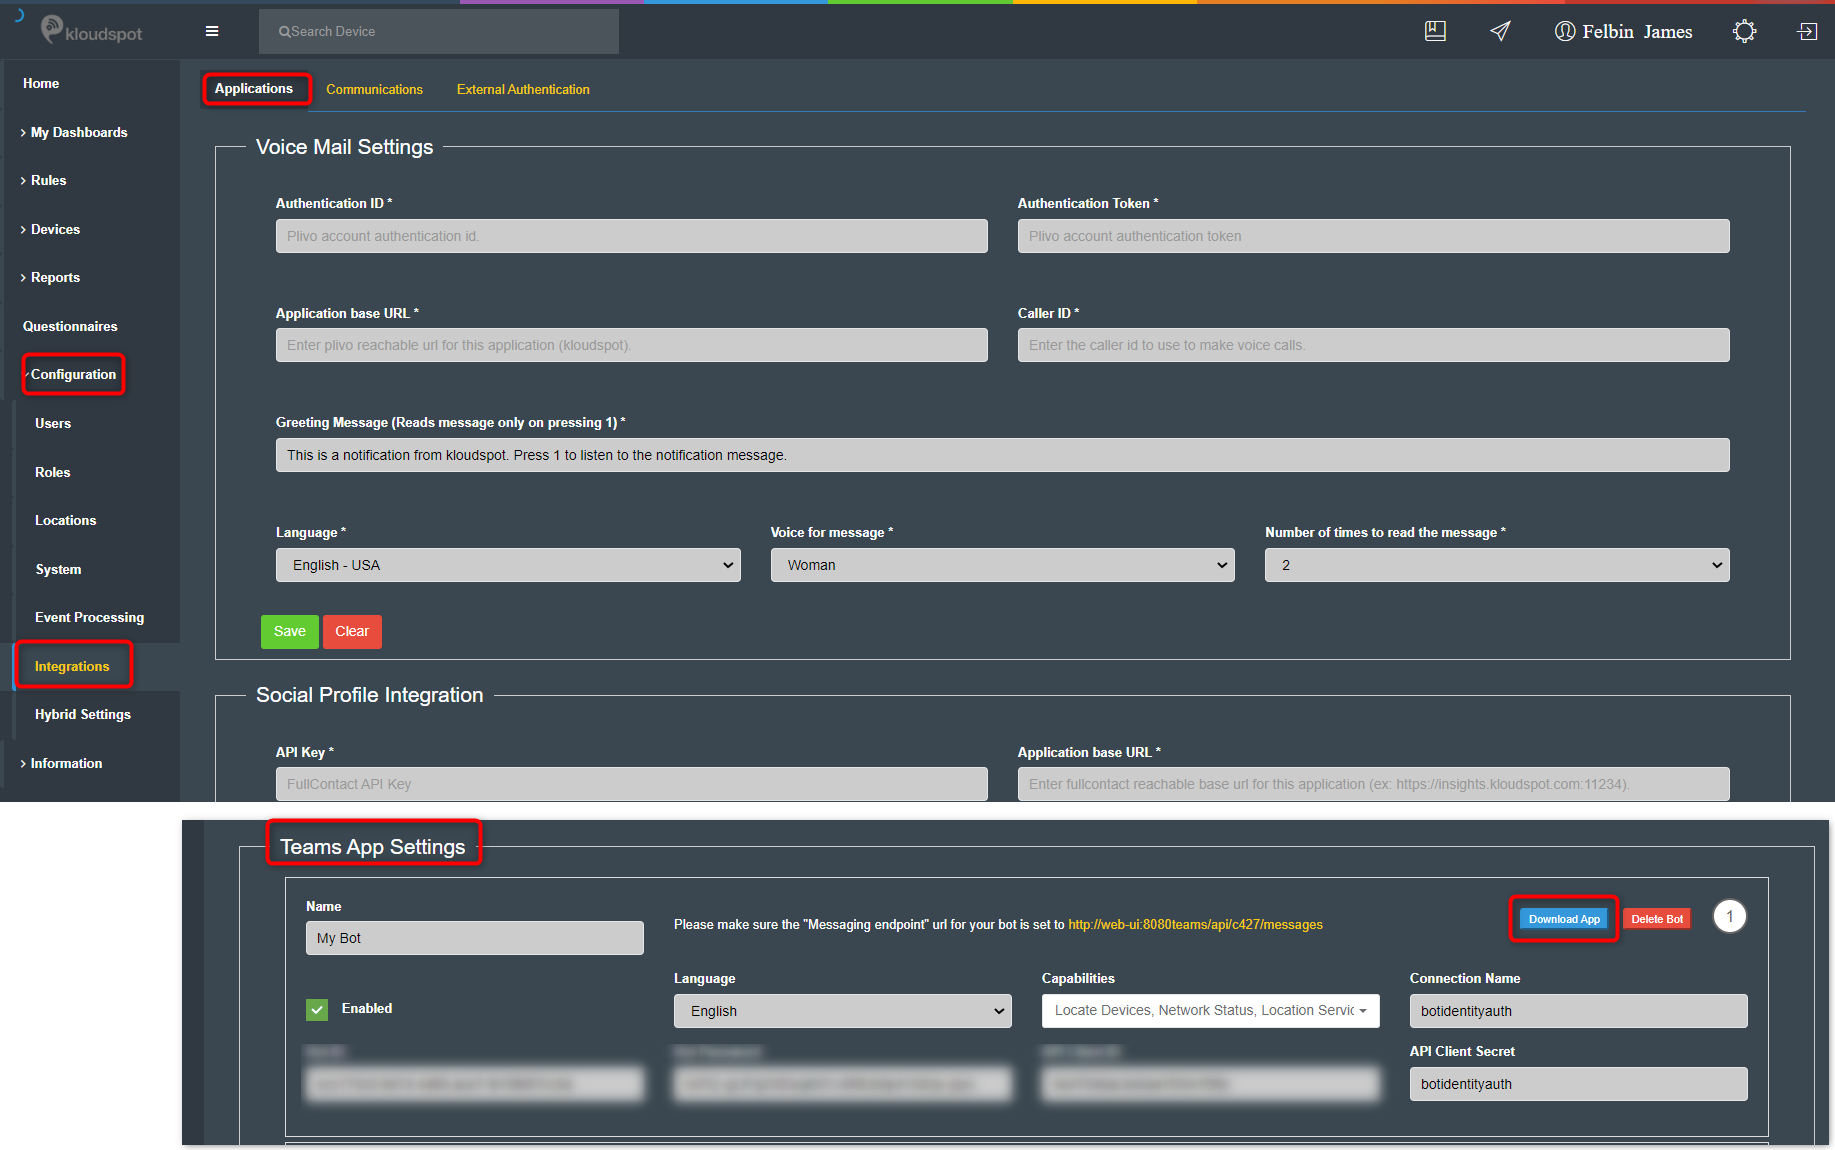
5. Then navigate to Configuration > Integrations > Applications.
6. Scroll down and find the Teams App Settings.
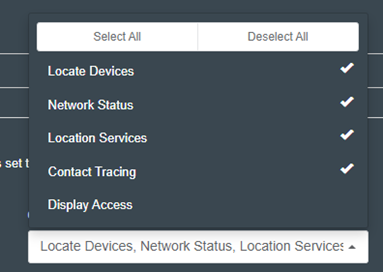
7. Enter the Name, Language, and connection name and select the capabilities.
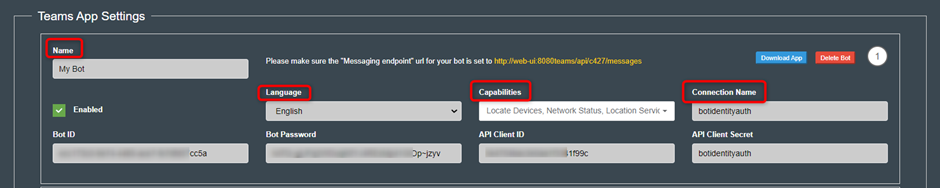
8. You can select capabilities based on requirements.
9. Enter the Microsoft App ID and secret ID obtained when the Azure bot was created in the Bot Id and Bot password columns. Refer Create an Azure bot section for more details
10. Enter the ID and secret Key obtained from the API Keys in the API Client ID and API client Secret columns.
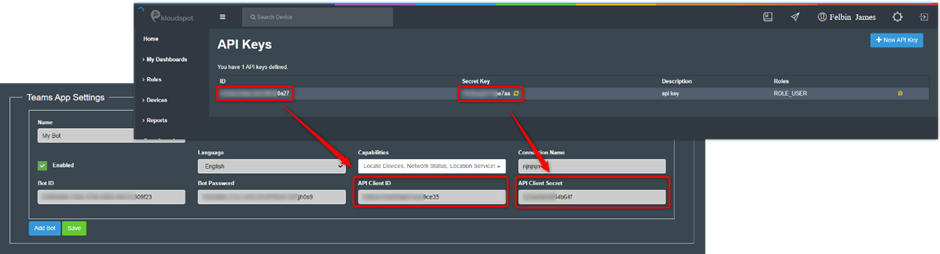
11. Finally click on the Save button to save changes.
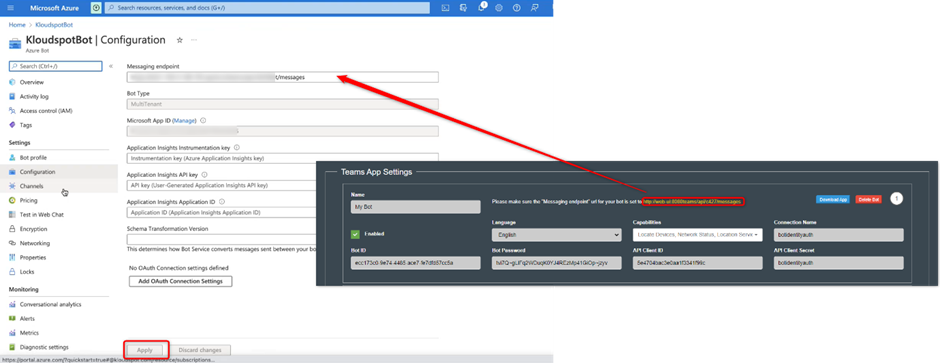
12. Immediately you will get the messaging endpoint URL.
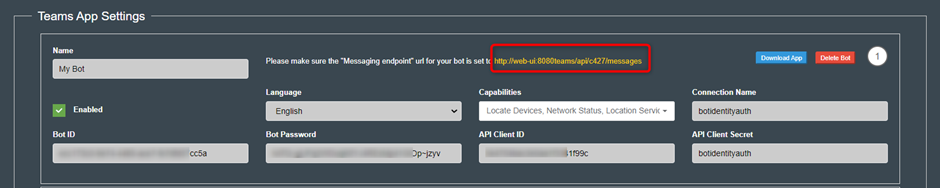
13. Return to the Azure portal and paste the messaging endpoint URL into the Messaging endpoint column.
14. Click the Apply button to save the changes.
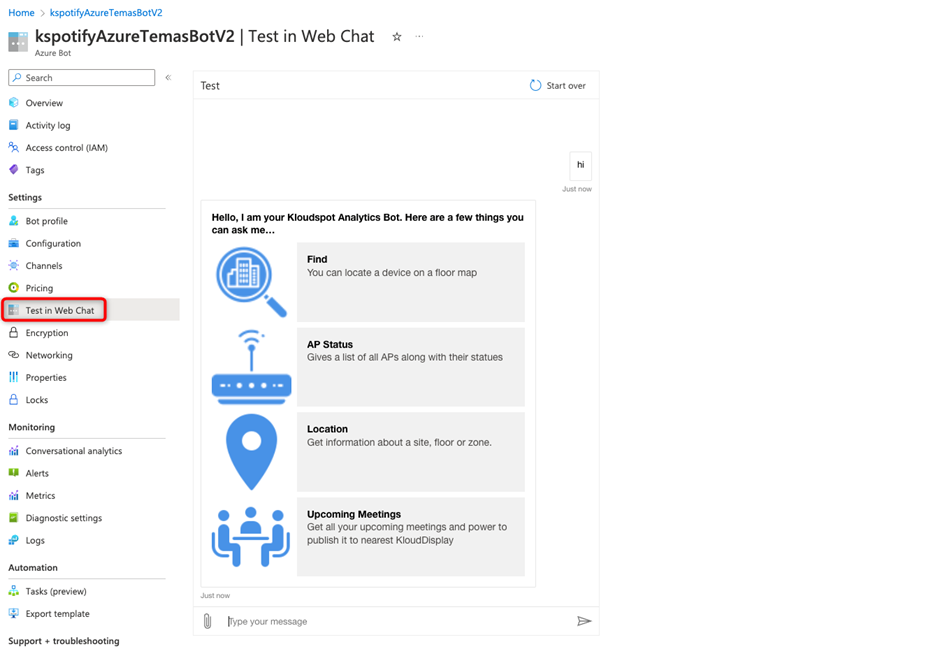
15. Then go to the Test In Web Chat menu and check that the app is working properly.
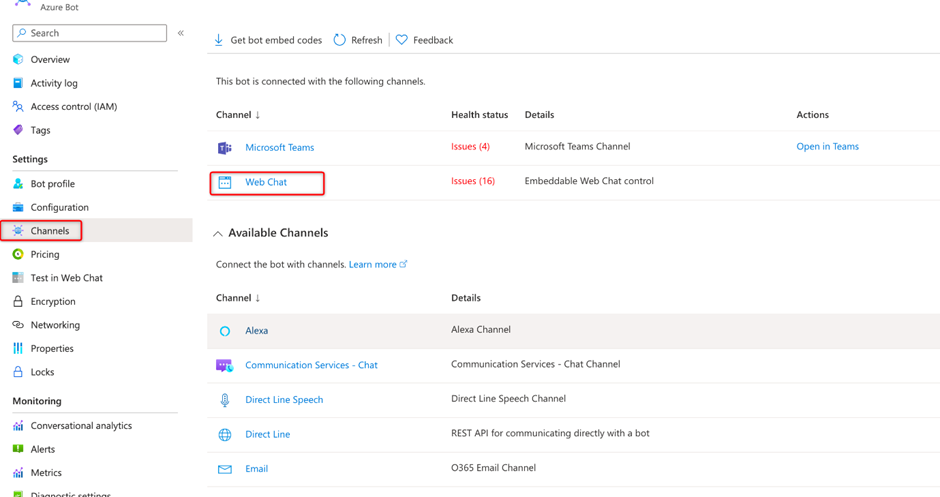
16. If the app is working properly, the next step is to integrate it into the teams app.
17. To do so, navigate to Channels menu and Select the Web Chat option from the channel list that opens.
Note: If you are opening the Channel menu for the first time, the Web Chat Channel will be in the Available channels list.
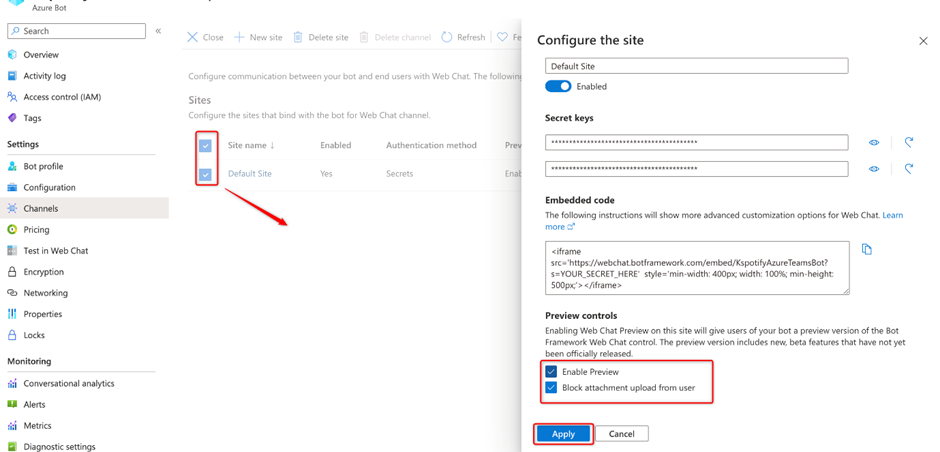
18. Select the Default Site option. Then, in the new window, check the Enable Preview and Block attachment upload from user checkboxes then click the Apply button.
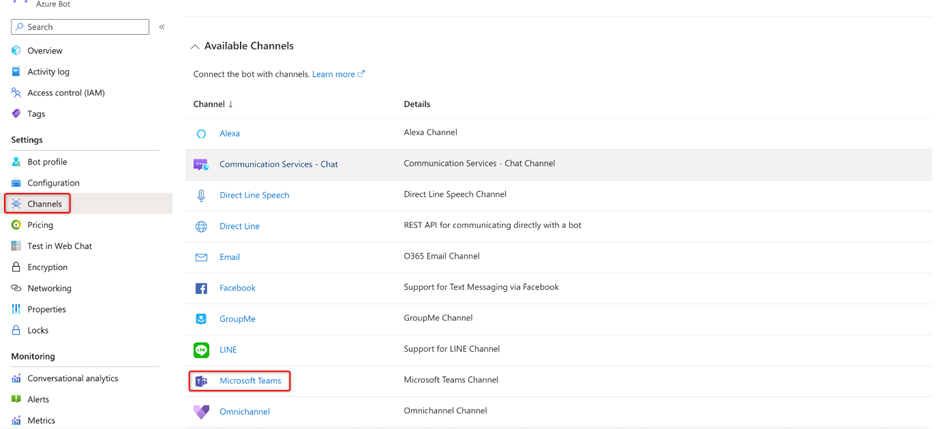
19. Return to the Channel menu and click on the Microsoft Teams channel.
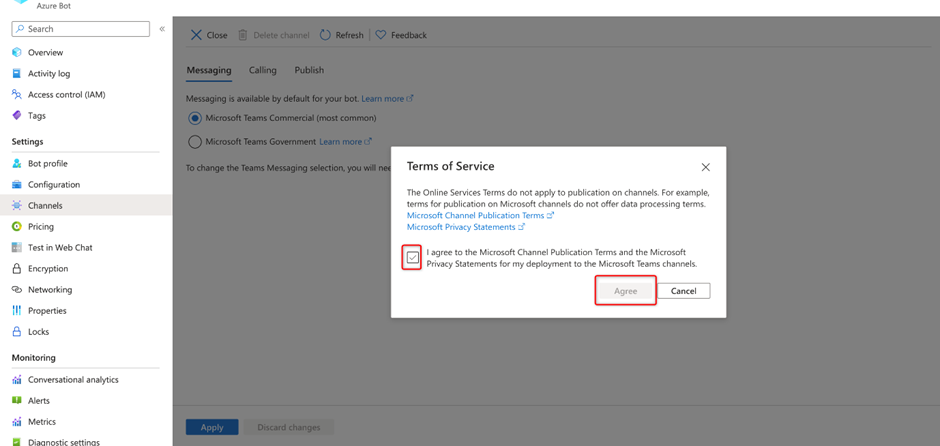
20. Immediately the terms of service popup window will open, check the checkbox, and click the Agree button.
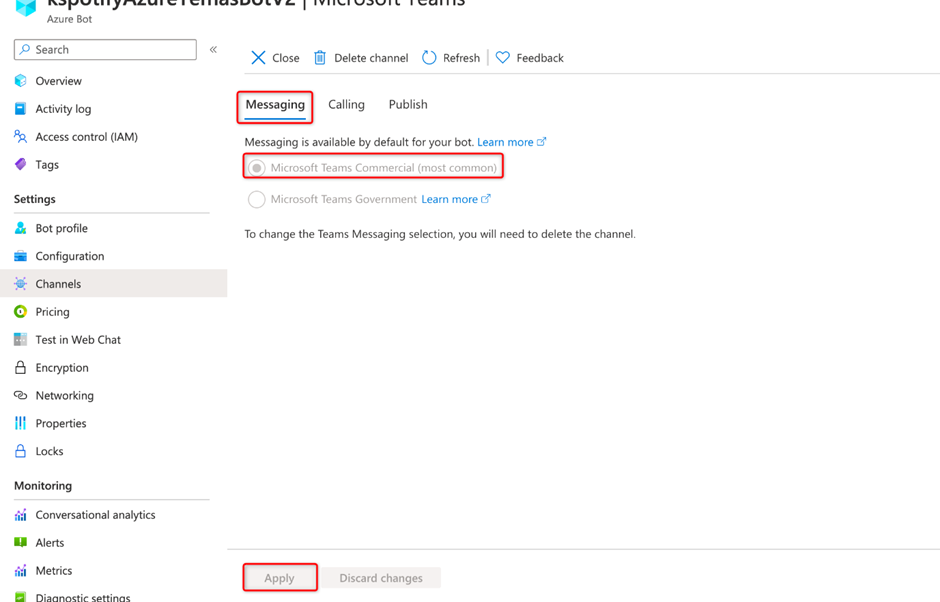
21. In the window that opens, on the Messaging tab, check the Microsoft Teams commercial(most common) check box and click the Apply button.
22. Your application is successfully integrated into Teams App.
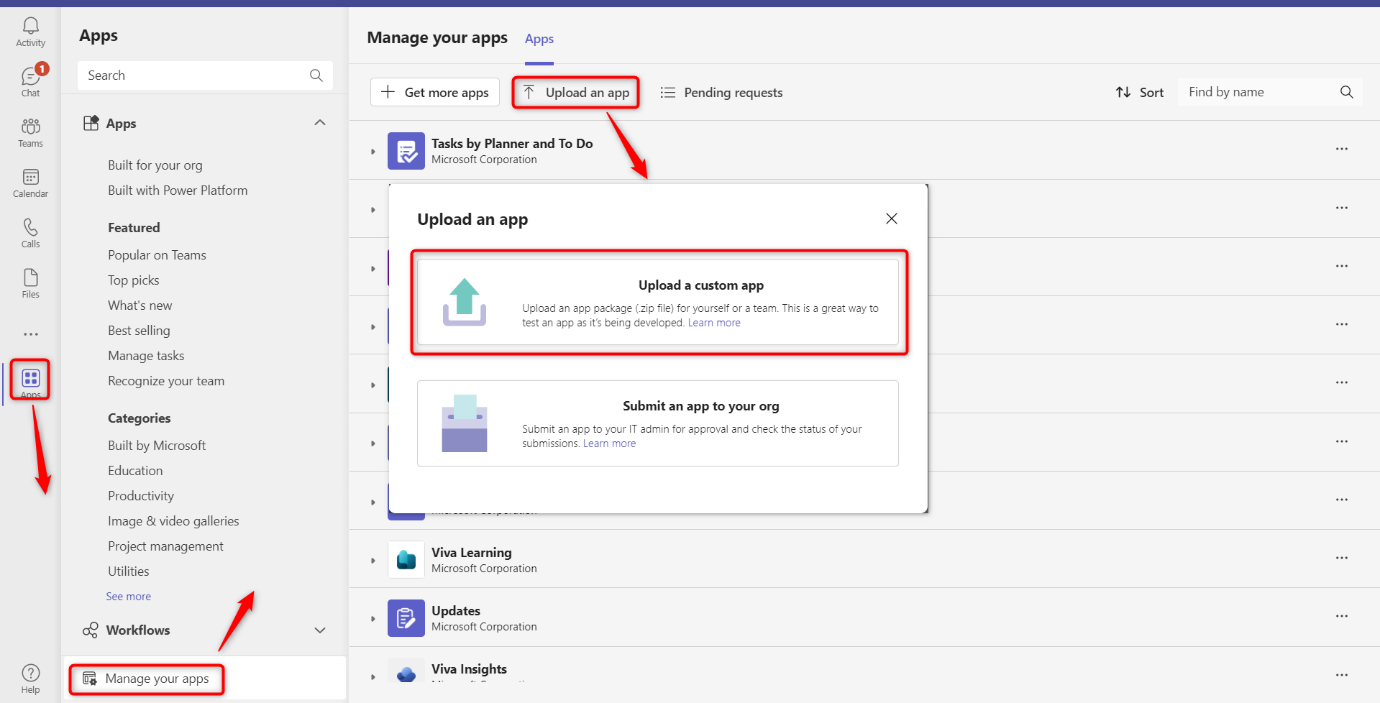
Add KloudBot to Teams App
1. First, download the app from KloudInsights. For that. Login to the KloudInsights.
2. Then navigate to Configuration > Integrations > Applications.
3. Scroll down and find the Teams App Settings.
4. Download the App by clicking the Download App button.
5. Then open teams App and navigate to Apps > Manage your apps > Upload an app.
6. Select Upload a custom app option and then upload the App downloaded from Insights.
7. Your app has been successfully added to Teams