Creating Rules
The rule editor is an easy way to create automated policies that trigger actions once a condition is met. The rule editor is where you combine the three key elements of a rule:
- Schedule: When does the rule run?
- Action: What happens when the rule is triggered?
- Condition: Under what circumstances should the rule be triggered?
To create a rule, you first need to create an action template. If you haven’t created an action template yet, refer to the Action Templates section to create one.
Creating a Rule
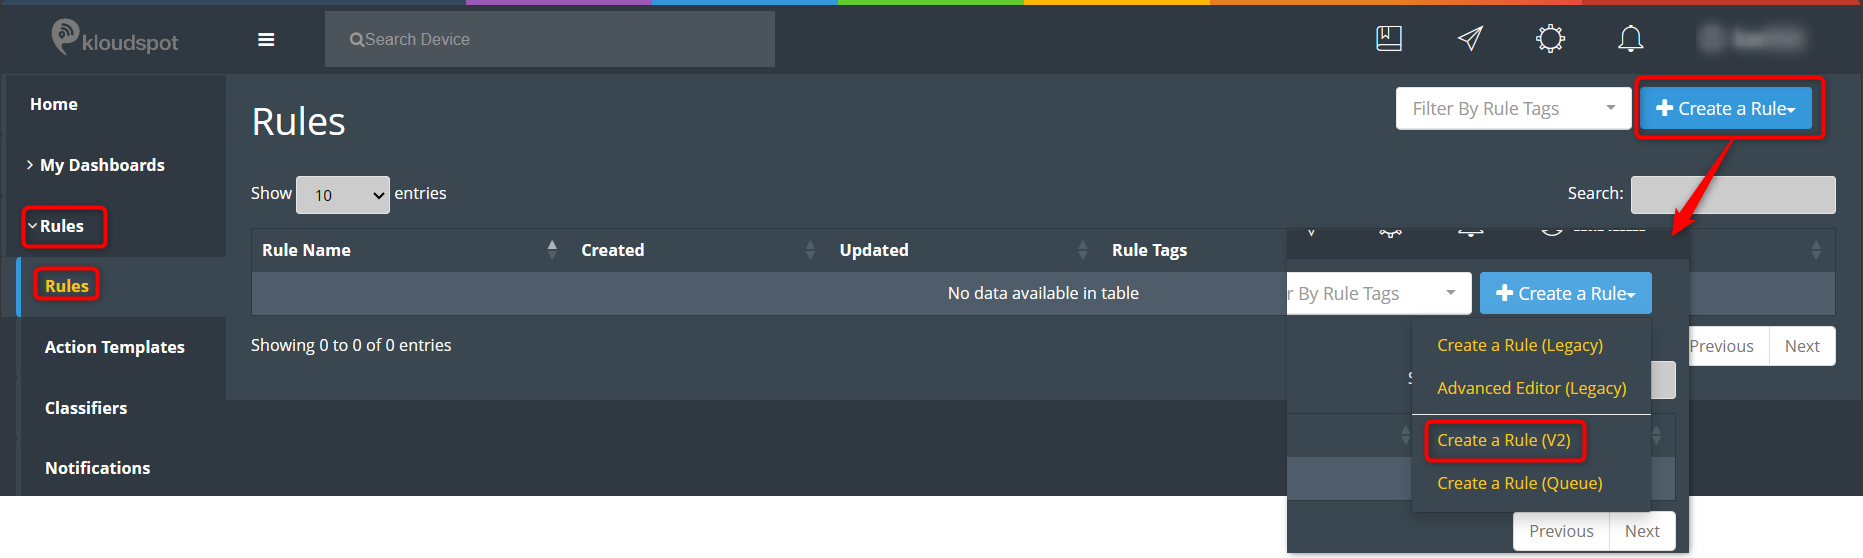
- To initiate the rule creation process, navigate to Rules > Rules. Look for the Create a Rule button in the top-right corner of the page. Clicking on it will reveal three rule options:
-
Create a rule (Legacy)
-
Advanced Editor (Legacy)
-
Create a rule (V2)
- For this guide, we’ll focus on the latest and most advanced option – “Create a Rule (V2).”
-
Click on Create a Rule (V2), and a new page will appear.
-
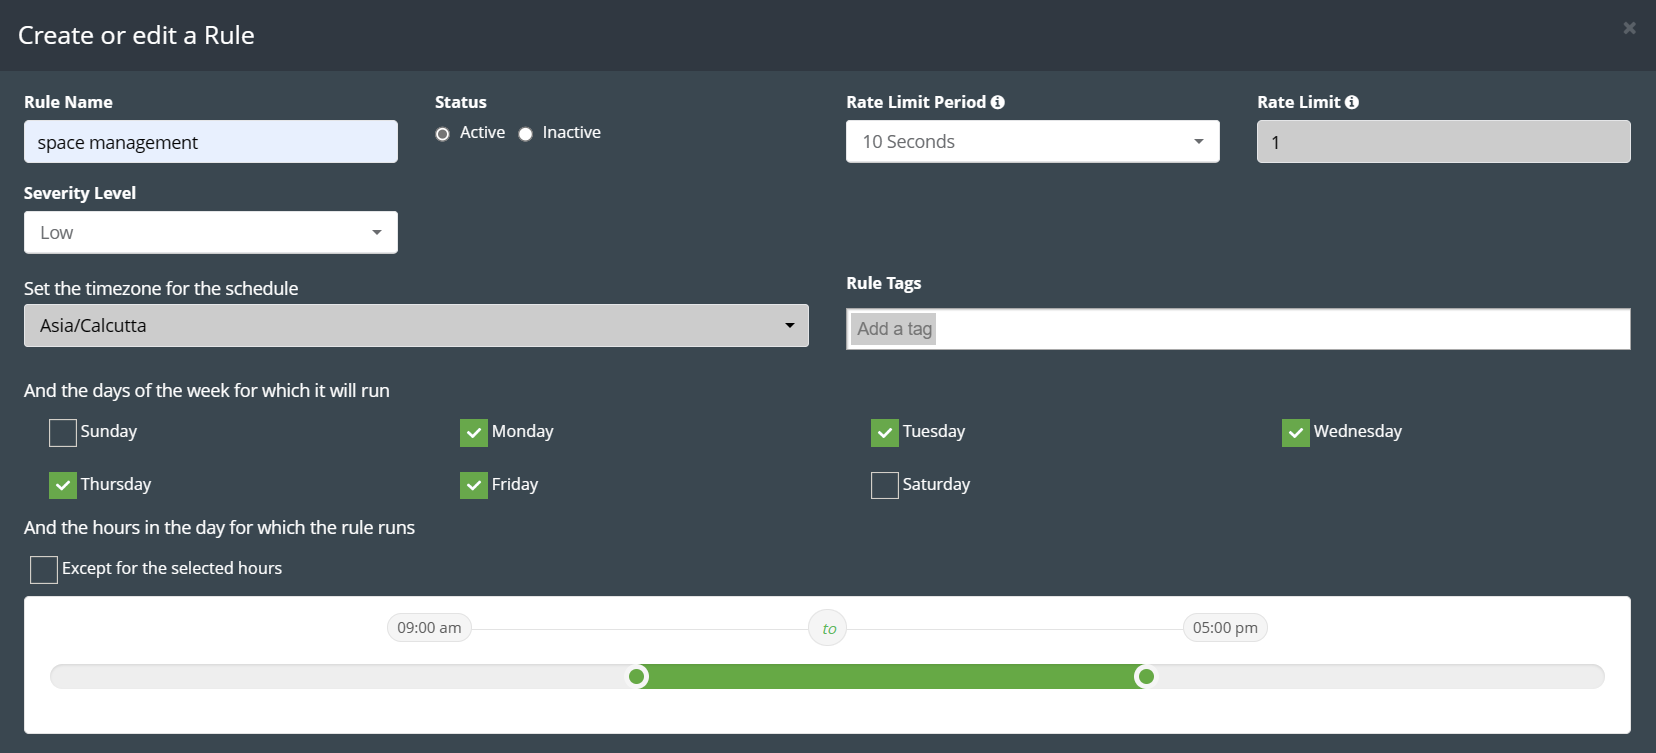
In the Rule Name section, enter a descriptive name for your rule.
-
Decide the rule’s status by checking the “Active” or “Inactive” box.
-
Set the Rate Limit Period and severity level of the rule.
-
Rate Limit Period: By configuring the Rate Limit Period appropriately, you can strike a balance between staying informed about potential security breaches and avoiding notification overload, thus enhancing the effectiveness of your Rule.
-
Limit: When setting a Rate Limit, you are defining the maximum allowable number of notifications that can be generated within a specific Rate Limit Period.
-
Severity level: You can select the impact of the rule. Three Severity Levels are available, Low, medium, and High.
-
-
Choose the time zone, specifying the days and hours the rule should run.
For example: If you want this rule to run from Monday to Friday from 9 am to 5 pm then check the days from Monday to Friday. Then select 9 to 5 in the time selection bar.
-
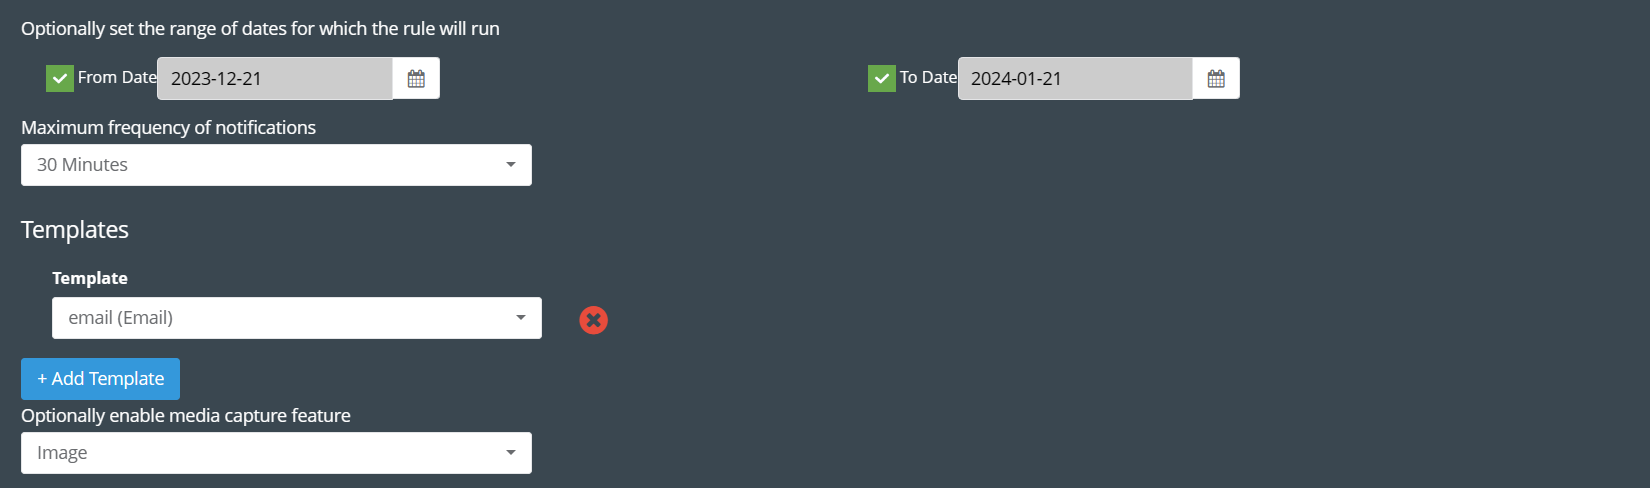
Optionally, set a date range for the rule’s activation.
For example: If you want this rule to run from December 21 to January 21, check the “from date” check box and select December 21. Then check the To Date checkbox and select January 21. This way you can run this rule for one month.
-
Select the frequency of notifications to stay informed about triggered rules.
-
Add a pre-prepared template using the Add Template section.
-
Optionally, enable the media capture feature to receive captured media when vision or camera rules are triggered.
-
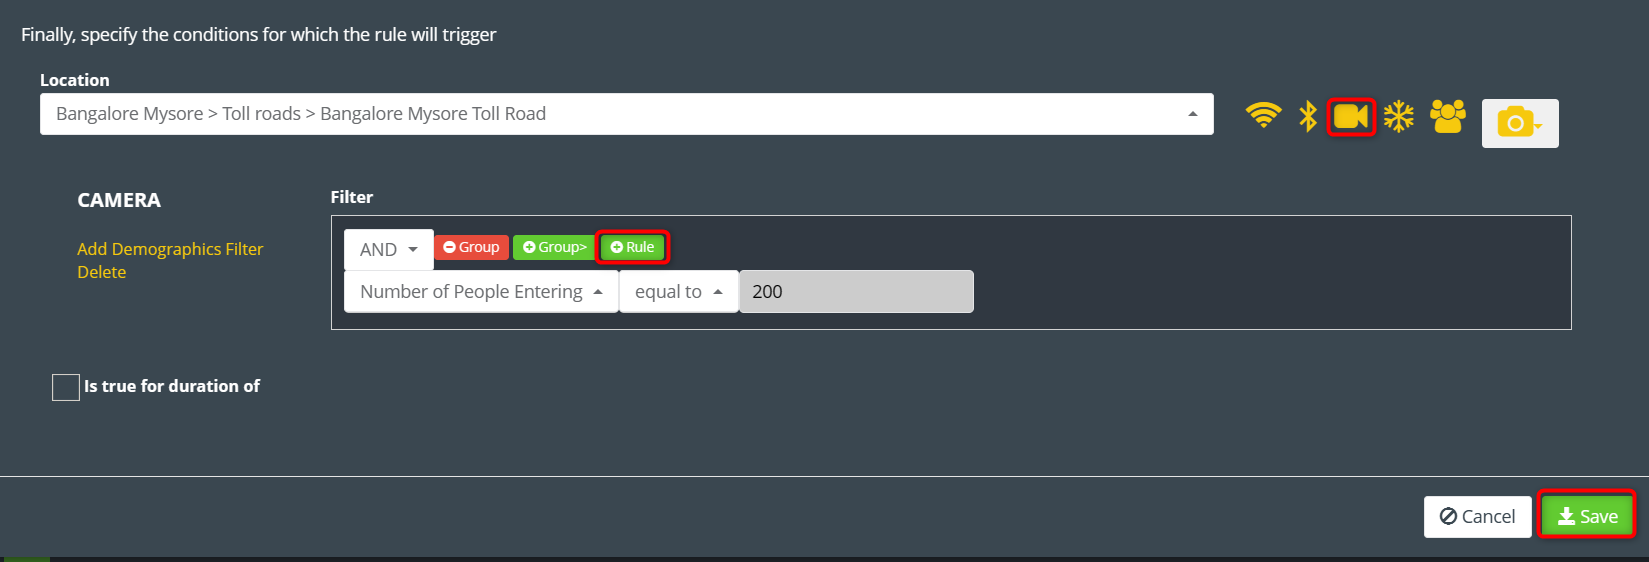
Specify the location where the rule will apply.
-
Add rules (WiFi, BLE, Camera, Air Quality, WiFi Density Condition, Vision Entity Condition) by clicking the corresponding icons.
-
For a camera rule, click on the Camera Icon.
Note: This is an example, you can create rules like WiFi, BLE, Air Quality, WiFi Density Condition, Vision Entity Condition etc, in the same way.
-
In the rule filter section that opens, click on the Rule button.
-
Select the main condition from the dropdown list.
-
Choose the secondary condition and add a value.
Example: “Number of people entering” is “equal to” 200.
-
Optionally, add more demographic filters by clicking the Add Demographics Filter button.
-
Click the Save button to preserve your configured rule.