Summary: Custom roles in VMS - ROLE_VMS_USER and ROLE_VMS_SECURITY - define what a user can do in the system. They help manage access and ensure security by giving users only the permissions they need.
Create Roles in Insights:
i. Log in to KloudInsights.
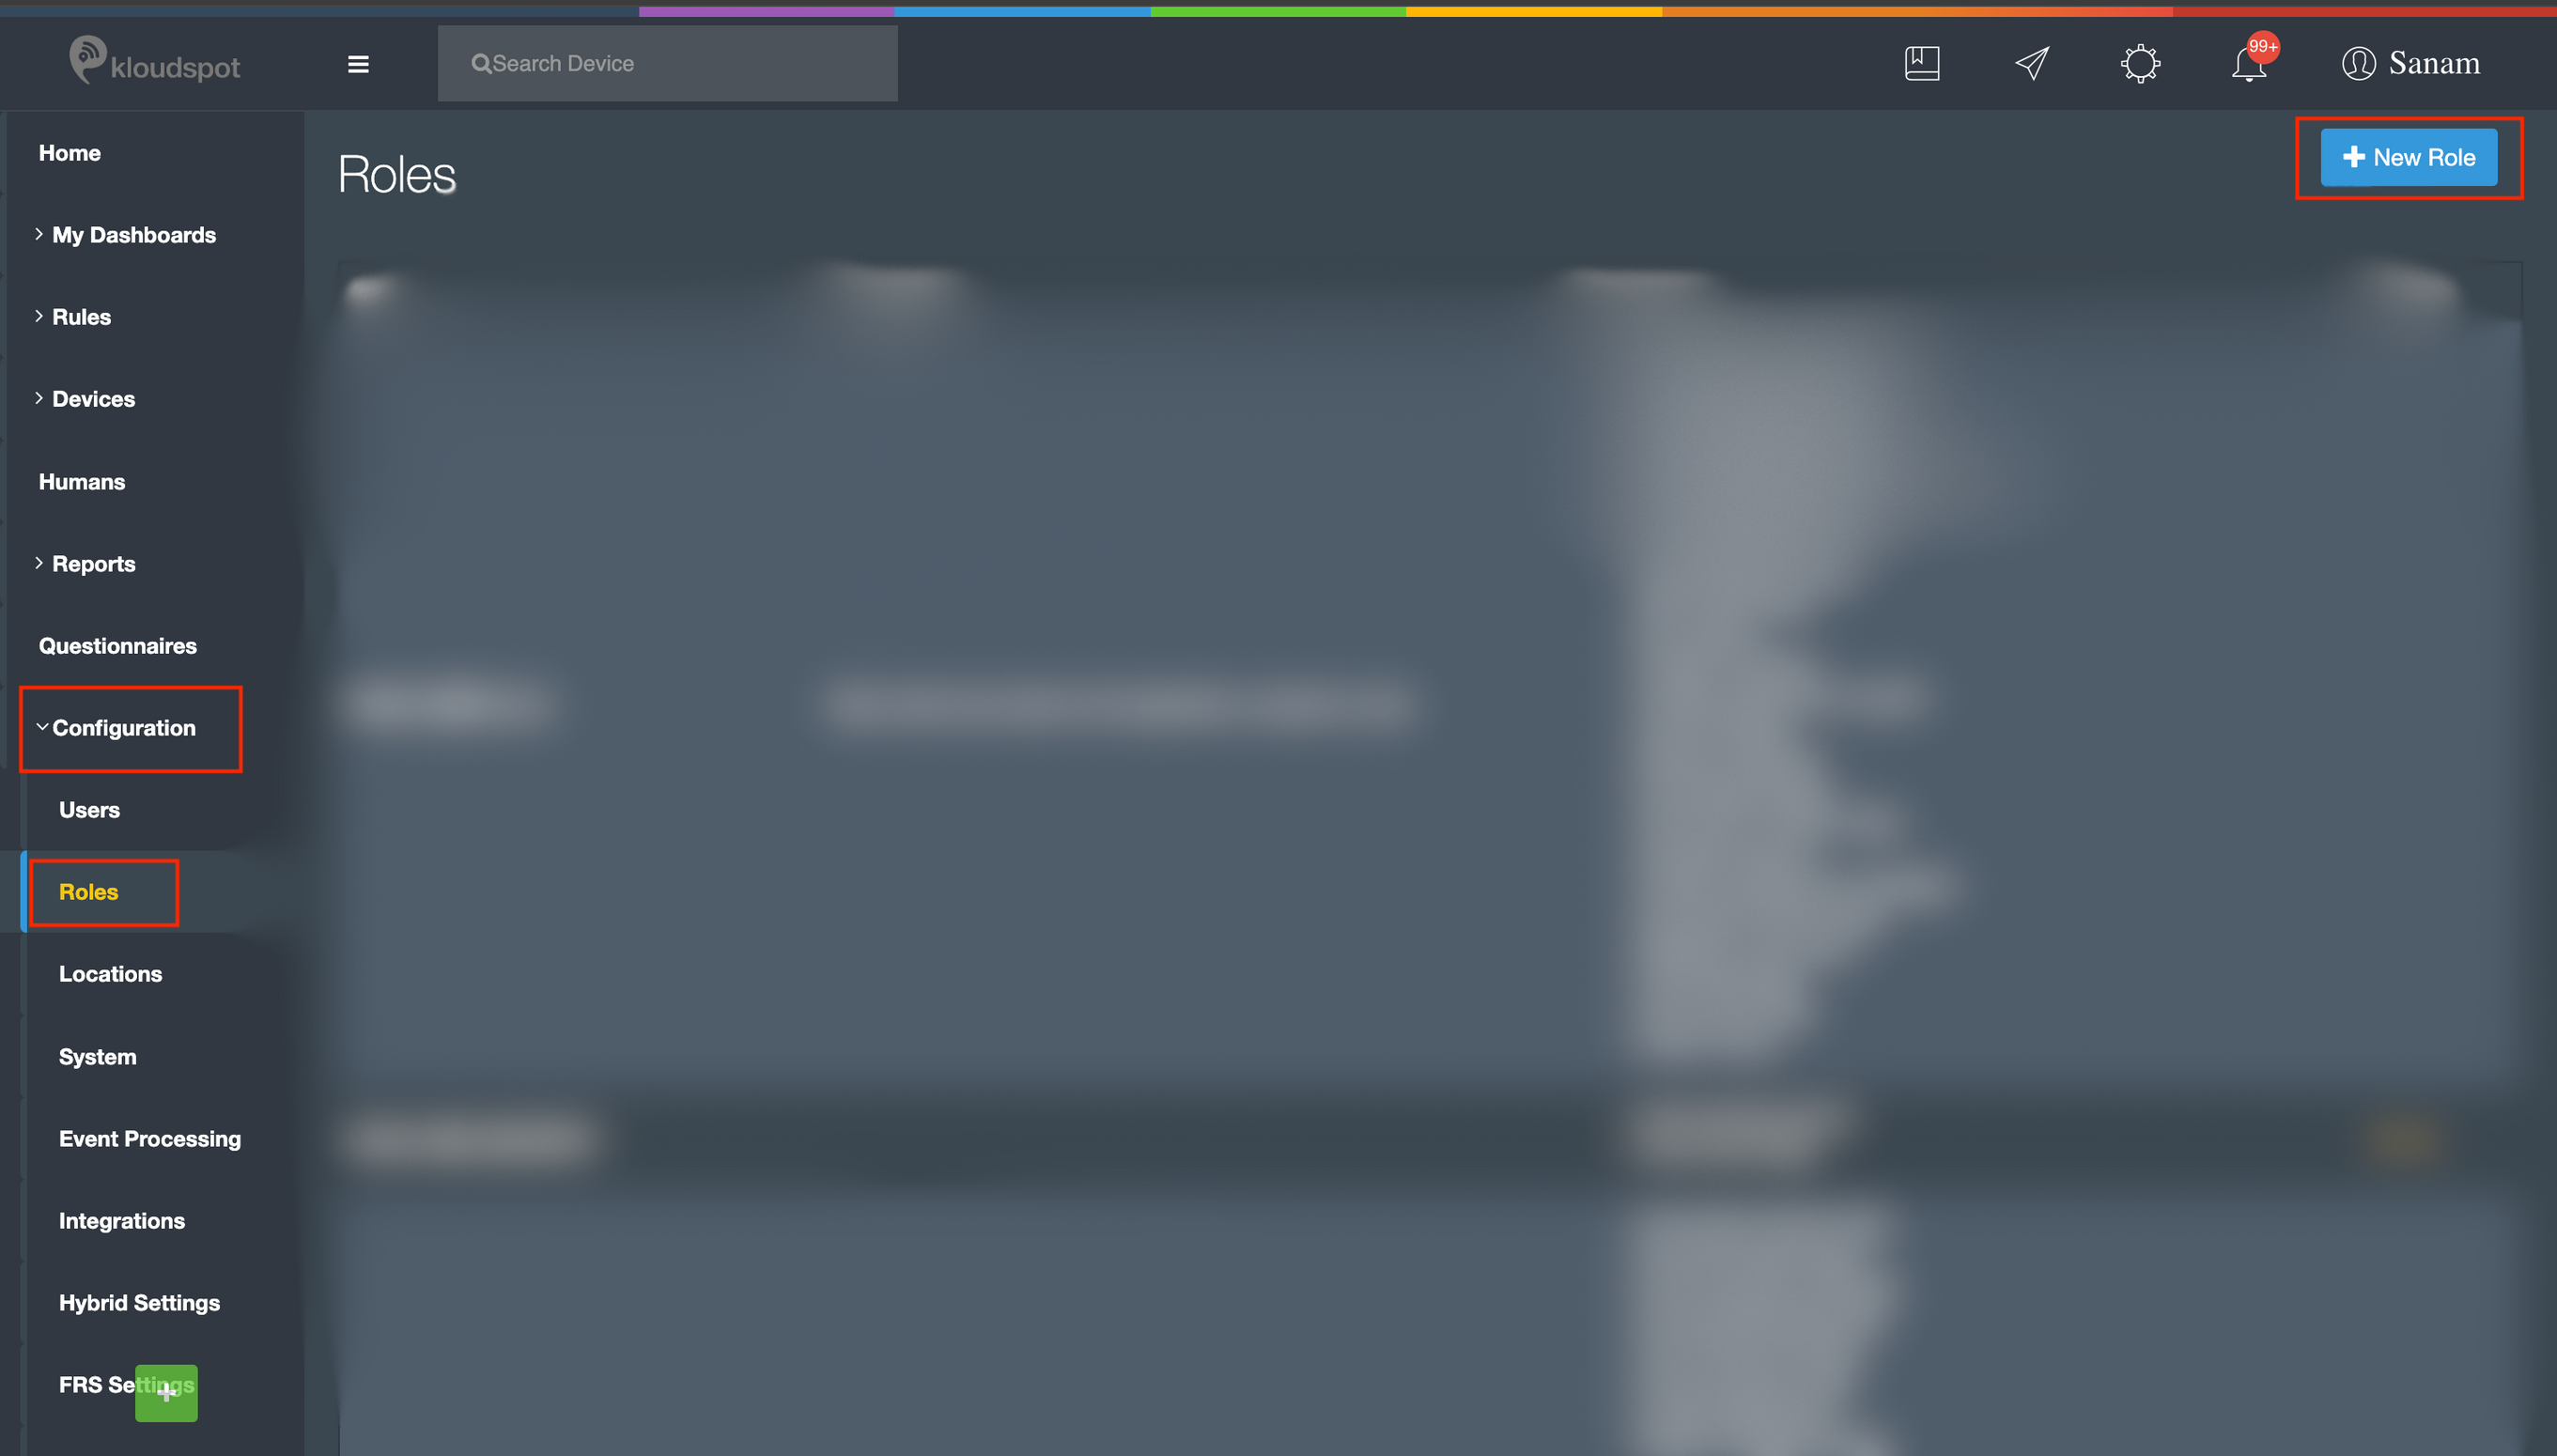
ii. Navigate to Configuration > Roles and click + New Role.
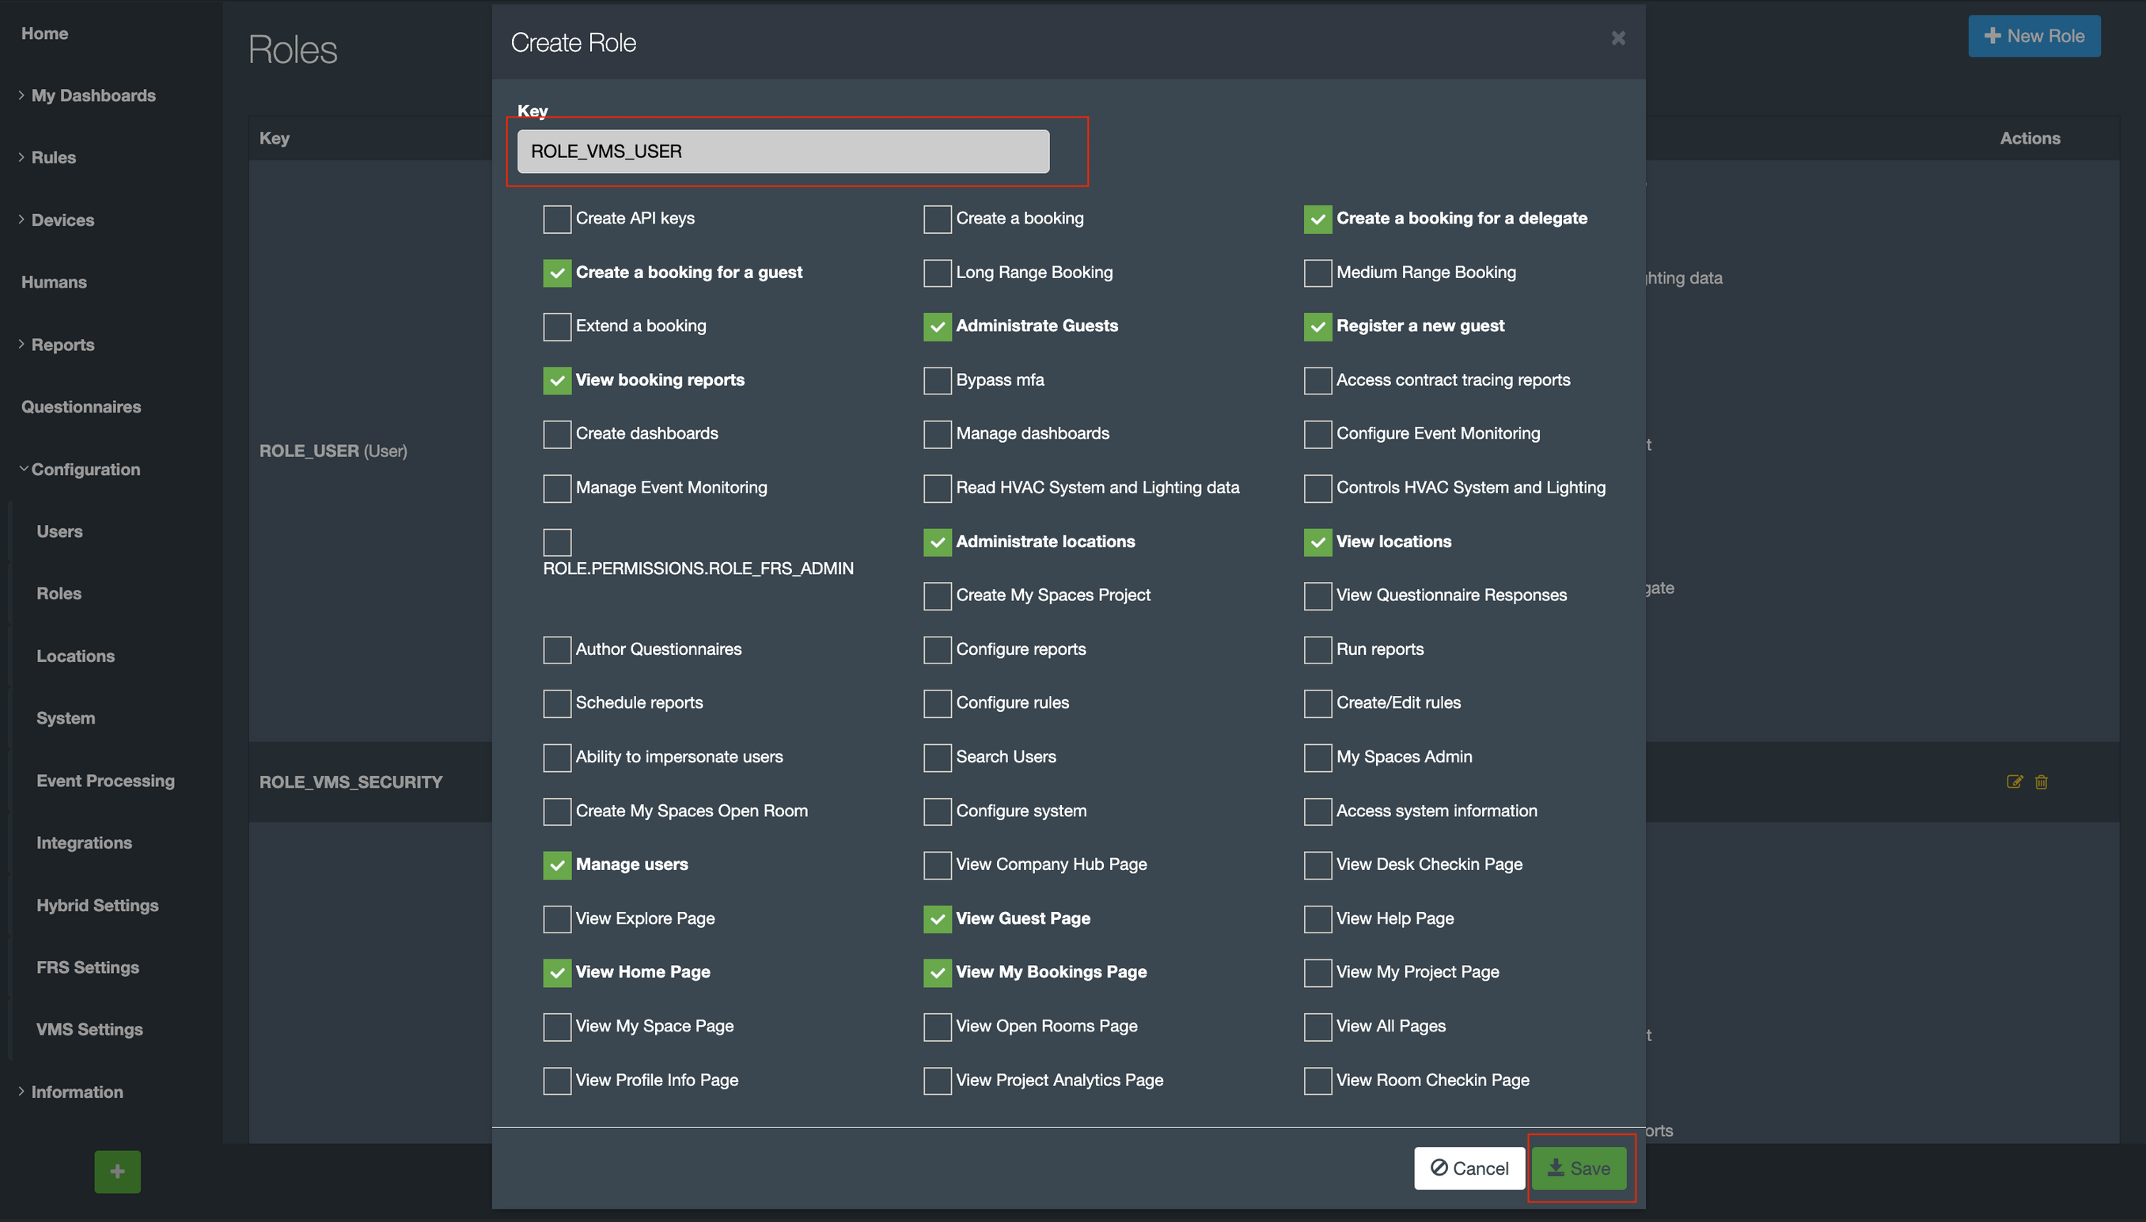
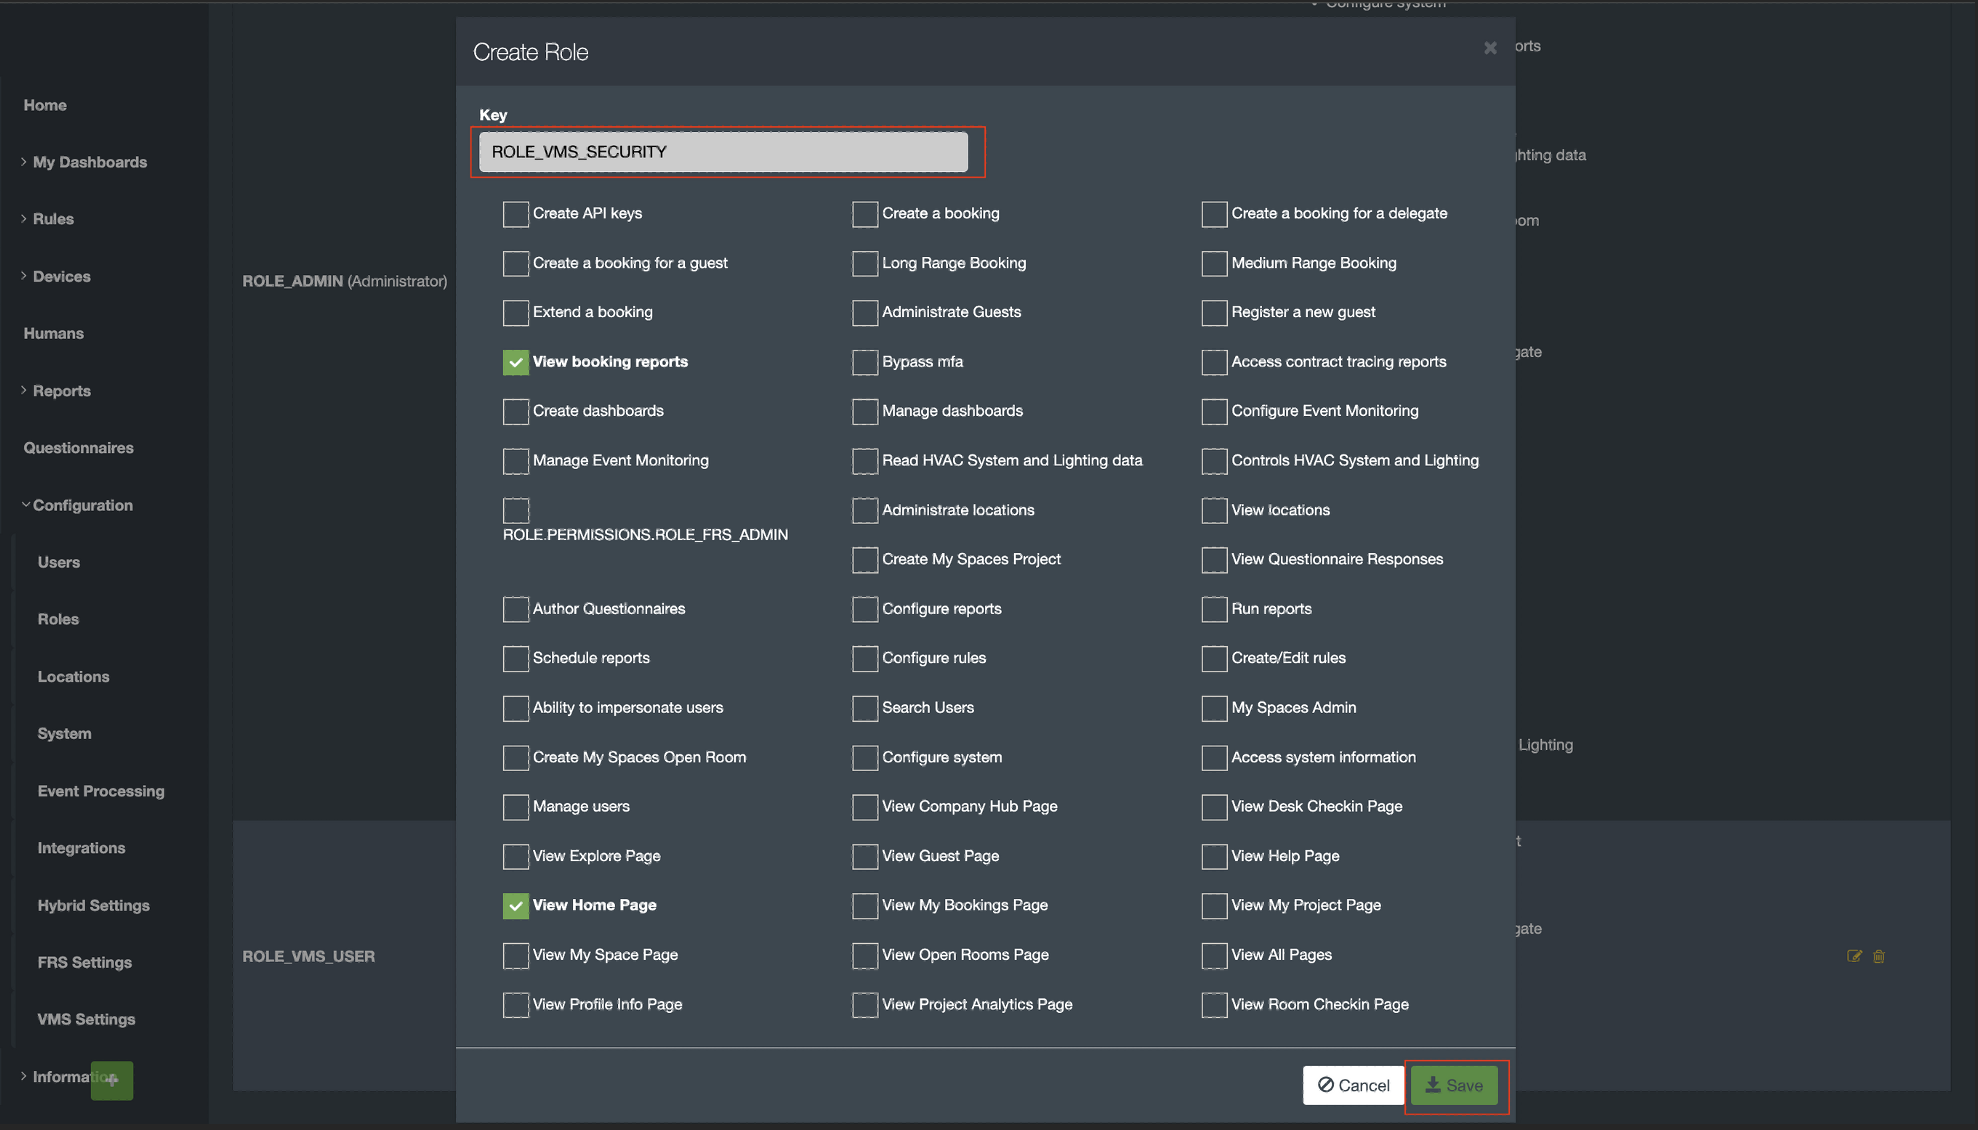
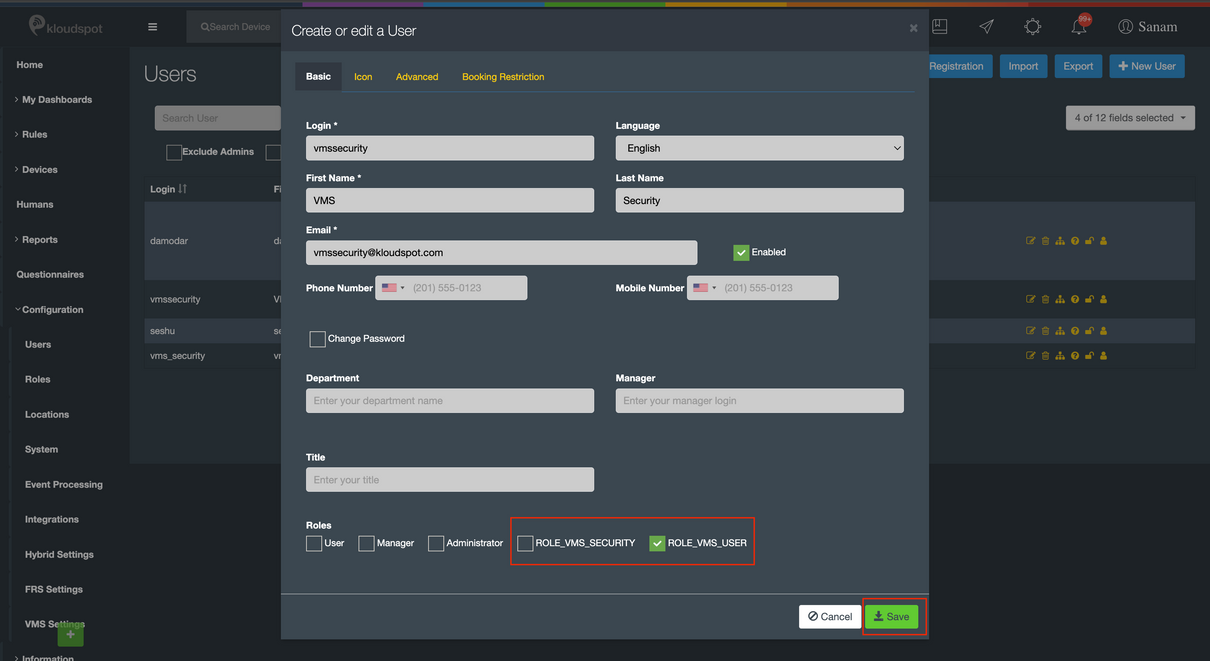
iii. Create the roles, select the permissions shown in the screenshot, and click Save.
1 .ROLE_VMS_USER
2 .ROLE VMS_SECURITY
iv. Navigate to Users. Search for a user you want to assign the roles for or Create a New User
v. Choose roles and click on “Save”
Visits
Summary: Visitors can be categorized as Invited or Walk-In. You can invite an individual or a group of visitors for a meeting, or a person can request a meeting by themselves. This is considered a Walk-In visit.
Visit Types:
a. Invited
b. Walk-In Visit
a. Steps to Invite a Visitor
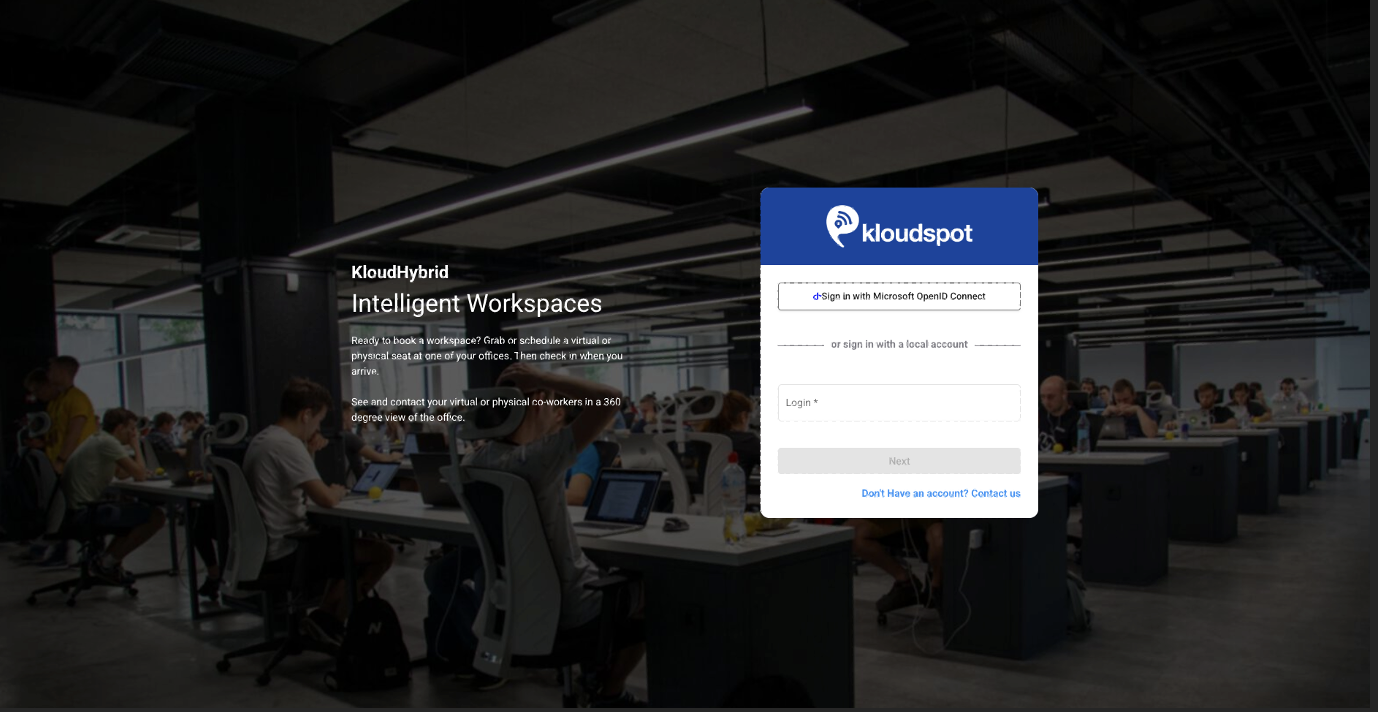
Log in to KloudHybrid.
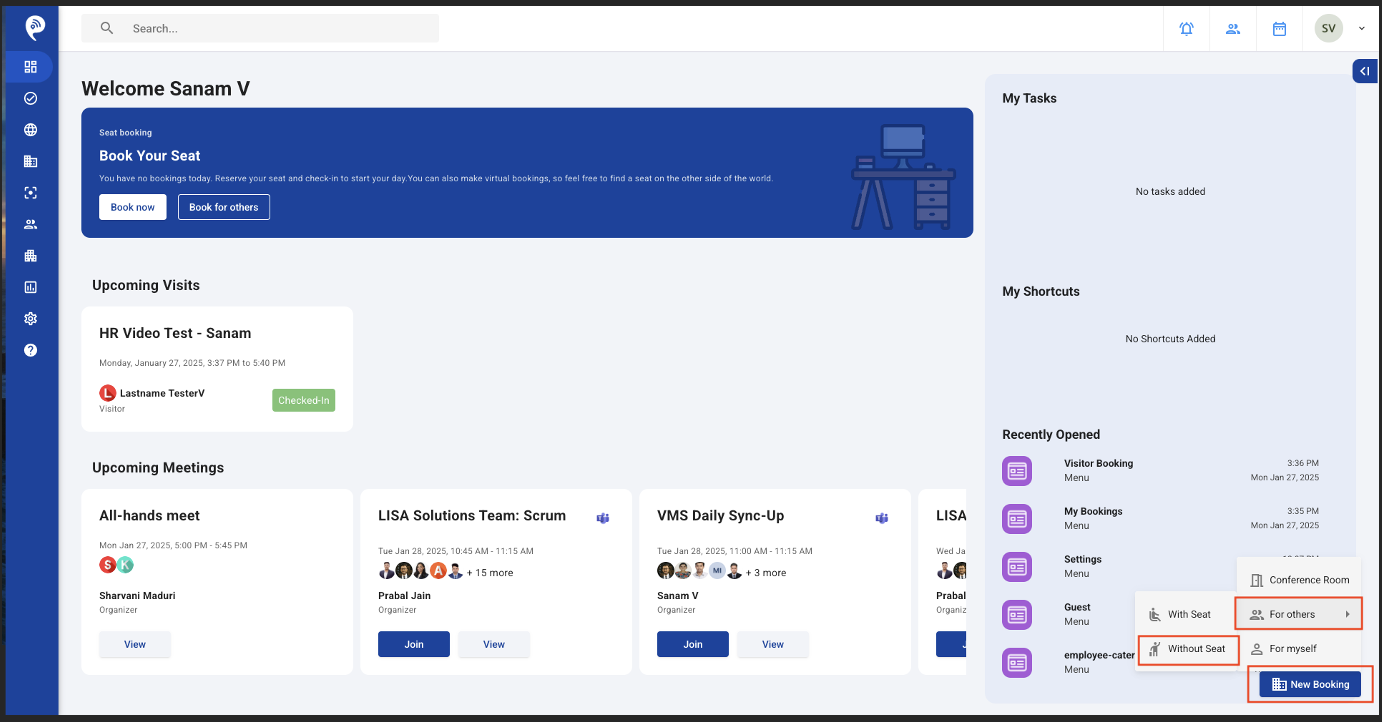
Navigate to New Booking > For Others > Without Seat.
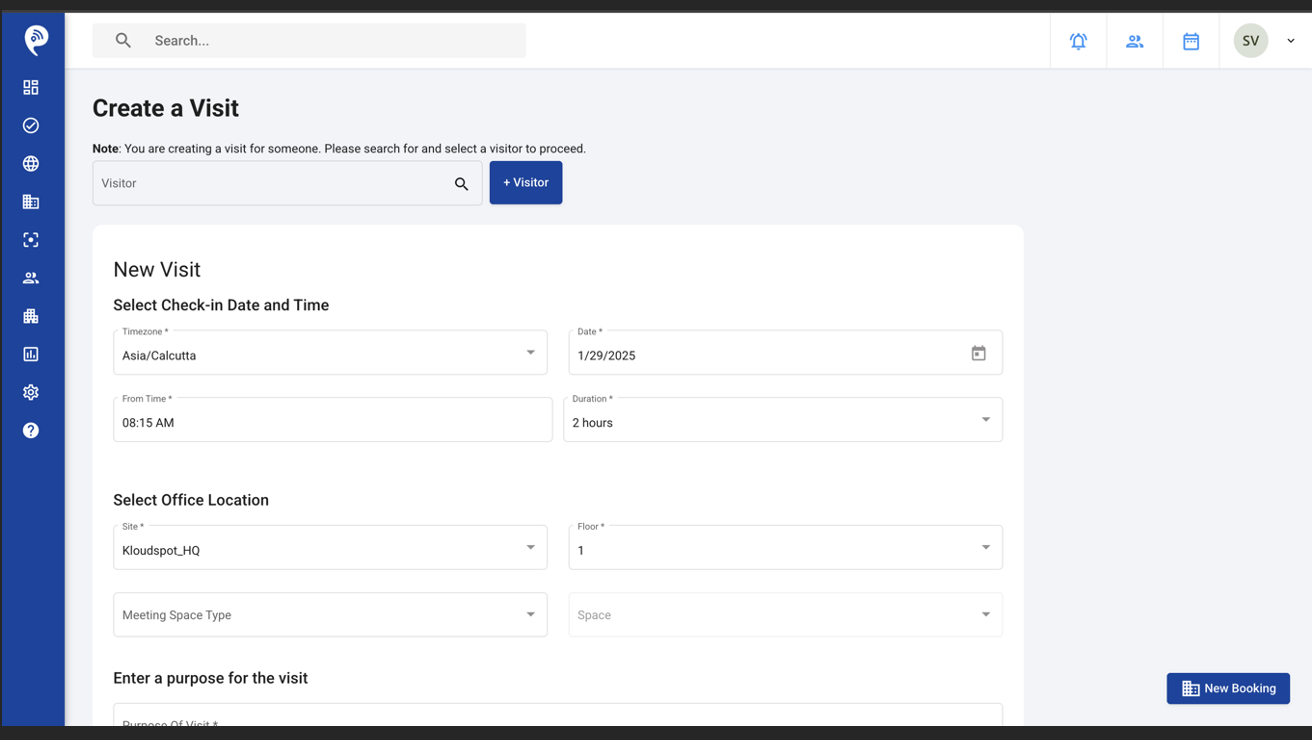
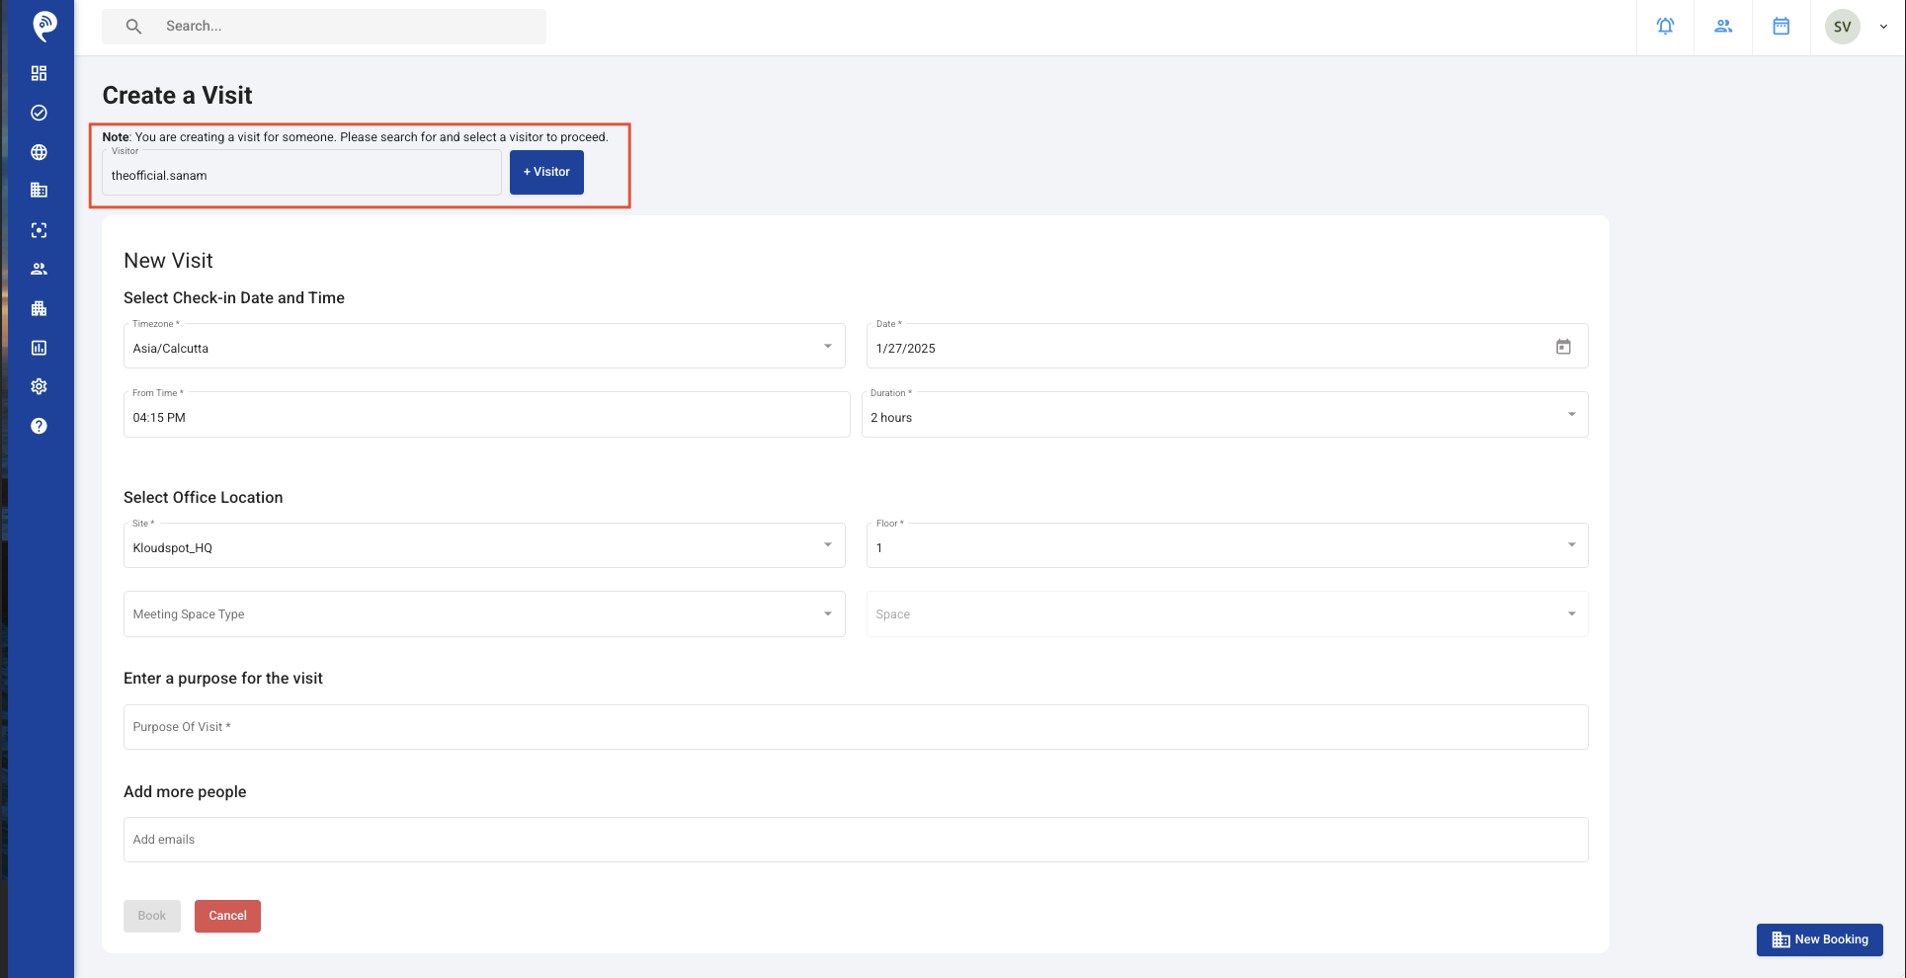
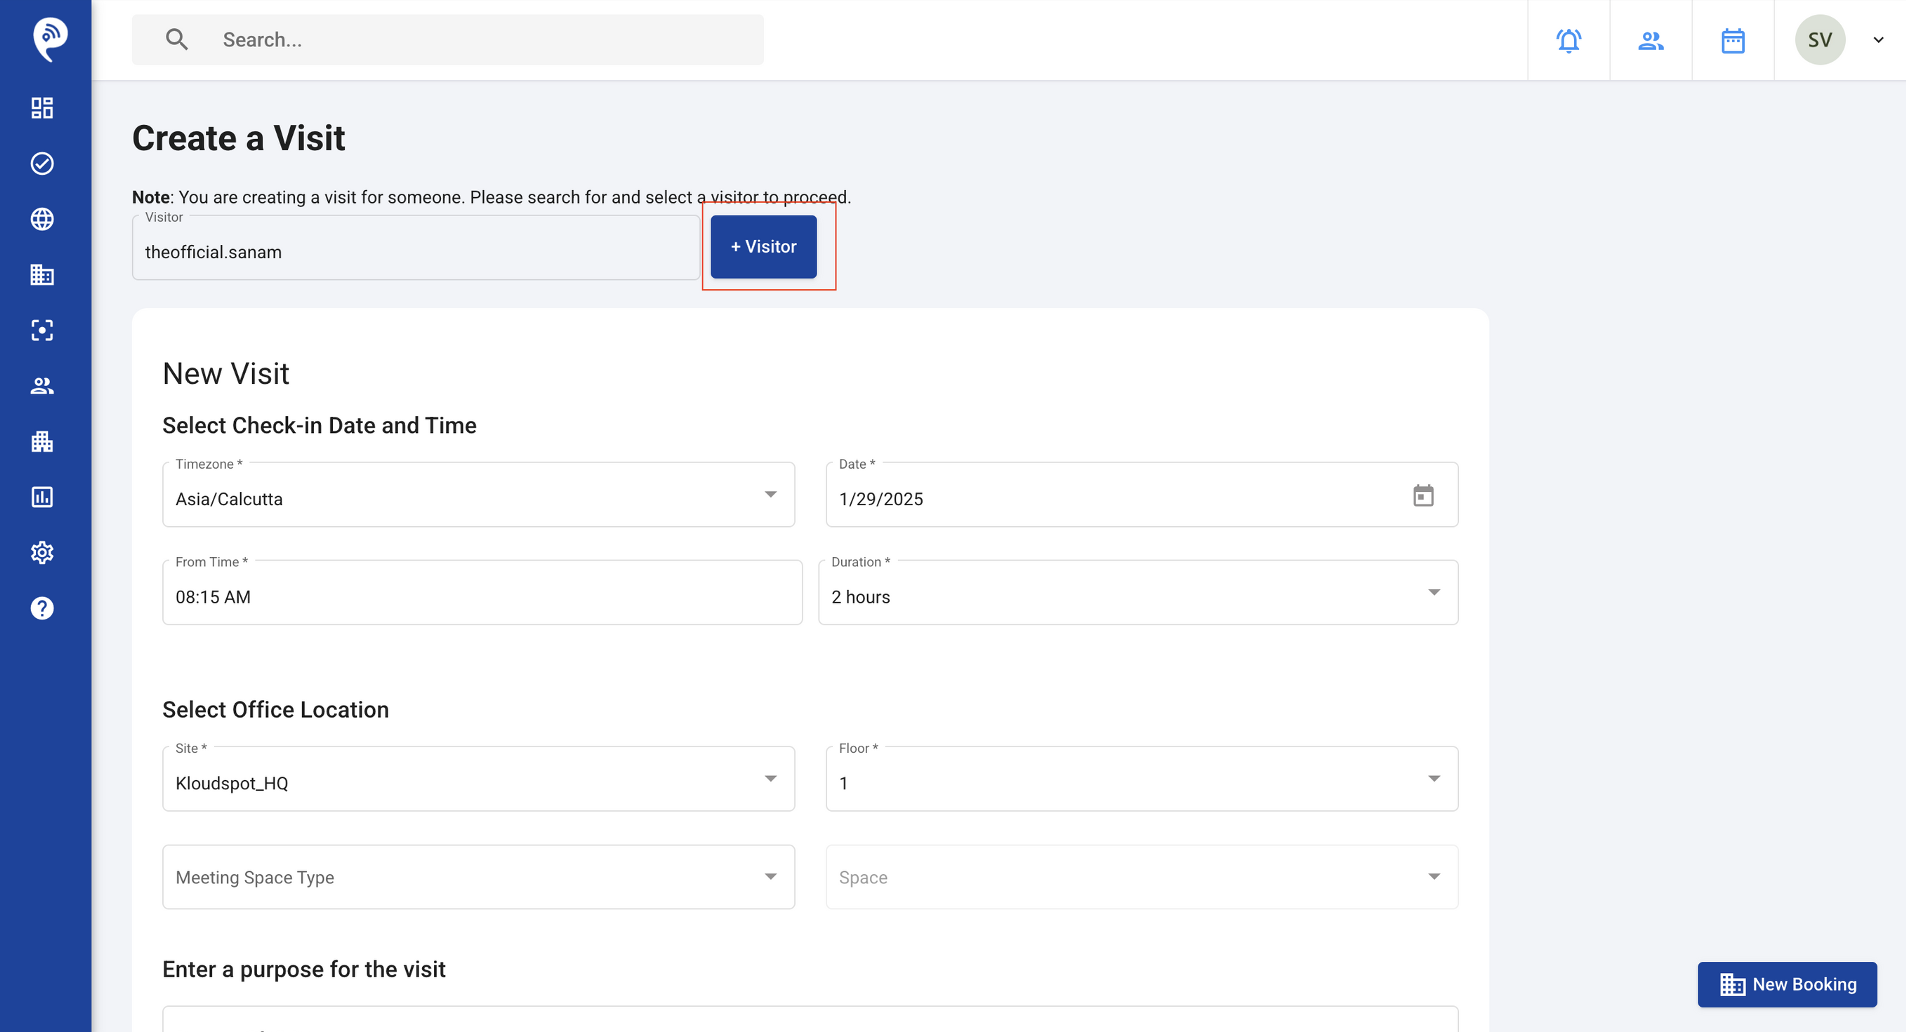
You will be redirected to Create a Visit Page.
Search for the guest in Visitor field.
• Type the visitor’s name in the search box.
• If the visitor is already in the system, their details appear in a dropdown.
• If not, click the + Visitor button to add a new guest.
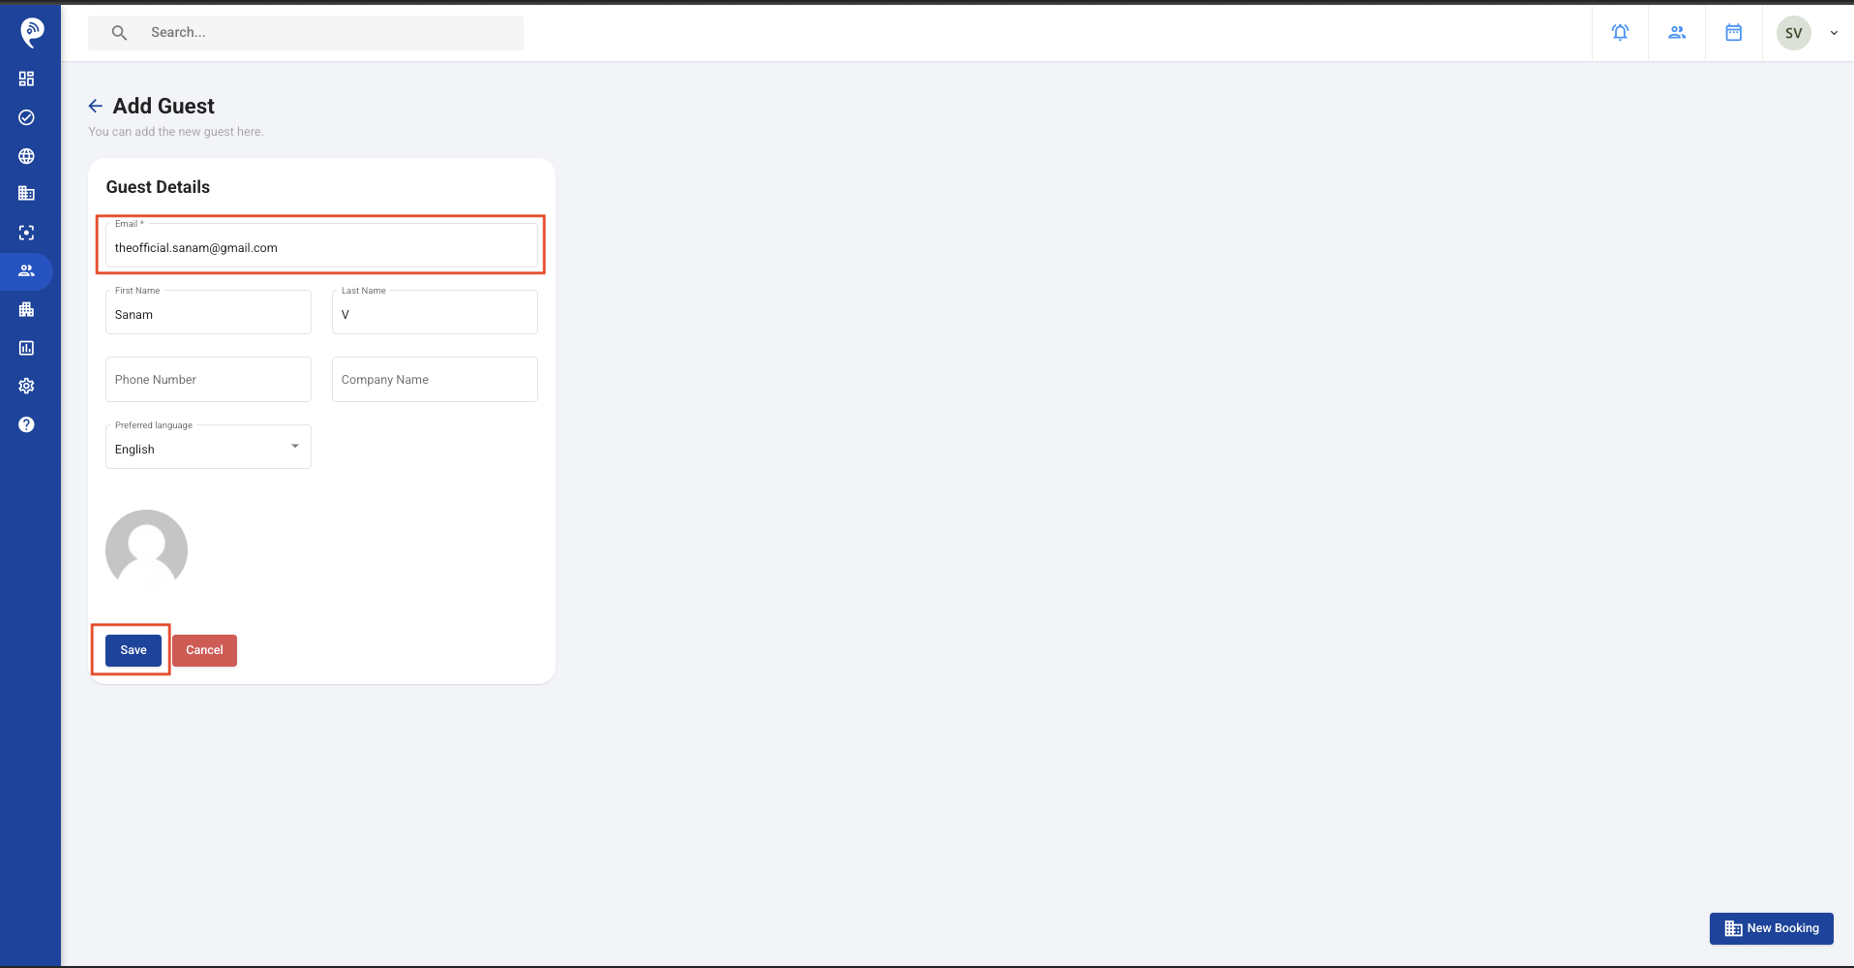
Add the guest’s details:
• Fill in the guest’s information and click Save.
• After saving, you will be redirected to Create a Visit Page again.
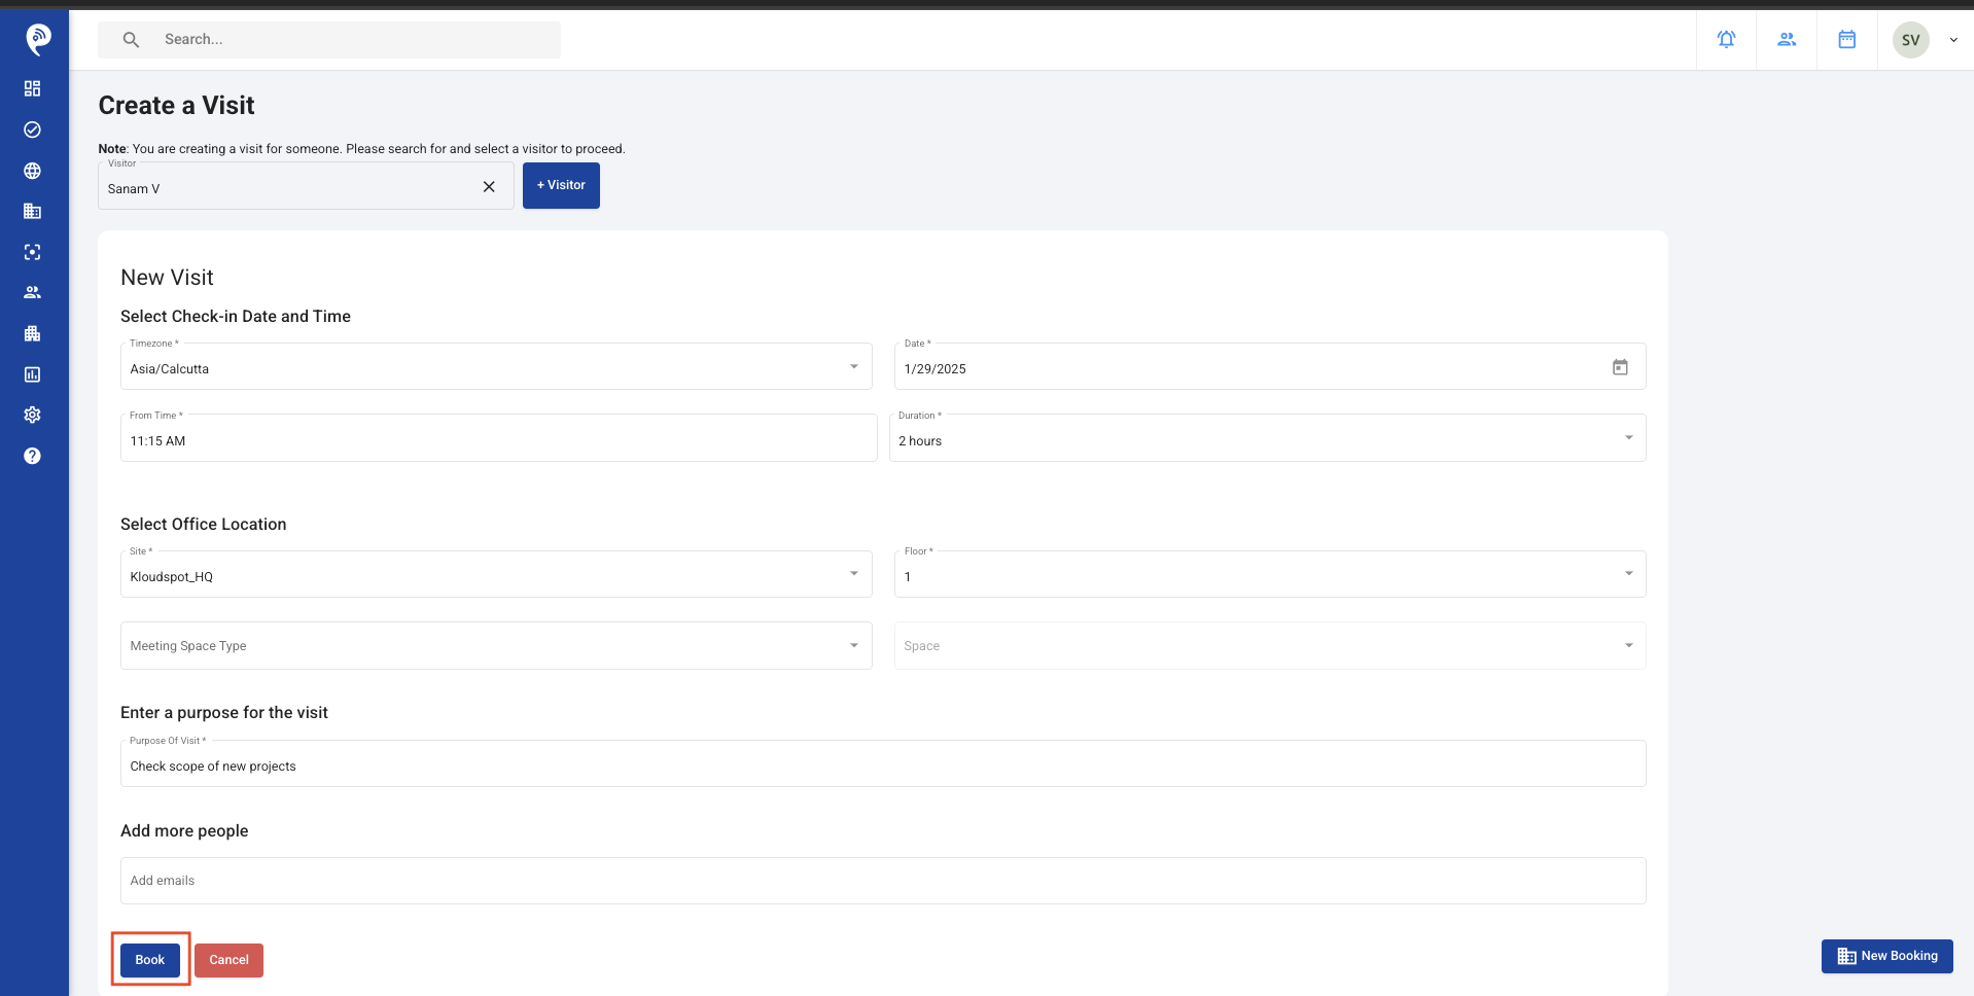
Create the Visit:
• Search for the guest you just added.
• The newly added guest will appear in the dropdown.
• Select the guest and enter the meeting details like Time Zone, Meeting Date, From Time, Duration, Location, Meeting space and Purpose of Visit.
• Click Book to create the booking.
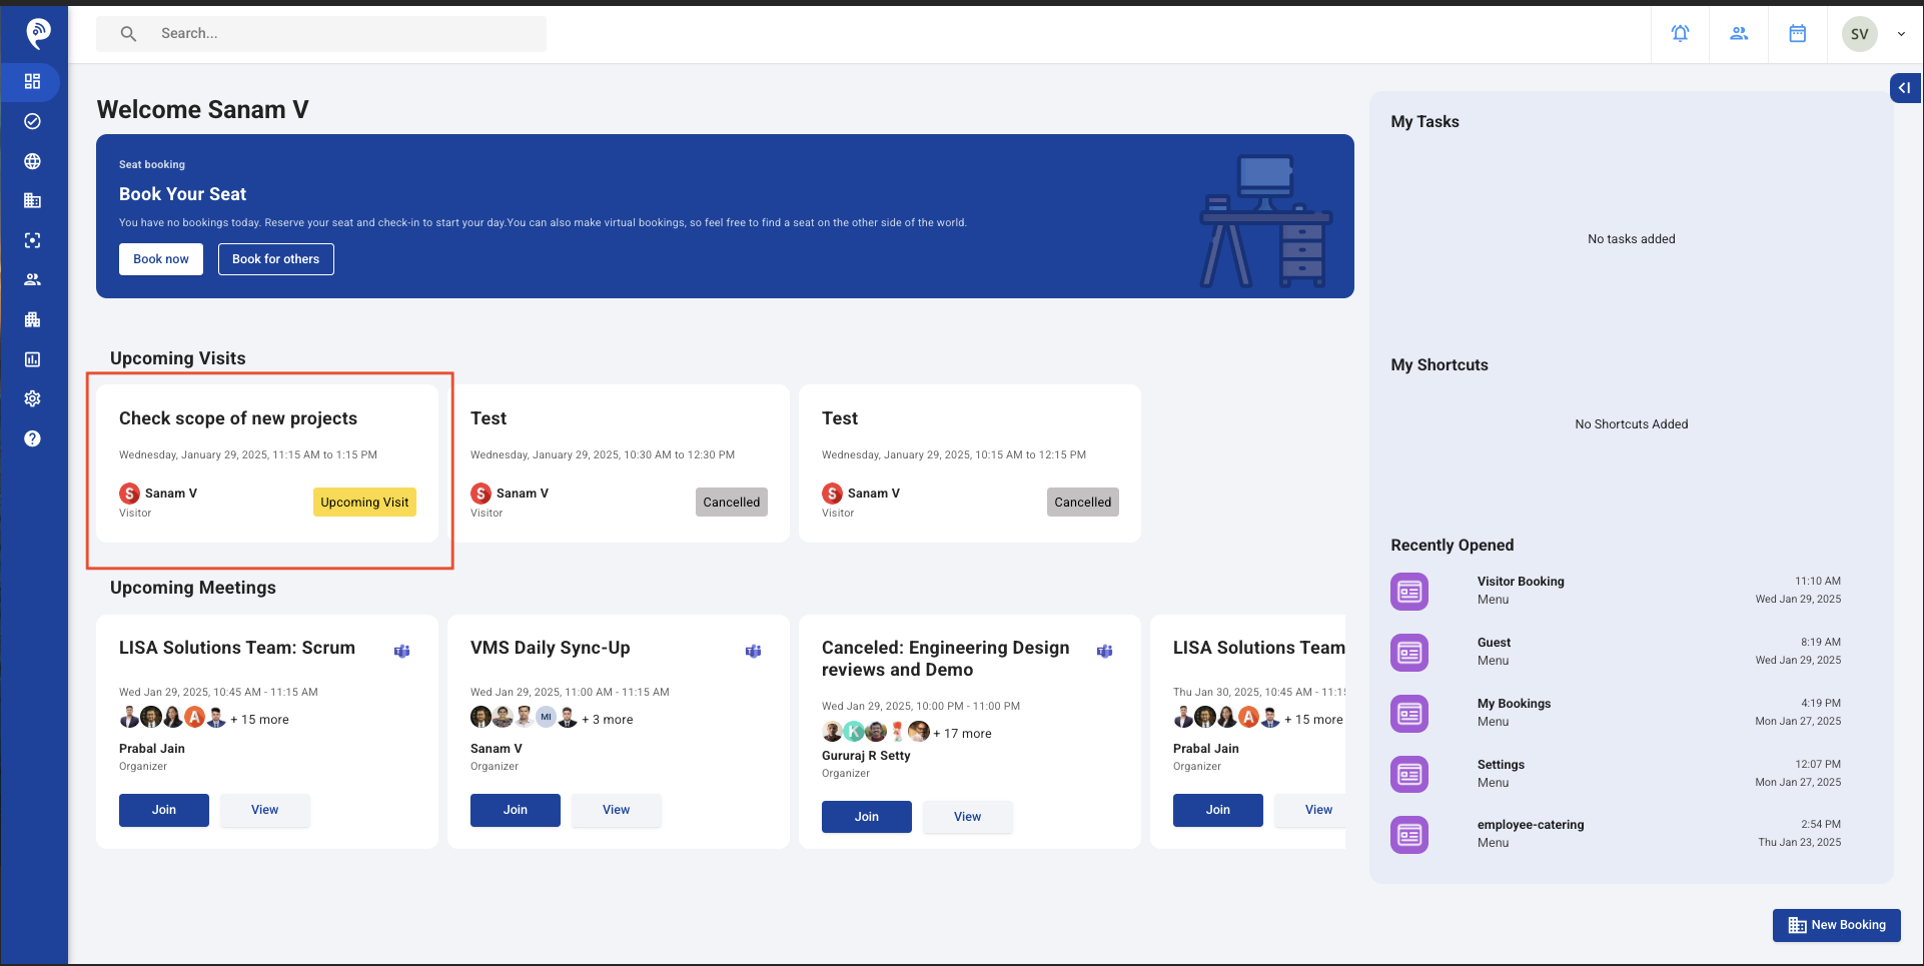
• The visit that was created can be seen on the Home Page under
Upcoming Visits Section.
• The Visit can also be seen in “My Bookings” page under “Visits”
Next Steps:
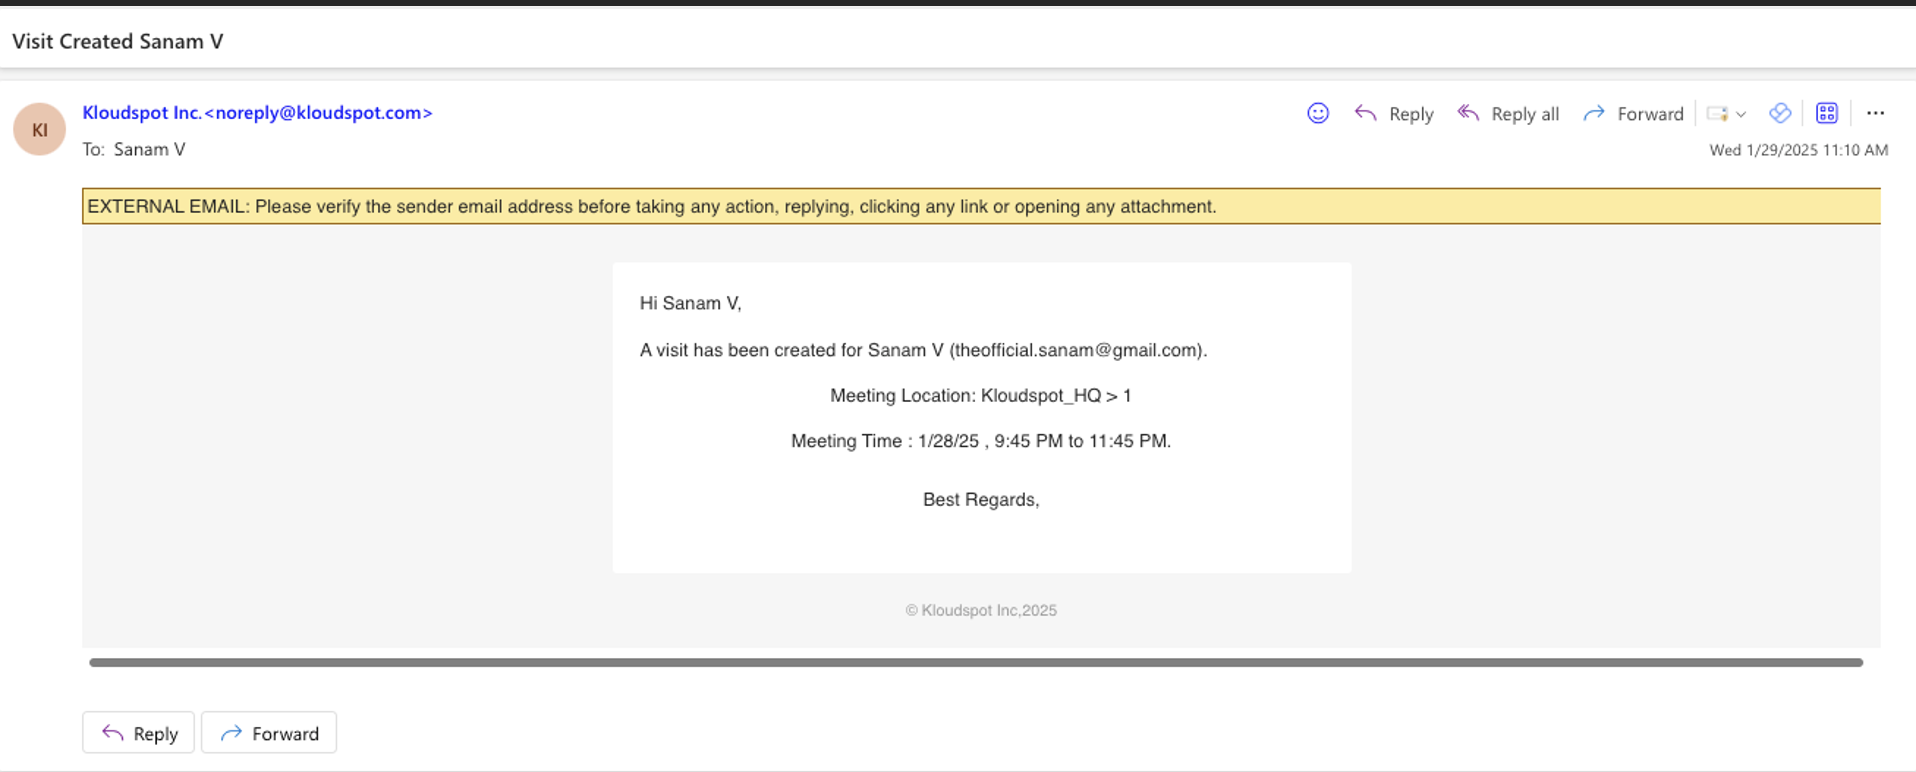
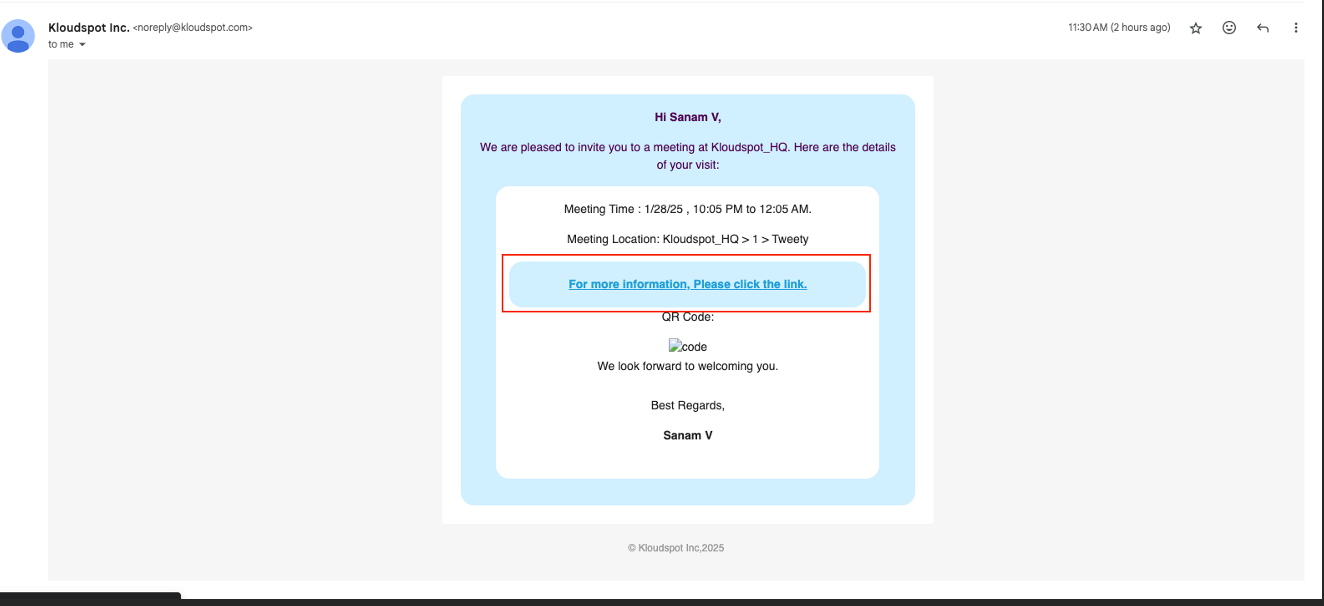
• Both the Host and the guest will get an email with the meeting details:
Email to Host
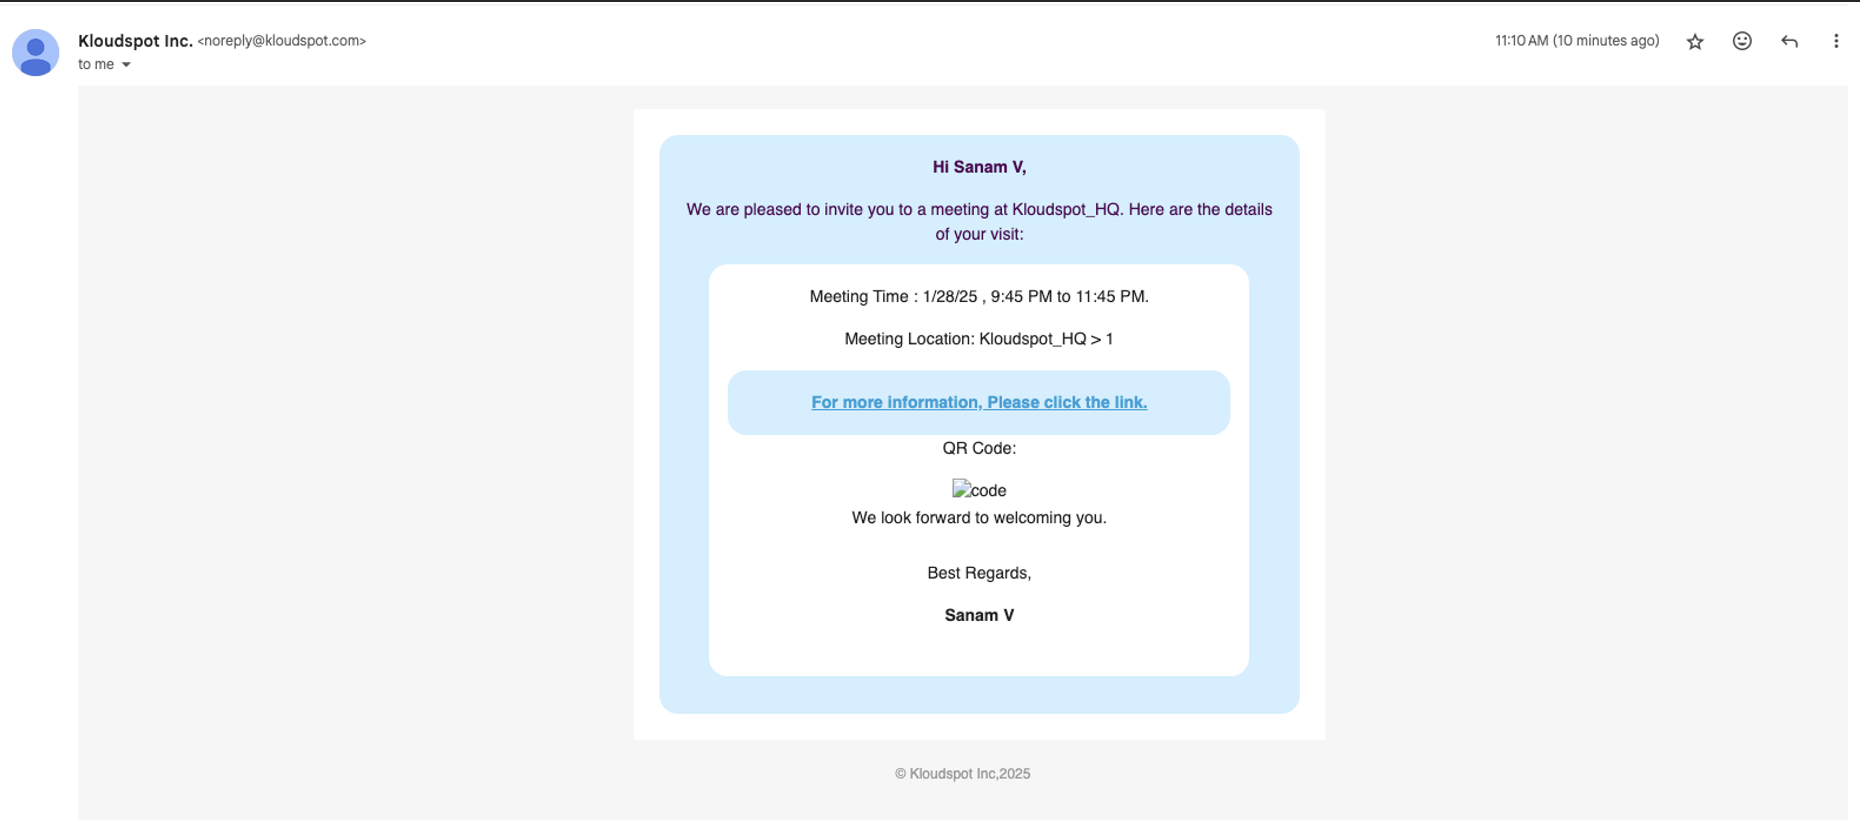
Email to Guest
• The guest’s email will include:
A link to update their details if needed.
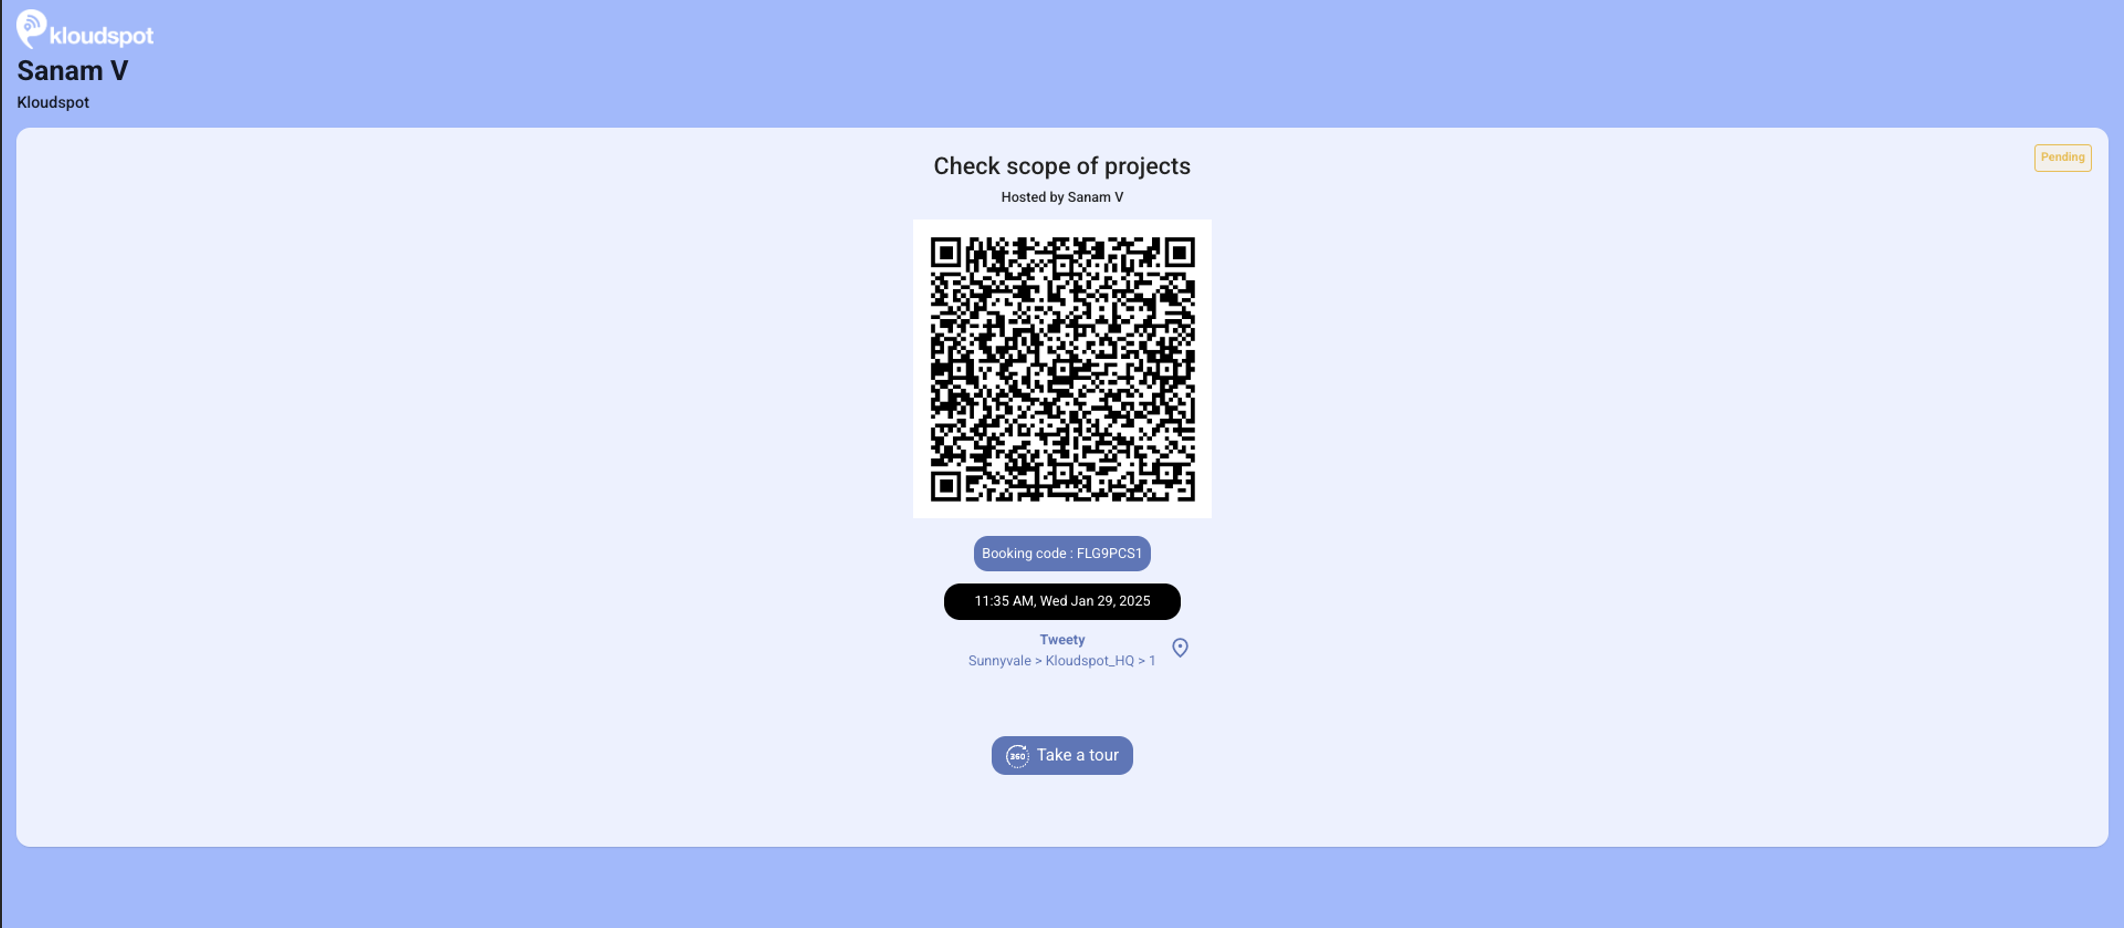
A booking code and a QR code for easy entry.
Guest Check-In Process:
• The guest can scan the QR code or enter the booking code at the office kiosk.
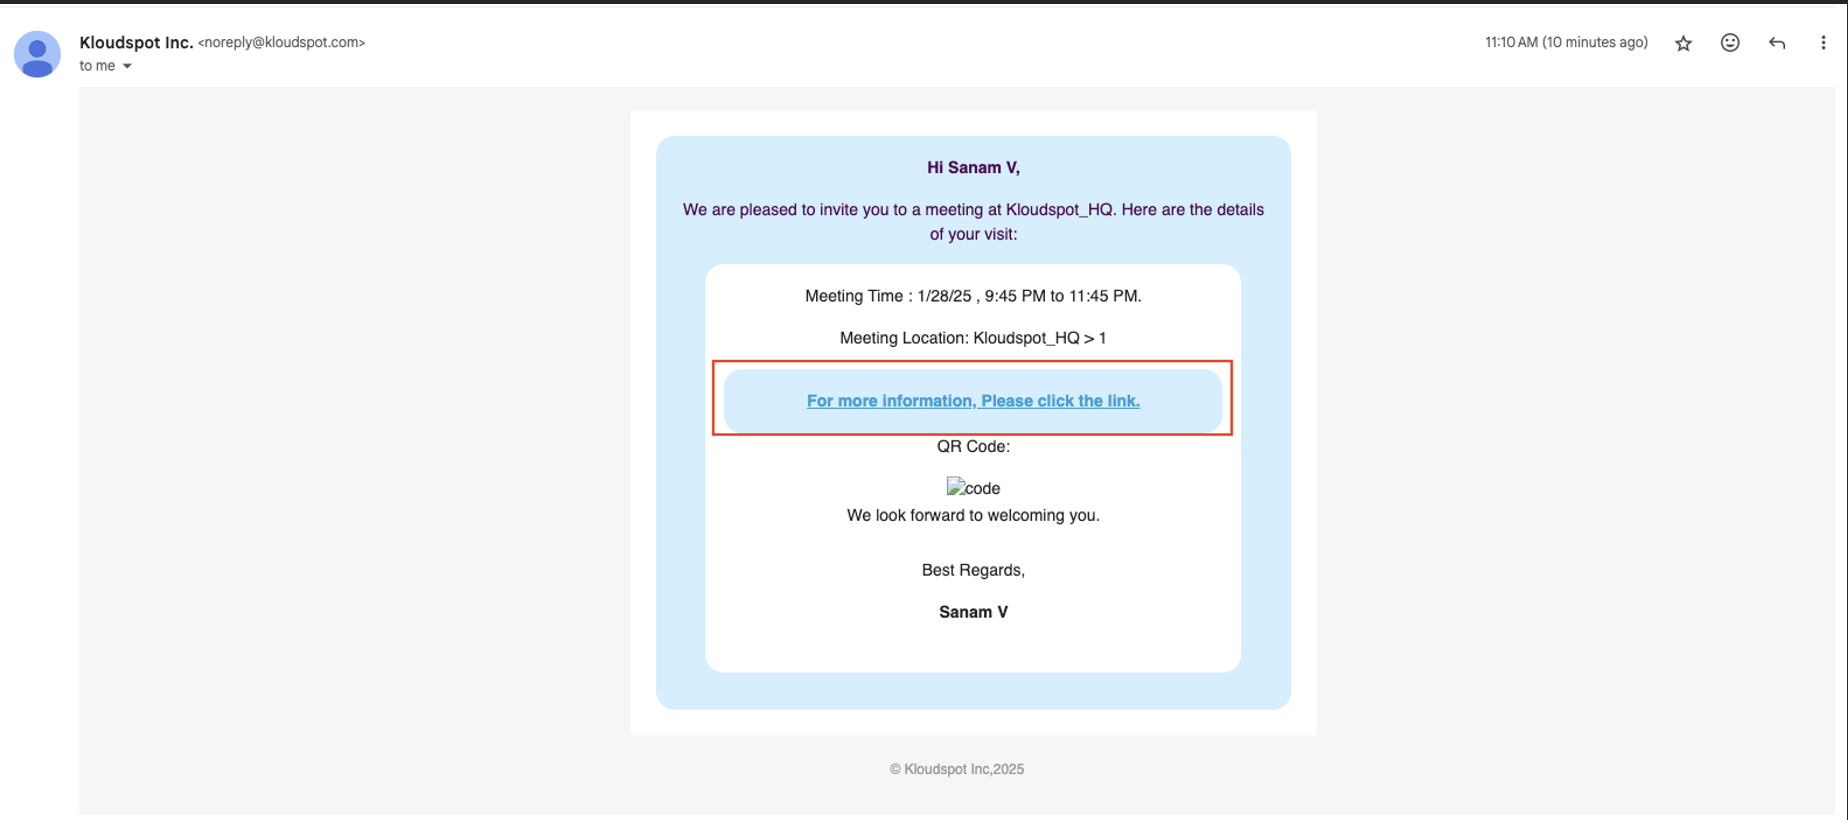
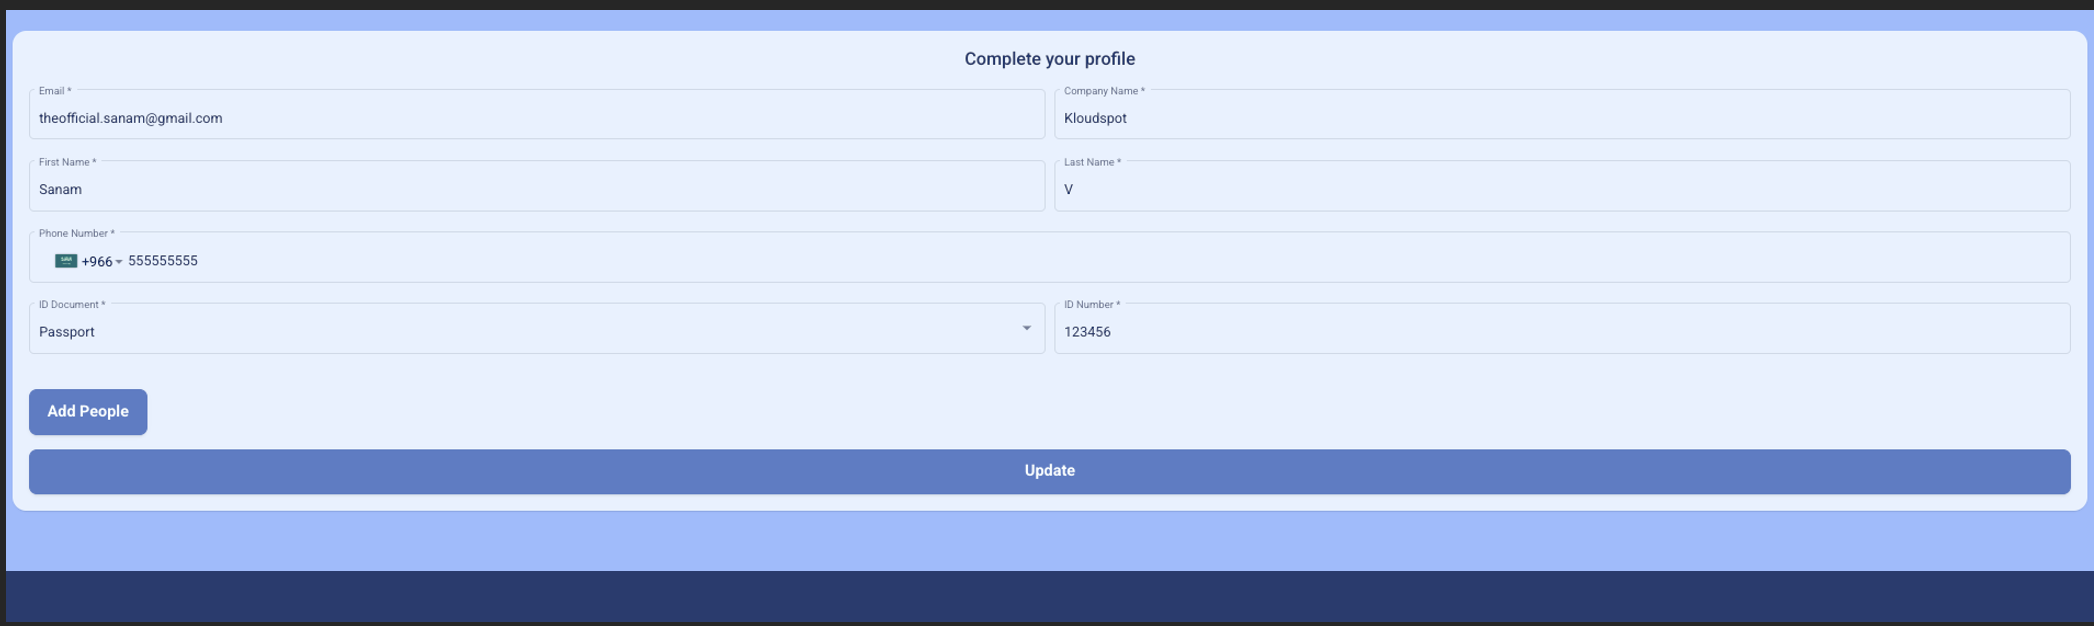
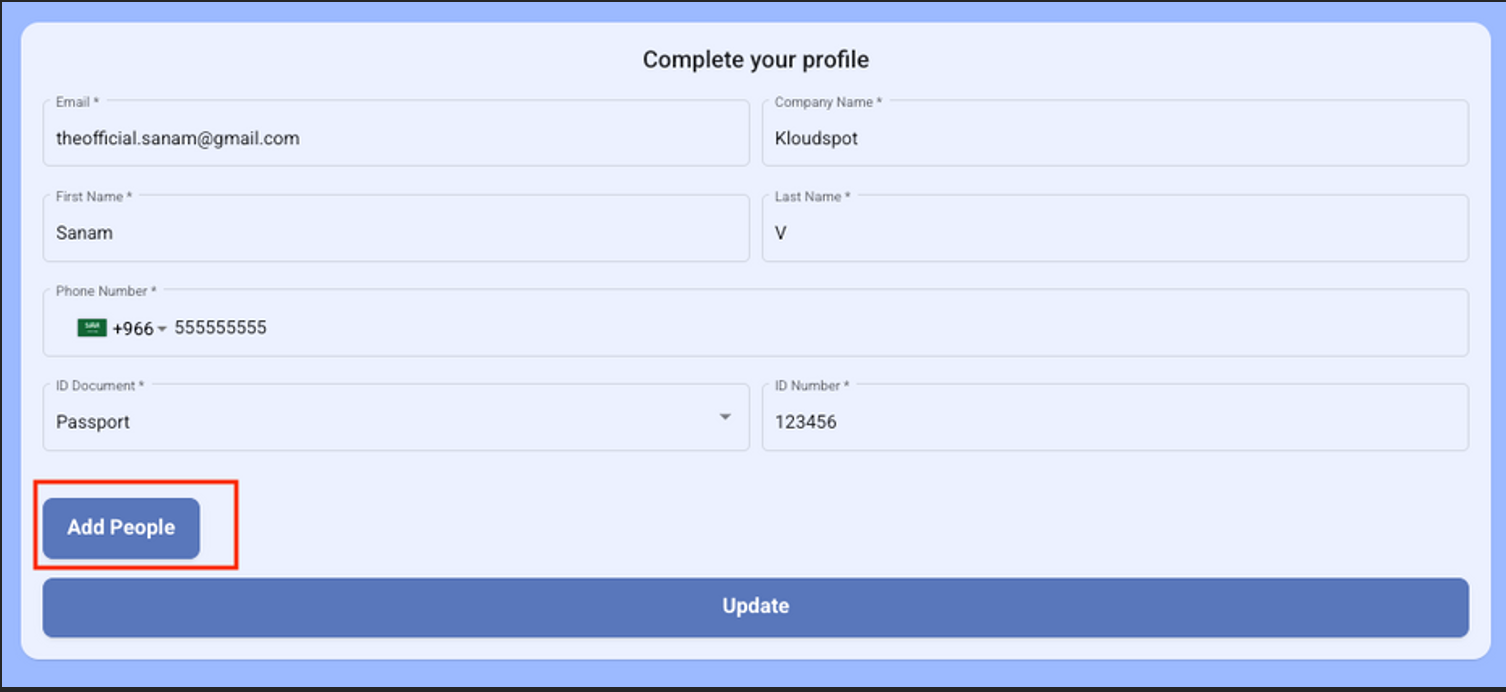
• Click on the link in email.
• Verify and Update details. The guest can optionally add Delegates by clicking on Add People button. For more details on delegates refer to 3.Delegates below.
• Click on Update.
• Guest will get a booking code and a OR code which he can use for
CheckIn at Office Kiosk.
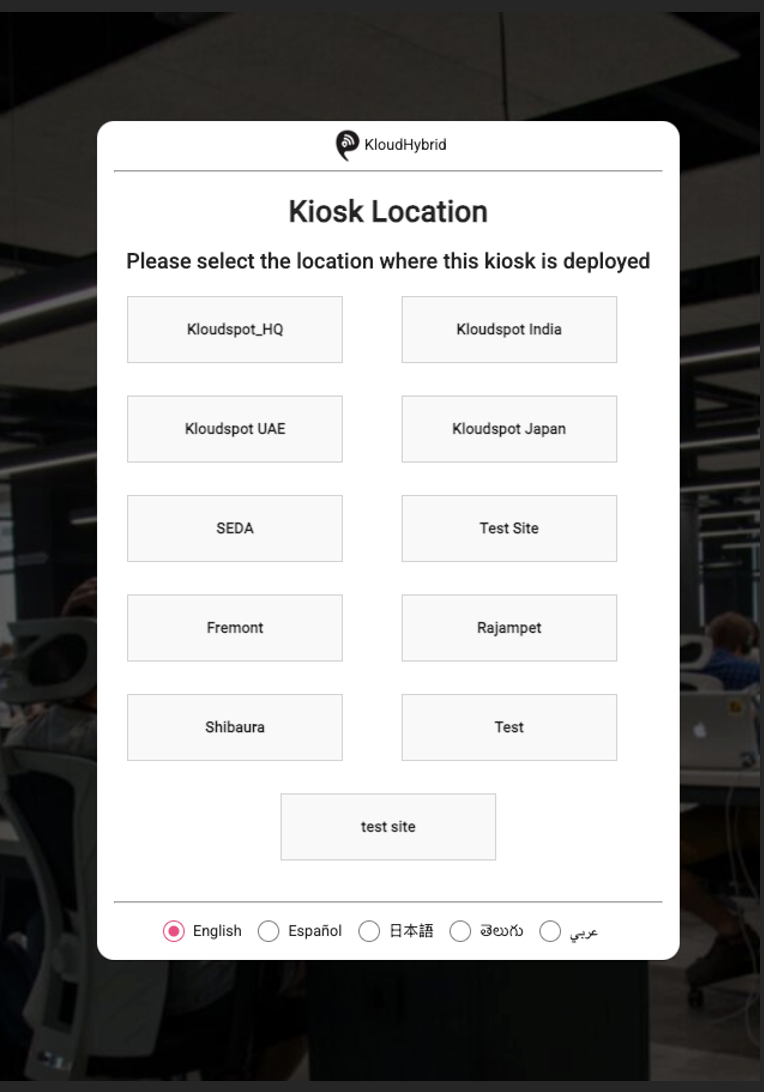
• While setting up the Kiosk for the first time, Select the Site location.
This information is stored on the Kiosk and will be used whenever the kiosk starts.
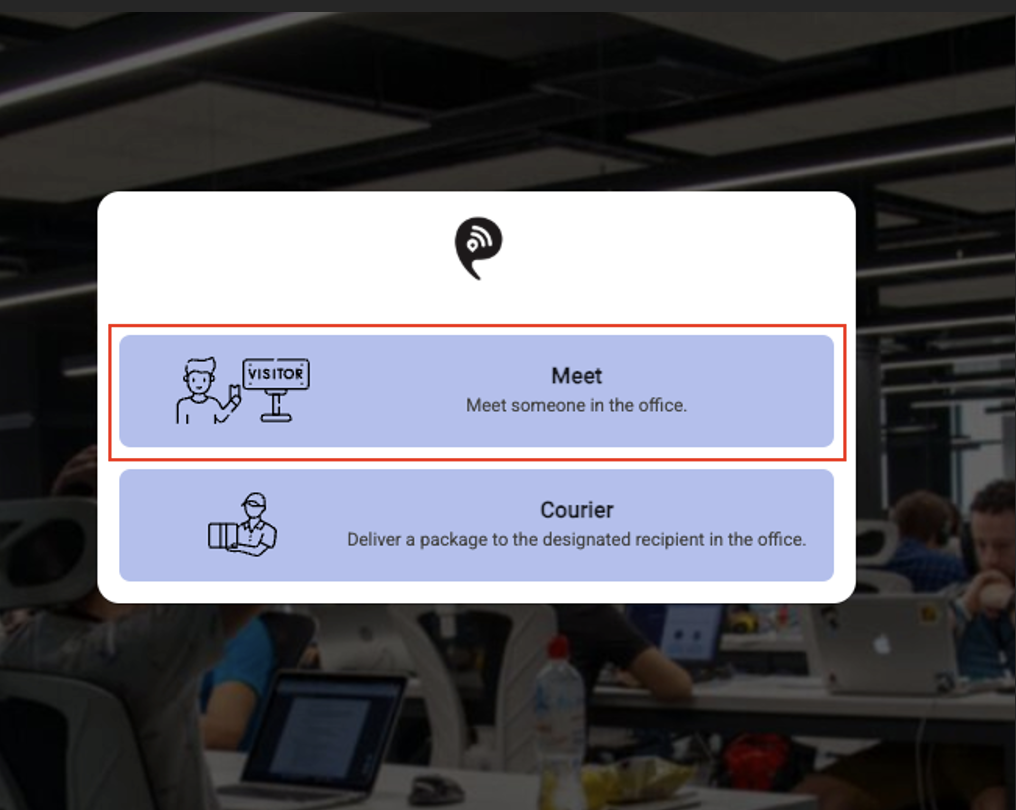
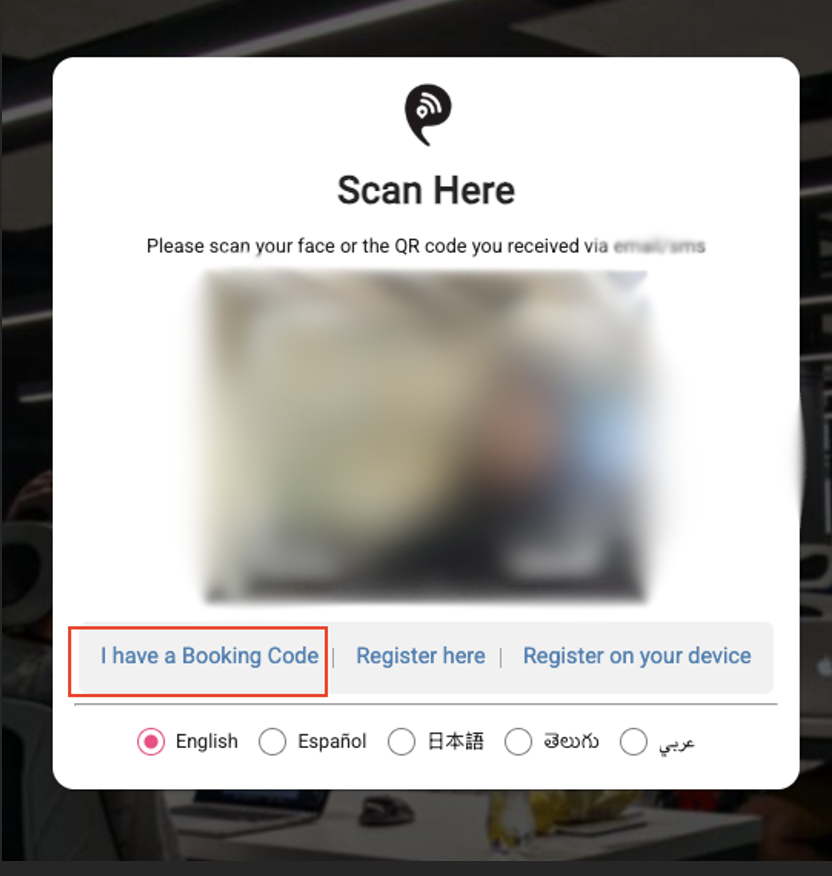
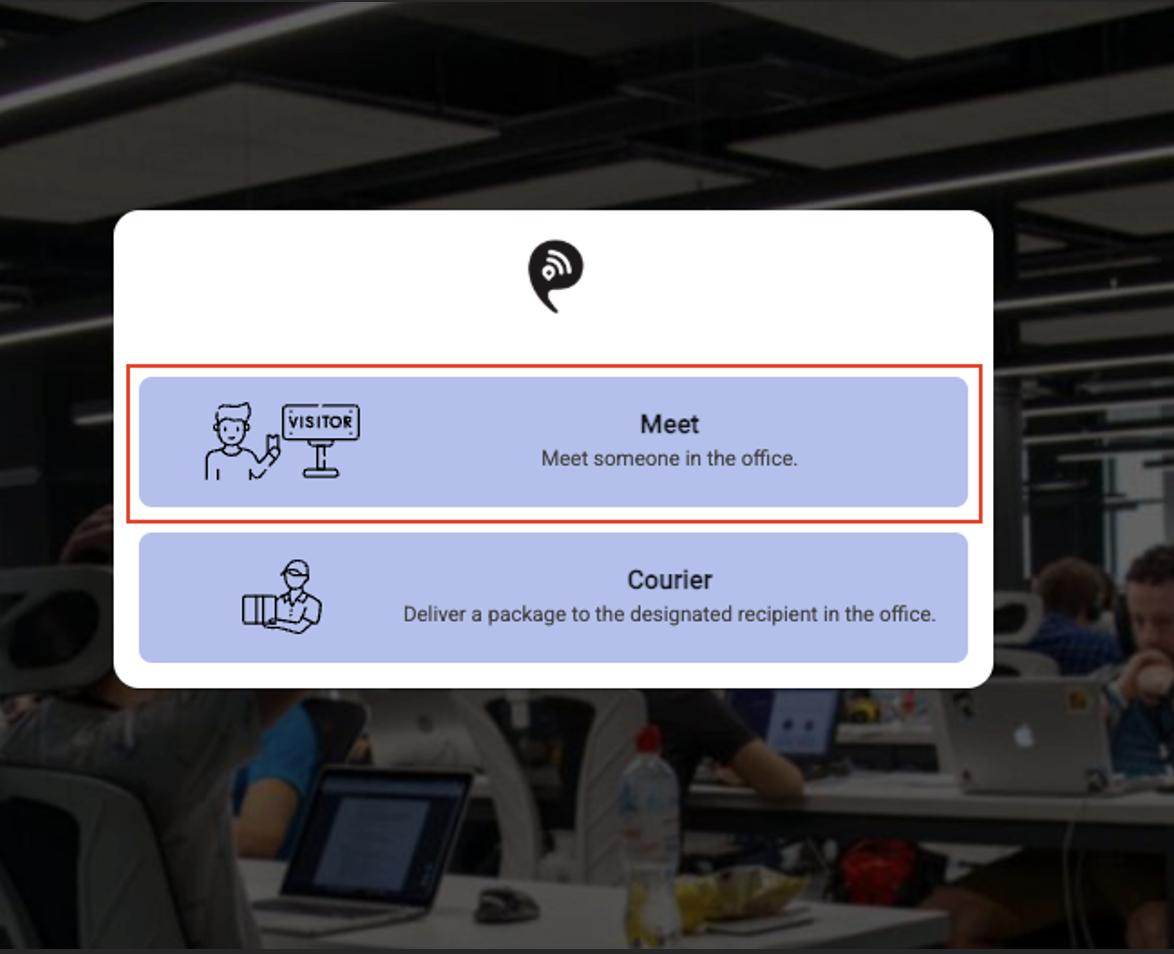
• Select Meet
• Scan the OR code
• Or Click on I have a Booking Code
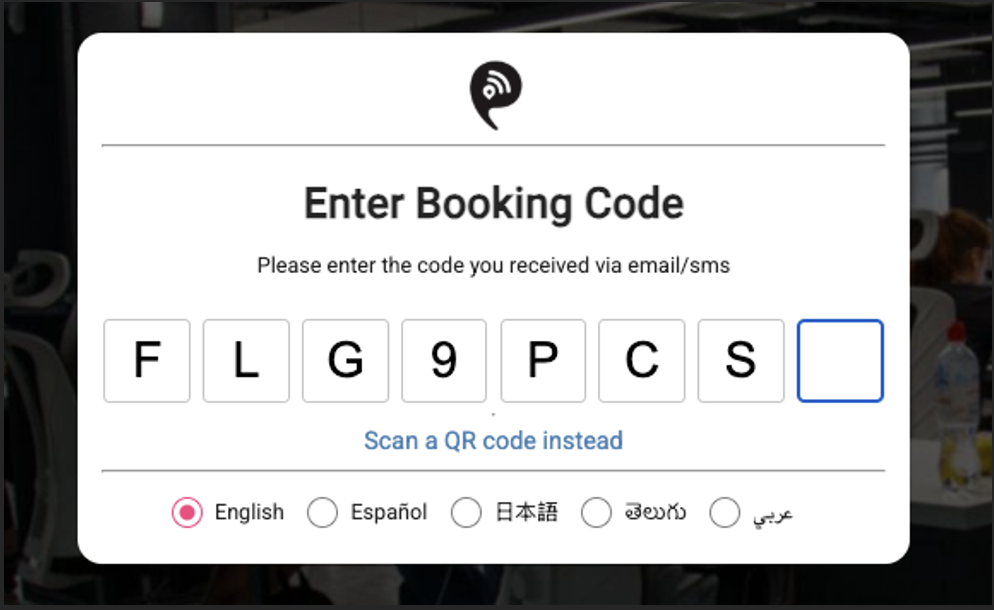
• Enter the booking code
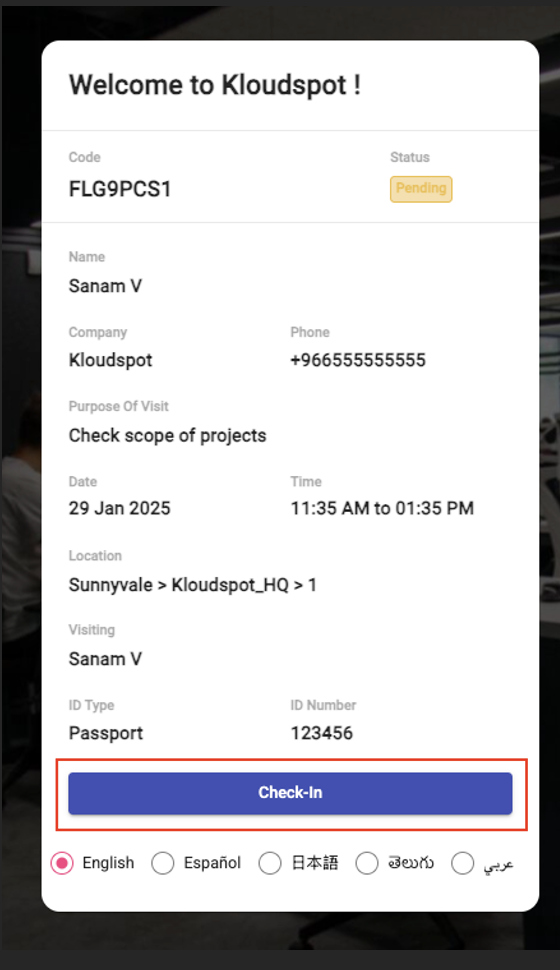
• Once the code is entered and verified, Click on CheckIn.
• Clicking this button will complete a guest check-in.
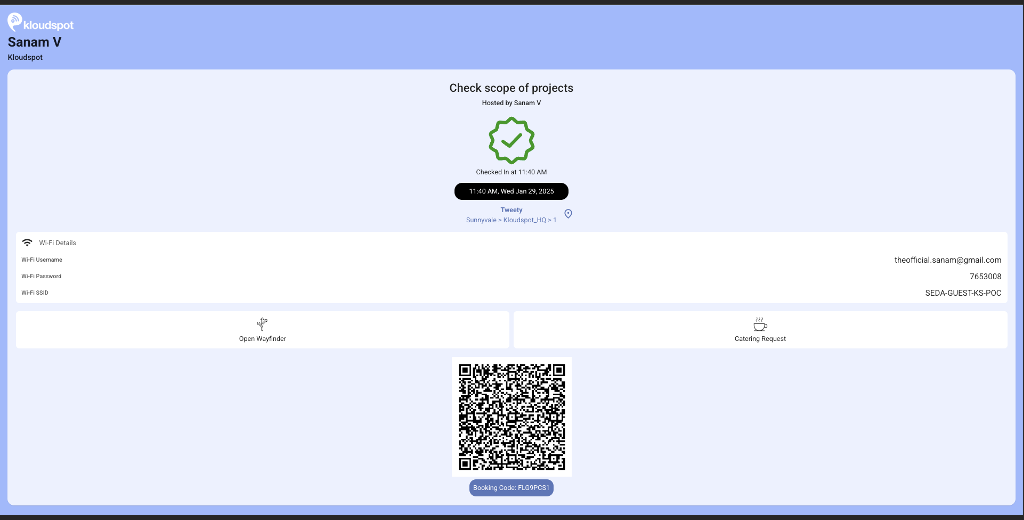
• Once the Check-In is done, the guest will see the page below.
• Click on Open Wayfinder to see the video guidance to the meeting location.
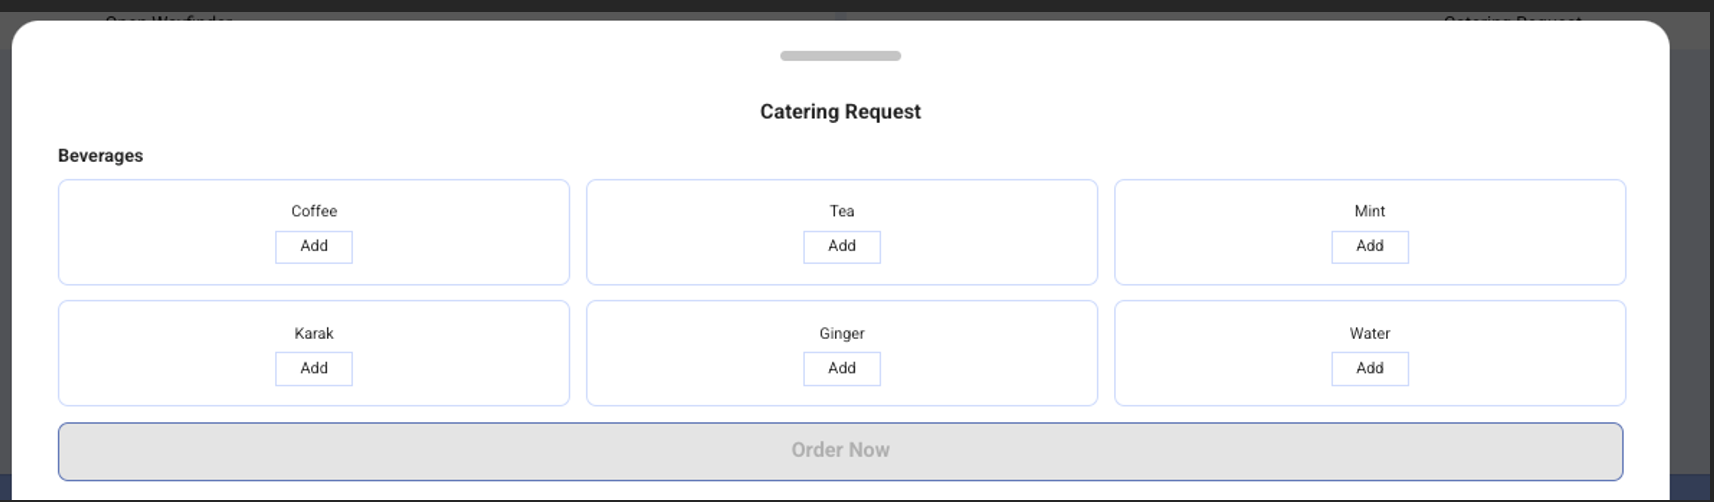
• Click on Catering request to order food.
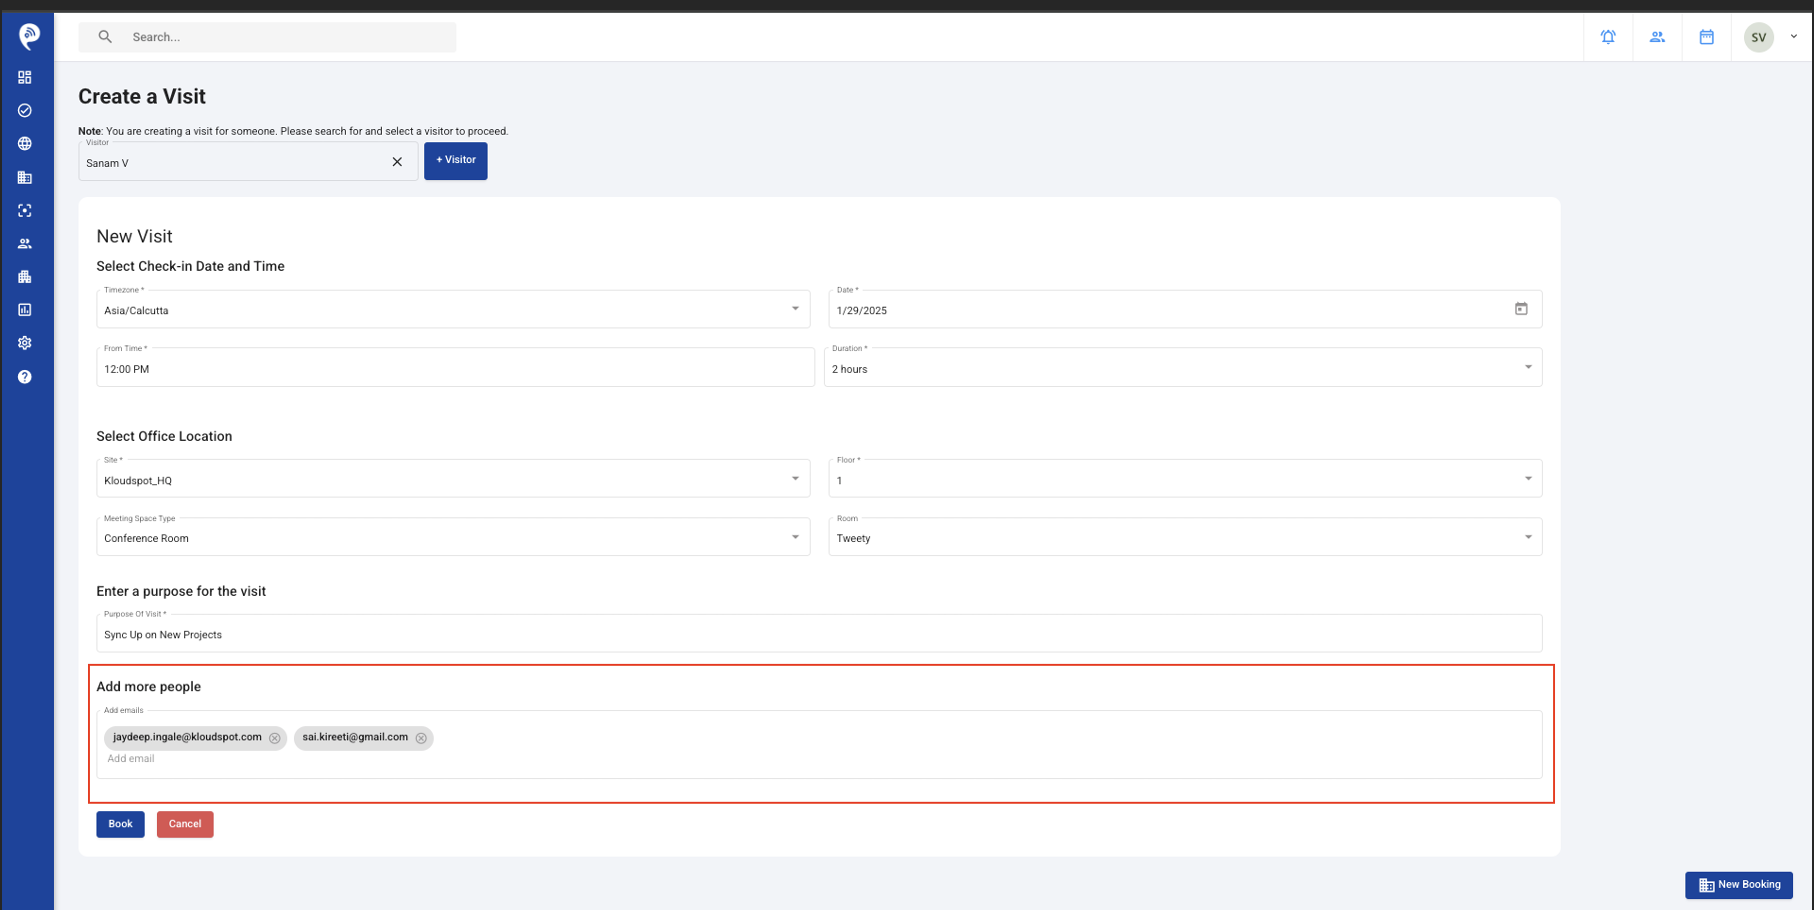
Invite a Group of Visitors
Add the emails of additional people you want to invite to the meeting in Add more people section and click on Book in Create Visit Page.
All the individuals that were added to this field will receive an email with a booking code and a QR to scan at the office kiosk is These booking codes are different for each visitor, even though the referred meeting is the same.
Each group member needs to checkin individually.
b. WalkIn Visitor
Summary: A Walk-In Visitor is someone who comes to the office without an invitation.
They will have to use a kiosk at office to select a location and set up a
meeting with someone in the office.
• Select location in Kiosk
• Click on Meet
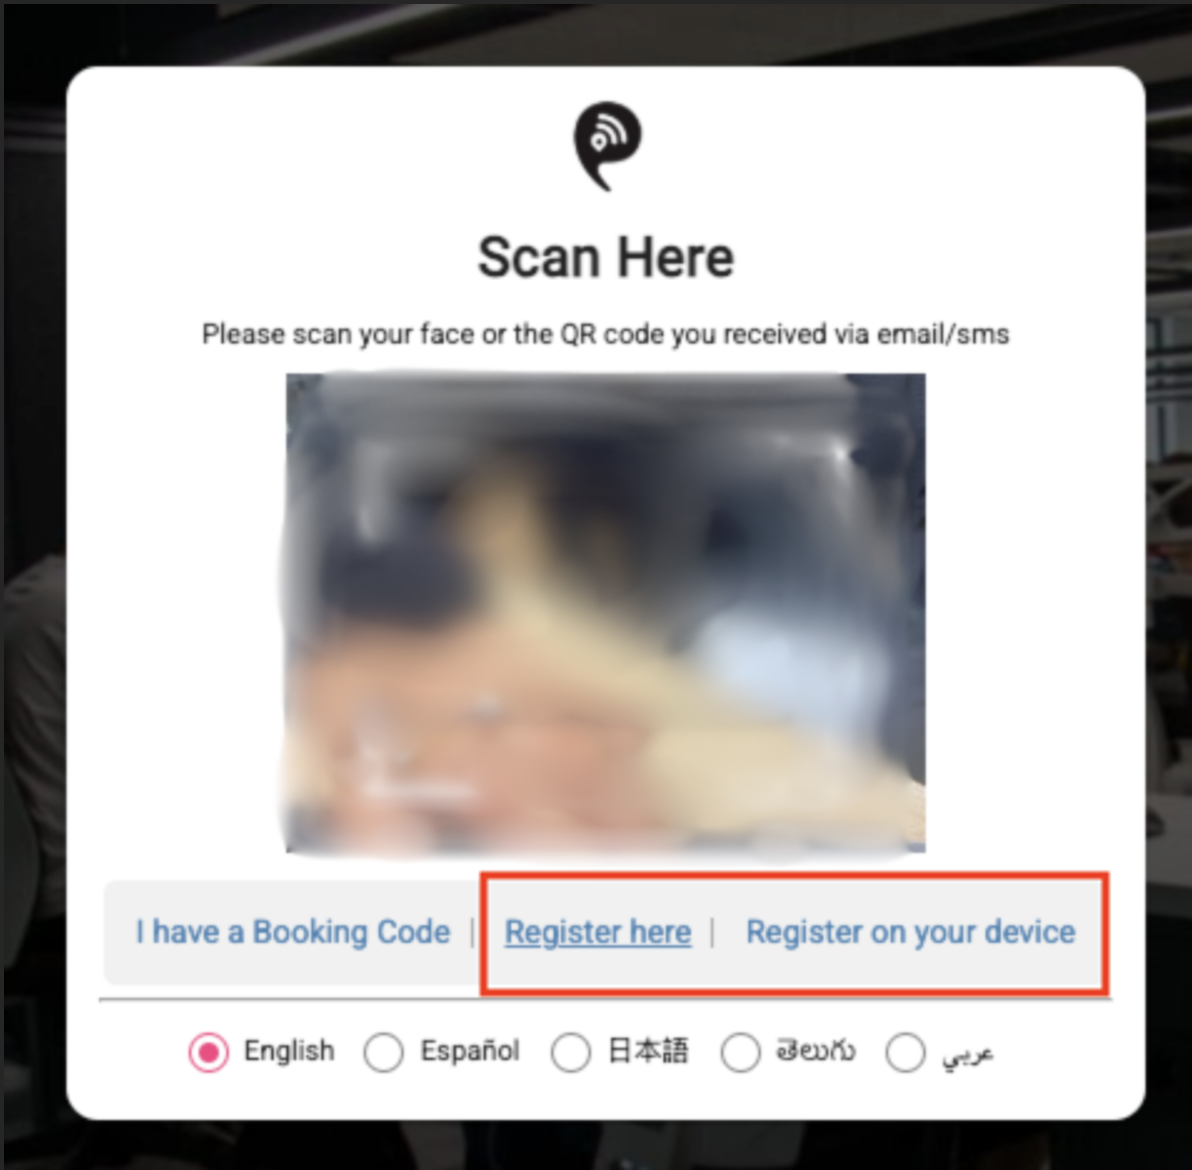
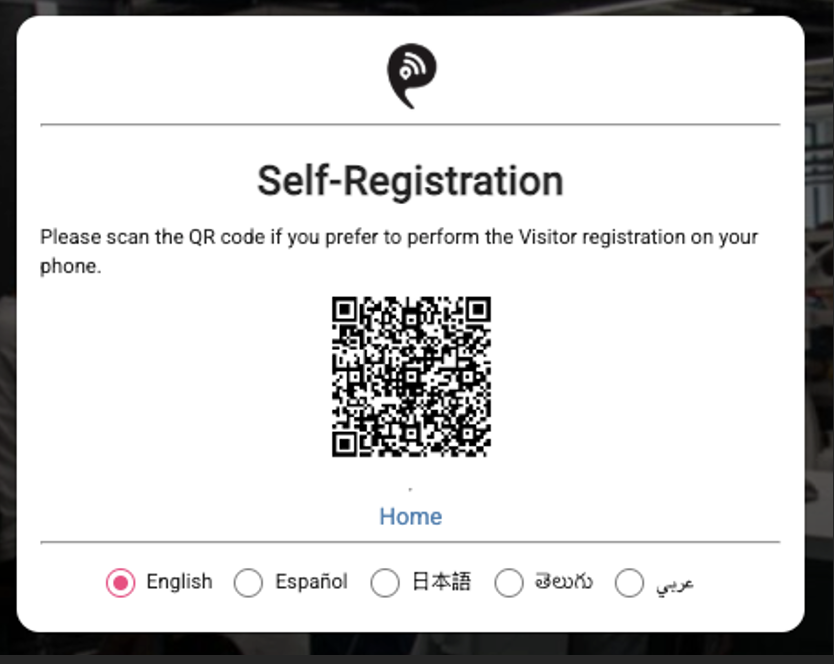
• Choose Register here or Register on your device
• Register on your device will allow the guest to create a meeting on his own device.
• Scan the QR on your device to register.s!p:
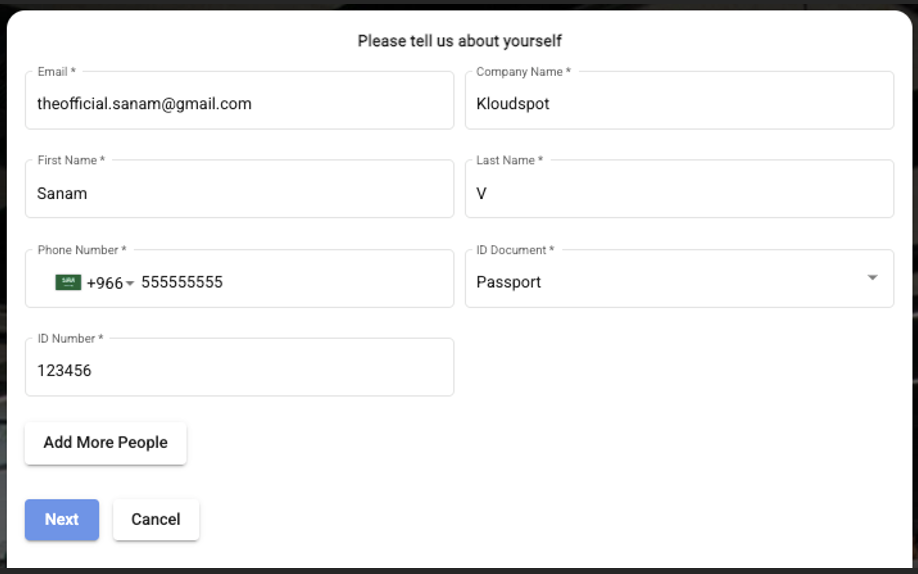
• Click on Register here to create a meeting yourself in Kiosk.
• Enter your details and click on Next to select meeting details. Click on Add More People to add Delegates. For more details on delegates refer to
3.Delegates below.
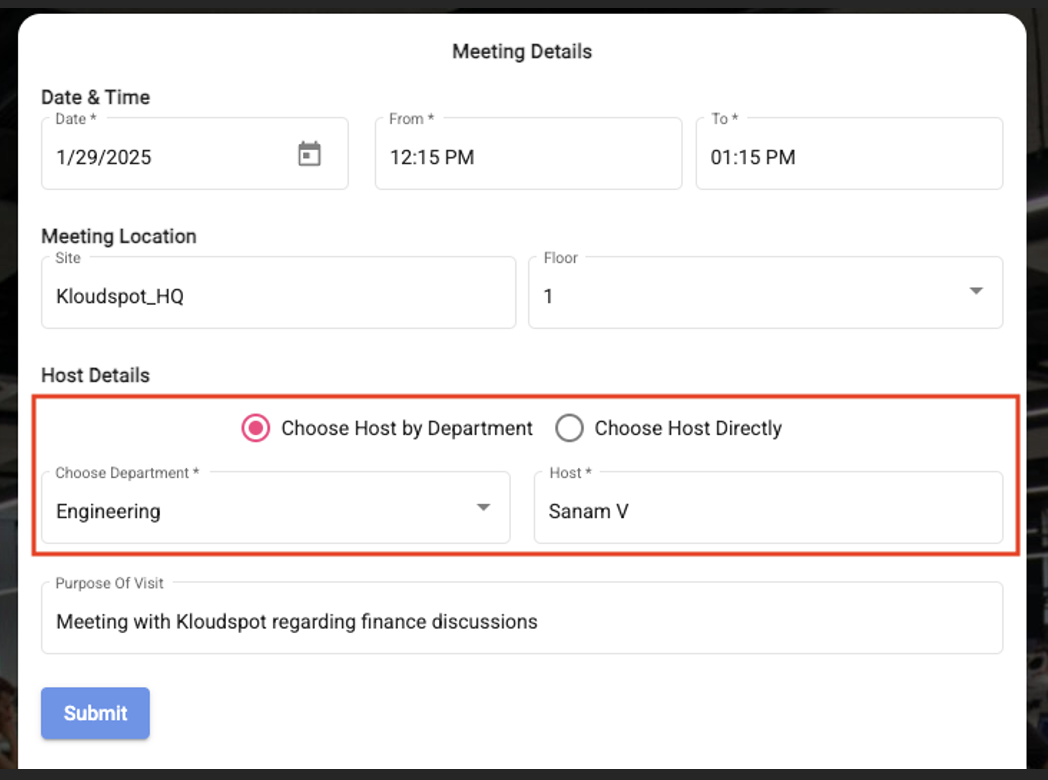
• Update the meeting details.
• Search for host by department or search host directly by choosing the appropriate option.
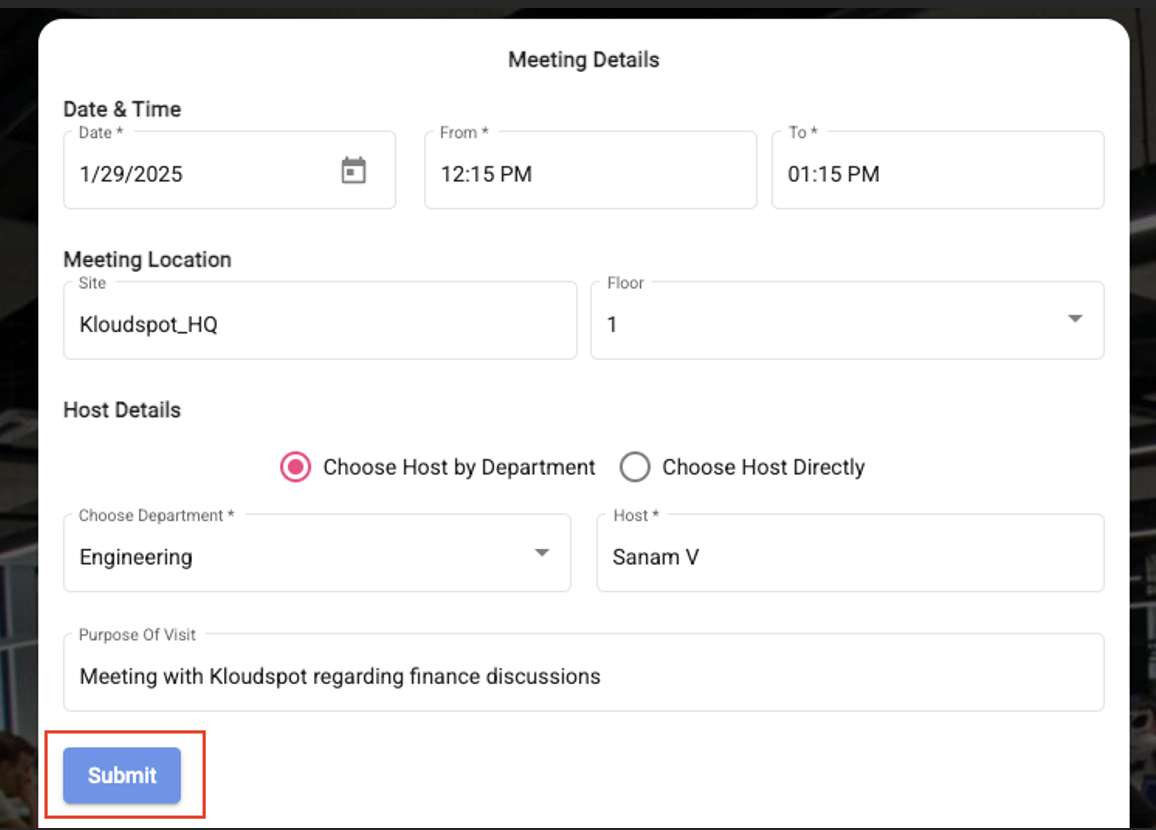
• Click on Submit
• Guest will be presented with his meeting details. Click on Done.
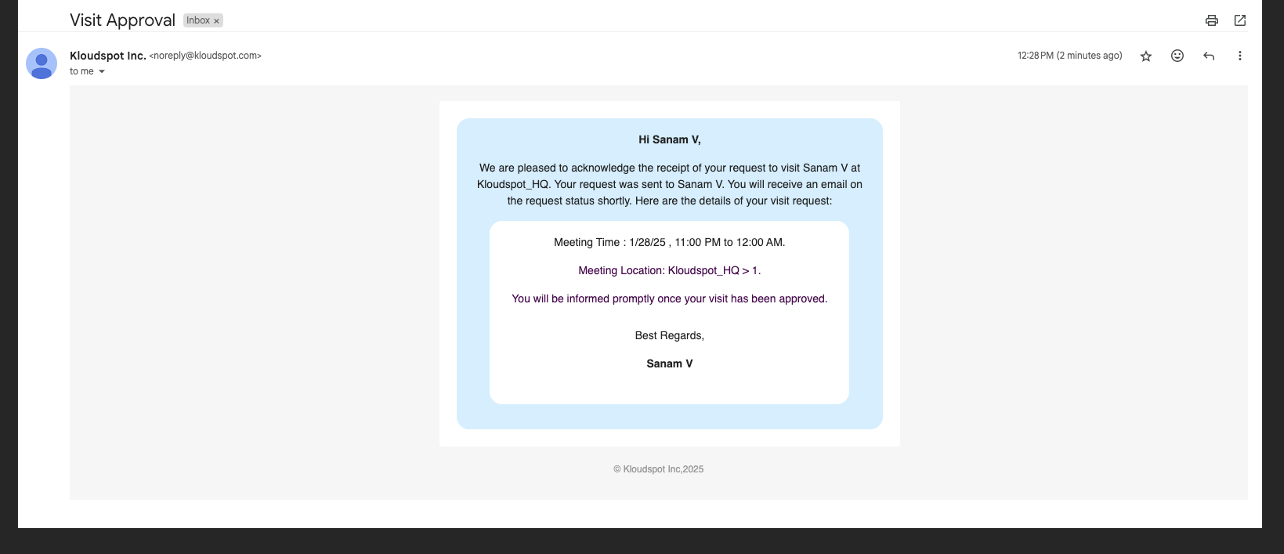
• Guest will receive an email saying that his request has been sent to the host for review.
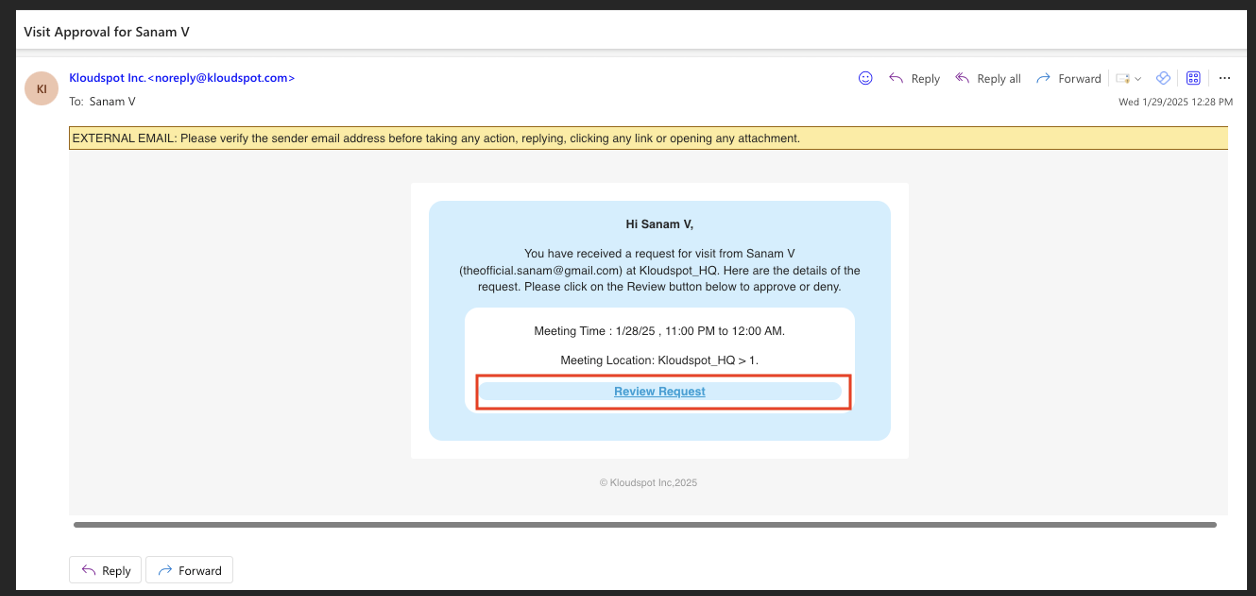
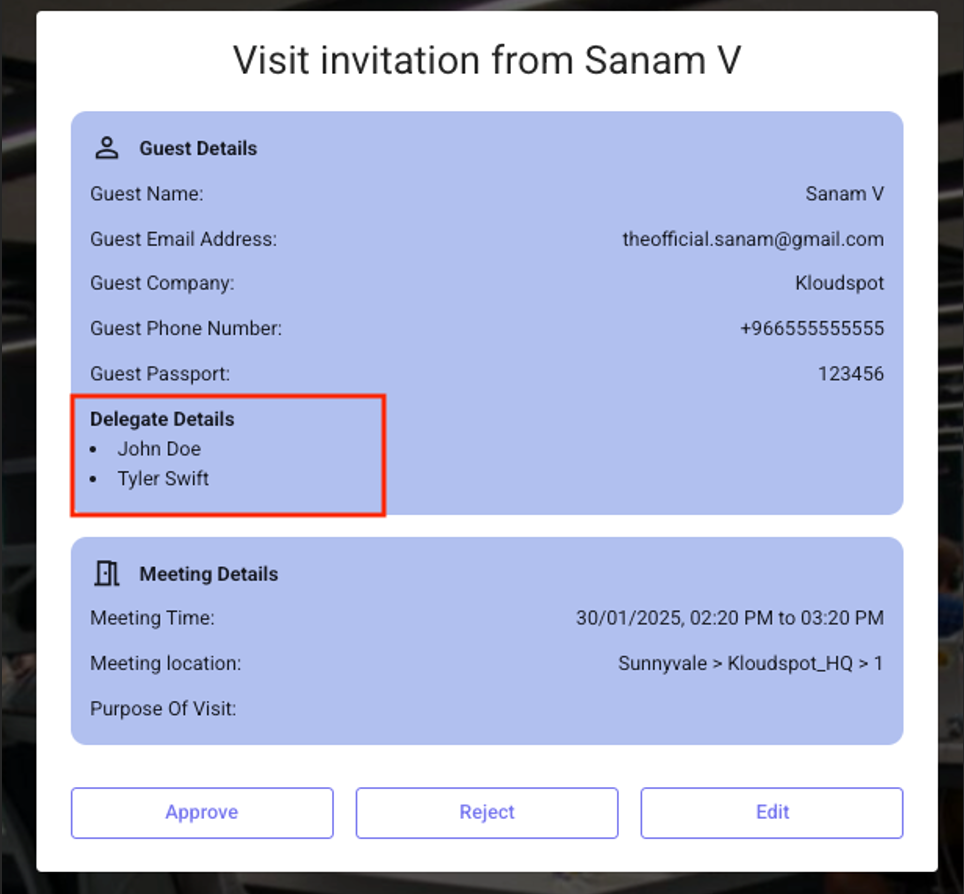
• An email with the same visitor information will be sent to the host. Click on
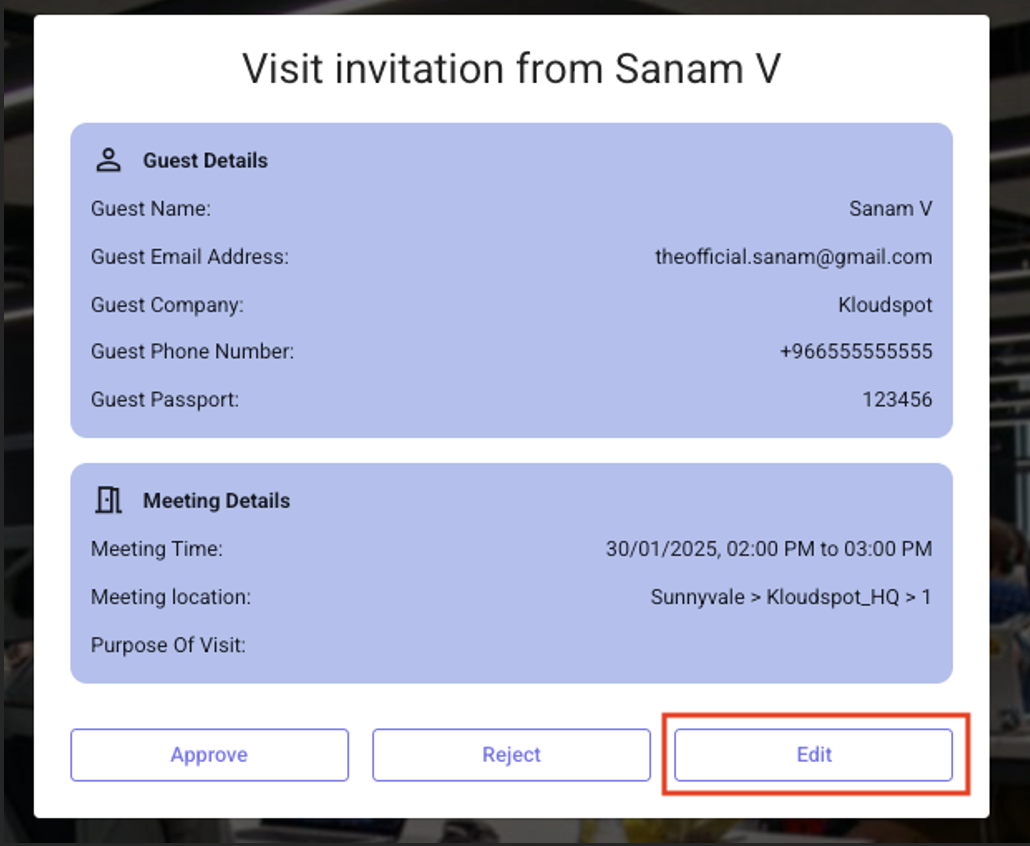
“Review Request”
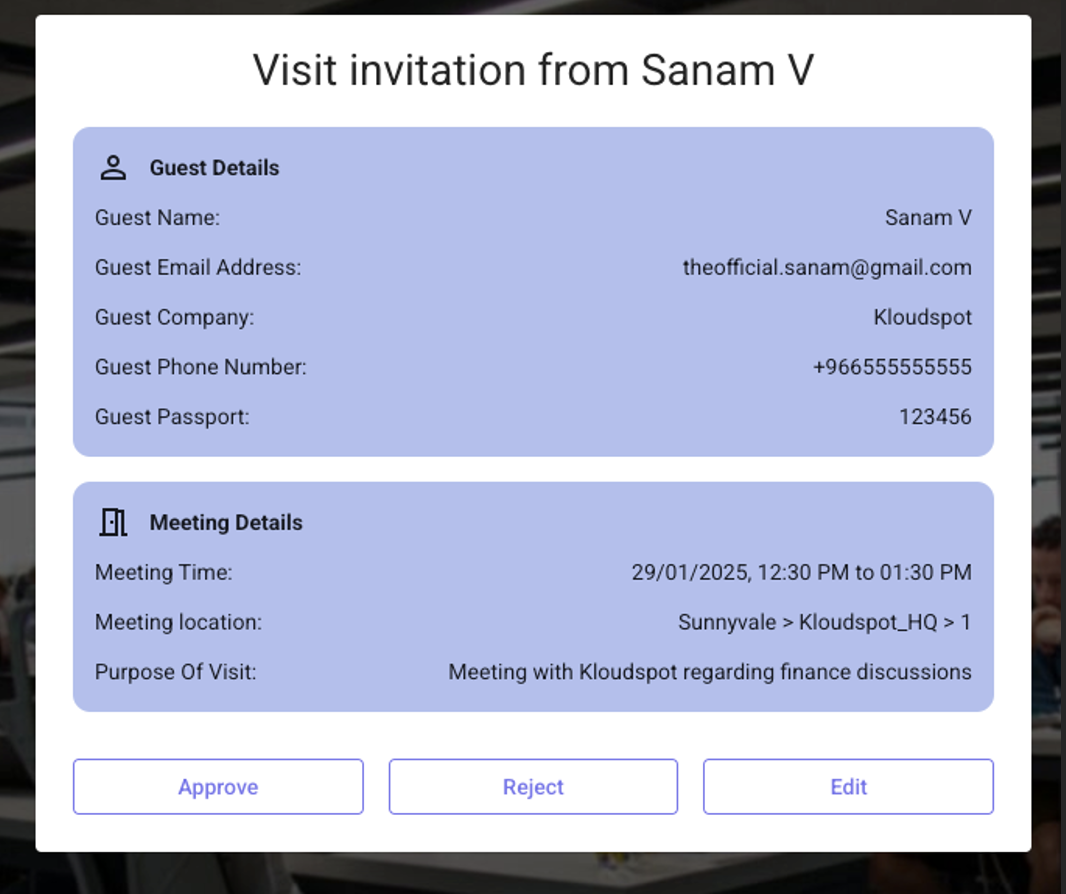
• Host will review the request and can perform actions like
-> Approve the meeting request
-> Reject the meeting request
-> Edit the meeting request
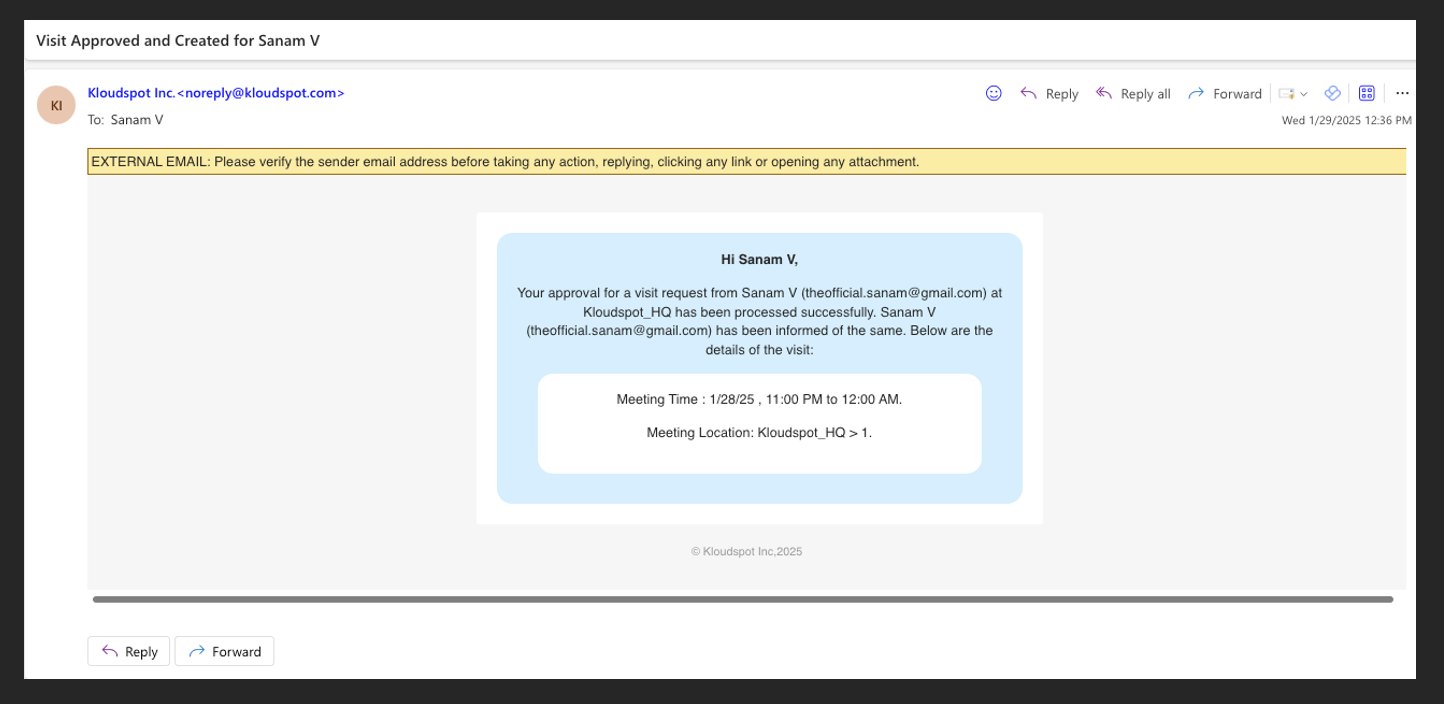
If Approved:
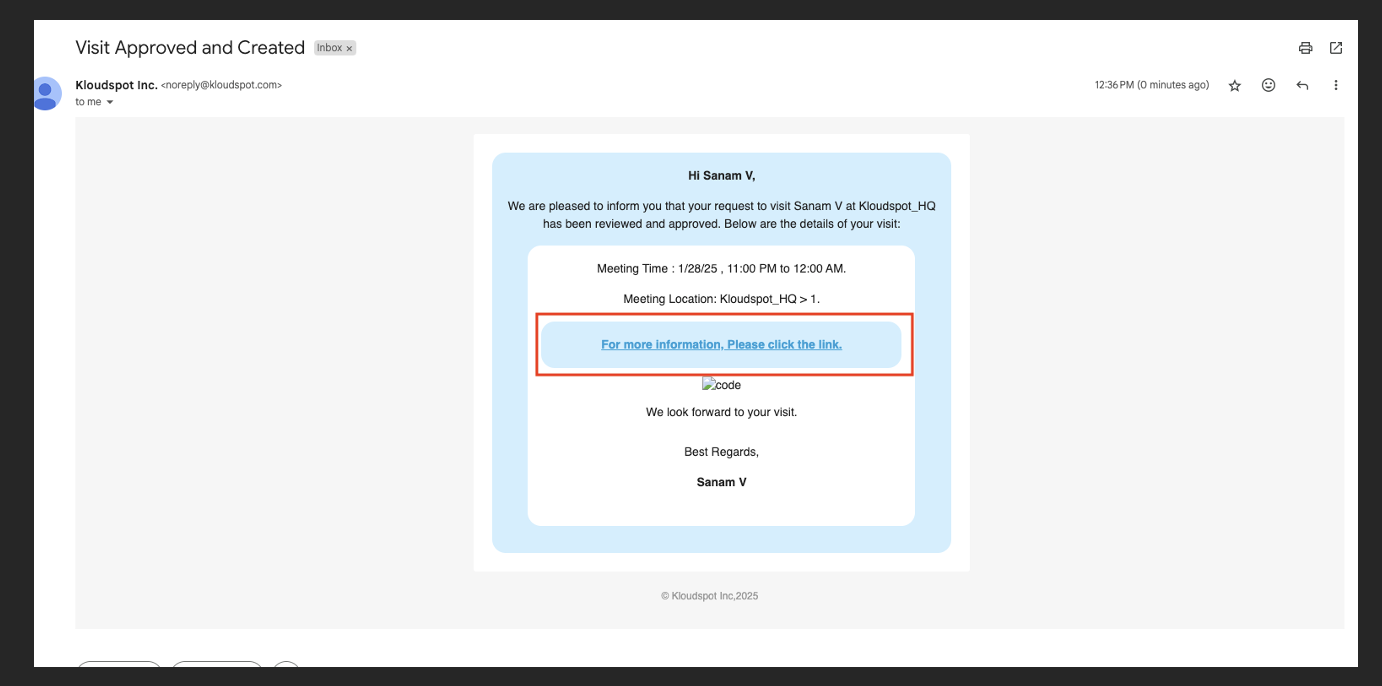
Once the meeting request is approved, both host and the guest will receive a confirmation email.
Email to Host
Email to Guest
Follow the steps 2.8 - Guest Check-In Process to check-in.
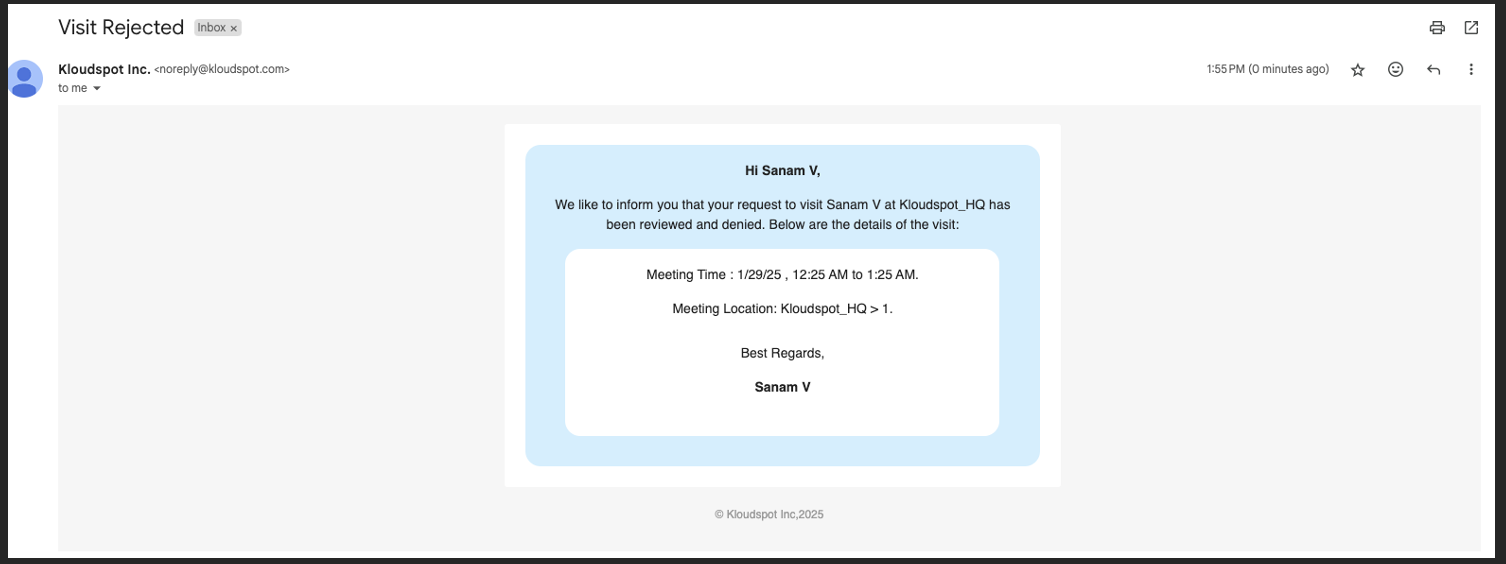
If Rejected:
• Guest will be informed that the visit request is Rejected via email notification.
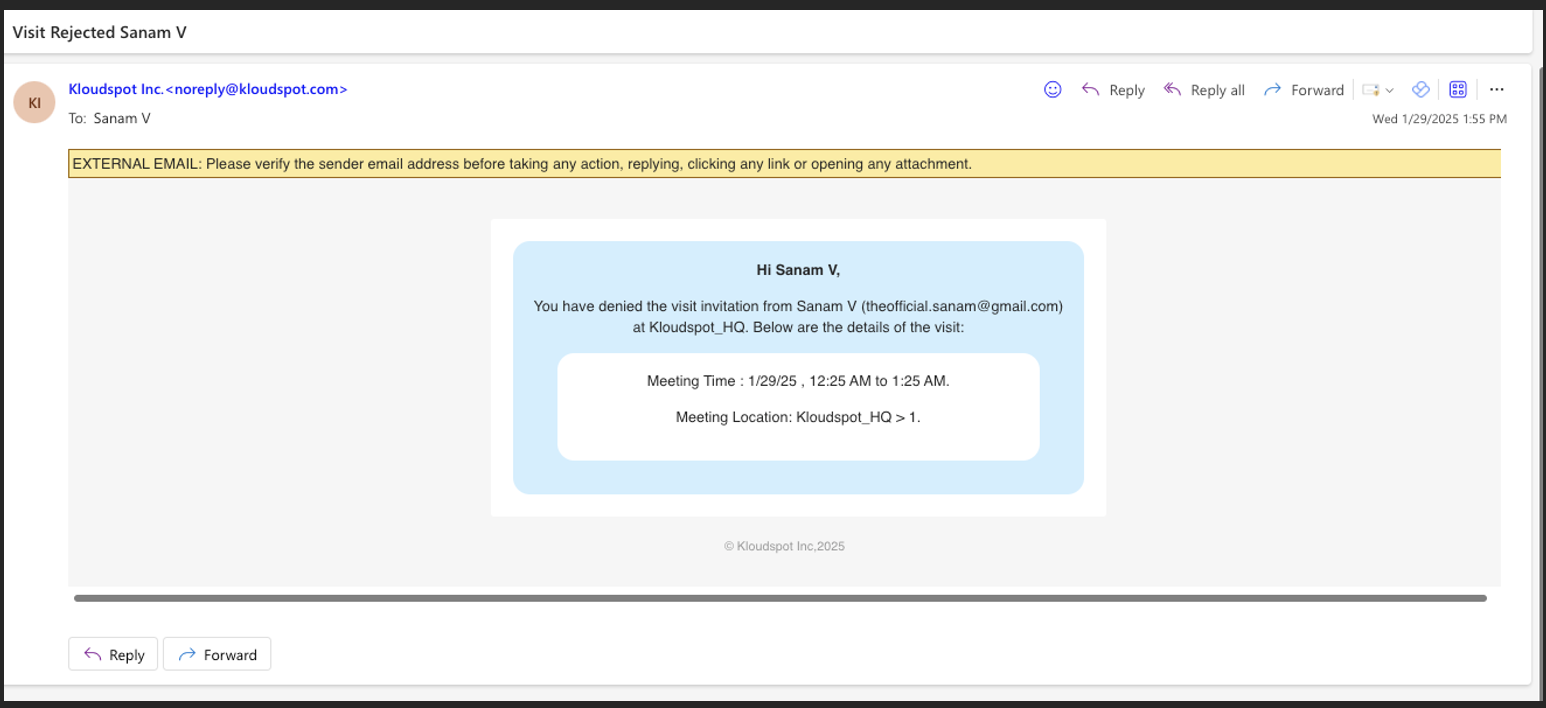
• Host will also get an email notification that he has rejected the visit request.
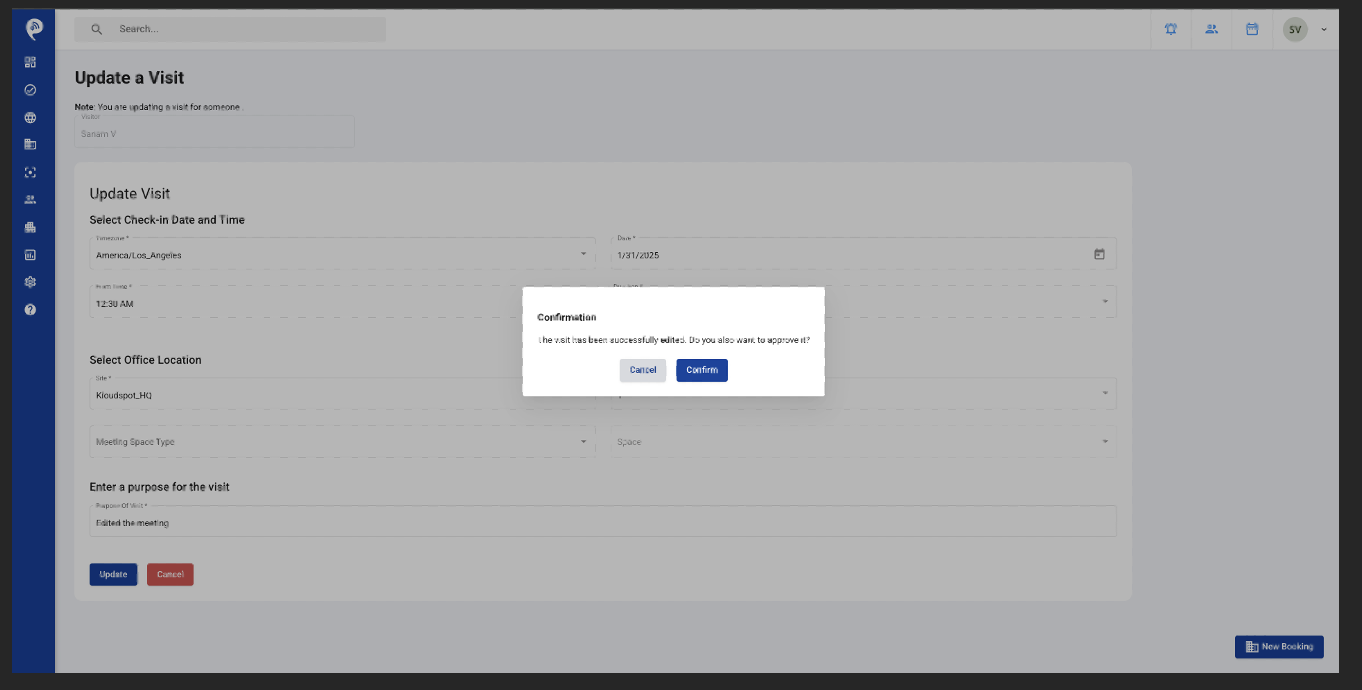
If Edited:
• Click on Edit to edit the visit.
• Update the information you want to and then click on “Update”
• Click “Confirm” to approve the request at the same time.
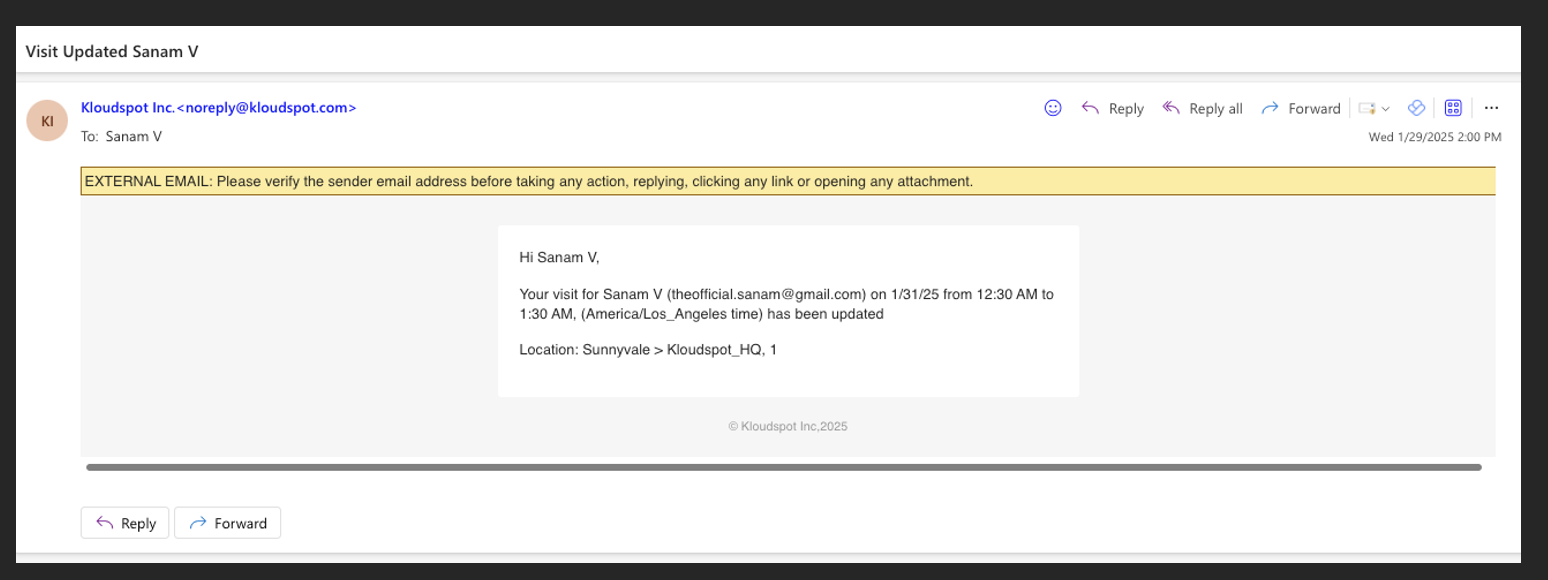
• Both Host and Guest will be informed that the visit request is being updated and
Approved via email notification.
Email to Host
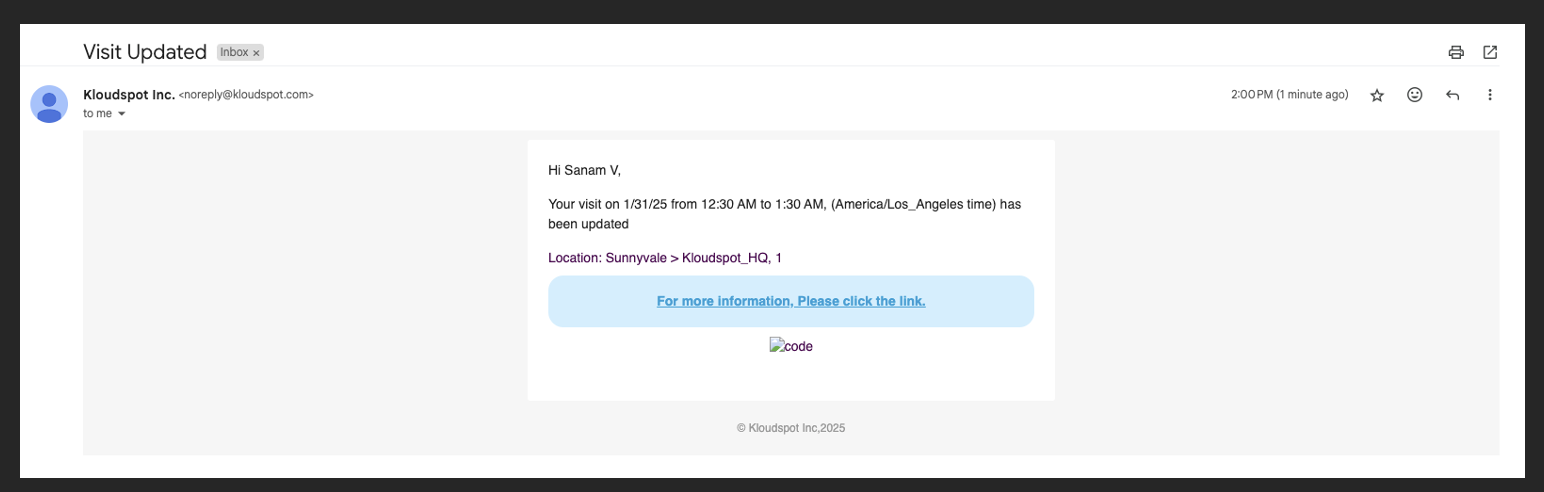
Email to Guest
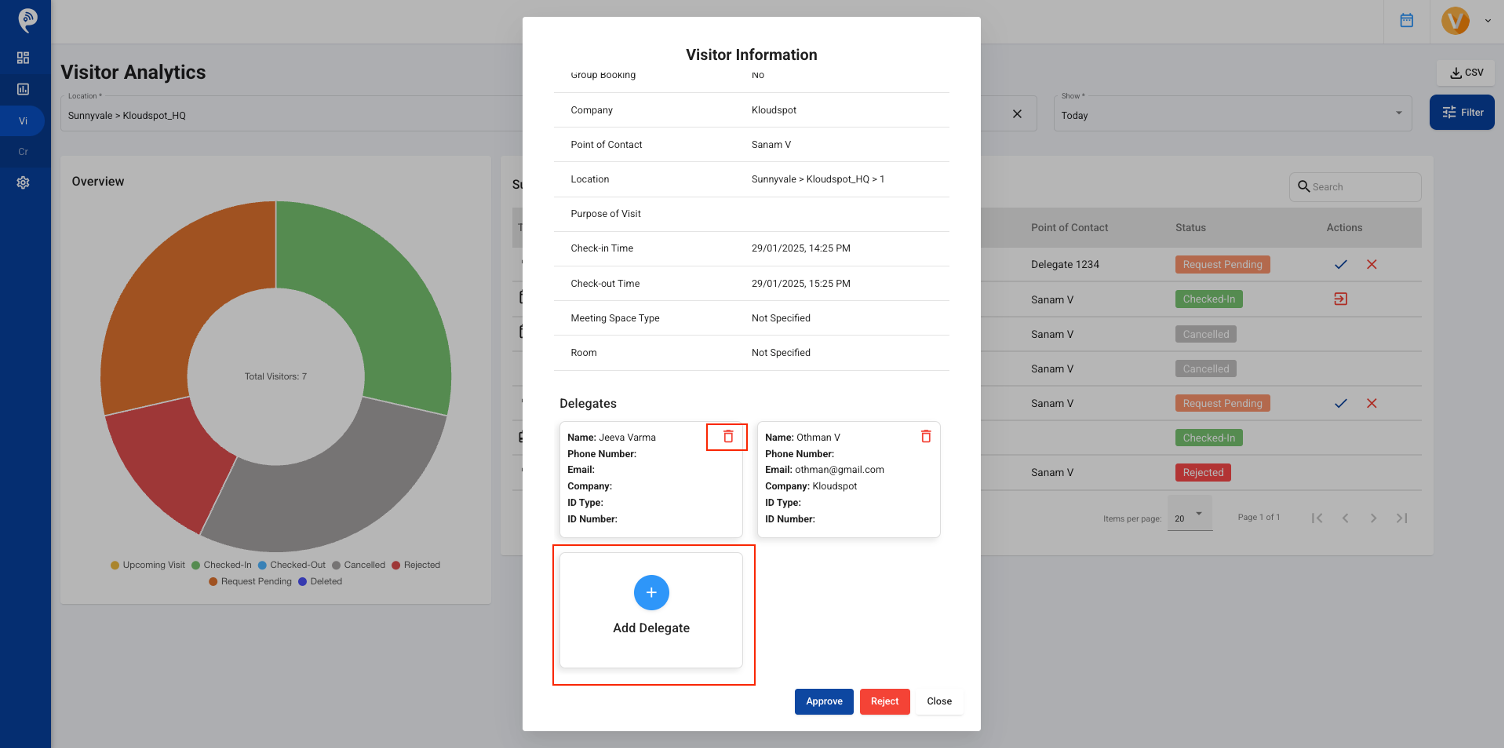
Delegates
Summary: In a Visitor Management System, delegates are people who go to a meeting along with the original invitee. If the invitee can’t attend for any reason, they can assign a delegate to represent them. The delegate can’t check in by themselves. When the delegate arrives, security at the office entrance manually verifies their details before allowing them to enter the office.
Add Delegates in Walk-in Visitor
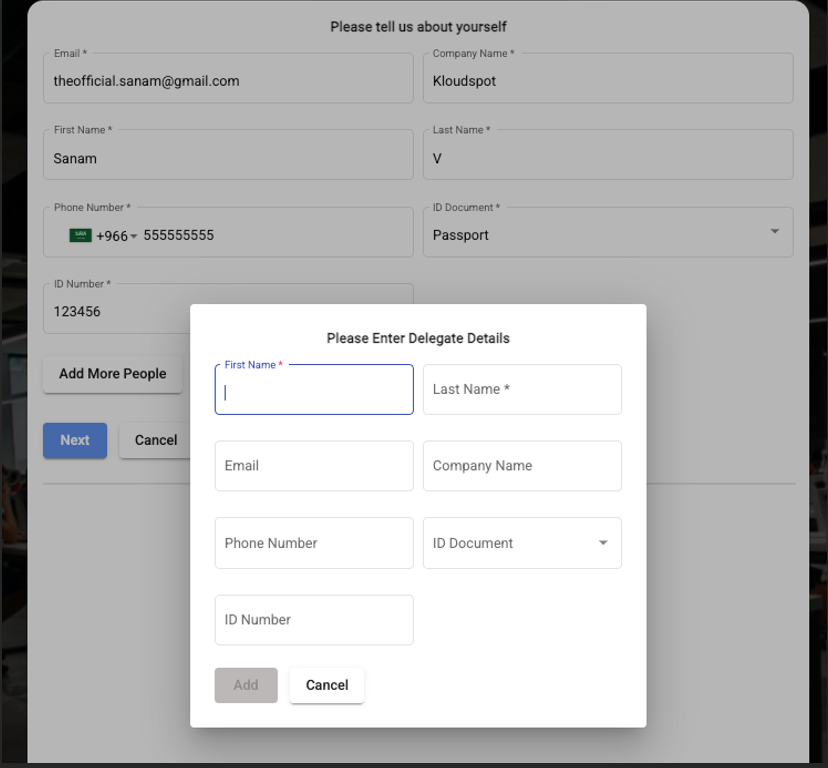
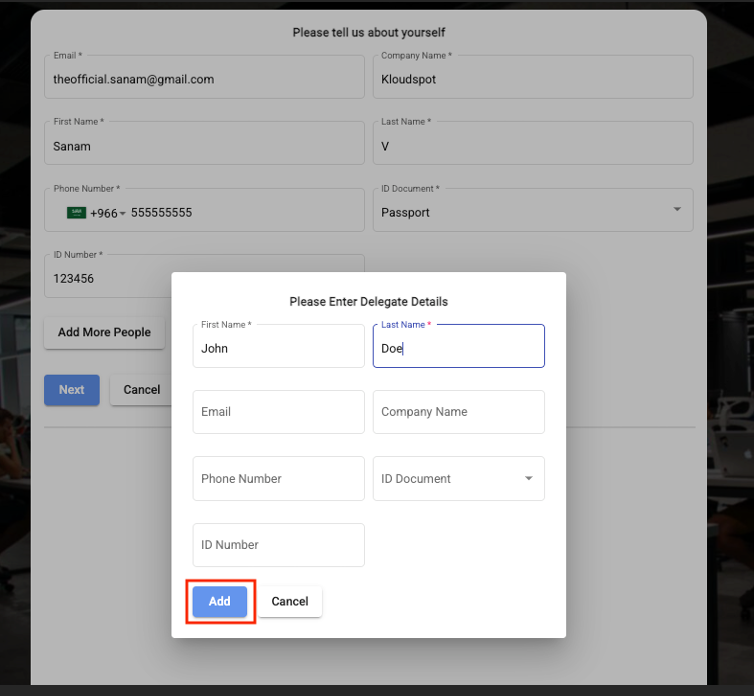
i.Click on Add More People in the registration screen in kiosk
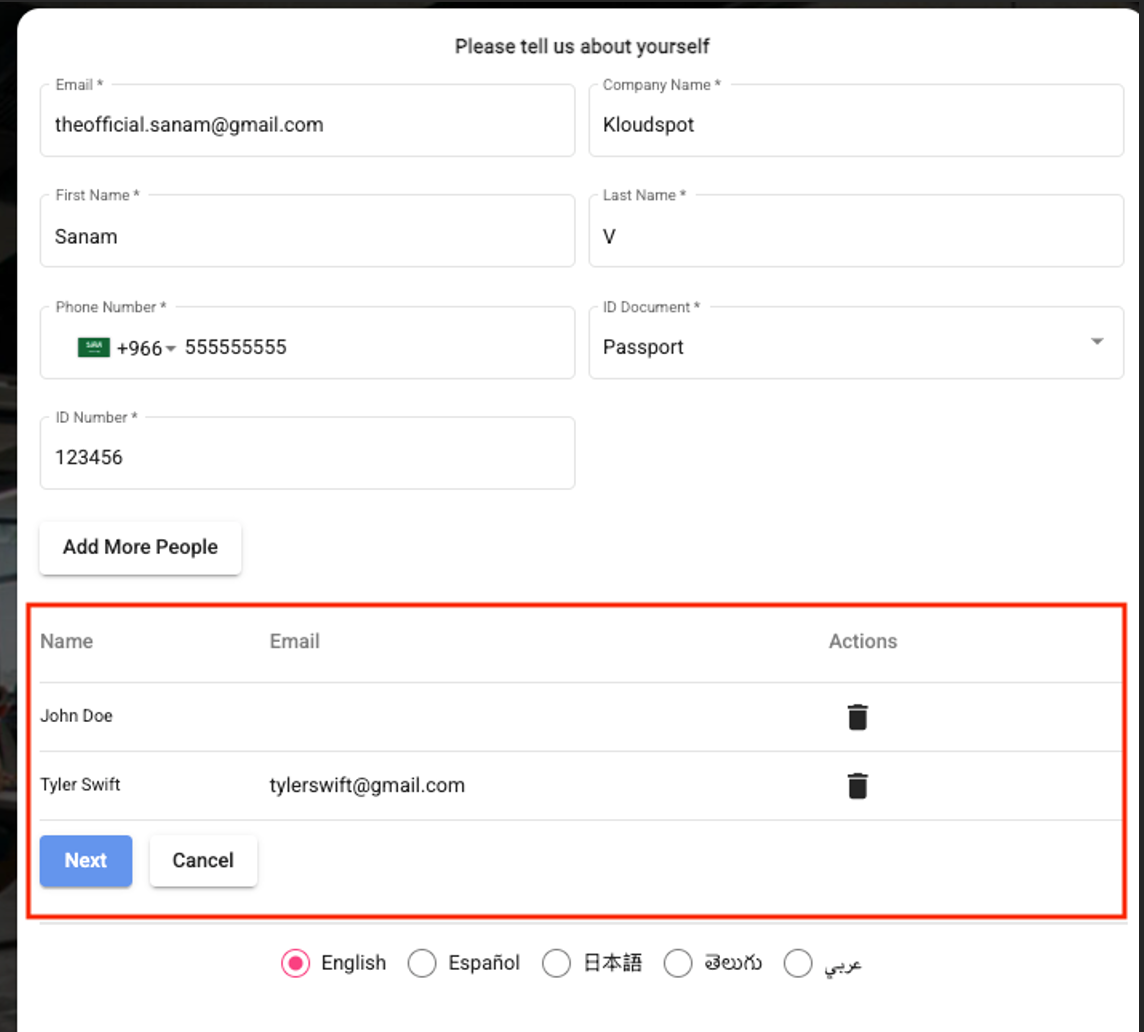
ii.Enter the delegate details and click on Add.
iii.One Visitor can have multiple delegates.
iv.Once the visit is submitted, Guest will receive a Visit Approval email with the delegates information included.
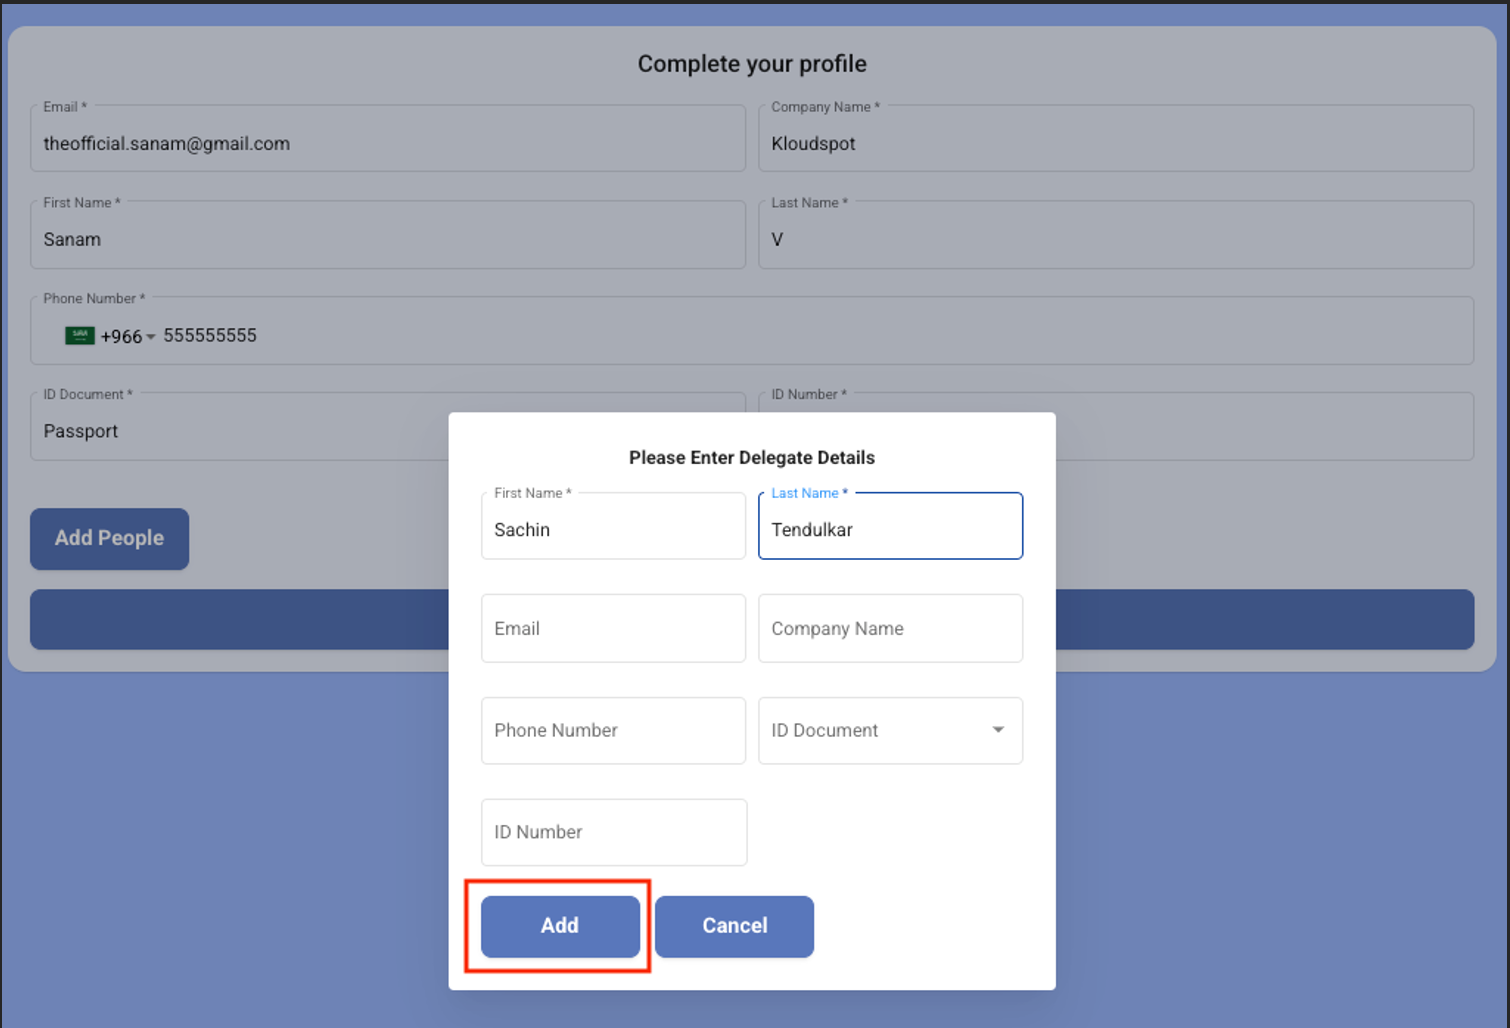
Add Delegates in Invited Case
i. An Invited Visitor can add Delegates through the link he receives when a visit is created.
ii. Click on the link in Visit Created Email.
iii. Click on Add People
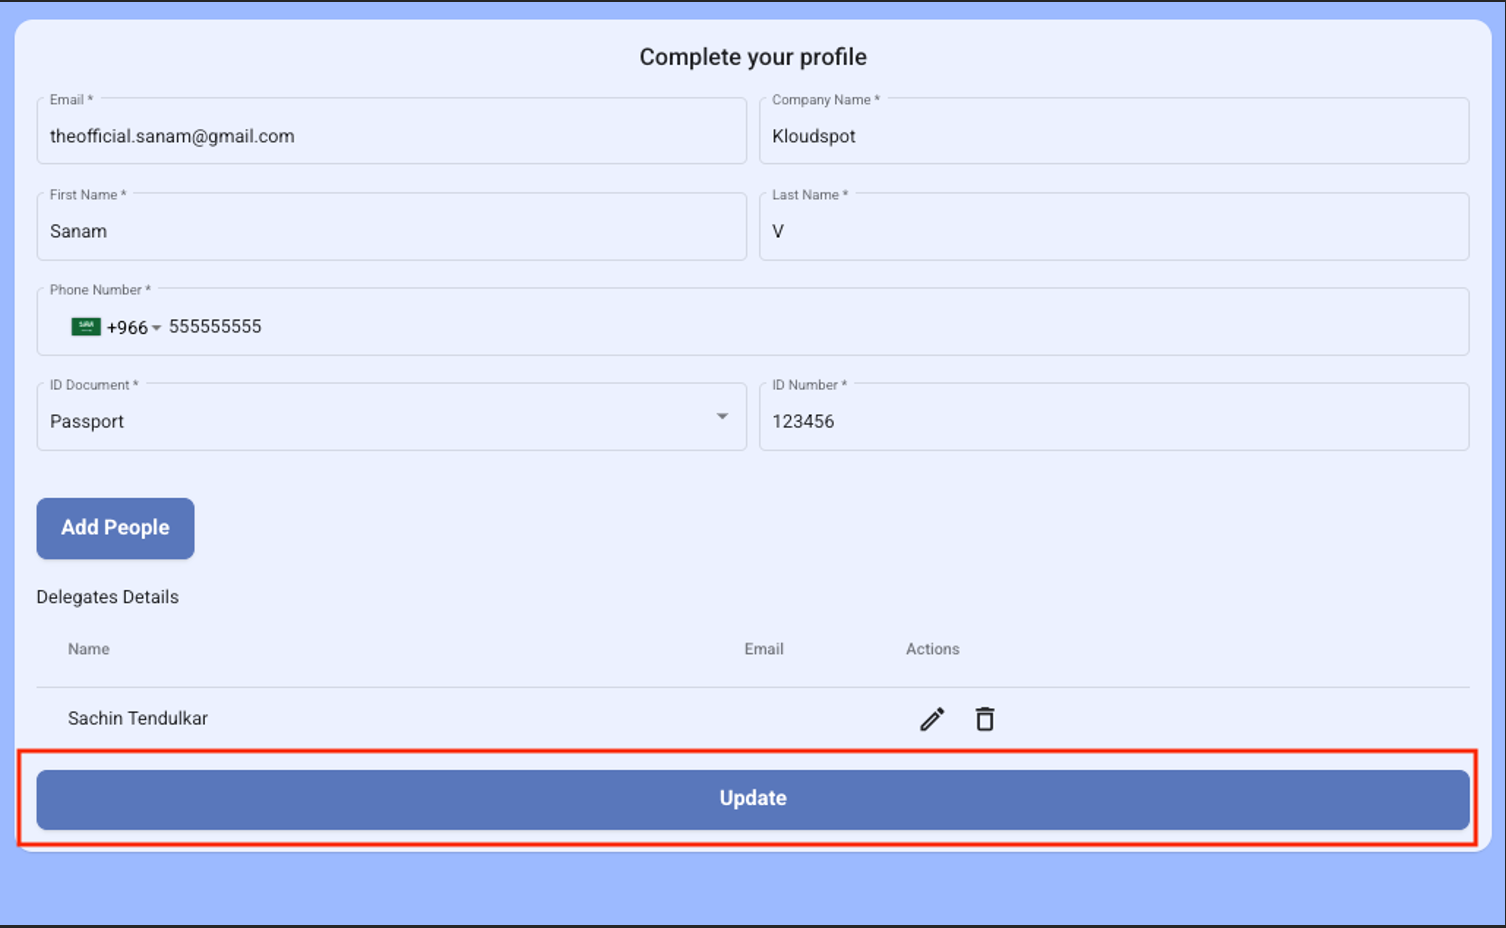
iv. Enter the Delegate information and click on Add.
v. Once all the details are added click on Update to send the request to Host for processing.
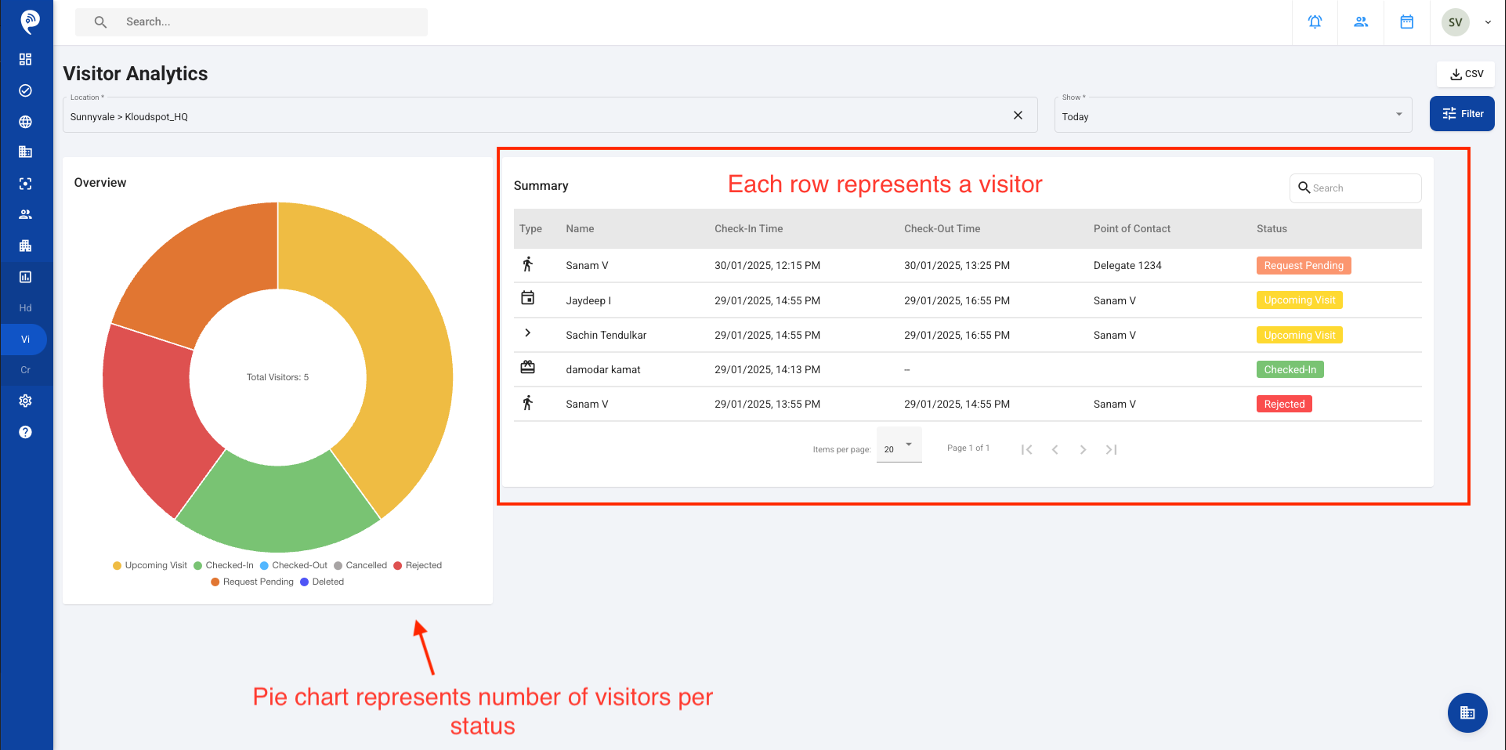
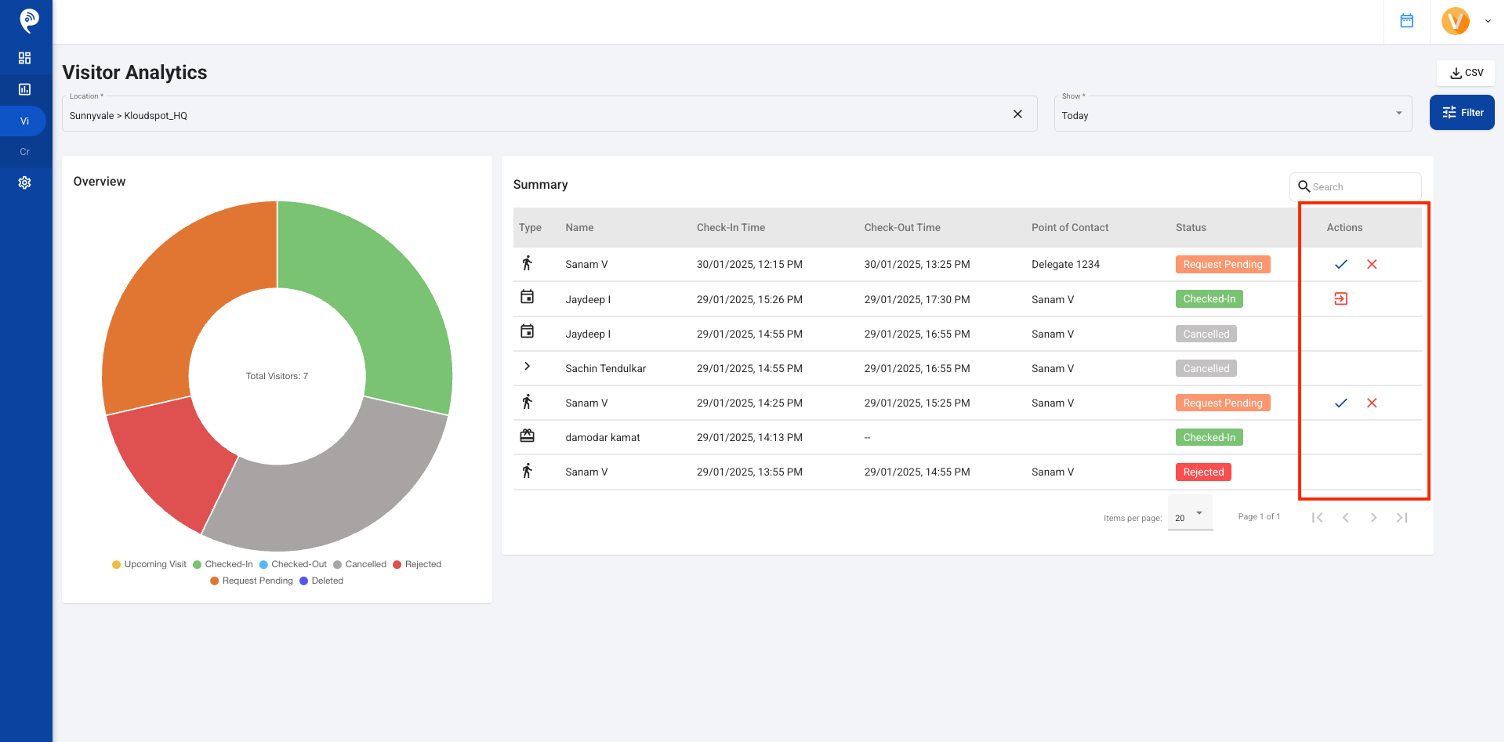
VMS Analytics
Summary: Visitor Analytics page displays details about visitors at each location. Past visit data can also be looked up by changing the date.
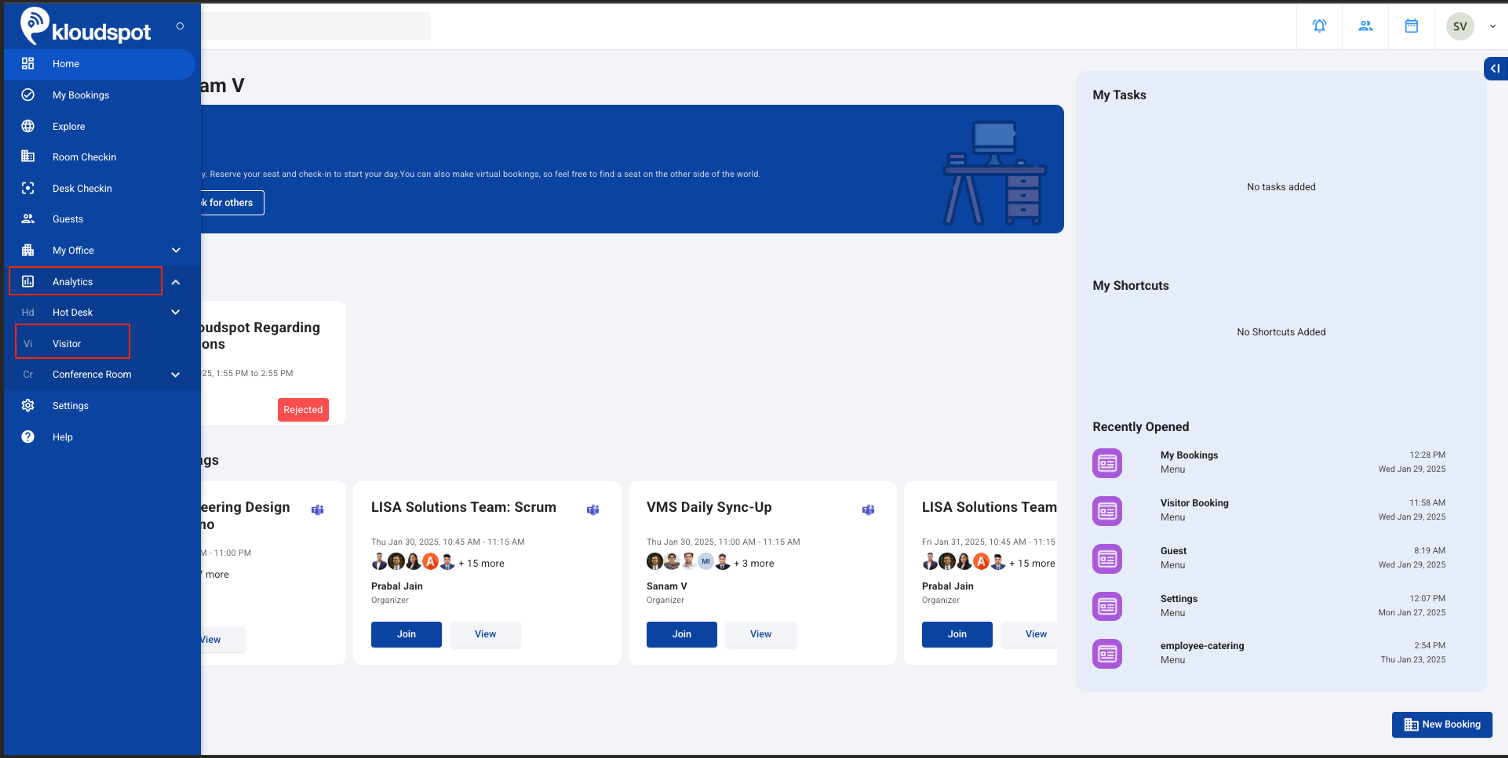
Login to KloudHybrid
Navigate to Analytics > Visitor to see all the analytics
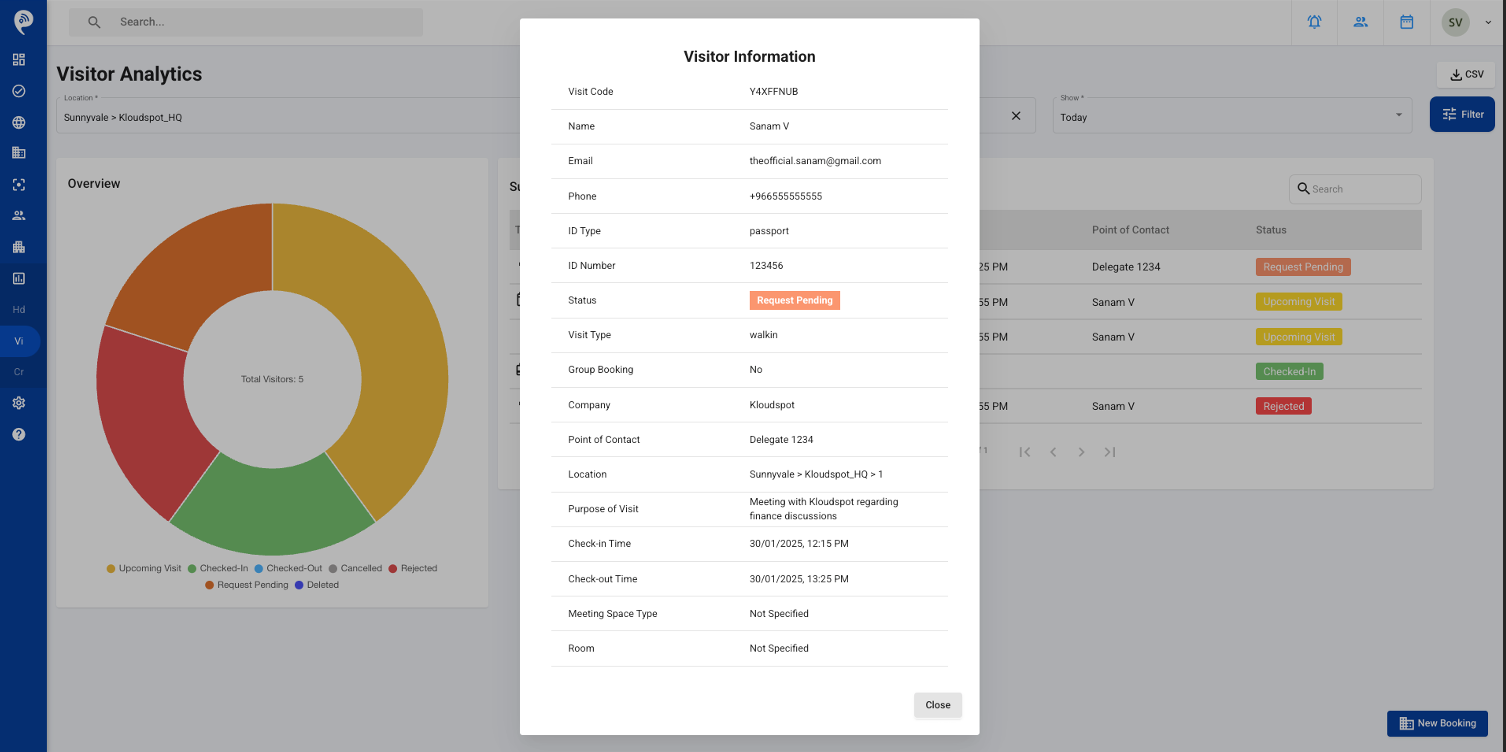
Click on each row to see the complete information of Visitor.
Change the Location to see the Visits for specific location.
Past Visits can be seen by changing the Duration to This Week, This Month, Custom-Date.
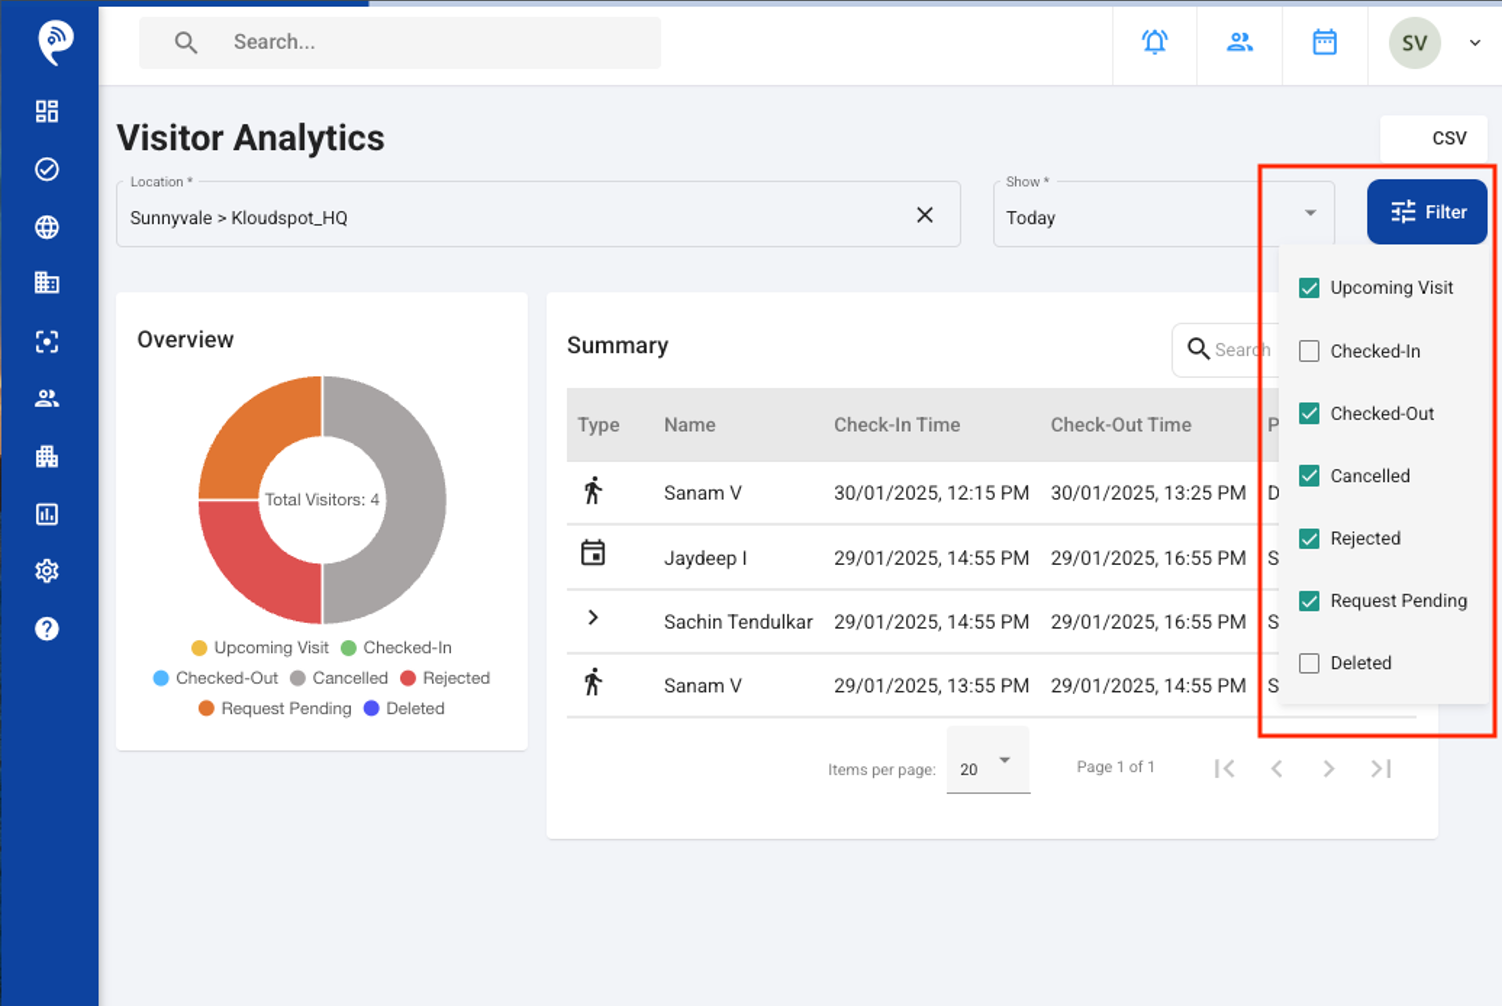
6. Click on filters and select the visits that should be displayed by status.
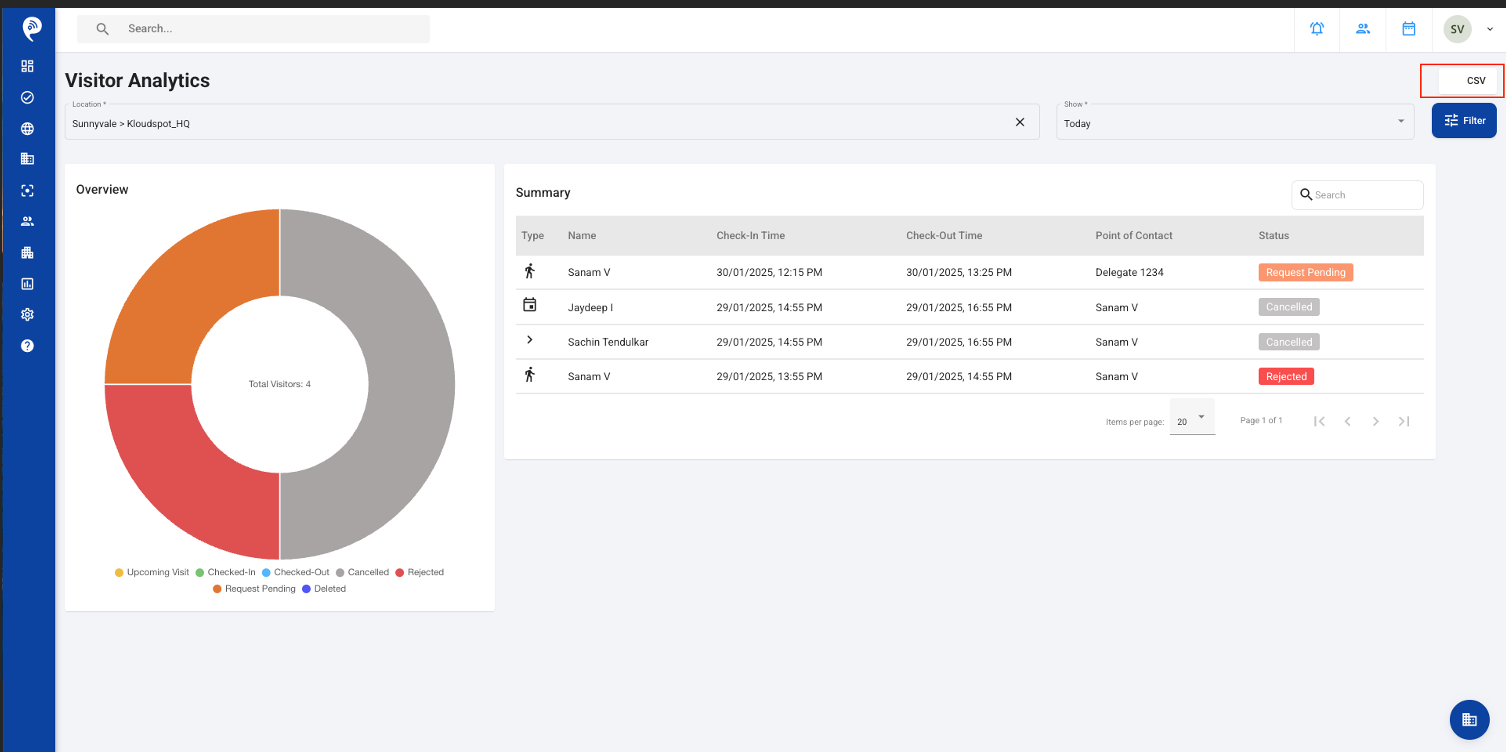
7. This data can be exported as CSV. Click on CSV to export.
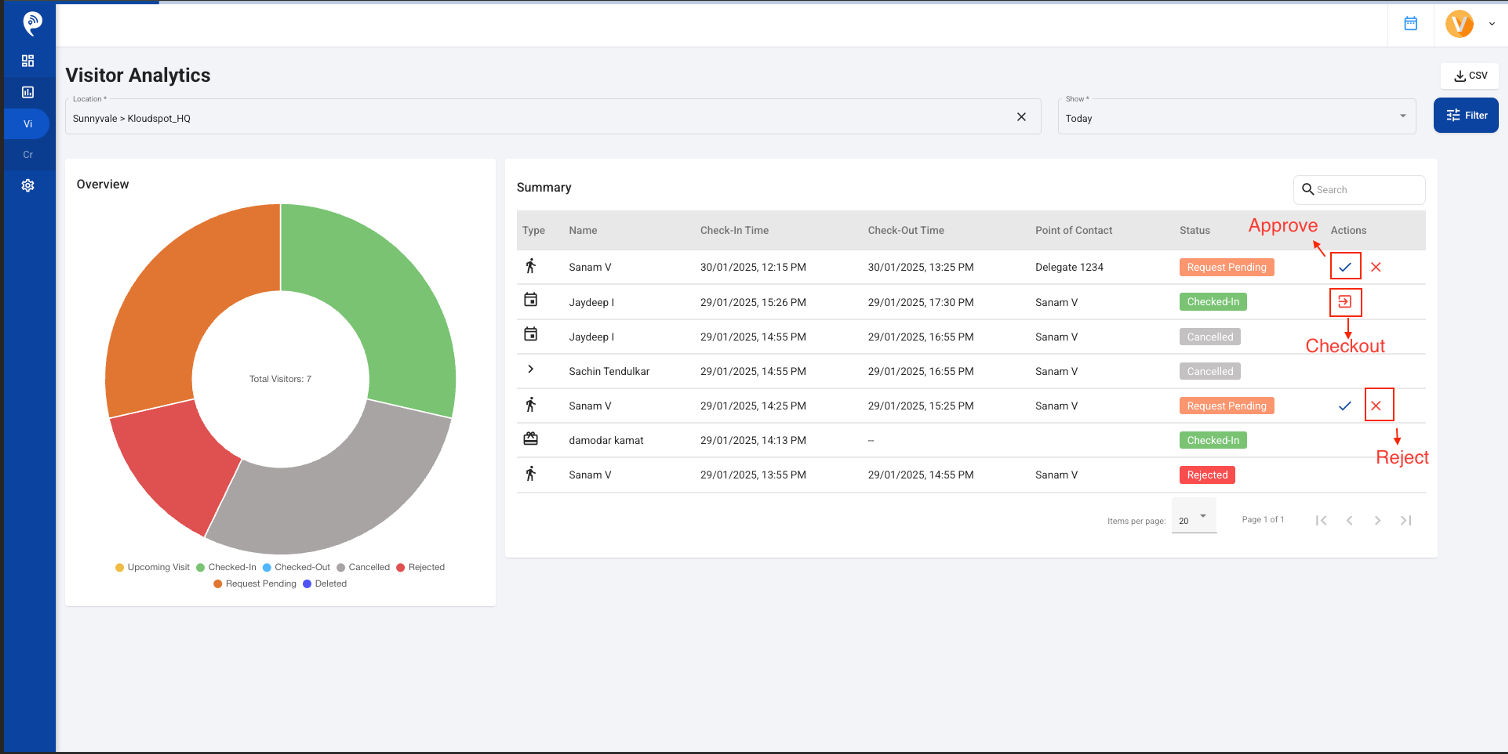
8. If the logged in user has ROLE_VMS_SECURITY assigned, one extra column will be added into the table which is actions.
9.Security can take actions on visits like Approving a Request, Rejecting a Request, Checking Out a Visitor, Adding Delegates to Visitor, Removing Delegates to Visitor in Visitor Information Dialog.
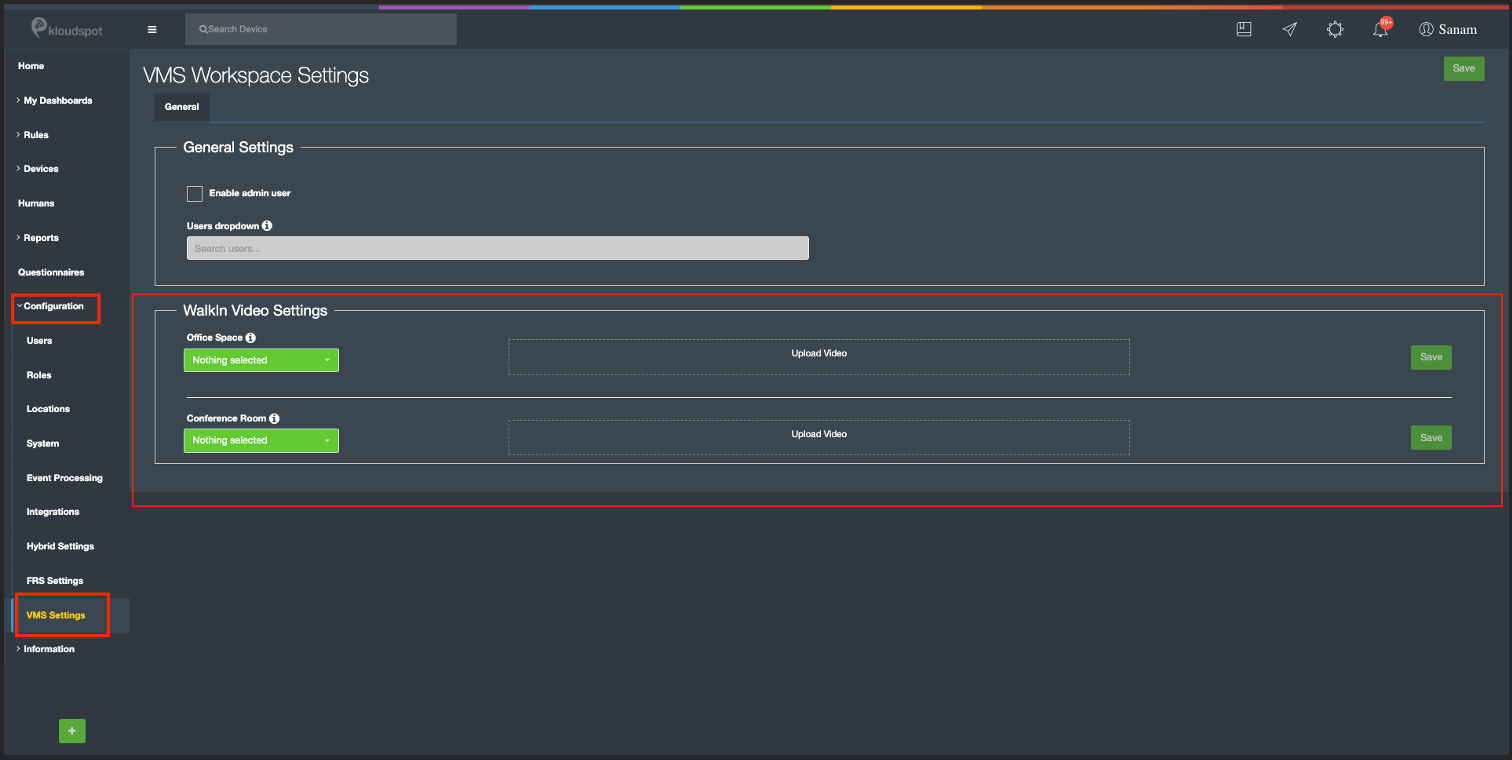
Way Finding Video Configurations:
Summary:
• The Way Finding video is a video that helps a visitor how to navigate to the meeting location that is selected when creating a visit
• This video helps guide the visitor to their meeting location.
• If no meeting space is chosen, then Way Finding is disabled.
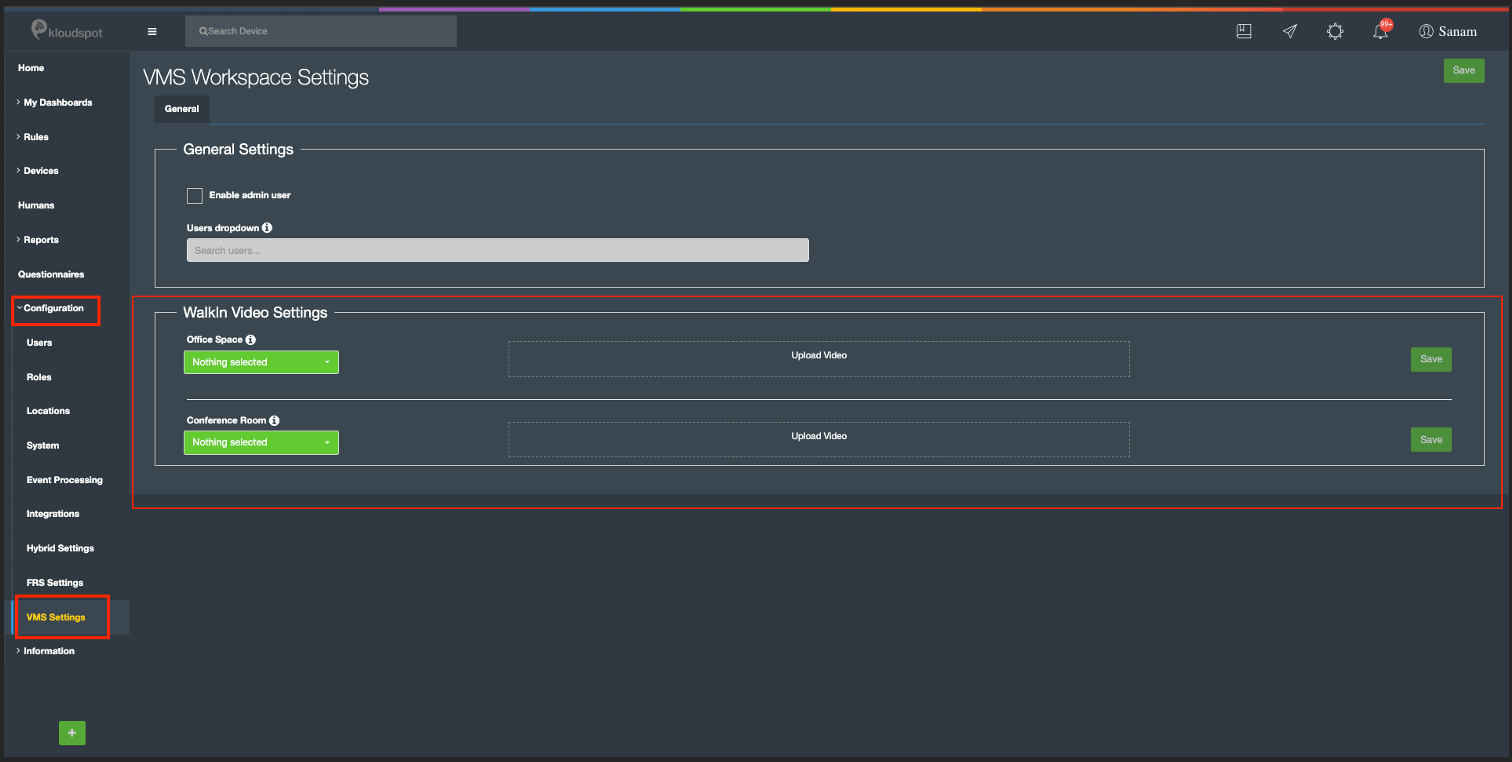
Configure and Upload the Video
• These videos must be uploaded as per the meeting space (e.g., Office Space or Conference Room).
• To upload the video:
• Login to KloudInsights
• Navigate to Configuration > VMS Settings > WalkIn Video Settings.
• Upload the video for the respective meeting space and click on Save.
• This ensures the correct video is displayed to guide the visitor to their meeting location.
Notifications:
Summary: In Visitor Management System, both the guest and the host will receive notifications for every status update related to the visit. This includes notifications about the below.
Visit created - when a visitor is invited.
Visit updated - when the meeting information is updated.
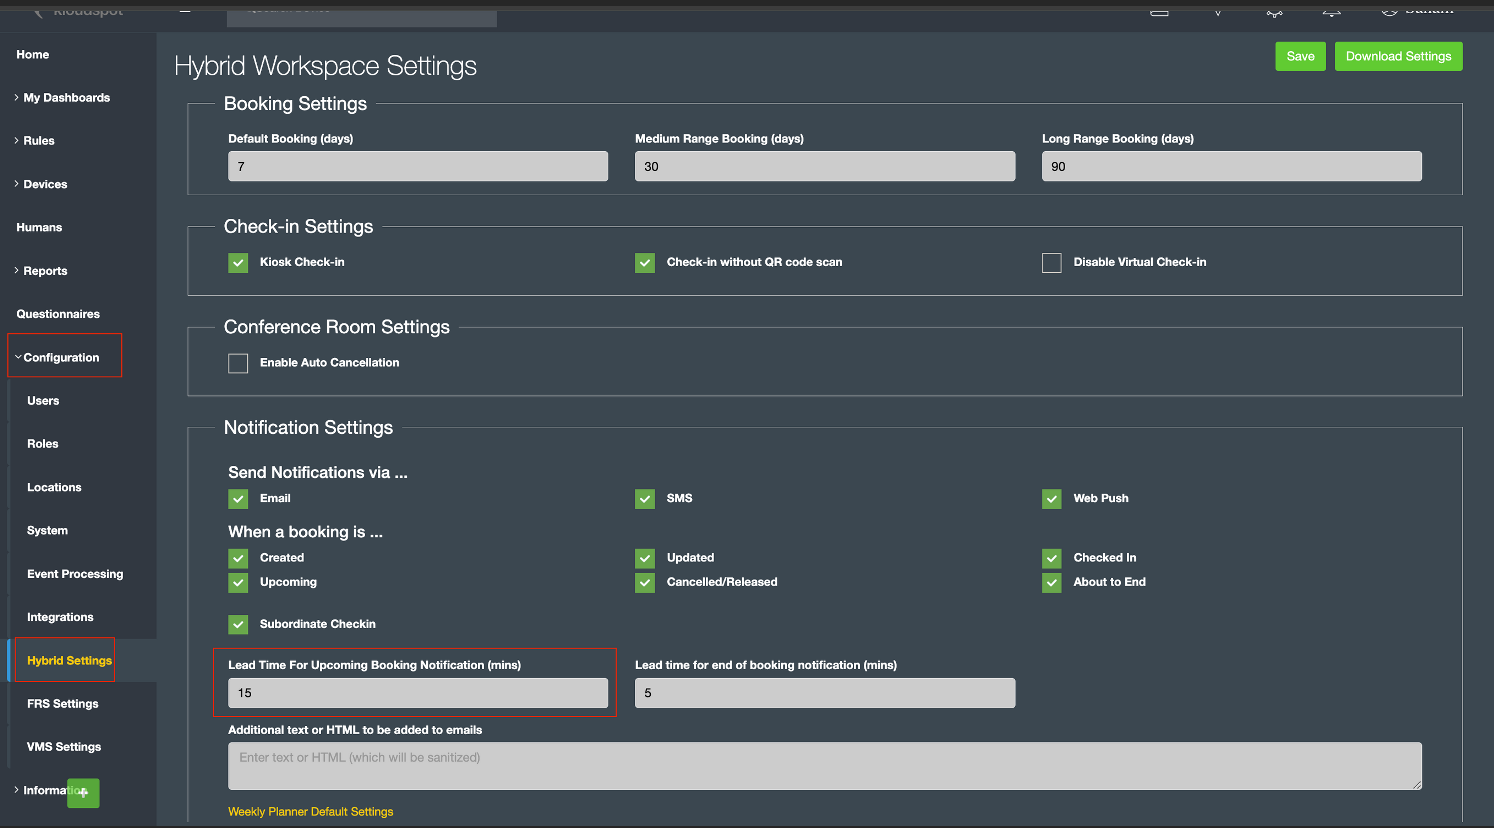
Visit upcoming - This is a reminder about your upcoming meeting. The reminder will appear a few minutes before, and this timing can be set in
KloudInsights > Configuration > Hybrid Settings > Notification Settings > Lead Time For Upcoming Booking Notificatio (mins).
Visit checked in - once a visitor is checked in via QR code or booking code at kiosk.
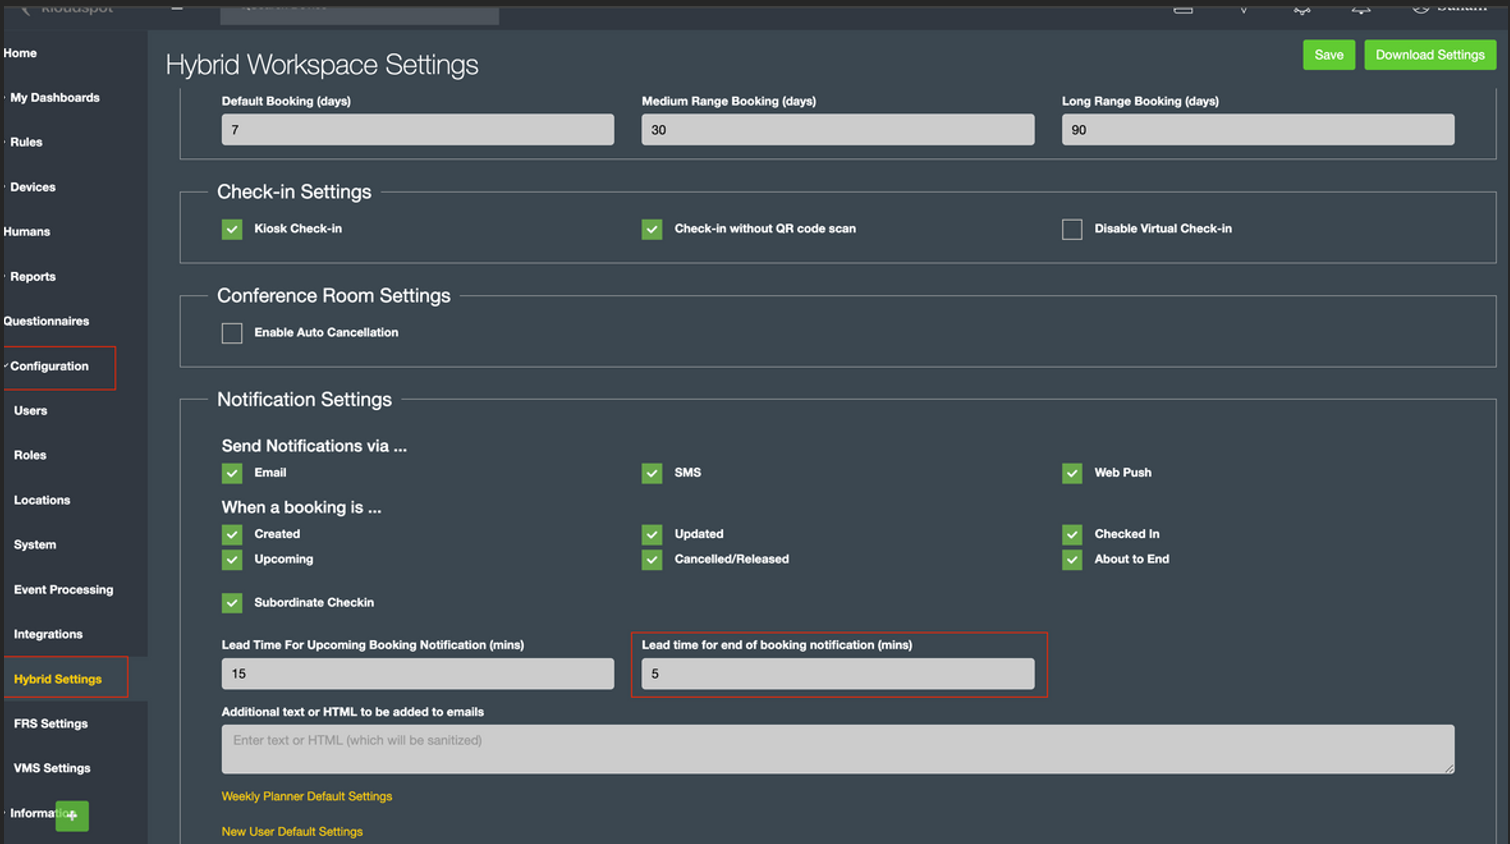
Visit ending soon - This is a reminder that your meeting is ending soon. The reminder will appear a few minutes before, and this timing can be set in KloudInsights > Configuration > Hybrid Settings > Notification Settings >Lead time for end of booking notification (mins)
Visit checked out - If a visitor is checked out.
Visit rejected - If a visit is rejected by the admin (in case of Walk-In).
Visit expired - If the visitor is not checked in within the meeting duration.
Visit approval - If a visit is requested by a walk-in visitor at kiosk.
Visit approved and created - If a visit is approved by the admin in case of Walk-In
Notes:
Only Current day visits are shown under Upcoming Visits in Home Page.
Group bookings are only for Invited Visitors.
Delegates can not be added or removed once the guest is checked-in.
In group booking, if a parent visit is rejected by security in analytics all its child visits will also get rejected.