Employee Catering Service
Area (Zone) or Desk (Infospot) Creation:
In the catering system, admins can create areas (zones) or desks (infospots) to define catering locations. Once an area is created, a QR Code is automatically generated for that area to allow employees to scan a QR and place an order.
Area (Zone) Creation:
Log in to insights with admin credentials > Click on configuration > Locations > Site > Zone > Select floor > Click on Add/Edit Zone > Add Zone > Draw on Map > Enter required zone detail
Roles and Permissions
1. ROLE_KITCHEN_STAFF
The Kitchen Staff role is assigned to users responsible for managing daily kitchen operations. This role includes the following permissions:
• View assigned orders.
• Update order status with the following transitions:
- Pending: Order is received and awaiting preparation.
- Preparing: Order is currently being prepared.
- Cancelled: Order has been cancelled.
- Completed: Order is prepared and completed.
Note: Users with this role will have restricted access to kitchen staff functionalities such as order management.
2. ROLE_CATERING_ADMIN
The Catering Admin role is assigned to users with administrative privileges to manage the catering system. This role includes the following permissions:
- Add new food categories.
- Add, edit, and delete menu items.
- Generate QR codes for menu items.
- Manage system configurations related to the catering service.
Role Assignment
Roles are assigned to system users by users with Insight Admin privileges.
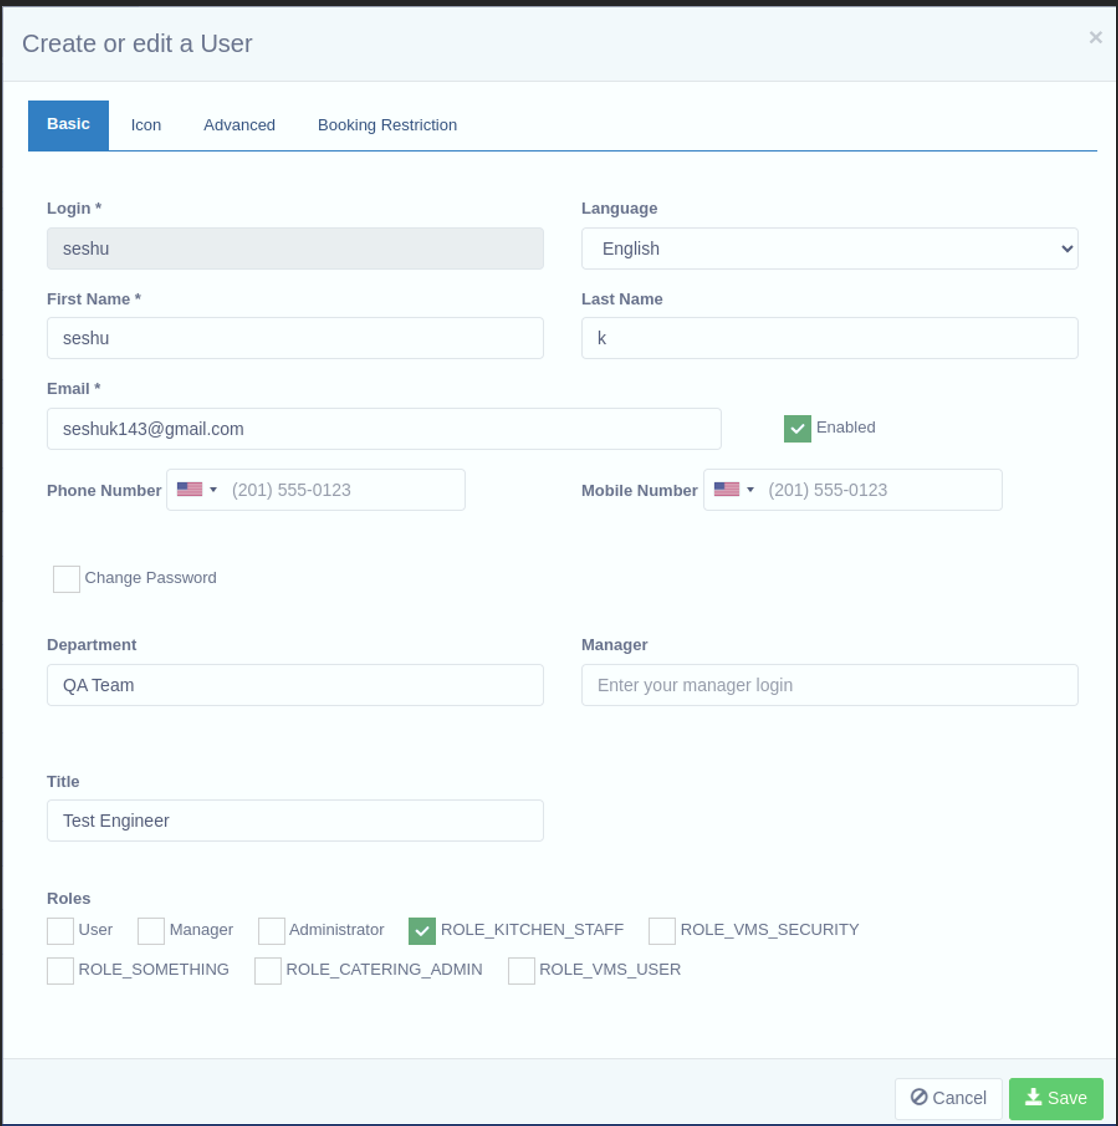
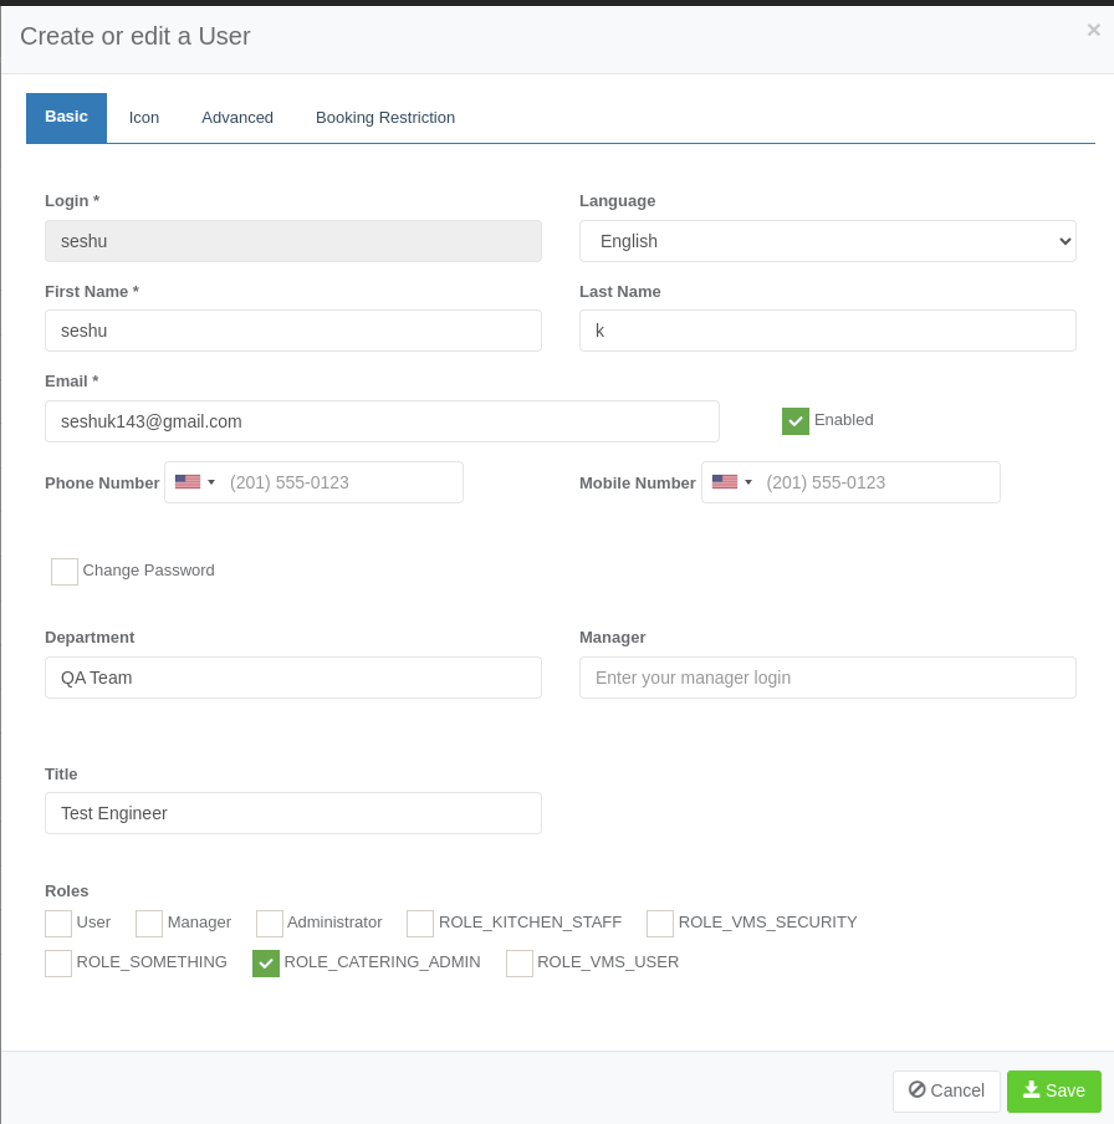
• To assign roles for Internal Users
- Navigate to Users in the Insight Admin panel (Configuration > Users)
- Select the desired system user and click on the edit icon.
- Choose either ROLE_KITCHEN_STAFF or ROLE_CATERING_ADMIN from the available roles.
- Confirm the assignment to apply for the selected role.
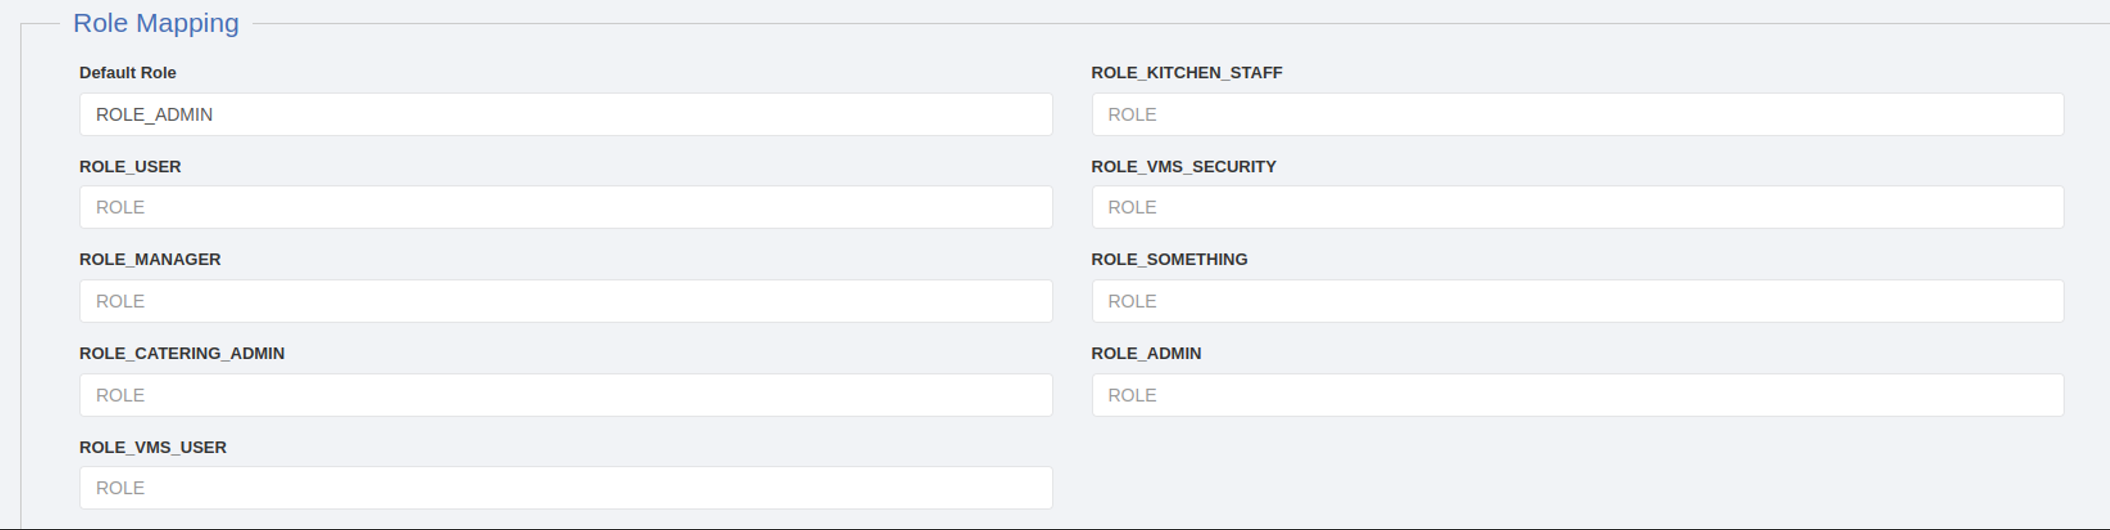
• To assign roles to External Users (Single Sign On - SSO)
- Navigate to Configuration > Integrations > External Authentication
- Select the provider for external authentication (Okta OR Microsoft)
- Select the protocol (OpenID Connect/SAML)
- Under ROLE Mapping section assign the default role to SSO users and assign ROLE_KITCHEN_STAFF and ROLE_CATERING_ADMIN according to groups configured and users assigned in respective SSO portal. (Example Microsoft Azure portal on https://portal.azure.com/)
Catering Admin Responsibilities:
1. Managing Categories
✔ Create & Edit Categories – Define food categories (e.g., Indian, Chinese, Beverages, Desserts).
2. Managing Catering Items
✔ Add, Edit, and Delete Food Items – Create new dishes and update existing ones.
✔ Set Item Descriptions & Images – Provide details for each menu item, including pictures.
✔ Define Availability – Set food availability for specific days and time slots (Breakfast, Lunch, Dinner).
✔ Assign Items to Categories – Ensure each menu item is placed in the right category.
3. QR Code Management
✔ View & Print QR Codes – Allow users to scan QR codes for quick access to menus and ordering.
✔ Assign QR Codes to Sites & Floors – Ensure proper placement of QR codes in designated areas.
1.Steps for Categories creation
1.1 Log in to KloudHybrid.
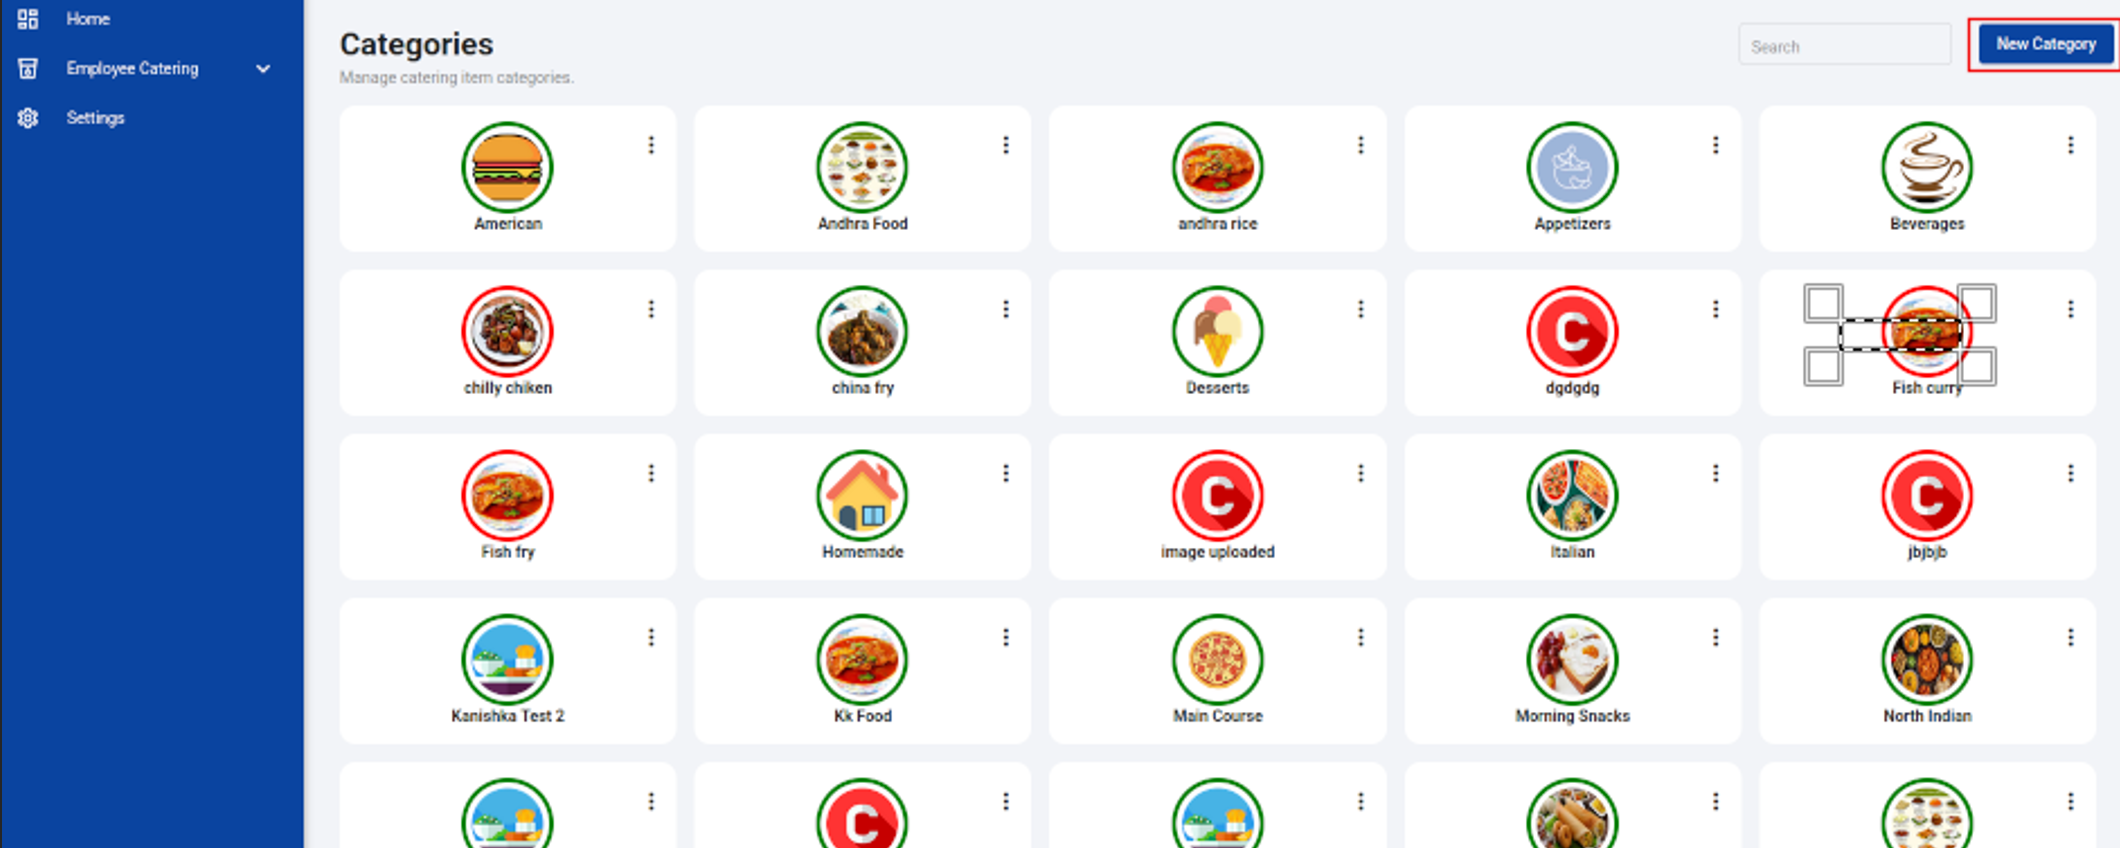
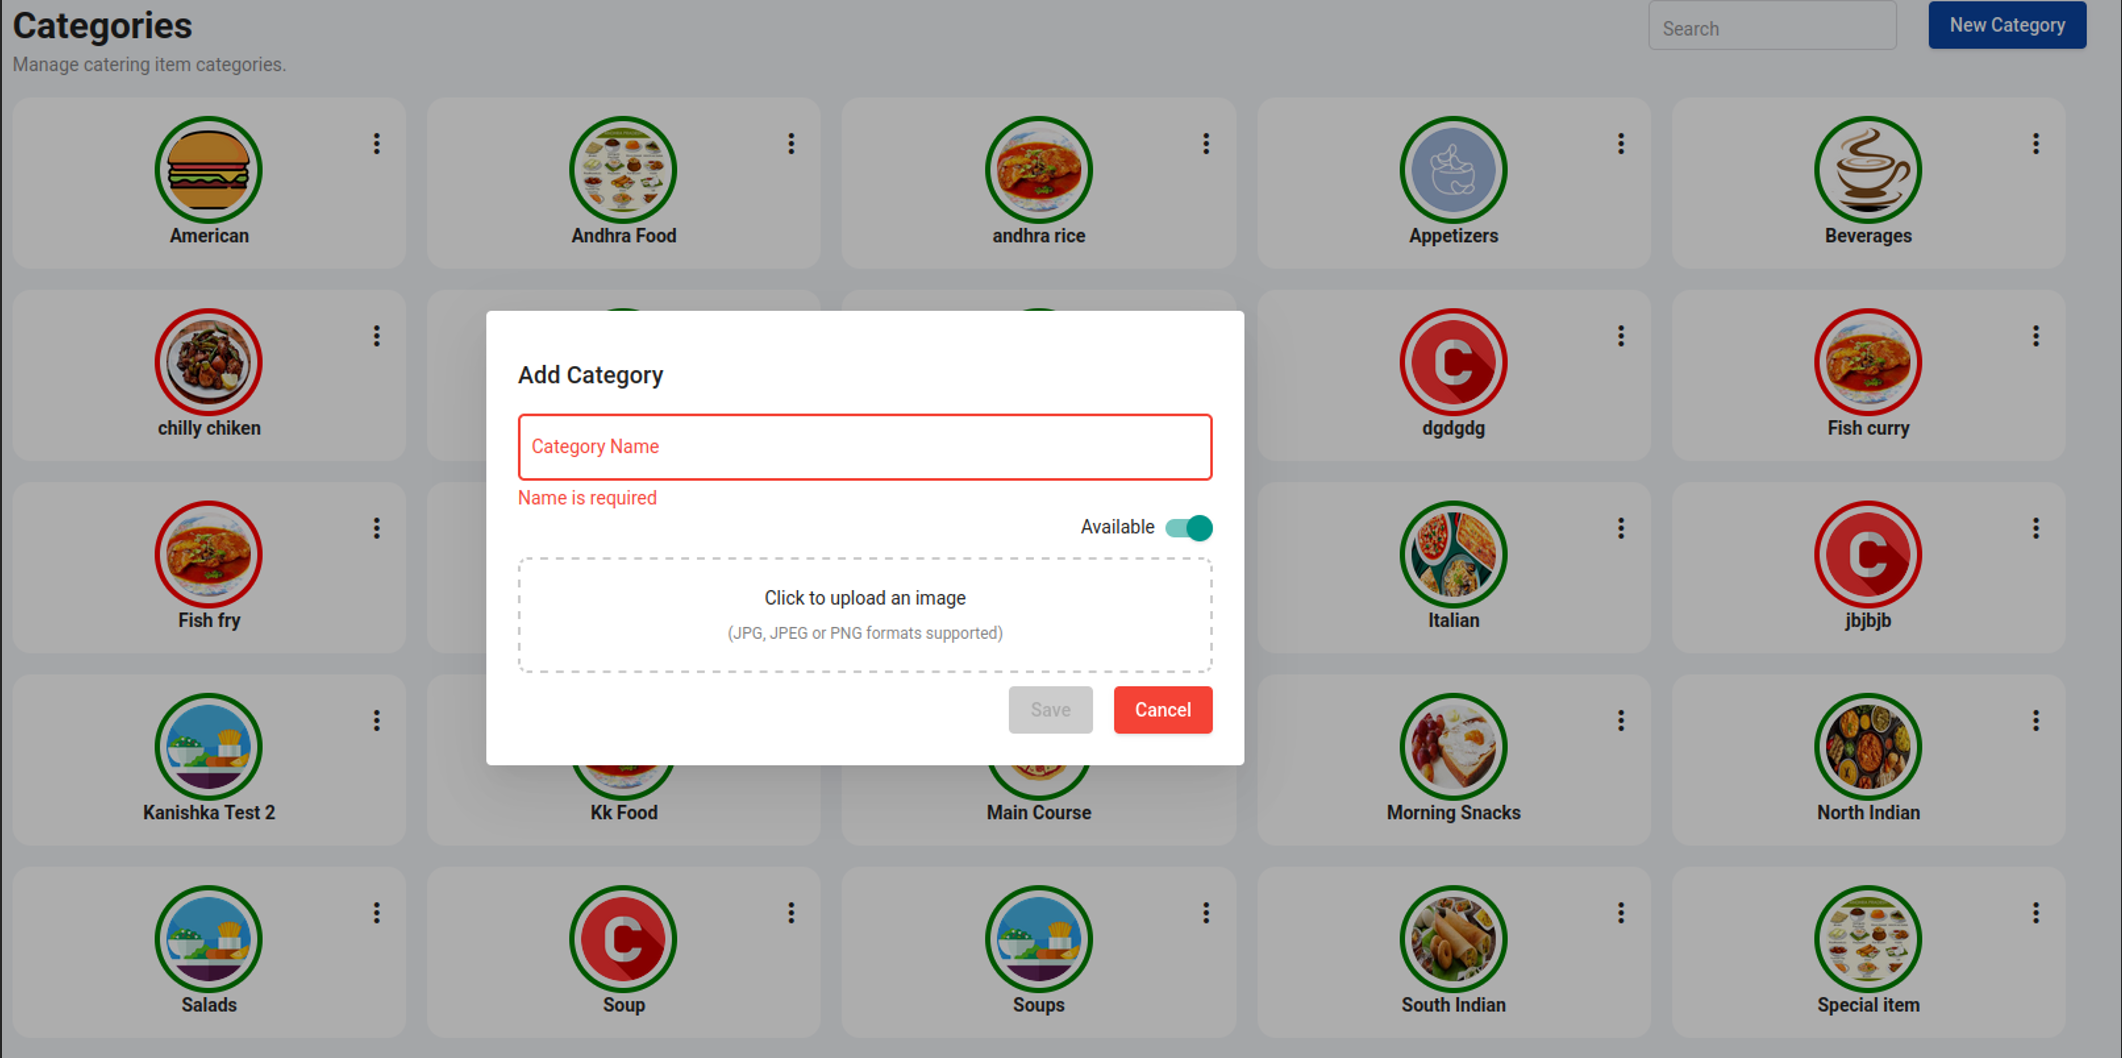
1.2 Navigate to Employee Catering > Catering Admin > Categories > New category
Type the category name (e.g., Snacks, Desserts), select Available based on the category’s availability, upload an image, and then click Save.
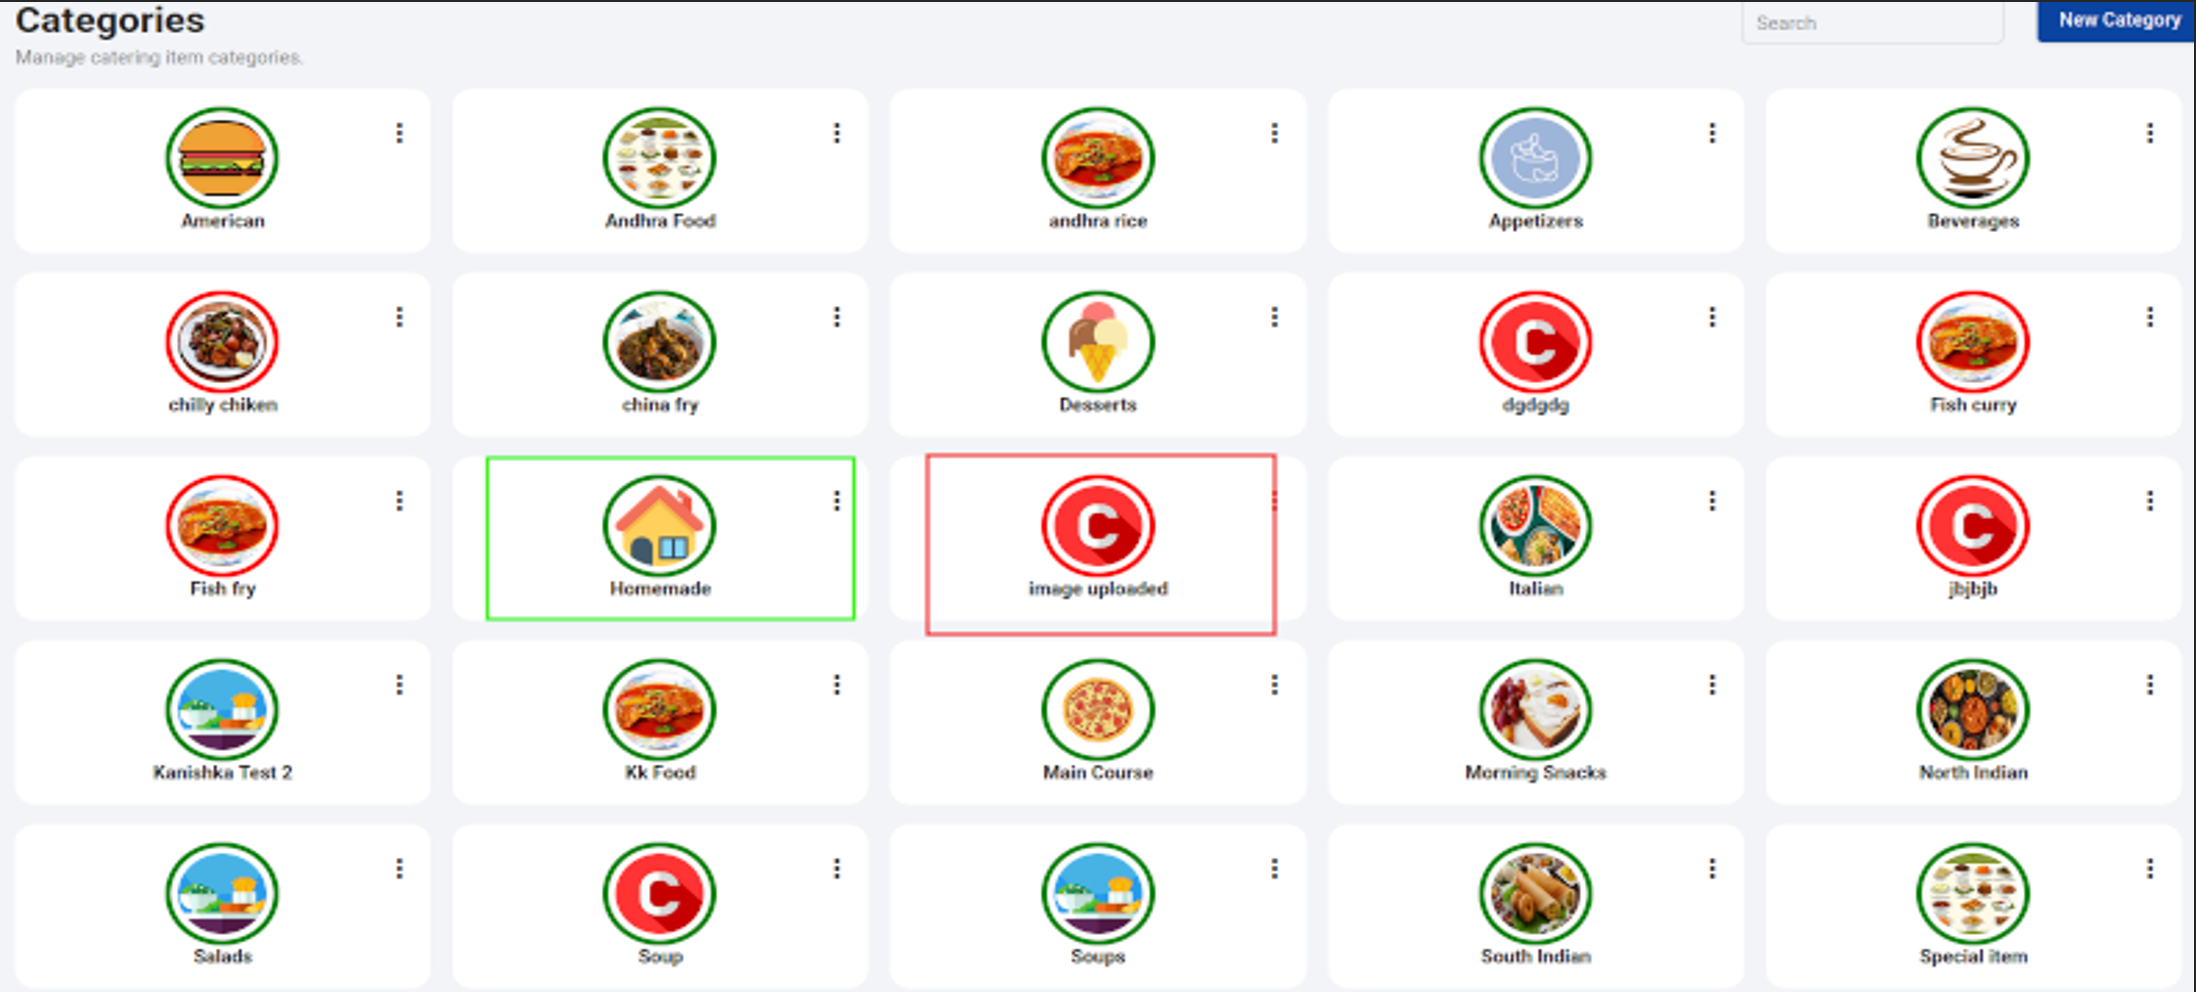
Added categories will be isplayed as follows:
- If a category is available, a green border will appear around the image.
- If a category is not available, a red border will appear around the image.
- A search option is available to quickly find categories.
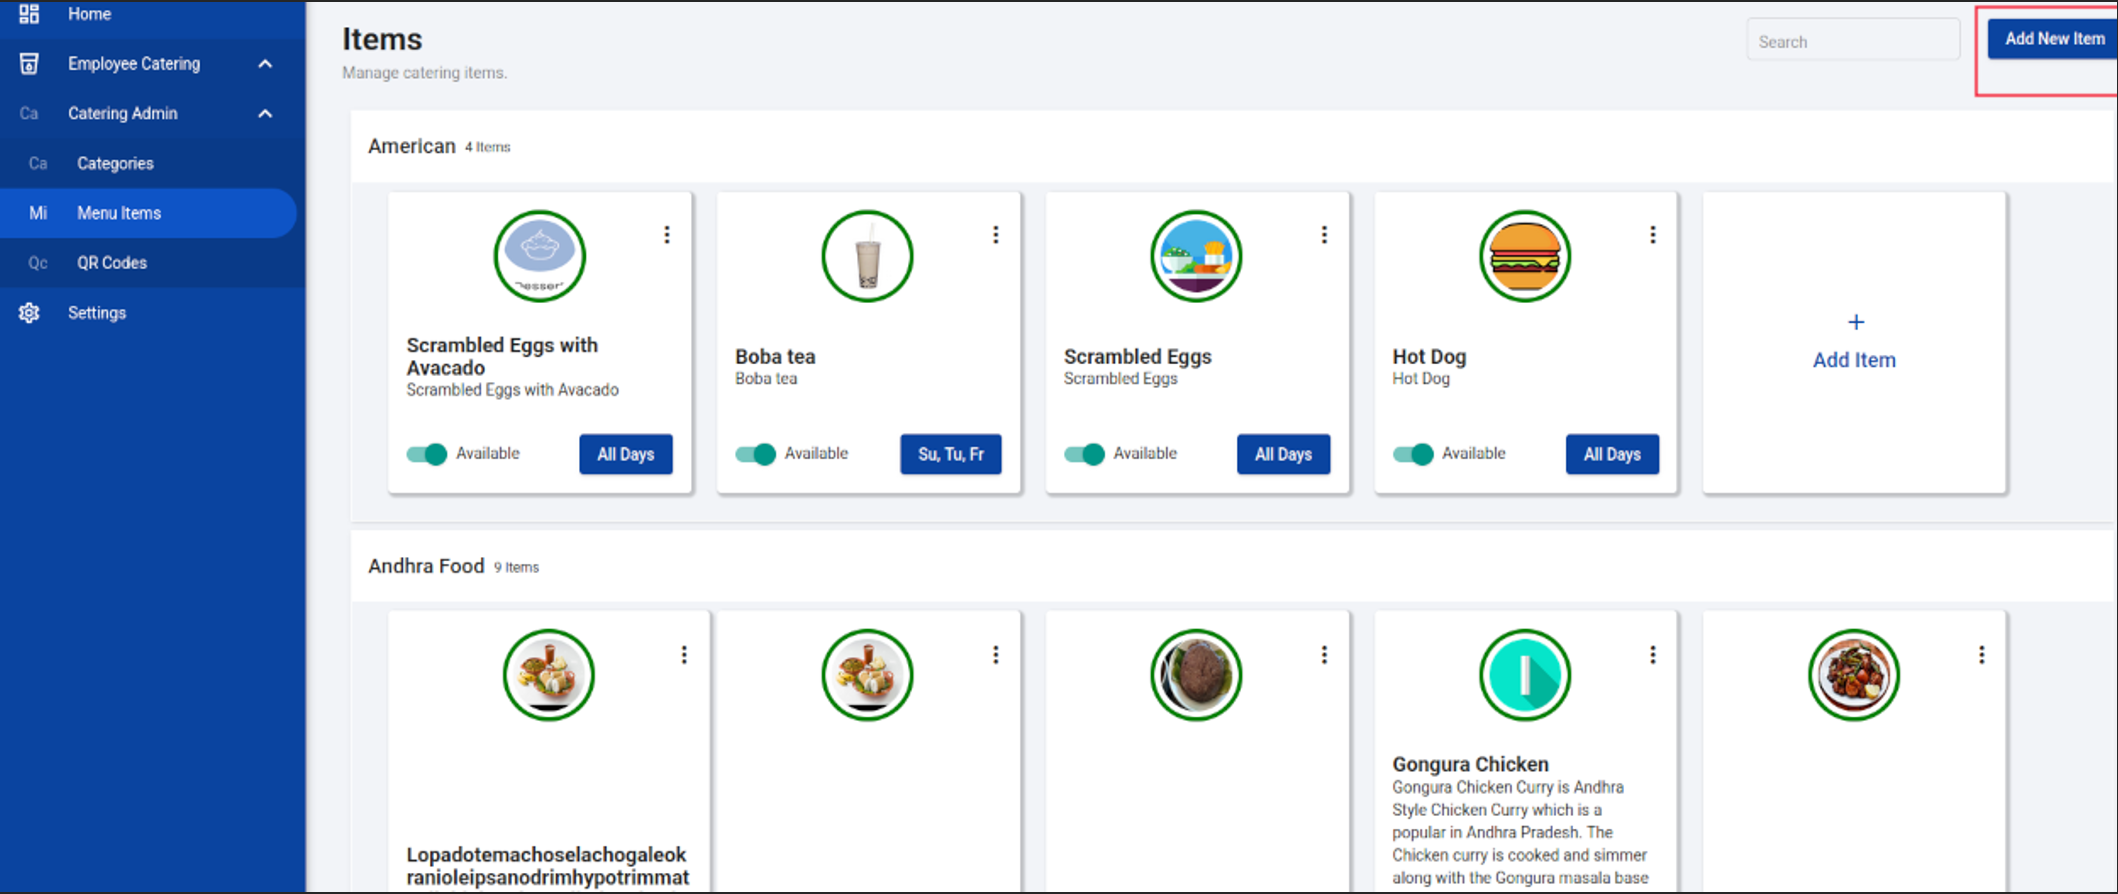
2.Menu items creating under Category
2.1 Navigate to Employee Catering > Catering Admin > Menu Items. Click on Add New Item. (It opens a form)
-
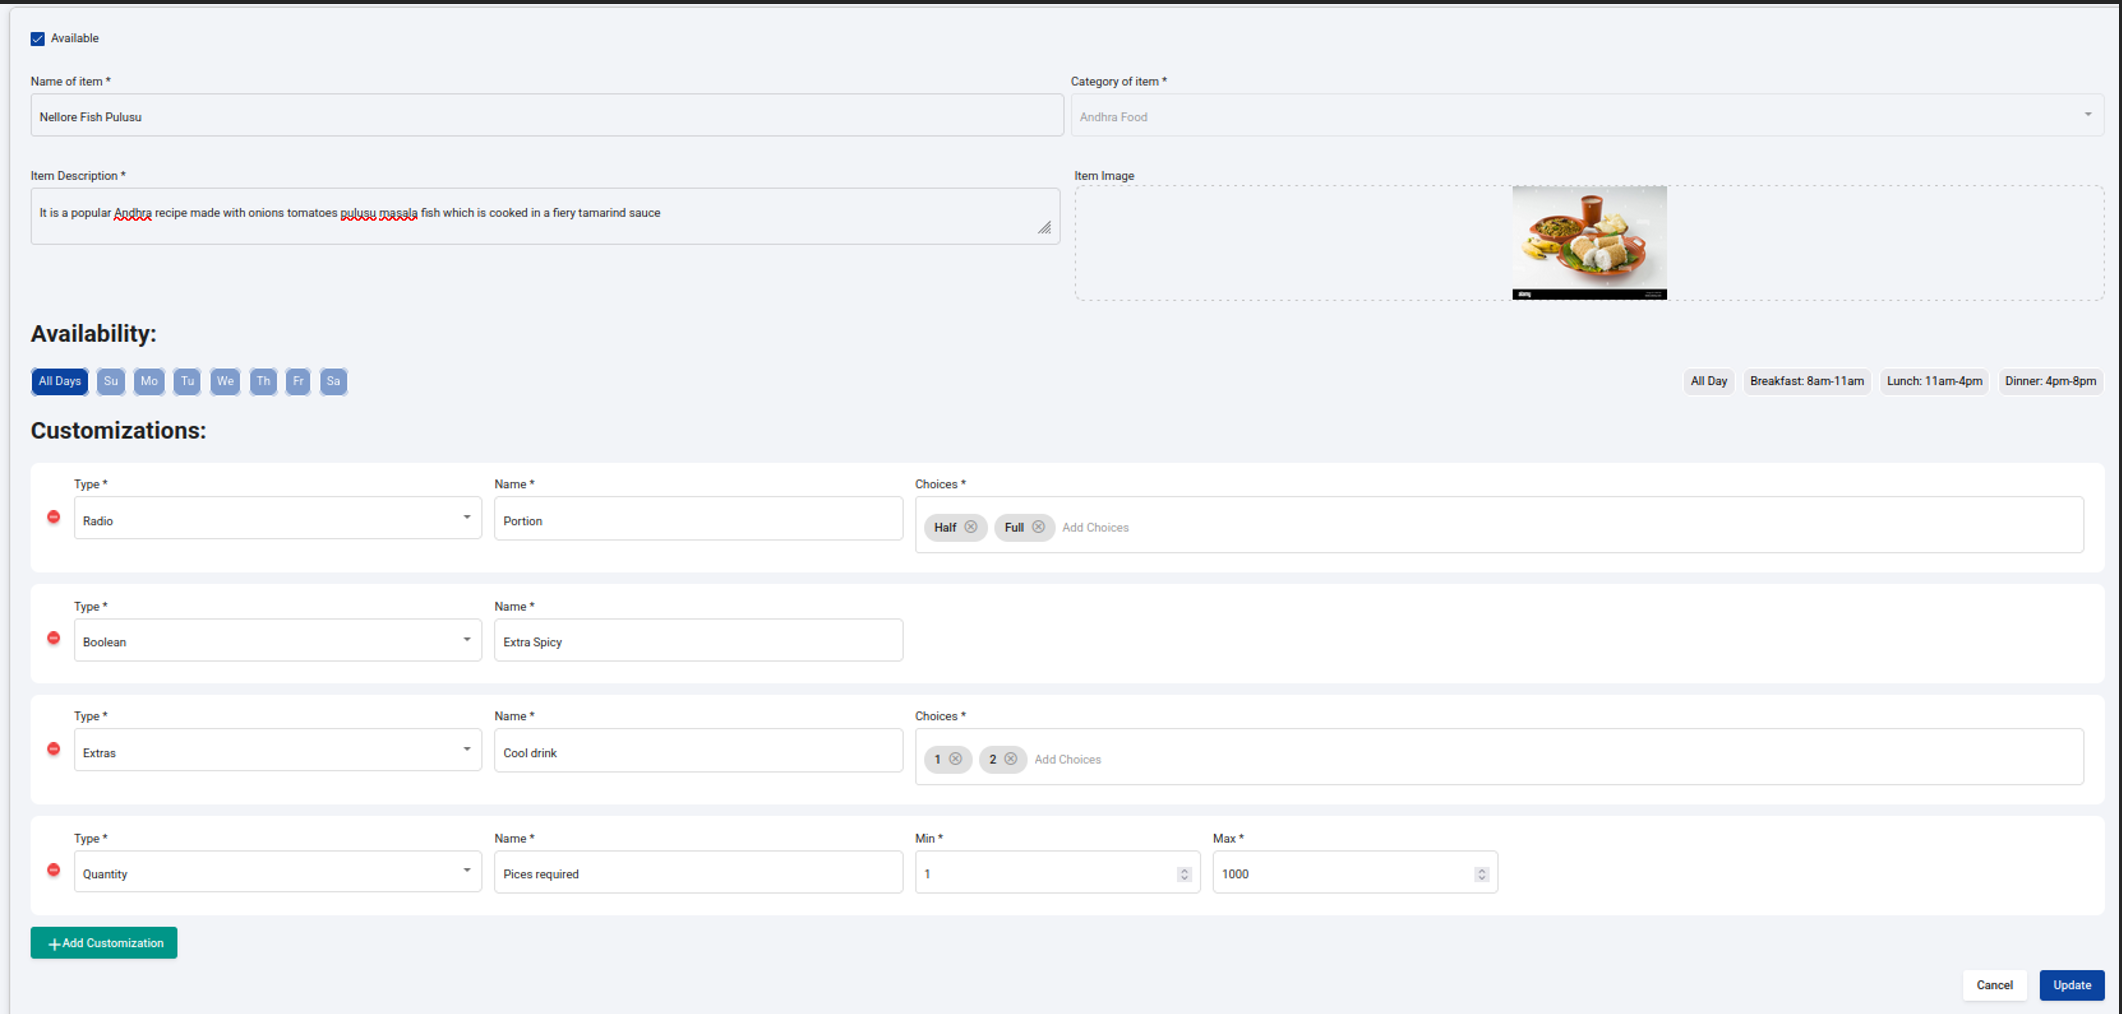
Item Details Section:
• Available Checkbox – Indicates if the item is available for ordering.
• Name of Item – “Pizza”.
• Category of Item – “Main Course” (Categorizing cuisine type).
• Item Description – A description of the dish.
• Item Image – Displays a related food image.
-
Availability Section:
• Specifies when the dish is available:
• Select All Days to make dish available on all days of a week or any specific days can be selected separately.
• Specific mealtimes: Breakfast (8 AM - 11 AM), Lunch (11 AM - 4 PM), Dinner (4 PM - 8 PM). This time is applicable based on local timezone.
-
Customizations Section:
This allows customers to customize their orders with the following options:
• Type: Radio (Eg: Name:Size, Choices: Small,Regular,Large). -User can select only one option, while ordering.
• Type: Boolean (Eg: Name: Extra Cheese). -User can choose to have it or not by selecting or deselecting this option, while ordering.
• Type: Extras (Eg: Name: Topppings:, Choices: Onion, Tomato, Olives). - multiple options can be selected by the user, while ordering.
• Type: Quantity (Eg: Name: Chillies, Min: 1, Max: 10). -User can select minimum of 1 and upto 10 based on requirement, while ordering.
Note: The values here are not pre-defined. They are custom values based on user input.
-
Action Buttons:
• + Add Customization – To add more customization options.
• Save/Update – To save/update changes.
• Cancel – To discard changes.
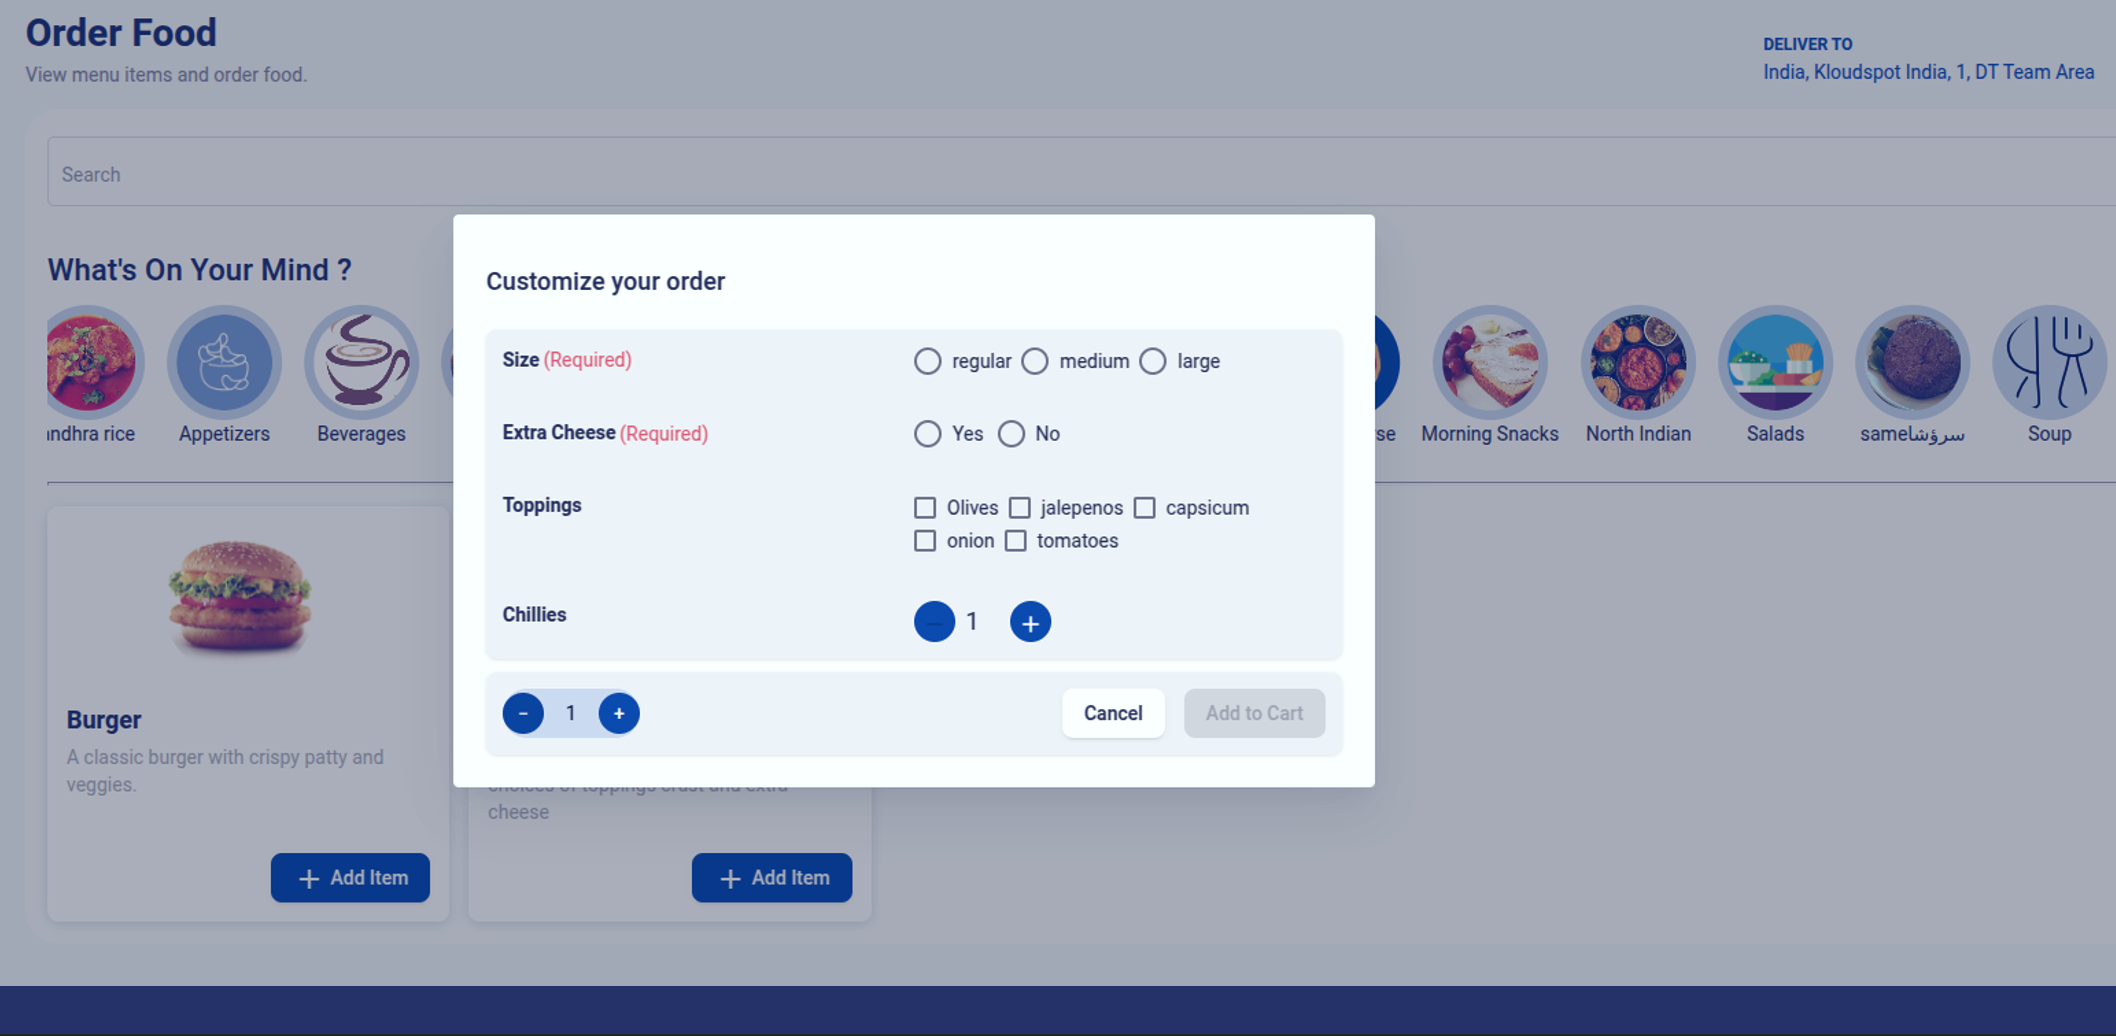
The item will be displayed to the end user while ordering as shown below.
3. QR codes:
The Catering Admin can view and print QR Codes to enable employees to access the ordering screen. These QR codes can be placed on desks, areas, or designated catering locations.
Steps to View QR Codes:
- Log in as a Catering Admin.
- Go to Employee Catering > Catering Admin > QR Codes.
- Select the Site and Floor for which a QR code needs to be generated.
- The QR codes for different zones and desks will be displayed.
Steps to Print and Place QR Codes:
- Locate the QR Code for the specific Area/Desk.
- Click on the QR Code to preview it.
- Click Print QR Code and select the printer.
- Stick the printed QR code in the designated area (Desk, InfoSpot, Dining Area, etc.).

Kitchen Staff Responsibilities in Catering Management:
The Kitchen Staff role is responsible for handling food orders and updating their statuses. Below are the key responsibilities and workflow:
-
Order Processing & Status Updates
• The kitchen staff receives new orders in the system.
• They must update the order status based on progress:
->Preparing – The order is currently being cooked or prepared.
-> Completed – The order is fully prepared and ready.
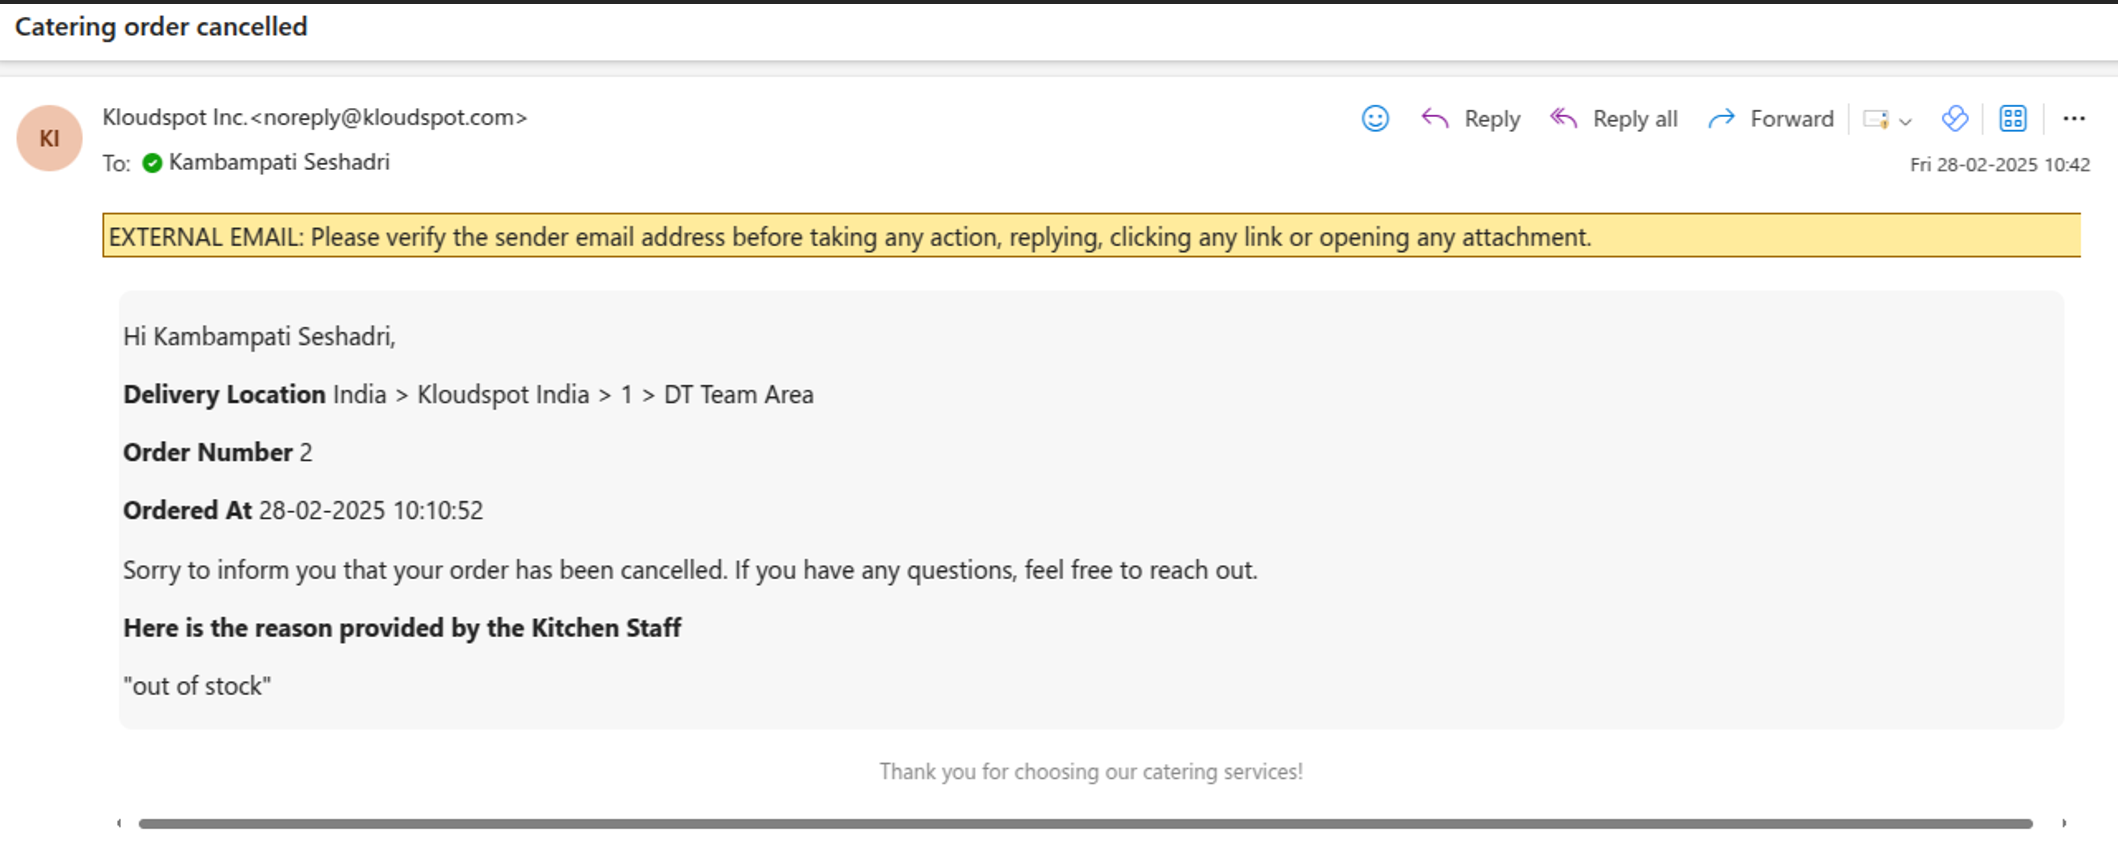
-> Cancelled – The order has been canceled for any reason, with a corresponding cancellation reason provided.
->All Orders – Displays all orders placed on the same day, regardless of their status.
-
Email Notifications
• Every time an order status is updated, an email notification is sent to the user who placed the order.
• Notifications are triggered for:
Order in Progress (Preparing)
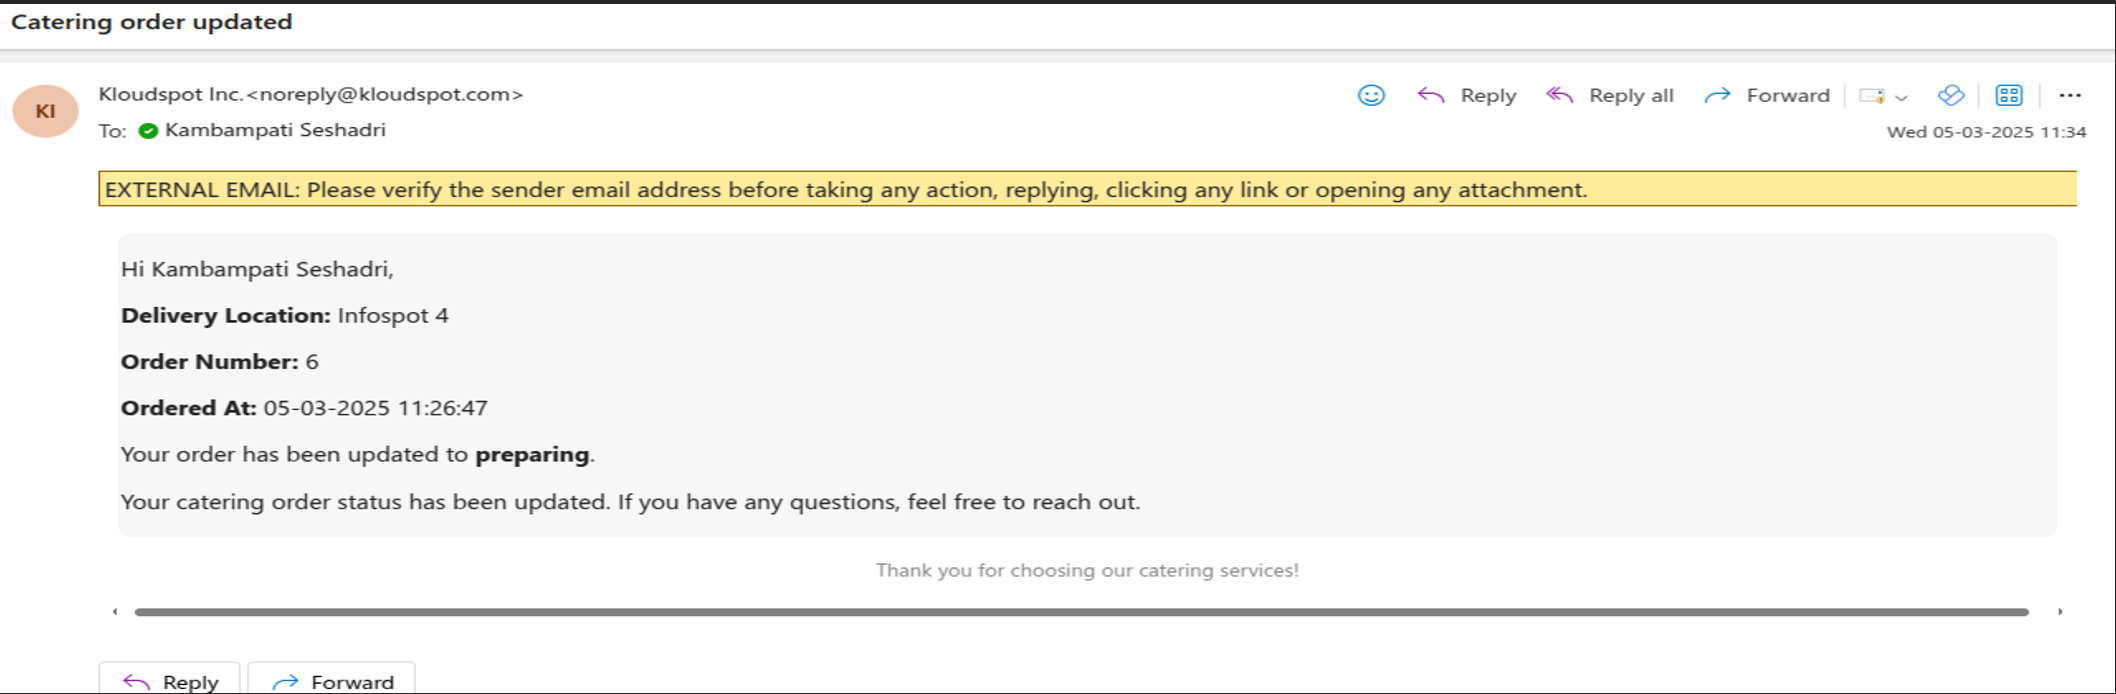
Order Ready (Completed)
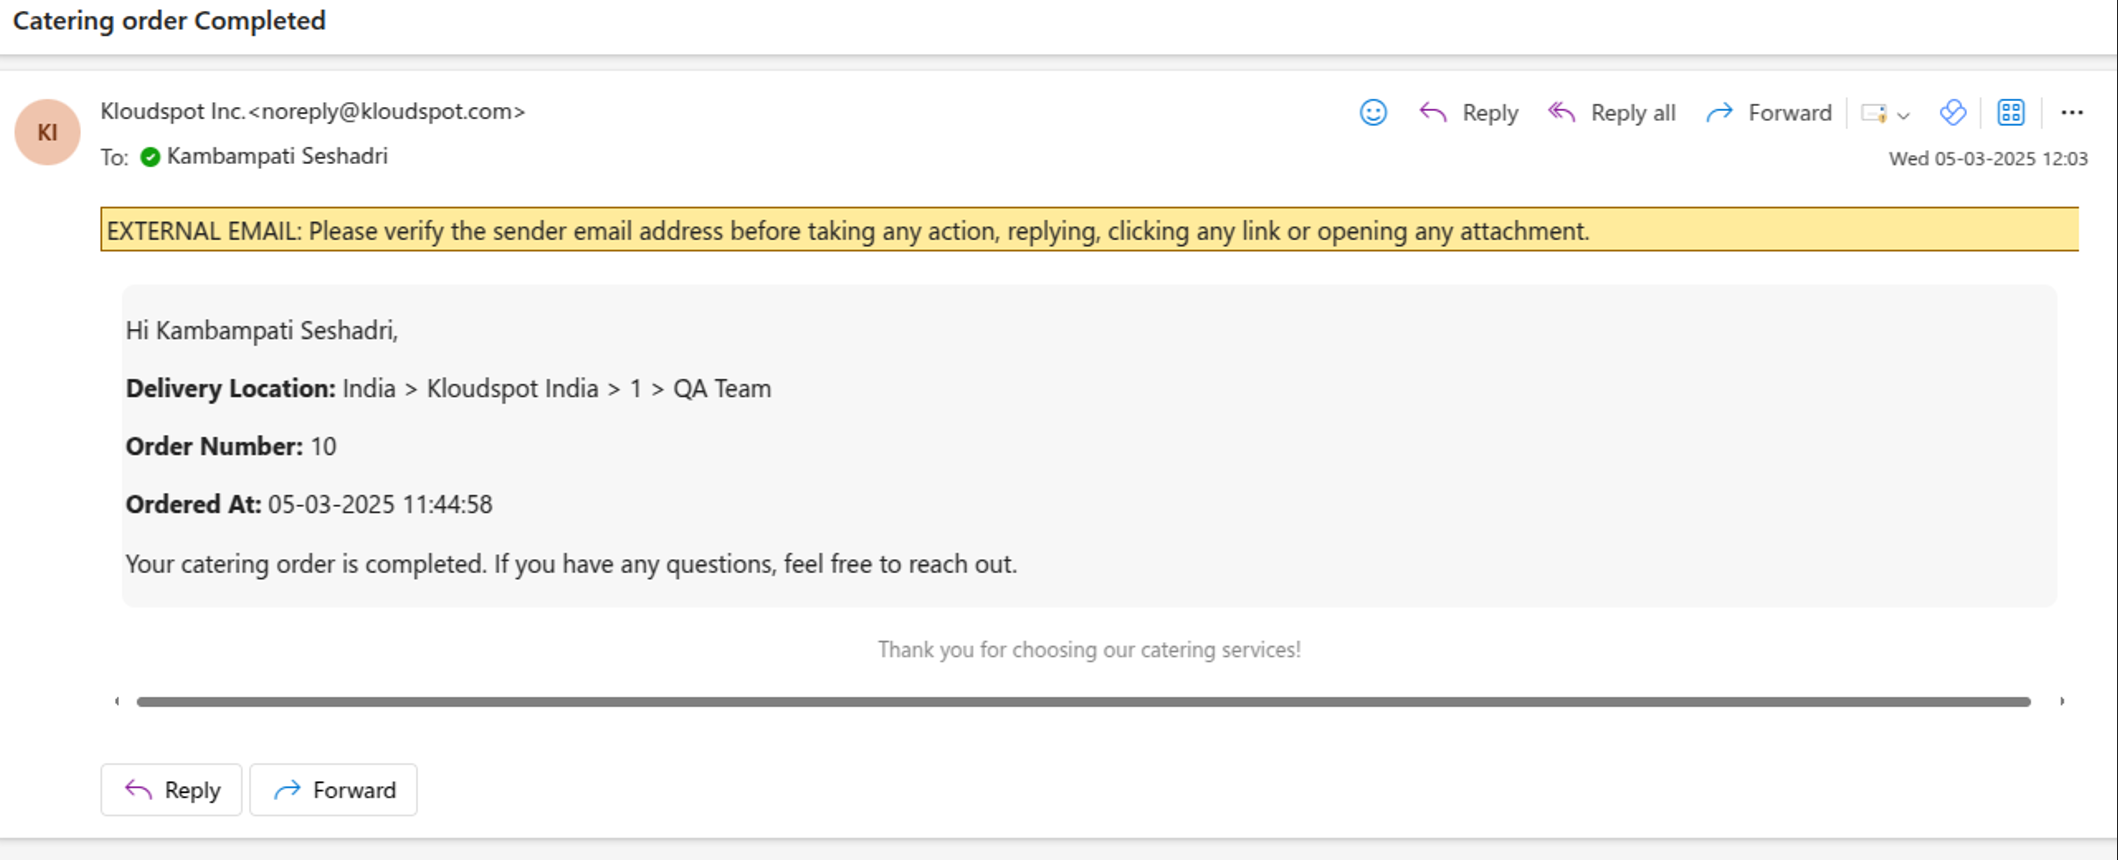
Order Cancelled
3. Date & Status-Based Filtering
• The Kitchen Staff section allows staff members to filter orders by:
-> Date selection – Filter orders based on a specific date.
-> Status selection – Filter orders on a specific date with “Preparing” “Completed,” or “Cancelled” status.

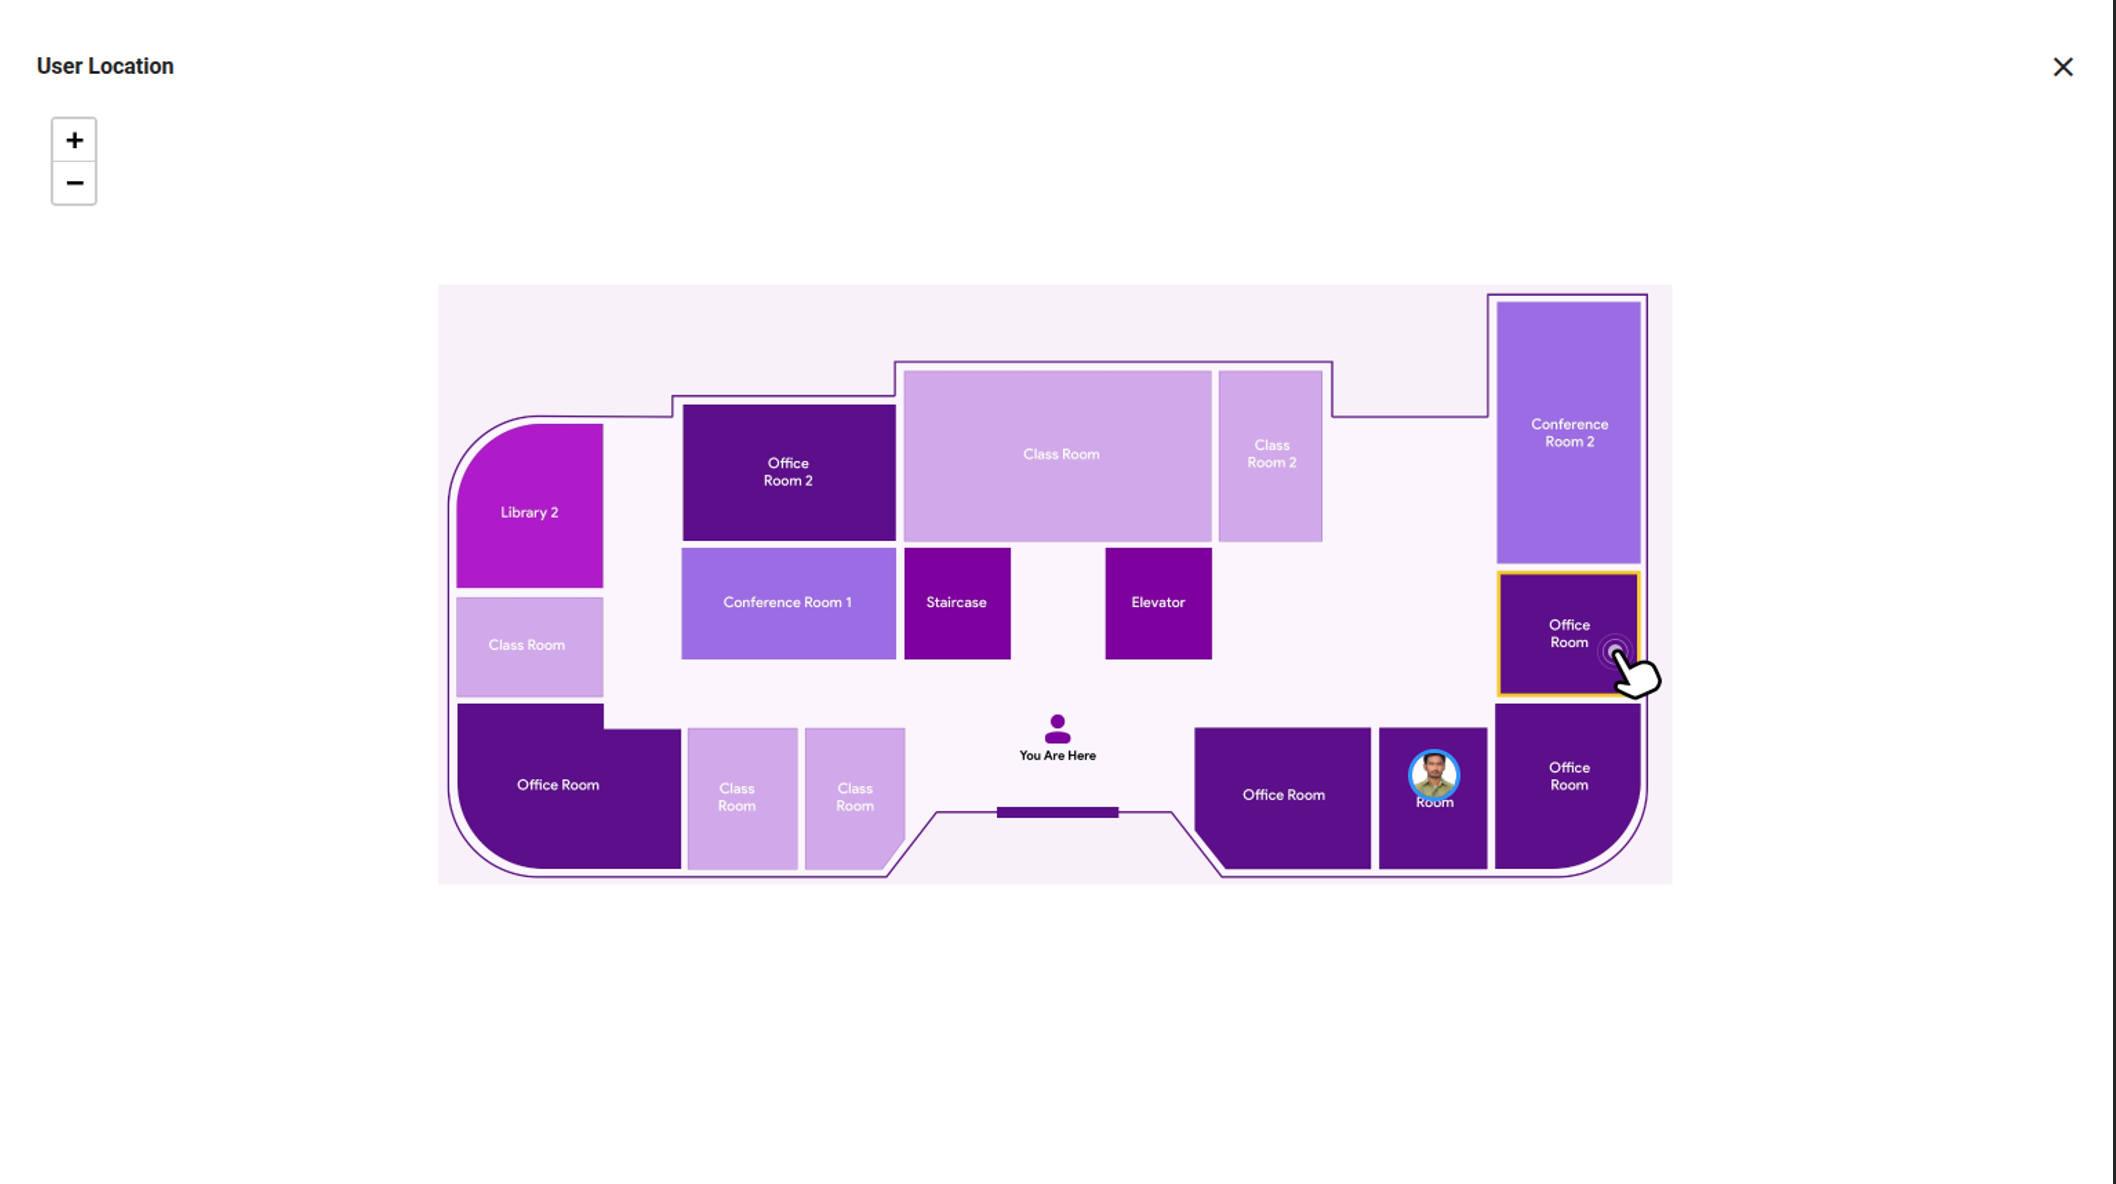
Kitchen staff can view user’s ordering location by clicking on the Location Symbol. This feature helps in identifying their location to deliver food to the user for better service.
Steps to View Current Location:
- Go to the order, click on click here for more details link.
- Click on the Location Symbol on the screen.
- Staff can view order placed location (e.g., Zone/Area, Desk).
Employee usage: (Ordering Food)
• QR Code Scanning: Employees scan the QR code assigned to a specific desk or designated area using their mobile device.
• SSO Authentication: Upon scanning, users are redirected to the Single Sign-On (SSO) login page for authentication.
• Automated Navigation: After successful authentication, the system automatically directs the user to the food ordering section, where they can browse and place orders.
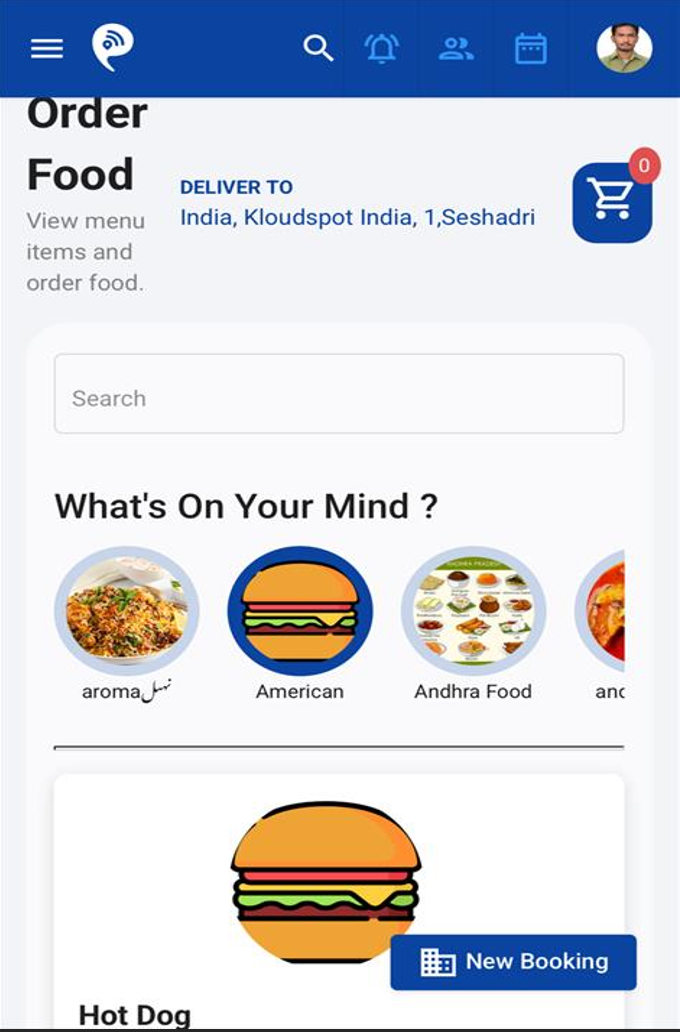
Ordering Process:
- Users can search for a specific item or navigate through categories to find what they need. To add an item, simply click the "+ Add Item" button.
- Customize Order: A customized order popup will appear, allowing users to select their preferred options.
- Select Quantity: Choose the desired quantity for each food item.
- Add to Cart: Click on the “Add to Cart” button to confirm the selection and proceed with the order.

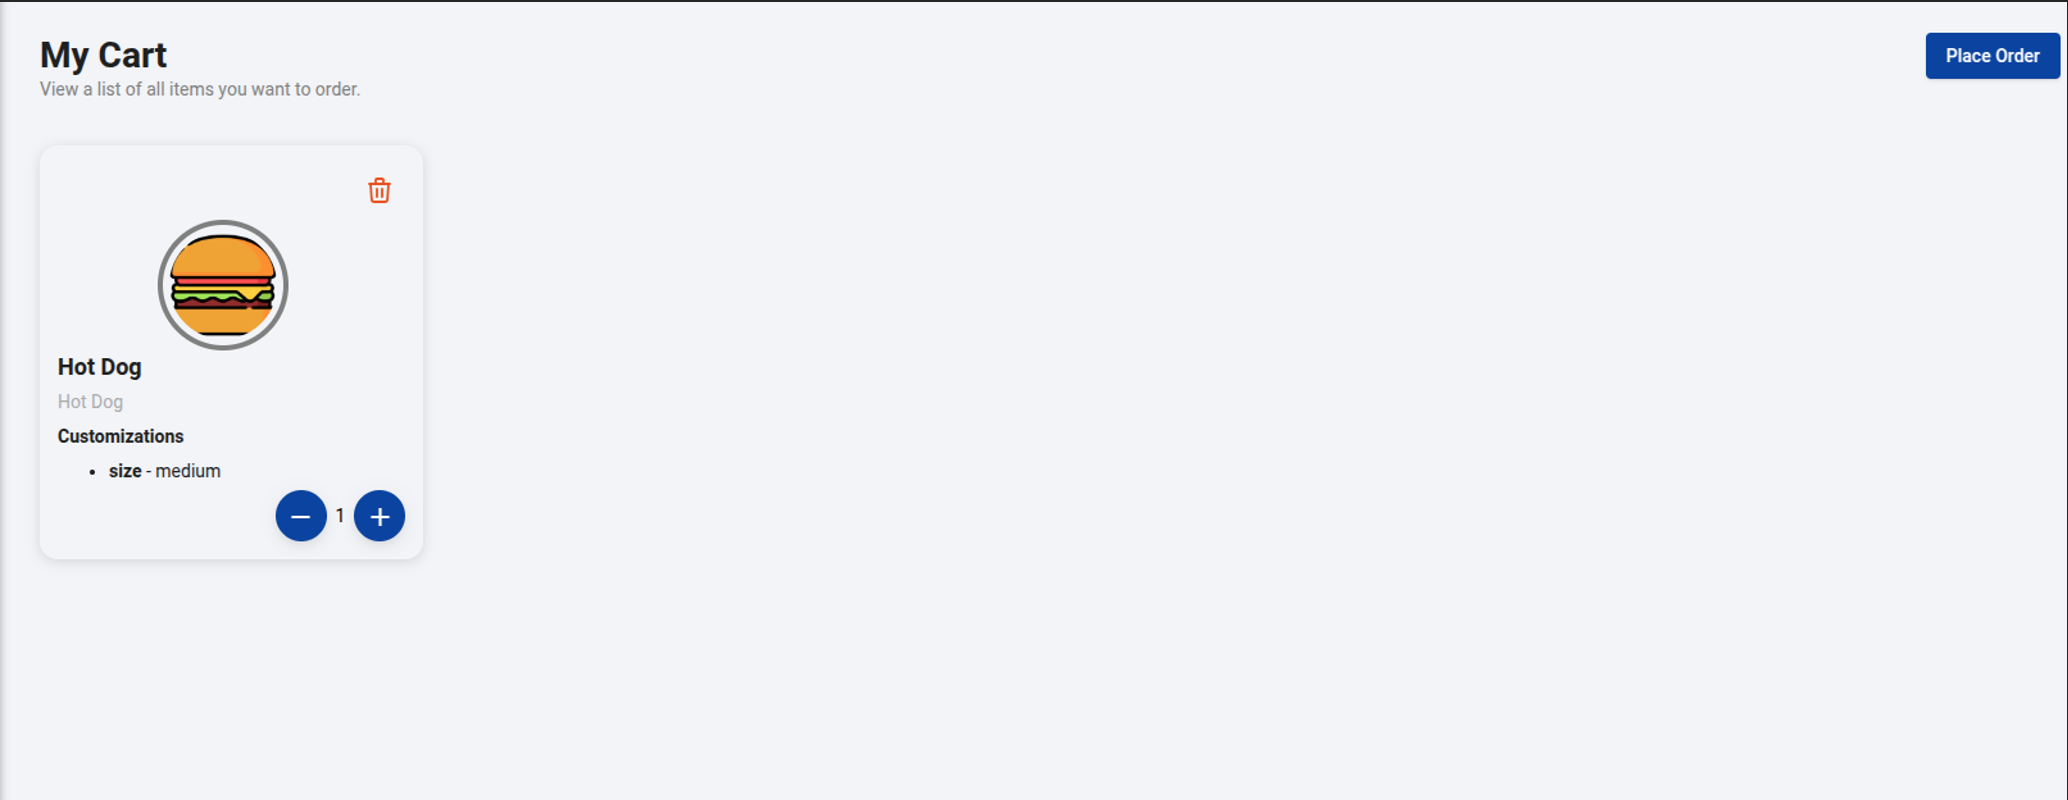
Orders Cart – How Users Can Checkout Their Orders
Once the user selects an item, it will appear in their Cart with the following options:
1. Increase/Decrease Quantity:
a. Users can increase the quantity of the selected item
b. Typically, there will be a "+" button to increase and a "-" button to decrease the quantity.
2. Delete Item:
a. If the user no longer wants an item, they can click on the Delete button (trash icon on top right corner as shown below).
3. Place Order:
a. Once the user has finalized their selection, they can click the Place Order button.
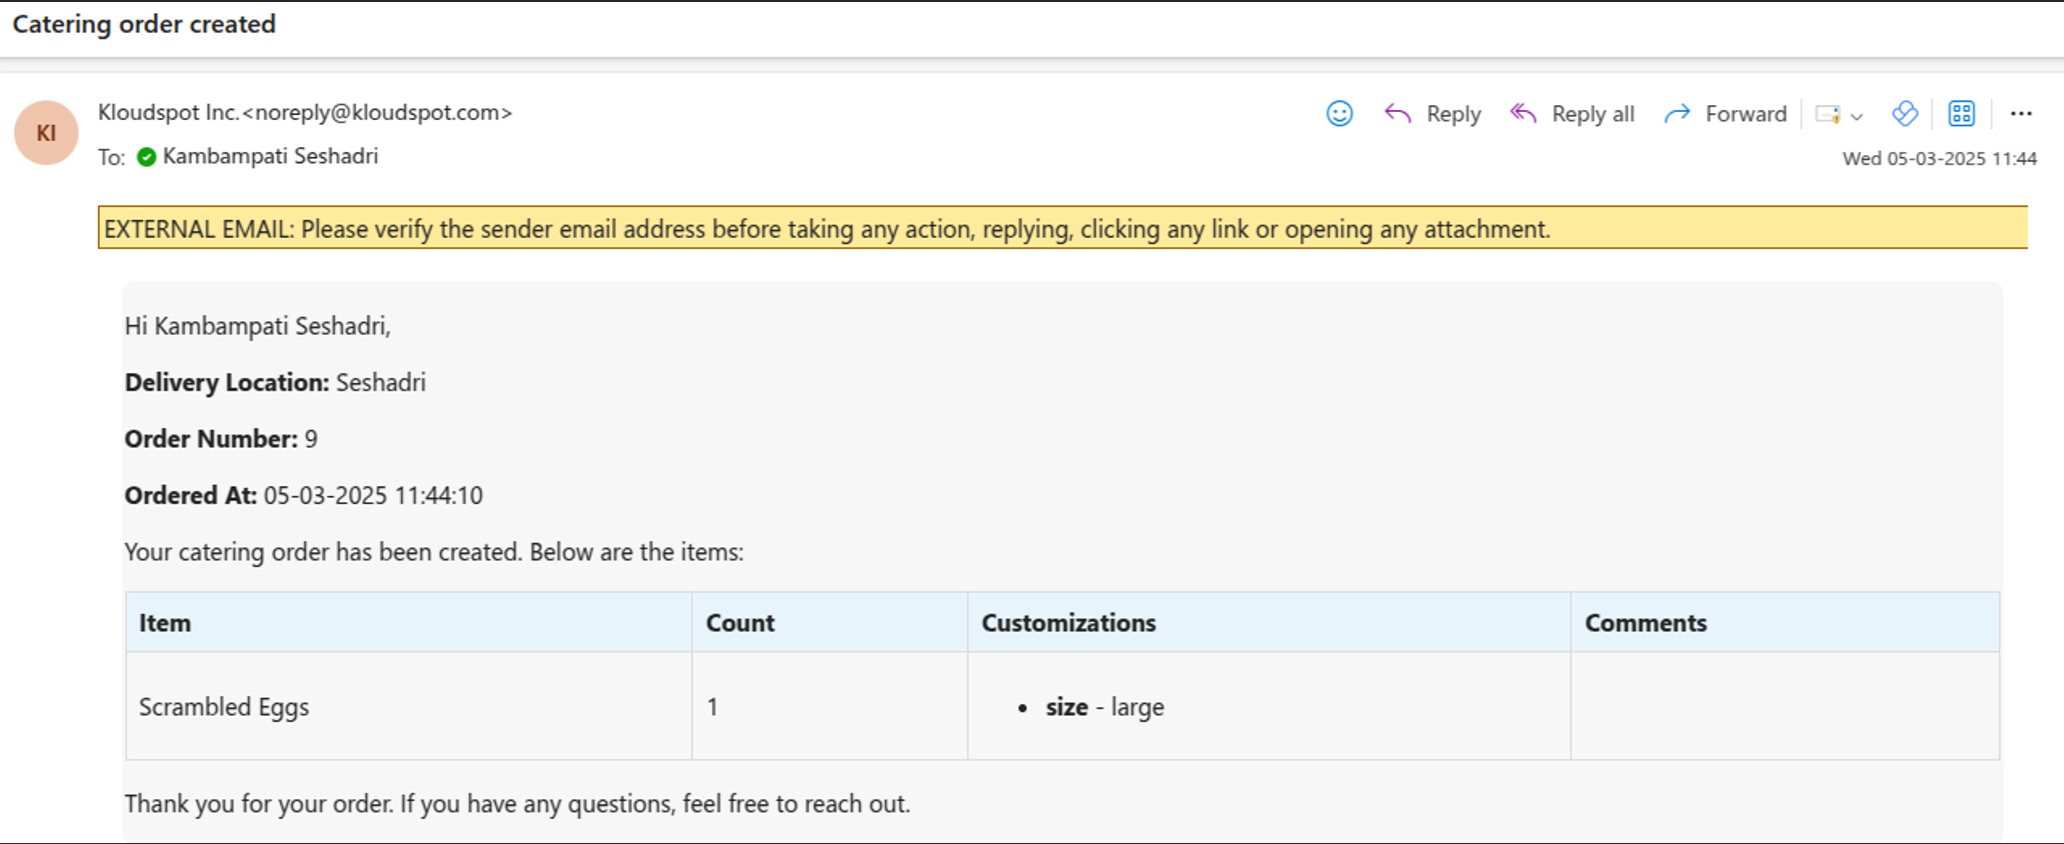
Once the order is successfully created, the system sends an automated email notification to the user.
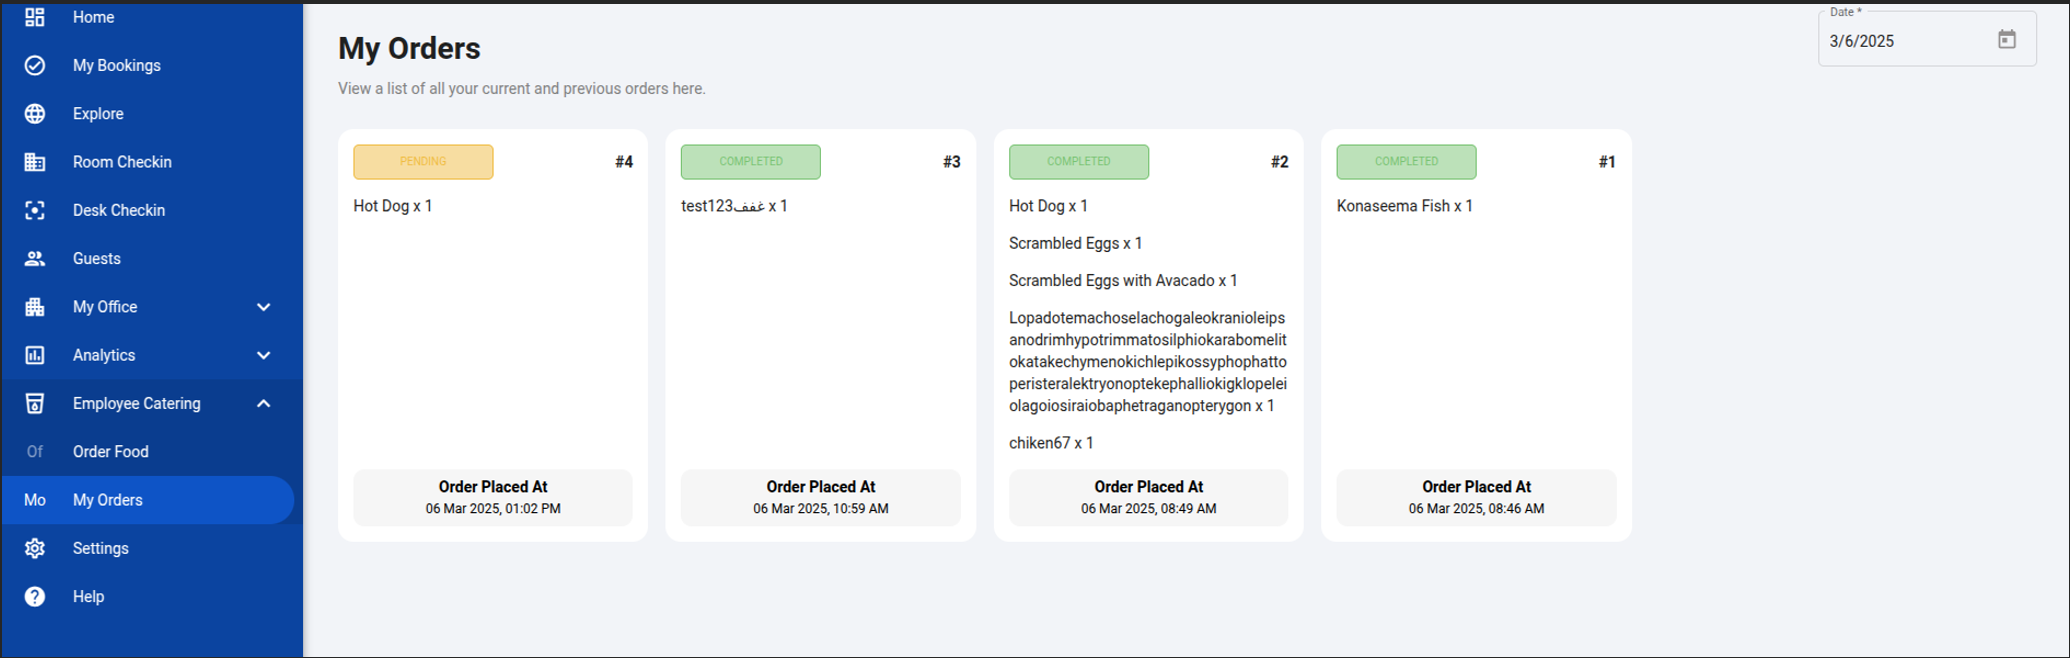
User Order History:
- Access Order History: Navigate to the “My Orders” section to view all orders.
- Filter by Date: Use the date filter to fetch the orders based on a selected date.
- Order Details: Each order entry displays order details, status and time.