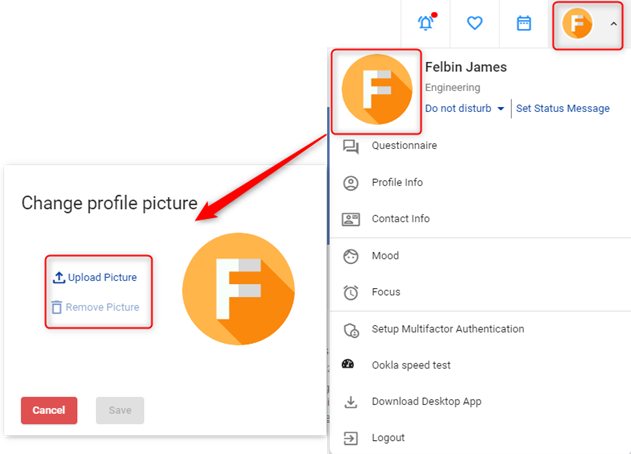
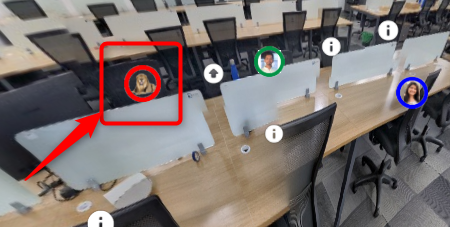
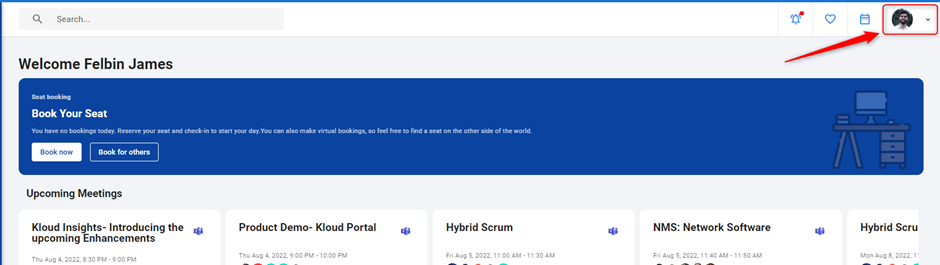
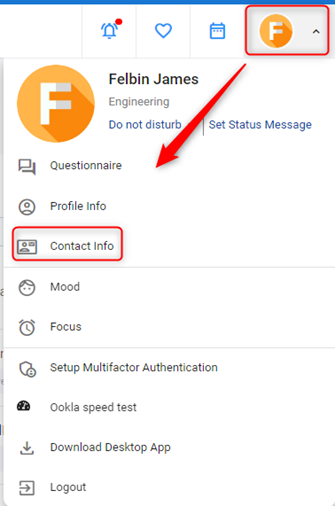
To get started, configure your profile by clicking on the avatar button. Here, you can set your profile picture, write a status message, provide contact information, and update your profile details. Additionally, you will find various other options available in this section. For a comprehensive guide on how to configure your profile, please refer the following steps.
- The logged-in users’ avatar (if available) is displayed on the top right corner of the application.
-
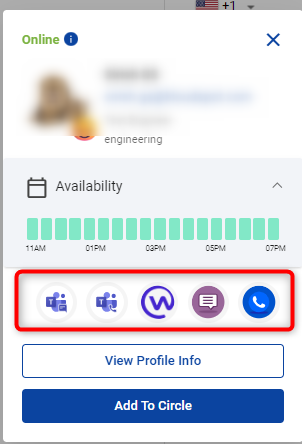
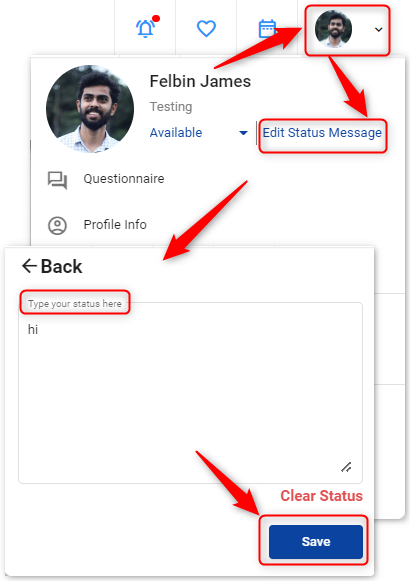
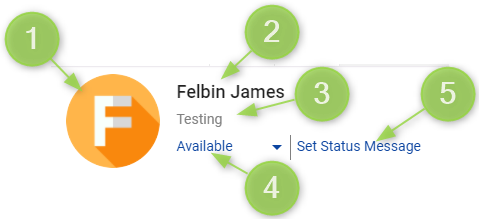
The header of the avatar button contains information about the user.
- Profile picture
- Name
- Department
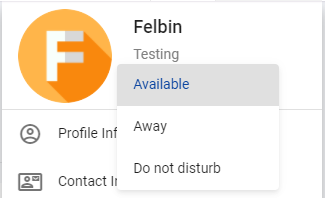
- Status
- Status message
-
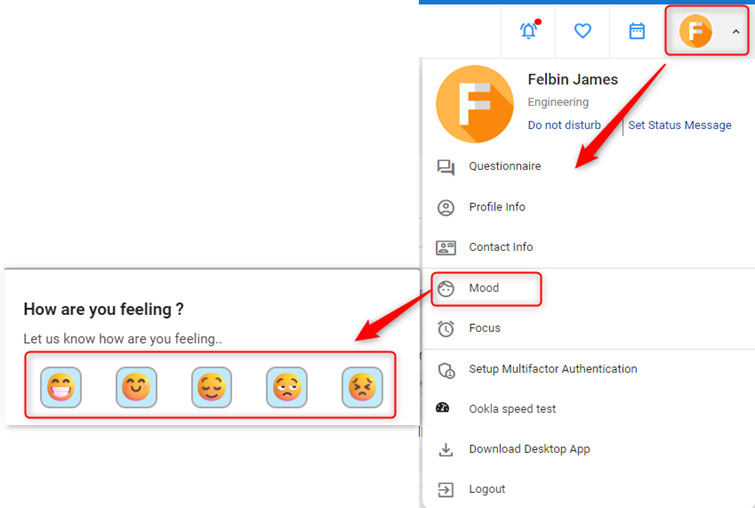
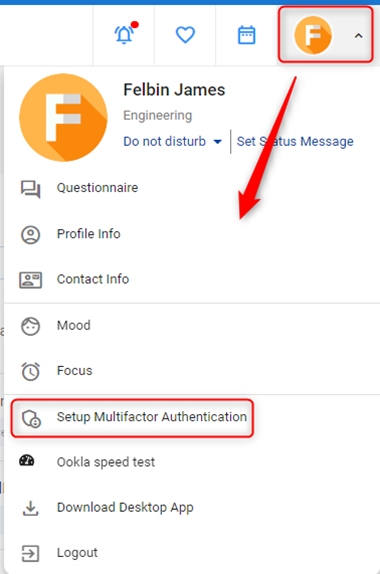
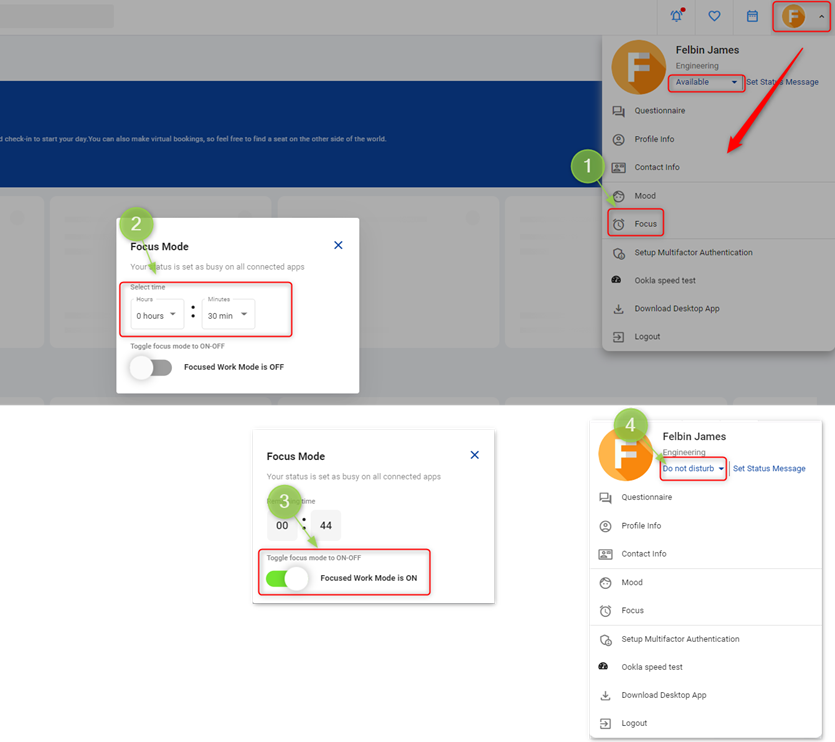
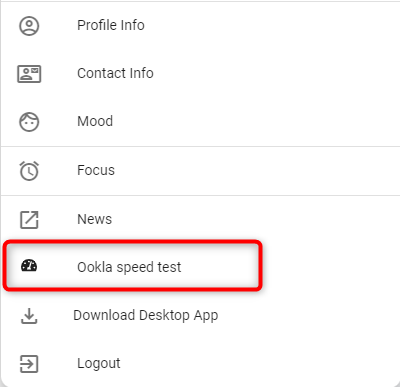
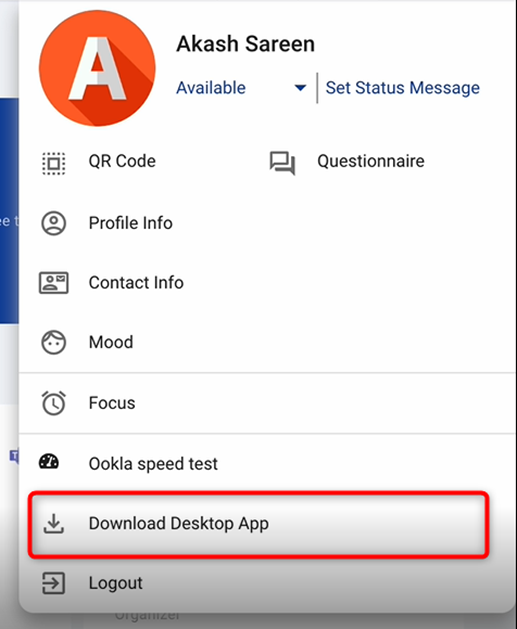
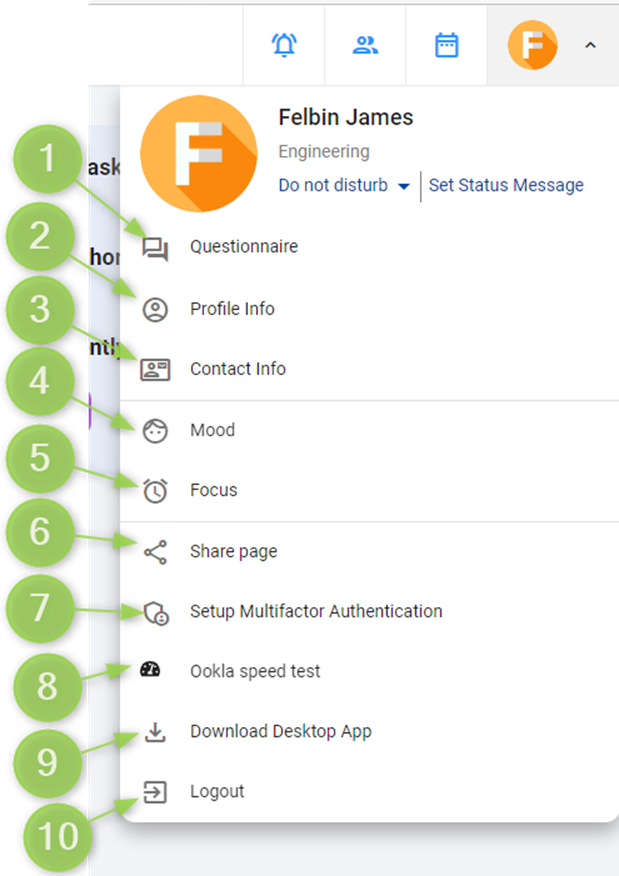
The avatar button contains the below options also.
- Questionnaire
- Profile Info
- Contact Info
- Mood
- Focus
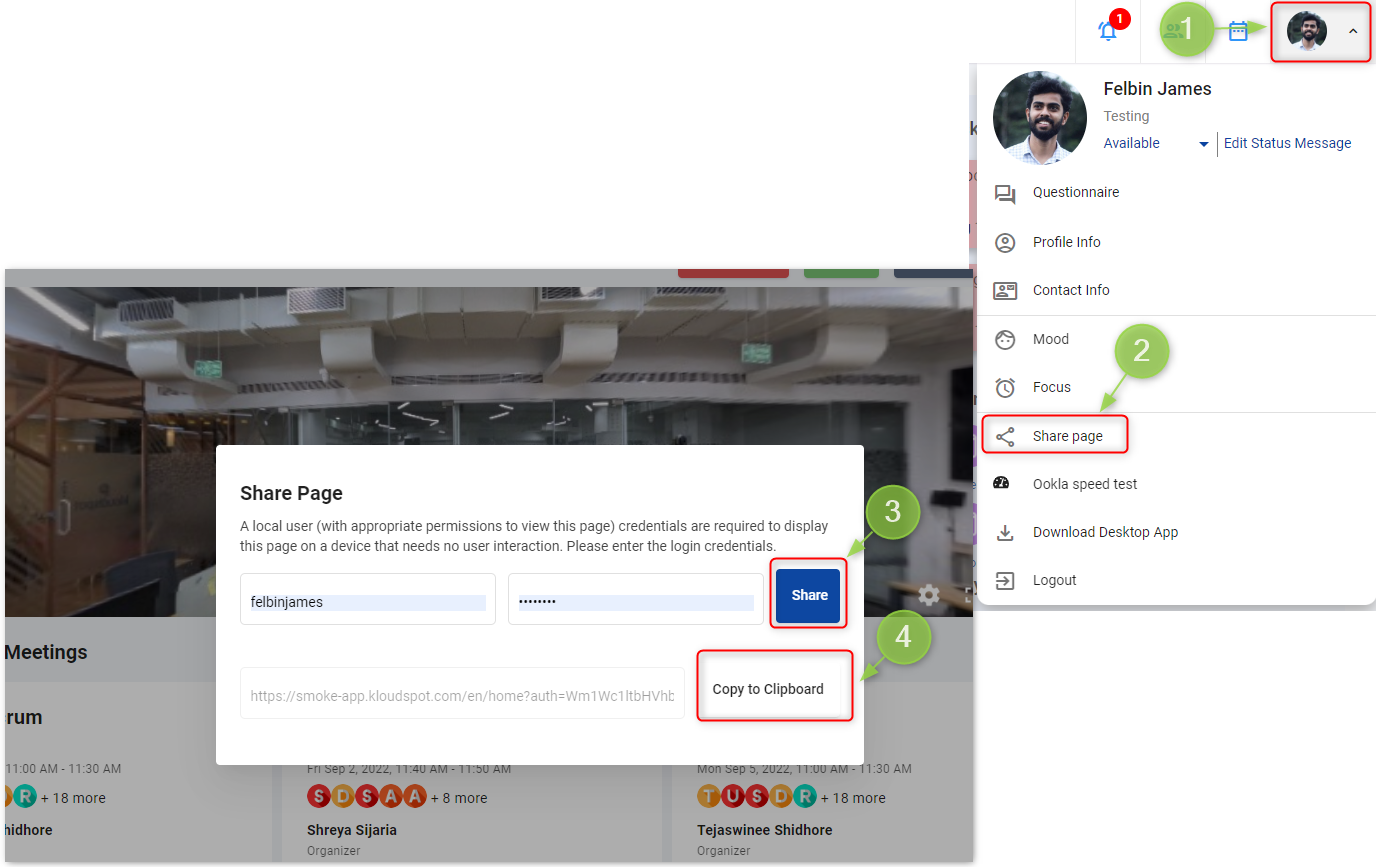
- Share Page
- Setup Multifactor Authentication
- Custom Link
- Download Desktop App
- Logout
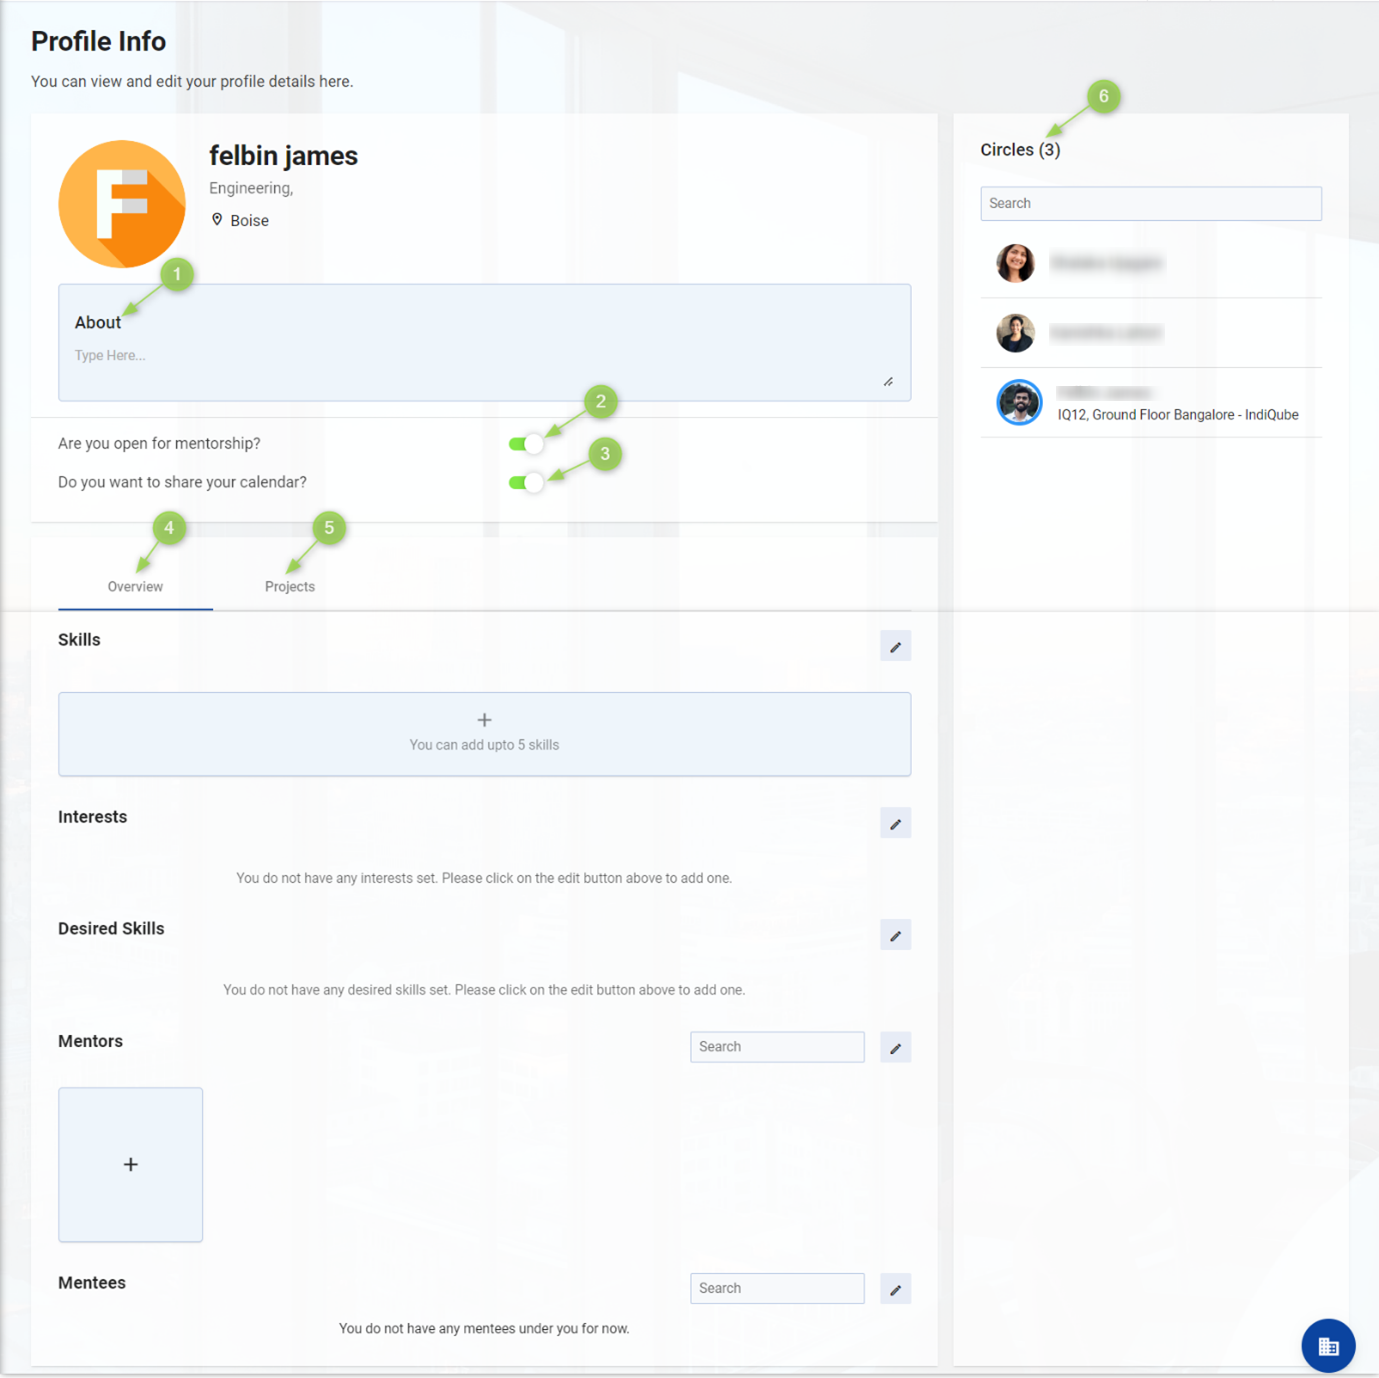
Create Profile Info
Provide essential information about yourself in your profile. From professional details to personal interests, create a comprehensive profile that showcases who you are.
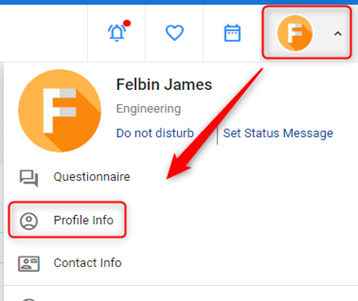
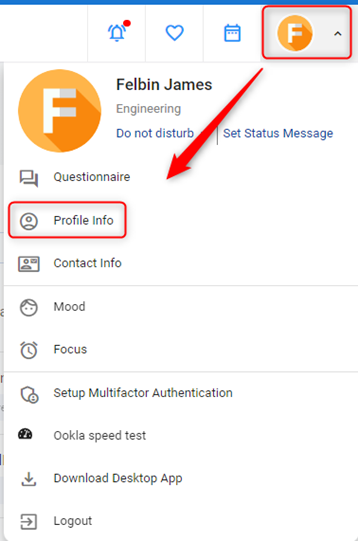
- Navigate to the Avatar button.
- Then click on the Profile Info button. This will take you to the Profile info page. This page contains the below options.

1. About
- In this section, you can briefly describe yourself.
2. Enable mentorship
- If you want to share your knowledge with others, you can enable this button. It will be enabled by default. You can turn it off if necessary.
- By enabling this, others will be able to add you as a mentor.
3. Share your calendar
- By enabling this, others will be able to see your calendar.
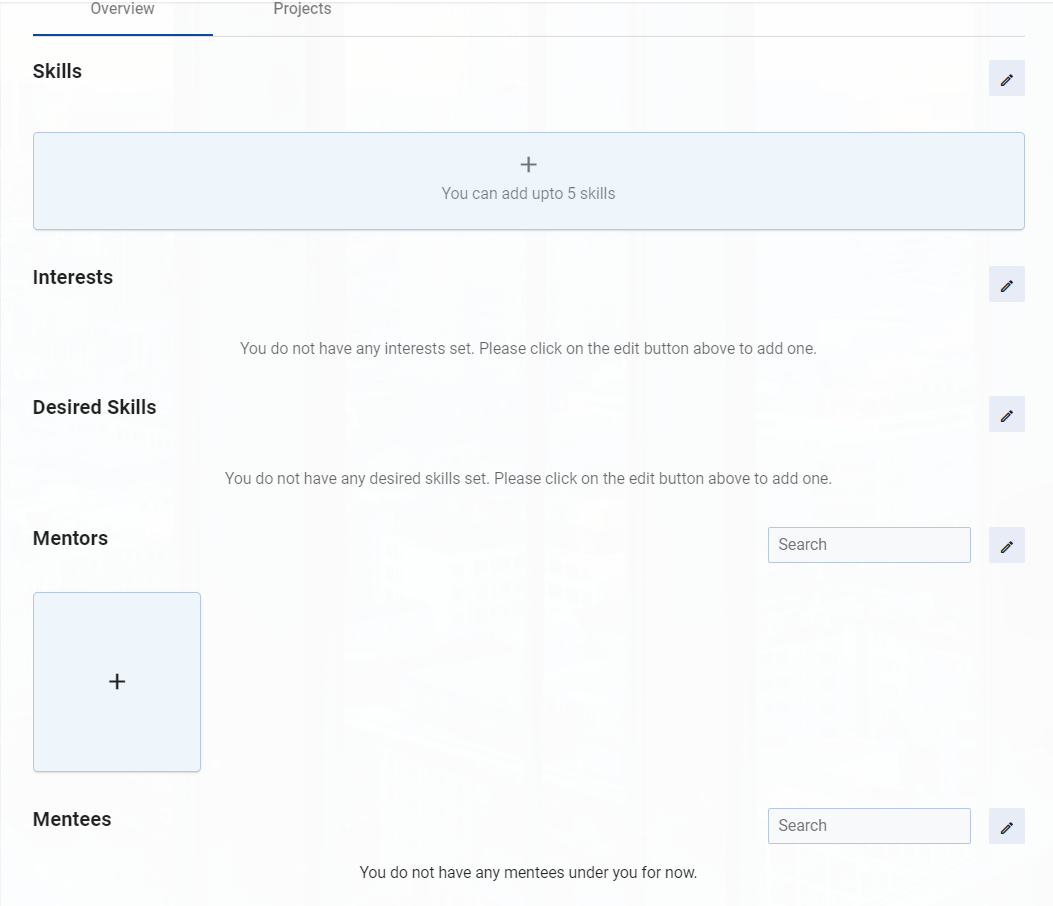
4. Overview Tab
- Here you can add skills, Interests, desired skills, and mentors.
How to Add Skills?
- Click on Add button.
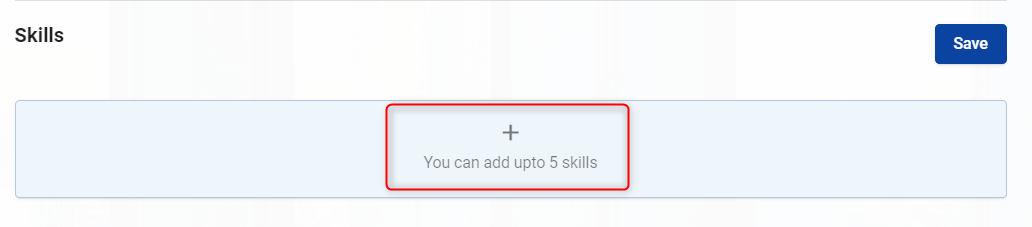
-
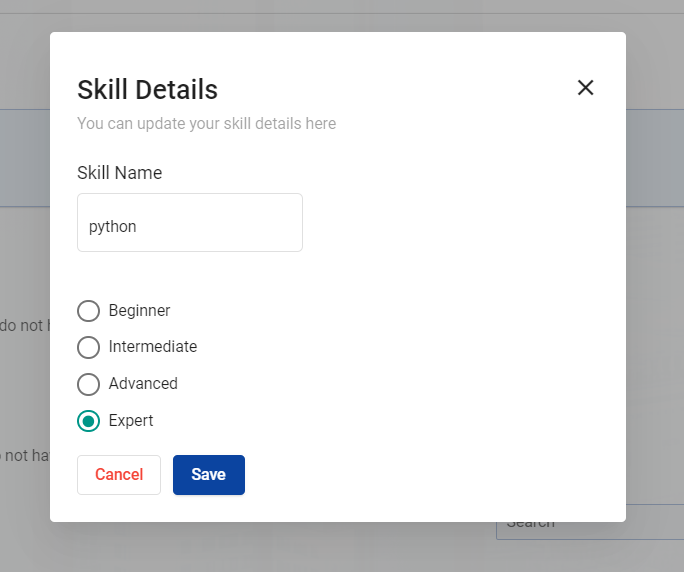
Skill details pop-up window will appear.
-
Enter the first few letters of the skill you want to add, then choose it from the dropdown list that appears. Then select your level from the Level checklist.
- Click on the Save button. A new skill is added successfully.
How to Add Interests?
- Click on Edit button.

-
An editable text box will open.
-
Enter your interests and press Enter Key.
-
Click on the save button. New interests are added successfully.

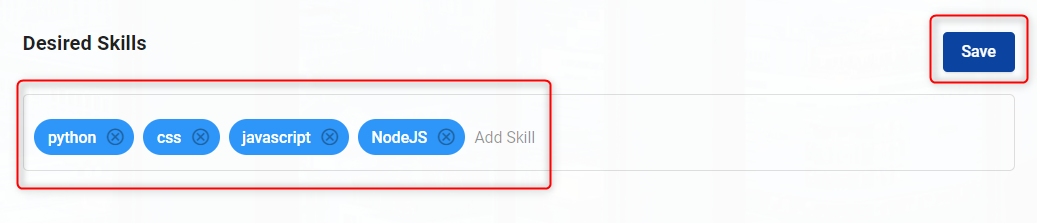
How to Add Desired Skills?
- Click on the Edit button.

-
An editable text box will open.
-
Enter the first few letters of the skill you want to add, then choose it from the dropdown list that appears.
- Click on the Save button. A New Desired skill is added successfully.
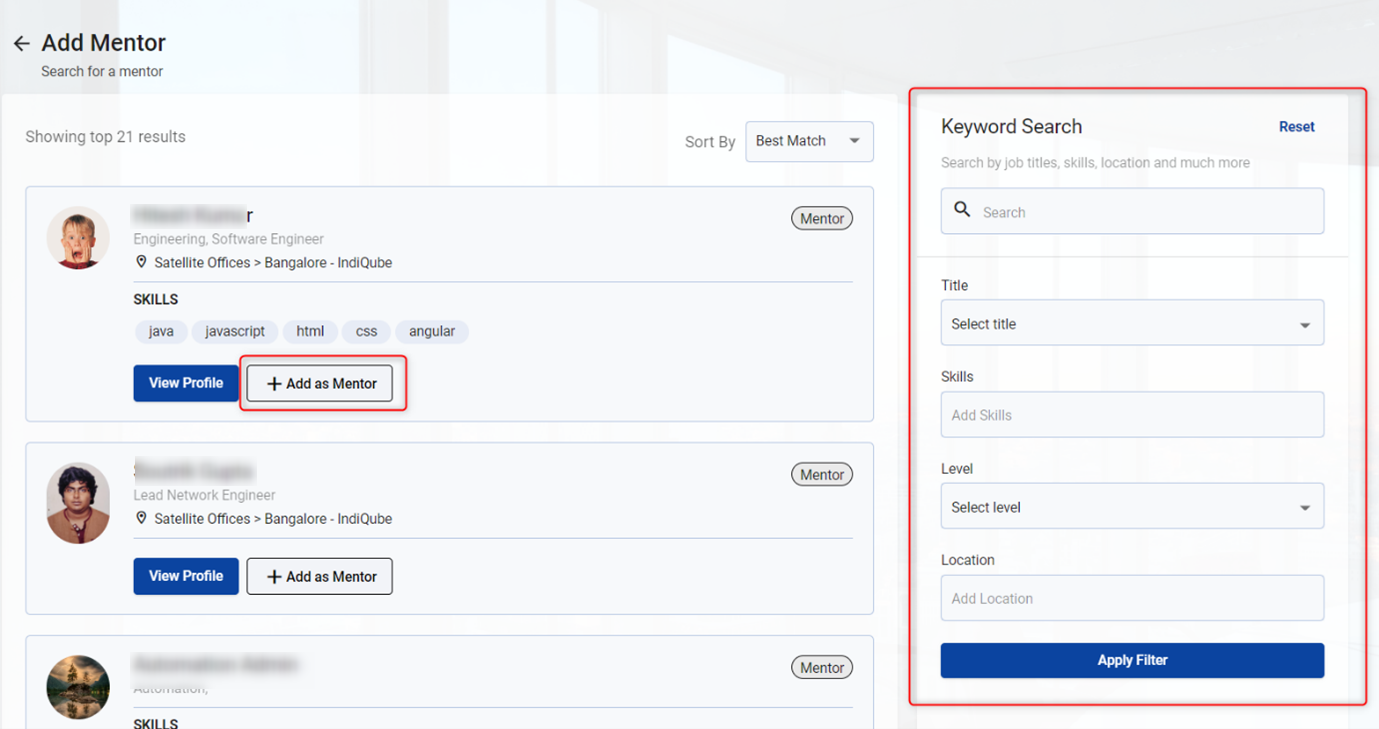
How to Add Mentors?
- Click on Add button.
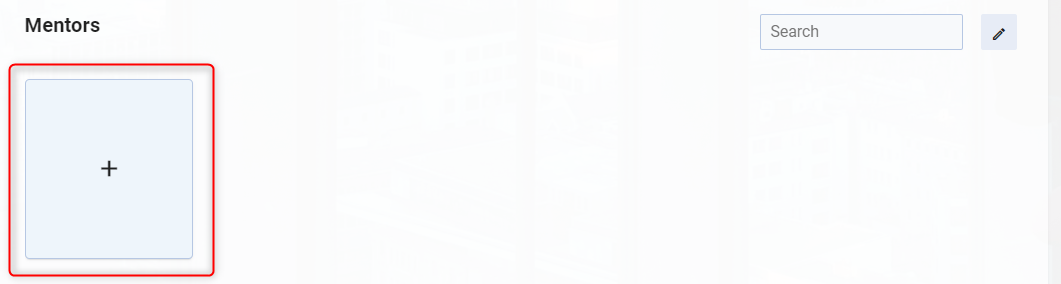
-
Add Mentor window will appear. This window contains a list of people who want to be mentors.
-
Select the person you want to add from the list by clicking on the + Add as mentor button. It can also be filtered by name, title, skills, level, and location.

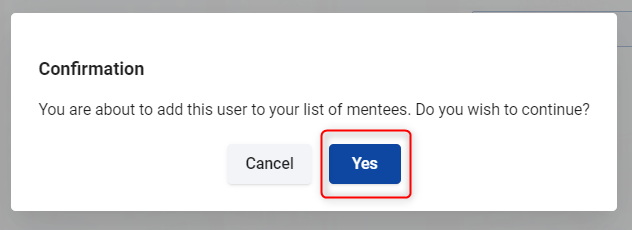
- After clicking on the + Add as mentor button, click the yes in the confirmation popup window that opens.
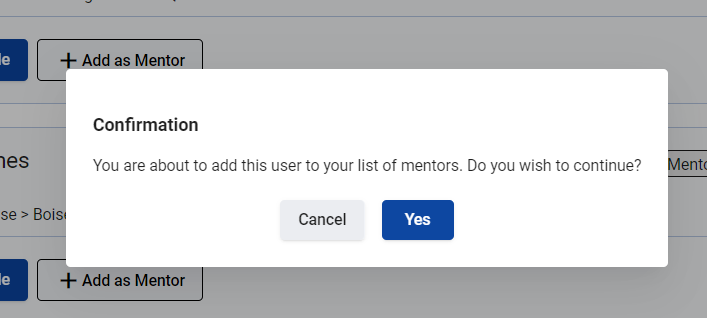
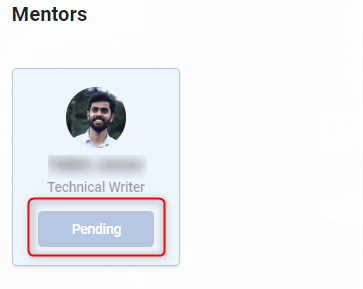
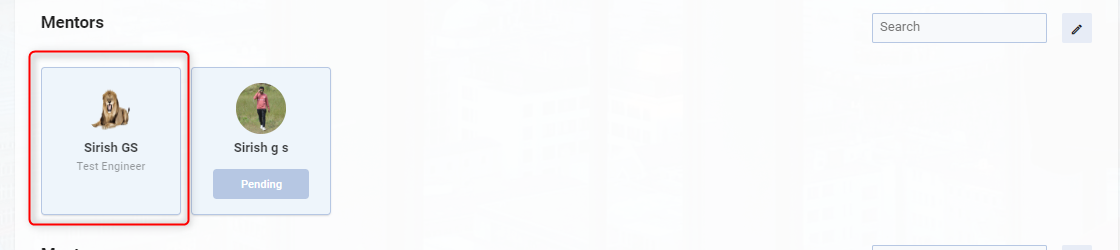
- As soon as it is added, a notification will be sent to the mentor’s email address. Until the mentor accepts it, the status will be pending.
How to accept mentor request?
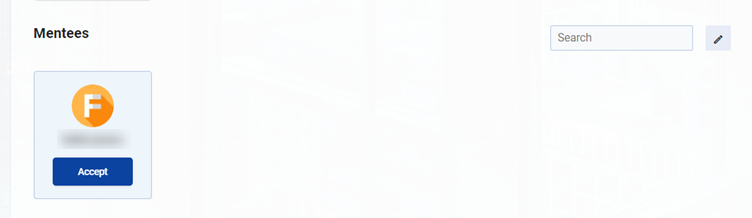
- Navigate to Avatar Button > Profile info. Then scroll down and find the new request in the mentee section.
- Click on Accept button, then click yes in the confirmation popup window that opens.
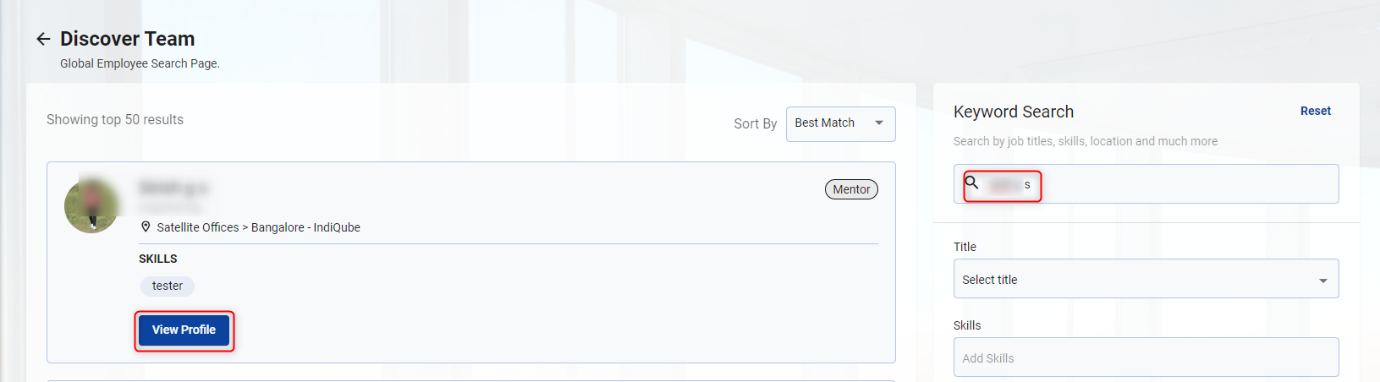
How to set up a meeting with a mentor?
- A meeting with the mentor can be scheduled if the mentor’s assistance is required in any situation.
Click on the mentor’s name
or
- Navigate to My Office > Company Hub > Discover.
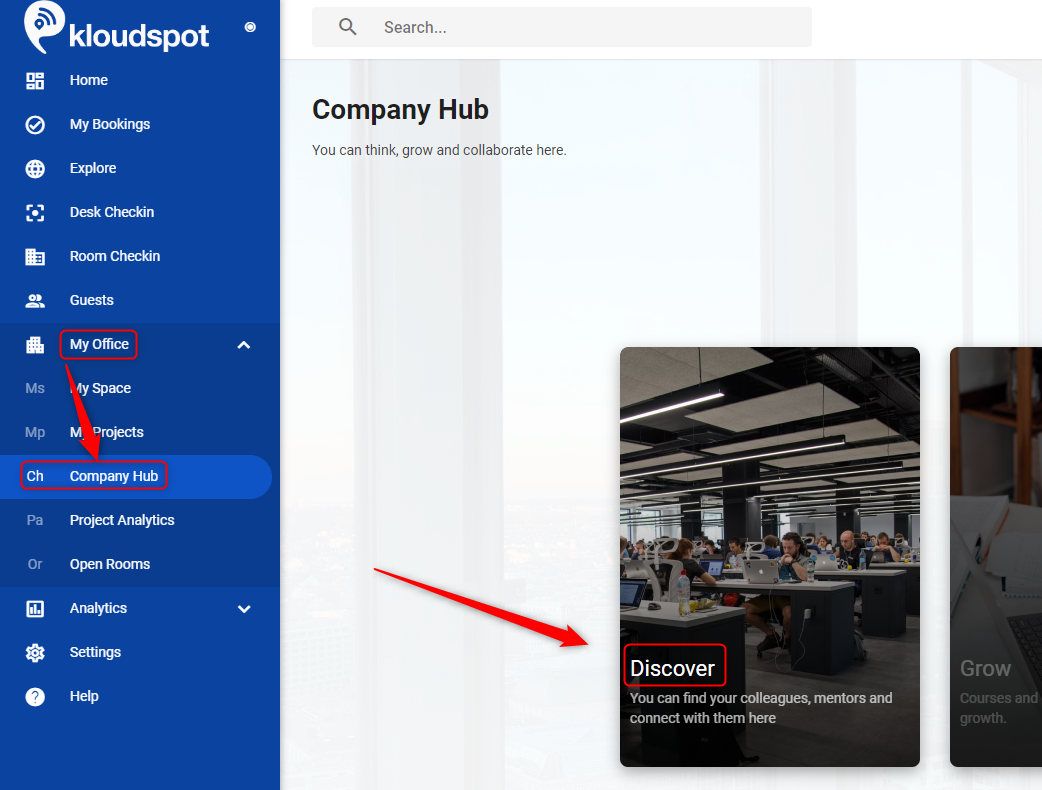
- Then search the mentor’s name in the window that opens and click on the View Profile button.

- Then, in the profile information window, choose a date and time from the available sessions. After you have chosen a time, click the Confirm button in the popup window that appears.
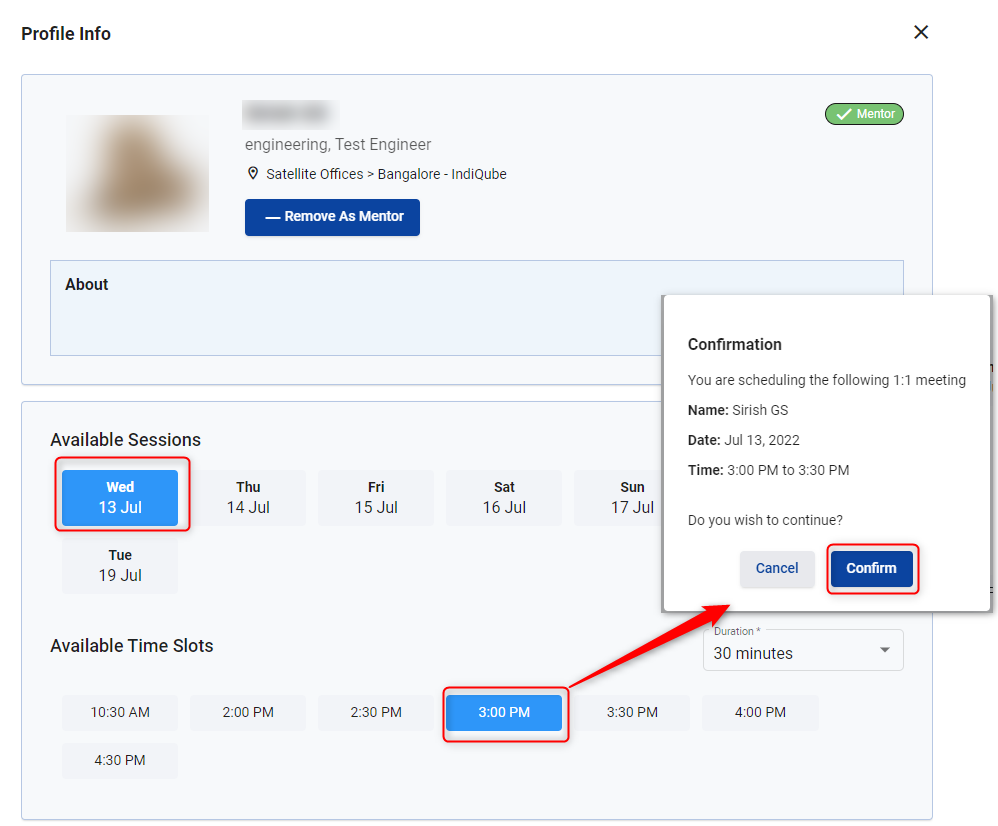
- The mentor will receive the notification of the meeting by mail. He can accept it and confirm the meeting.
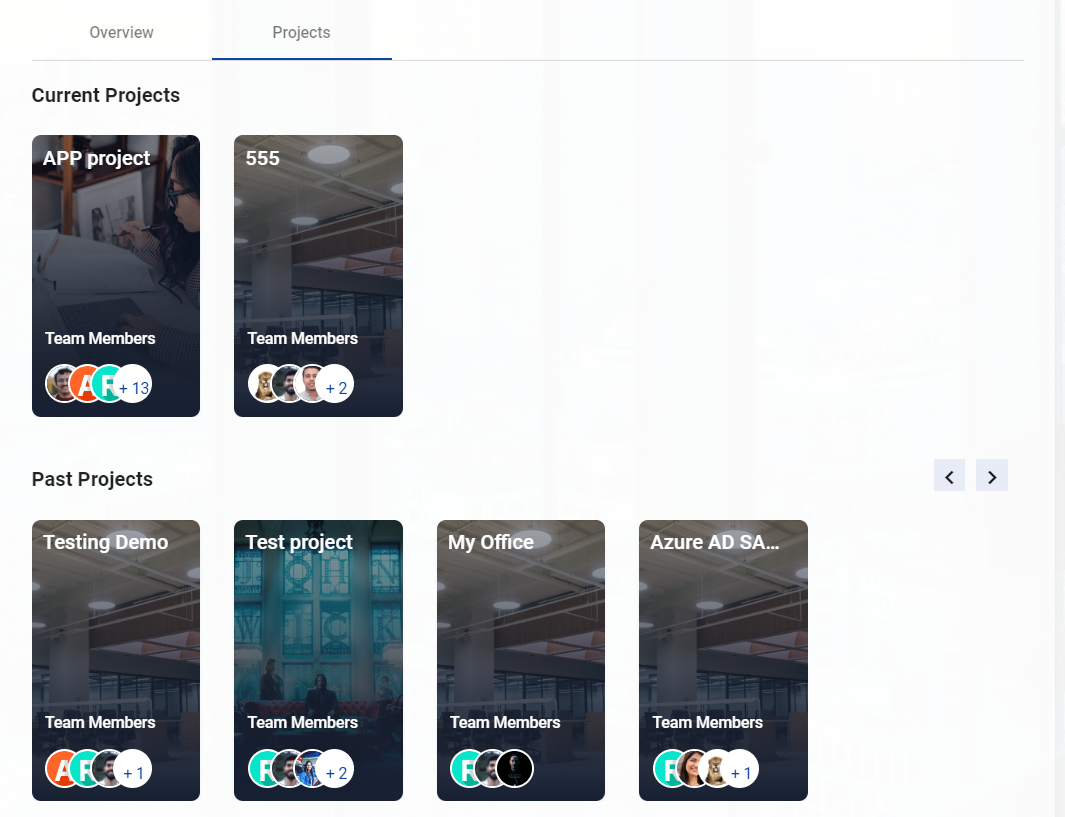
5. Projects Tab
It is useful for viewing current and previous projects.
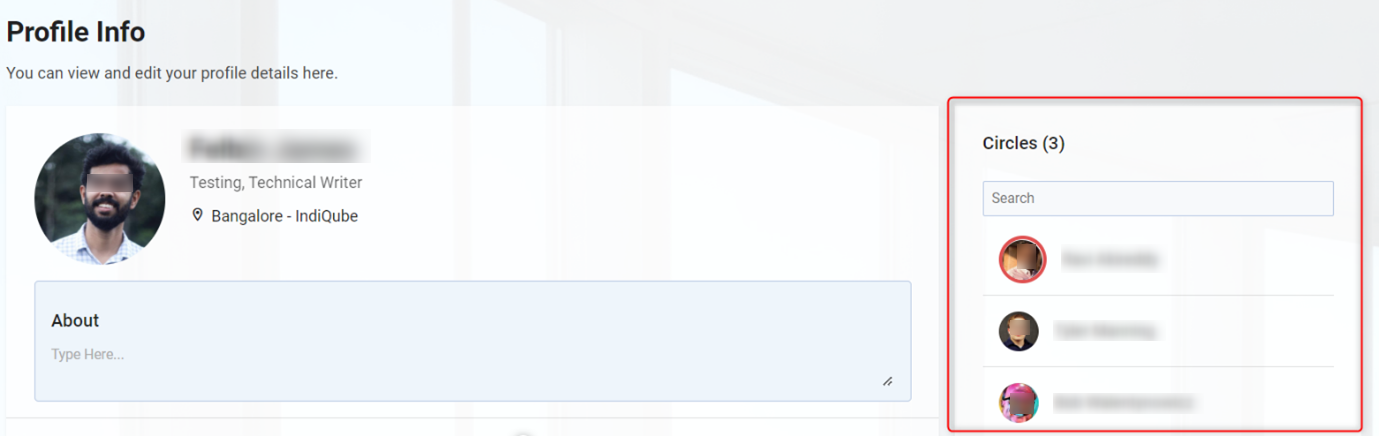
6. Circles
This function displays the profiles that have been added to my circle.

Welcome to the Contact Info section of KloudHybrid! Here, you have the opportunity to configure various general information options that will enrich your communication and collaboration experience. The information you provide in this section will be displayed on your profile card, allowing others to easily access and connect with you.
- Navigate to Avatar button > Contact Info.
- Within the Contact Info section, users can configure various general information options to enhance communication and collaboration.

Phone and Mobile Numbers:
Users can input and configure their phone and mobile numbers, ensuring that their contact details are up to date and readily available for communication purposes.
WhatsApp:
Users can now configure their mobile number specifically for WhatsApp communication. This enables seamless communication through the popular messaging platform.
Teams Email:
Users have the option to configure their email ID for Microsoft Teams. By doing so, they can ensure that their Teams-related communication is streamlined and connected to their preferred email address.
Zoom Link:
The contact info section now includes the ability to configure a personal Zoom link. Users can set up their unique Zoom link, making it easy for others to join Zoom meetings or video conferences with them.
Skype ID:
Users can configure their Skype ID within their contact details. This allows others to connect with them directly through Skype for instant messaging, voice, or video calls.
Slack URL:
The contact info now provides the option to configure a direct message URL for Slack communication. Users can enter their Slack URL, enabling others to initiate direct communication with them on the Slack platform.
UnivergeBlue Link:
Users can configure their personal meeting link for UnivergeBlue meetings. This allows for easy access to UnivergeBlue meetings by sharing the personalized meeting link.
Google Meet Link:
Within the contact info, users can configure their personal link for Google Meet communication. This link can be shared with others to quickly join Google Meet calls or conferences.
Zoom Phone Number:
By adding your Zoom phone number to your contact info, you enable seamless connectivity, ensuring that colleagues, clients, and partners can easily reach out to you whenever needed. Whether it’s for quick discussions, important updates, or collaborative projects, having your Zoom phone number readily available streamlines the communication process and fosters efficient collaboration.
Users can now include their Meta workplace link as part of their contact details. This allows for easy access and navigation to their Meta workplace, promoting collaboration and communication within the Meta platform.