Manage my bookings
The My Bookings menu contains 4 tabs:
- Current: Shows the data of currently active booking details.
- Previous: Shows the data of previously booked sessions.
- Delegated: Shows the data if it is booked for you by someone else (delegated user) or booked by you for some other users/guests.
- Visit: If you have created a visit without a seat for a guest, that information is displayed on this tab.
The details are shown if it exists, else an appropriate message is shown in the respective tabs.
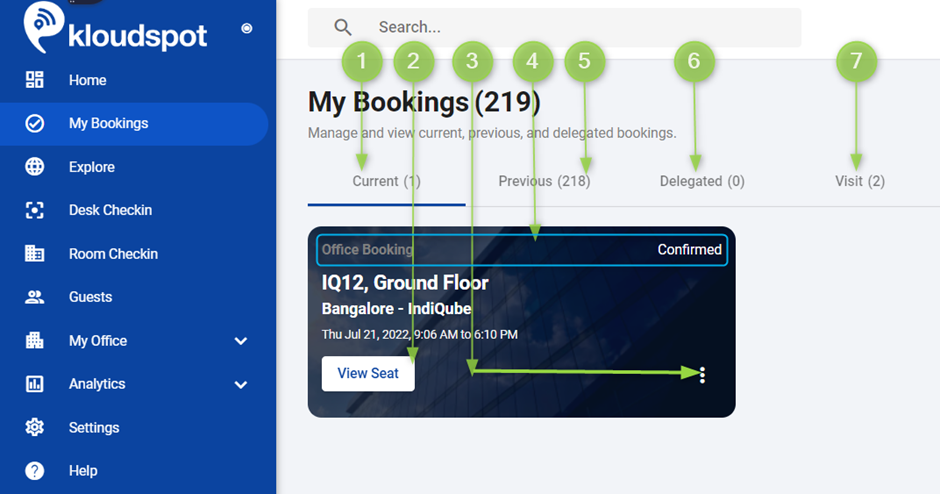
- Current tab
- View Seat
- Context menu
- Booking status
- Previous tab
- Delegated tab
- Visit
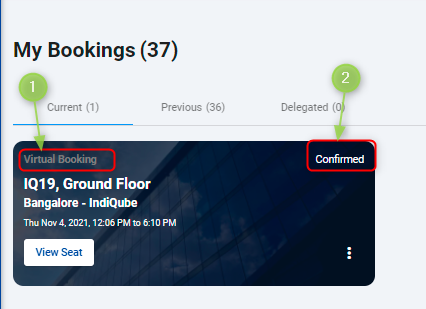
Booking Status:
- Displays the details either as Virtual (if you are working from home) or Office (if you are working from any of your office locations).
- Displays the booking status such as pending, confirmed, released based on the status.
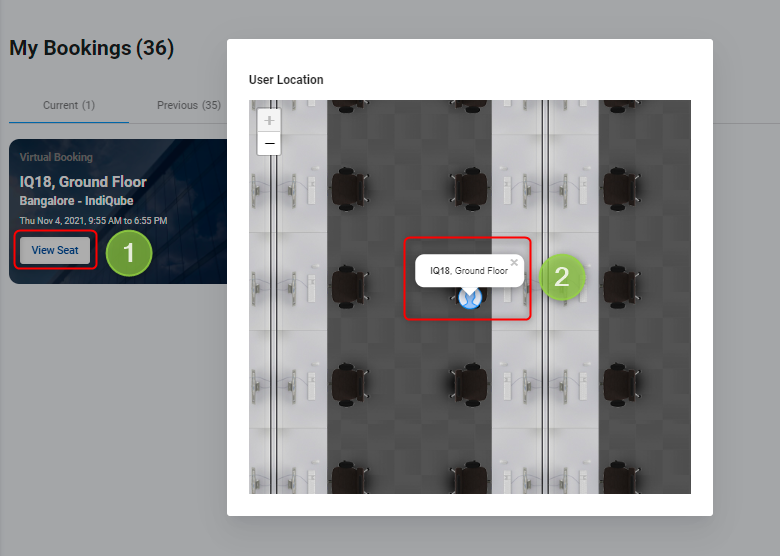
View Seat
Helps to view the currently booked seat.
To view the seat:
-
Click View Seat.
- The “User location” is opened with a display picture (if uploaded).
-
Click on the display picture to view the workstation details.
Context menu
The Context menu helps to extend the timings for the currently booked seat, the Delete helps to delete the current seat and the Details option helps to view the seat booking details.
Note: The extension is not possible for the guest users.
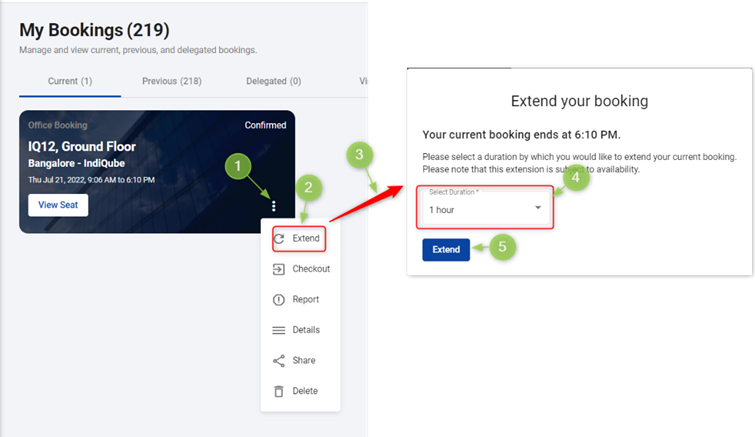
To extend the timings:
Method 1
- Click context menu button from the bottom right corner.
- Click Extend on the context menu.
- The “Extend your booking” dialog box is displayed with the current booking details.
- Click “Select timeframe” drop-down menu and select the extension timings.
- Click Extend.
- A message is displayed for the successful booking. In case, the seat is not available for extension, the error message is displayed.
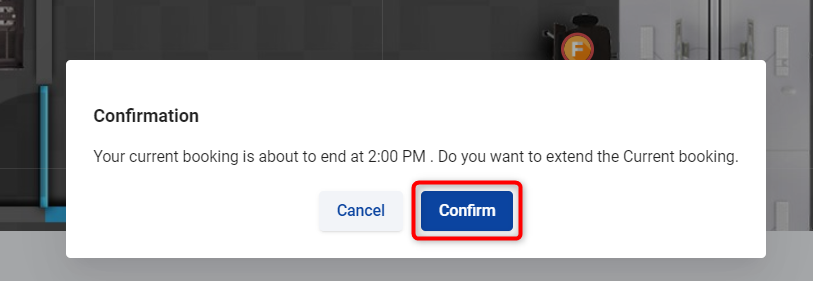
Method 2
- A popup window will appear asking if you want to extend the booking 15 minutes before it expires.
Note: You will get this notification as a popup and push notification.
- If you want to extend the booking, click on the confirm button.
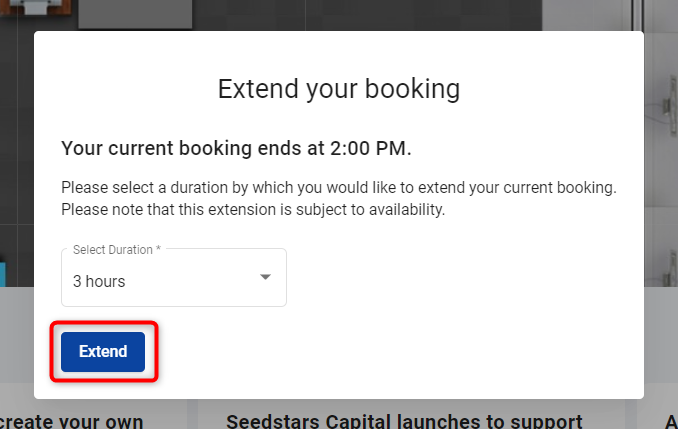
-
Select the time to extend from the dropdown list and click the extend button on the page that appears.
-
Your booking has been successfully extended.
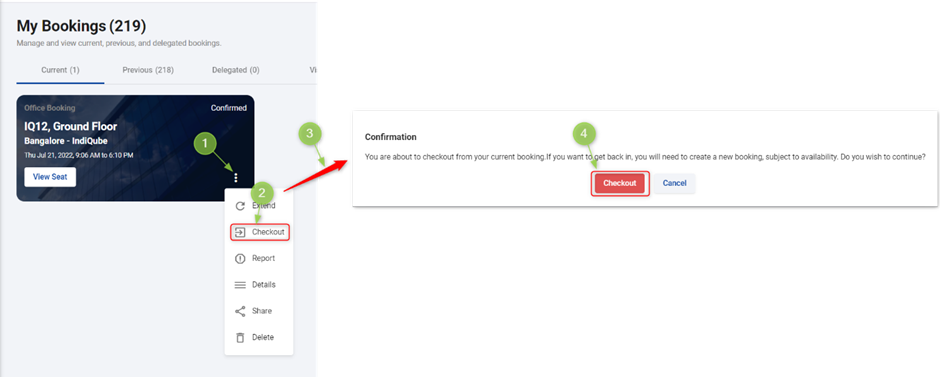
To Checkout from the current booking:
- Click context menu button from the bottom right corner.
- Click Checkout on the context menu.
- The “Checkout” dialog box is displayed.
- Click the “Checkout” button to Checkout.
- A message is displayed for the successful Checkout.
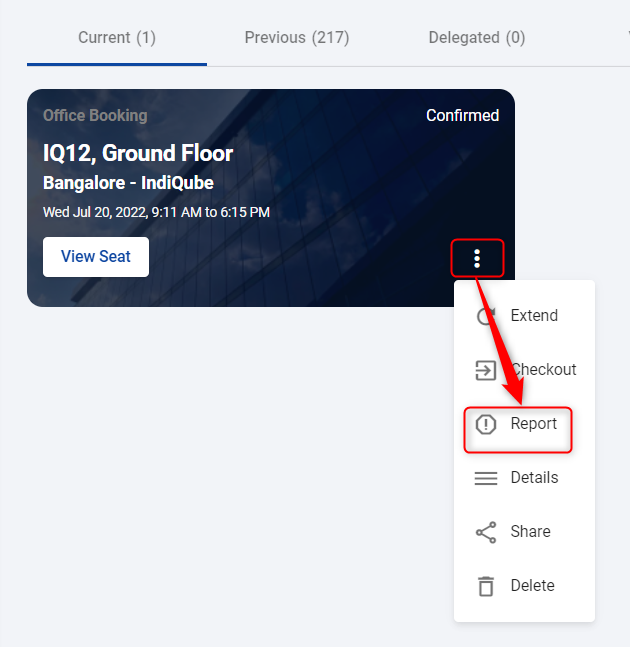
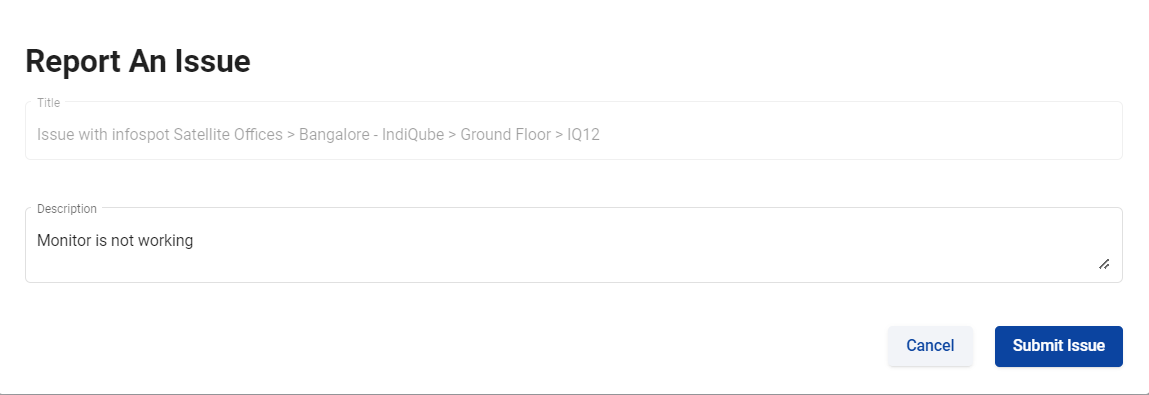
To report an issue
- Click the menu icon on the booking card and then select the Report option. describe your problem in the description column and click the Submit Issue button.
-
Submitted issues can be viewed in the incident window of ServiceNow.
-
Depending on the nature of the issues, the supporting team will resolve them as soon as possible.
-
To Know how to integrate ServiceNow with Hybrid, refer Application Integrations section and see the ServiceNow integration document.
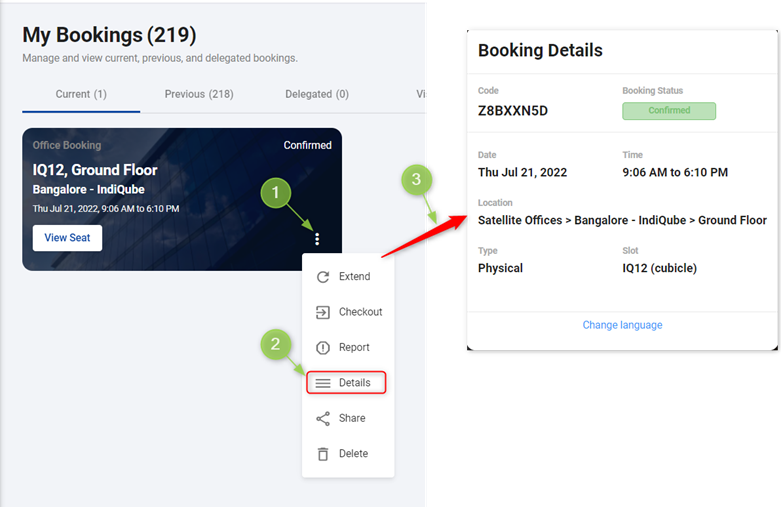
To view the booked seat details:
- Click context menu button from the bottom right corner.
- Click the Details button on the context menu.
- Seat details will appear in the new tab.
Note: you can check out from the context menu if you are already checked in.
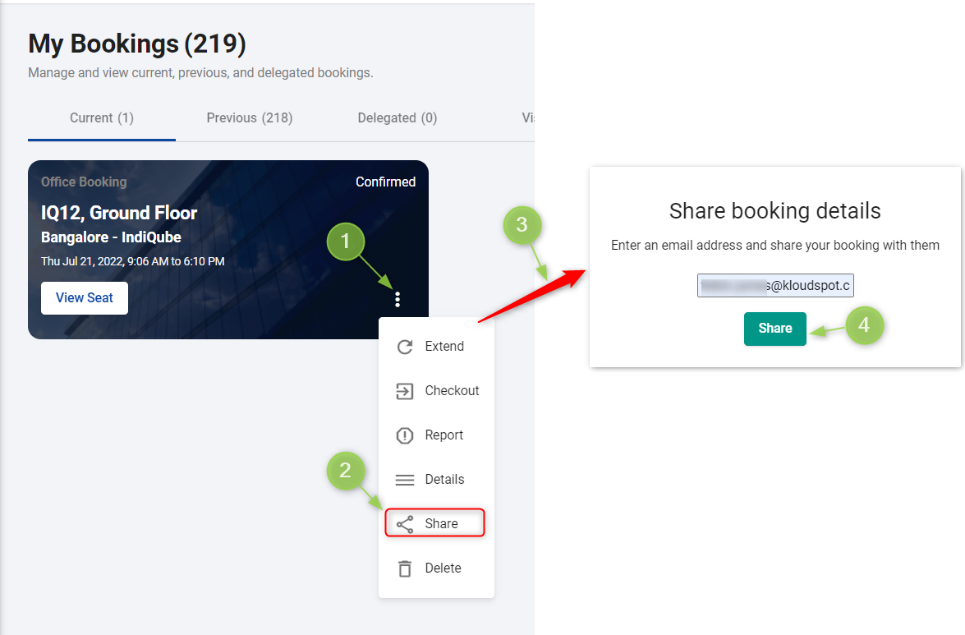
To share your booking details
- Click context menu button from the bottom right corner.
- Click Share on the context menu.
- Enter the email address in the popup window that opens. Then click the Share button.
- Your booking information is sent to the email address you provided.
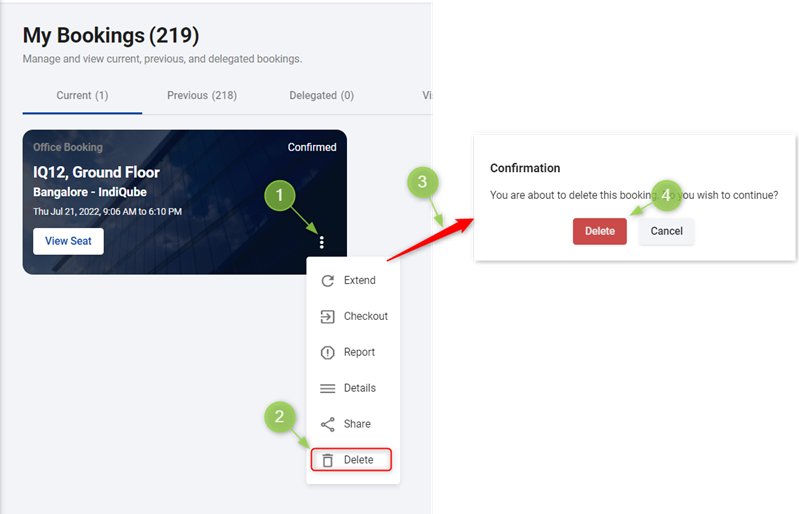
To delete the current Booking:
- Click context menu button from the bottom right corner.
- Click Delete on the context menu.
- A confirmation dialog box is displayed.
- Click Delete.
- A message is displayed for the successful deletion.