My Space
Overview
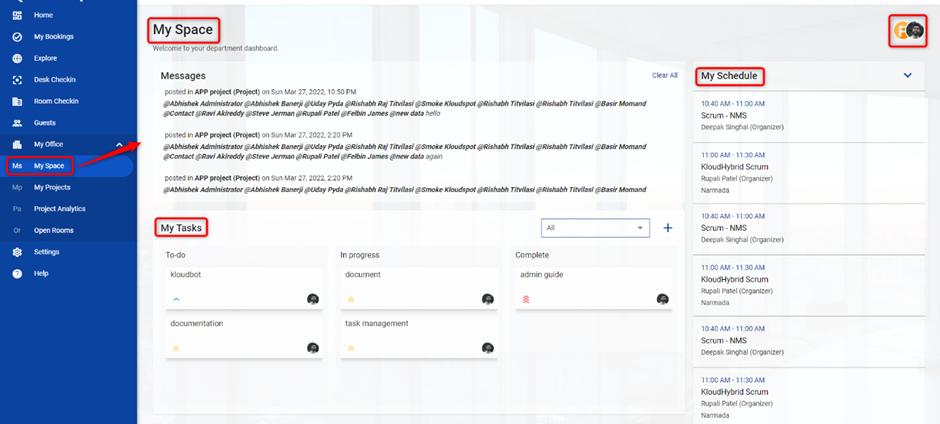
My Space is you personal My Office dashboard! Here, you can easily manage and access key features that help you stay organized and connected:
-
My Schedule: Keep track of your appointments and deadlines in one place.
-
Messages: Communicate with colleagues and collaborate effectively.
-
Department Users: Find and connect with team members quickly.
-
My Tasks: Stay on top of your assignments and tasks.
My Space is designed to simplify your work and enhance productivity. Access these features effortlessly and enjoy a streamlined workflow.
Open My Space
- Click on My Space from the My Office dropdown menu.
- This is your personal dashboard. From this, we can know the following.
- My Schedule
- Messages
- Department Users
- My Tasks
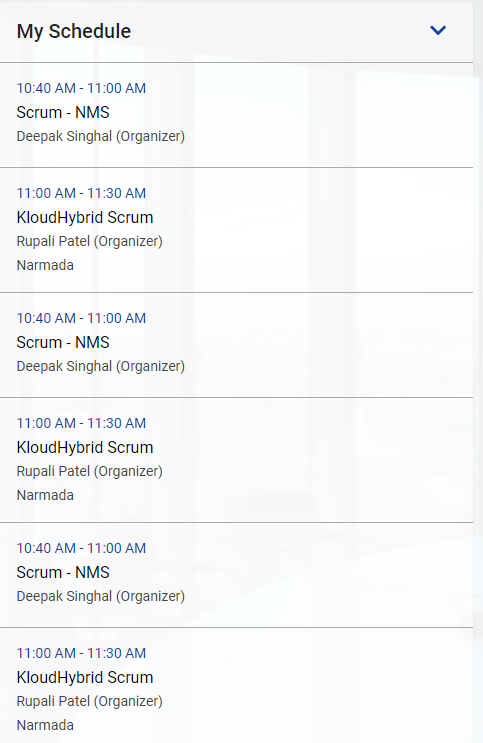
My Schedule
Provides information about upcoming meetings.
Messages
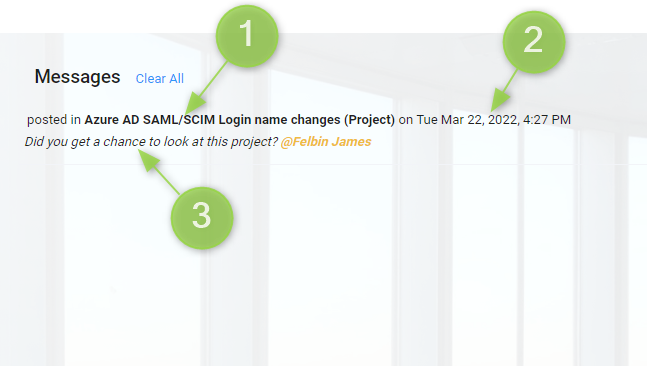
If someone sends you a message that was mentioned to you in any project or open room in which you are involved, you can find it here.
- Indicates from which project the message came.
- Displaying the date, the message was received.
- Shows what the message is.
- Click on the message to proceed to the project.
Department Users
- You can see the users in your department.
- Click on the member’s button. Department users window will open.
- Under the Online section, you can see a list of users who have checked in.
- Under the Offline section, you can see a list of users who have checked in.
- Under the Team Emotions section, you can see overall department emotion.
- A Presence Details session contains the following.
- How many people have logged in Physically?
- How many people have logged in virtually?
- How many are offline?
- Where have people logged in from?

My Tasks
- You will be able to see the tasks that you have created as well as those that have been assigned to you by others.
- You can use the search bar if you want to search for a specific task.
- You can organize the tasks by due date and priority. To do so, click the filter button and select the appropriate option.

Create new tasks
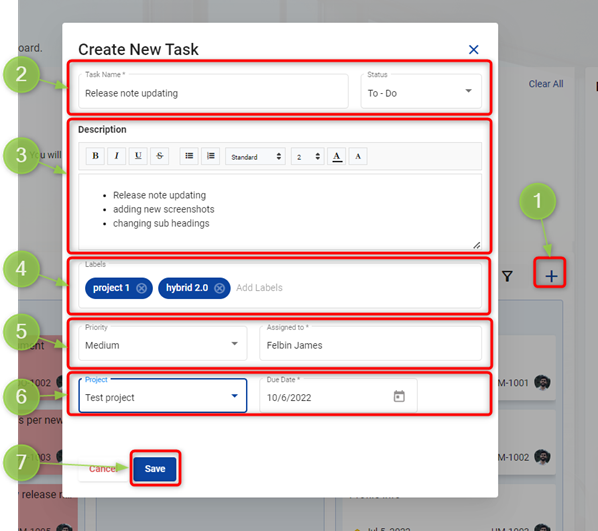
- Click on add button. A popup window will appear.
- Enter the task name and select status from the dropdown.
- Describe the task in detail.
- Add labels if required.
- Select priority and enter the assignee’s name.
Note: By adding a task from my space, you will be unable to assign it to another person. Visit the task tab from the My Project menu to assign the task to someone else.
-
Select the project and select the due date.
-
Then click the Save Button.


