My projects
Overview
The “My Projects” feature in the KloudHybrid app provides a comprehensive overview of the projects in which you are involved. This section offers valuable information and tools to help you manage and stay updated on your projects.
By leveraging the “My Projects” feature in the KloudHybrid app, you can efficiently manage your project portfolio, collaborate with team members, stay updated on project progress, and access essential project-related information. This feature enhances productivity, fosters effective teamwork, and contributes to successful project outcomes.
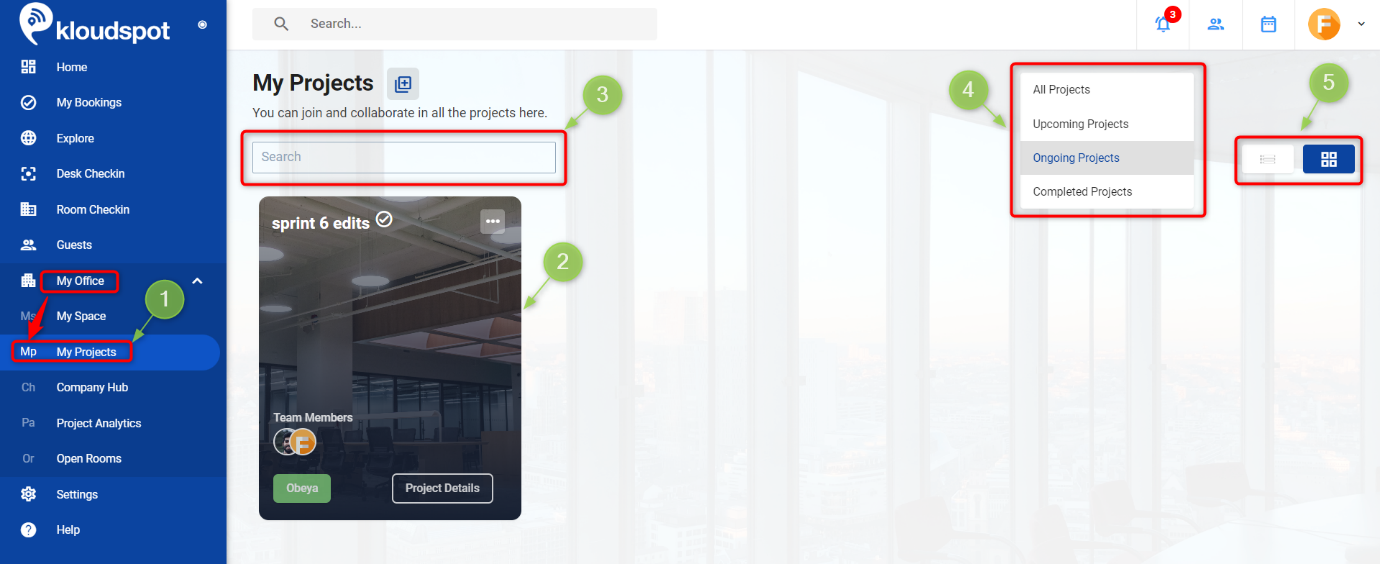
Open My Projects
- Click on My Projects from the My Office dropdown menu.
- This section contains information about the projects in which you are involved.
- You can search for Projects using the search bar
- You can sort projects using the drop-down menu.
- You can also change the view to list view and grid view.
How to view Project details
- Click on Project Info from the menu Icon.
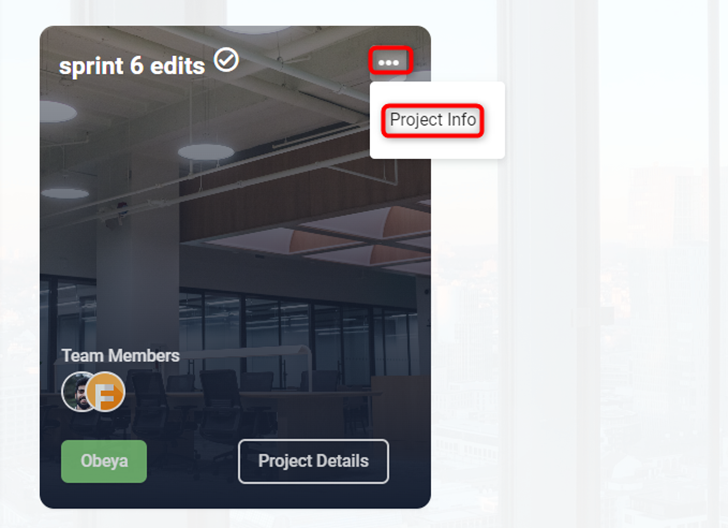
-
This will take you to the project info page.
-
You can find the following information related to the project in general information page.
Note: Only the admin or organizer can edit the project information.
- Project title
- Project description
- Project Tag
- Project Code
- Start date and End date
- Thumbnail Image

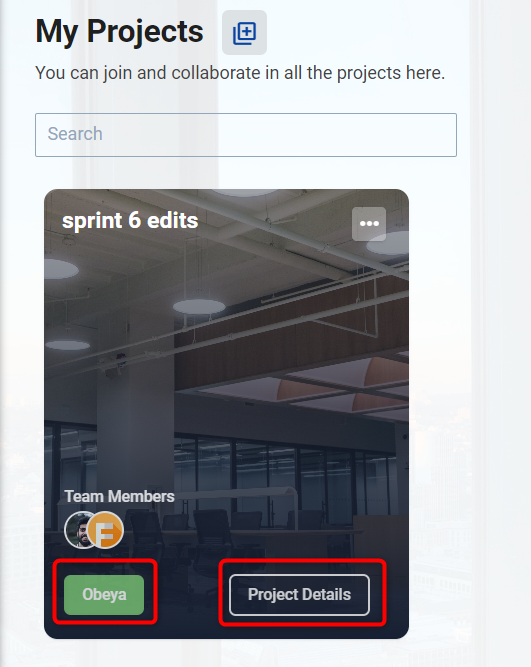
- To check in to the project click on Project details Button or Obeya button from the Project card.
-
If you are checking in through Obeya button it will direct, you to obeya screen. Refer Obeya mode Button for more details.
-
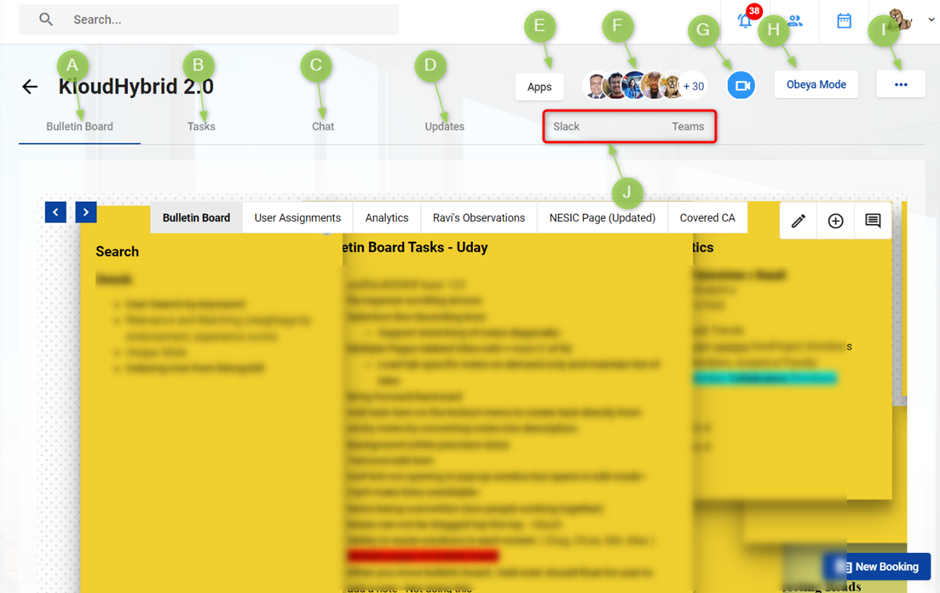
If you are checking in through Project Details button This will take you to the project dashboard. There you can see the following.
A. Overview
B. Tasks
C. Chats
D. Updates
E. Apps
F. Members
G. Meeting Room Button
H. Obeya mode Button
I. Menu Icon
J. Slack and Teams
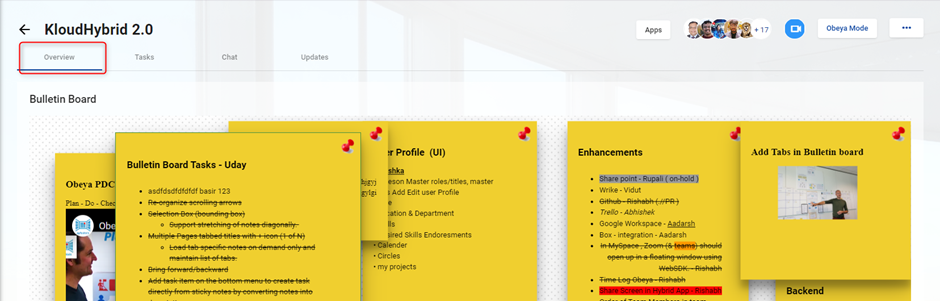
A. Overview tab
- On the overview page, there is a bulletin board. This is an open board. All project members can see the changes that have been made to this.
How to add note
- Click on +Add Note button from the top right corner. If the Add Note button is not visible, hover the mouse pointer over the bulletin board and the Add New button appears at the top right corner.
-
New note is added. Enter title and description to the text box.
-
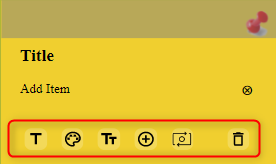
You can edit font, color of the note, and font size using toolbar.
-
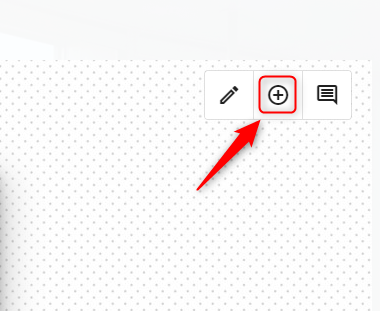
Click + button to add new Item.
-
To delete the note, Click the Delete button and click delete on conformation popup window.
-
To convert the contents of the note to the task, click the Convert to Task button.
How to add a comment on a note
- Click on the comment button from the top right corner. If the comment button is not visible, hover the mouse pointer over the bulletin board and the comment button appears at the top right corner.
- Then, to add a comment, click on the note. Then a new comment icon will appear; click on it to add a comment.
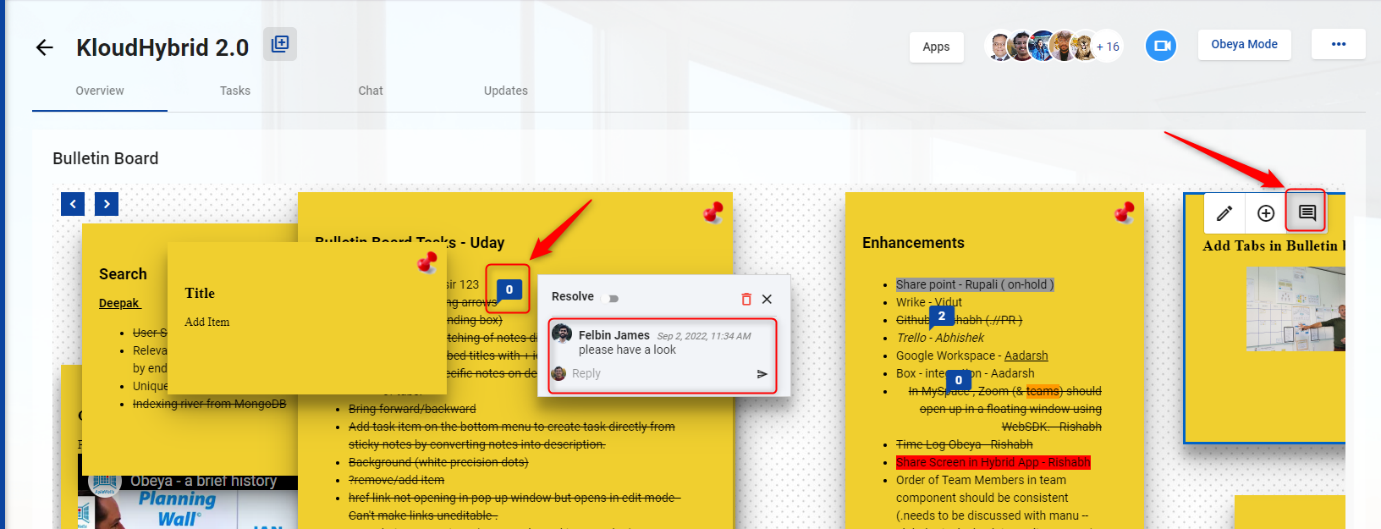
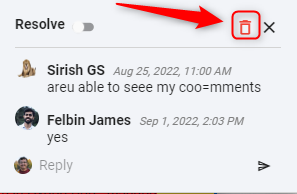
- To delete the comment, click on the delete button.
How to create a new tab
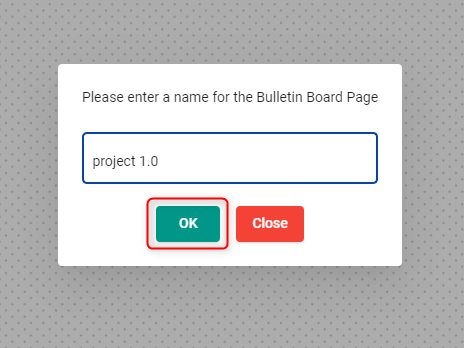
- You can add multiple tabs to a bulletin board. For that scroll down on the bulletin board and click the + button found in the Tab list.

-
Then type the tab name in the pop-up window that opens and click the OK button. The new tab is added successfully.
-
Drag and drop the tabs according to your priority.
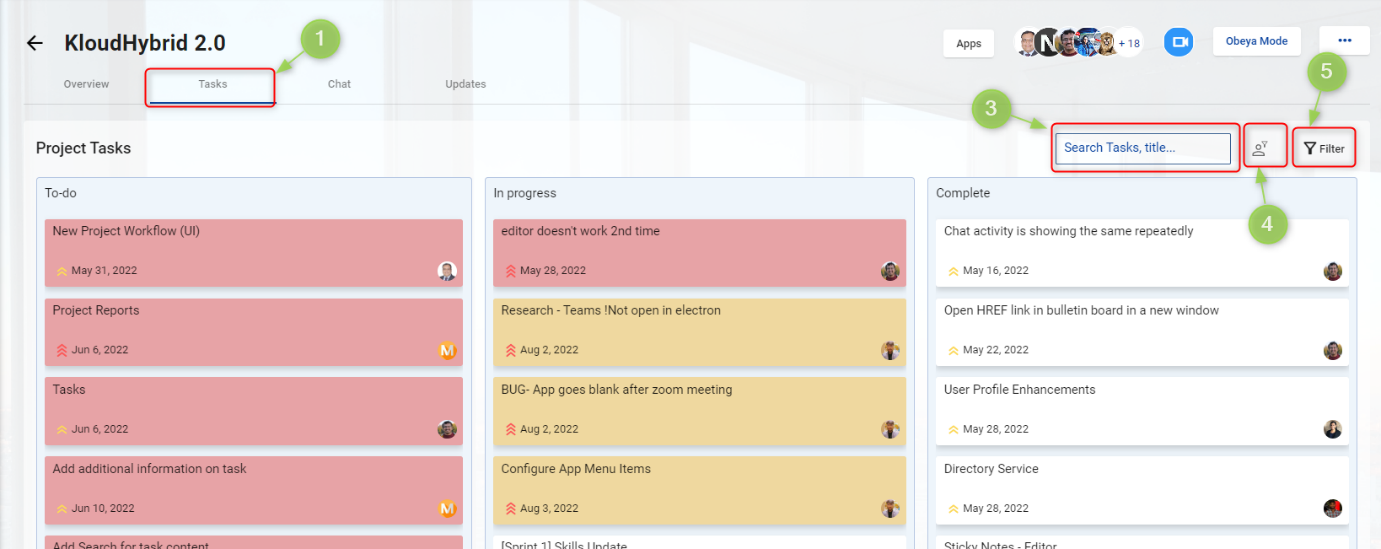
B. Tasks tab
- You can see all the tasks associated with this project.
- Visit the create new task section to learn how to add a new task.
- You can use the search bar if you want to search for a specific task.
- You can organize the tasks by the due date, priority, specific user, and reporter. To do so, click the filter button and select the appropriate option.
-
By clicking on the task, the edit task window will open. you can make the necessary changes on it.
-
To assign a task to someone else, click the Assign to text box and type in the desired name and click Save.
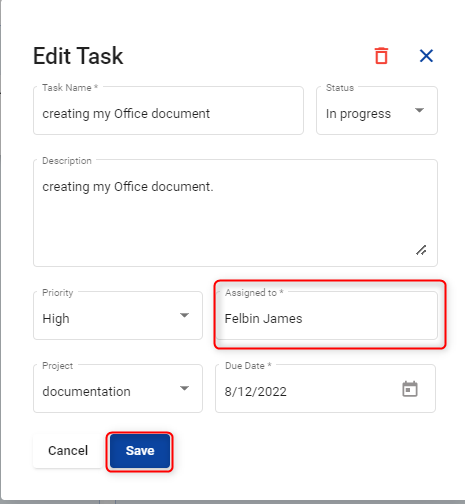
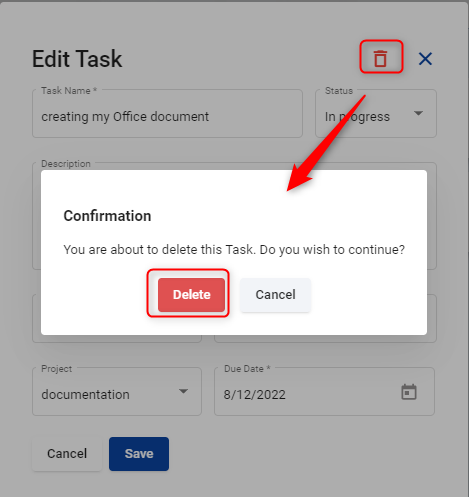
- If you want to delete the task, click the delete button and confirm the deletion in the window that appears.
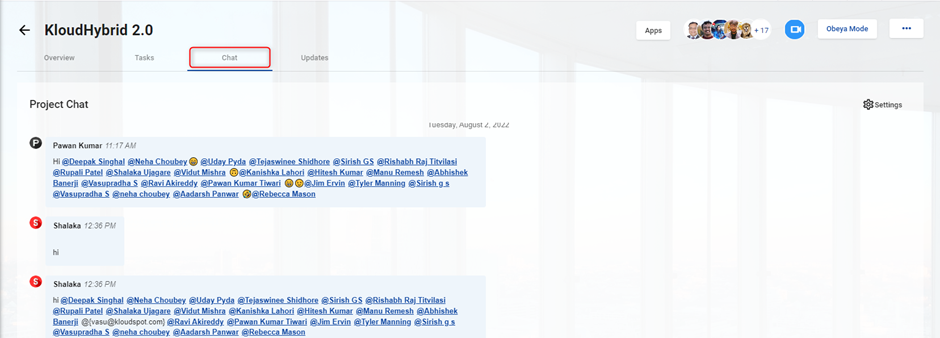
C. Chats tab
- Project-related information can be communicated to team members in the form of text.
- You can mention members with @ symbol in the chat. The @all tag can be used to mention the entire team members.
- Mentioned messages can be found in “My Space”.
D. Updates tab
- In this tab you can find chat activity, project configuration change, task added, and task updated information related to the project.

E. Apps
- You can see the Apps added by the organizer related to the project.
- Select one of the available Apps. The app launches in a new window.

F. Members
- Helps to identify project members.
- Click on members button. You can see the members in your department.
- Under the Online section, you can see a list of users who have checked in.
- Under the Offline section, you can see a list of users who have not checked in.
- Share Thanks points: If any of the team members assisted you in any way with the project requirements, you can rate their assistance on a scale of 1 to 10. See the Thanks Points section below for more information.
- Under the Team Emotions section, you can see overall team emotion.
- A Presence Details session contains the following.
- How many people have logged in Physically?
- How many people have logged in virtually?
- How many are offline?
- Where have people logged in from?
- Team members’ project-related activities can be viewed in the Activity Details section.

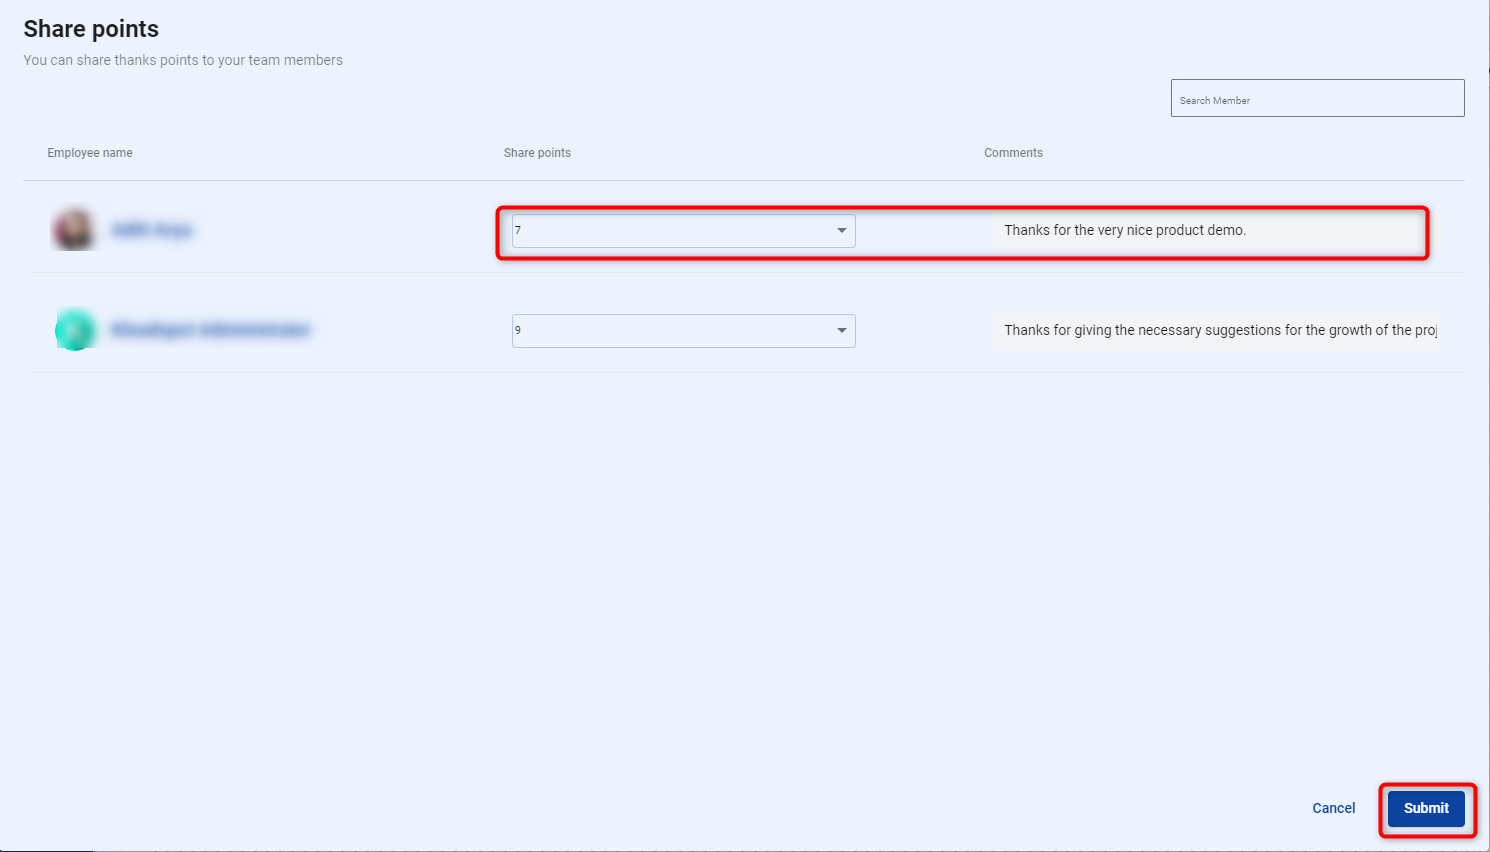
Thanks Points
- Thanks Points are a way for members of a project group to show appreciation for their teammates. They can be awarded for contributions such as going above and beyond on a task, helping a fellow team member, or consistently doing excellent work. They are a simple and effective way to boost morale and recognize the hard work of team members.
- For this, click on the Share Thanks Points button. Then a window containing the list of team members will open.
- Select the Thanks points you want to give to the members from the Share Points dropdown list on the right side of the members. If you have any comments, write them in the comment column.
Note: A user may only award another user with thanks points once per day. A thanks points popup will appear when you open the project for the first time in an evaluation cycle and you can give thanks points there.
-
Click the Submit button to submit the points.
-
See the Menu Icon section to see how you can view the Thanks points you have earned.
G. Meeting Room Button
- The organizer can connect the Meeting room link if required. This allows project meetings to be held.
- Various meeting room providers can be added as required.
- Available providers are Zoom, Teams and WebEx.
- By clicking the meeting button, you can attend the meeting in any platform.
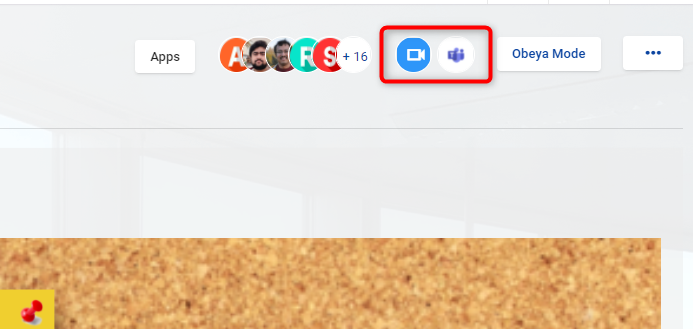
H. Obeya mode Button
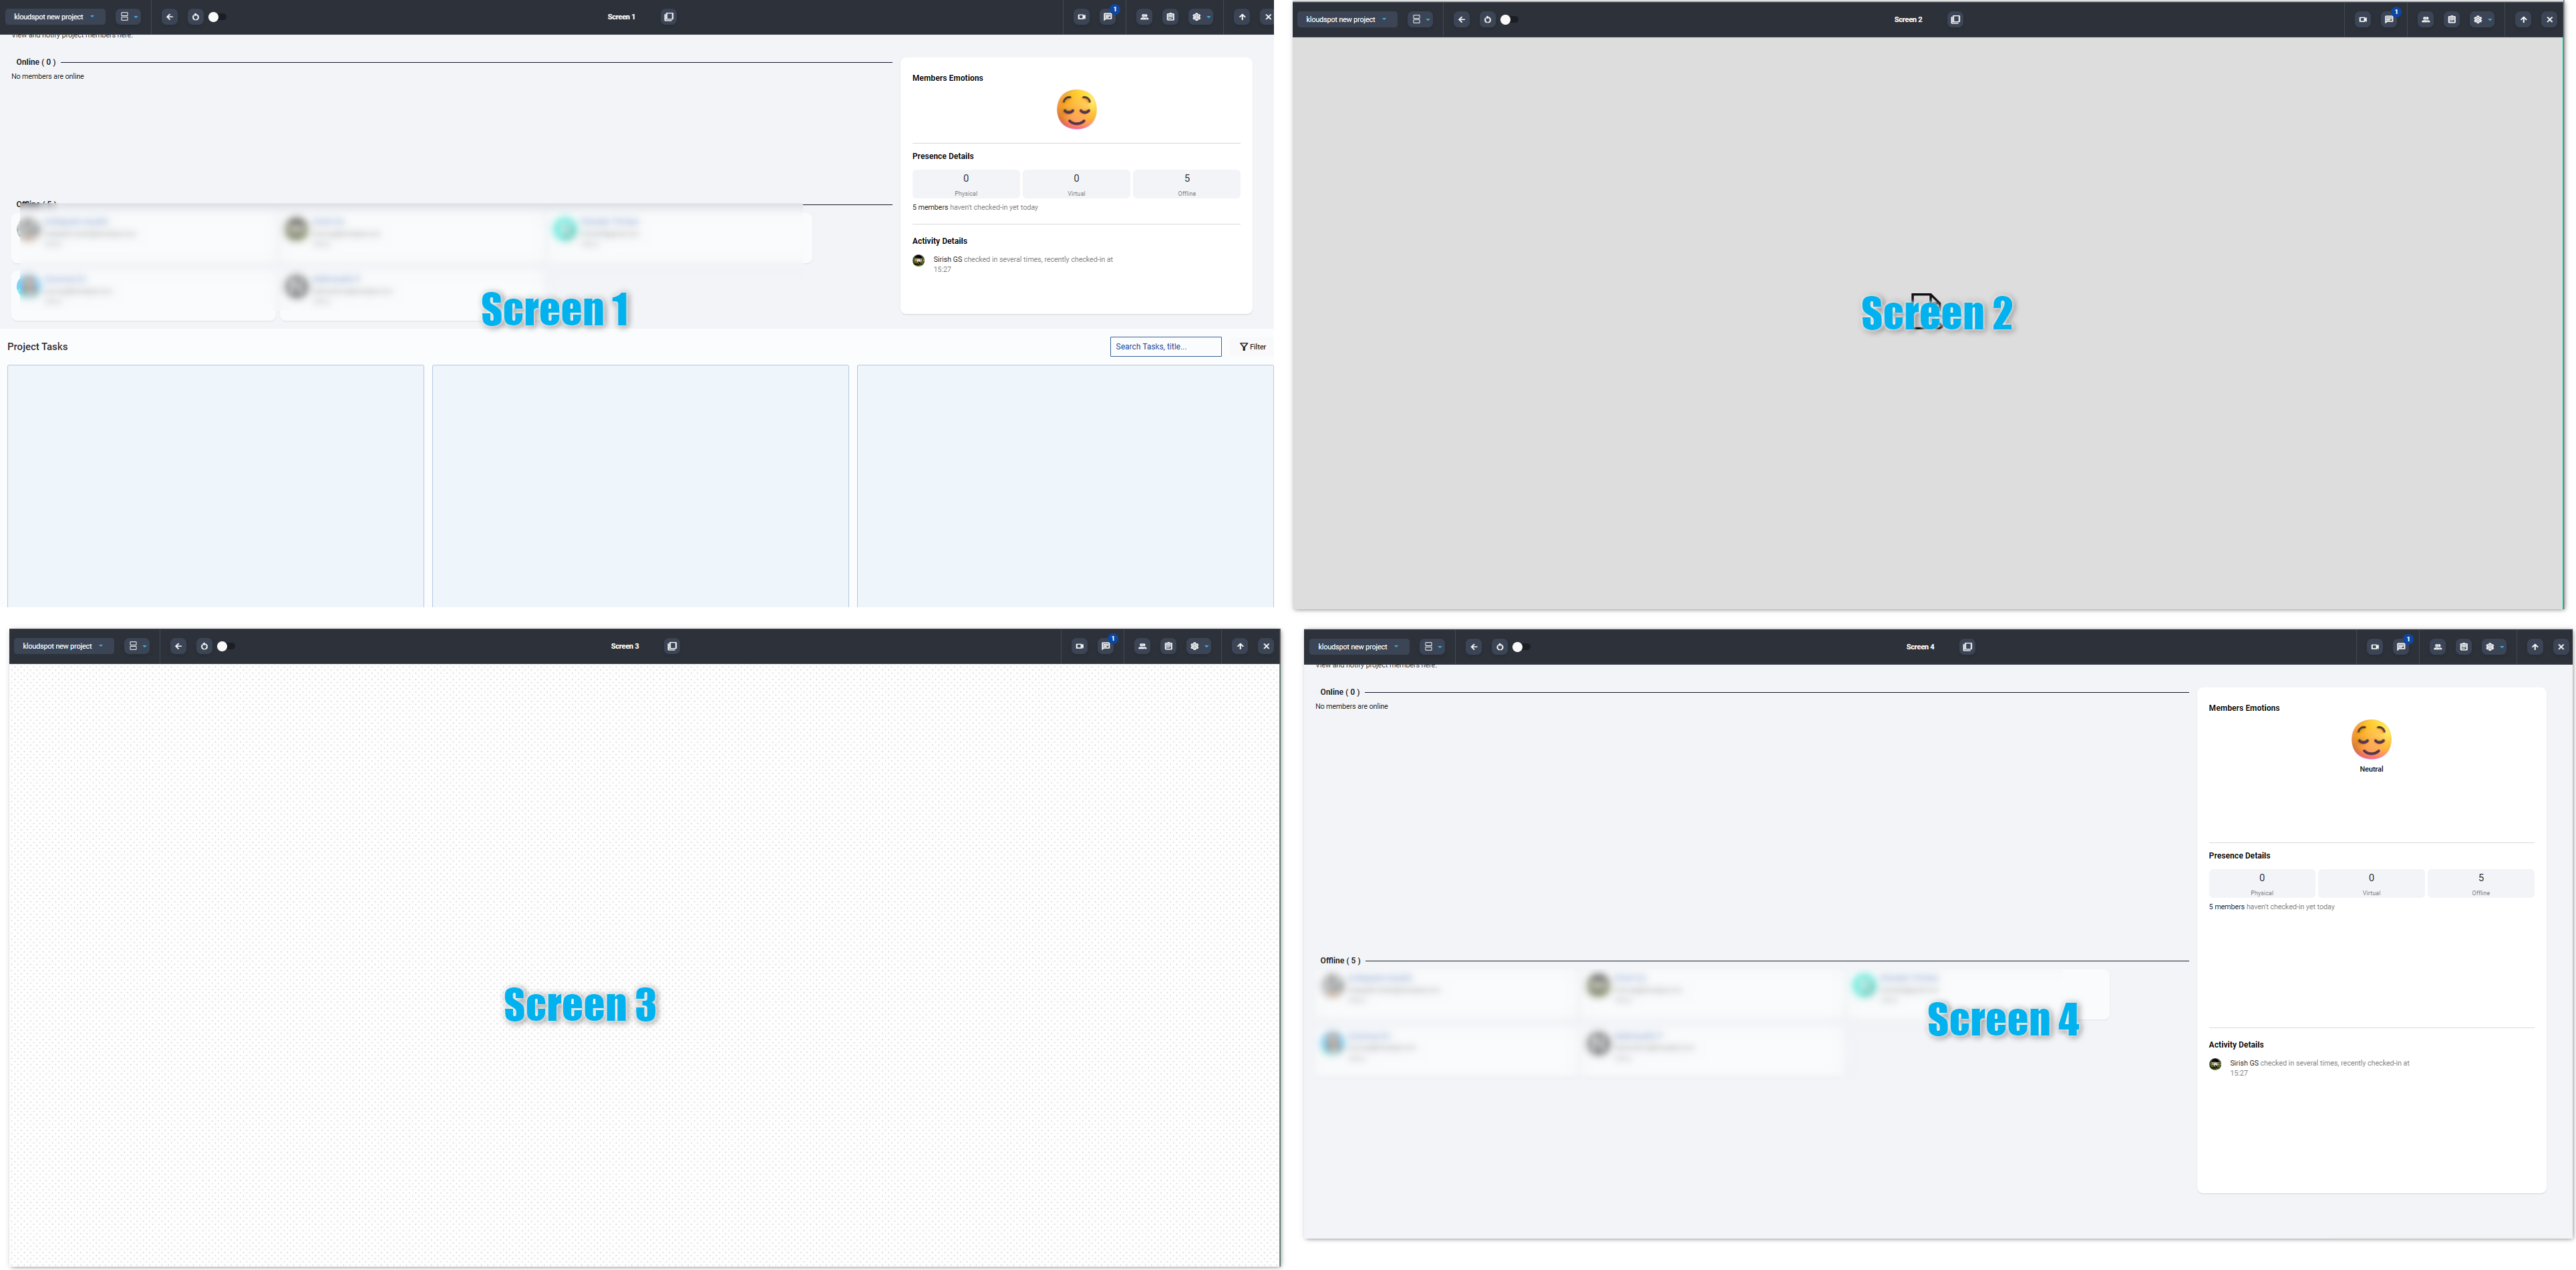
- The admin will configure the obeya mode according to the project requirements when creating the project. If the administrator has not configured it. The Obeya will be created automatically with an overview tab, task tab, and Project members
- This allows integrated apps to be viewed in different modes. These are the 3 modes currently available.
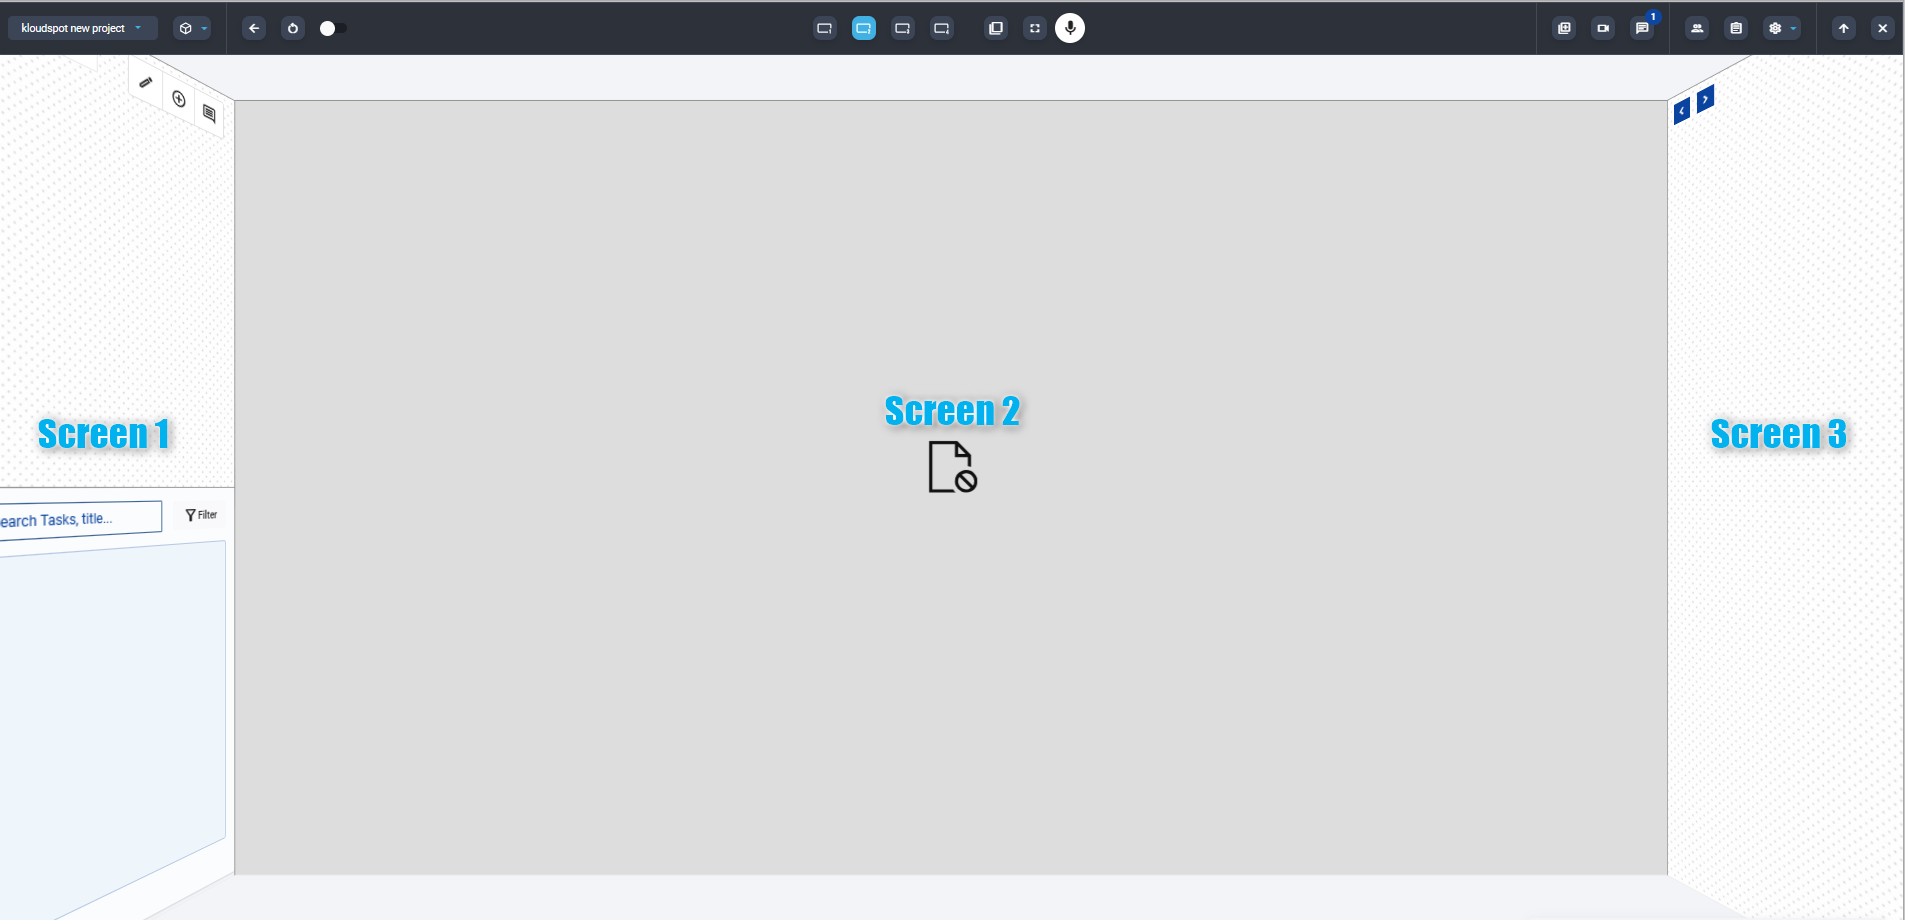
- Multi screen mode
- Wide screen mode -3D screen mode
- The obeya screen toolbar allows you to do the following.

A. Project switching menu: It helps to switch from project to another project.
B. Obeya mode switching tool: Allows you to switch to different obeya modes.
C. Go Back: Allows you to go back to the previous page.
D. Reload the window: It helps to refresh obeya screen.
E. Dynamic sync: If Dynamic Sync is enabled, your modifications will be visible to other project members who have Dynamic Sync enabled. You can also observe if they make any modifications.
F. Flip to different screens: It helps switch between screens.
G. Change Integrated Apps: It helps to switch between the integrated apps.
H. View fullscreen: Helps to make fullscreen.
I. Voice command: Helps to control the obeya screen with voice commands. Click on the button to find out which voice commands are available. It works only on 3D screen mode.
J. Add to the shortcut menu: Helps to add Obeya to your homepage.
K. Meeting App: Helps to conduct internal meetings.
L. Chat with project members: It helps to chat with project members.
M. View team members: It helps to know who the team members are.
N. Show project updates: It helps to know about the most recent project developments in real time.
O. Settings: Helps to make other changes related to the project.
P. Hide the menu bar: Helps to hide the menubar.
Q. Exit Obeya mode: It helps to exit the Obeya screen.
Multi screen mode
- If you choose the multi-screen mode, all three screens will be open in separate tabs.
-
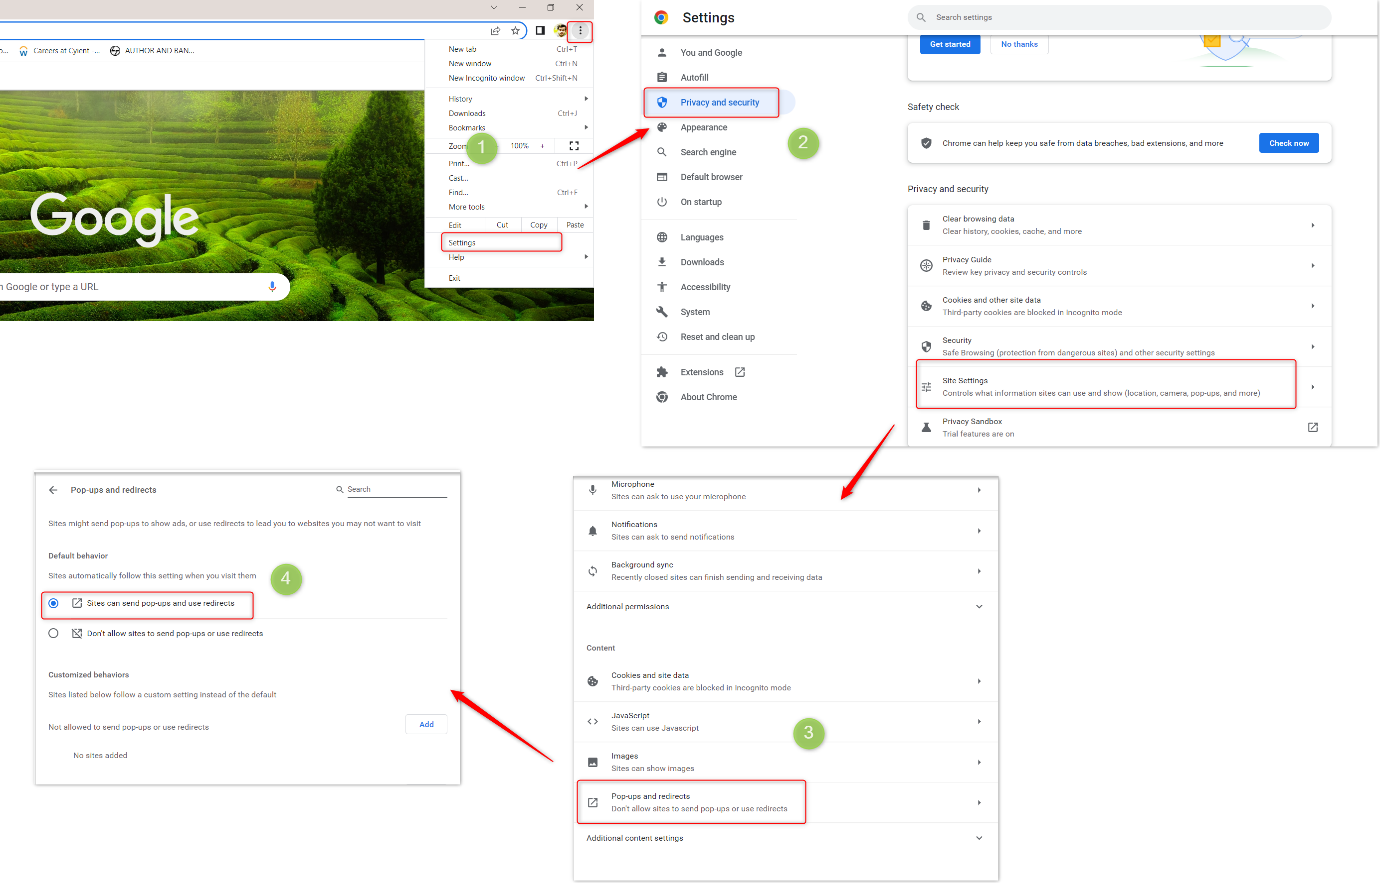
Depending on the browser you are using, sometimes Multi screen mode may not work. In such cases, privacy and security settings of the browser need to be changed.
Chrome browser is taken as an example here. The steps will vary depending on the browser you are using.
- On your computer, open Chrome. At the top right, click More > Settings.
- Click Privacy and security > Site Settings.
- Click Pop-ups and redirects.
- Choose the option Sites can send pop-ups and use redirects.
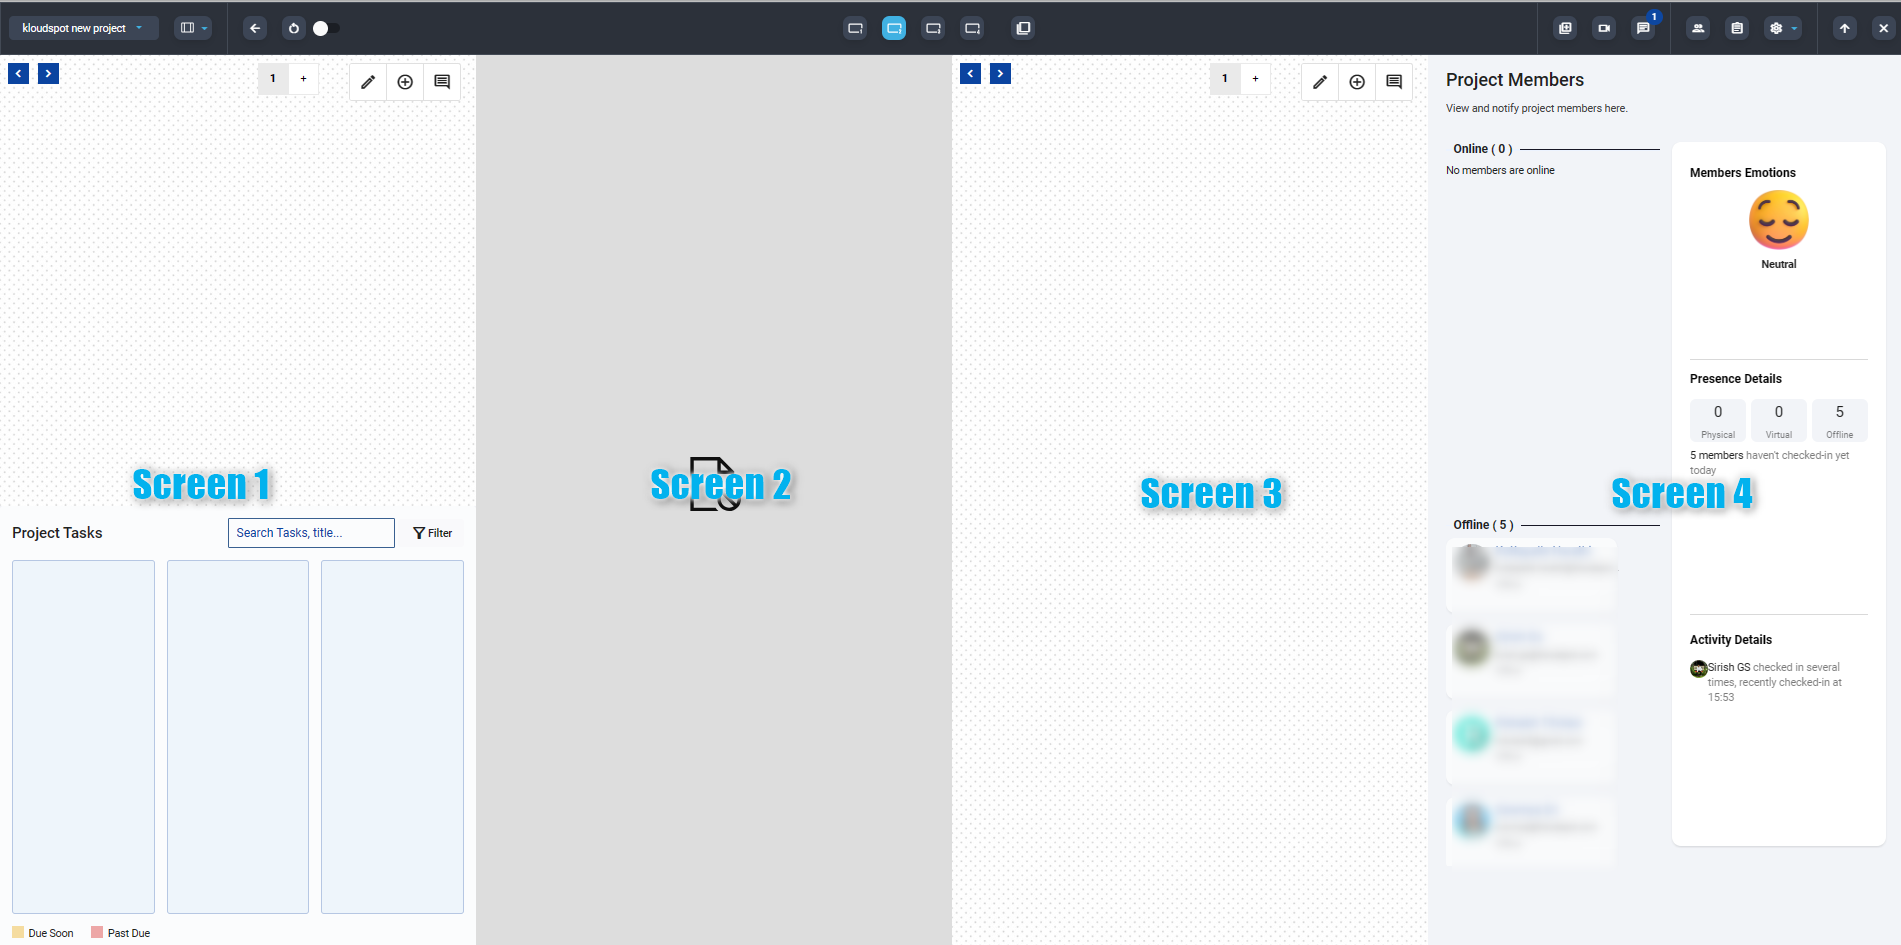
Wide Screen mode
- In Wide Screen mode, all screens can be viewed in one tab.
3D screen mode
- These three tabs can be viewed in 3D. This allows you to work by swiping to the desired screen.
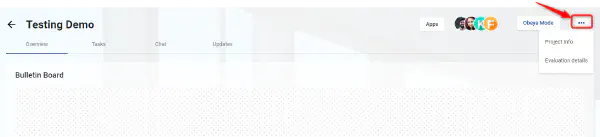
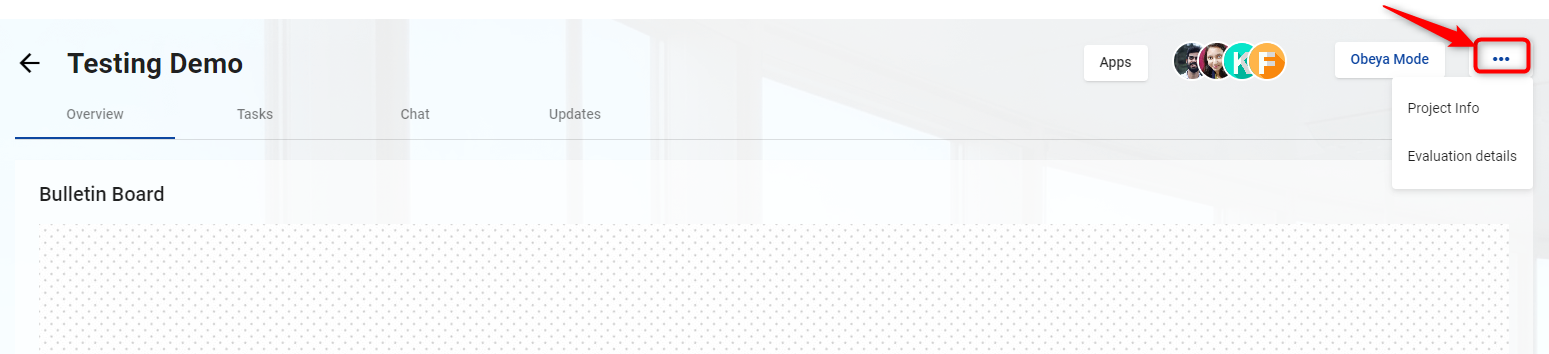
I. Menu Icon
-
Click the Menu icon from the top right corner of the project window. There are two options available here.
- Project Info
- Evaluation details
- Trend
-
Project Info: This will help you to go back to project info. Refer to Project Info for more details.
-
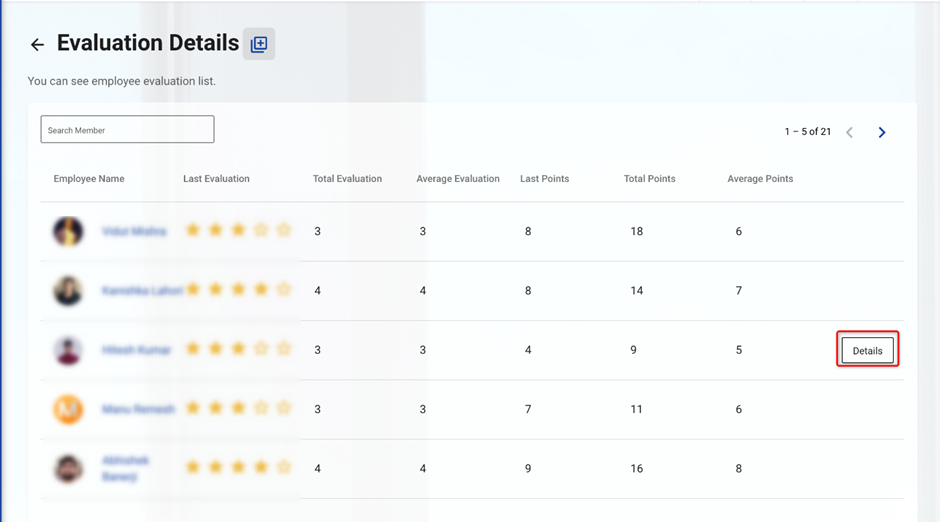
Evaluation details: Evaluations of members are an important part of ensuring project success and ensuring that everyone is working toward the same goal. Both the project administrator and the members can conduct evaluations.
-
Evaluation details menu helps to know the evaluation points you have got.
- In the evaluation window that opens, you can see the evaluation details of each team members.
- Click on Details button to view your evaluation details.
-
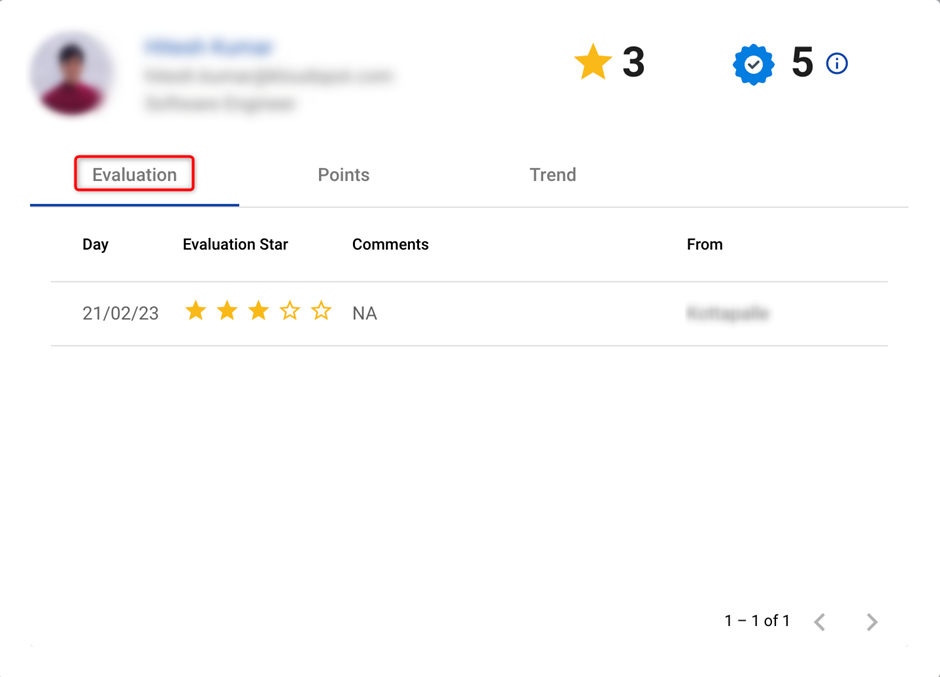
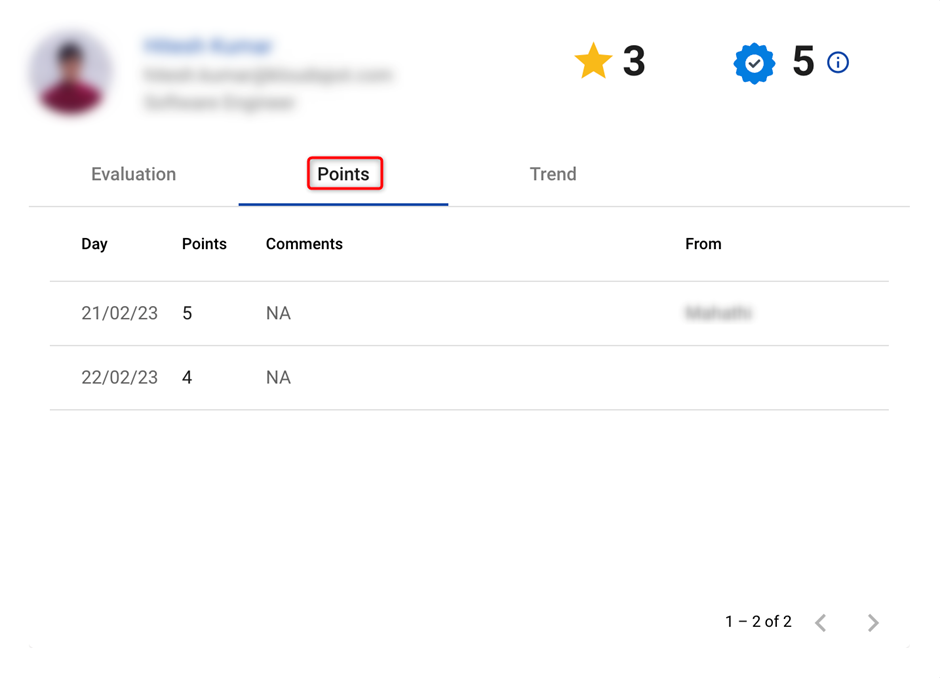
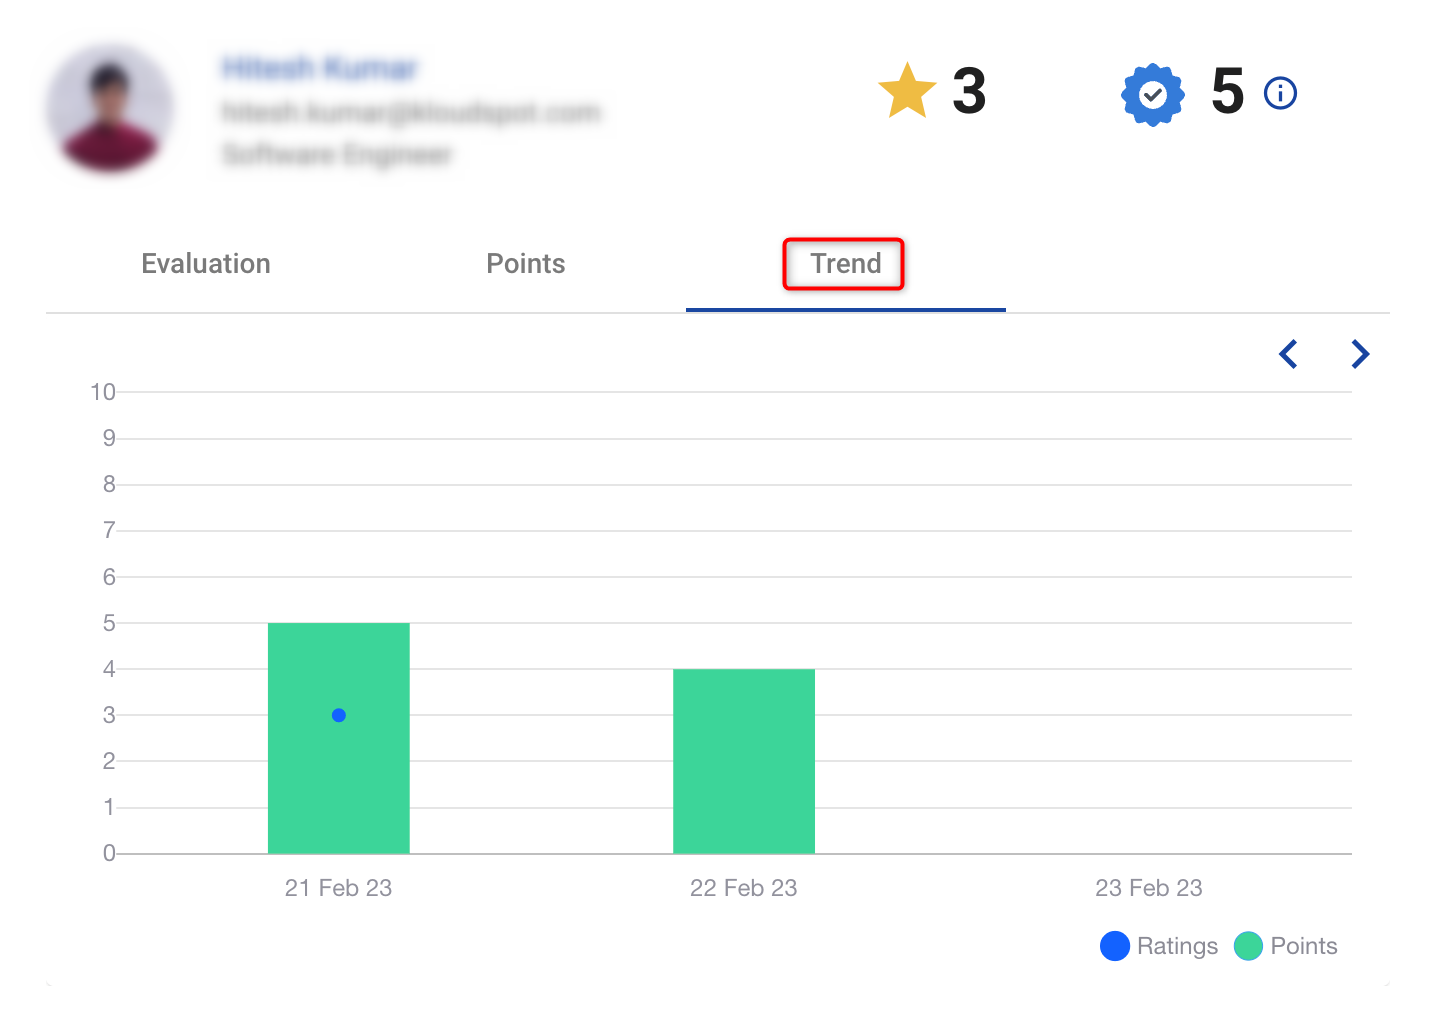
There are three tabs in the evaluation popup that opens.
- Evaluation
- Points
- Trend
Evaluation tab: The star rating given by the project administrator can be seen here. Admin can give star rating based on user’s activity once in every evaluation cycle.
You can see the average number of stars earned so far on the right side of the window. It is evaluated out of five.
Points: This tab displays thanks points awarded by other members based on one’s ability to collaborate with other project members.
You can see the average number of thanks points earned so far on the right side of the window. It is evaluated out of ten.
Trend: This tab contains a bar chart based on the points and ratings you received.
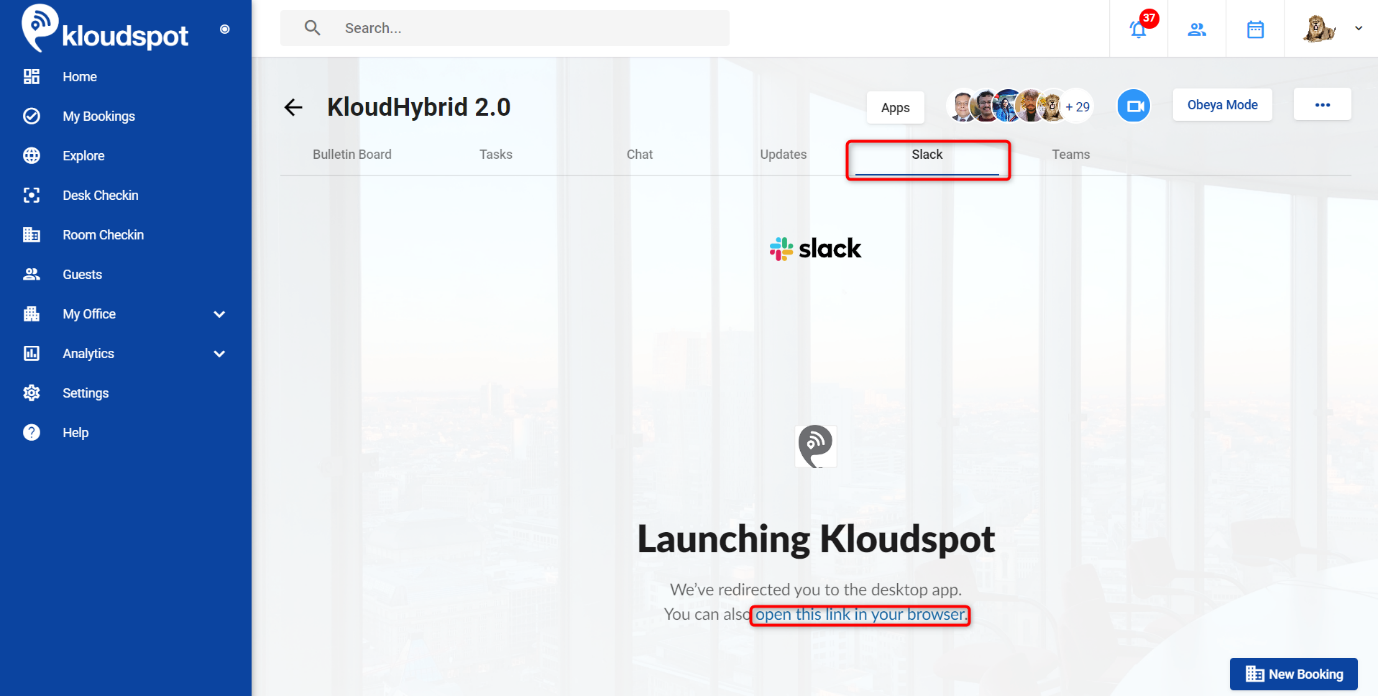
J. Slack and Teams
This is optional. This tab is available if Slack or Teams application has been added to the project. Using this, you can send messages to Teams App and Slack App without leaving the Hybrid workspace.
Send messages using Slack.
- Click on the Slack tab. When you click on the Slack tab, the slack application will open if you have installed it on your computer.
Note: The group that opens will be related to the project.
-
If not, you can open slack by clicking on the “Open this link in your browser” Link.
-
Then You can then use Slack to send messages and view messages sent by team members.
Send message using Teams.
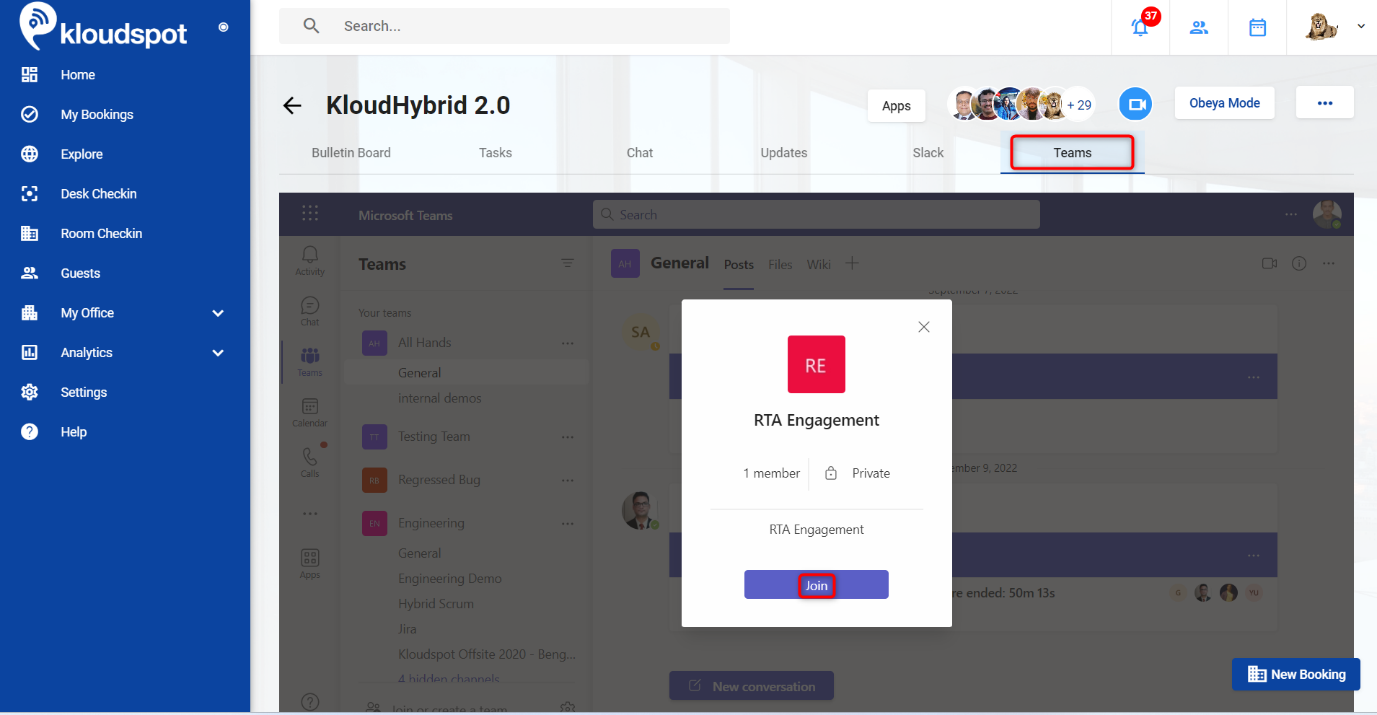
- Click on the Teams tab, Immediately the Teams app will open in the hybrid workspace app.
Note: The group that opens will be related to the project.
-
If you are not a member of that group, you can join by clicking on the Join button.
-
Then You can then use Teams to send messages and view messages sent by team members.