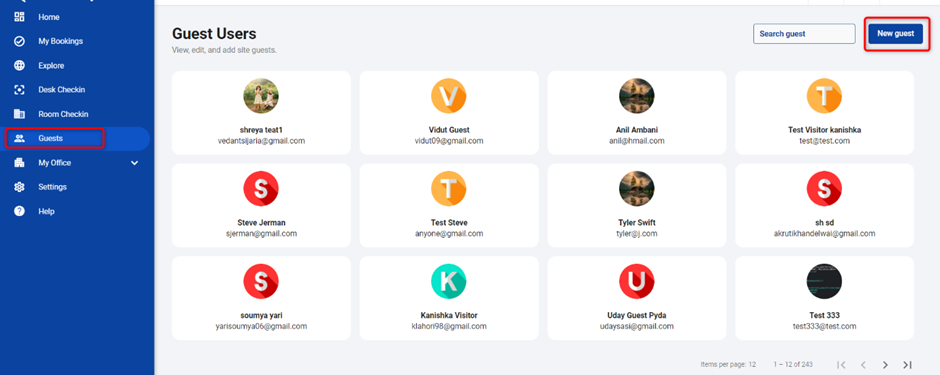
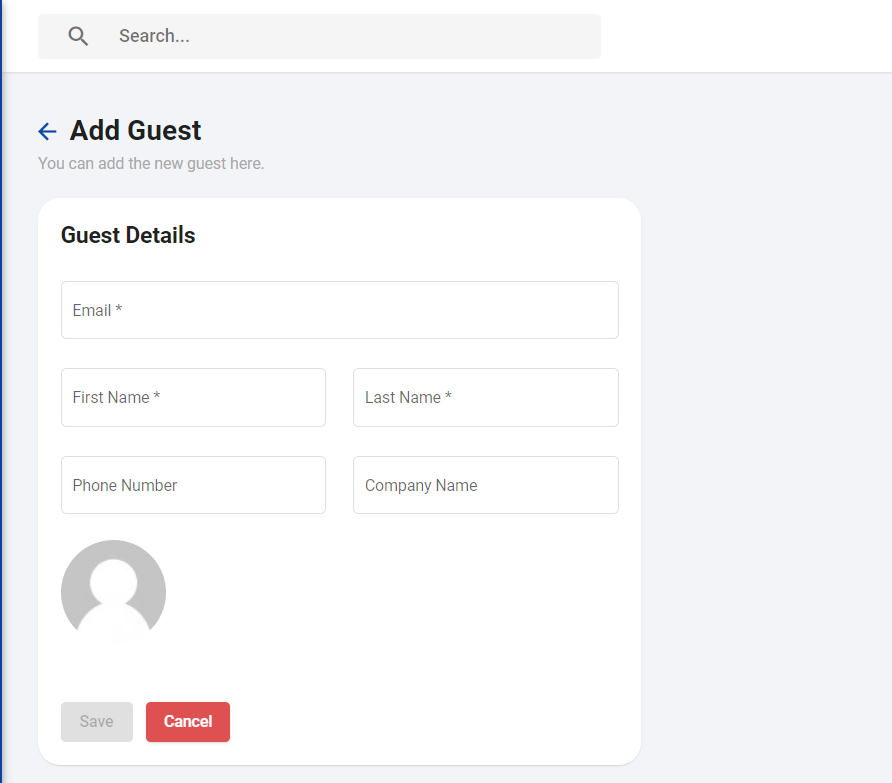
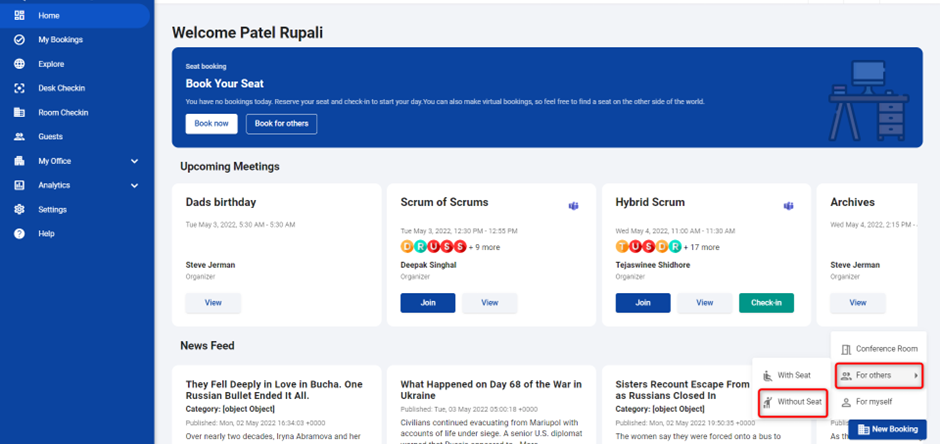
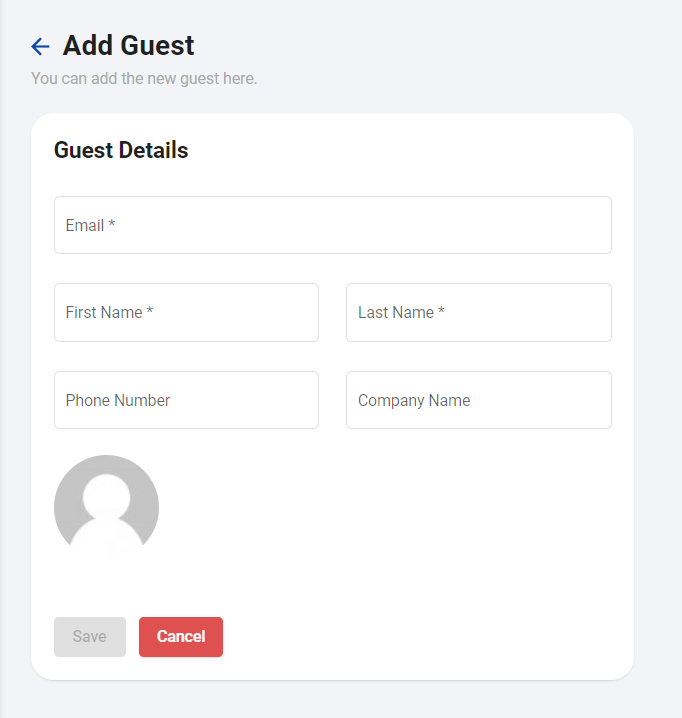
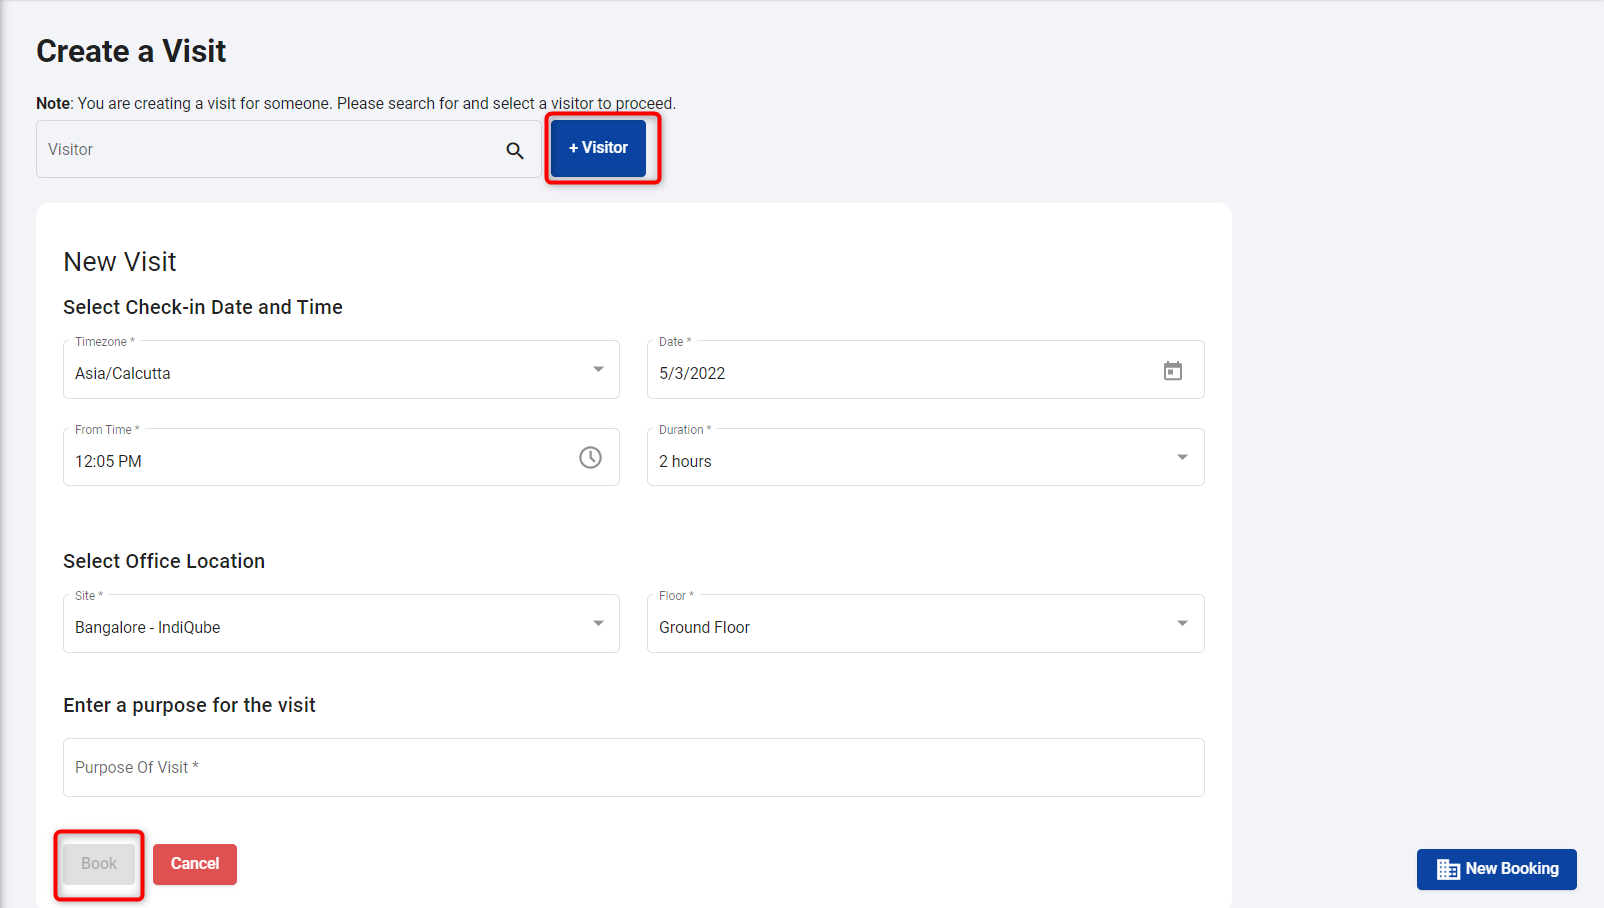
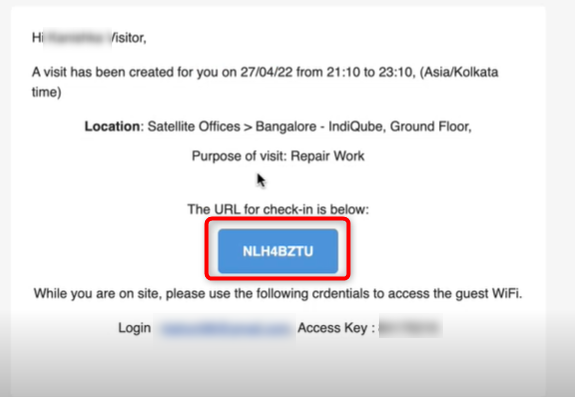
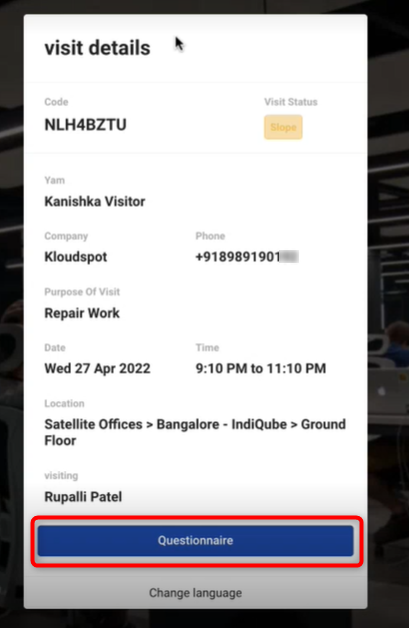
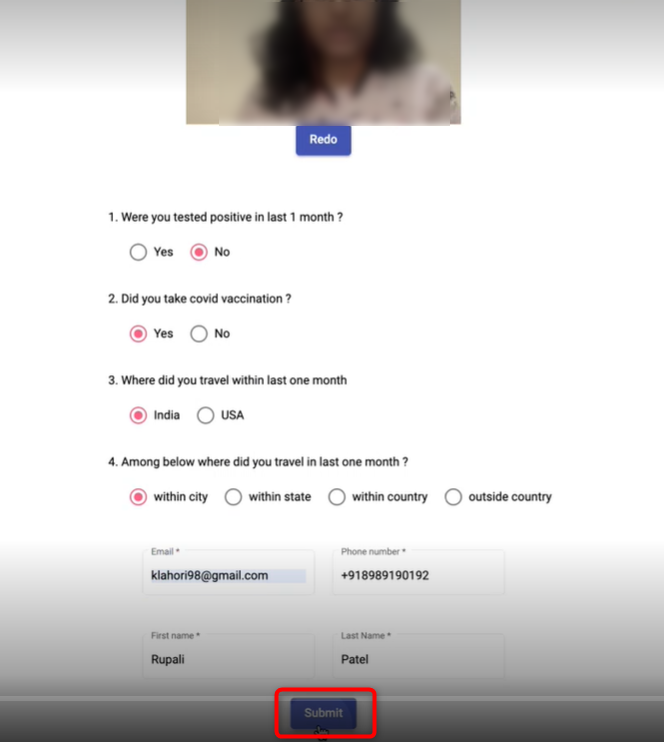
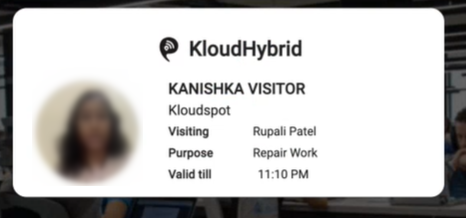
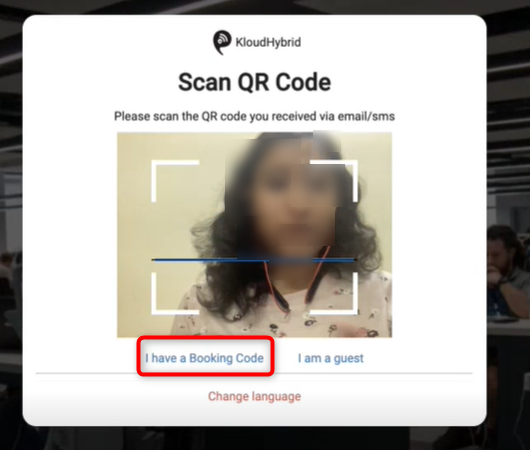
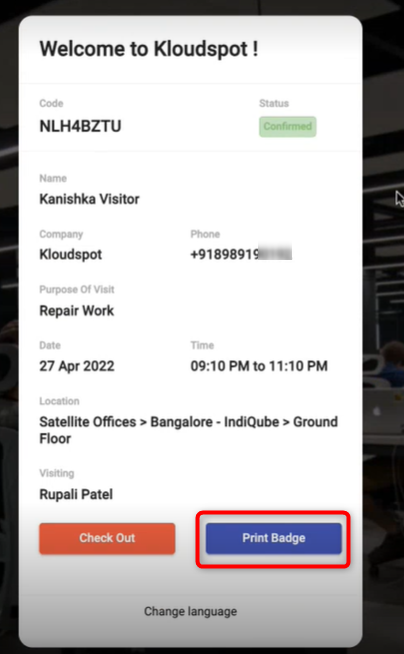
Booking Seats for Guests or Visitors
To host a guest or visitor in your office, you must first add them to the KloudHybrid application. For adding guests, consult the Add a New Guest document, and for visitors, refer to the Create A Visit guide. Once added, book a seat for them by following the Book a Seat For Others section. To check in a visitor, follow the Check-In a Visitor guide, If you need to make any modifications to your existing bookings, such as extending the booking duration, checking out, reporting an issue, sharing the booking with others, or deleting the booking, you can easily do so by following the instructions provided in the Manage My Bookings guide.