My Project
Open My Projects
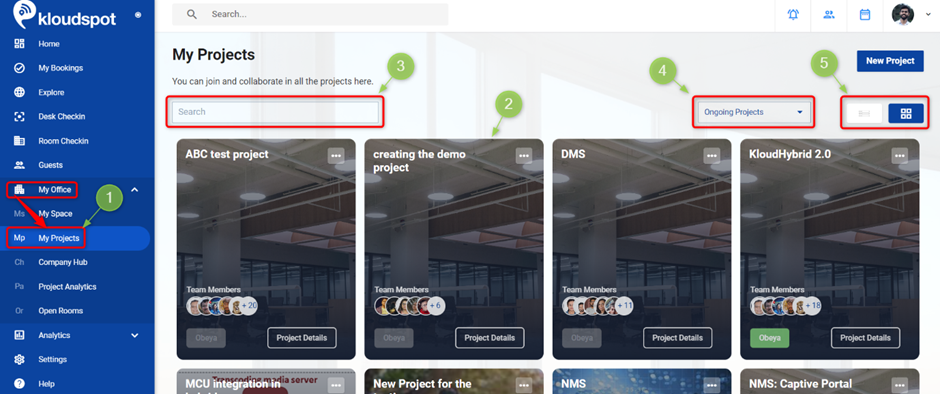
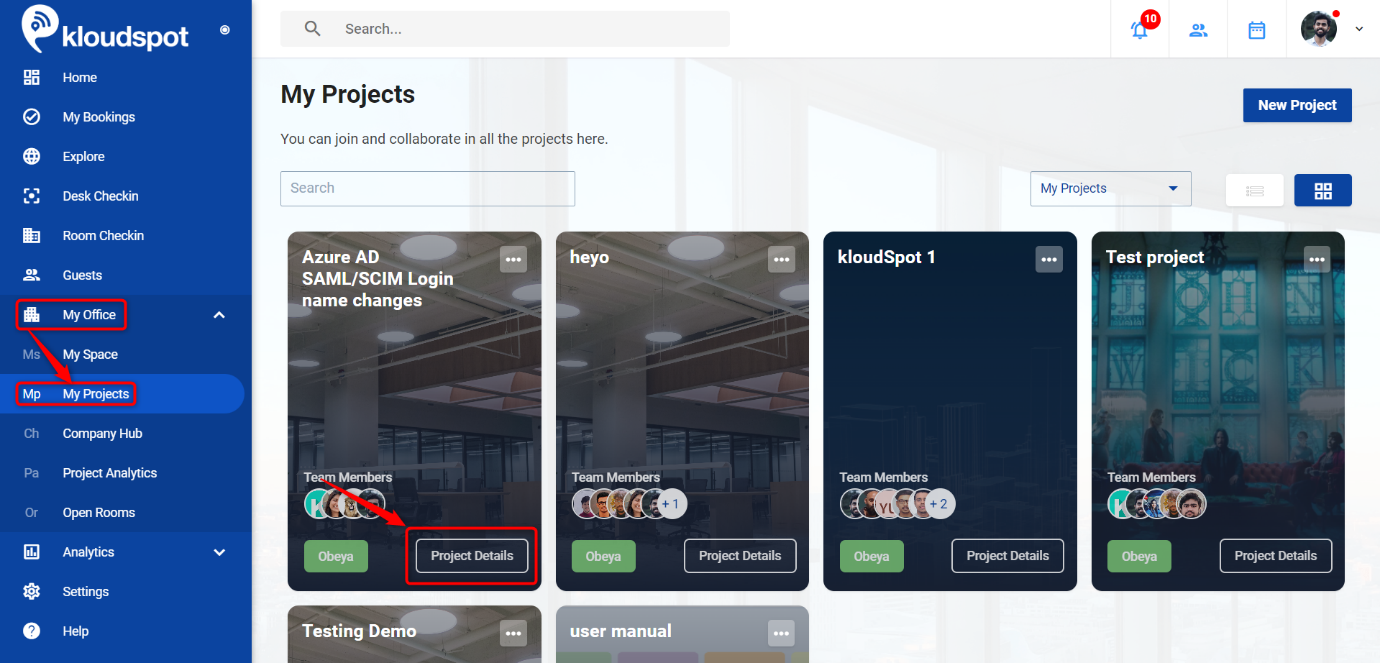
- Navigate to My Office > My Projects.
- This section contains information about all the projects.
- You can search for Projects using the search bar
- You can sort projects using the drop-down menu.
- You can also change the view to list view and grid view.
- This sub-category only describes what you can do as an admin in the My Project menu. More information can be found in the My project section of the user manual.
How to Create New Project?
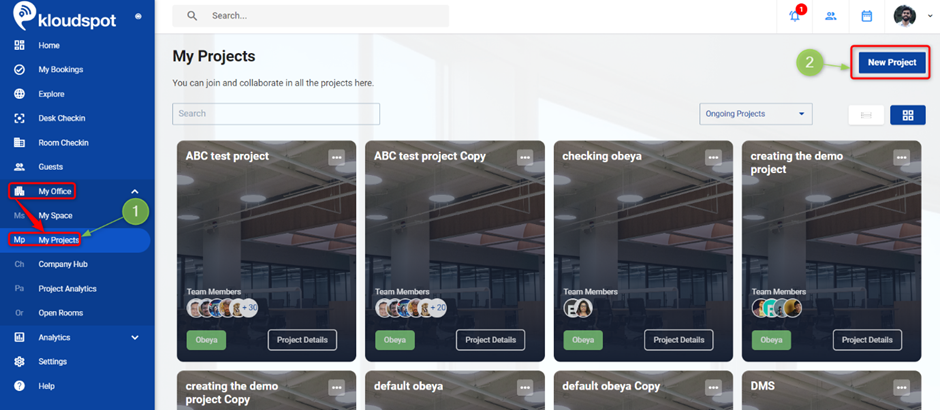
- Navigate to My Office > My Projects.
- Click on the New Project button from the top right corner.
-
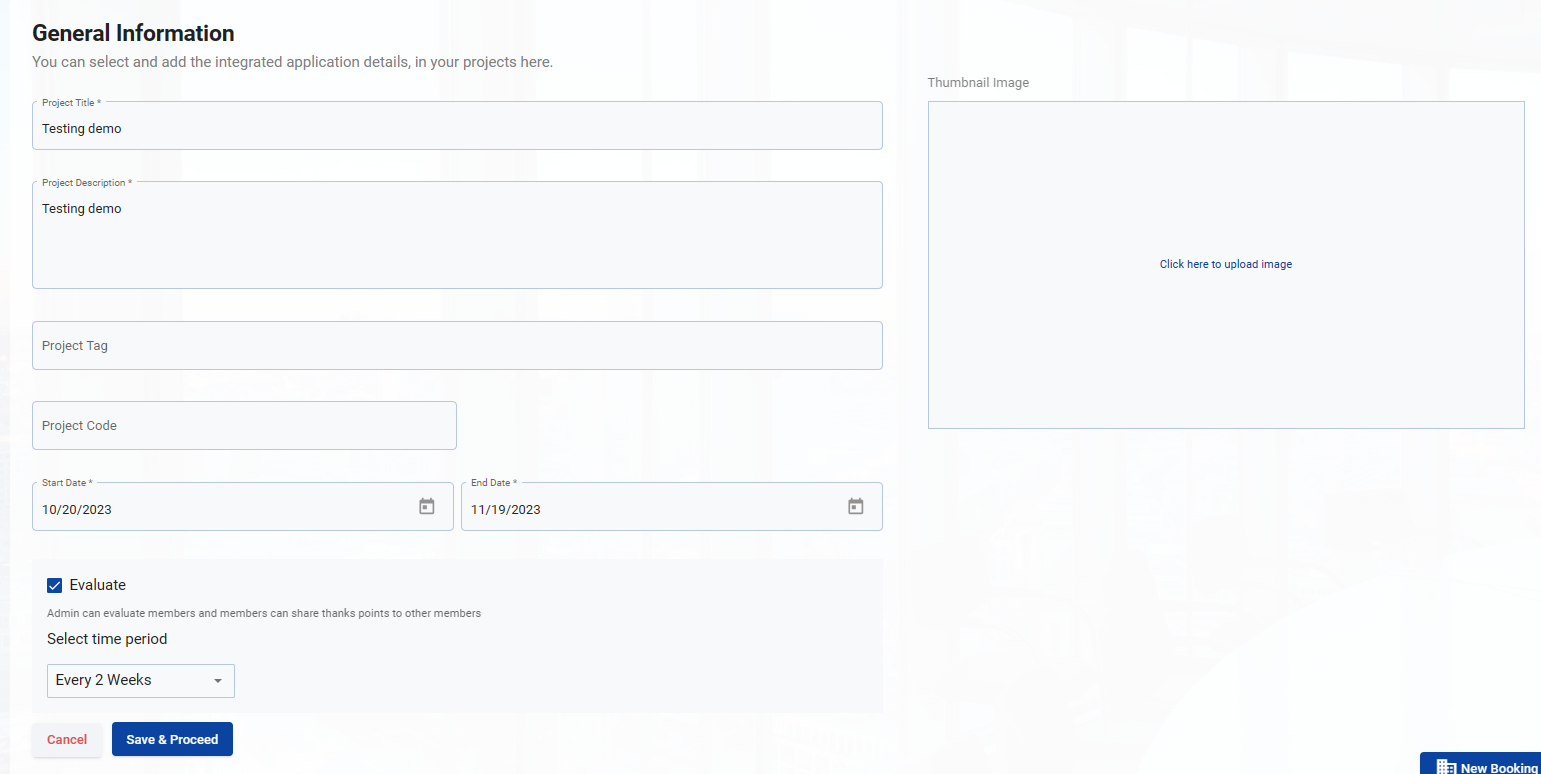
Fill out all the information in the Create New Project window and click on the Save & Proceed button.
- Project Title: Enter the title of the project.
- Project Description: Explain the project details.
- Project Tag: You can give different tags to identify the project.
- Project code: Type a project code to find your project easily.
- Start Date and End Date: Enter the project start date and end date.
- Evaluate: If you want to enable the Evaluation feature, check the checkbox, and select the time period. The Time Period is the duration of the evaluation cycle. For example, if you select 2 weeks, the new evaluation cycle starts 2 weeks after project creation. Refer How to evaluate a project member? section for more details.
- Thumbnail Image: The image to be displayed on the project card in the My Project window can be added here.
-
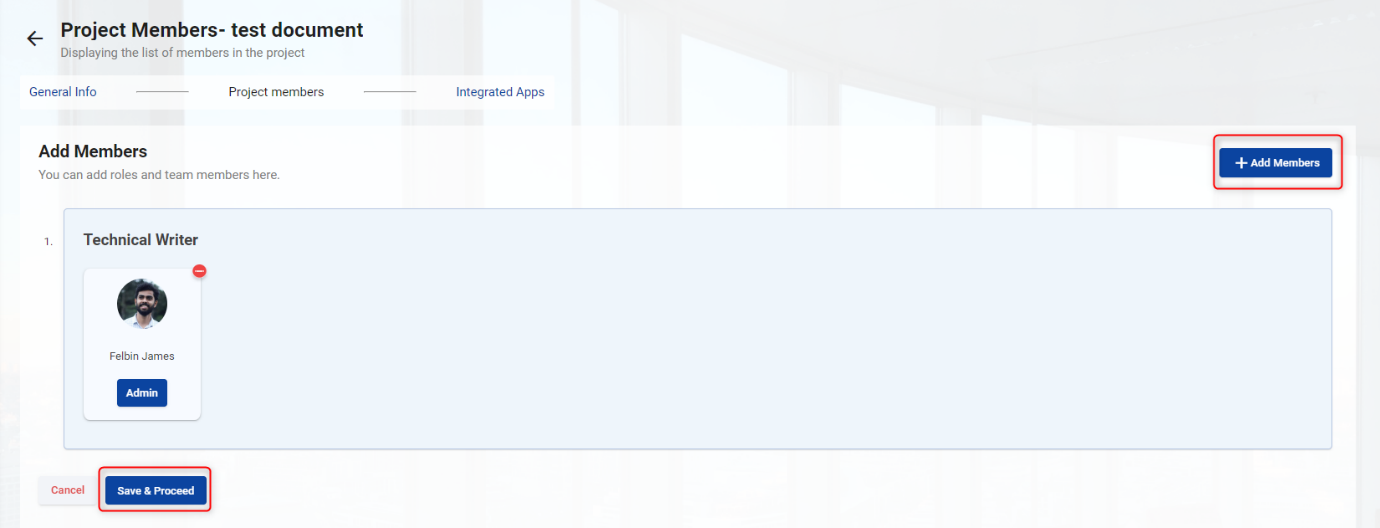
This will take you to the Add Members page. Here you can add project members.
-
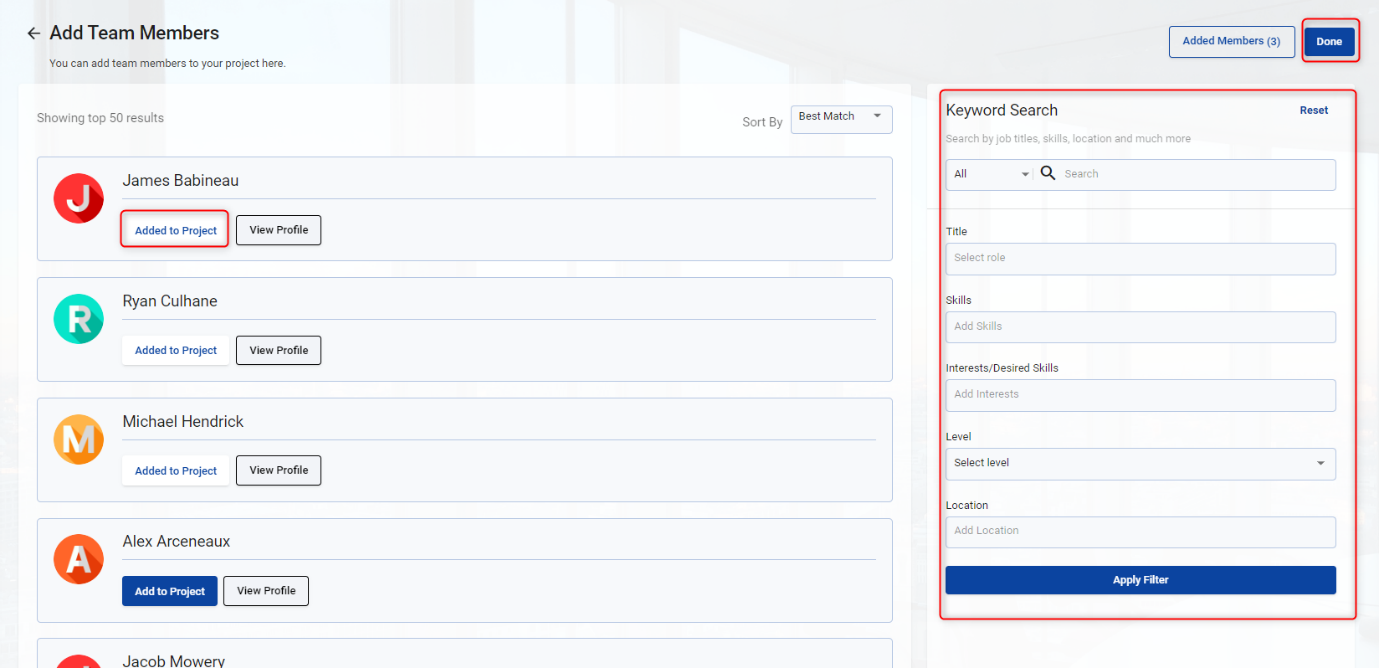
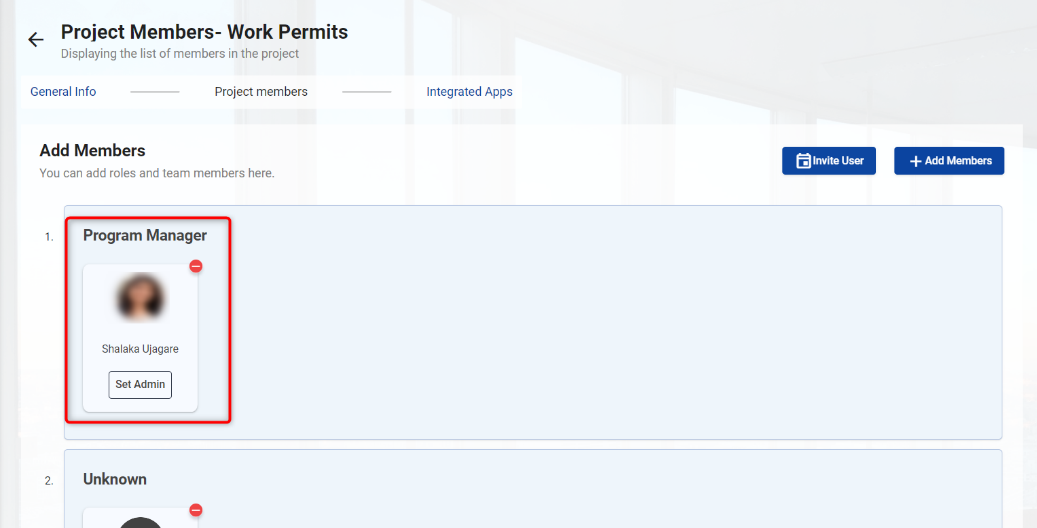
To add members, click on the + Add Members button.
- From the list of members that opens, click the Add to project button and add members.
Note: You can search for members using the search bar. Also, it is possible to filter members using the filter option.
- After adding the members, click on the Done button, and from the add members page, click on the Save & proceed button.
- The next step is to add integrated apps. To add meeting rooms, click add button below the meeting room section.
Note: See the How to set up meeting room section for more information on adding a meeting room.
- To add integrated apps, click add button below the integrated apps section.
Note: See the How to add Integrated Apps section for more information on adding integrated apps.
- After adding the meeting rooms and Apps, click the Done button. A new project has been successfully added.
How to set up meeting room?
-
Three meeting rooms are available. It helps to conduct project related meetings.
- Zoom
- Teams
- Webex
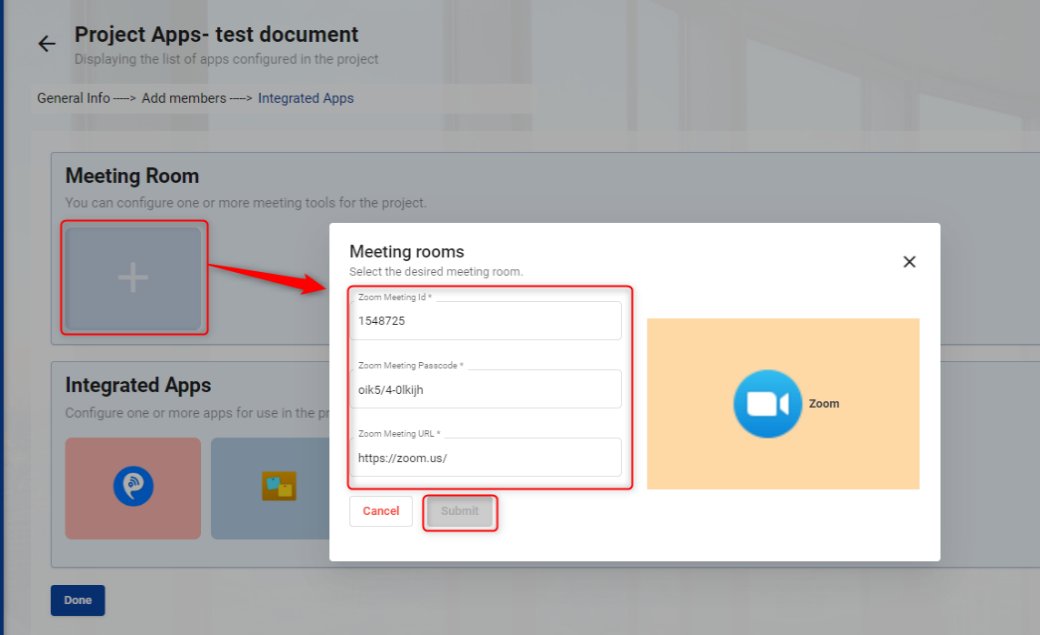
To set up a Zoom meeting.
- Click add button below the meeting room section.
- Then select Zoom in the popup window that opens.
- Then enter your meeting ID, meeting passcode, and meeting URL, and finally, click the Submit button.
- Zoom has been successfully integrated.
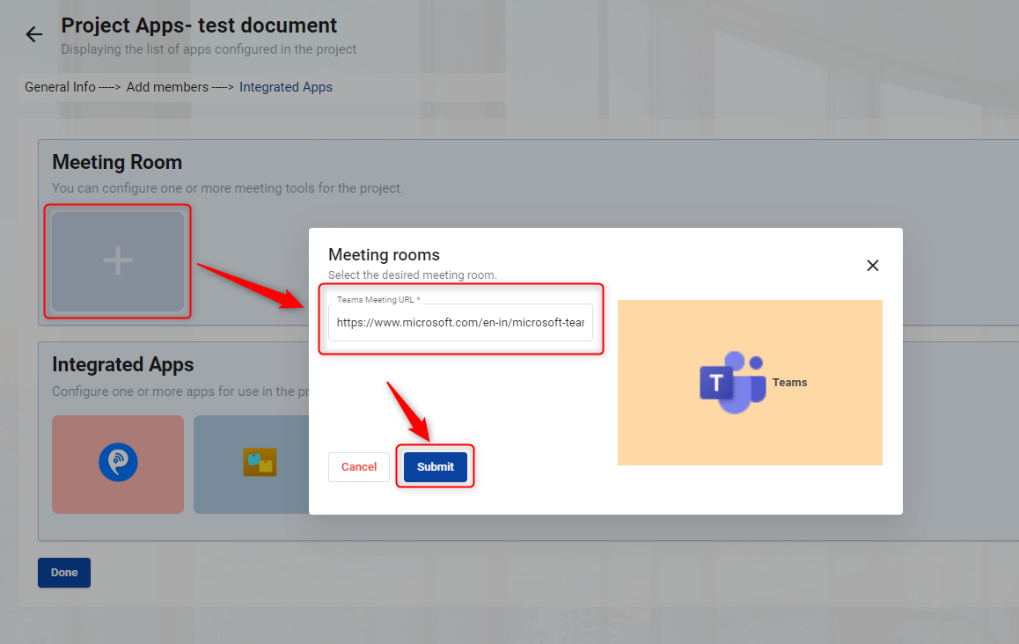
To set up a Teams meeting.
- Click add button below the meeting room section.
- Then select Teams in the popup window that opens.
- Then enter your Teams meeting URL, and finally, click the Submit button.
- Teams has been successfully integrated.
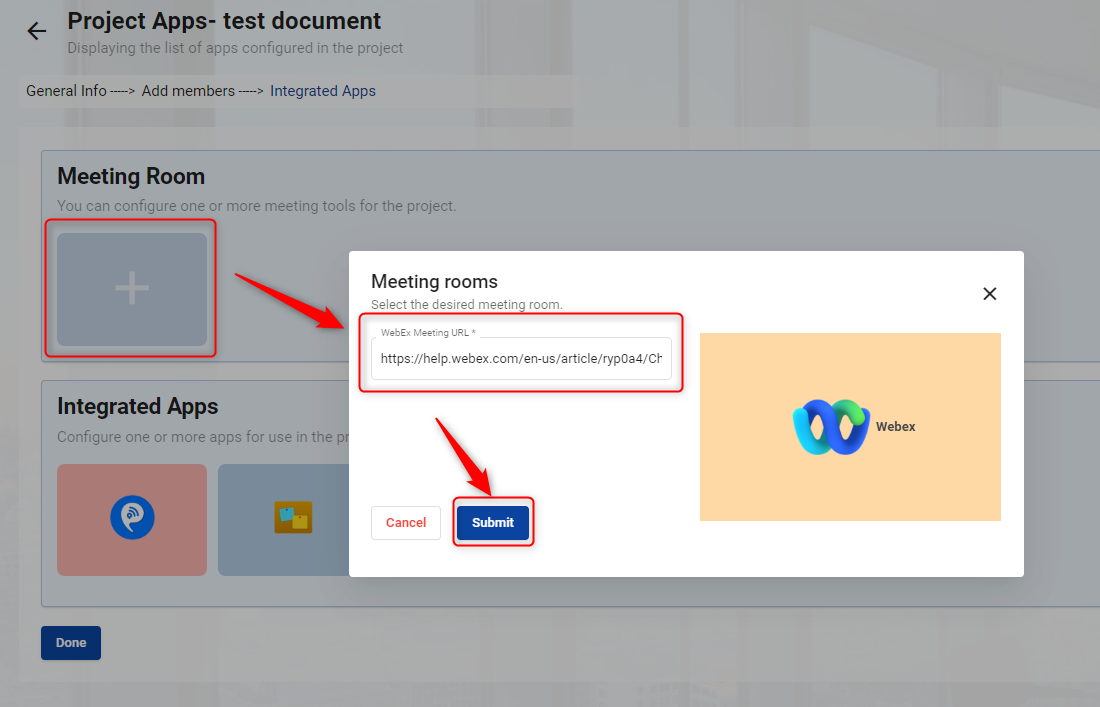
To set up a Webex meeting.
- Click add button below the meeting room section.
- Then select Webex in the popup window that opens.
- Then enter your Webex meeting URL, and finally, click the Submit button.
- Webex has been successfully integrated.
How to add Integrated Apps?
- You can add required apps to the project by adding resources. There are multiple apps available; read on to learn how to integrate each one.
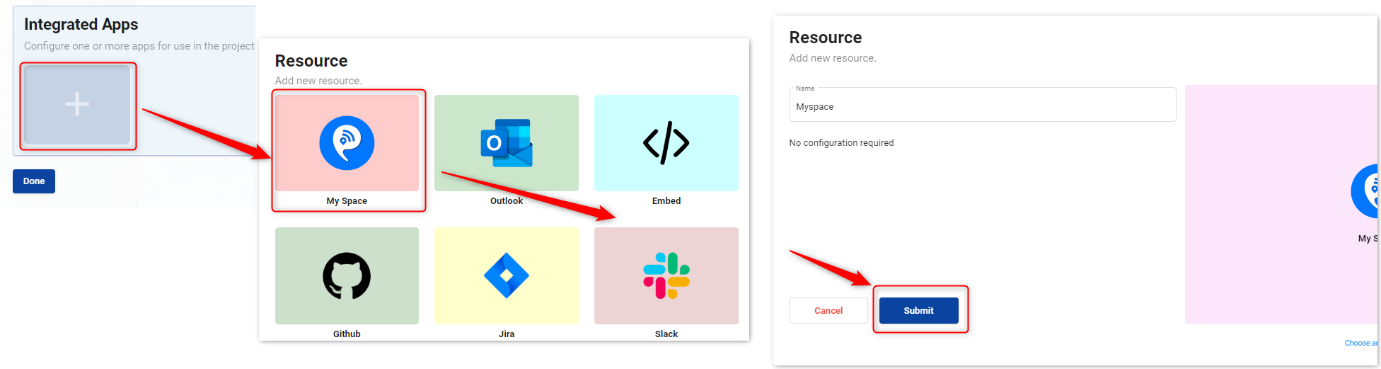
- To integrate My Space, Bulletin board, Zoom, and Tasks, no configuration is required. It can be added directly by clicking the Submit button.
To add Outlook into a project
- Click add button below the integrated apps section.
- Then select Outlook in the resource popup window that opens.
- Then enter your Resource Name and Resource URL, and finally, click the Submit button.
Note: By default, the Name will be Outlook you can change it as per your requirements.
- Outlook has been successfully added.

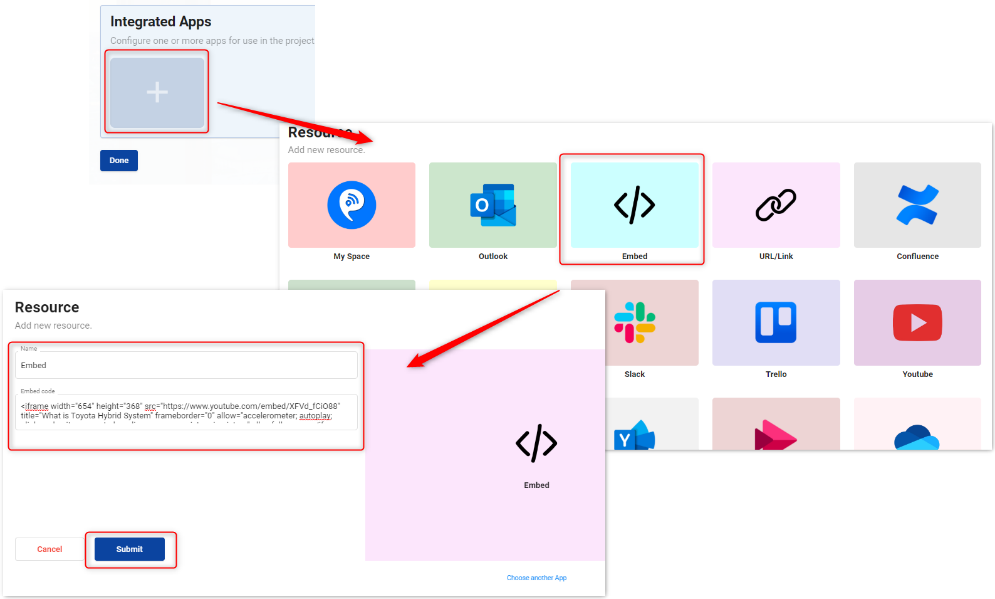
To add Embed link to a project
- Click add button below the integrated apps section.
- Then select Embed in the resource popup window that opens.
Note: Some URLs may not work directly, in this case, embed link can be used.
- Then enter your Embed link, and finally, click the Submit button.
Note: By default, the Name will be Embed you can change it as per your requirements.
- Embed link has been successfully added.
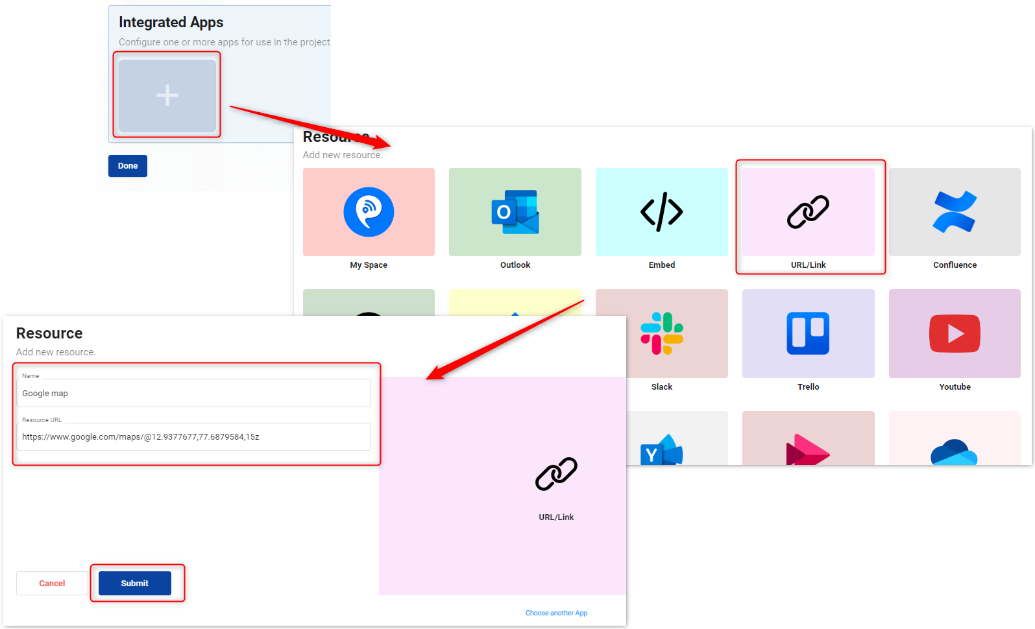
To add URL/Link into a project
- Click add button below the integrated apps section.
- Then select URL/Link in the resource popup window that opens.
- Then enter your Resource URL, and finally, click the Submit button.
Note: By default, the Name will be Url you can change it as per your requirements.
- URL/Link has been successfully added.
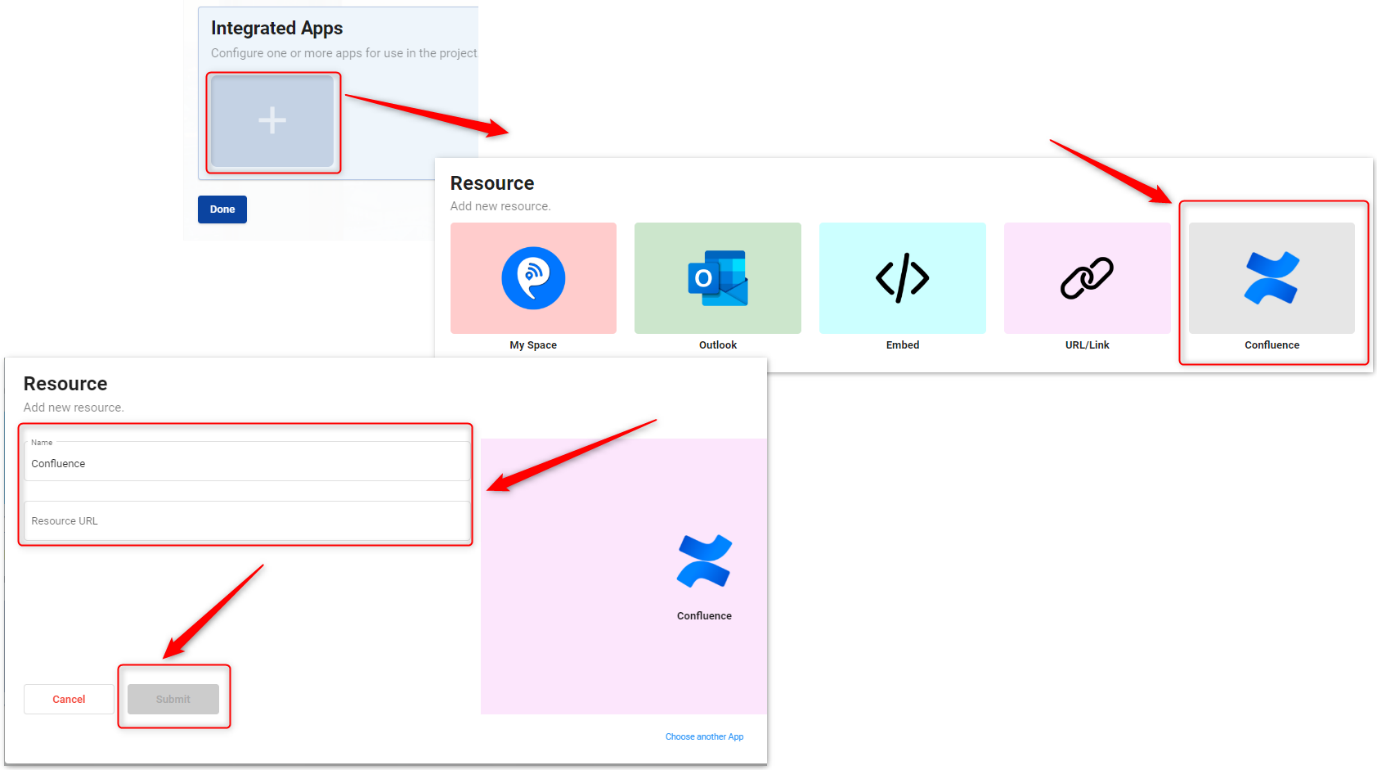
To add Confluence into a project
- Click add button below the integrated apps section.
- Then select Confluence in the resource popup window that opens.
- Then enter your Resource Name and Resource URL, and finally, click the Submit button.
Note: By default, the Name will be Confluence you can change it as per your requirements.
- Confluence has been successfully added.
To add GitHub into a project
- Click add button below the integrated apps section.
- Locate and click on the GitHub app, in the pop-up window that appears.
- Copy the GitHub Repository URL and paste it into the URL section.
Note: When you click on the GitHub App Icon from the home page, this URL helps you determine which page to redirect.
-
Check the Enable Notifications checkbox in the Resource window that opens.
-
Select the Repository name from the drop-down list and click submit button. Updates to that Repository will be notified to project members.
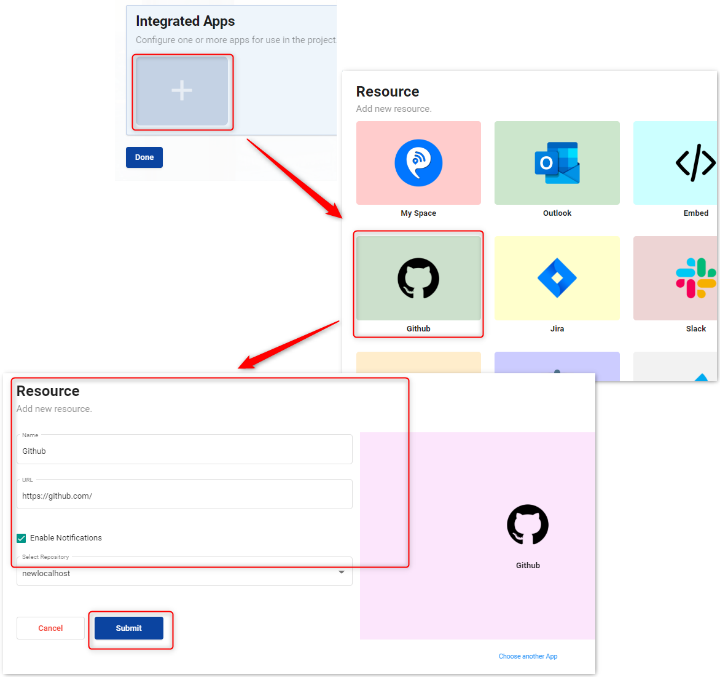
- GitHub notification is enabled successfully.
To add Jira into a project
- Click add button below the integrated apps section.
- Locate and click on the JIRA app, in the pop-up window that appears.
- Copy the JIRA Repository URL and paste it into the URL section.
Note: When you click on the JIRA App Icon from the home page, this URL helps you determine which page to redirect.
-
Check the Enable Notifications checkbox in the Resource window that opens.
-
Select the project name from the drop-down list and click submit button.
-
Updates to that project will be notified to project members.
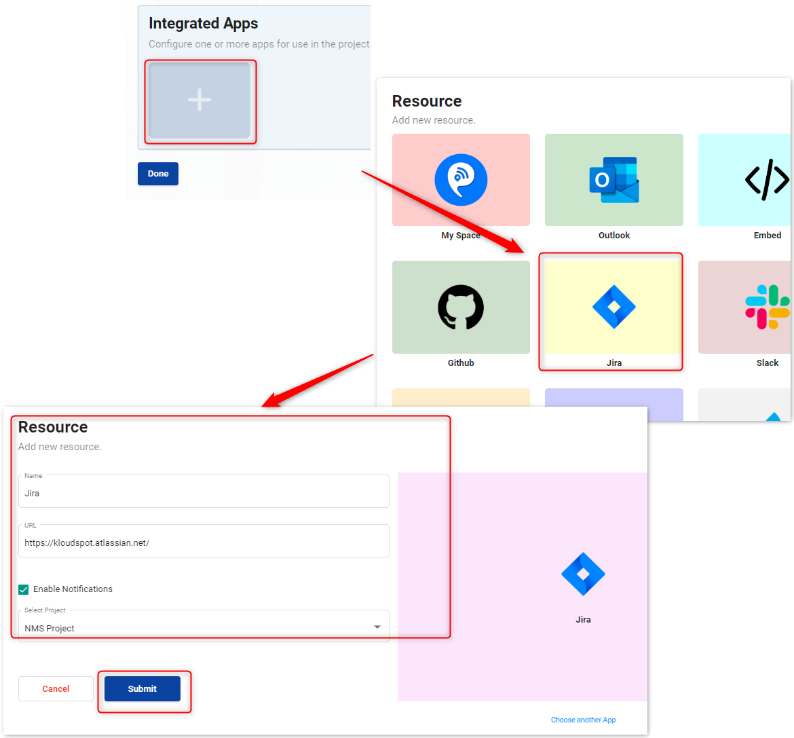
- JIRA notification is enabled successfully.
To add Slack into a project
- Click add button below the integrated apps section.
- Locate and click on the Slack app, in the pop-up window that appears.
- Copy the Slack group URL and paste it into the URL section.
Note: When you click on the Slack tab from the home page, this URL helps you determine which group to redirect.
-
Check the Enable Notifications checkbox in the Resource window that opens.
-
Select the channel name from the drop-down list and click submit button.
-
Updates to that channel will be notified to project members.
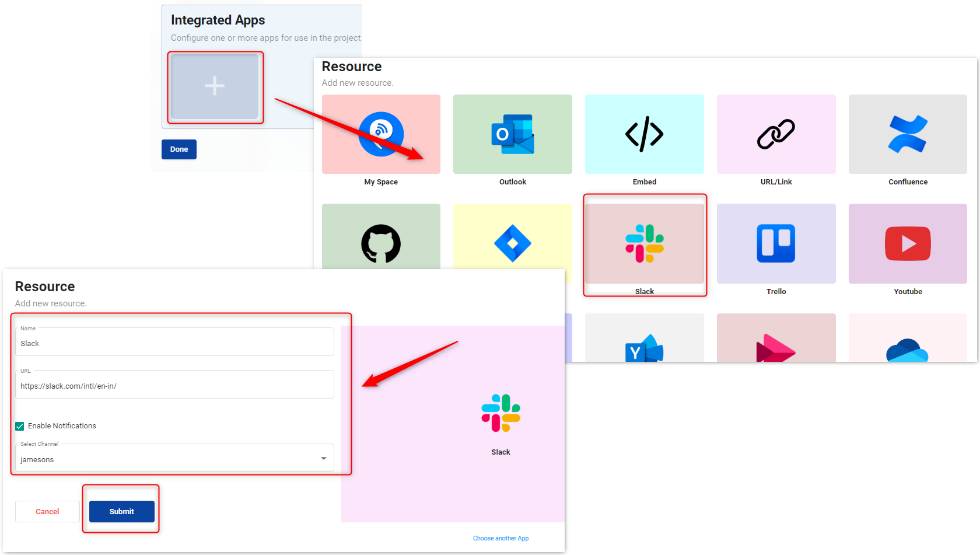
- Slack notification is enabled successfully.
To add Trello into a project
-
Click add button below the integrated apps section.
-
Locate and click on the Trello app, in the pop-up window that appears.
-
Copy the Trello Repository URL and paste it into the URL section.
Note: When you click on the Trello App Icon from the project page, this URL helps you determine which page to redirect.
-
Check the Enable Notifications checkbox in the Resource window that opens.
-
Select the Board name from the drop-down list and click submit button.
-
Updates to that Board will be notified to project members.
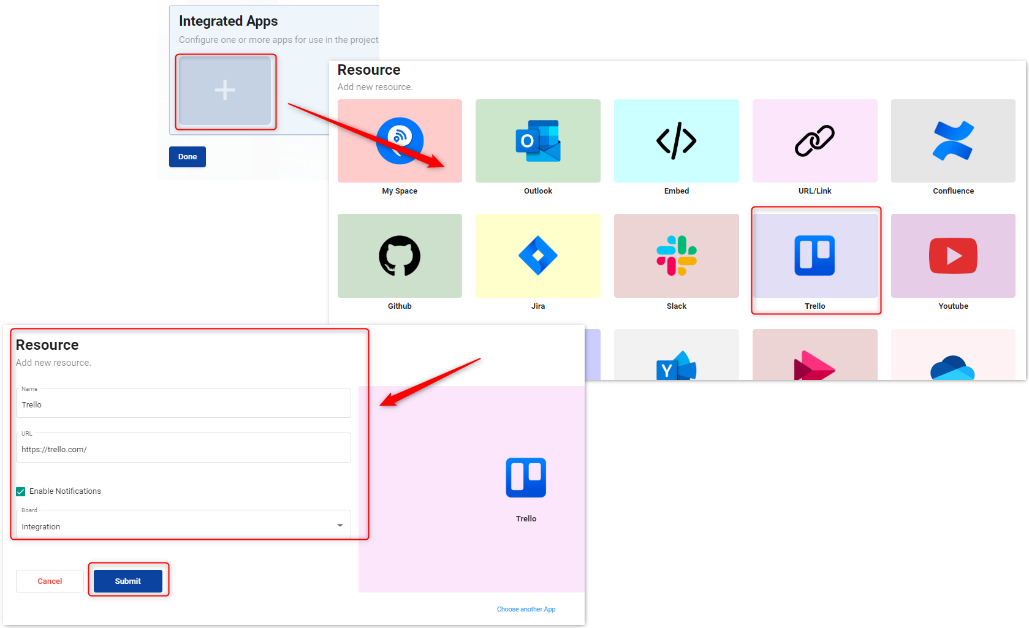
- Trello notification is enabled successfully.
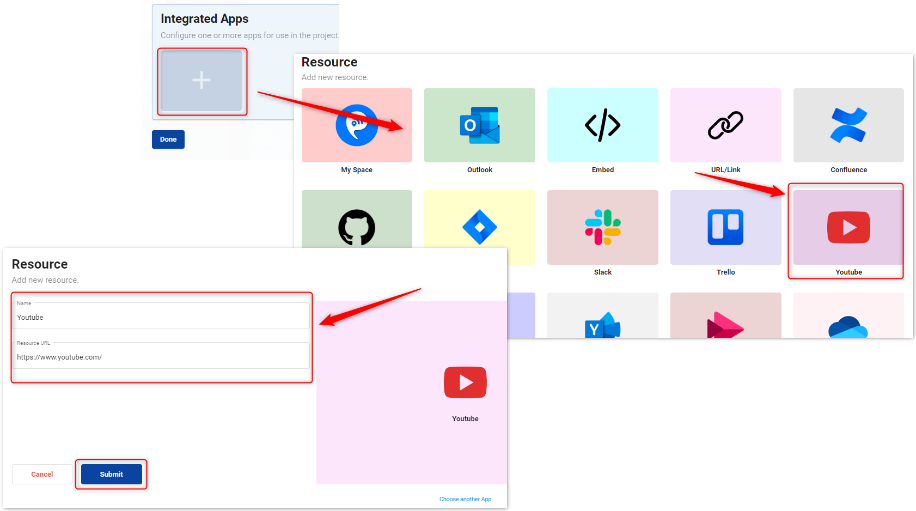
To add YouTube into a project
- Click add button below the integrated apps section.
- Then select YouTube in the resource popup window that opens.
- Then enter your Resource URL, and finally, click the Submit button.
Note: By default, the Name will be YouTube you can change it as per your requirements.
- YouTube has been successfully added.

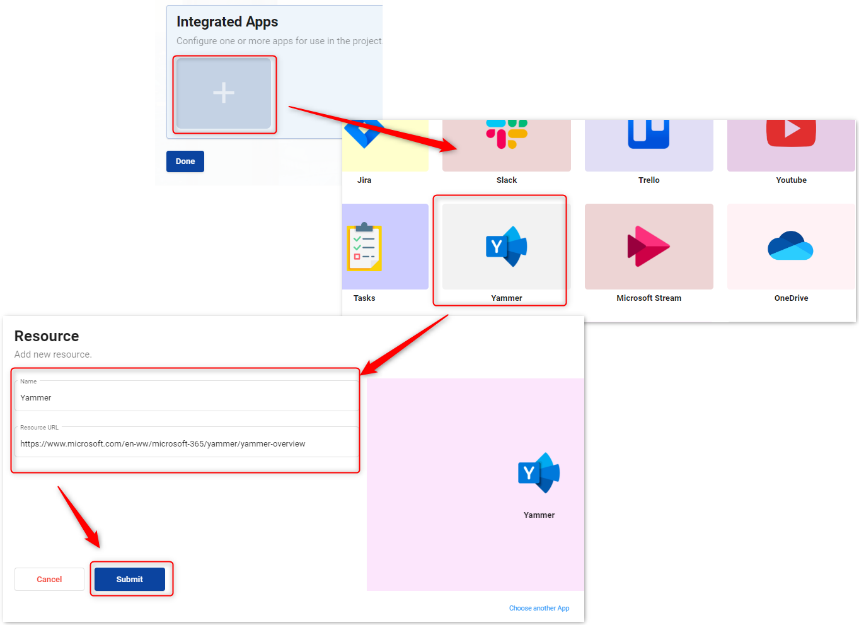
To add Yammer into a project
- Click add button below the integrated apps section.
- Then select Yammer in the resource popup window that opens.
- Then enter your Resource URL, and finally, click the Submit button.
Note: By default, the Name will be Yammer you can change it as per your requirements.
- Yammer has been successfully added.
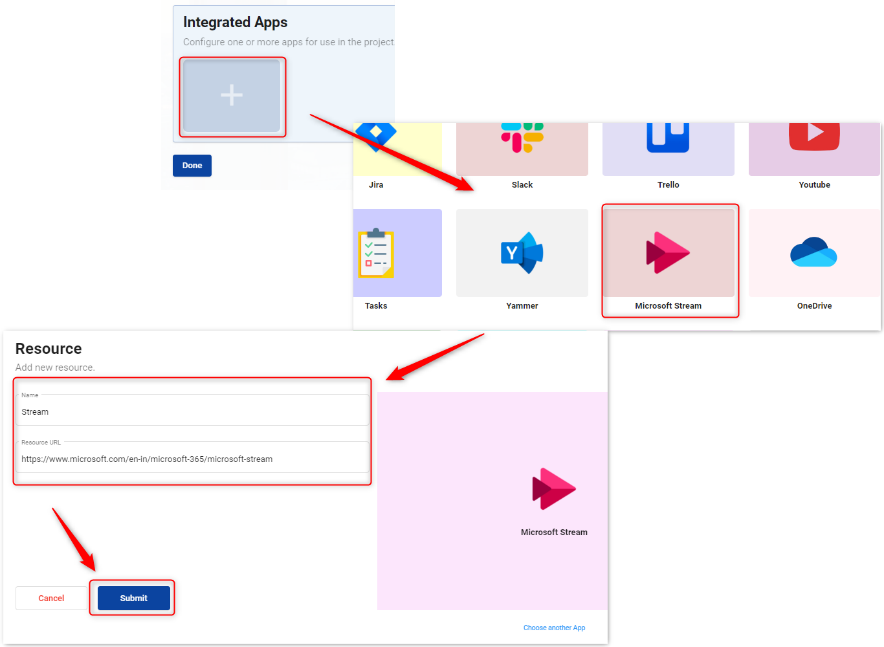
To add Microsoft Stream into a project
- Click add button below the integrated apps section.
- Then select Microsoft Stream in the resource popup window that opens.
- Then enter your Resource URL, and finally, click the Submit button.
Note: By default, the Name will be Stream you can change it as per your requirements.
- Microsoft Stream has been successfully added.
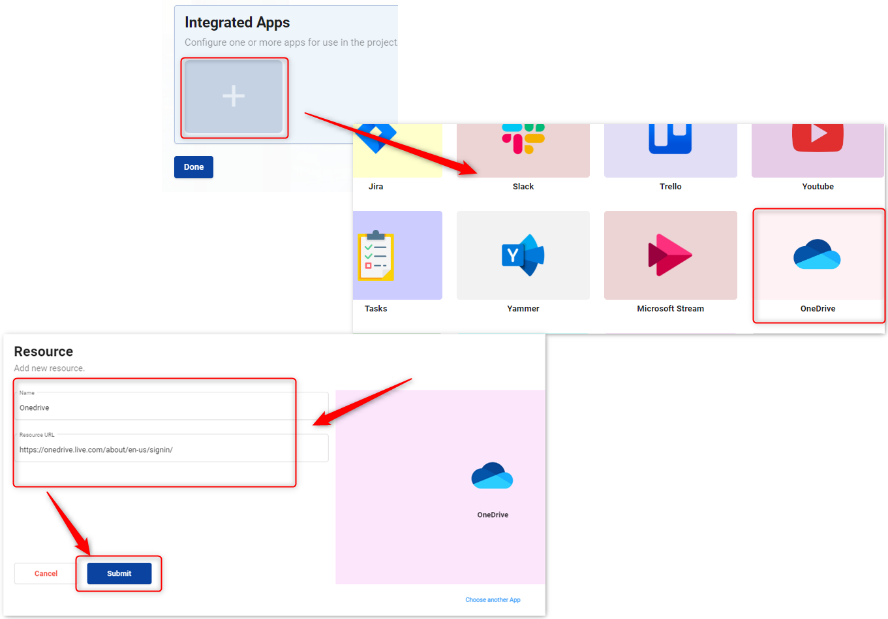
To add OneDrive into a project
- Click add button below the integrated apps section.
- Then select OneDrive in the resource popup window that opens.
- Then enter your Resource URL, and finally, click the Submit button.
Note: By default, the Name will be OneDrive you can change it as per your requirements.
- OneDrive has been successfully added.
To add SharePoint into a project
- Click add button below the integrated apps section.
- Then select SharePoint in the resource popup window that opens.
- Then enter your Resource URL, and finally, click the Submit button.
Note: By default, the Name will be SharePoint you can change it as per your requirements.
- SharePoint has been successfully added.

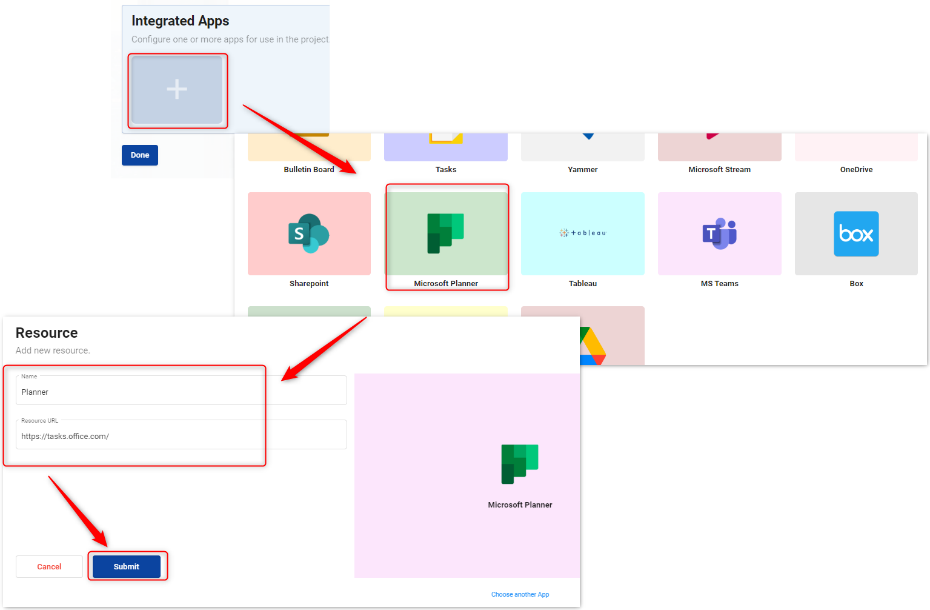
To add Microsoft Planner into a project
- Click add button below the integrated apps section.
- Then select Microsoft Planner in the resource popup window that opens.
- Then enter your Resource URL, and finally, click the Submit button.
Note: By default, the Name will be Planner you can change it as per your requirements.
- Microsoft Planner has been successfully added.
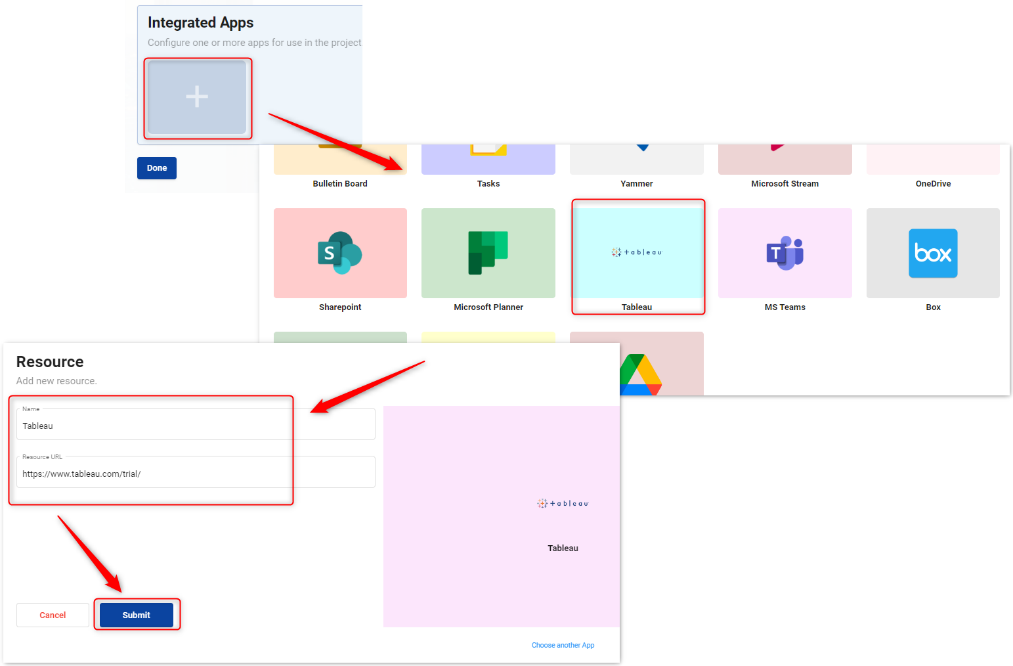
To add Tableau into a project
- Click add button below the integrated apps section.
- Then select Tableau in the resource popup window that opens.
- Then enter your Resource URL, and finally, click the Submit button.
Note: By default, the Name will be Tableau you can change it as per your requirements.
- Tableau has been successfully added.
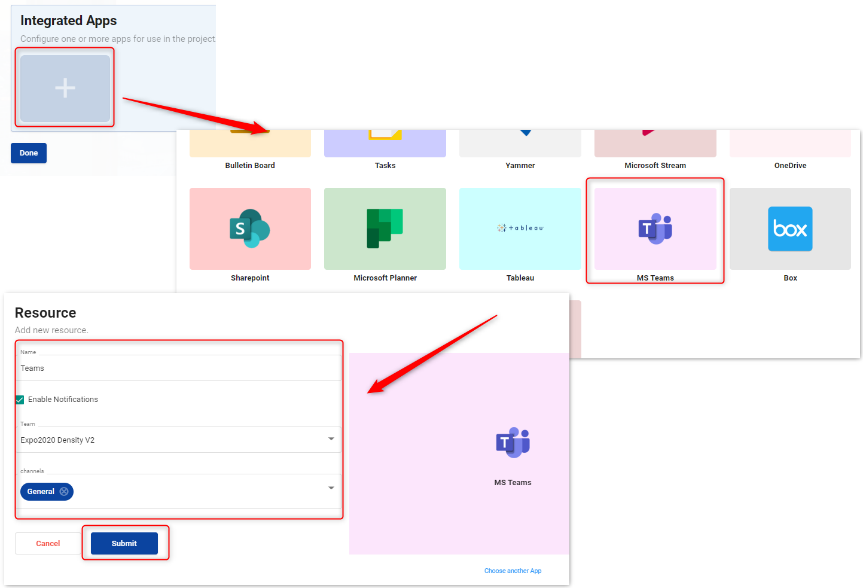
To add MS Teams into a project
- Click add button below the integrated apps section.
- Locate and click on the MS Teams app, in the pop-up window that appears.
- Check the Enable Notifications checkbox in the Resource window that opens. Select the Team name from the drop-down list, then select the channel.
Note: When you click on the Teams tab, you will be redirected to the team given here, so select the team related to the project.
-
Then click submit button.
-
MS Teams is added successfully.
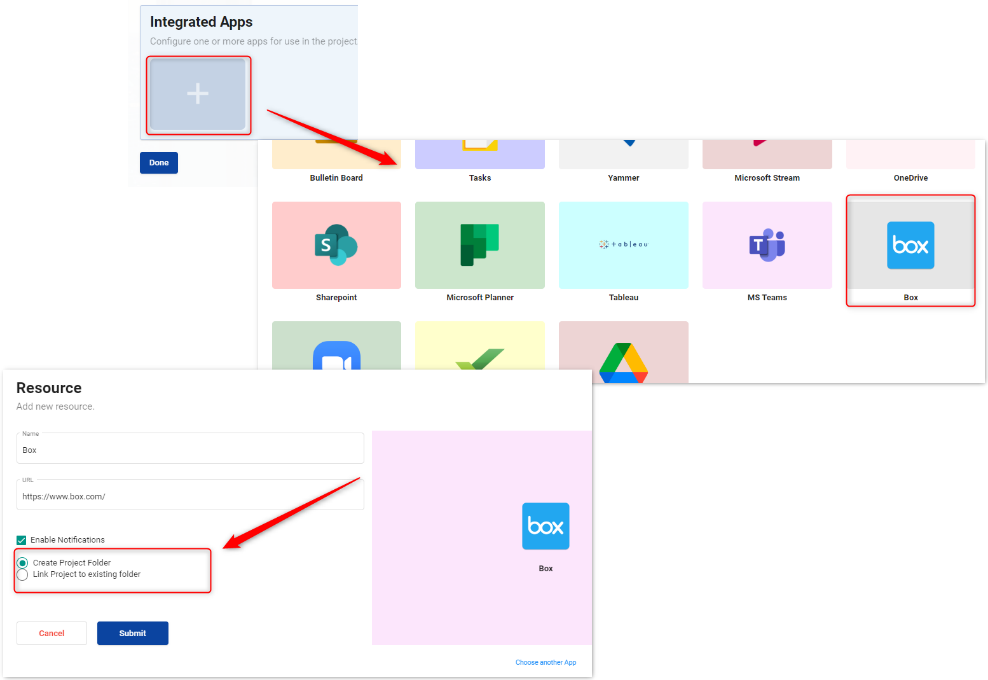
To add Box into a project
-
Click add button below the integrated apps section.
-
Locate and click on the Box app, in the pop-up window that appears.
-
In the resource window that opens, there are 2 options.
-
Create Project Folder: Helps to create a new folder in the box.
-
Link Project to existing folder: Helps to select a folder that exists in the box.
-
Note: If another folder with the same name of the project exists in the box, the new folder cannot be created. In this situation, you can select the folder from the select folder drop-down.
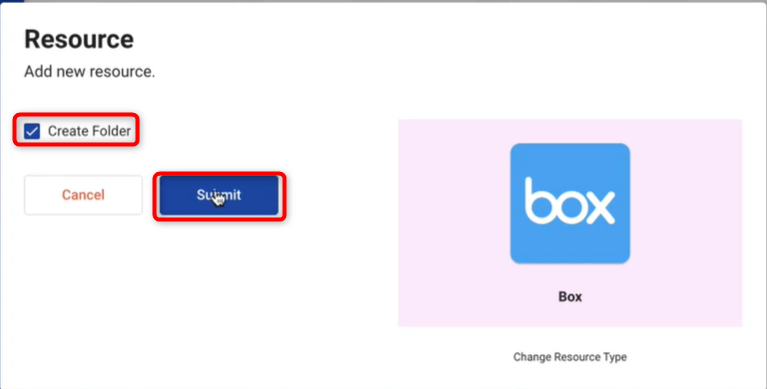
Create Project Folder
- Check the Create Folder Check box and click Submit button.
-
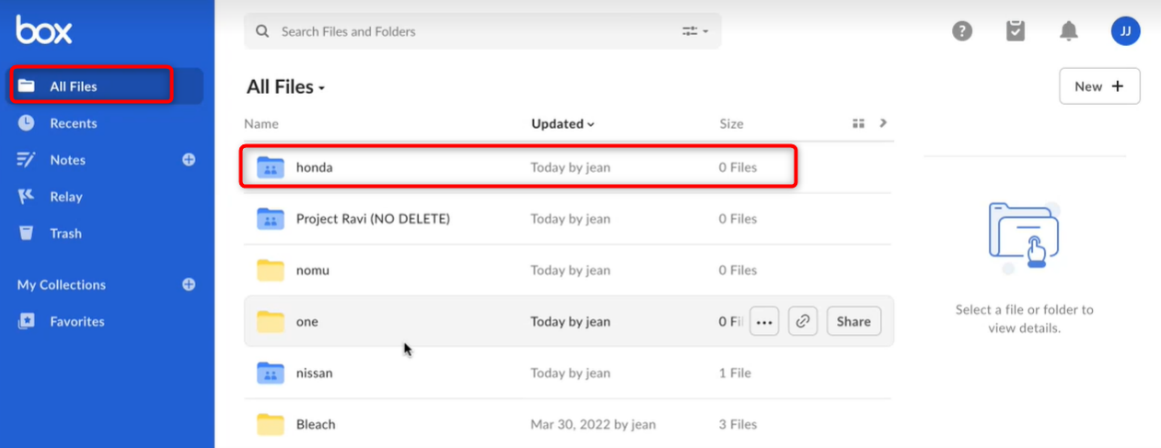
A folder with the project name will be created in the box.
-
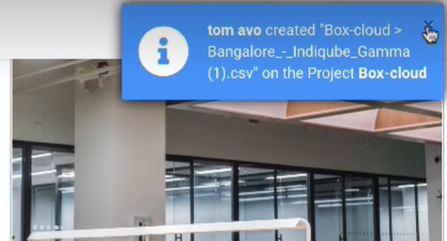
The created folder will contain all the project members. Project members will be notified if anything is added, deleted, or edited in this file.
Link Project to existing folder
-
Select the folder name from the drop-down list and click submit button.
-
project members will be added to the selected folder. members will be notified of updates that appear in that folder.
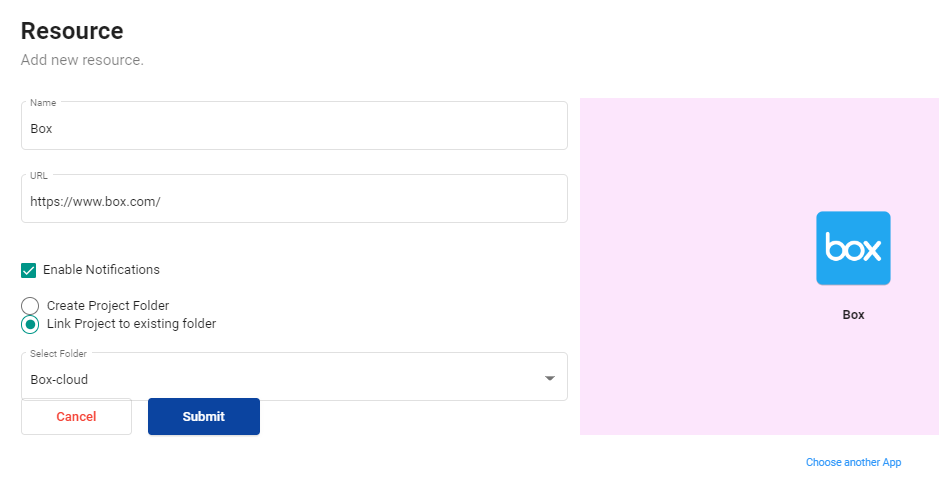
- Box App is added successfully.
To add Wrike into a project
- Click add button below the integrated apps section.
- Locate and click on the Wrike app, in the pop-up window that appears.
- Copy the Wrike folder URL and paste it into the URL section.
Note: When you click on the Wrike App from the home page, this URL helps you determine which page to redirect.
-
Check the Enable Notifications checkbox in the Resource window that opens.
-
Select the folder name from the drop-down list and click submit button. Updates to that folder will be notified to project members.
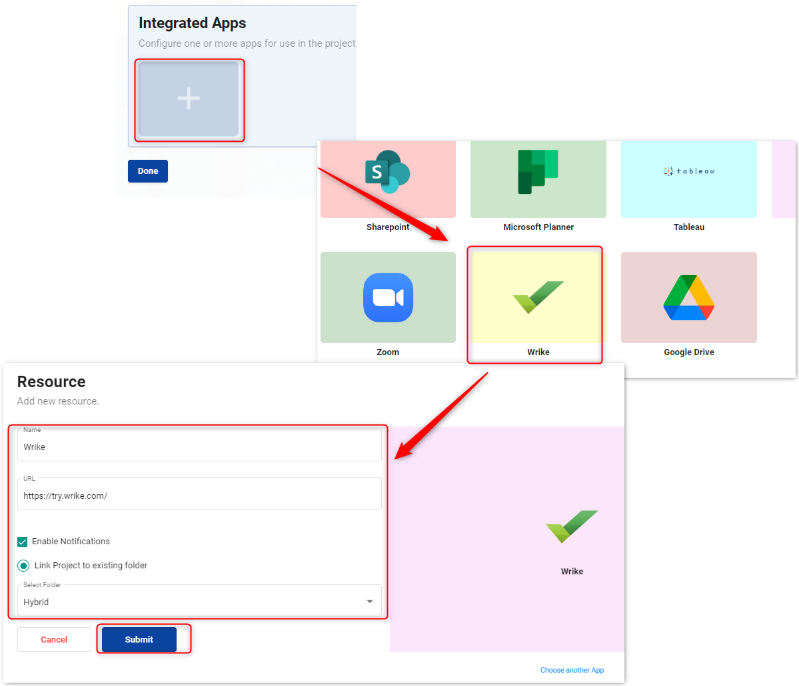
- Wrike notification is enabled successfully.
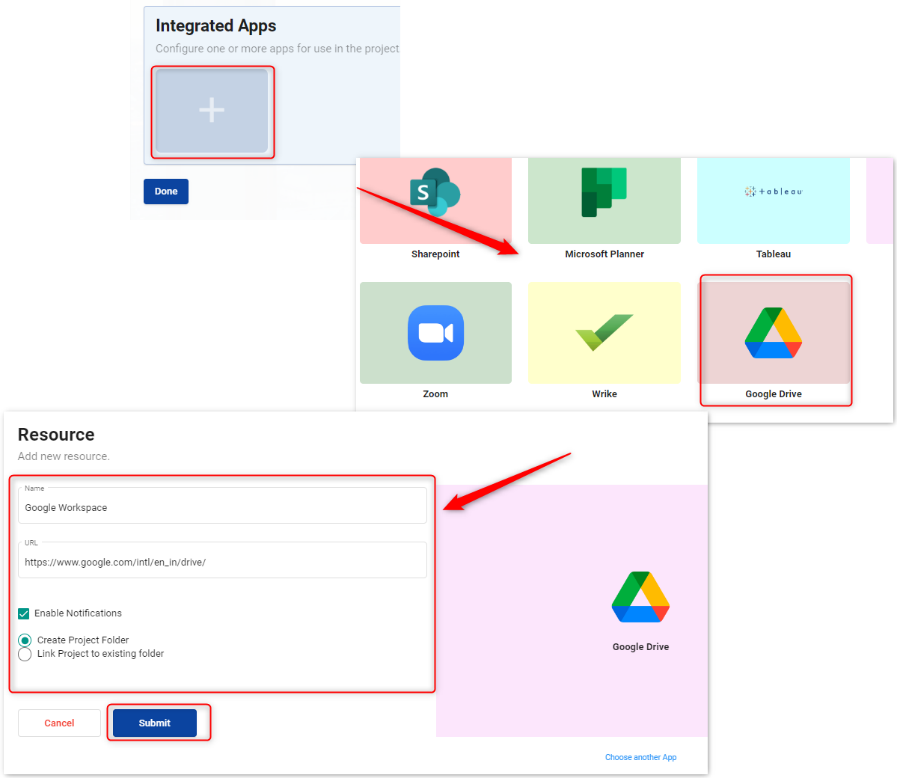
To add Google Drive into a project
-
In the Project App window that opens, click the Add button in the Integrated Apps section.
-
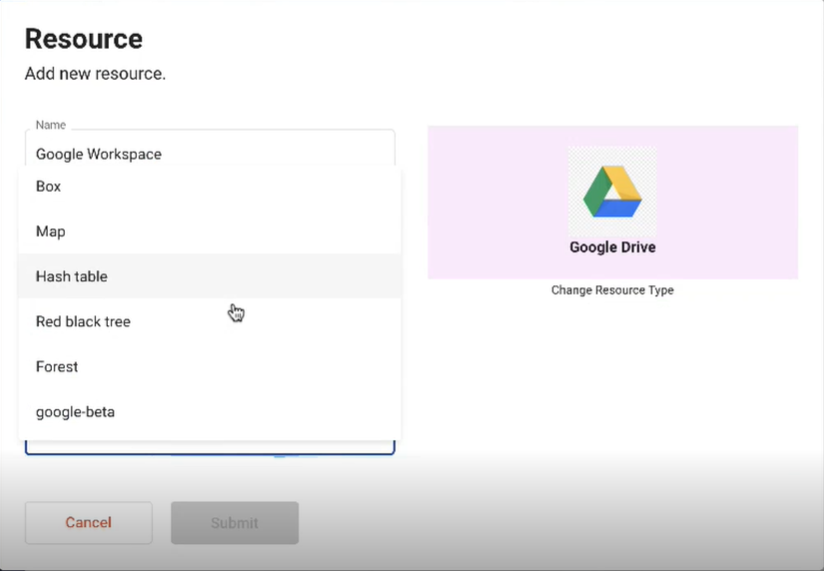
Locate and click on the Google Drive app, in the pop-up window that appears.
-
Check the Enable Notifications checkbox in the Resource window that opens, there are 2 options.
-
Create project folder: Helps to create a new folder in Google Drive.
-
Link project to existing folder: Helps to select a folder that exists in Google Drive.
-
Note: If another folder with the same name of the project exists in Google Drive, the new folder cannot be created. In this situation, you can select the folder from the select folder drop-down.
Create Project Folder
- Check the Create Project Folder Check box and click Submit button.
Note: Enter https://drive.com in the URL text box.
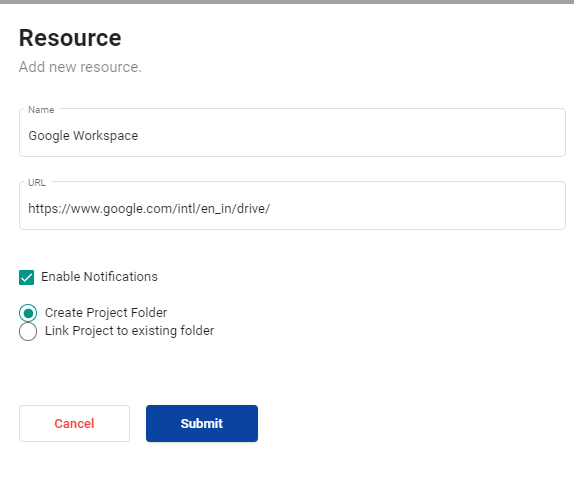
- A folder with the project name will be created on google drive.
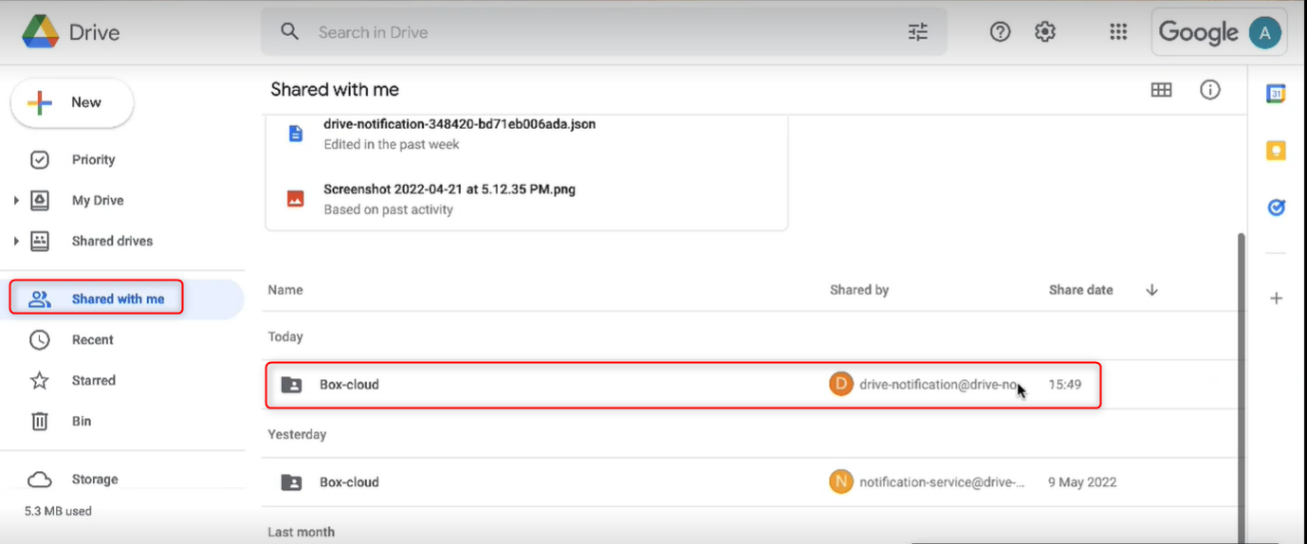
- The created folder will contain all the project members. Project members will be notified if anything is added, deleted, or edited in this file.
Link the project to an existing folder
-
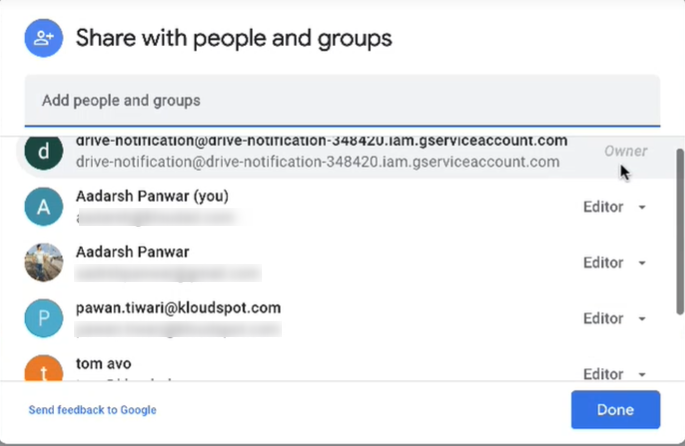
Select the folder name from the drop-down list and click submit button.
-
project members will be added to the selected folder. members will be notified of updates that appear in that folder.
- Google Drive is added successfully.
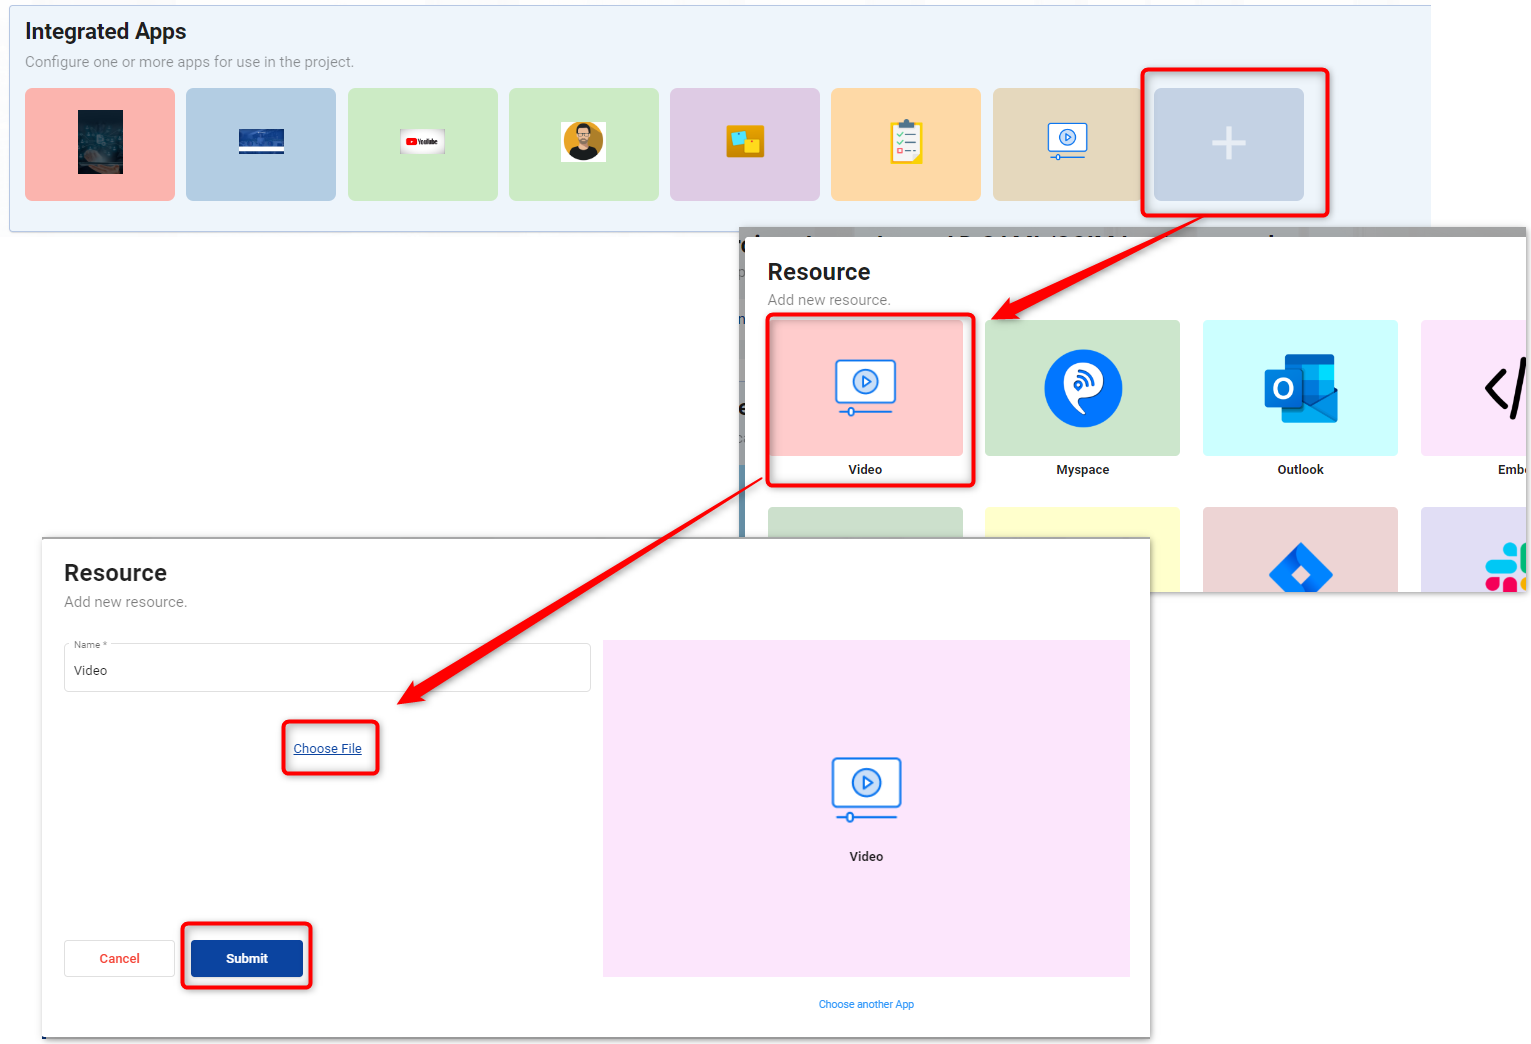
To add Video to a project
- Click add button below the integrated apps section.
- Then select the Video option from the resource popup window that opens.
- In the popup window that opens, click on the Choose file button and select the video file you want to add. Then click on the Submit button.
- Video has been successfully added.
How to setup Obeya Mode?
- The admin can configure the obeya mode according to the project requirements when creating the project. If the administrator has not configured it. The Obeya will be created automatically with an overview tab, task tab, and Project members.
- To configure Obeya mode click the Project Details button on the project card.
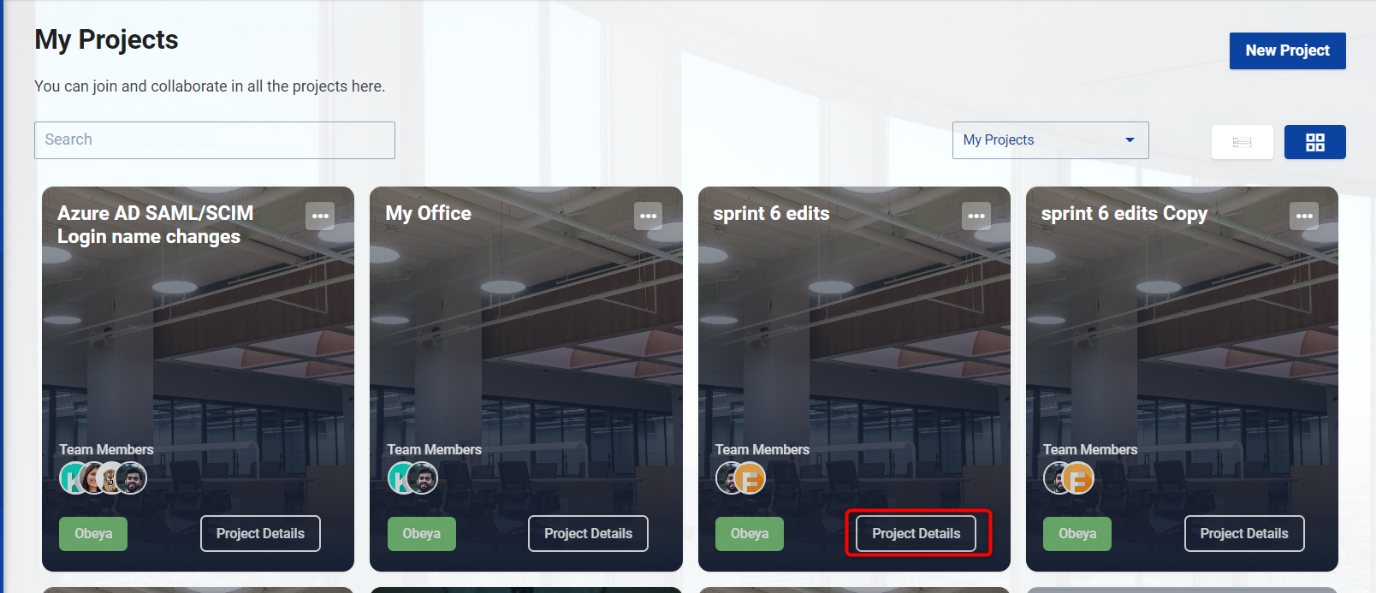
-
This will take you to the project dashboard.
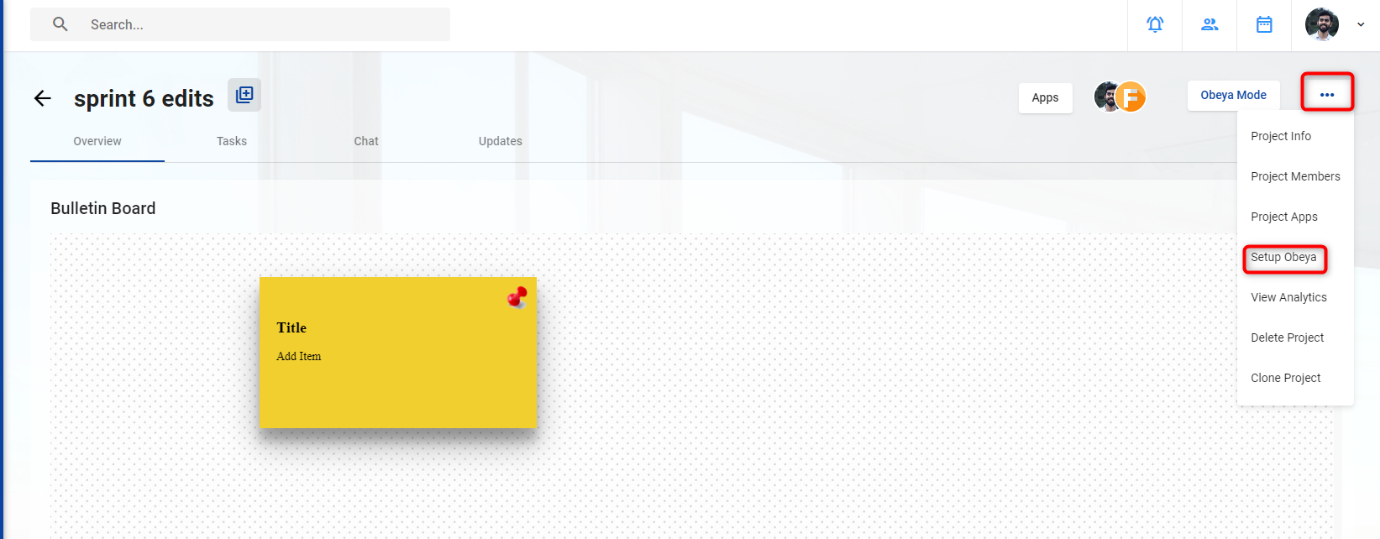
-
Here you can click on the Setup Obeya option from the Menu button.
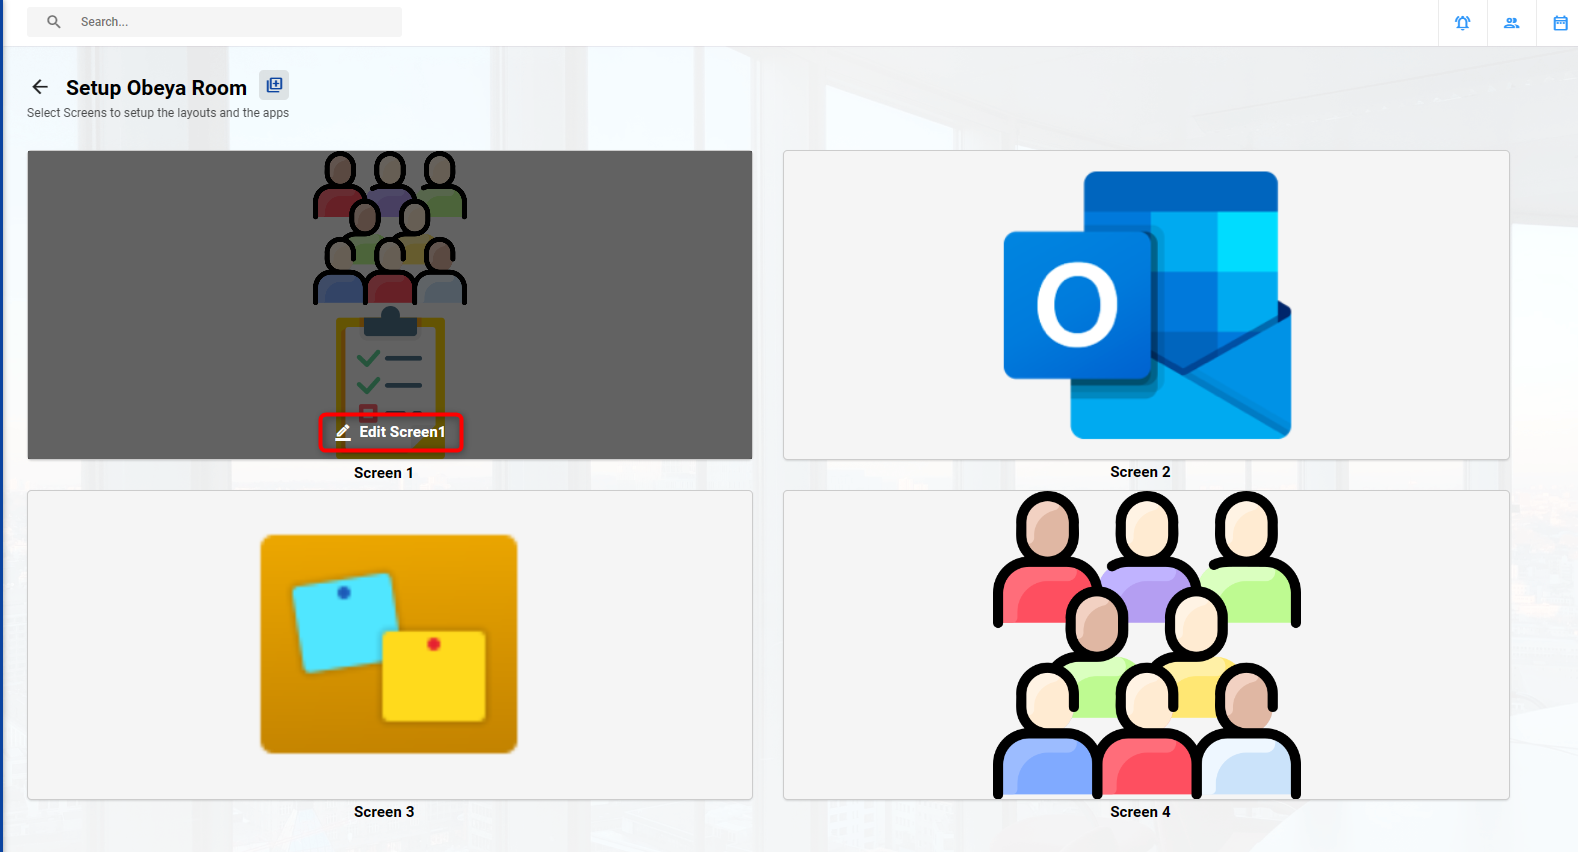
-
In the window that opens, click on the Edit Screen button on the screen to be edited.

-
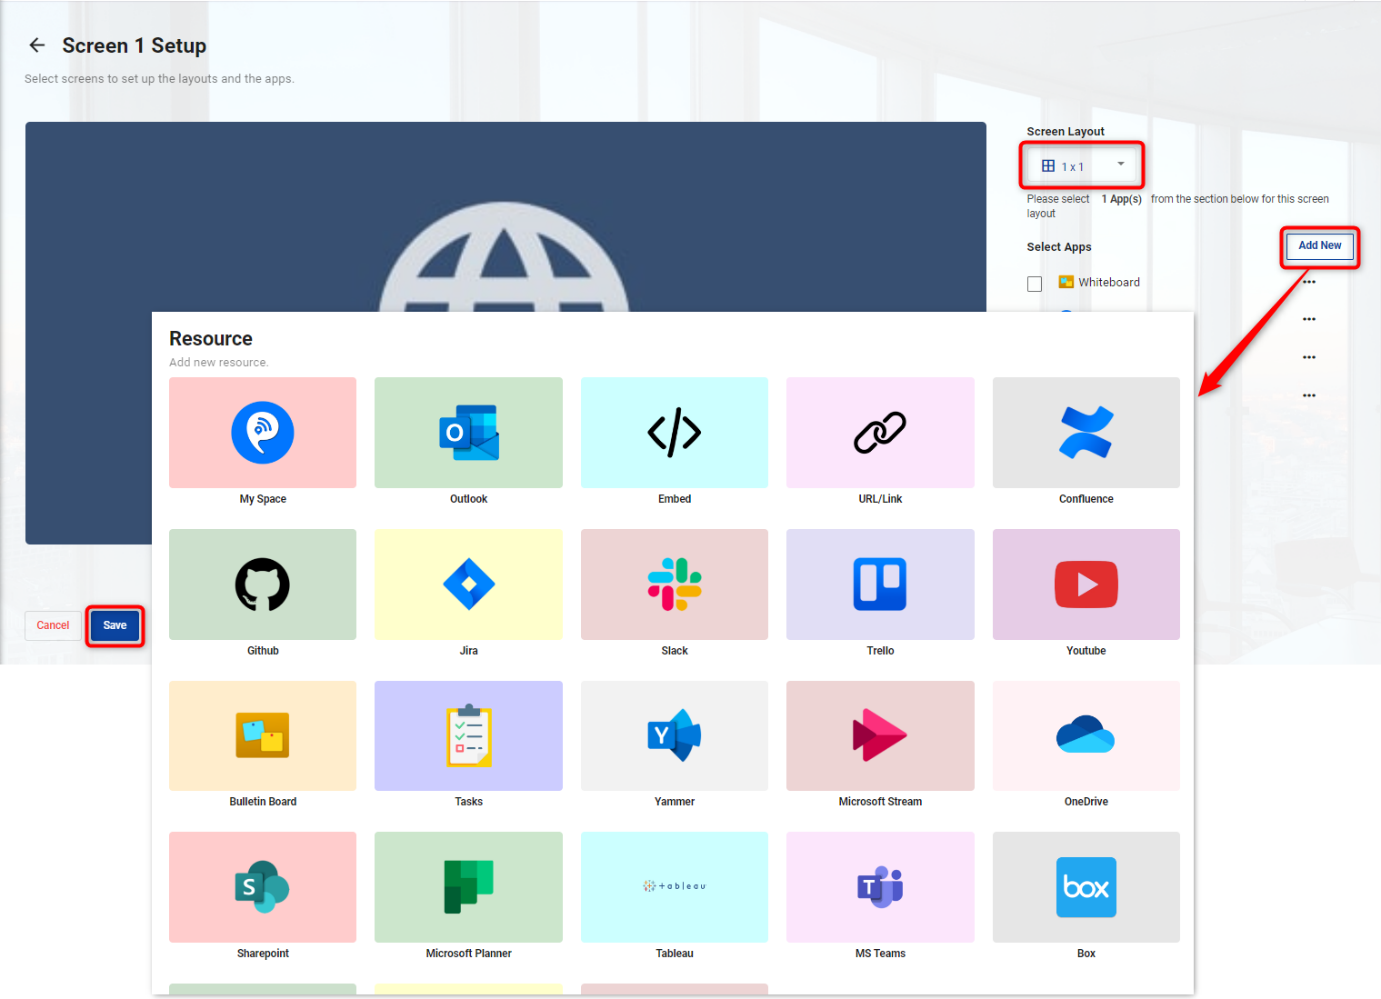
Select the layout from the layout list.
-
Click the Add New button to add resources. Then a popup window with resources will appear. Add the resource you want to add from there.
-
Refer How to add Integrated Apps section for resource integration.
-
Click on the save button to save the changes.
-
Configure the other screens in the same way.
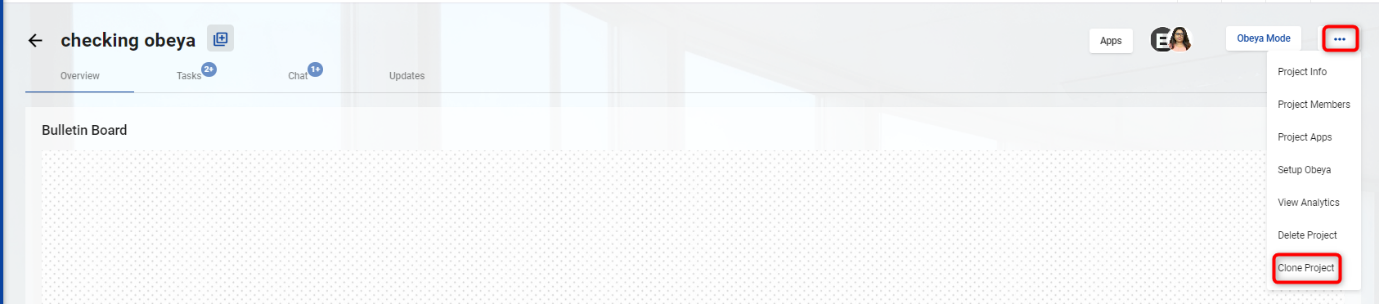
How to clone a Project?
- If you want to start another project with the same team members, you can use the clone project option.
- To do so, Click the Clone Project option from the menu button.
- Then a popup will open asking for the project key, enter a key with a maximum of 3 letters or numbers and click the Clone button.
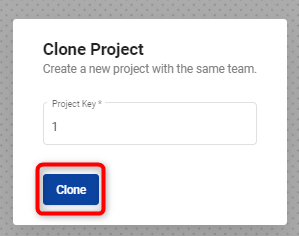
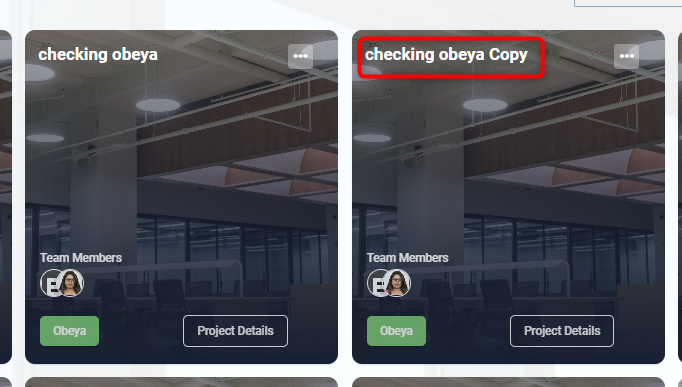
- Immediately a project containing the same team members will be created.
How to Invite users?
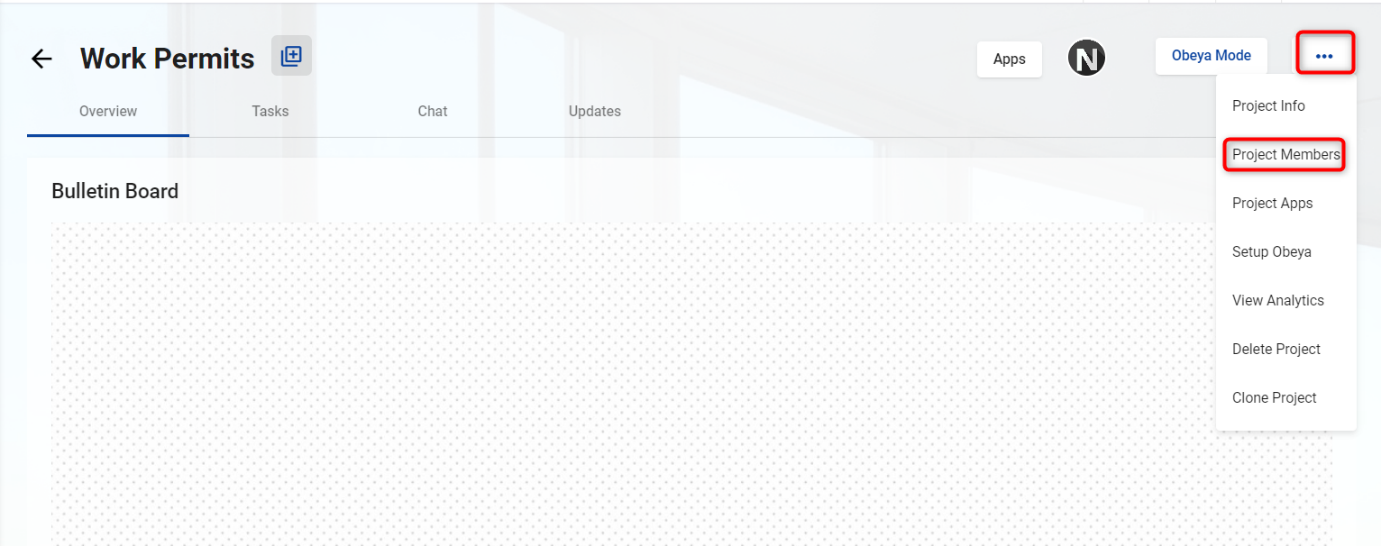
- If you want to add a member to an already created project, you can use the Invite user option.
- To do so, Navigate to Menu > Project Members.
-
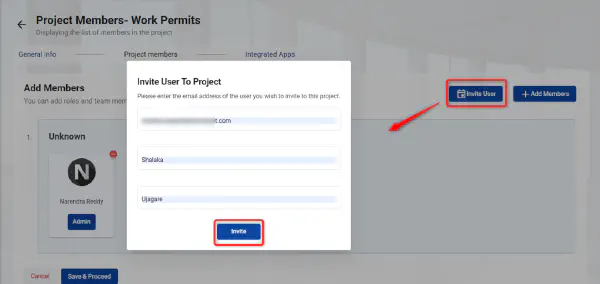
Click the Invite User button on the Project members page that appears.
-
Then, in the popup window that appears, enter the email address and name of the user to be added, and then click the Invite button.
-
New user added successfully. As soon as the invite is done, the user will receive that information as an email and push notification.

Note: Notifications will be delivered based on your chosen notification preference. If you are not receiving notifications, please verify your notification settings.
- When you invite an individual outside the KloudHybrid Application, they will receive an email containing a password reset link. By clicking on that link, they can reset their password and access the hybrid application.
How to evaluate a project member?
- The purpose of the project member evaluation is to offer a fair and open assessment of the team members’ performance and to assist them in strengthening their abilities and contributions to the project.
- In an evaluation cycle, a project member can only be evaluated once. Even if a project has multiple administrators.
- To evaluate a member in a project, open the desired project.
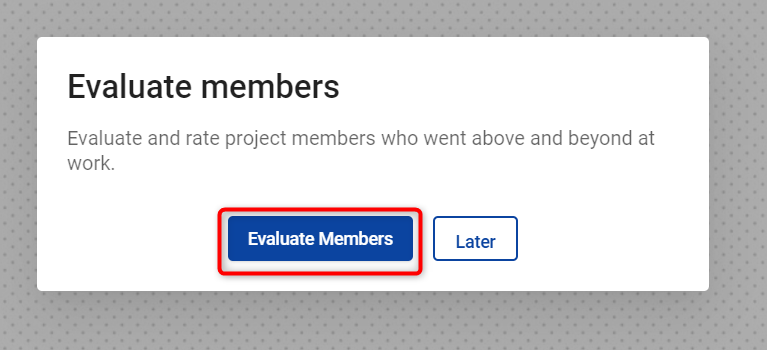
- If you are entering the project for the first time in an evaluation cycle, a popup will open to evaluate members. Click on the Evaluate member button.
- Also, you can open the evaluate popup by clicking on the members button from the project home page.

-
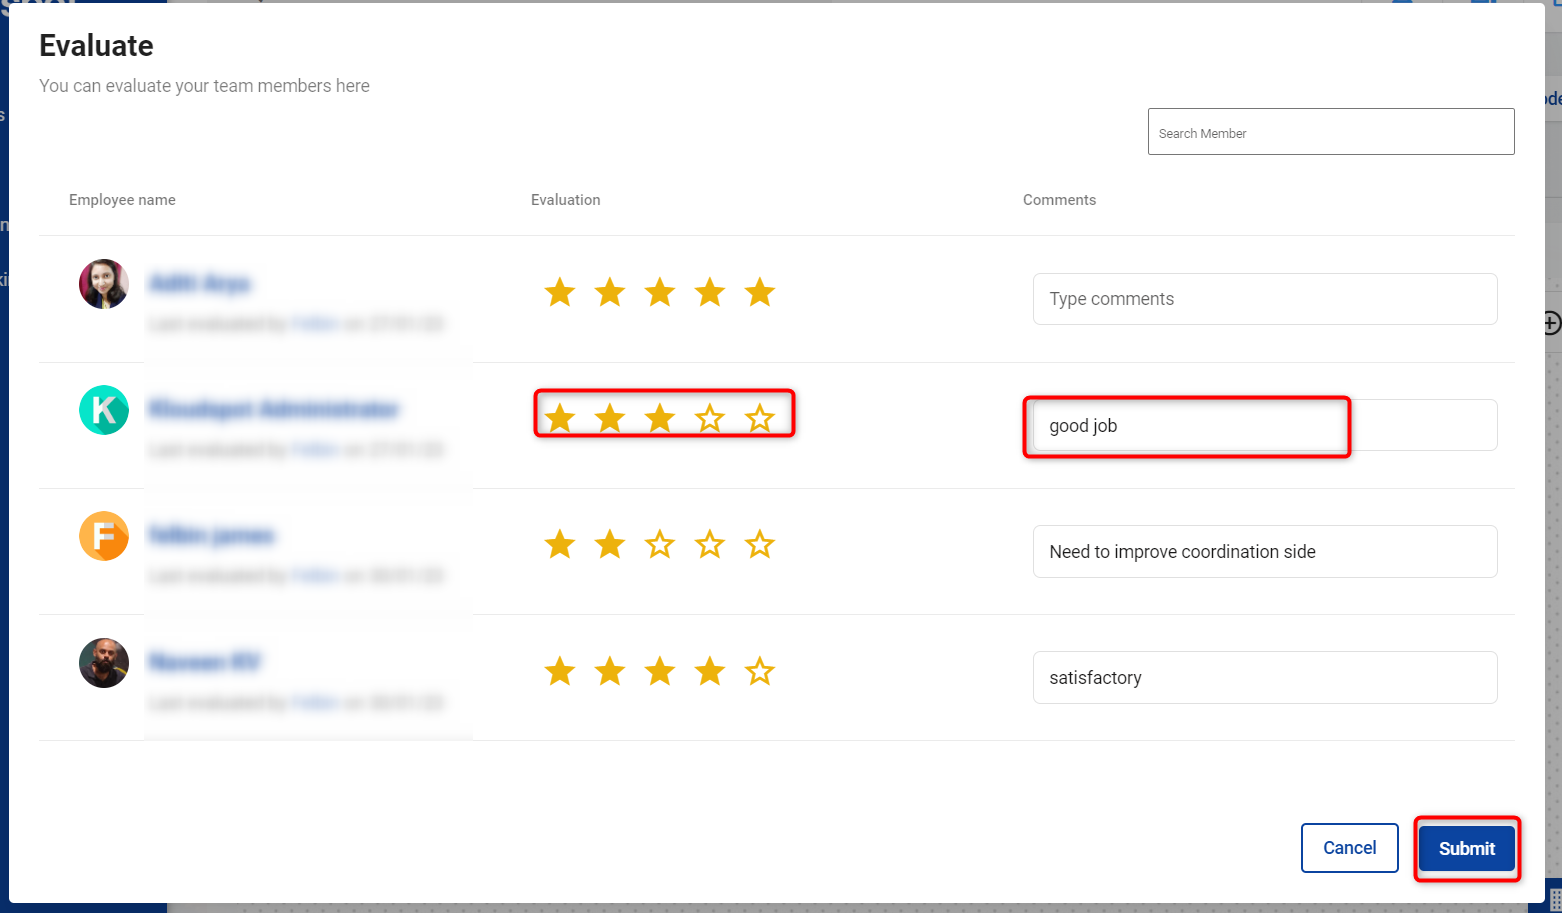
In the evaluate popup window that opens give a rating to each member, if there are any comments, can be added in the Comments column.
-
Click Submit button to save the changes.
-
If you want to see the evaluation details after the evaluation, follow the steps below.
-
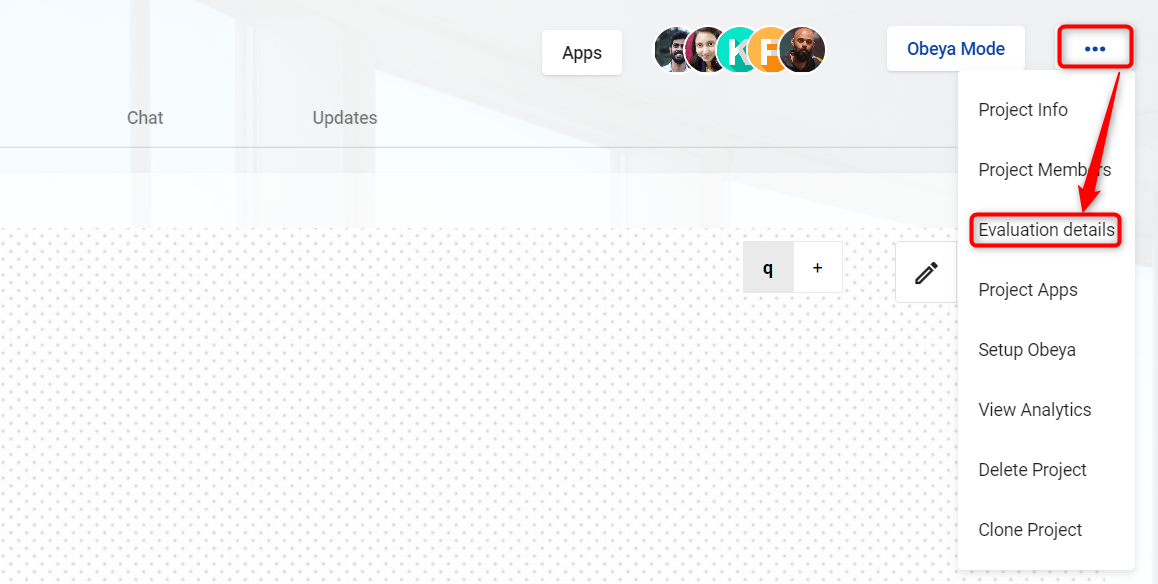
Select the Evaluation details option from the menu items on the project home page.
-
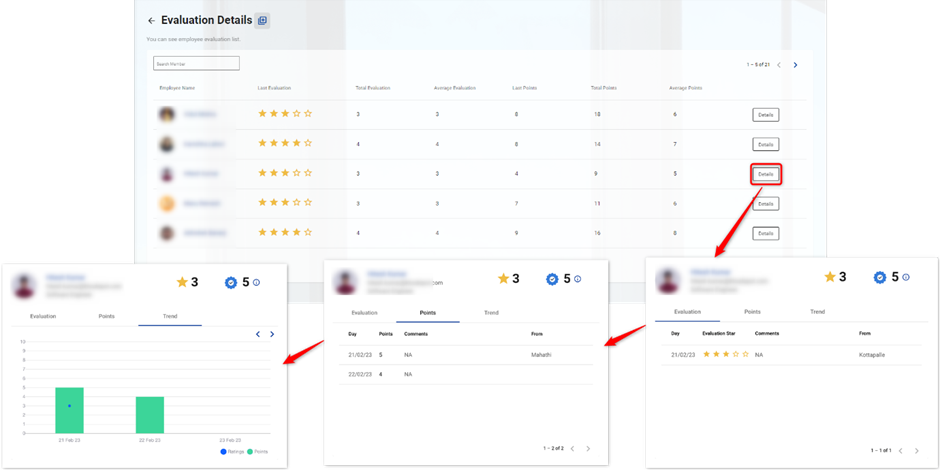
In the Evaluation Details window, you can see the details of all team members.
-
To learn more about a particular team member, click the Details button next to the member’s details.
-
In the popup window that opens, you can see the ratings received by that member in each evaluation cycle, thanks points awarded by other members and the bar chart based on the points and ratings you received.