Configure the System settings
If you wish to adjust system settings such as UI, database, password, language, etc., follow the steps given below.
System settings
- Go to the System configuration page from the Configuration Drop down menu. The “System” page allows to configure the following:
- UI
- Database
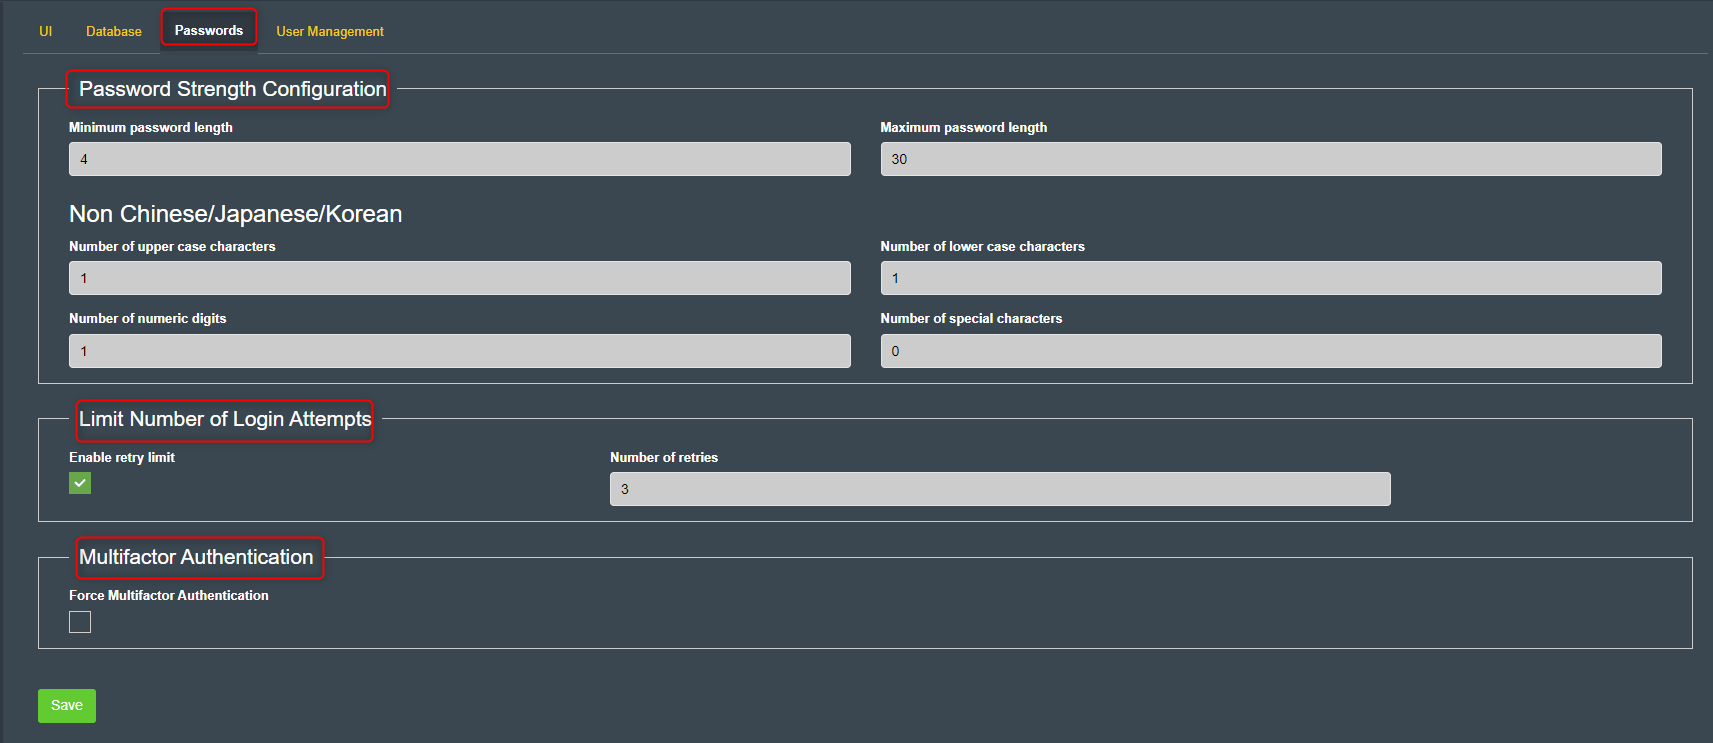
- Passwords
- User Management
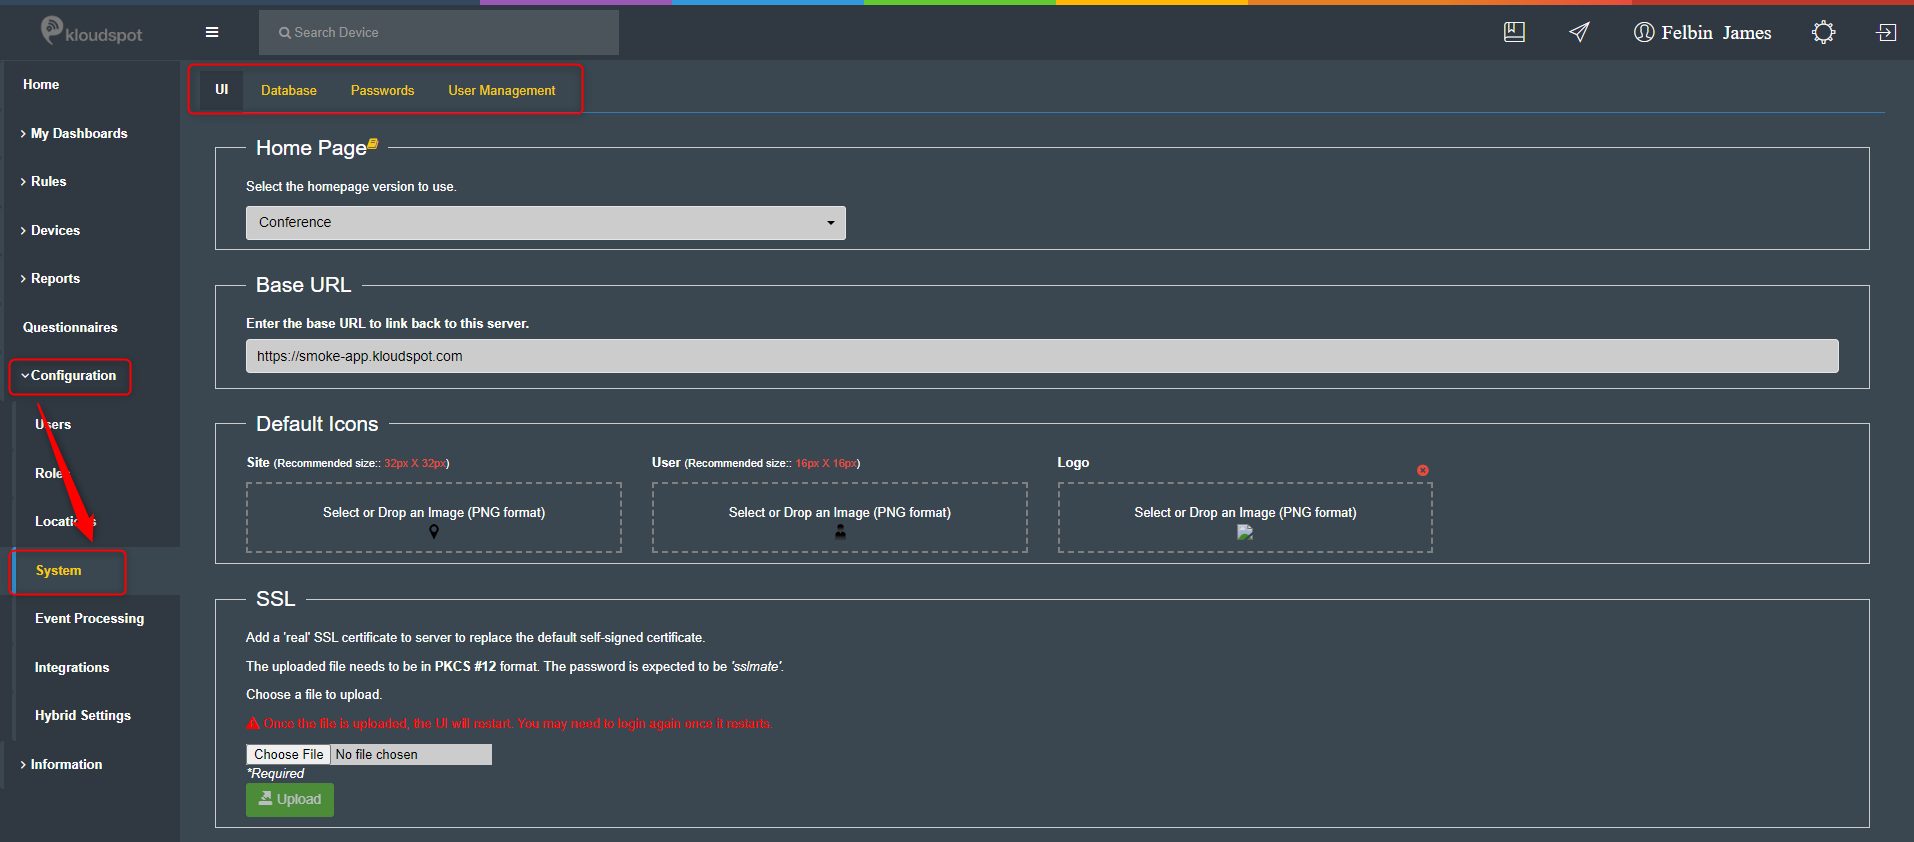
UI
The UI tab allows configuring the following:
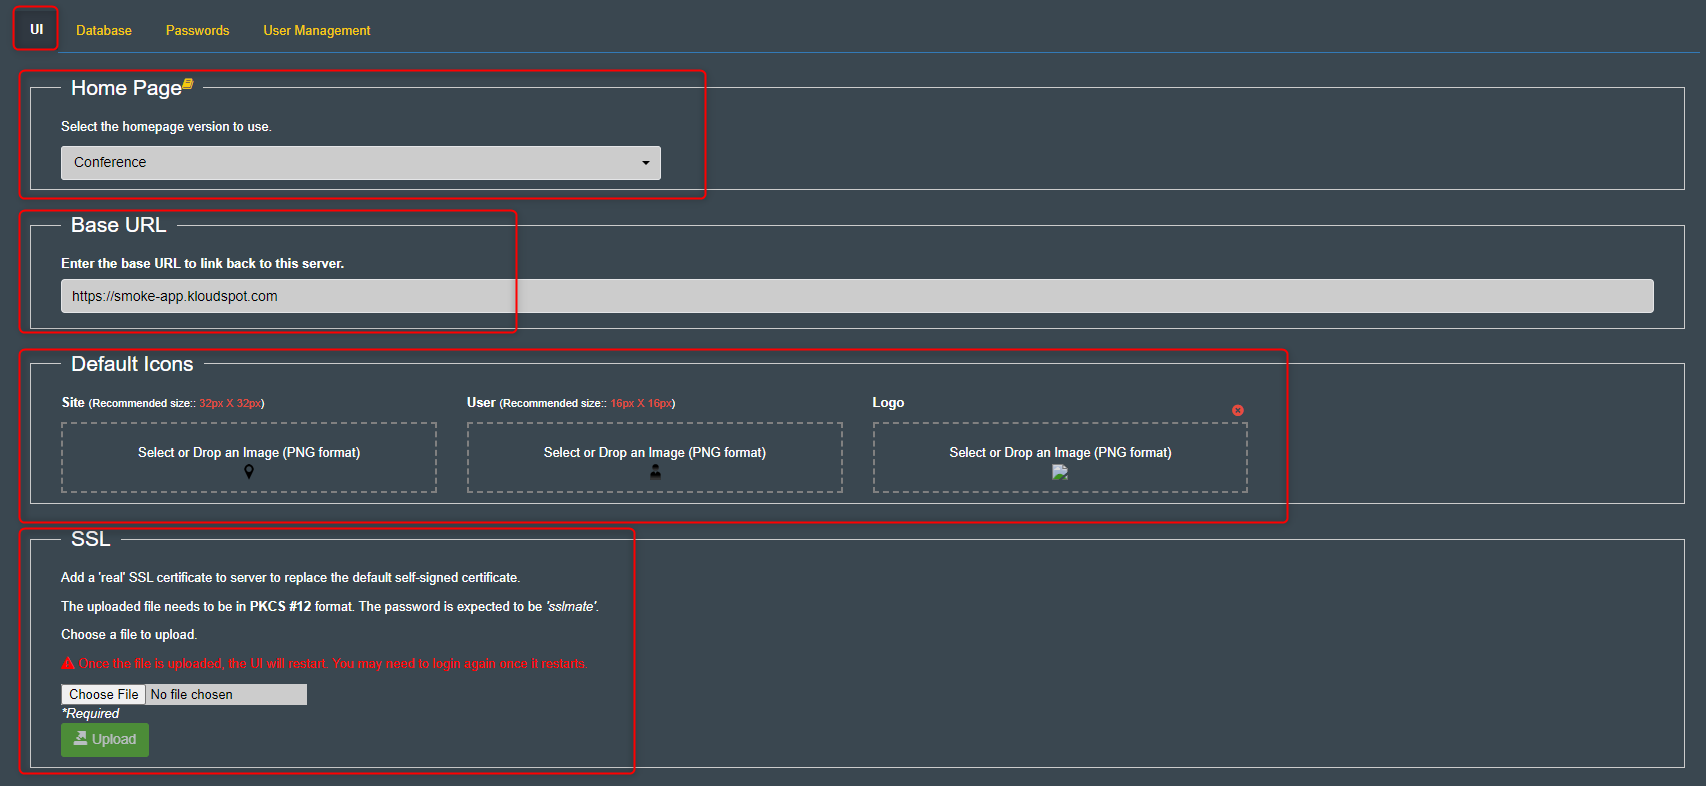
Homepage
Select the homepage version from the drop-down menu. This is applicable to Advanced Settings home page.

Base URL
Enter the base URL (for eg. https://smoke-app.kloudspot.com/en/login) to link back to this server.

Default Icons
- You can add an icon for a site or a user or upload a logo for an application in .png format.
- You can either browse and select an image or drag and drop an image in the provided box for each item.

How to add SSL?
- You can add an SSL (Secure Sockets Layer) certificate in PKCS #12 format.
- You can choose the file and click Upload to upload it.
- Please note that the application will be restarted once you upload a certificate. You may need to log in again once it restarts.

Database
- The Data Retention Period can be set as per the data backup and retention policy. You can either increase or decrease the number of days for the aggregated data retention and short data retention period. Once you make the changes, click Save and Apply.

Password
- In this tab, you can make the configuration so that the user can create a strengthened password for the application.
- It is also possible to enable or disable the retry limit. By default, it is enabled and ‘3’ retry limits are given.
- You can also enable or disable Multifactor Authentication from this Tab.
- With this, you can make your login a little more secure. Google Authenticator is used for this. If it is enabled, all users must use multifactor authentication.
- You can make the changes and click Save to save the changes.
User Management
-
There are 3 settings that can be done using user management.
- Set default language
- Set Remember me days
- Disable inactive users
- Delete inactive users
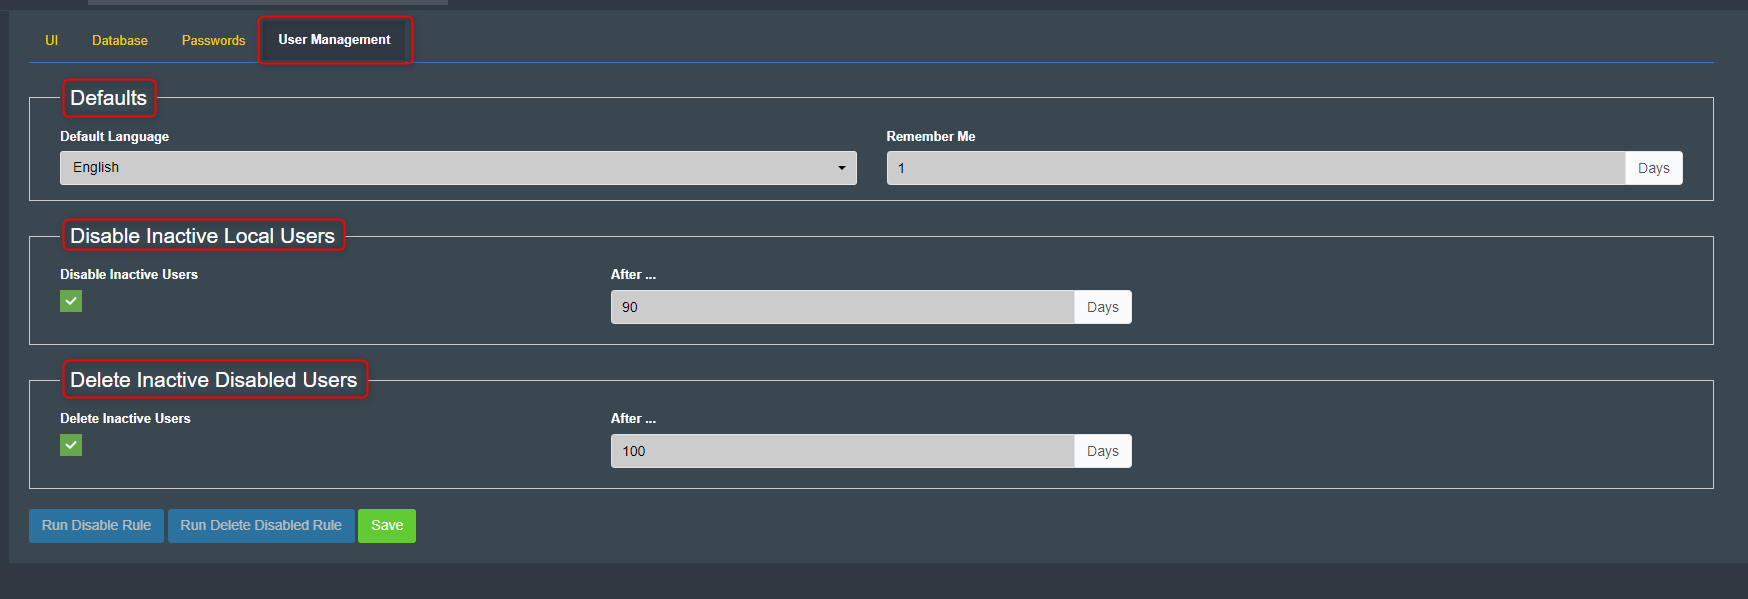
Set default language
- Select the language from the dropdown menu and click Save.
- This will be the language that opens when you log in to the hybrid workspace.

Set Remember me time
- Once logged in, it determines how long it takes to auto-log out. For that enter number in the ‘Remember me’ text box and click Save button.

Disable inactive users
- Check the ‘Disable Inactive Users’ checkbox. Enter the time range in the text box that appears. Inactivity beyond this limit will result in disabling the user.
- You can make the changes and click Save to save the changes.

Delete inactive users
- Check the ‘Delete Inactive Users’ checkbox. Enter the time range in the text box that appears. Inactivity beyond this limit will result in Delete the user.
- You can make the changes and click Save to save the changes.
