- Following the steps below to set up Okta and OpenID connect.
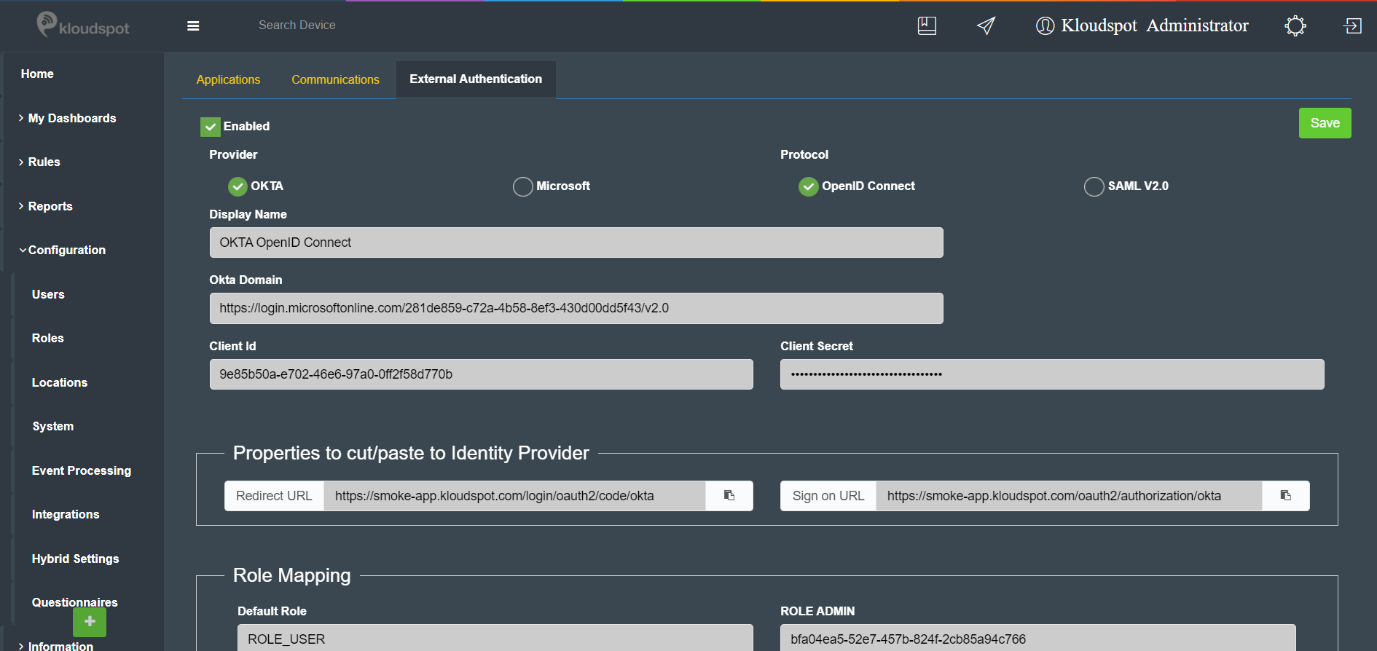
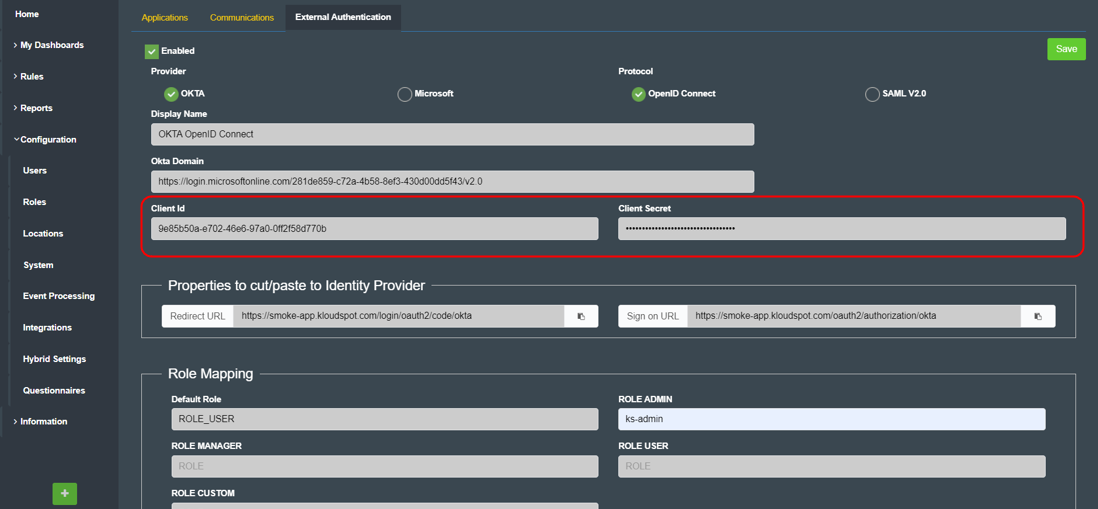
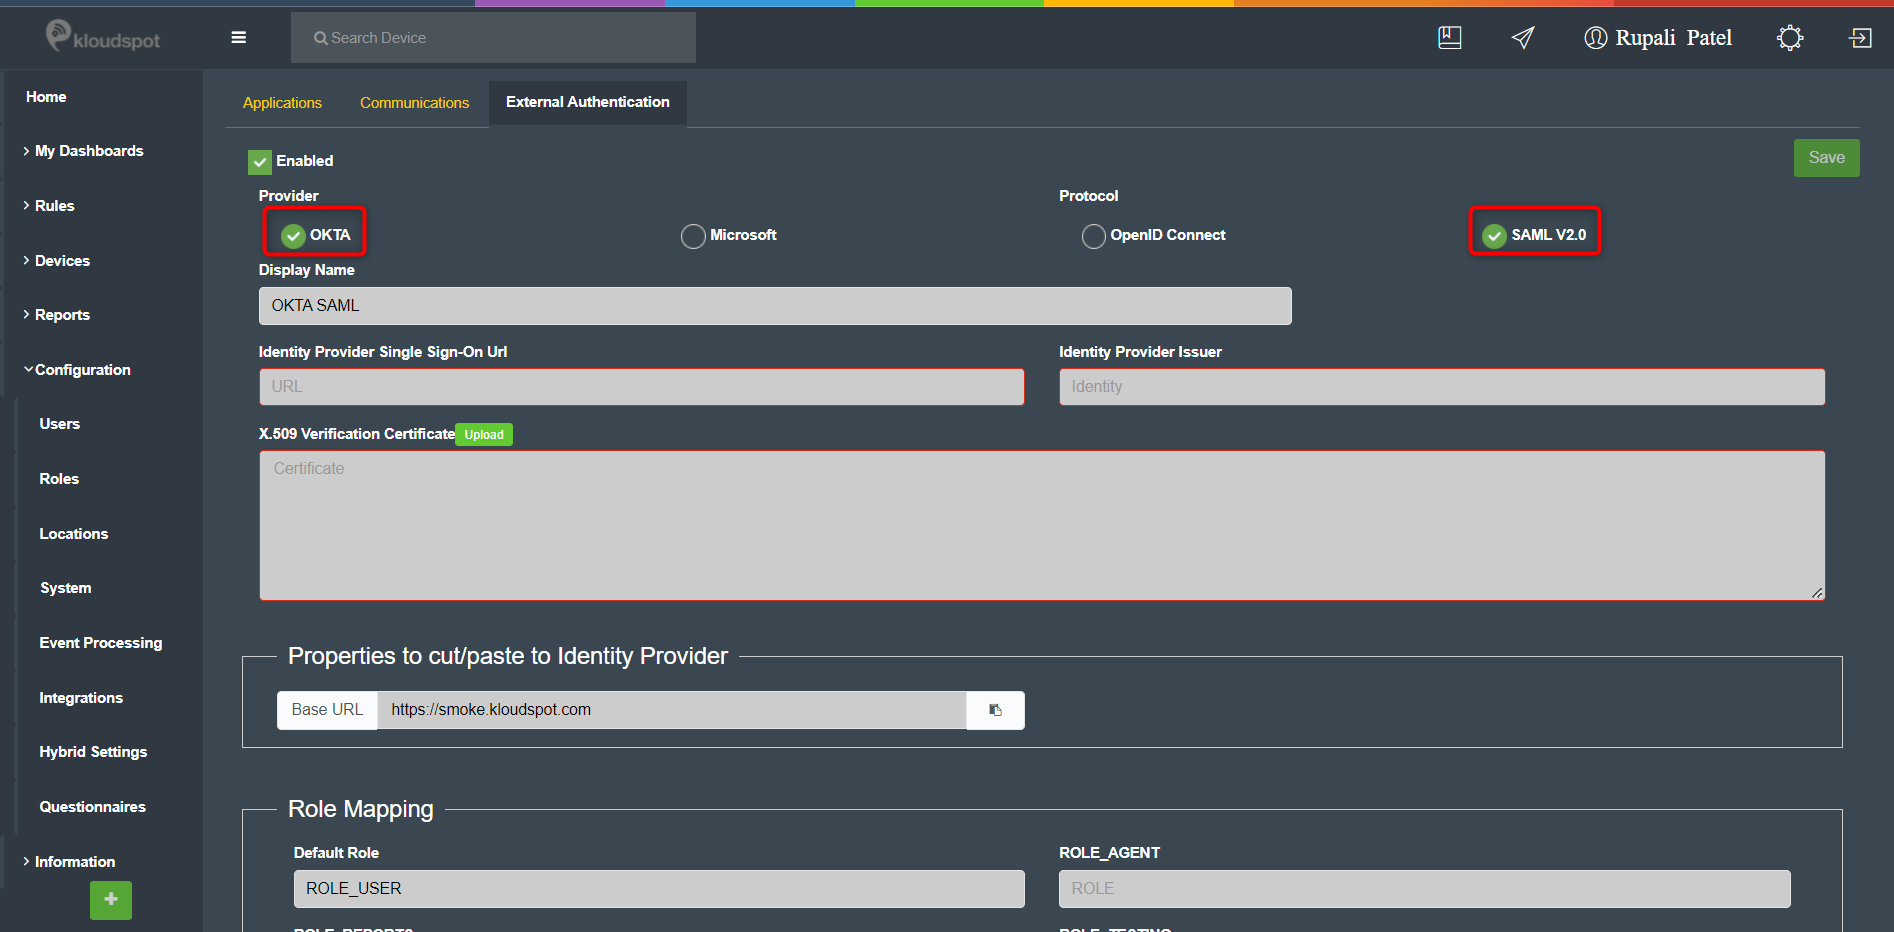
- Check OKTA for the Provider option and for the Protocol click on OpenID Connect.

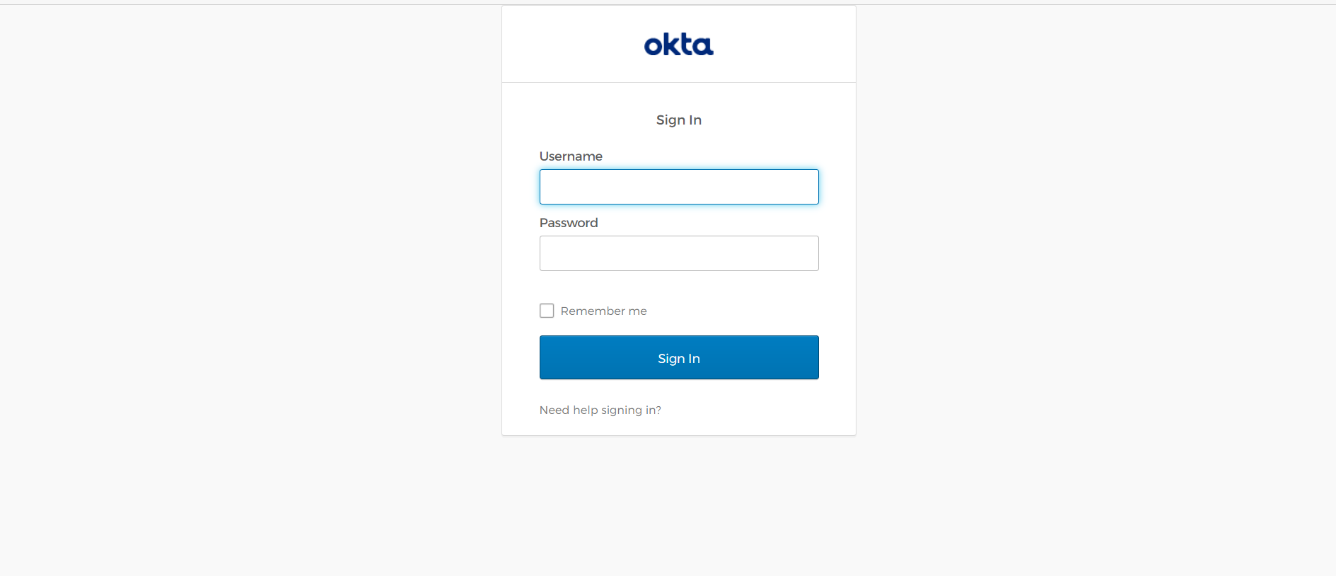
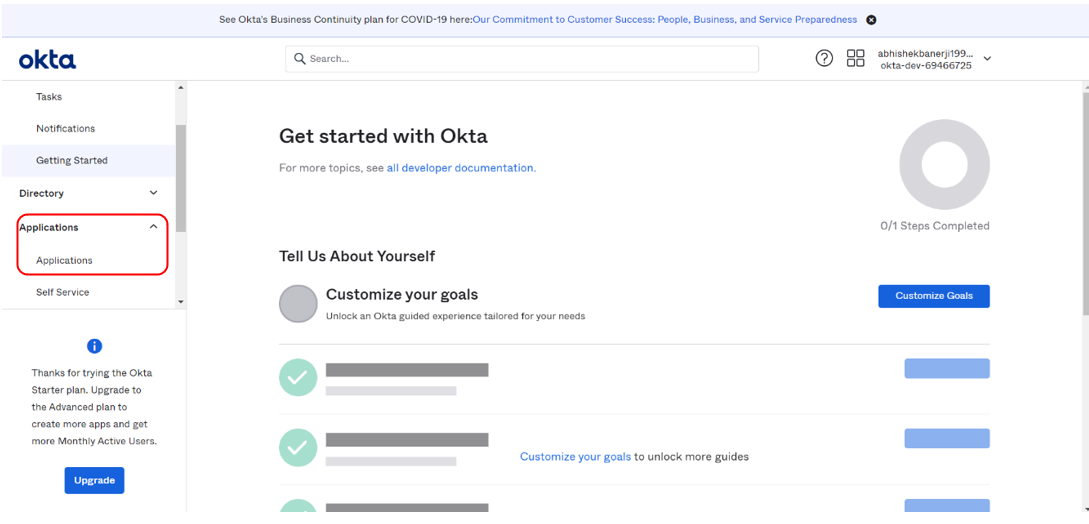
- Log in to your OKTA account.

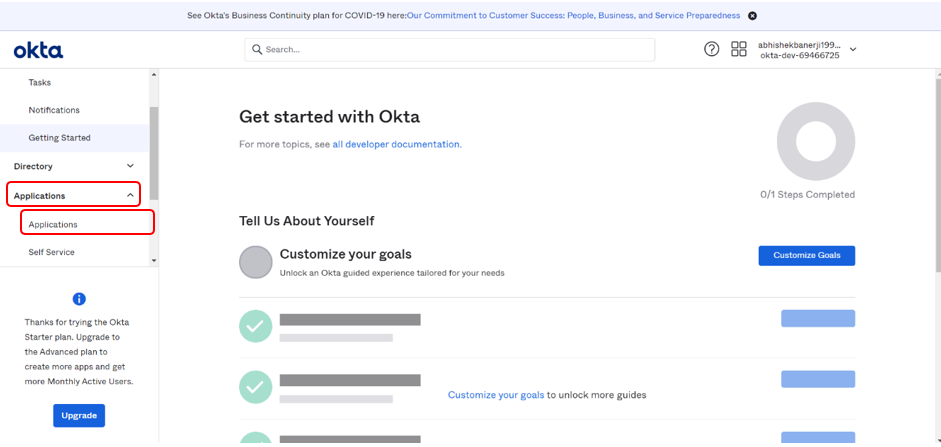
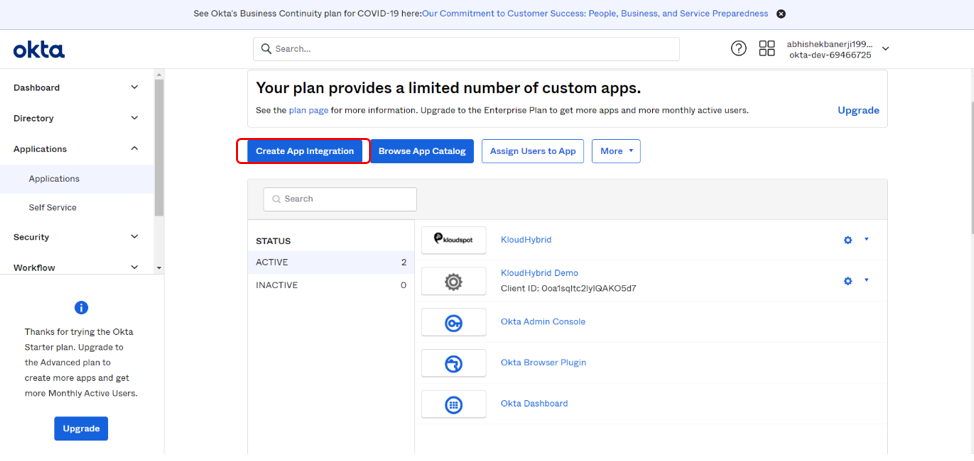
- Click on Applications and from the drop-down select Applications.

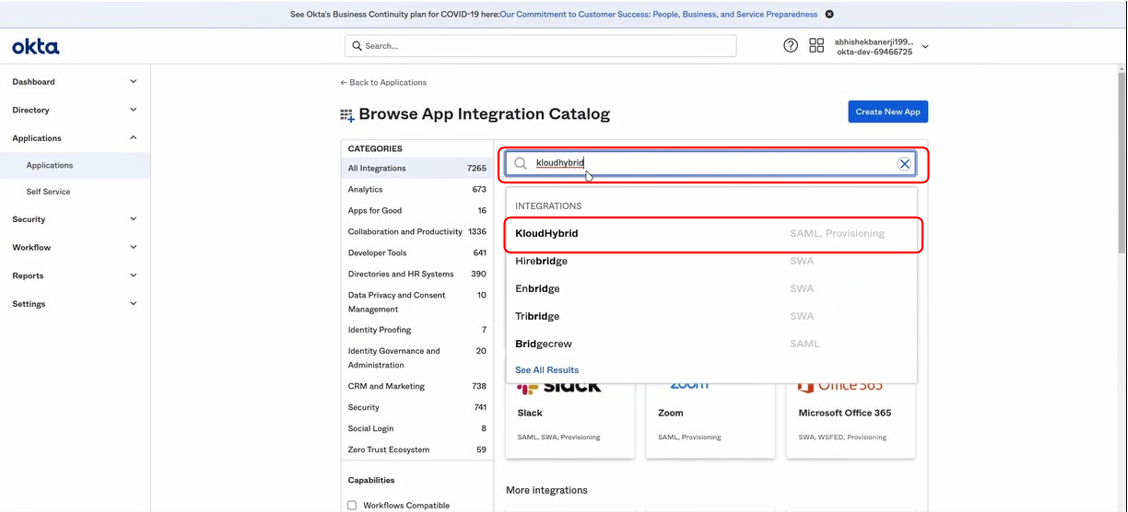
- Click on Create App Integration.

- As shown in the figure below, Check OIDC- OpenID Connect as the Sign-in Method and Web Application as the Application type and click on Next.

-
On the next page perform the following steps:
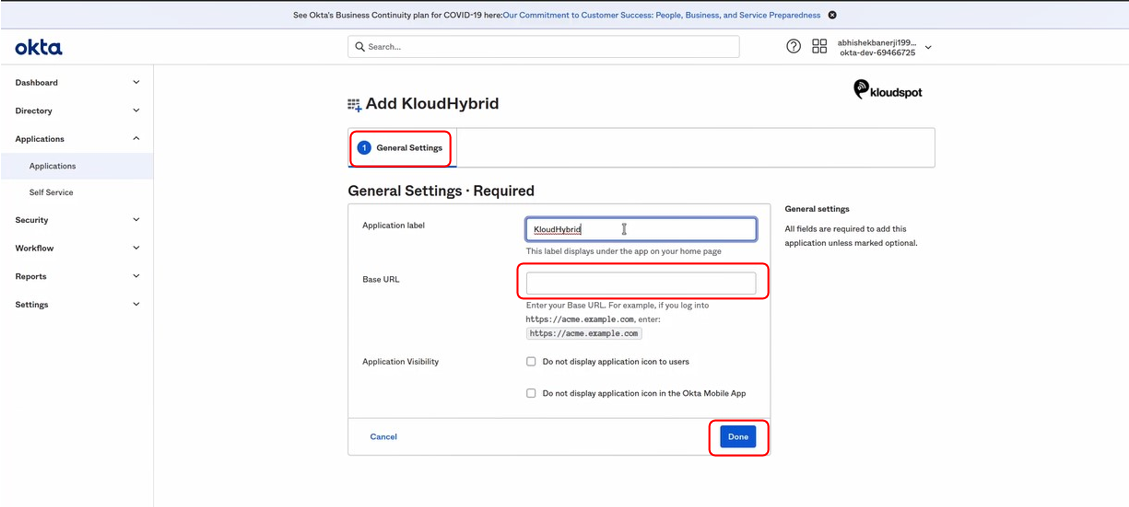
- Enter an App Name in the App Integration Name section.

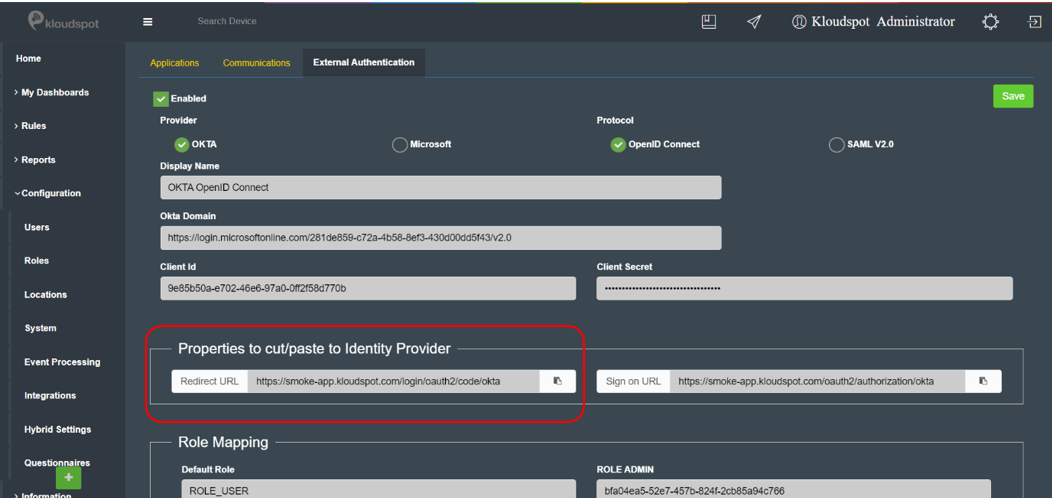
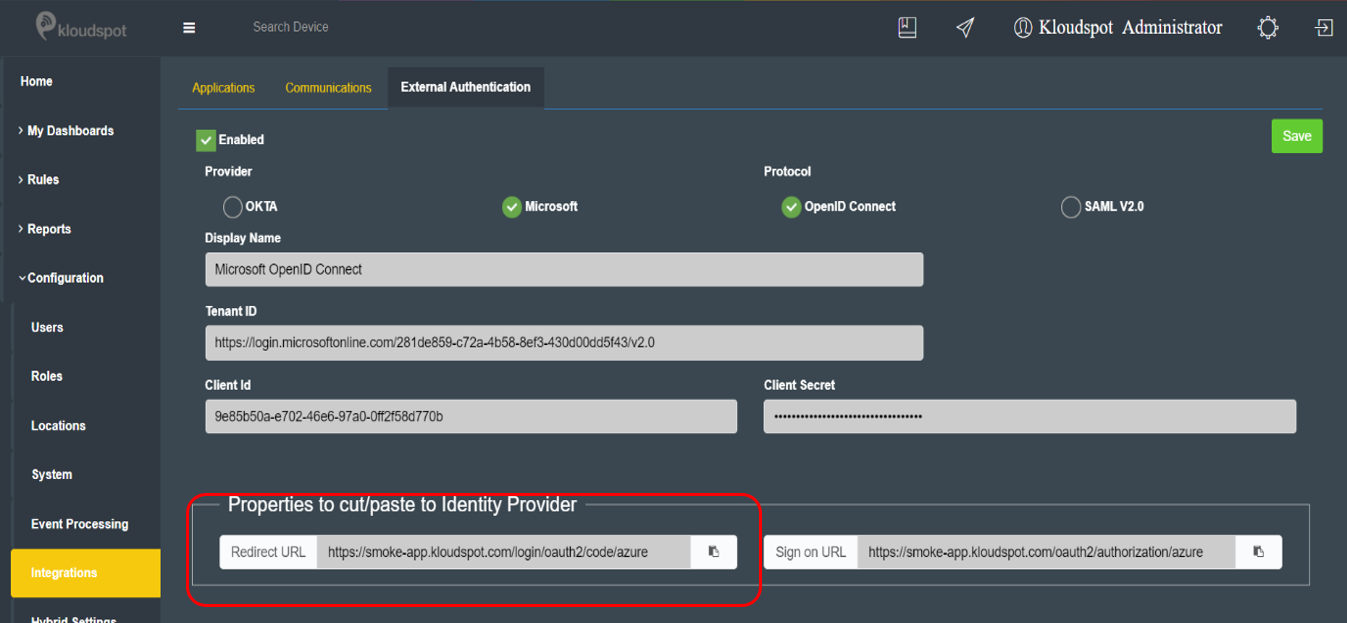
- Copy the Sign-in redirect URLs from OKTA, and paste that URL into the Redirect URL field in KloudHybrid.

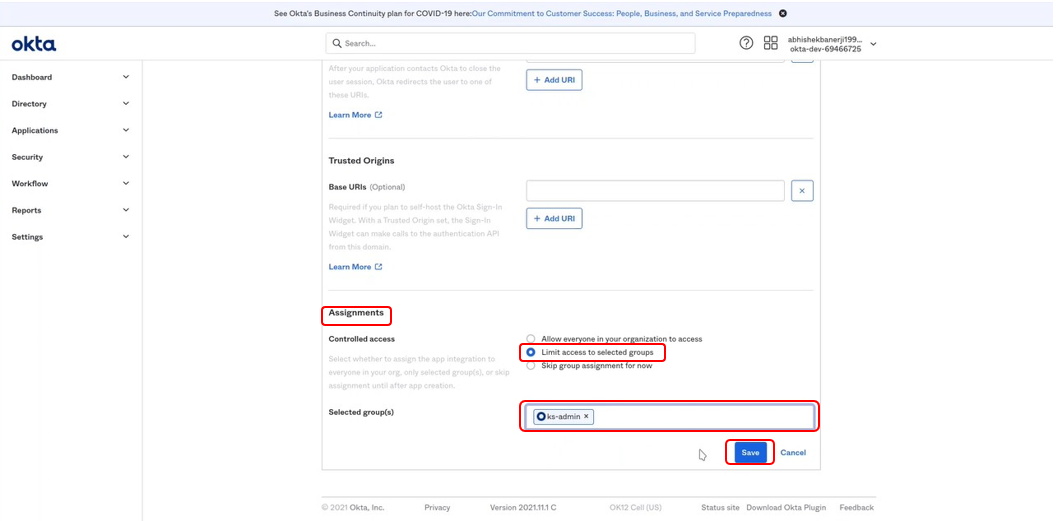
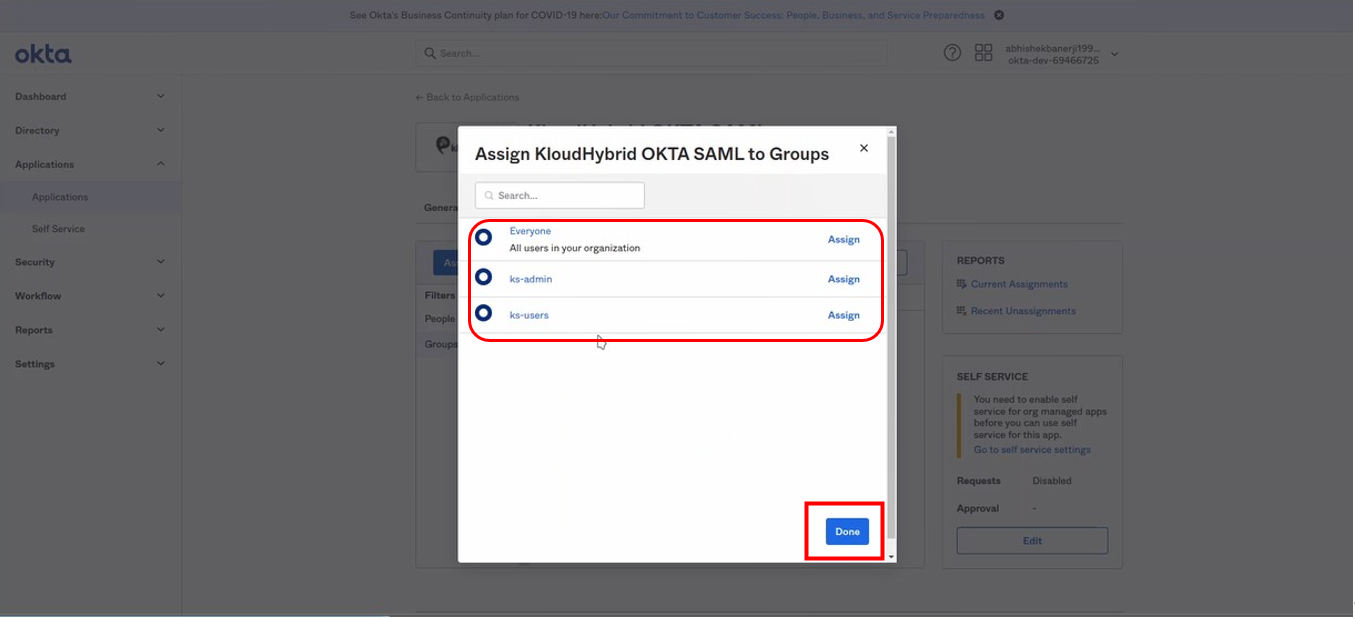
- Assignments: Scroll down the page to Assignments and click on Limited access to selected groups from the Controlled Access options.

-  Selected group(s): Enter the name of the group to grant Admin access to the application created.

-  Click on Save to save the configurations.

-
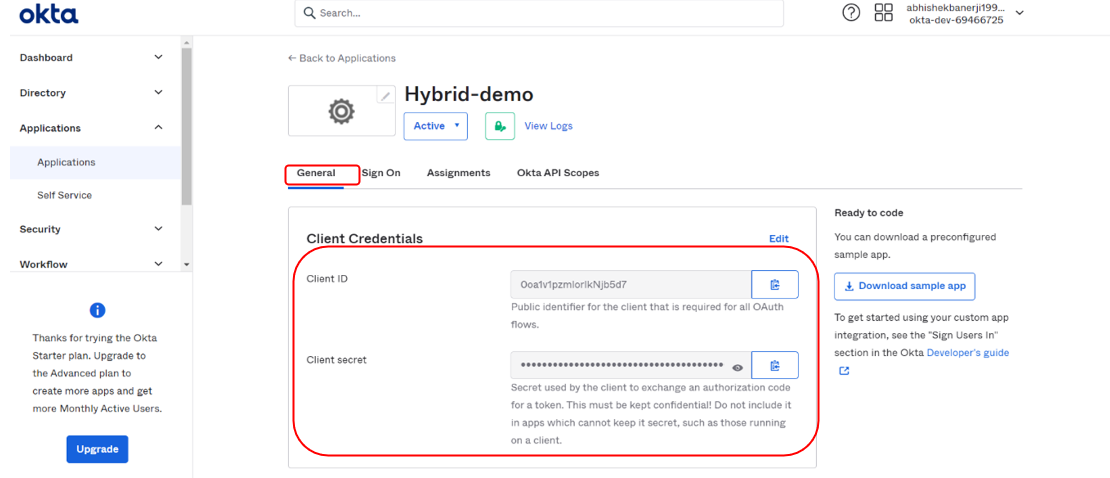
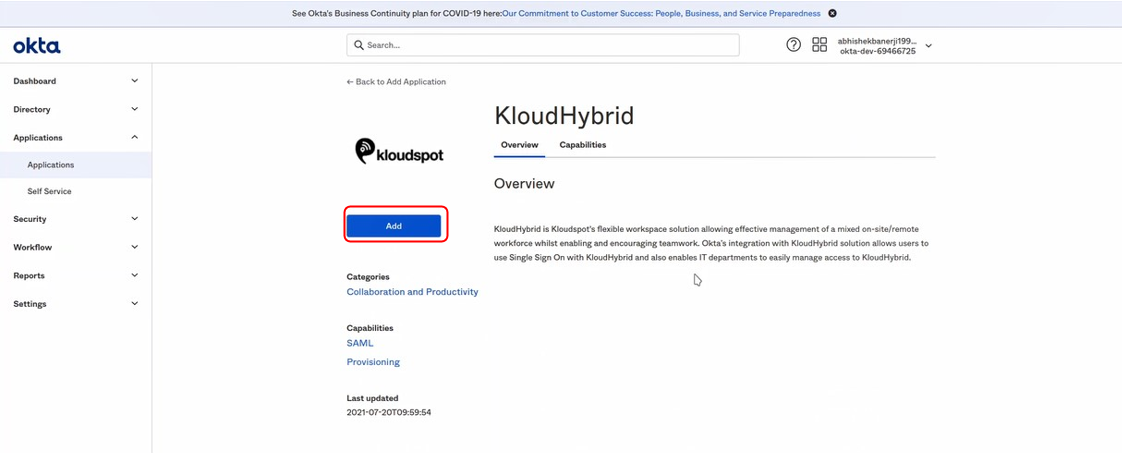
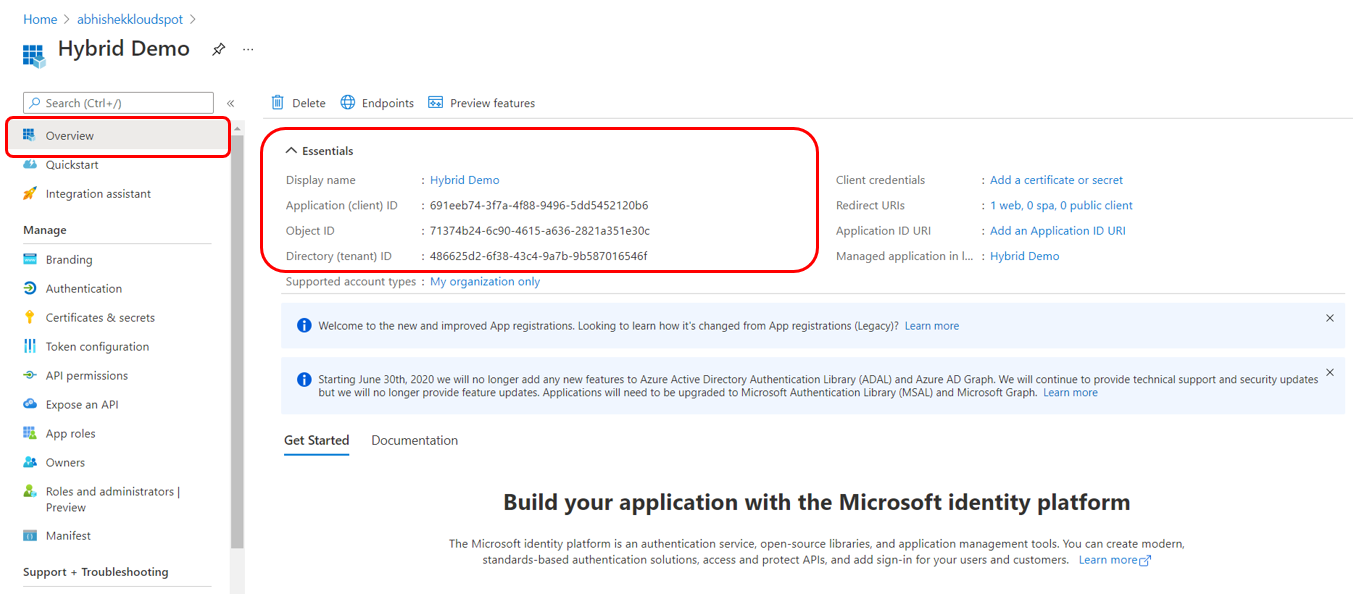
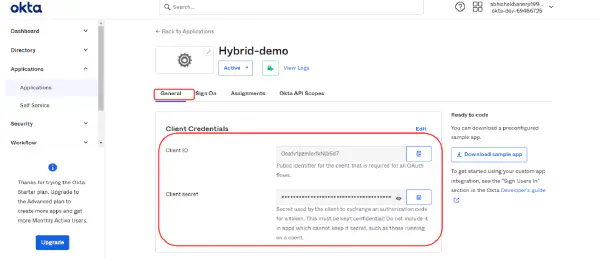
Once the Application is created successfully, the following window appears. It has detailed information for the Application.
**a. General:**
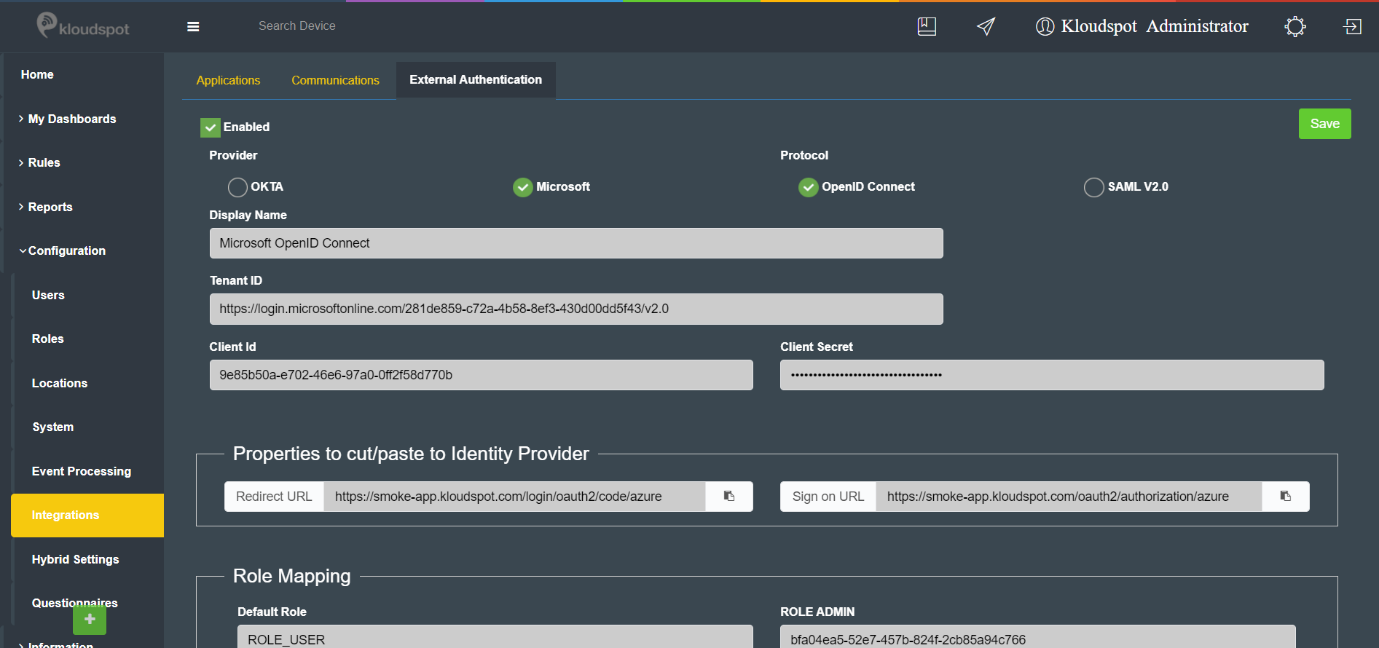
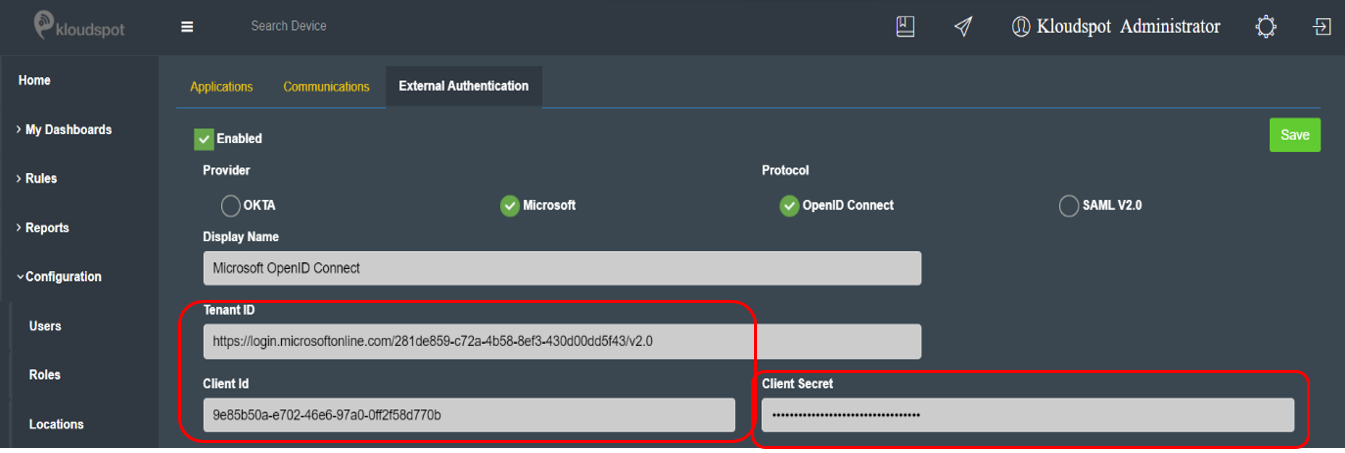
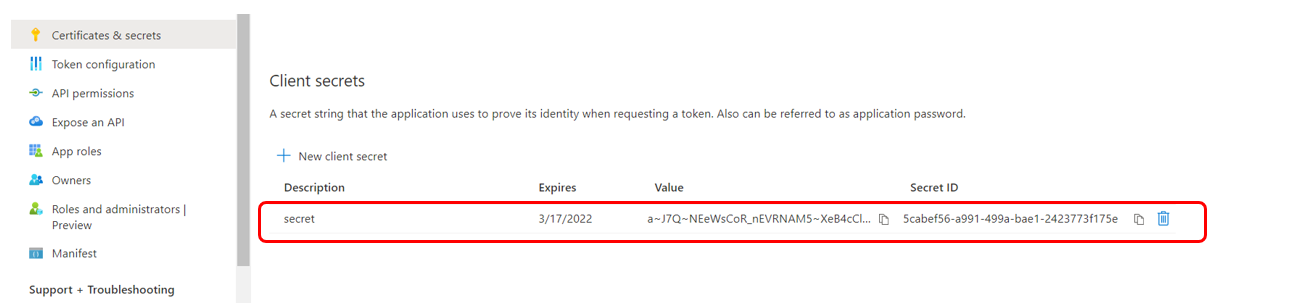
- Client Credentials: Copy the Client Id and Client Secret information and enter the same information in Insights as shown in the figure below. Also, enter the name for ROLE ADMIN as shown in the figure below.

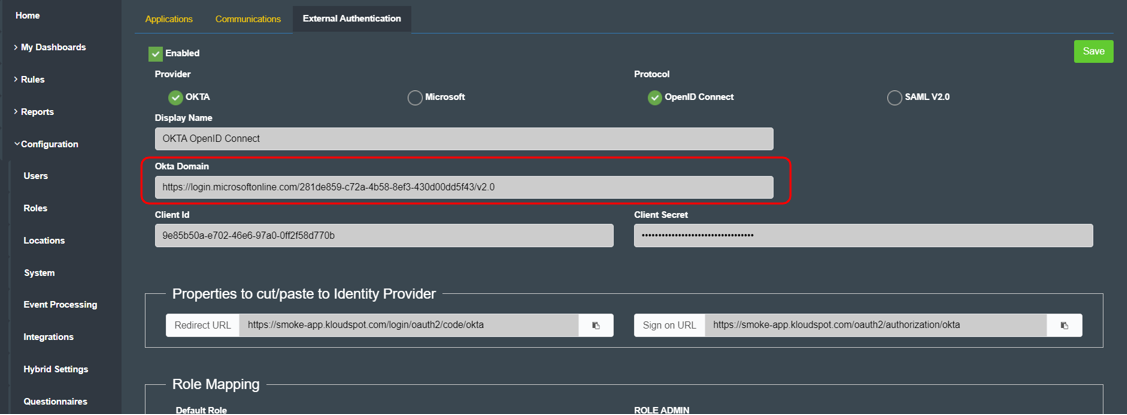
- General Settings: Enter the same Okta domain name in the Okta domain section on the “External Authentication” page in Insights as shown in the figure above.


- User Consent: The Require Consent option is checked by default, deselect if you don’t wish to require user consent to data sharing with the KloudHybrid application.
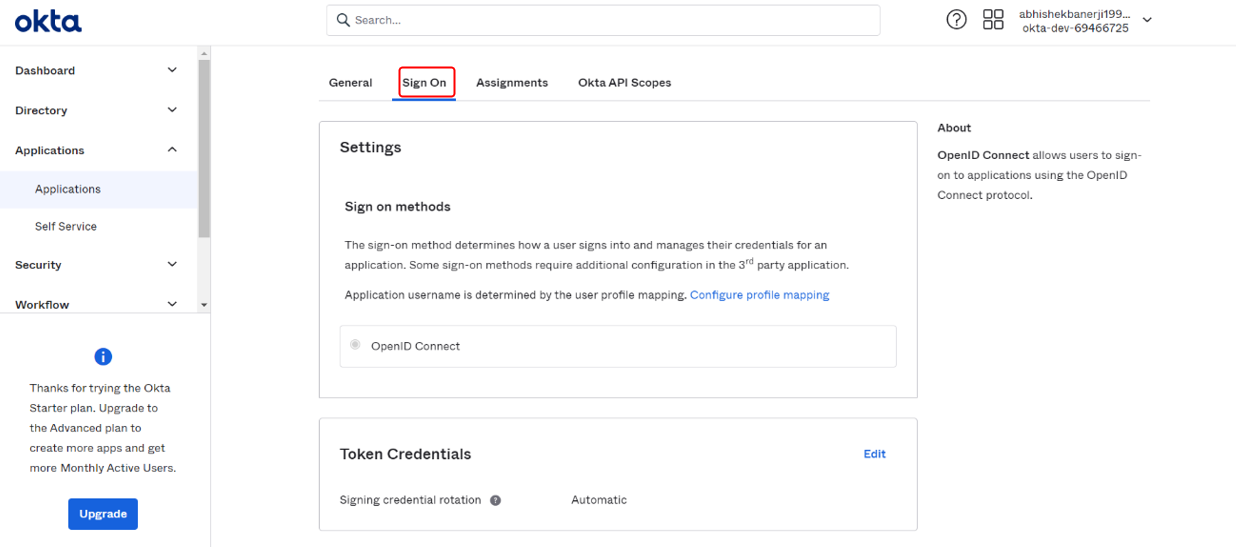
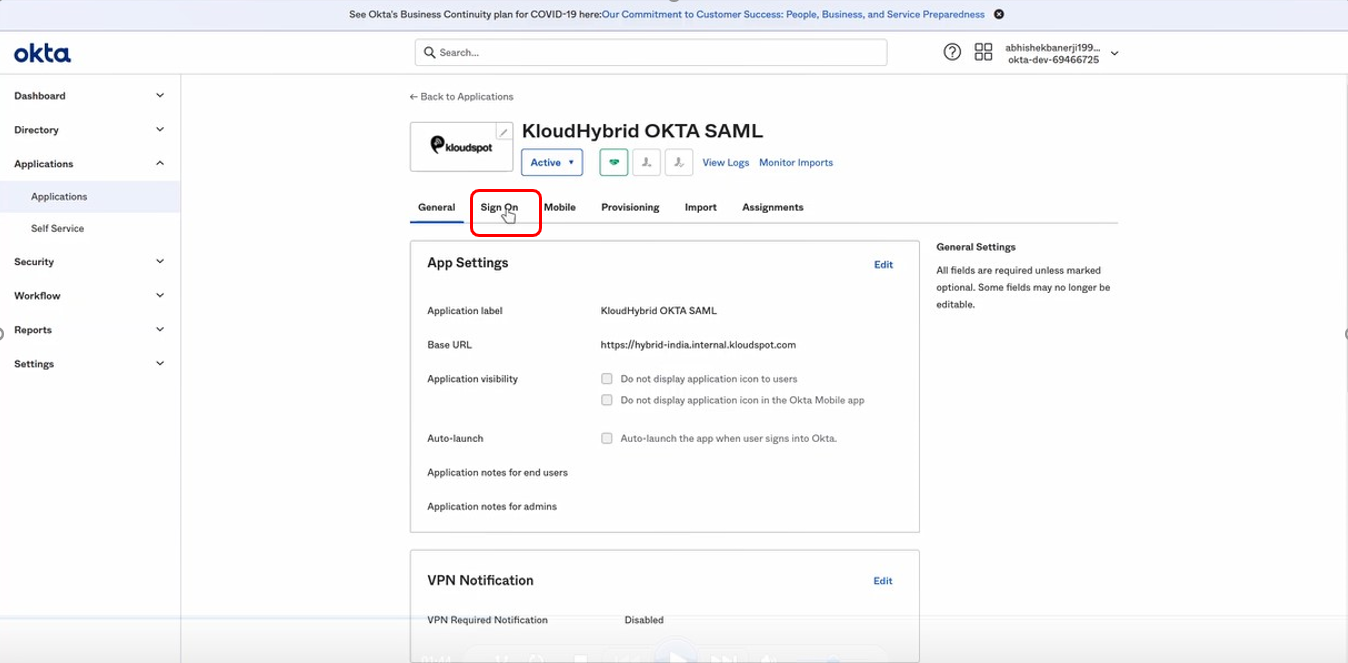
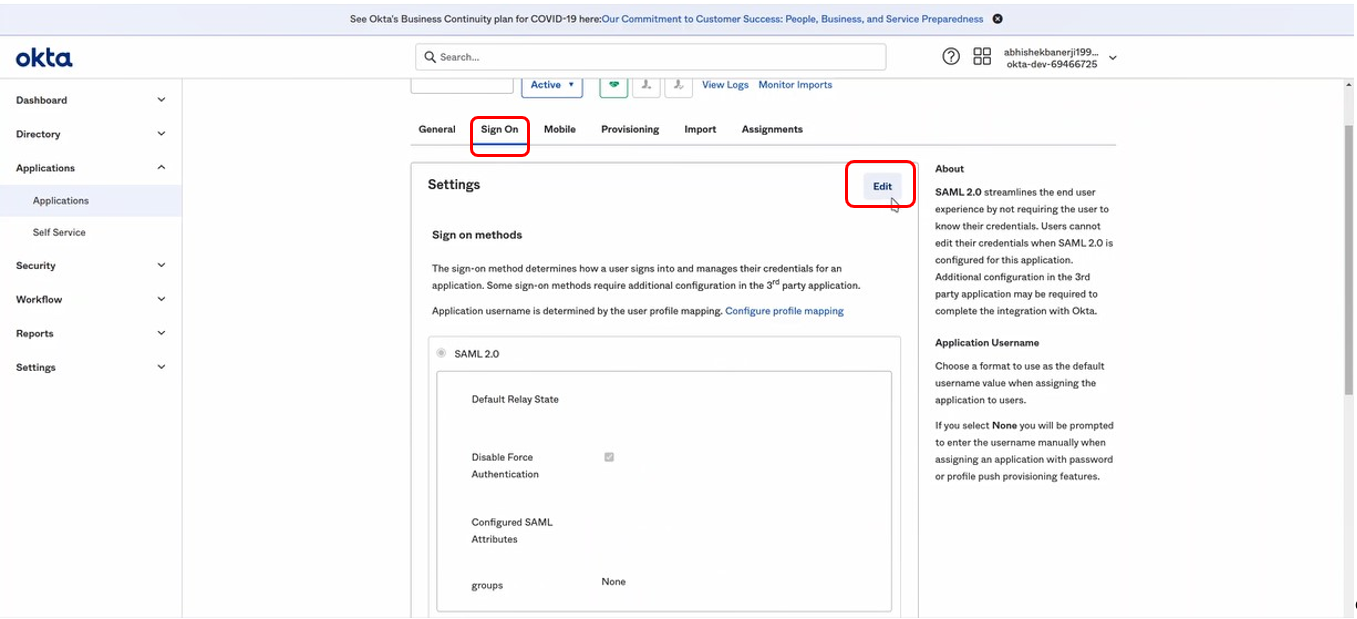
b. Sign-on: Click on Sign-on

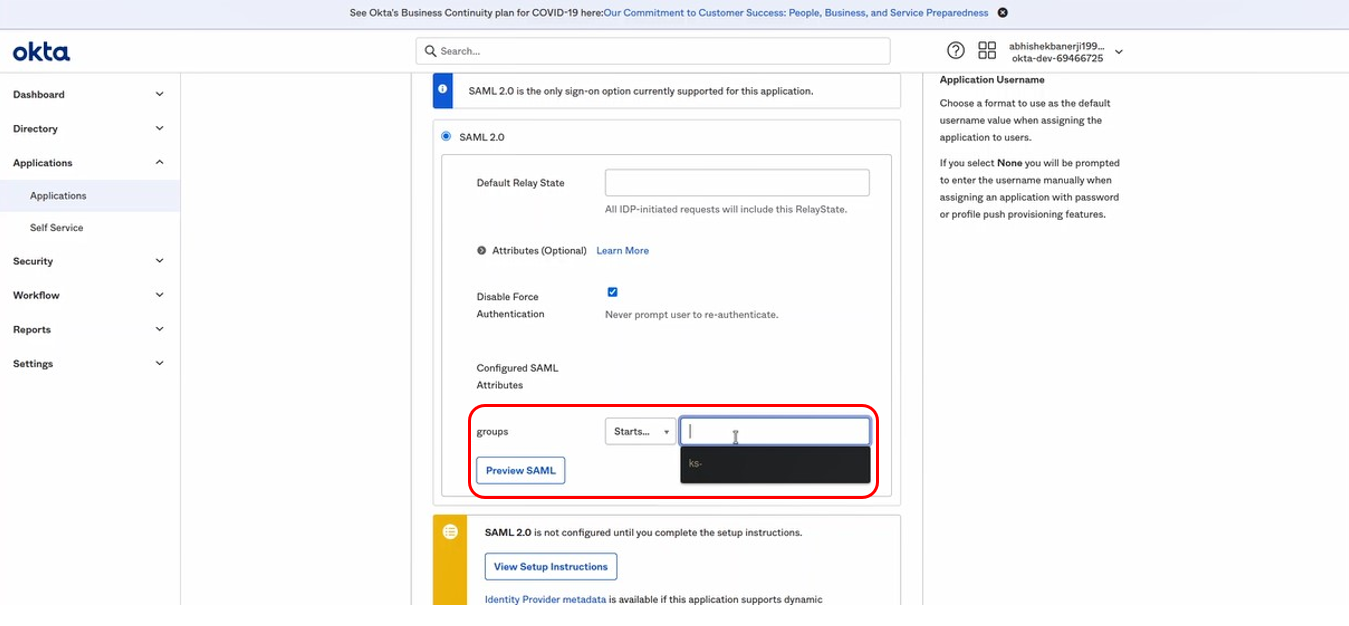
- OpenID Connect ID Token: Scroll down and click on Edit.

- In the Groups claim filter section, select the Start with option. Then type the prefix of the group to be added (Eg.Ks-). Click on Save.

-
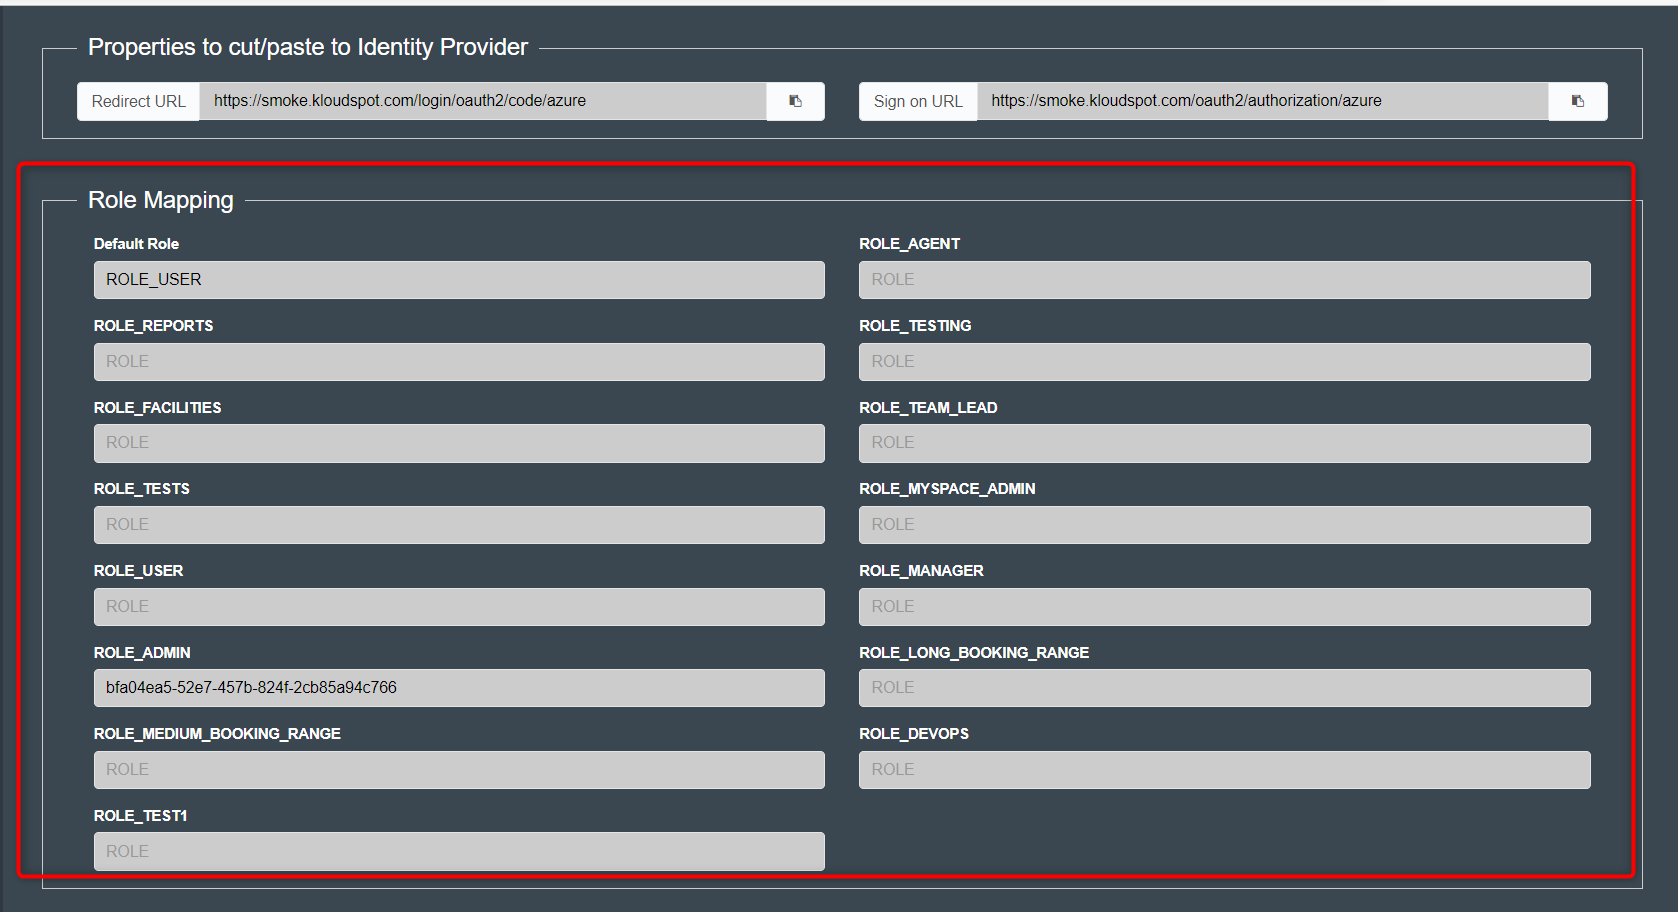
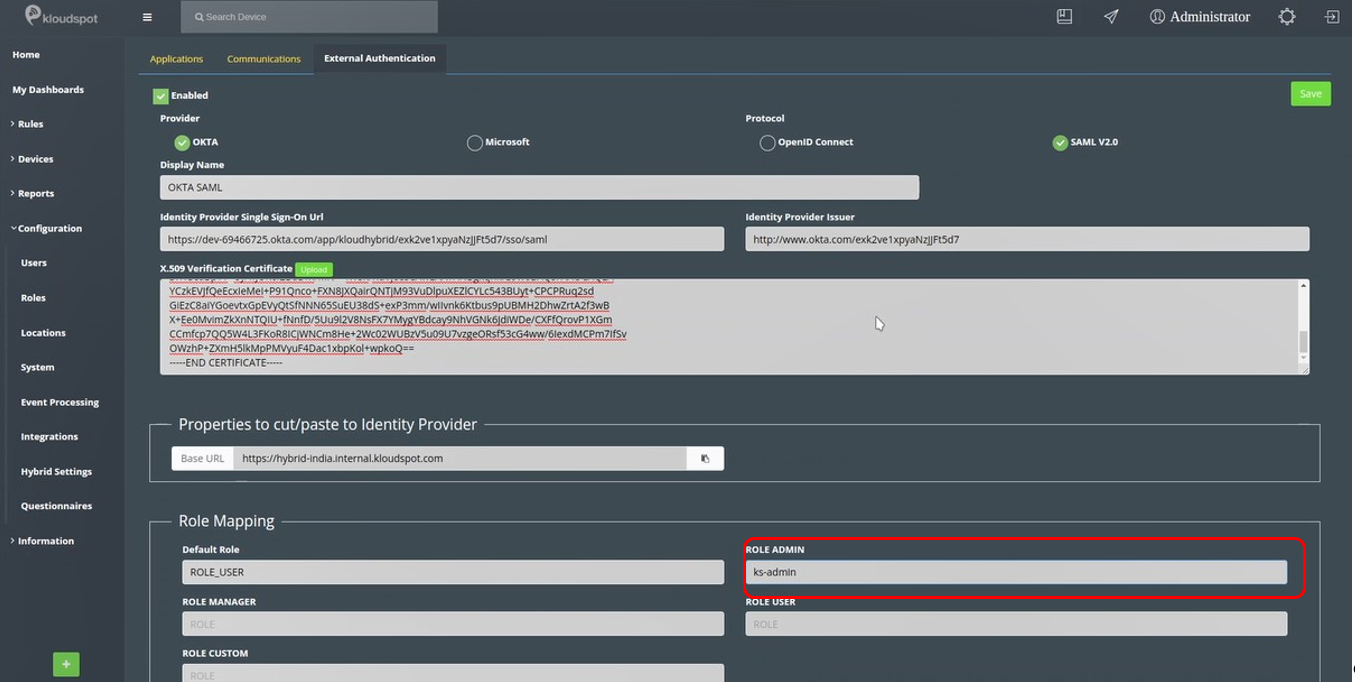
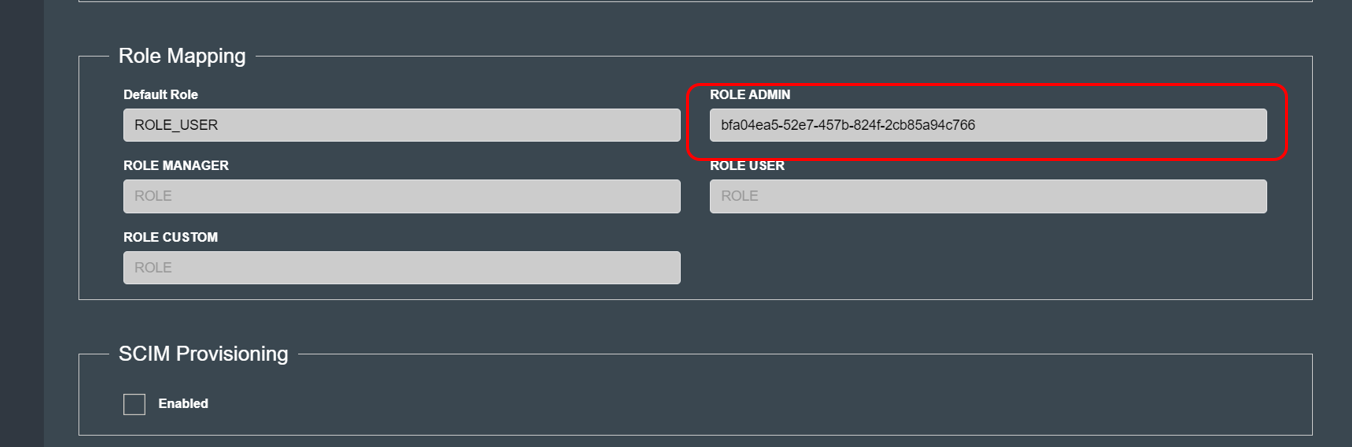
Finally. Open KloudManage. In the role mapping section, add the same name as in the OKTA group (Eg. Ks-admin). Additionally, you can set the following settings in the “Role Mapping” section.
- Default Role: This is the role/permission set that SSO users will be assigned to by default the first time they login (unless other role mappings apply). The default system configuration for this is ROLE_USER, which will give all SSO users user permissions by default.
- ROLE_MANAGER: If you have configured a specific group in OKTA that you would like to assign manager permissions, set this field. See the User & Permission Management section for additional details
- ROLE_ADMIN: If you have configured a specific group in OKTA that you would like to assign admin permissions, set this field. See the User & Permission Management section for additional details.
- ROLE_USER: If you have configured a specific group in OKTA that you would like to assign user permissions, set this field. See the User & Permission Management section for additional details.
- ROLE_CUSTOM: If you have configured a specific group in OKTA that you would like to assign a custom role, set this field. See the User & Permission Management section for additional details.
- ROLE_XXXX: If you have configured a specific group in OKTA that you would like to assign a specific role, set this fields. See the User & Permission Management section for additional details. XXXX represents the role name to be added.

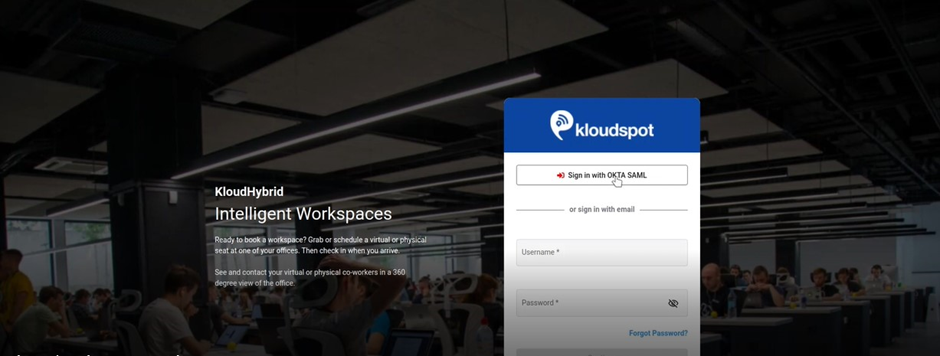
- Click on save. This allows you to login into KloudHybrid with OKTA OpenID Connect with a single click.

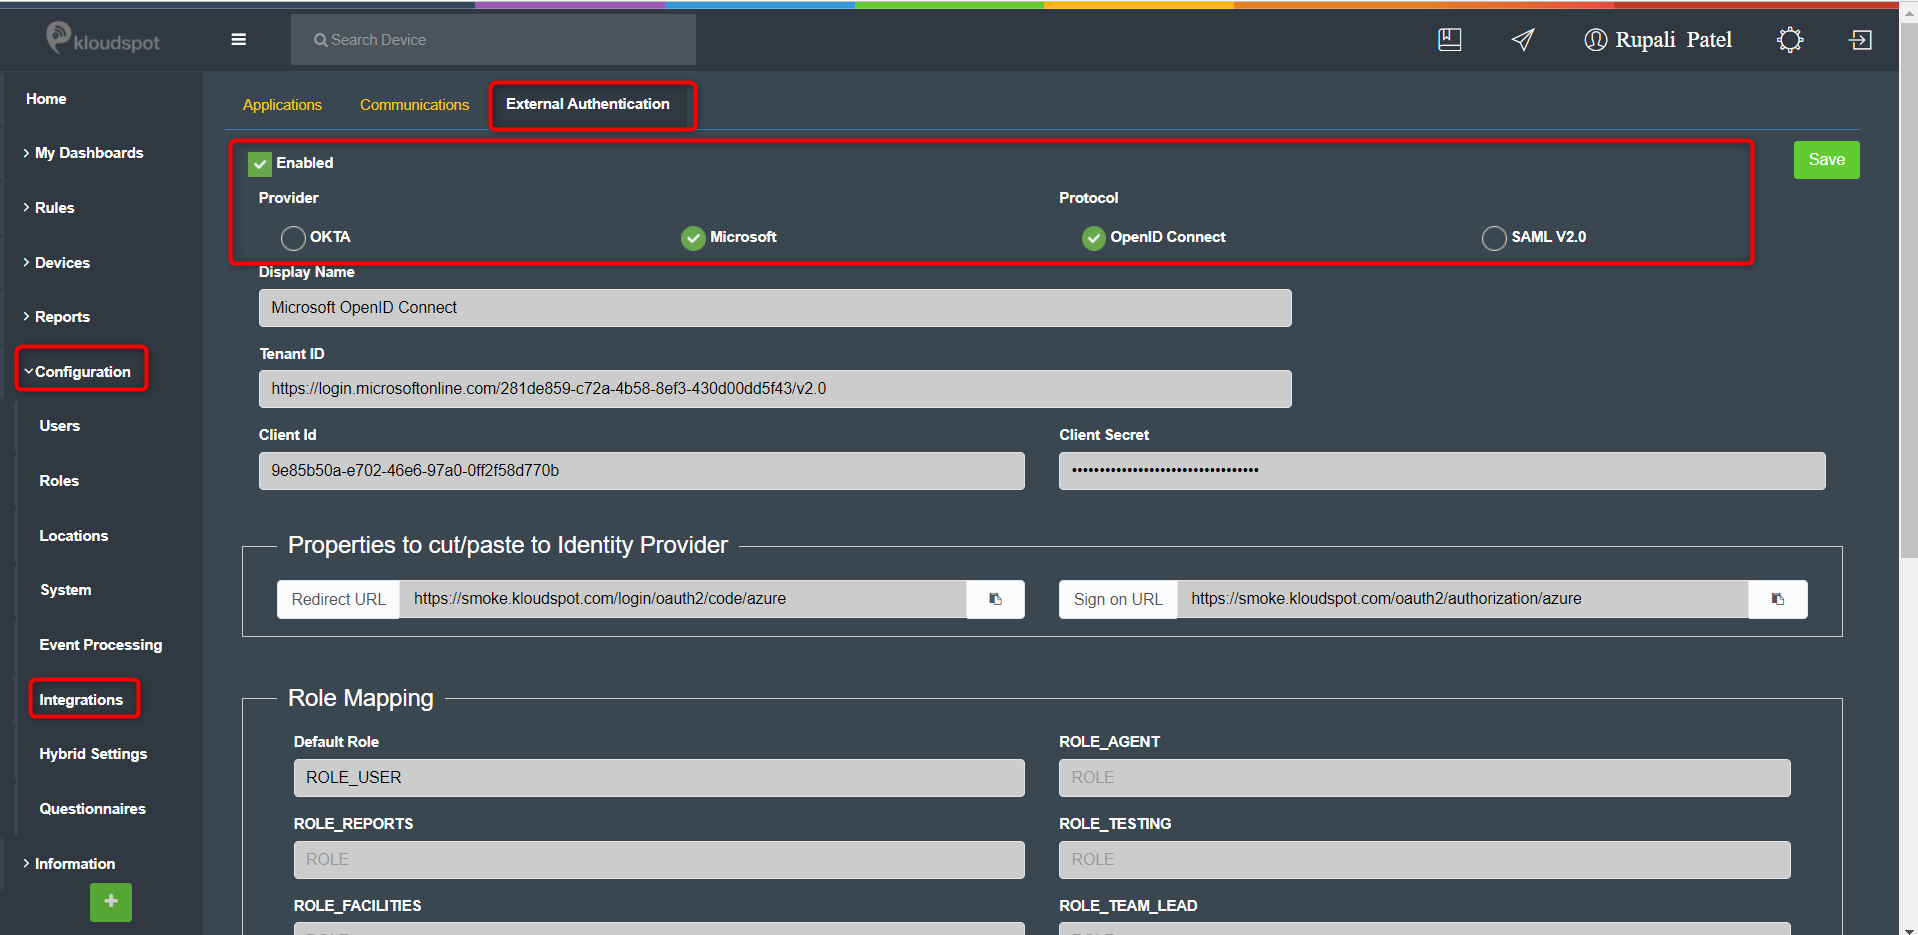
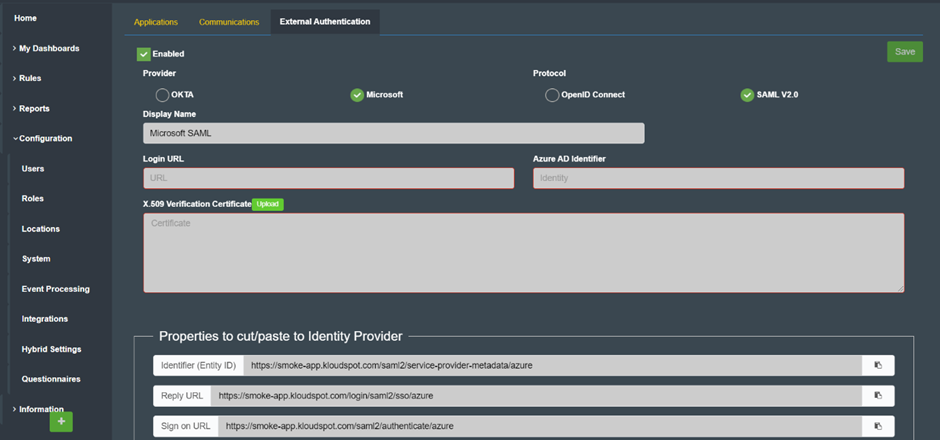
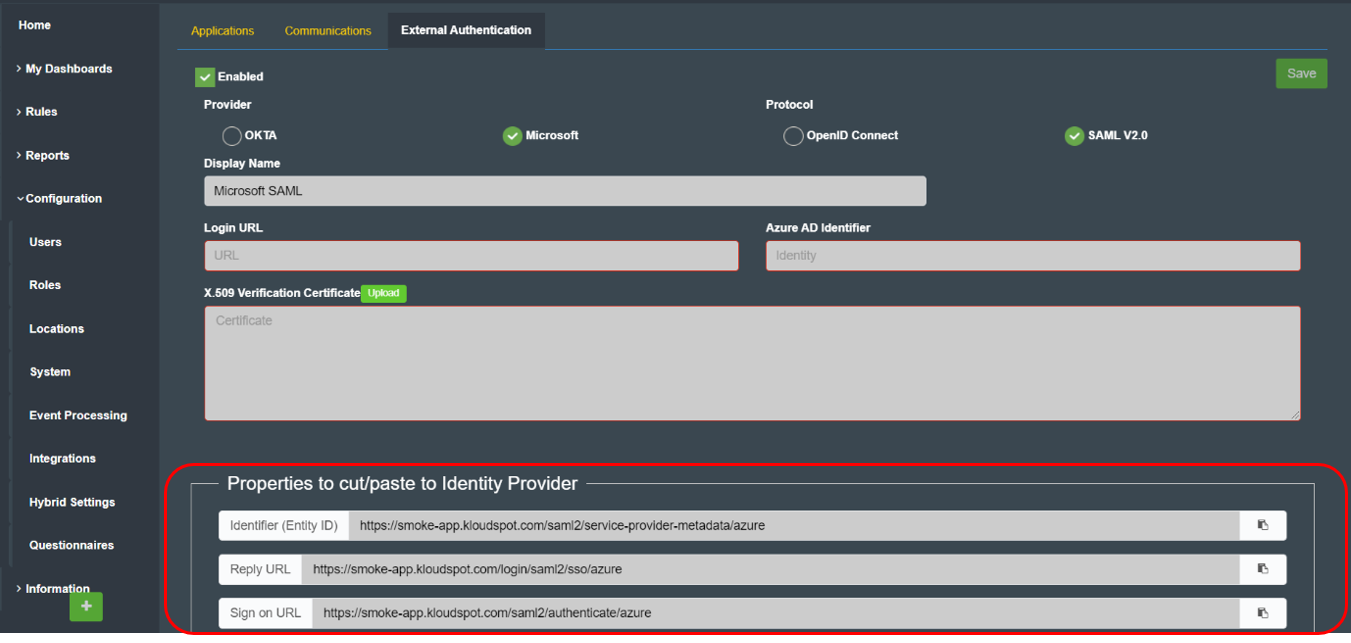
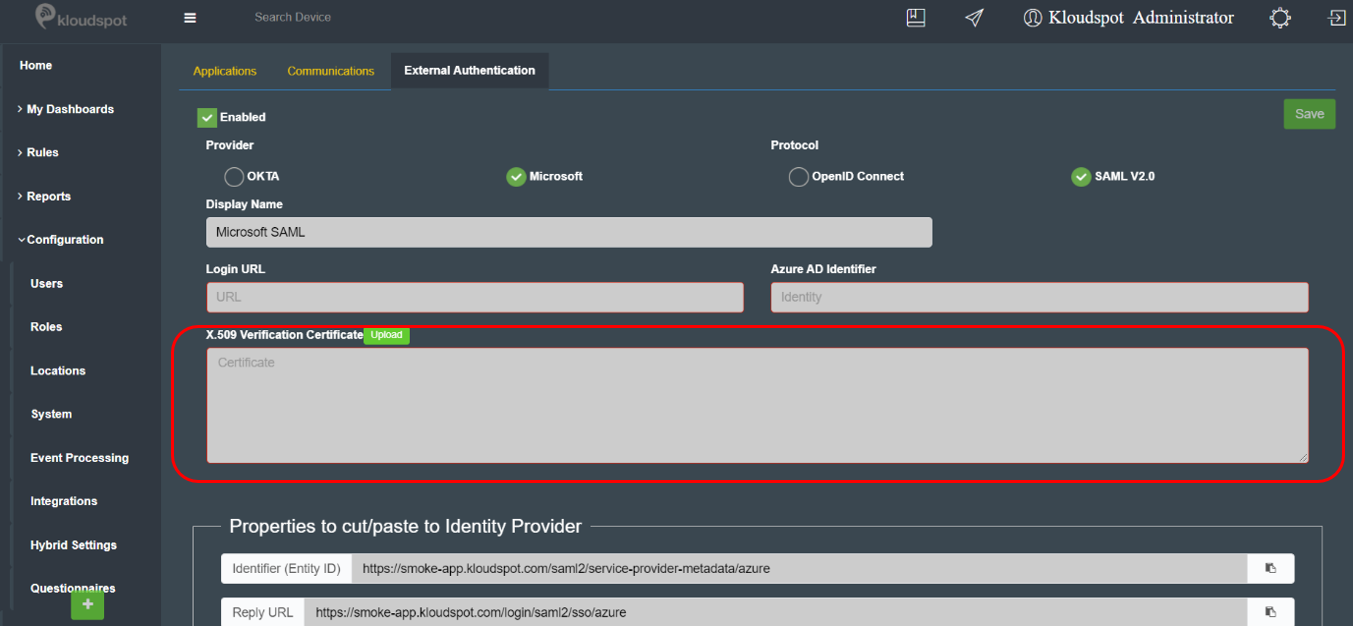
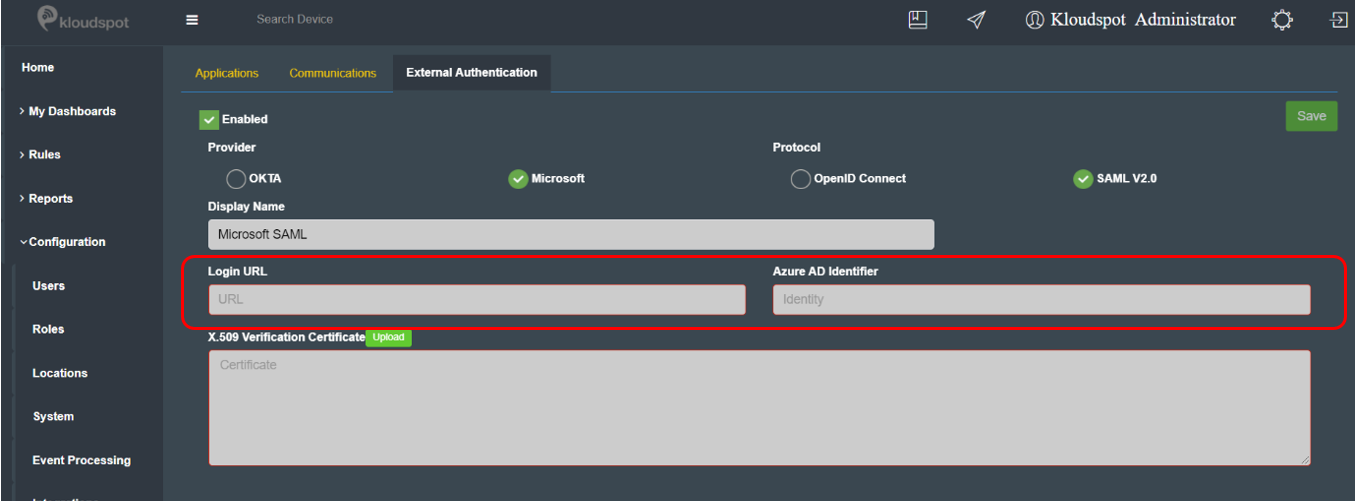
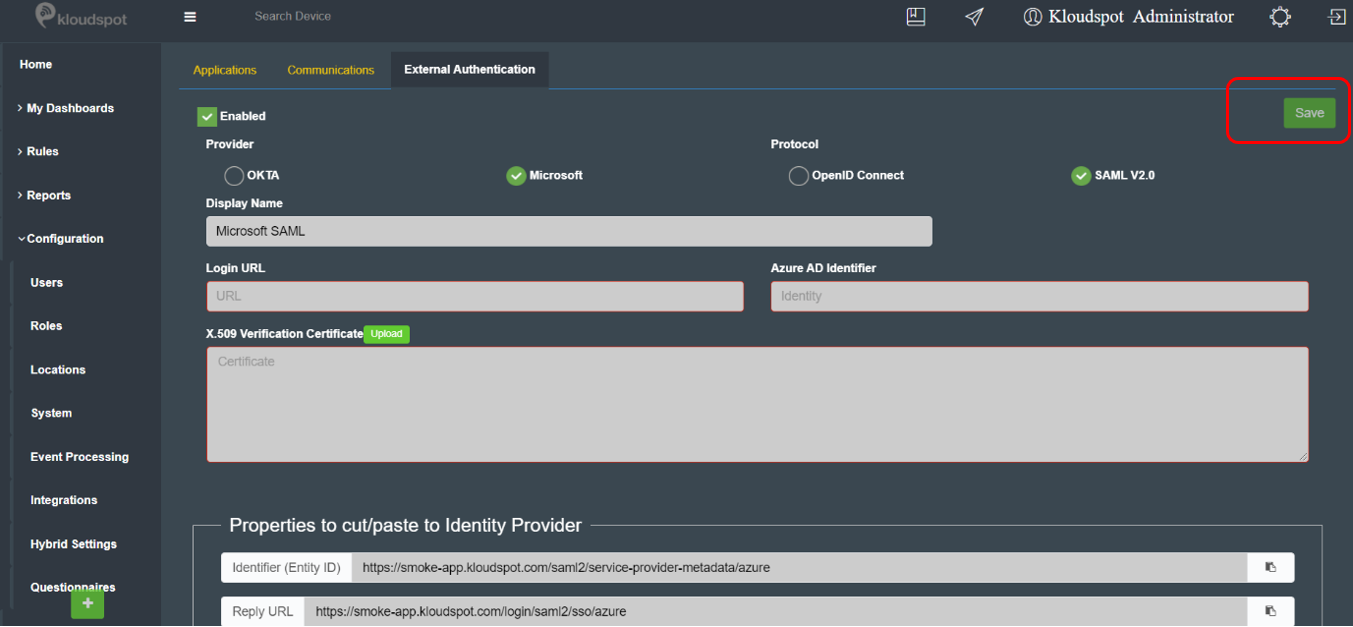
- Check Microsoft from the Provider option and for the Protocol select SAML V2.0 as shown in the figure below.

-
Log in to your Microsoft Azure portal on https://portal.azure.com/
-
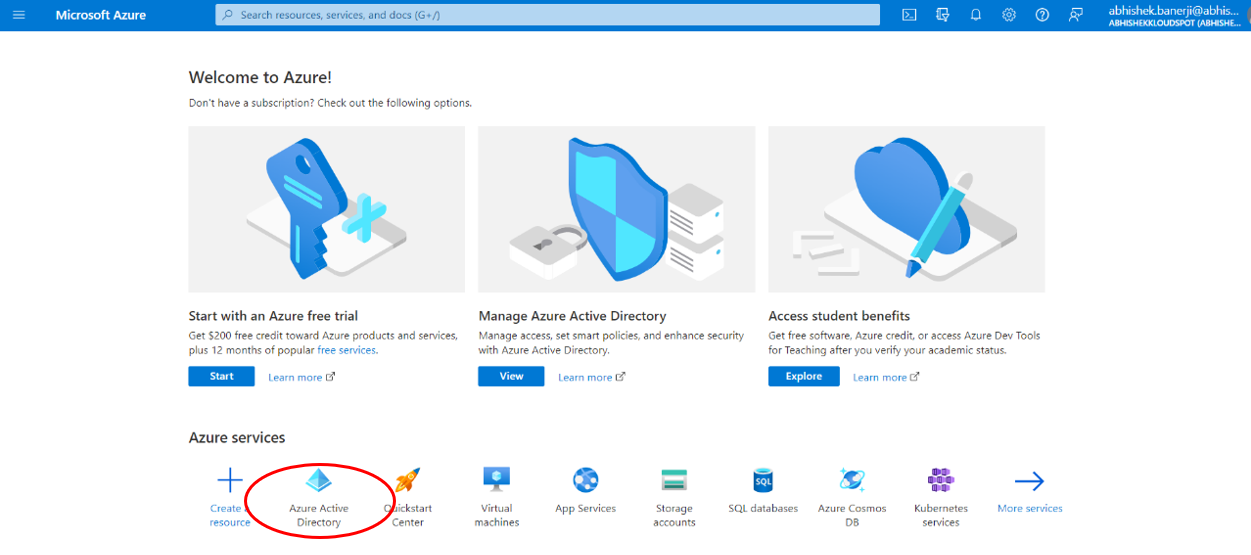
Click on Azure Activity Directory from the Azure services options as shown below.

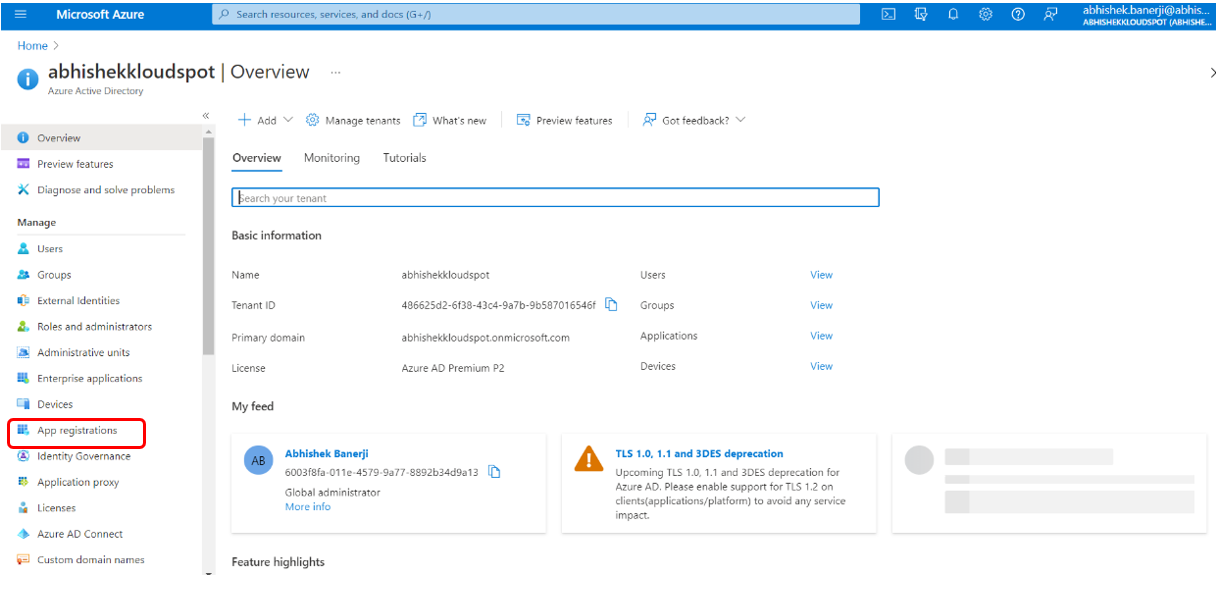
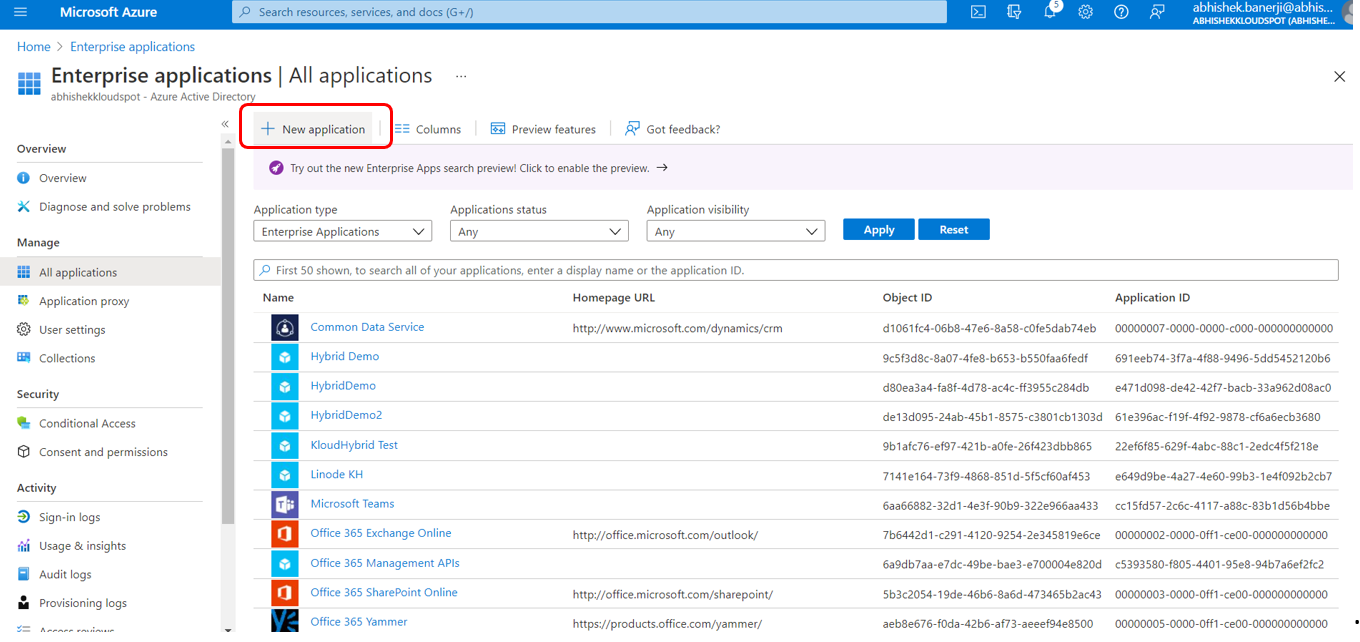
- Locate and click on the Enterprise Applications on the Window.

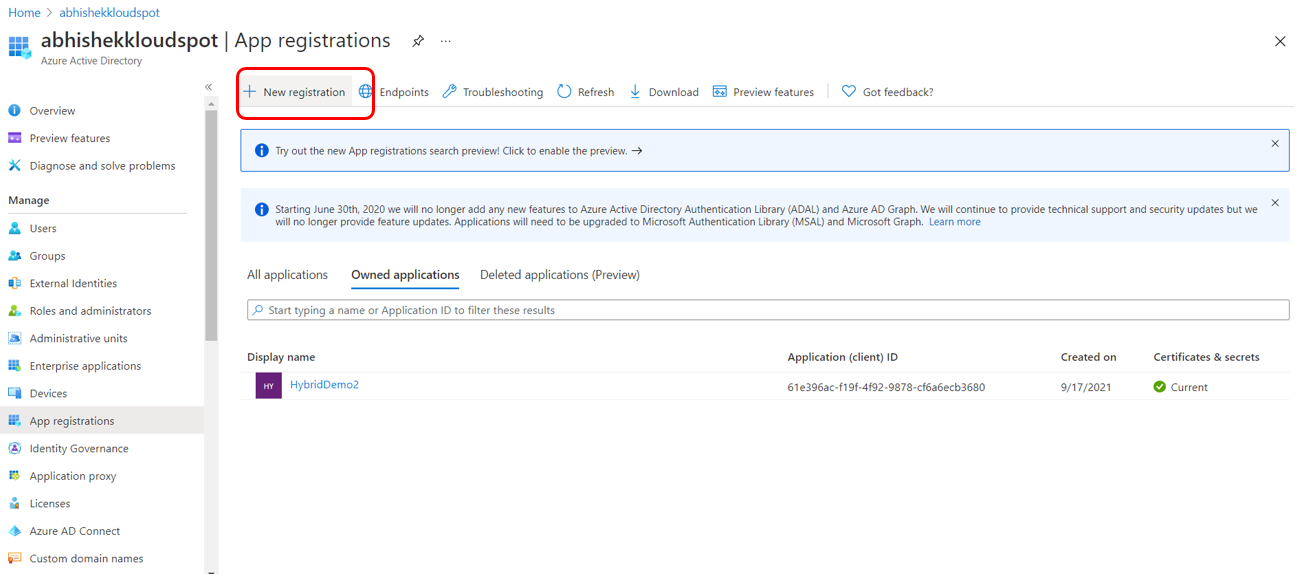
- Click on +New Application.

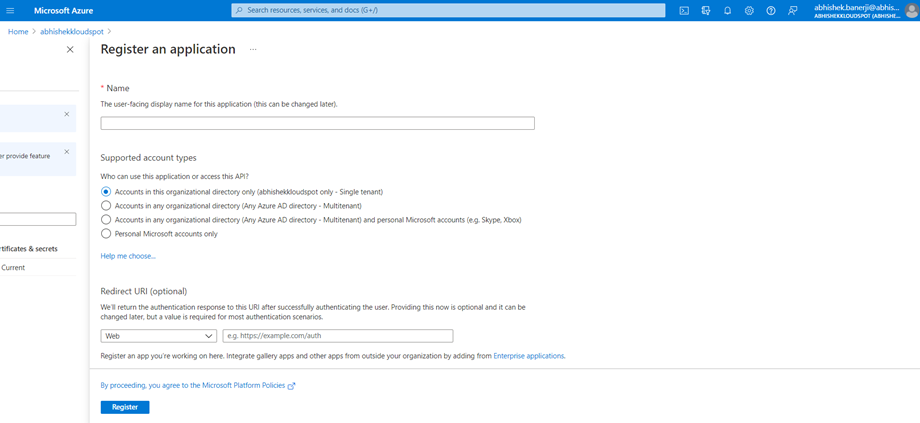
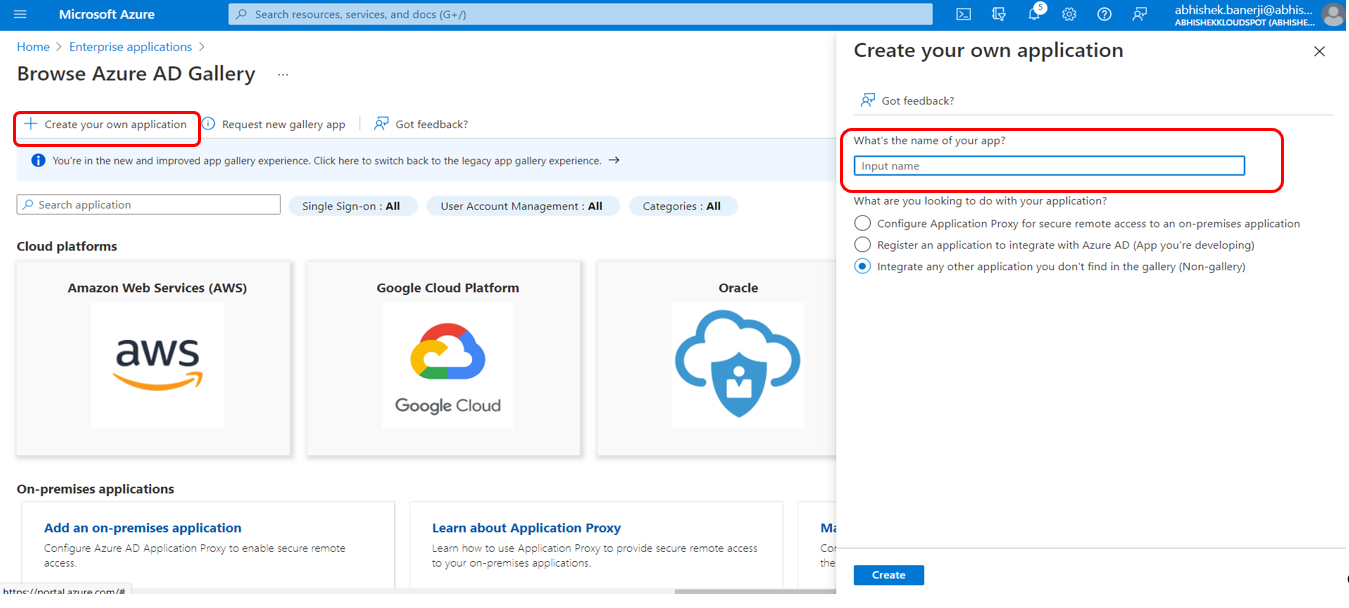
- Click on Create your own application and enter a name for the new application. Click on Create.

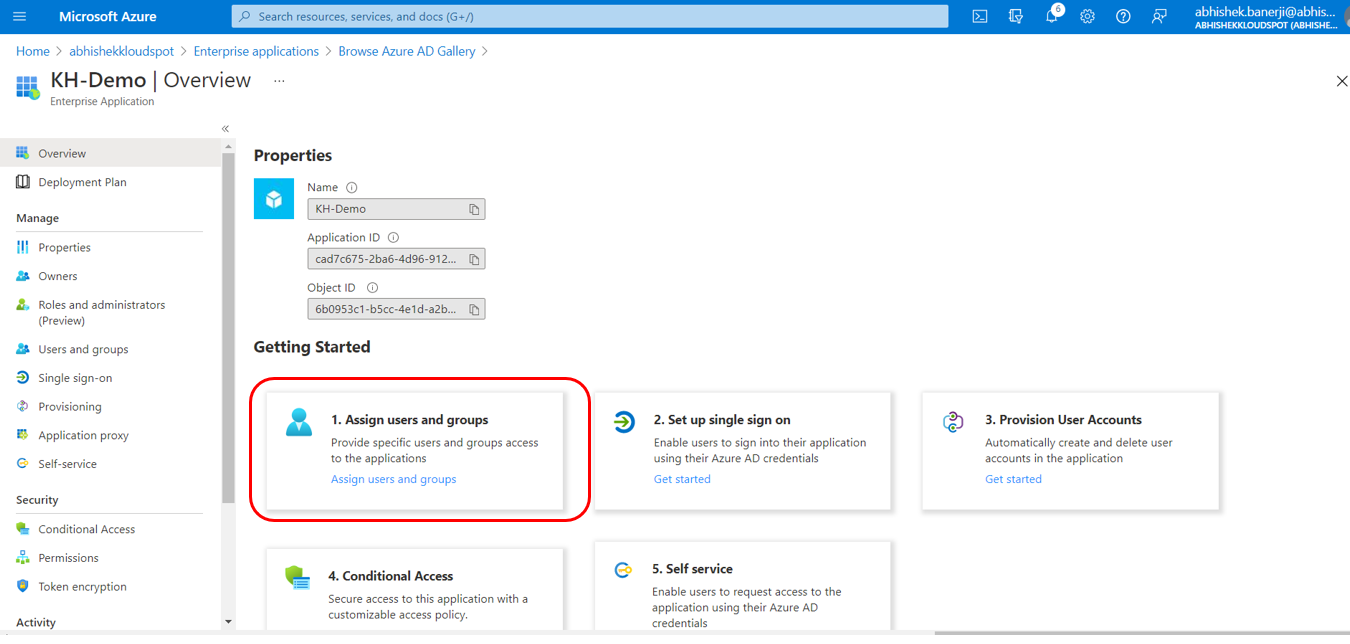
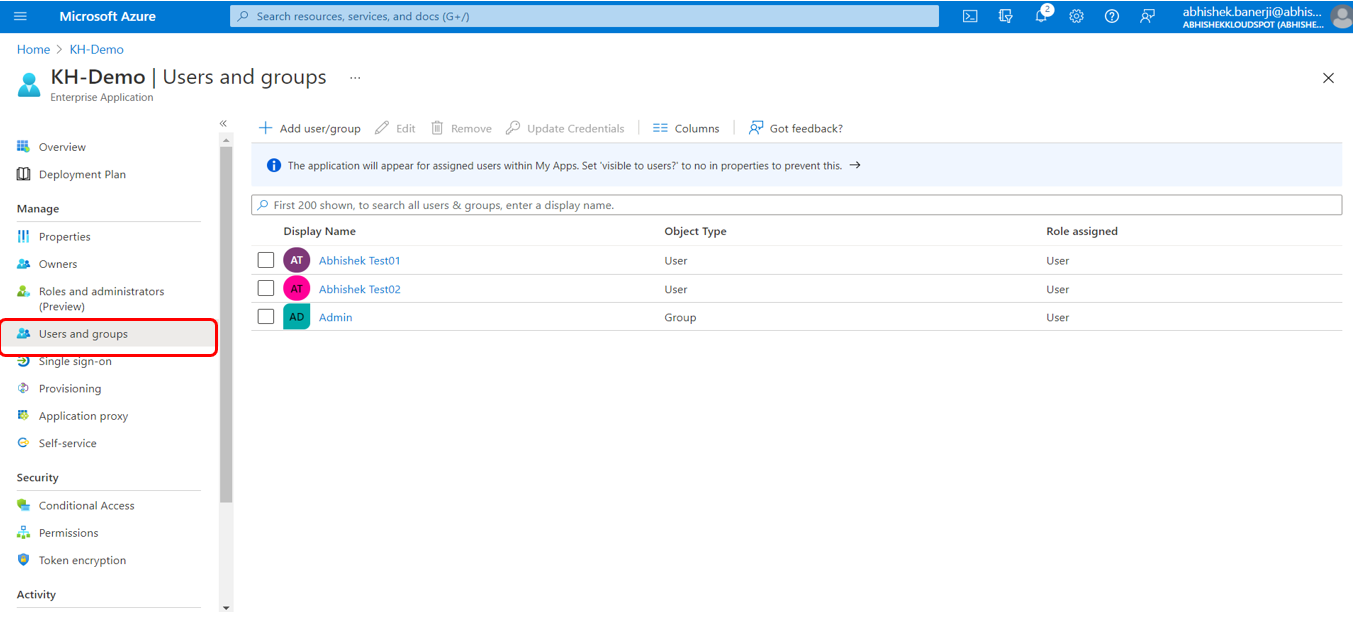
- On successfully creating the application, in this case KH-Demo, the following page is displayed. Click on Assign users and groups to provide specific users access to the application.

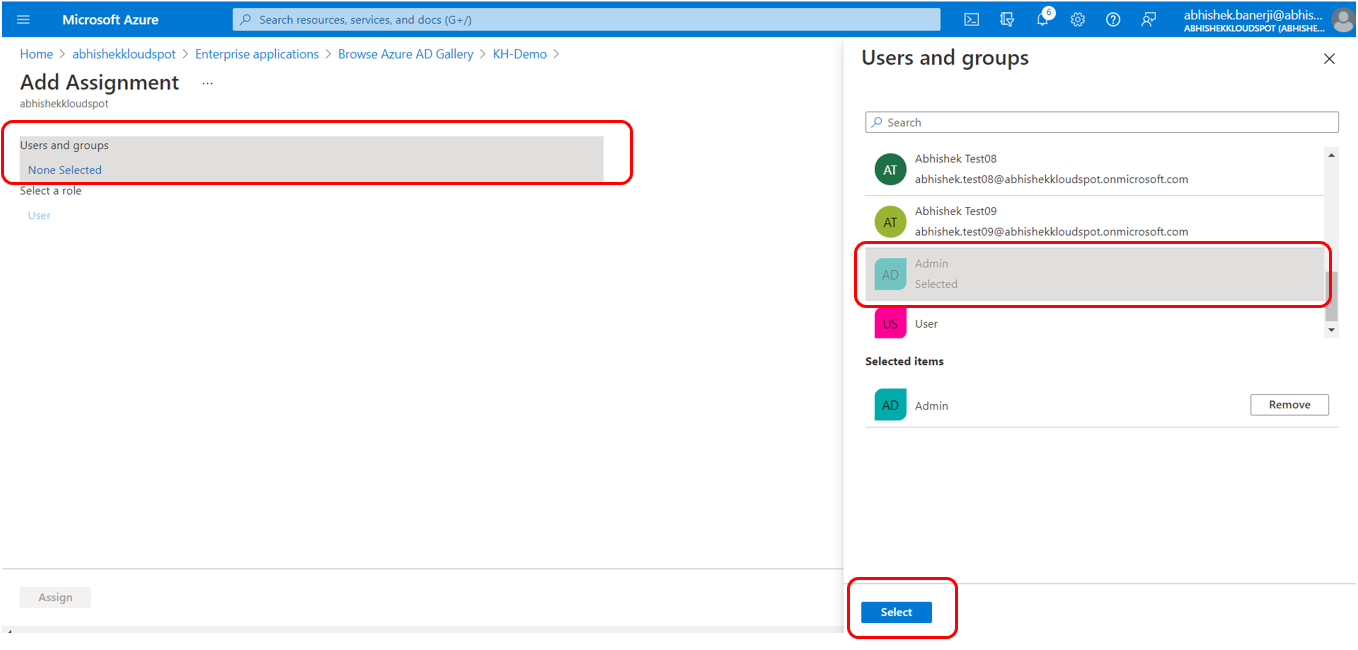
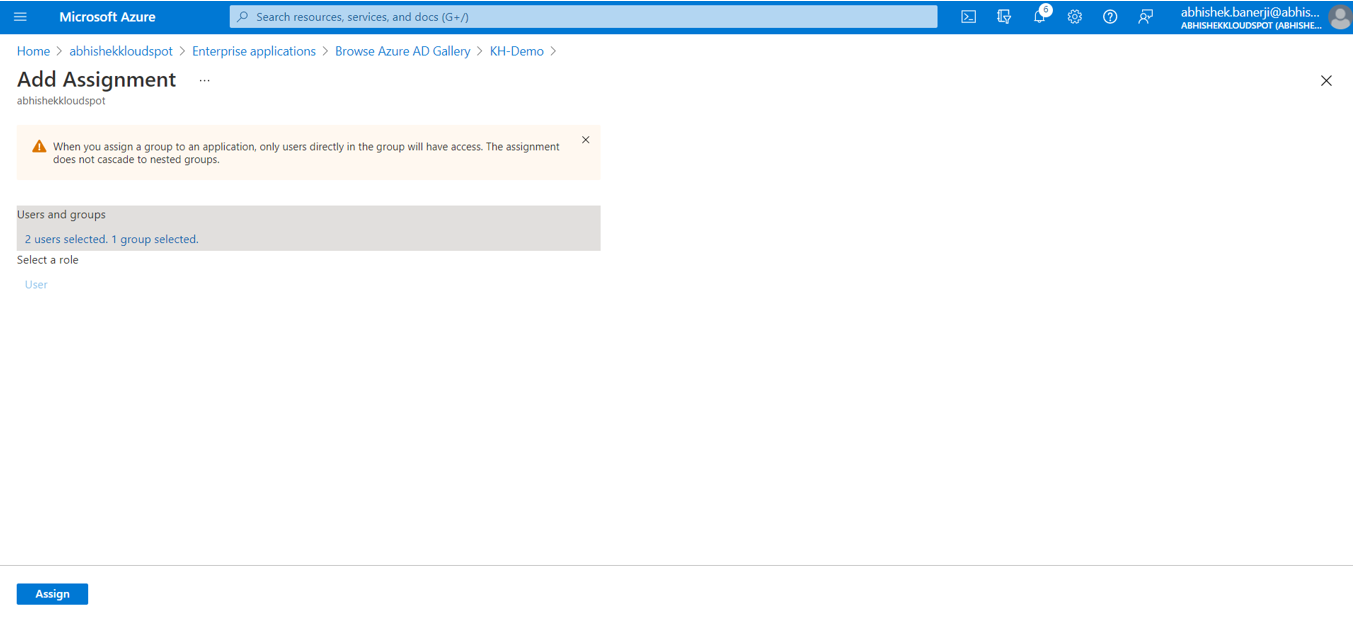
- Click on Users and groups and select Users or groups from the list and click on Select as shown in the figure below.

- On selecting the users and groups, click on Assign.

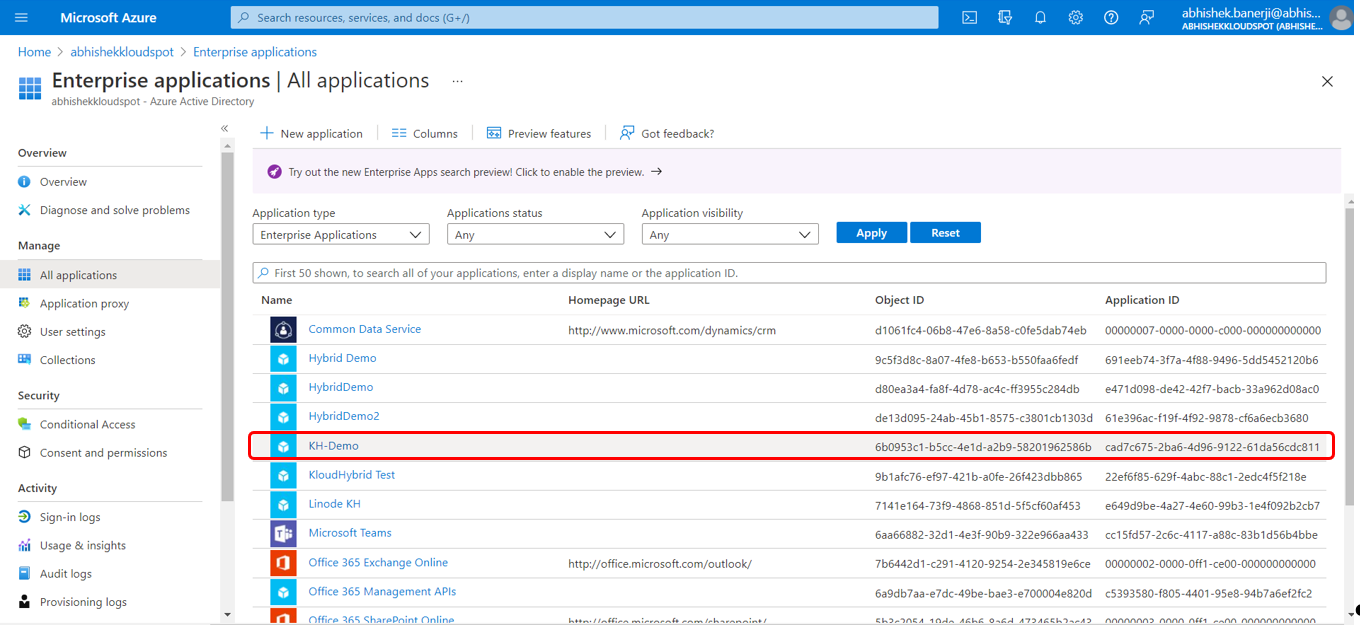
- Refresh the page and the newly created application i.e KH-Demo will be added to the list of All applications.

-
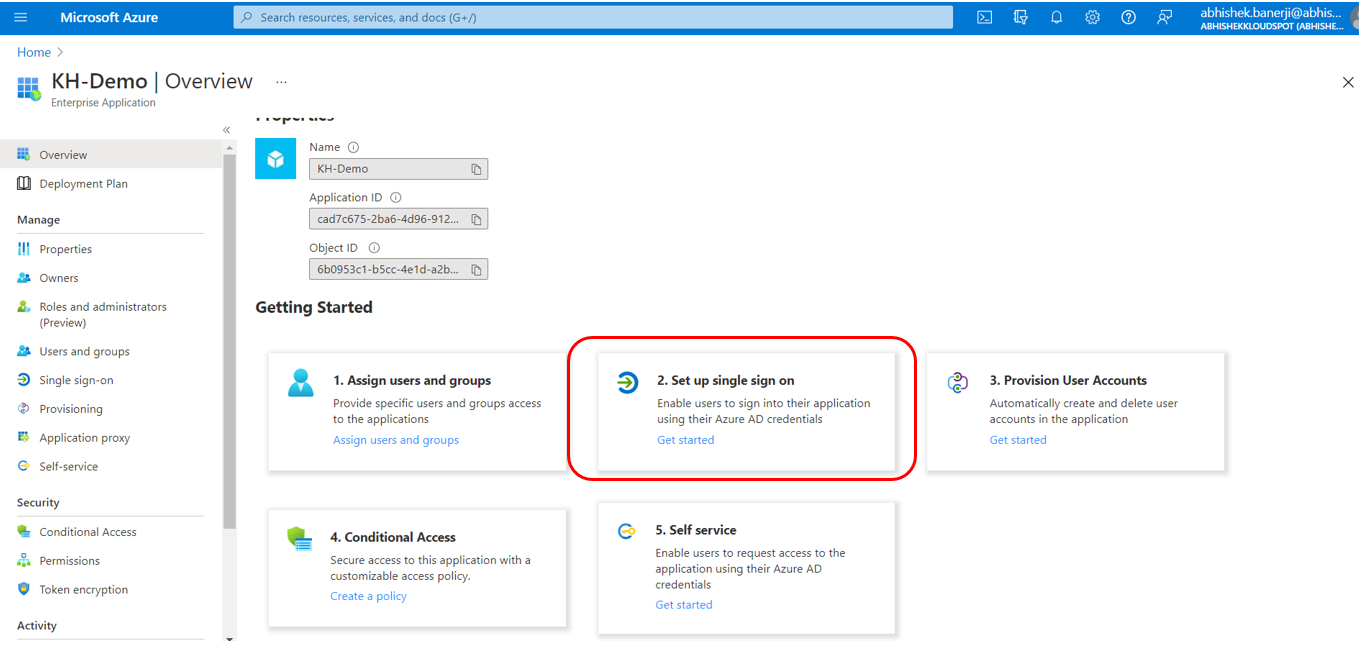
Click on the newly created application (in this case KH-Demo), hover over Set up single sign on and click on Get started.

-
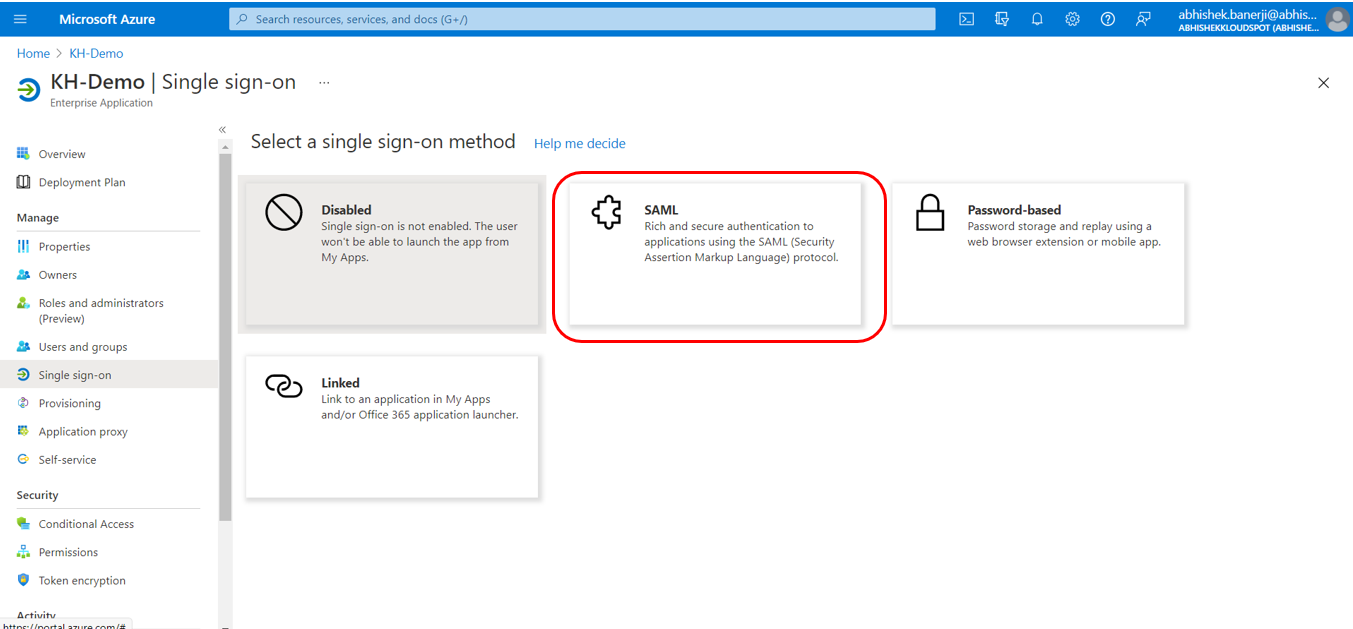
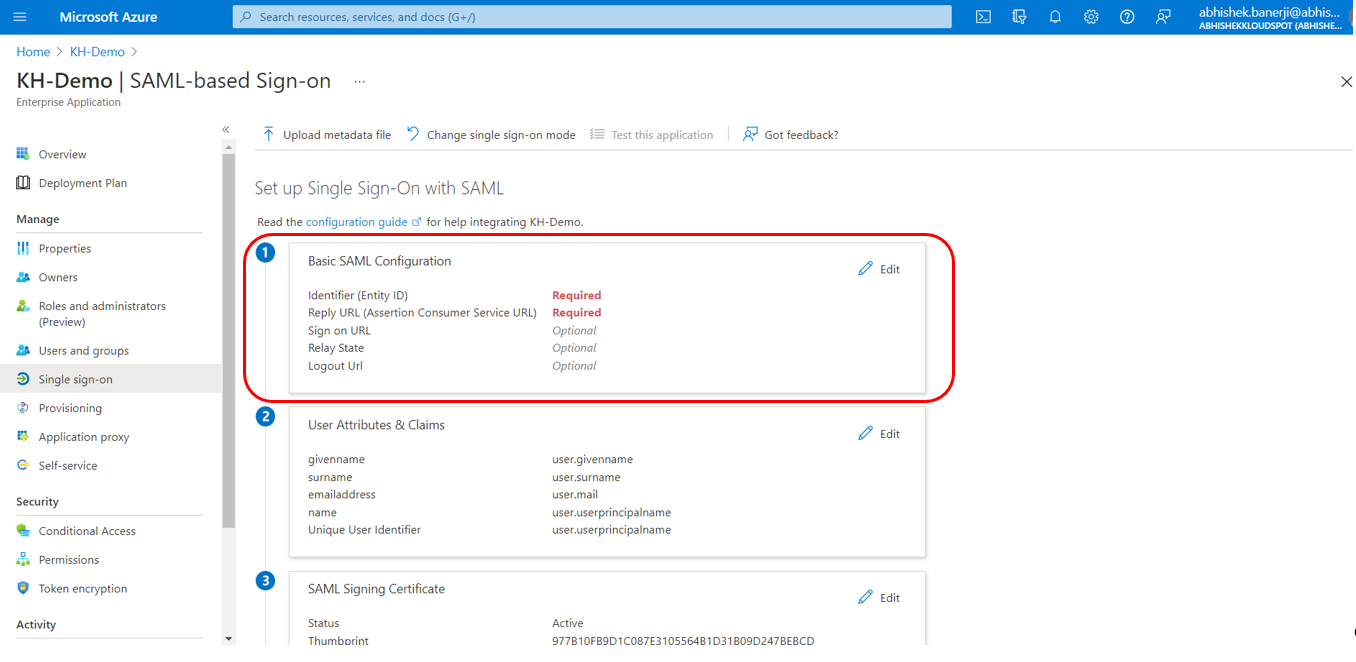
Click on SAML to set up a single sign on.

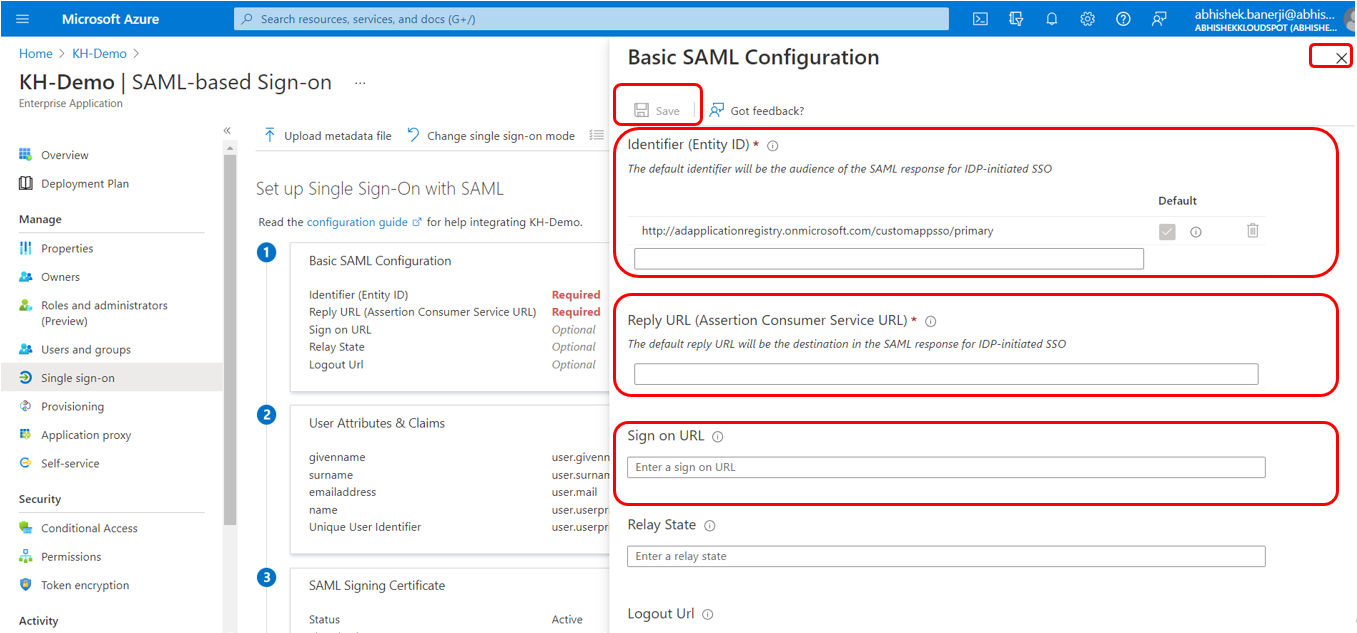
a. Basic SAML Configuration: Click on Edit from the Basic SAML Configuration section and fill in the information on the following page.

- Fill in the details to configure SAML as explained below and click on Save. Once it’s saved click ‘X’ on the top right corner of the page to close.

- The information such as Identifier (Entity ID), Reply URL, Sign-On URL is the same as it’s available in the KloudHybrid portal as shown in the figure below.

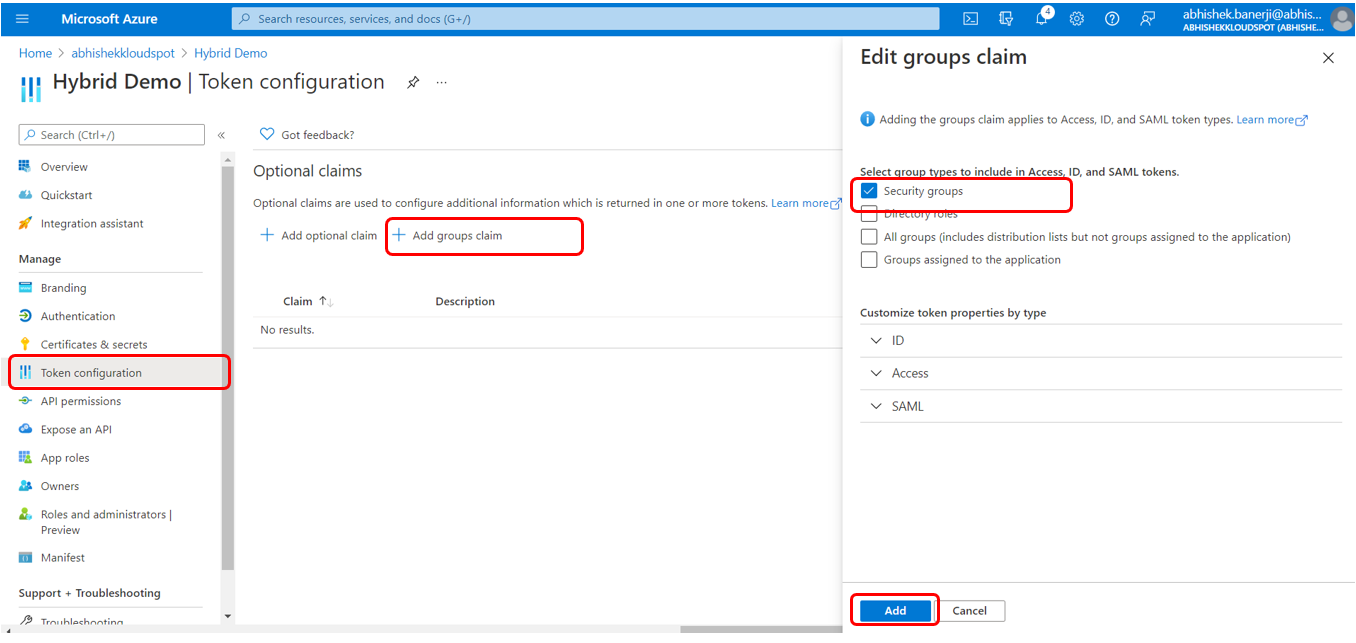
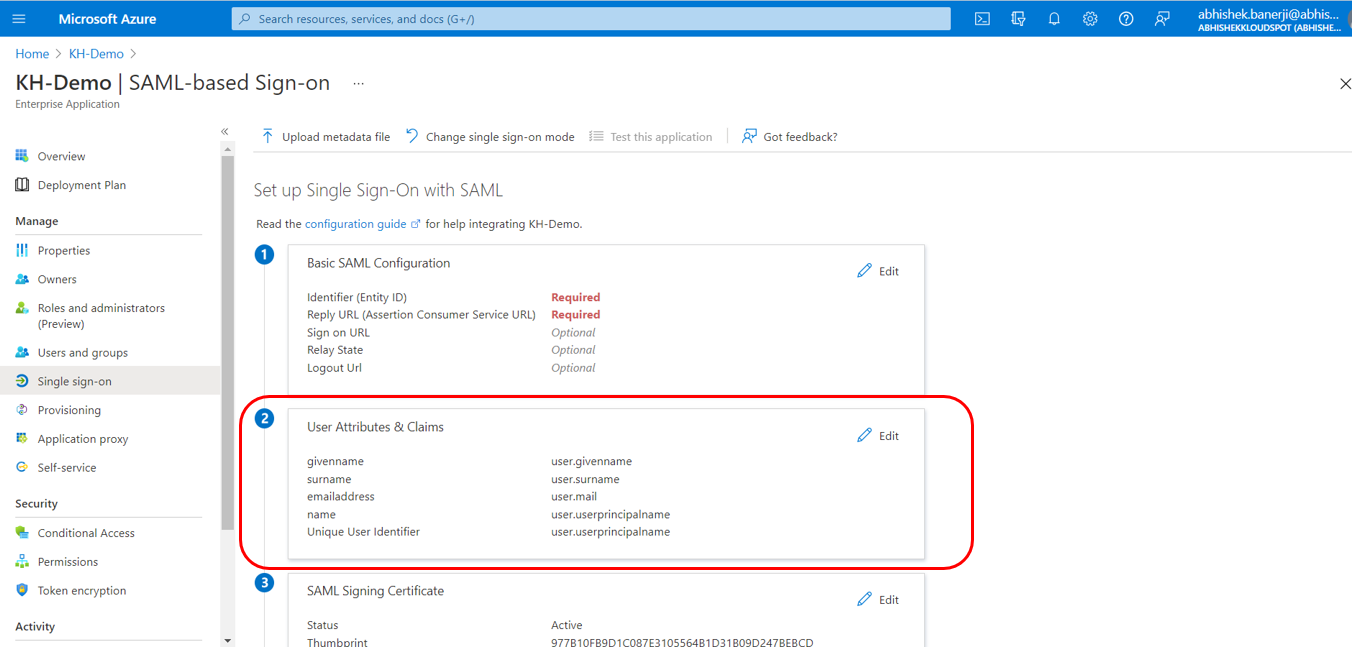
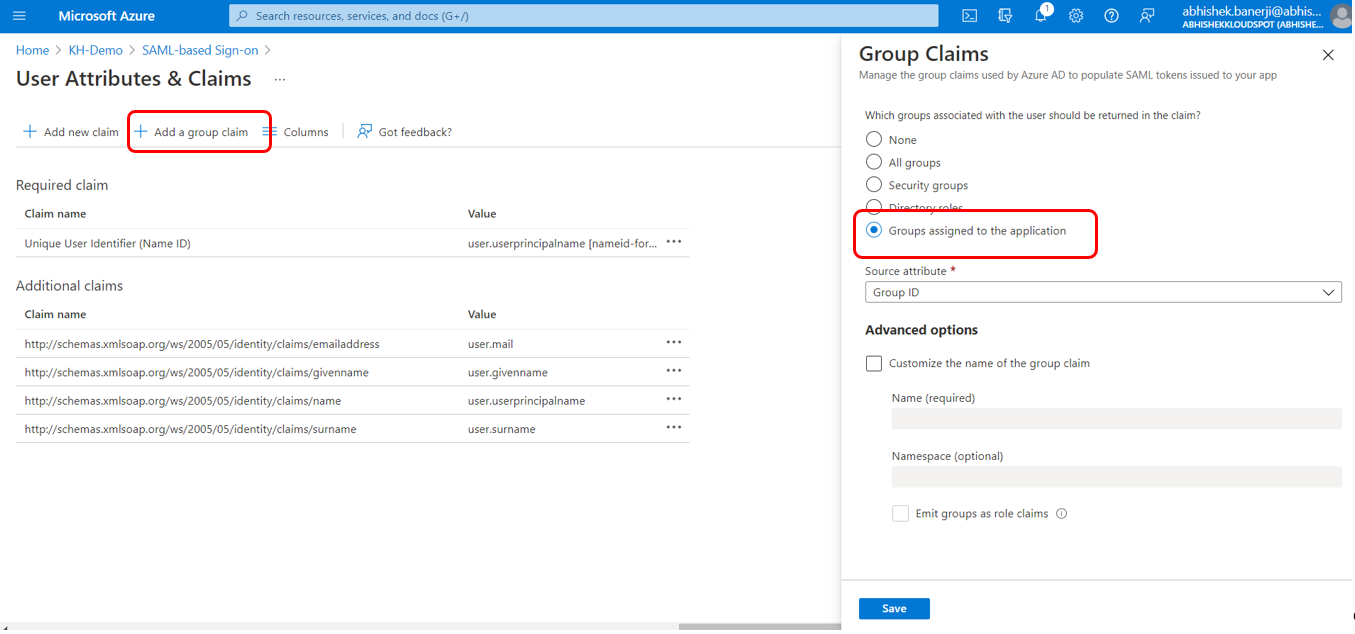
b. User Attributes and claims: Click on edit.

- As shown in the figure below, click on + Add a group claim and select Groups assigned to the application, click on Save and close the window by clicking on ‘X’ on the top right.

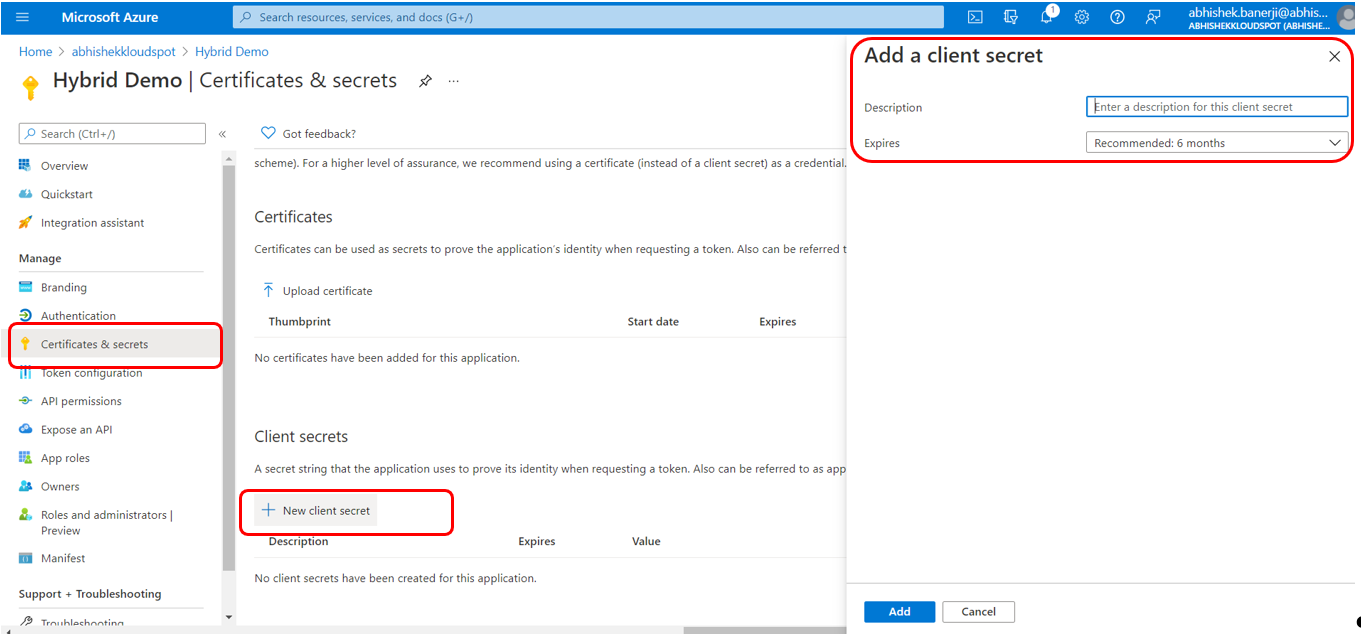
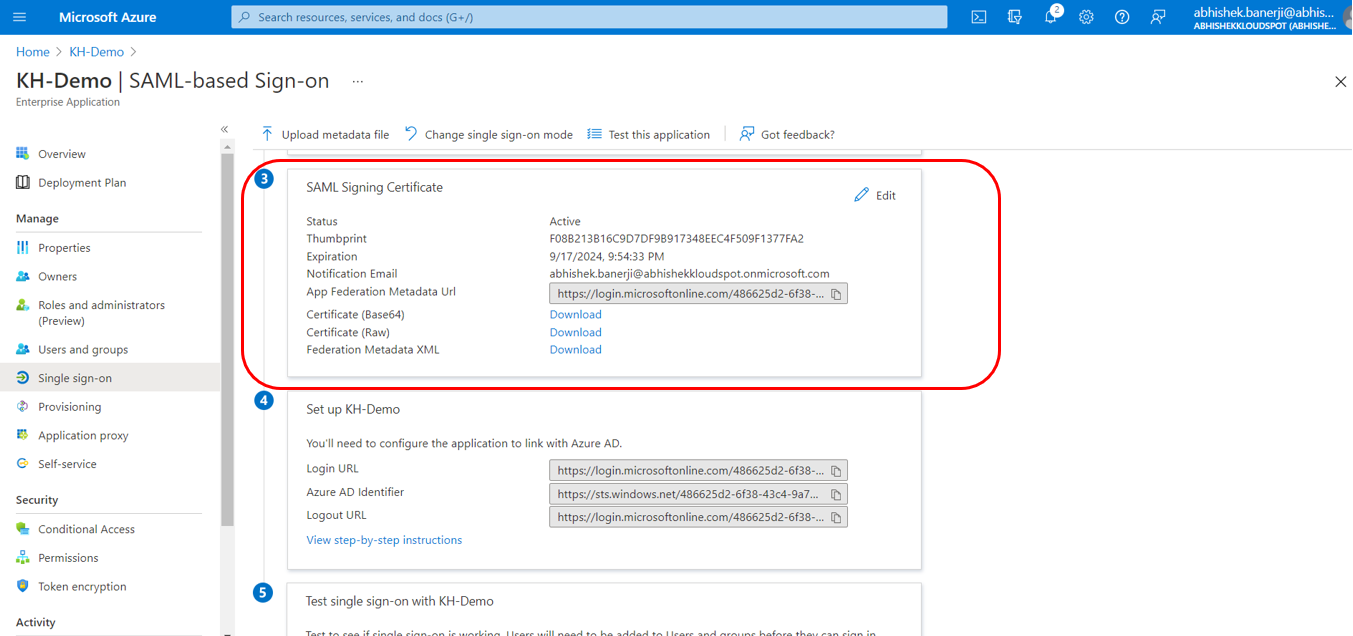
c. SAML Signing certificate: Click on Download the ‘Certificate (Base64)’.

- Upload the downloaded certificate in Insights as shown in the figure below.

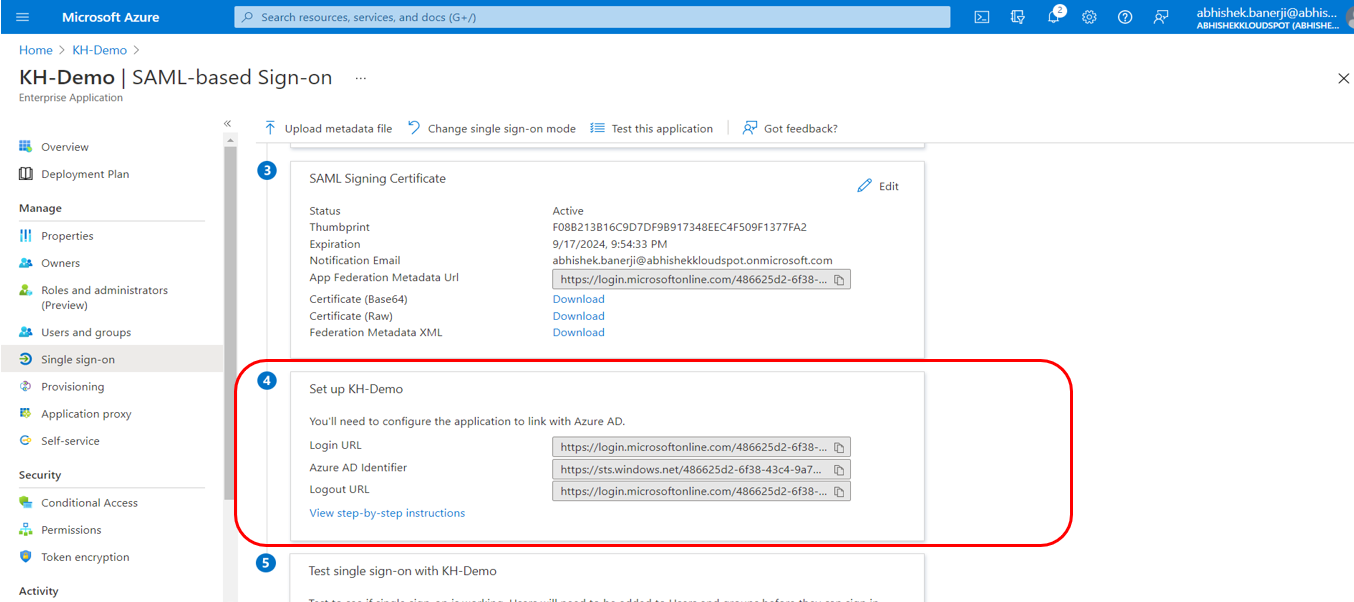
d. Set up KH-Demo (the application name):

- From this section, copy the URLs for Login URL and Azure AD Identifier and paste it in Insights as shown in the figure below.

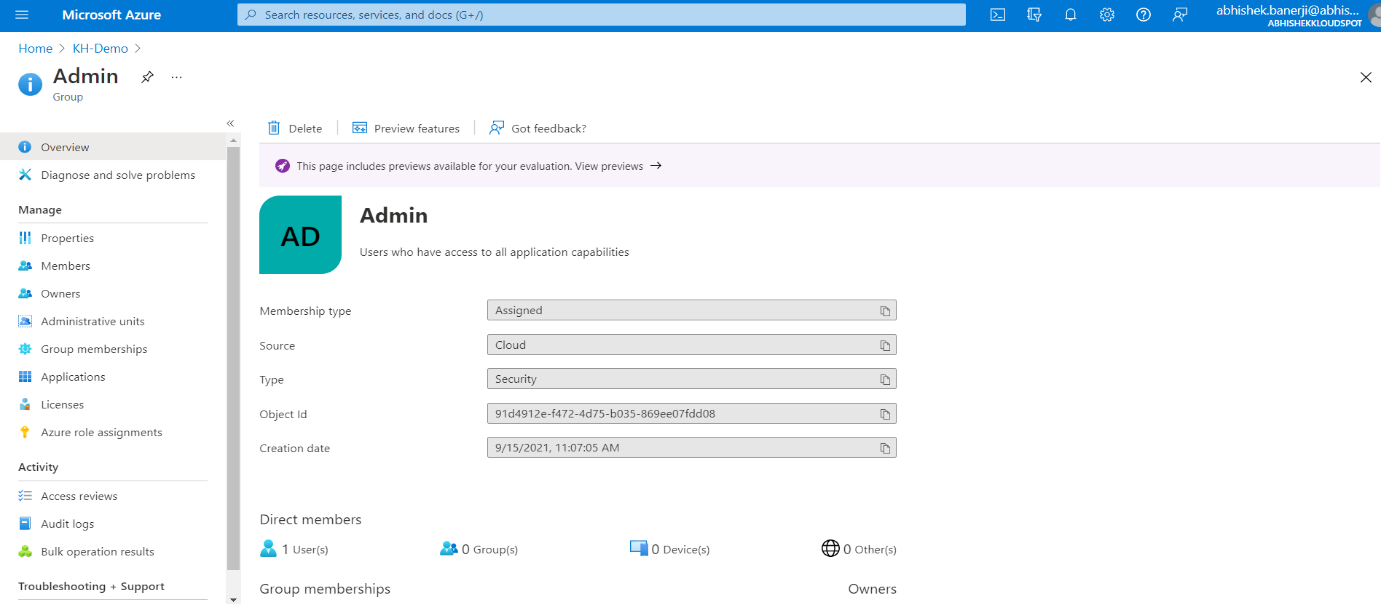
- Click on Users and groups to assign Admin role in Hybrid Application. Select a group of users from the list.

-
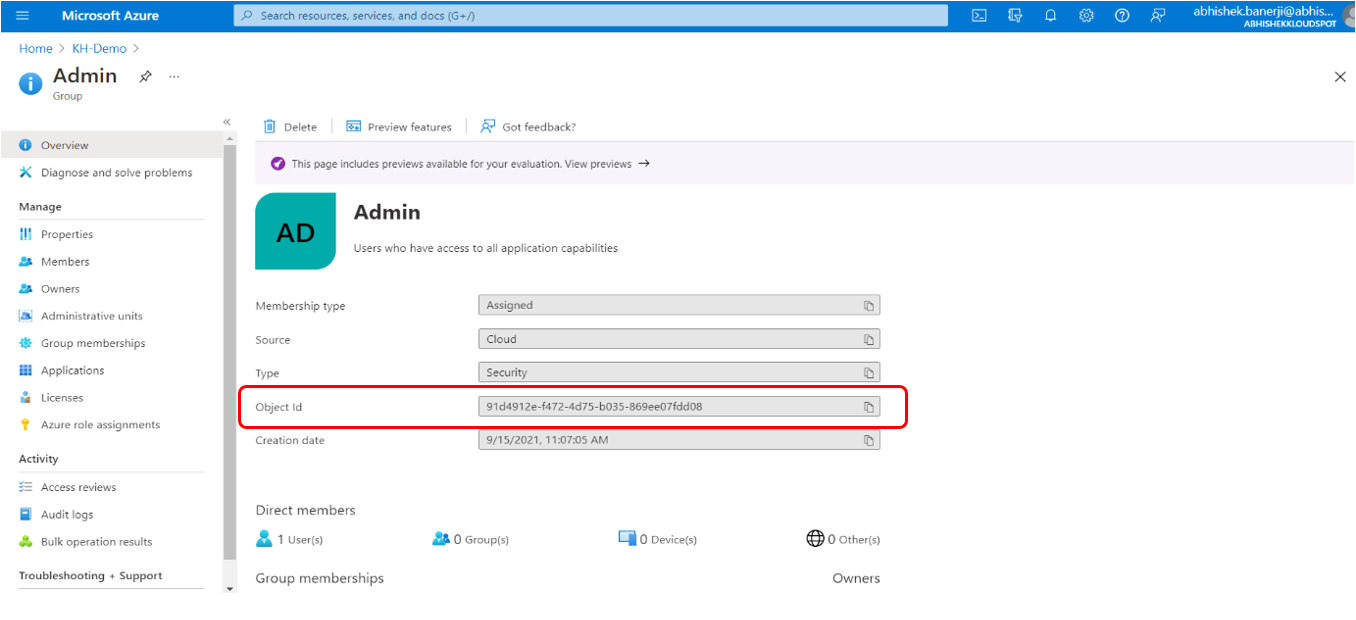
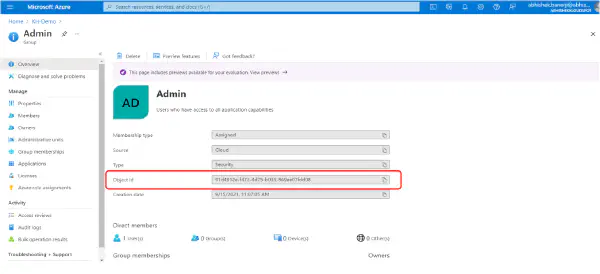
Copy the Object ID and paste it in the ADMIN ROLE hybrid Role Mapping section as shown in the figure below. The Object ID for Group of Users specified in hybrid will have an ADMIN Role assigned to them when logged in Hybrid App.

-
After filling in all the details, click on Save on the top right to save the configurations. And log out of KloudHybrid.

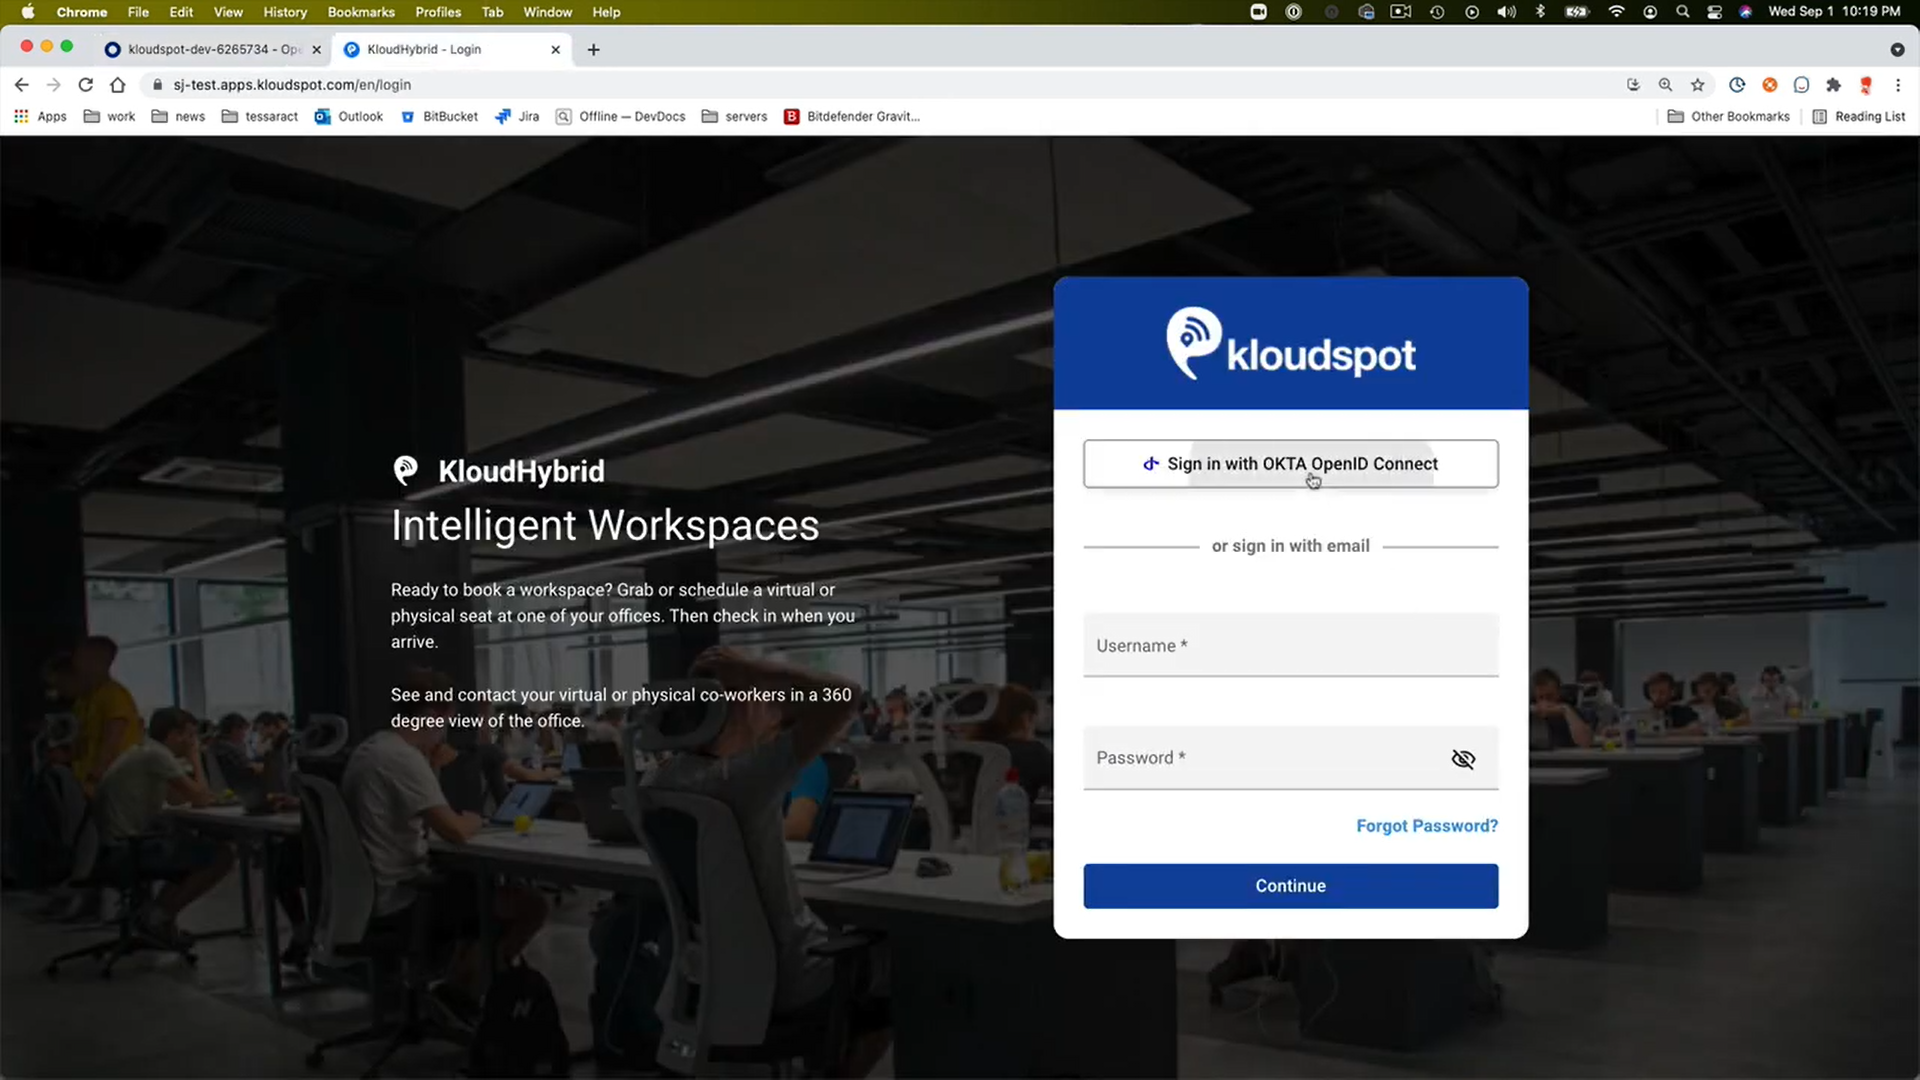
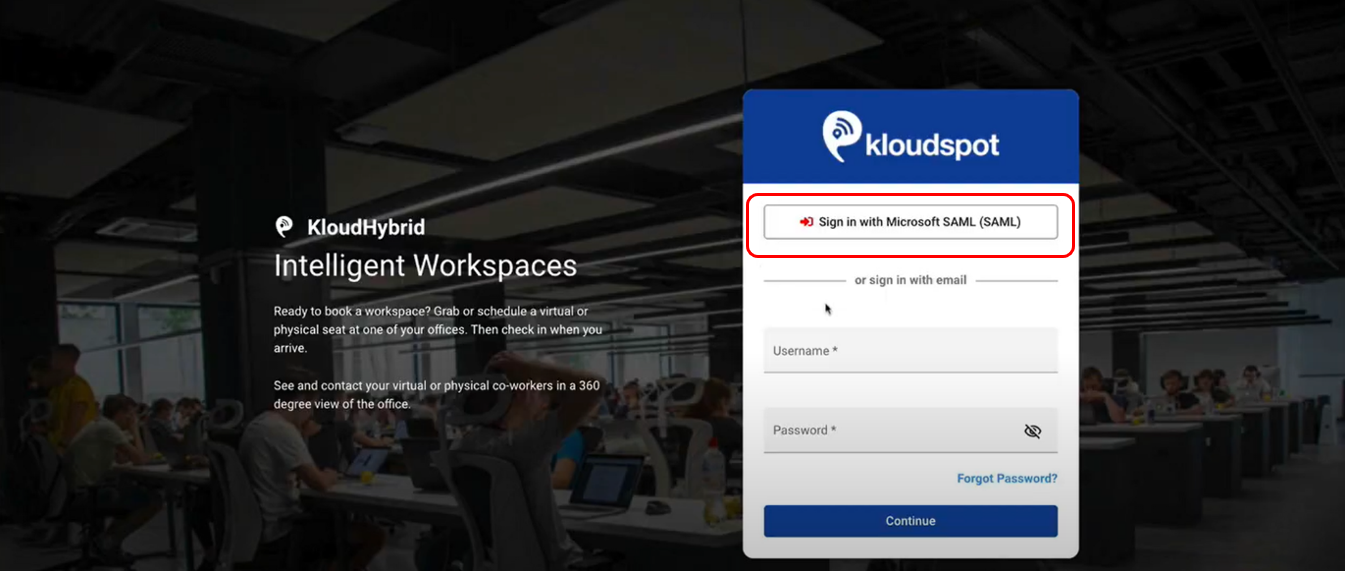
- Login with a single click on Sign in with Microsoft SAML (SAML) as shown in the figure below.