Creating & Assigning Health Questionnaires
-
After successfully configuring the check-in process, you have the option to create customized health questionnaires. Health questionnaires are designed to ensure the safety and well-being of your employees and visitors by verifying their health status before accessing the premises.
-
To create a health questionnaire, refer the following guide. This guide will provide you with step-by-step instructions on how to design and configure questionnaires tailored to your organization’s needs.
-
Once the questionnaire is created, you can assign it to specific locations within the KloudHybrid app. This enables targeted questioning based on different access points.
-
Health questionnaires can be a valuable tool in maintaining a safe and secure workplace environment, providing an additional layer of protection for your workforce.
-
Health questionnaires are the second step of the booking process, with the first step being reserving a space, and the third step being the check-in process. The health questionnaire gives employers an opportunity improves the health and safety of their site by validating the status of their employees before they come on site.
-
Administrators have several options with the health questionnaire that they will need to consider with their team before proceeding to configure the health questionnaire, such as:
-
What questions will be asked of the user, and what other information will they have to provide?
-
Will the system save the user responses to these questions, or simply save a true/false value if the user is allowed on site given what their responses were.
-
How often will employees need to fill out health questionnaires? Every day they come on site? Once a week? Once every two weeks?
-
In the case of an invalid response to the health questionnaire questions, who (if anyone) is notified?
-
Creating a Health Questionnaire
- Navigate to the Advanced Settings page, then to Configuration -> Questionnaire’s page.
- Click the +New Questionnaire button.
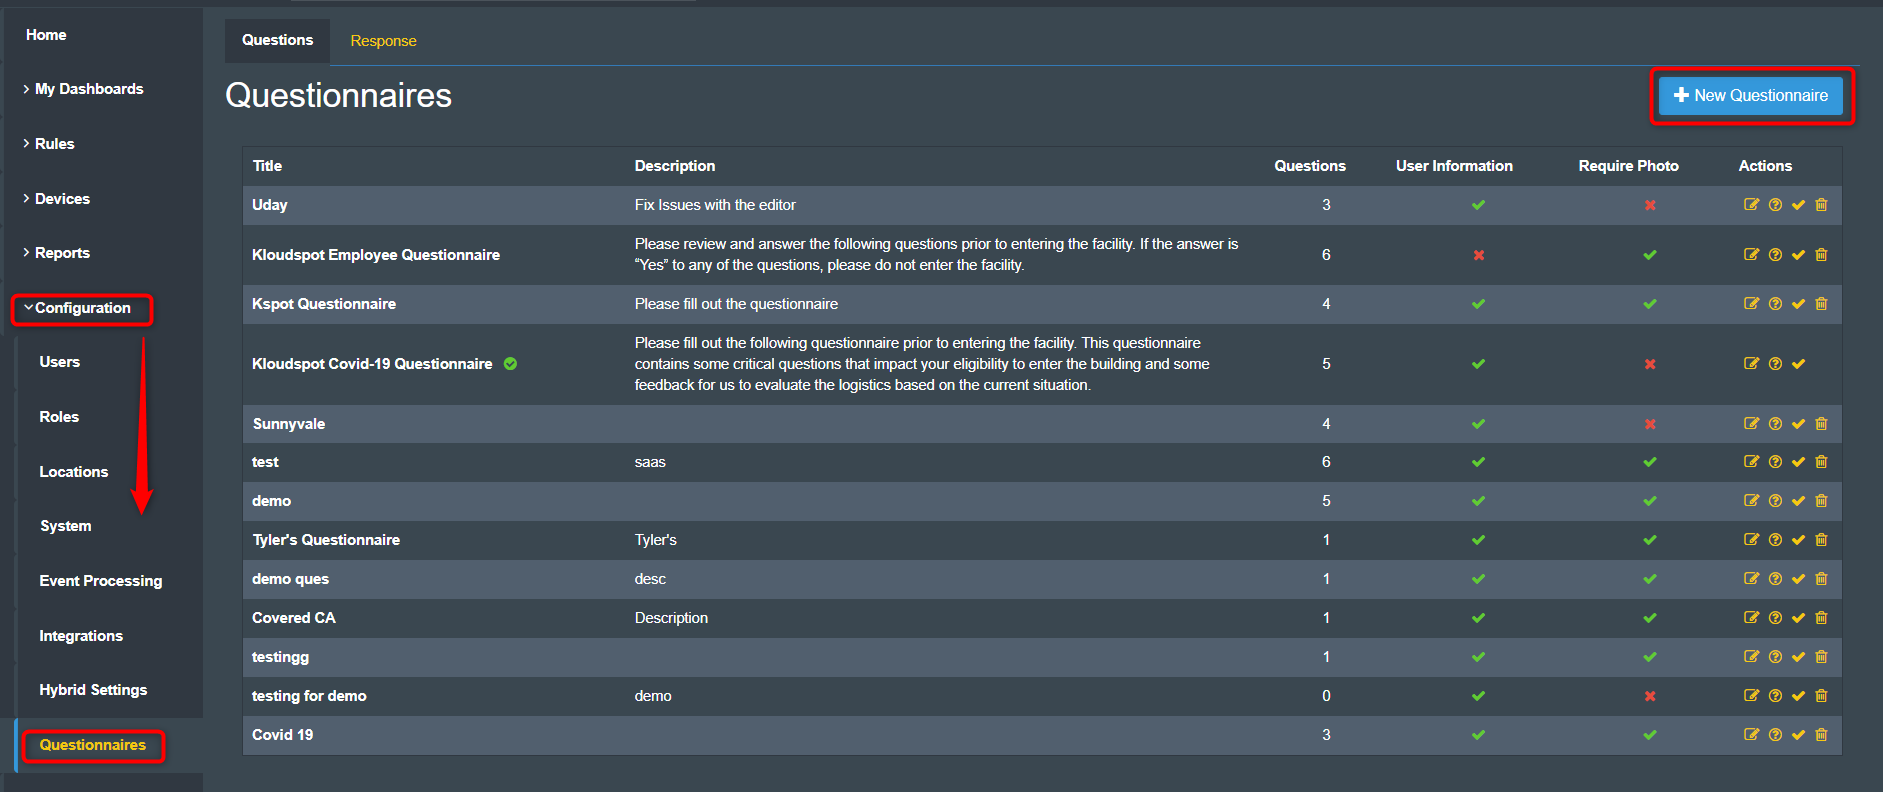
- The Add Questionnaire dialog box will be displayed, here there are several fields to fill out:
- Specify the title and description for the health questionnaire. The information entered here will be visible to the user when they fill out the health questionnaire.
- Check/uncheck require photo, if this option is selected the user will be required to take a picture of themselves during the health questionnaire process.
- Check/uncheck require user info, if this option is selected, the user will be required to provide their: email address, phone number, first and last name. If this information is available via the user profile, it will be automatically pulled.
- Check/uncheck save user’s answers for all questions, if this option is selected, the users specific answers to the questions you ask in the health questionnaire will be saved. If it is left unchecked, the system will only store a single true/false value that determines if they passed or failed the health questionnaire.

- Click Save to add it.
- To add questions, click on the questions button on the right-hand side of the questionnaire.
- Click on the +New Question button to add questions.

-
Fill in the question and description in the “Add Question” window that appears.
-
Select the answer type from the dropdown menu. There are three different question types including: yes/no questions, text question (which are free form responses), and multiple choice questions where a user can select a single answer from multiple options as a response.
- If you are creating a multiple-choice question, an additional field will be displayed that asks for you to input all possible answers as comma separated values. Example: answer1, answer2, answer3, answer4, answer5
-
Check/uncheck Mark as Required, if selected users will be required to answer this question before submitting the health questionnaire. If left unselected users can choose whether or not they fill out the question.
-
Check/uncheck Validate Answer, if selected you will also be required to fill out the Please provide a valid answer to this question for validation field. Additoinally, if selected, users will be required to fill out the correct response in order to complete their check in, if they fill out an incorrect response they will not be able to check in. If left unchecked, answers will not be validated.
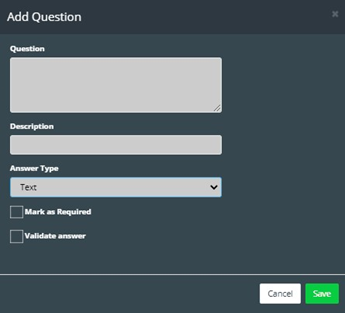
- Click Save.
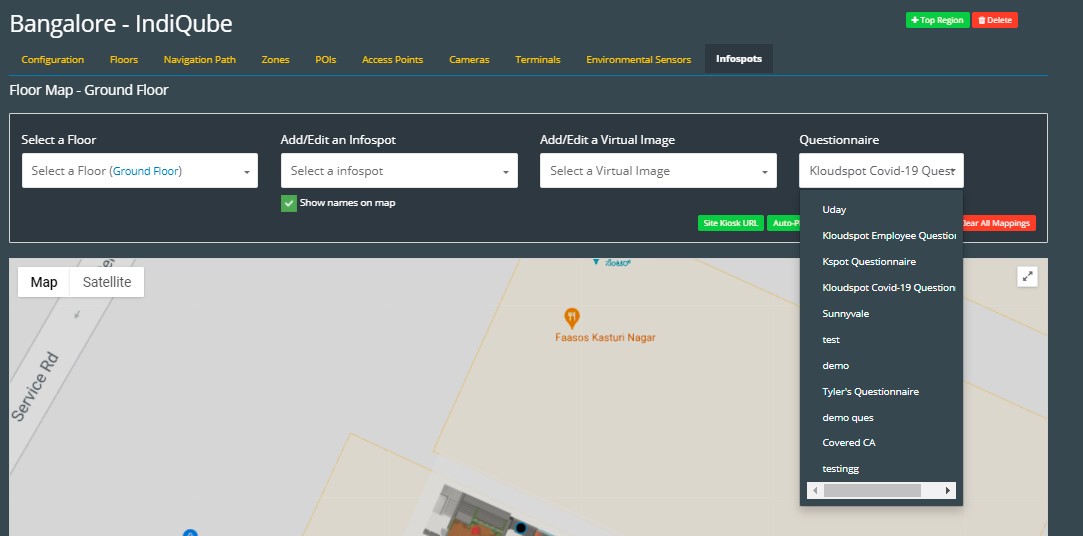
Assigning a Questionnaire to a Site
- Navigate to the Advanced Settings page, then to Configuration -> Location page.
- Select the site you wish to assign the questionnaire to. Then navigate to the infospot page.
- Select the Questionnaire from the dropdown menu as seen in the figure below.
Miscellaneous Health Questionnaire Settings.
- There are some additional settings available to help configure the functionality of the health questionnaire located on the Advanced Settings page, then to Configuration -> Hybrid Settings page. Scroll down the to Questionnaire Settings section as seen below.
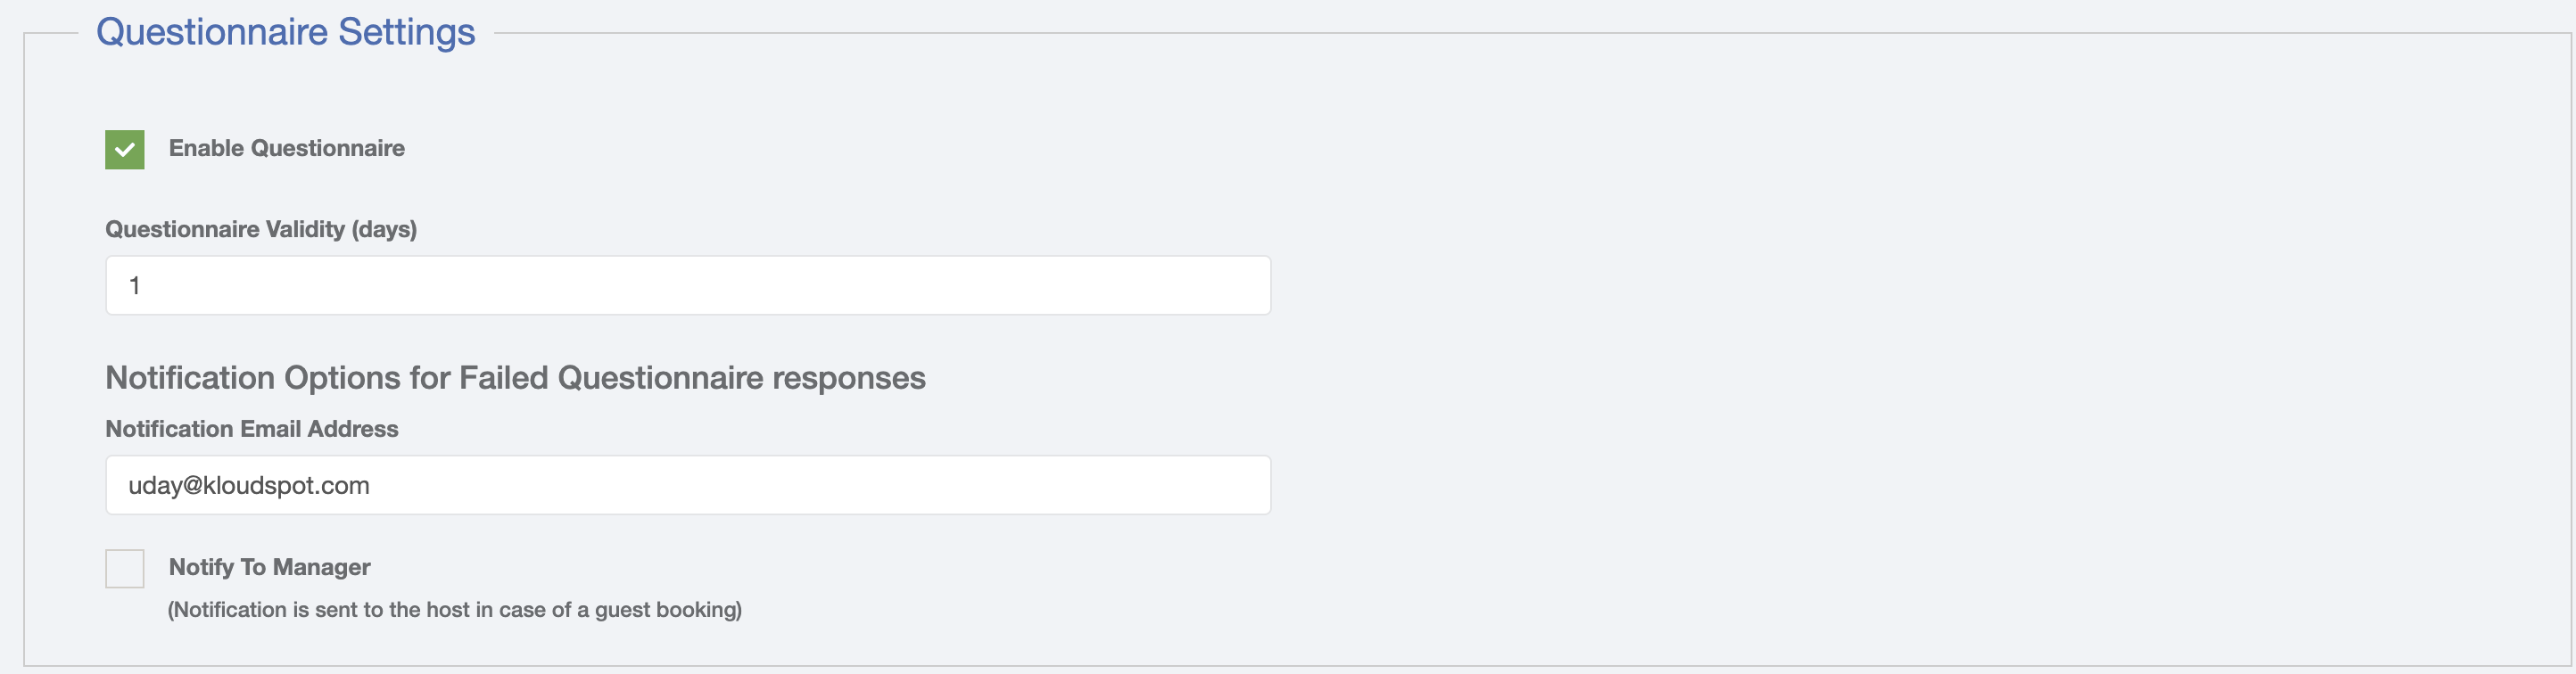
- This section allows you to enable/disable health questionnaires entirely from the system. If you enable the health questionnaire, but don’t want specific sites to fill out a health questionnaire, simply don’t assign a health questionnaire to that site.
- Questionnaire Validity is how long the health questionnaire is valid for. So, for example setting 1 day here would require the employee to fill out a health questionnaire every day they wanted to come on site. A setting of 5 day here would require the employee to fill out a health questionnaire once a week.
- Notification Email Address is the specific person or mailing list that will receive an email notification from the system if a user fails their health questionnaire. Ensure you have SMTP configured to receive these emails.
- Notify To Manager if selected, and a user fails the health questionnaire, their direct manager will also be sent a notification email. Ensure that both SMTP and SCIM are configured.