Zone Creation
-
Zones are an important part of the location setup process, and you will need to create zones for each floor of each building you have configured in the system.
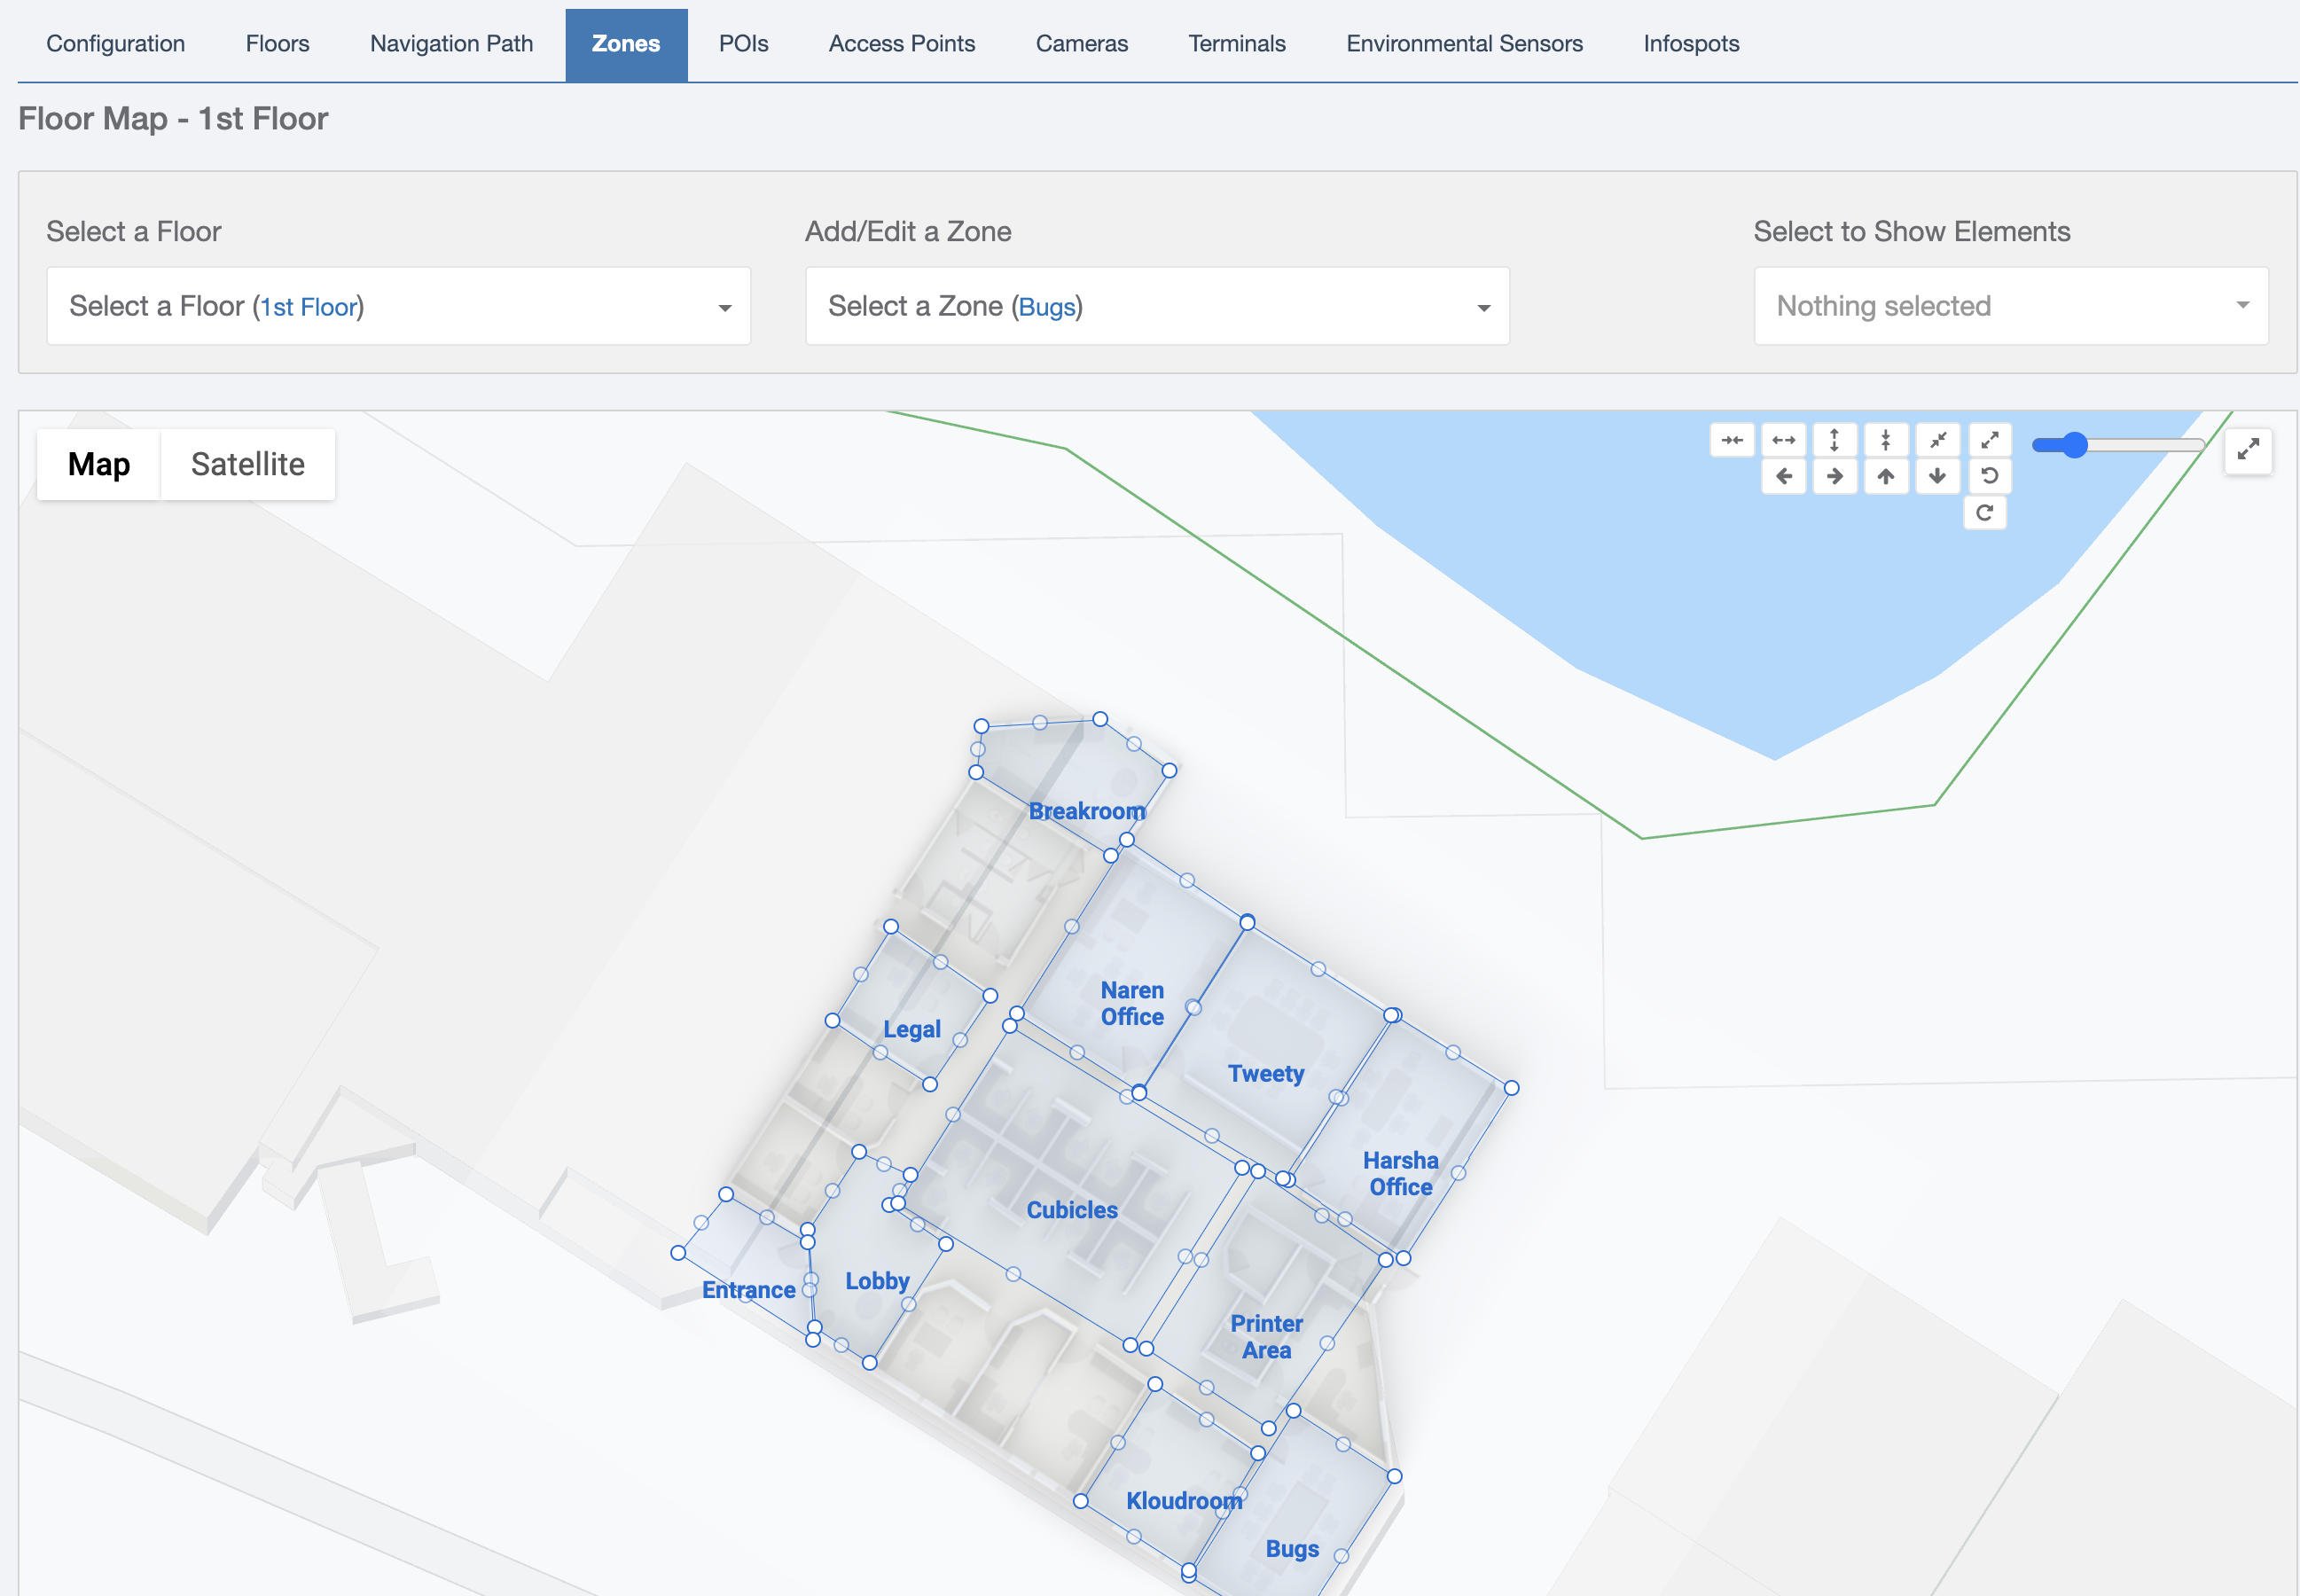
Zones are a way to logically group different elements placed on top of the floor map (such as hot desks and points of interest) or to designate specific areas of the floor map, such as an office, conference room, or cafeteria. In addition to this, zones are searchable so if enable wayfinding, users will be able to search for specific zones. Finally, zones can be used to set up booking neighborhoods, which allows employees of the same grouping to sit in designated zones (for example sales can only sit in the designated sales area).
In general, you will want to create separate zones for individual rooms such as conference rooms or offices, logical groups of cubicles, and open areas designated for specific purposes such as break rooms or restrooms.
-
Navigate to the zones tab. Click on the floor you want to add zones for. Click the ‘Add/Edit zones’ drop down and click ‘Add a zone’.
-
Once you do this, hover over the 2D map view with your mouse and begin to draw a zone. You can draw a zone by clicking to drop down a dot. Continue clicking until you have the entire area of the zone boxed in. You can terminate this sequence by clicking back on the first dot you dropped down.
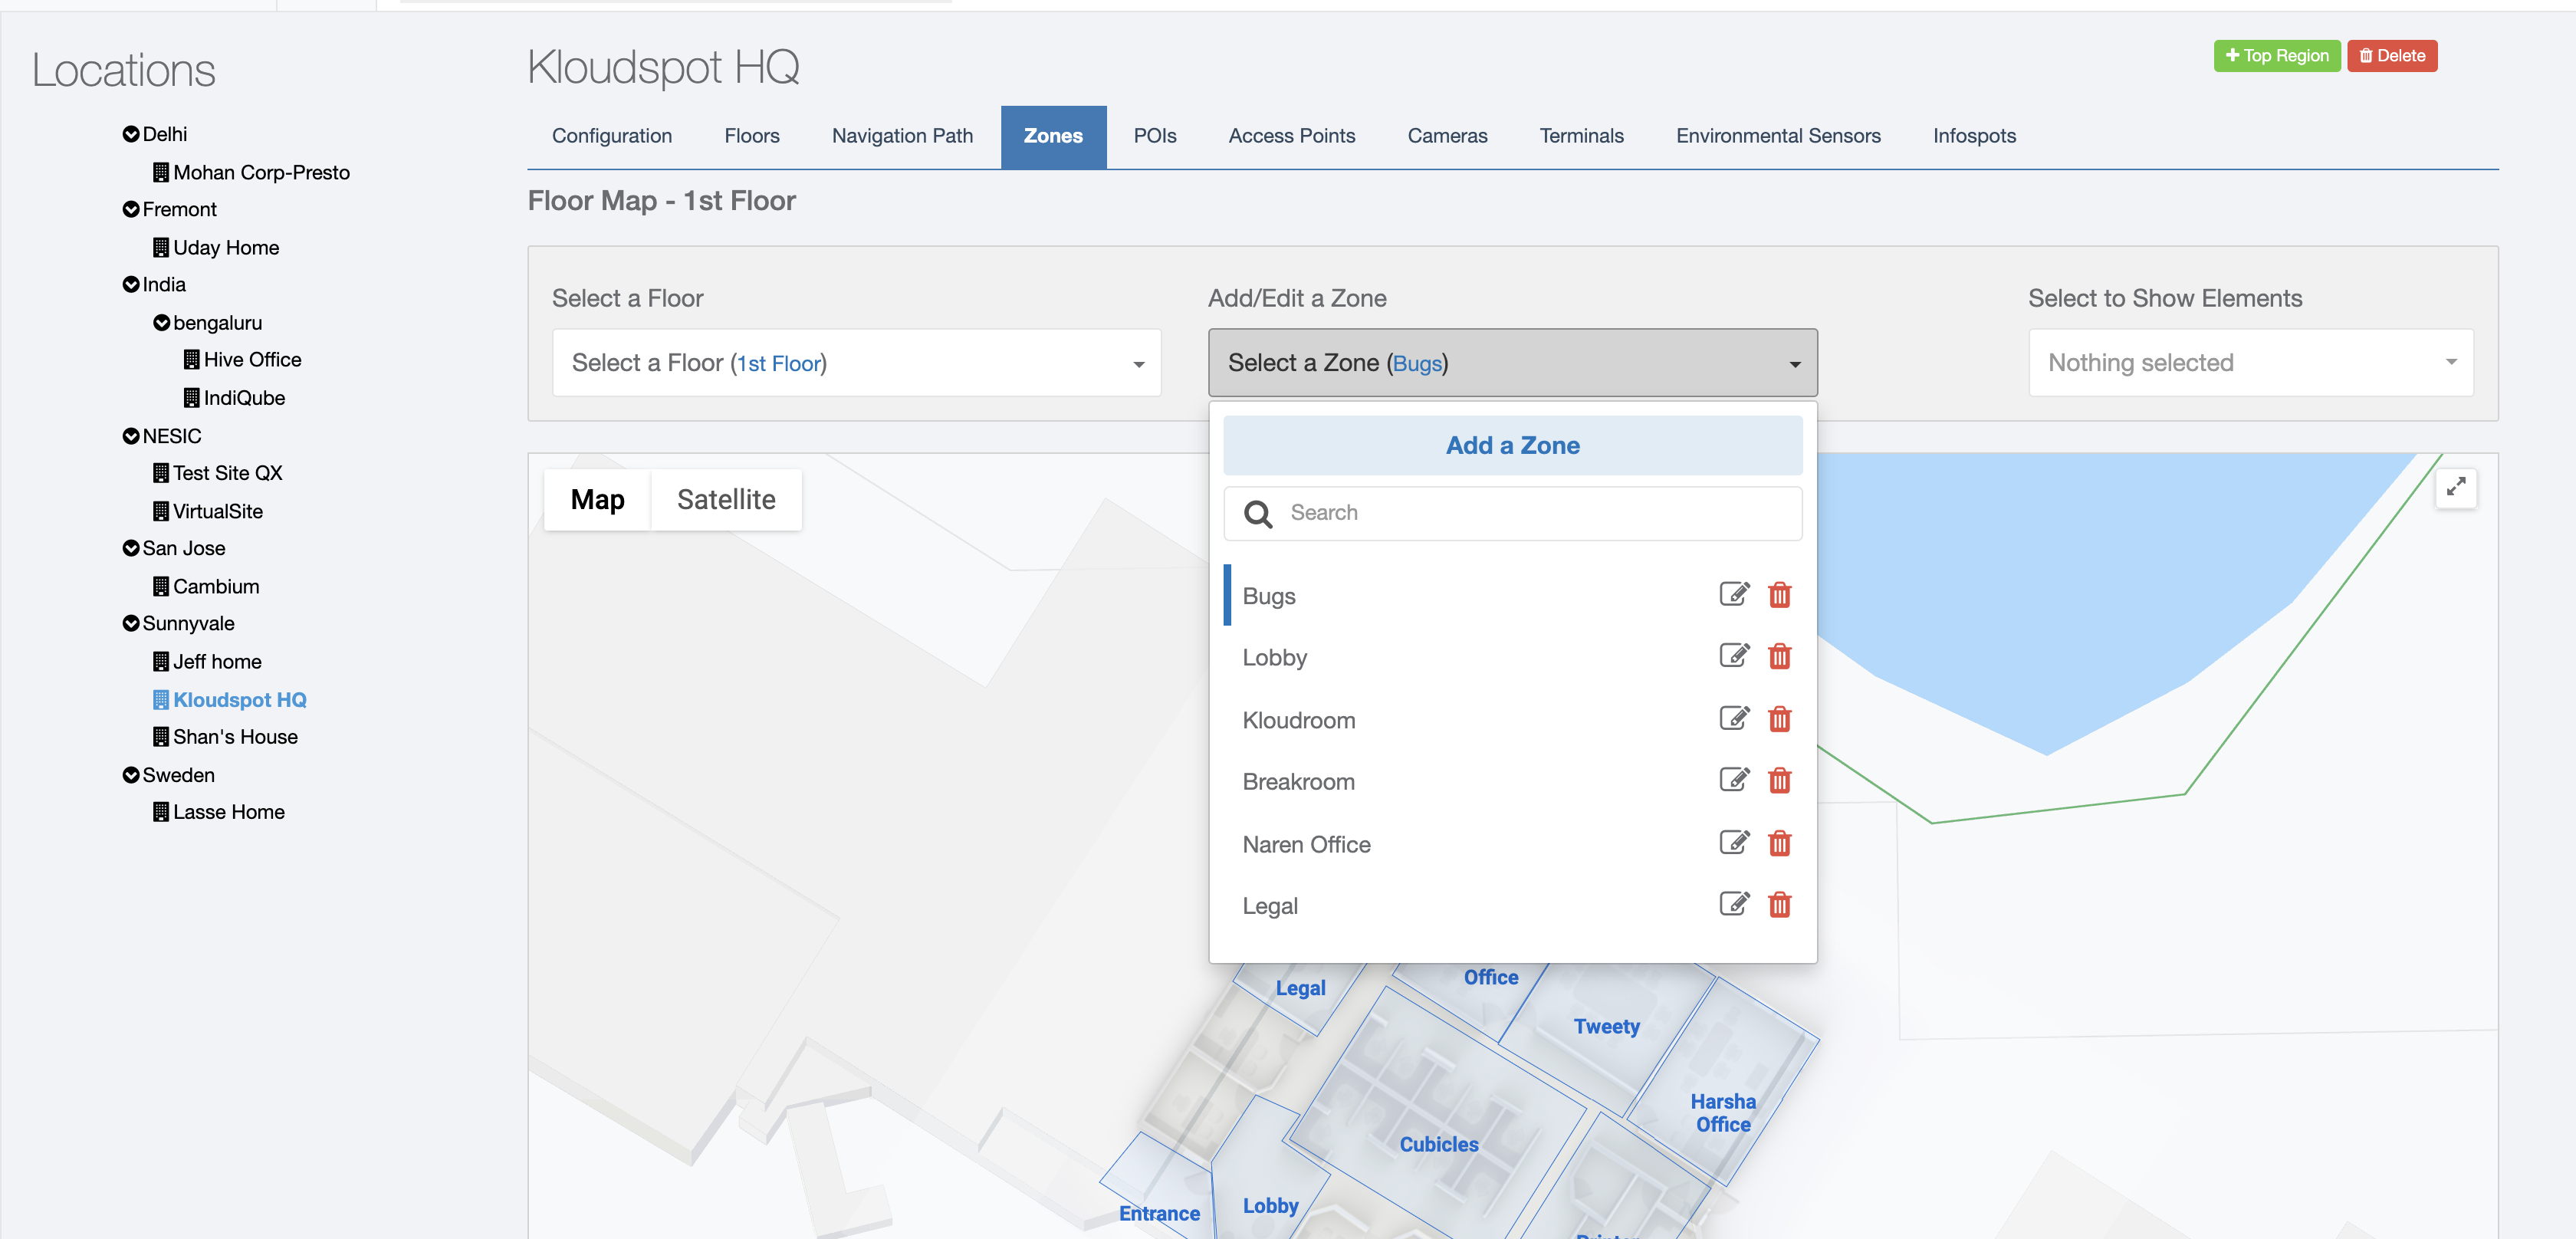
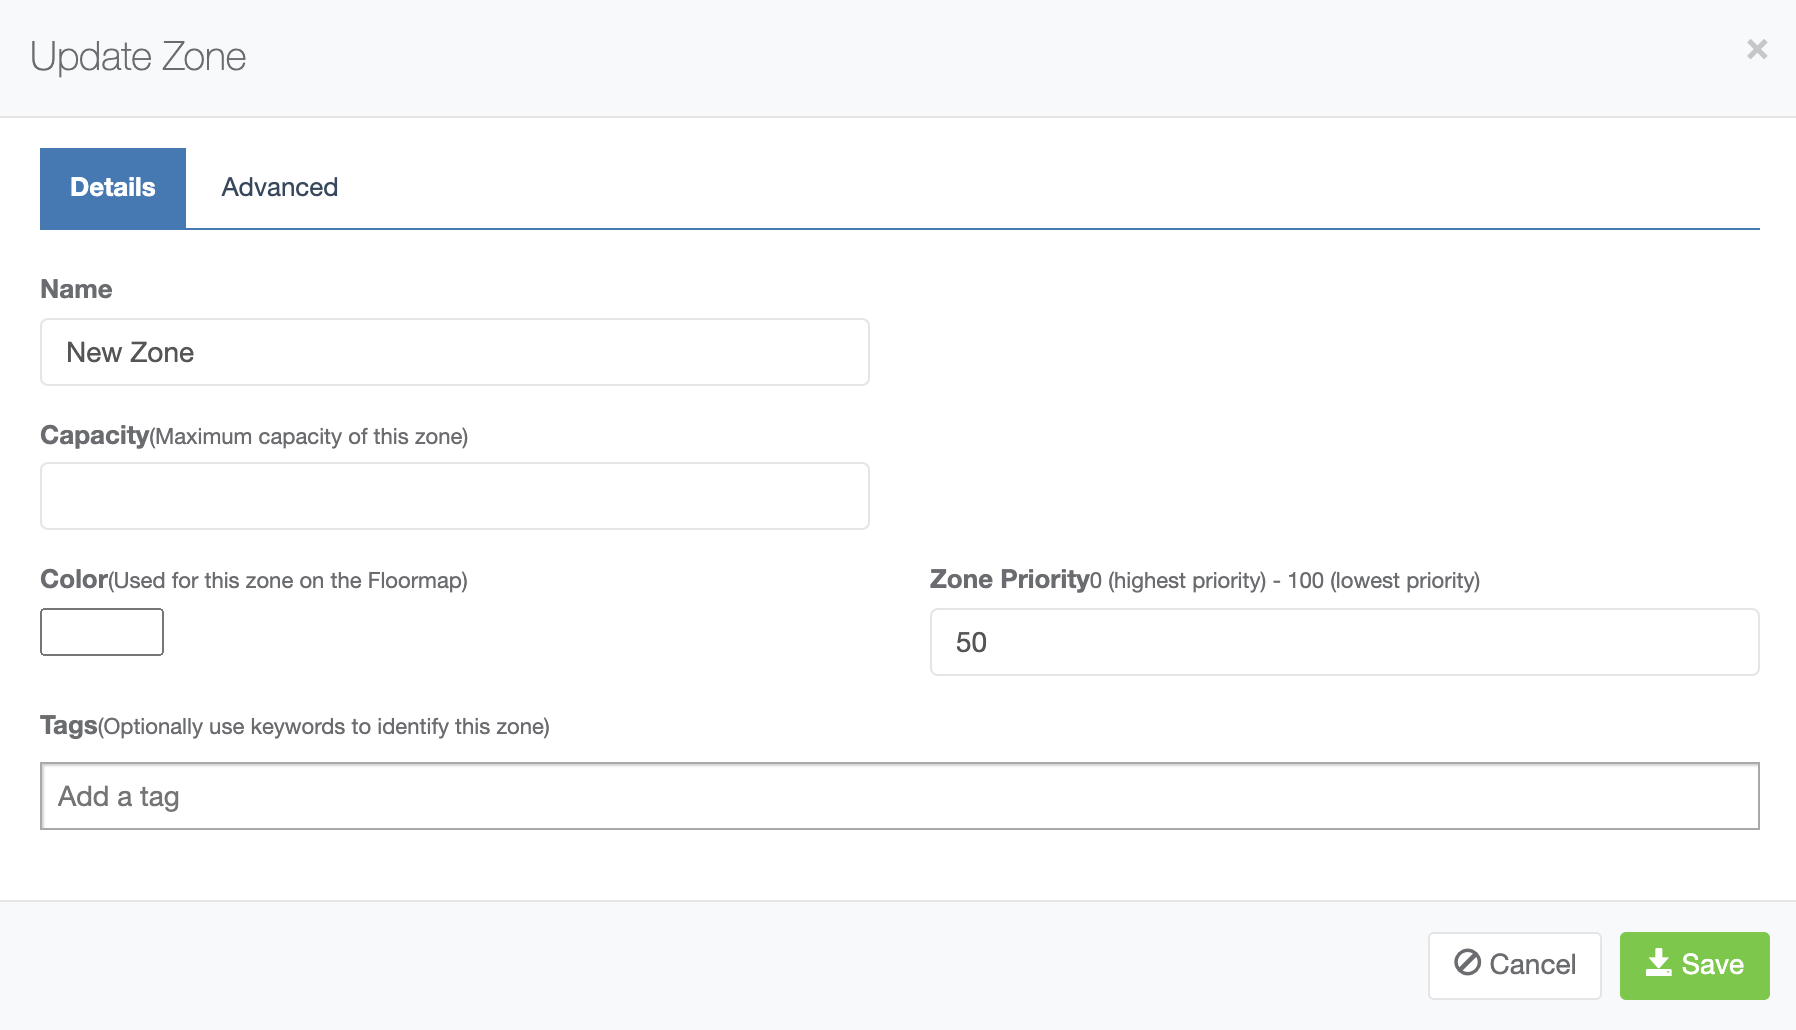
- Once the drawing sequence is completed, enter in the Zone Name, Capacity (optionally/if applicable), and color (if you want different zones to display with different colors on the floor map). Leave the other fields as default for now. The tag field can be used in the future to configure booking neighborhoods, as described in the Configuring Neighborhoods section.
- Optionally, if needed, you can edit the zone area on the floor map. To do this, click the select a floor dropdown. Then click the unlock icon. This will allow you to make edits to the map. Once you’re done making edits, click the ‘select a floor’ drop down again, and click the lock icon to lock the map. Zones can be edited by clicking on the less transparent vertices of the zone and dragging them to the appropriate location. If you need to add a new vertex, click one of the more transparent vertices. This will add a new vertex to the zone polygon, which can be then moved to the appropriate location.