Navigation Path
The navigation path is an optional piece of configuration that is used if wayfinding terminals are being used. The navigation path will be used to find paths between the user and their desired location.
Once you have configured the navigation path, if you wish to deploy the wayfinding application to a screen, please see the Deploying Hybrid Wayfinding to a Screen section.
To configure the navigation path, navigate to the Advanced Settings page, then to Configuration -> Locations -> click on your site -> Navigation Path.
- Select a floor from the drop-down menu.
- Click Add/Edit Navigation Path.

- Select the Add Marker and click the map to place the marker.
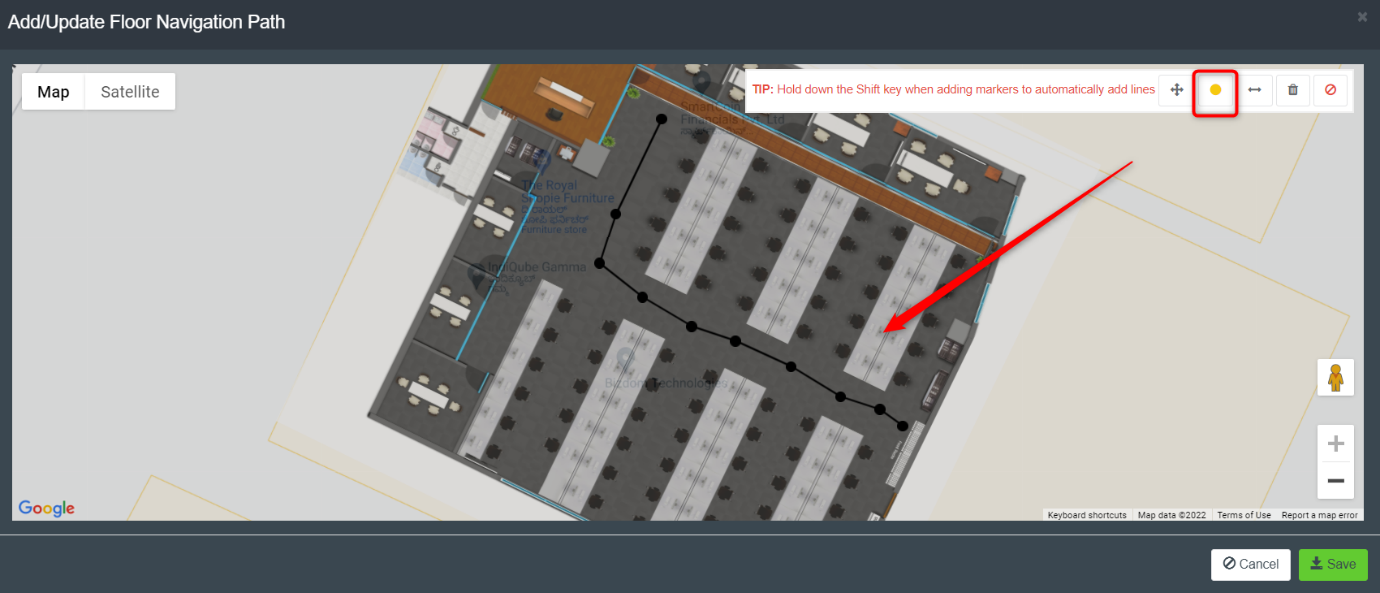
- Provide the link between the markers using Add Link icon. You can also hold the Shift key while adding markers and automatically add lines between them.
Note: You can clear the selection, delete the added markers/links, or clear the entire path by clicking on icons located at the top right corner of the map.
- Click Save button to save the changes.