Other Integrations

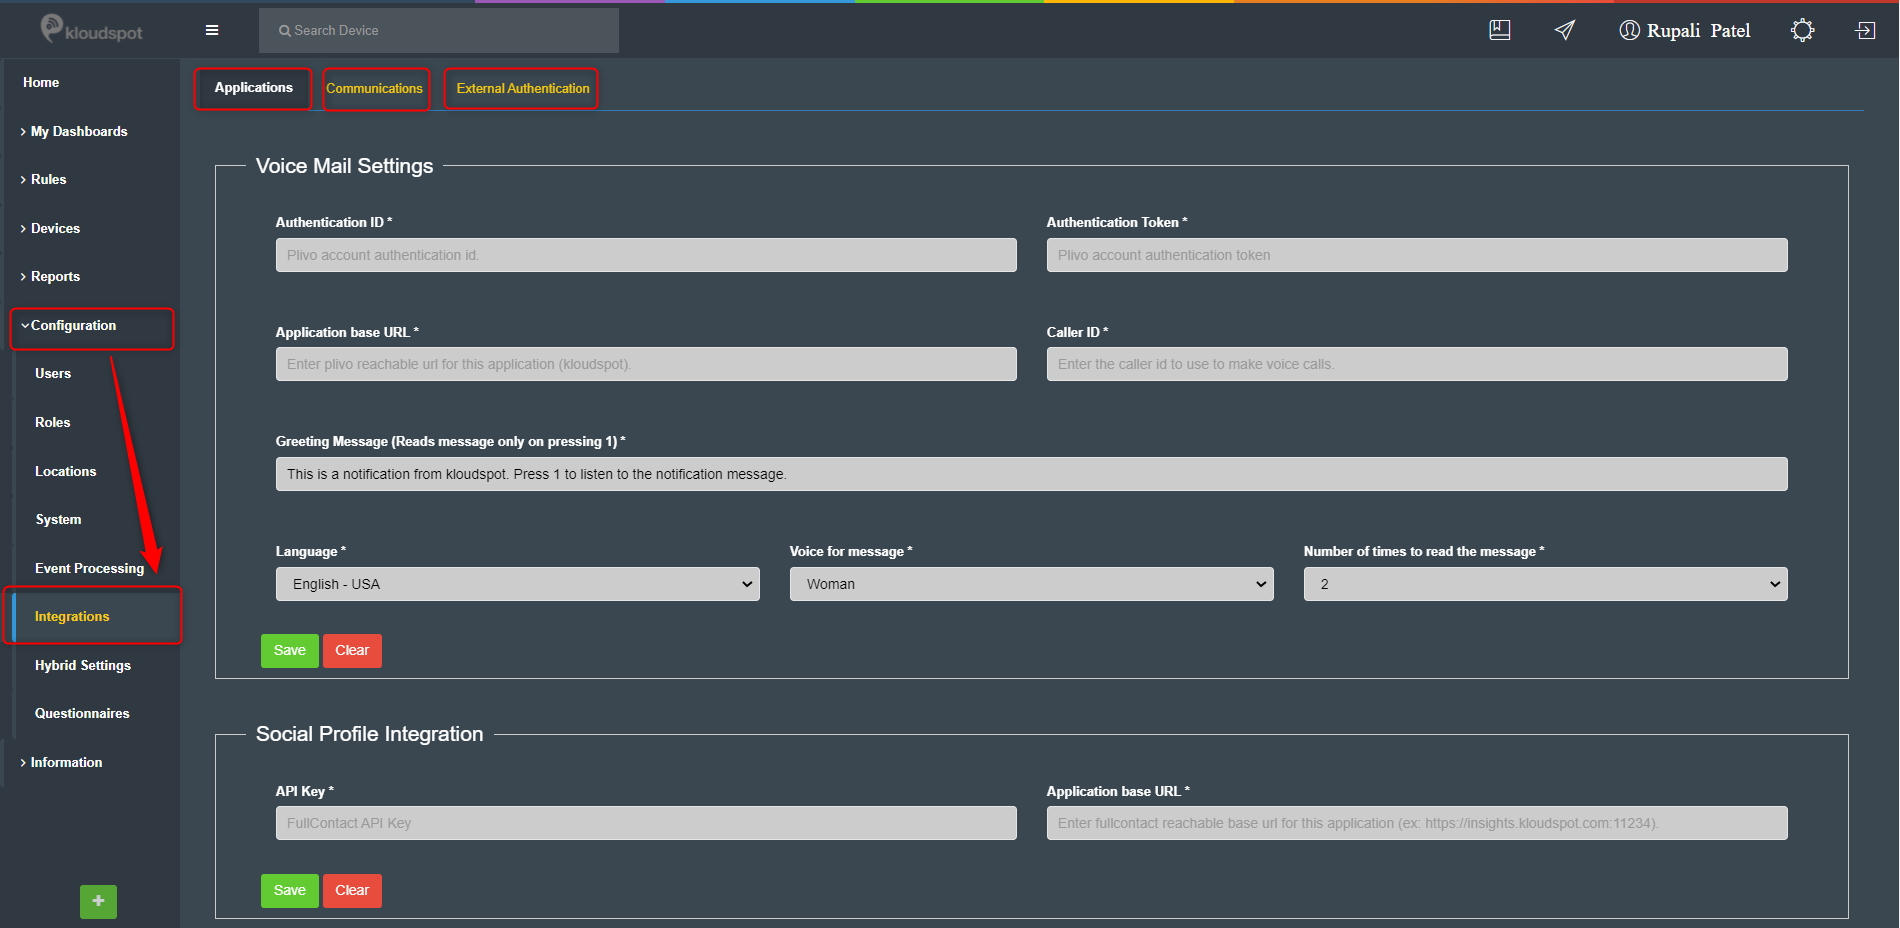
The “Integrations” page offers a convenient and versatile platform for configuring various aspects of your system. This page allows you to seamlessly integrate and customize applications, and communications. With these powerful features at your disposal, you can optimize your workflow, enhance communication, and ensure secure access to your system.

Table of content:

image

Subsections of Other Integrations

Applications tab

  1. The following 3 options are related to KloudHybrid.
  • Voice Mail Settings: Helps in configuring the Voicemail provider to send messages and notifications to users.

  • Social Profile Integration: Helps to interact with devices connected to the network.

  • Kloudspot Device Management Settings: It helps to integrate the KloudSpot NMS service with KloudHybrid.

Voice Mail Settings

  1. Get the Authentication ID, Authentication Token, Application base URL and Caller ID from the Voice Mail provider and enter it.
  2. Write “Greeting Message” in the text box. The message is read-only when the customer presses 1.
  3. Select “Language”, “Voice” and “Number of times to read the message” from the dropdown menu.
  4. Click the Save button to save the changes.
image

Social Profile Integration

To integrate a social profile, enter the API Key and Application base URL and save the changes.

image

Kloudspot Device Management Settings

  1. To integrate NMS with Hybrid workspace, 3 credentials are required.

    • Portal Base URL
    • API ID
    • API Secret Key
  2. Get these Credentials from the NMS account and past it here.

  3. Then Click on the Save & Test button to save the changes.

image

Communications tab

  1. The following options are available from the Communications tab.

    • Email Settings: Helps in configuring the Email provider to send messages and notifications to users.
    • SMS Settings: Helps in configuring the SMS provider to send messages and notifications to users.
    • Ticketing Settings: N/A
    • System Health Alerts: Helps in the configuration of methods for sending System Health notifications.

Email Settings

  1. Check the enable check box.
  2. Obtain the provider’s Host Name, Port, Username, and Password and enter them.
  3. Then type “from email” and “from the name” into the appropriate fields.
  4. If necessary, an email test can be performed by providing a test email ID.
  5. Click on Save

SMS Settings

  1. To enable SMS settings, check the Enable check box.
  2. Select the provider from the dropdown menu.
  3. Enter the sender’s phone number in the “Phone number to send from” text box.
  4. In the text box, enter the provider’s “Account key” and “Account Secret”.
  5. If necessary, a SMS test can be performed by providing a test phone number.
  6. Click on Save.
image

System Health Alerts

  1. Helps to receive system health-related notifications.
  2. Enable email notifications and add the email ID to receive the notification.
  3. Enable webhook notifications to receive notifications and select the desired webhook type.
  4. Then add a webhook Link.
  5. Click the Save button to save the changes.
image