Connecting to your Infrastructure

  1. Once you have successfully created your hybrid office in KloudHybrid, the next crucial step is to establish seamless connectivity between KloudHybrid and your existing infrastructure. This enables the application to efficiently interact with your established systems and streamline various processes.

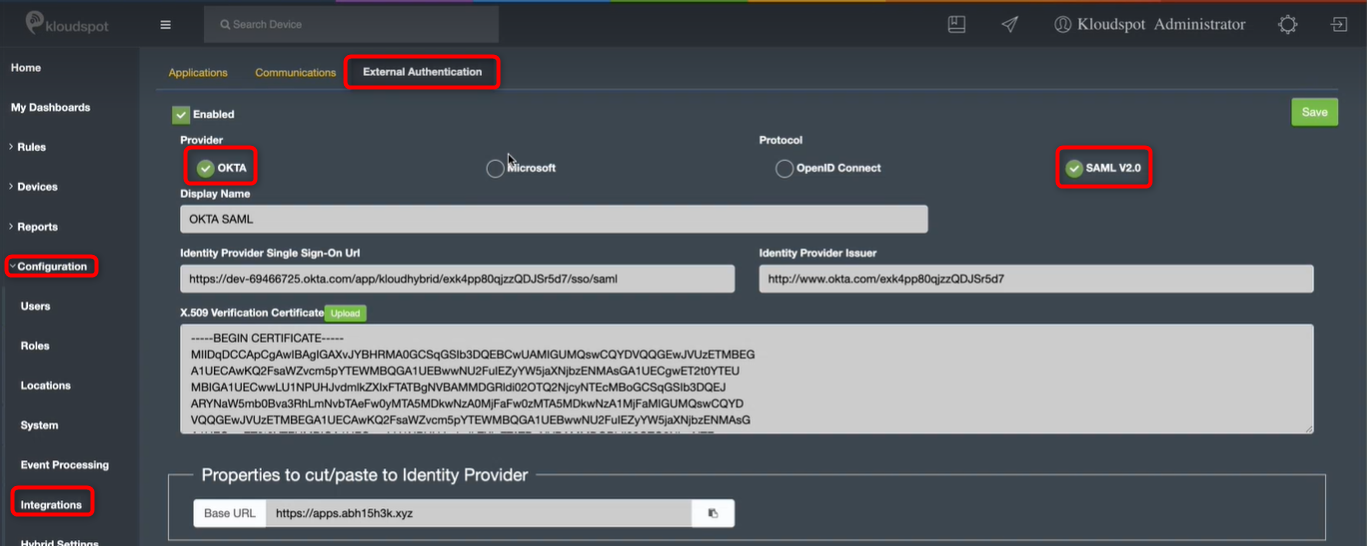
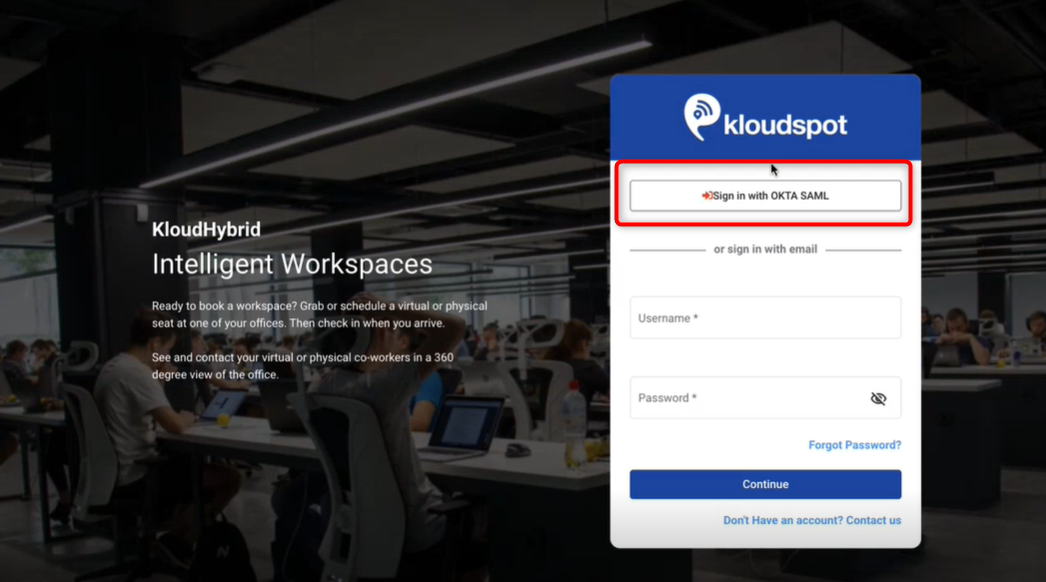
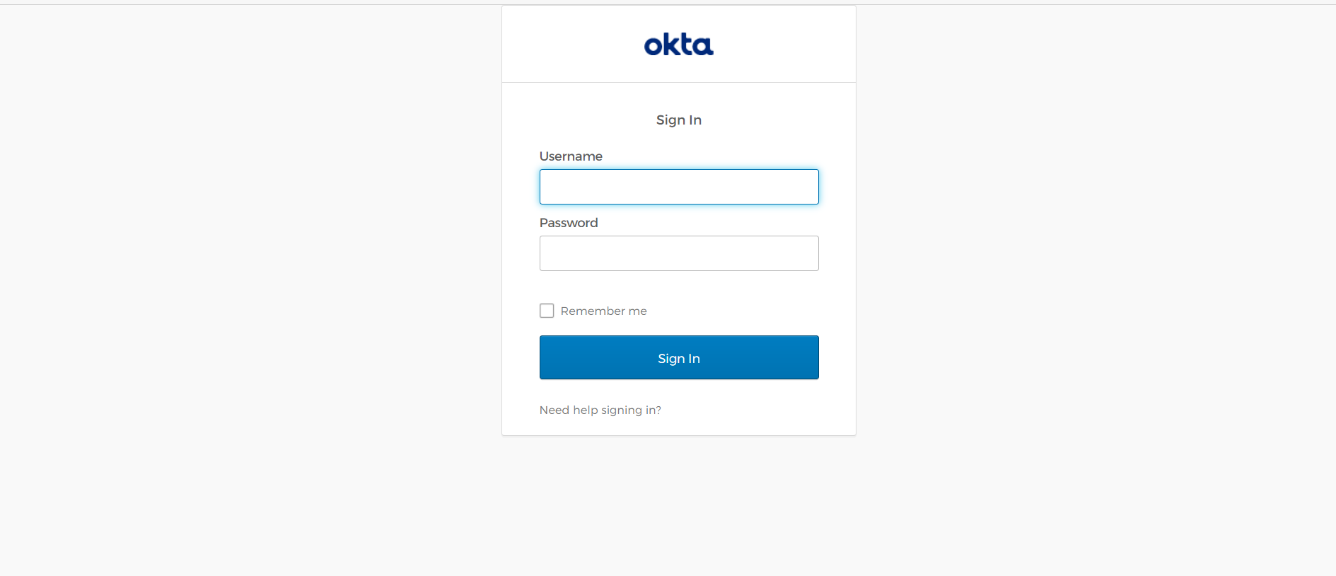
  2. KloudHybrid offers two providers, namely OKTA and Microsoft, for establishing this connection. You can choose the provider that aligns best with your organization’s requirements and infrastructure.

Overview

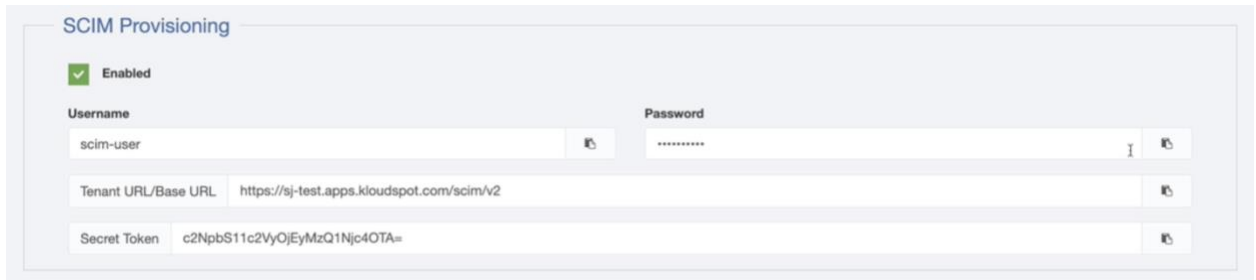
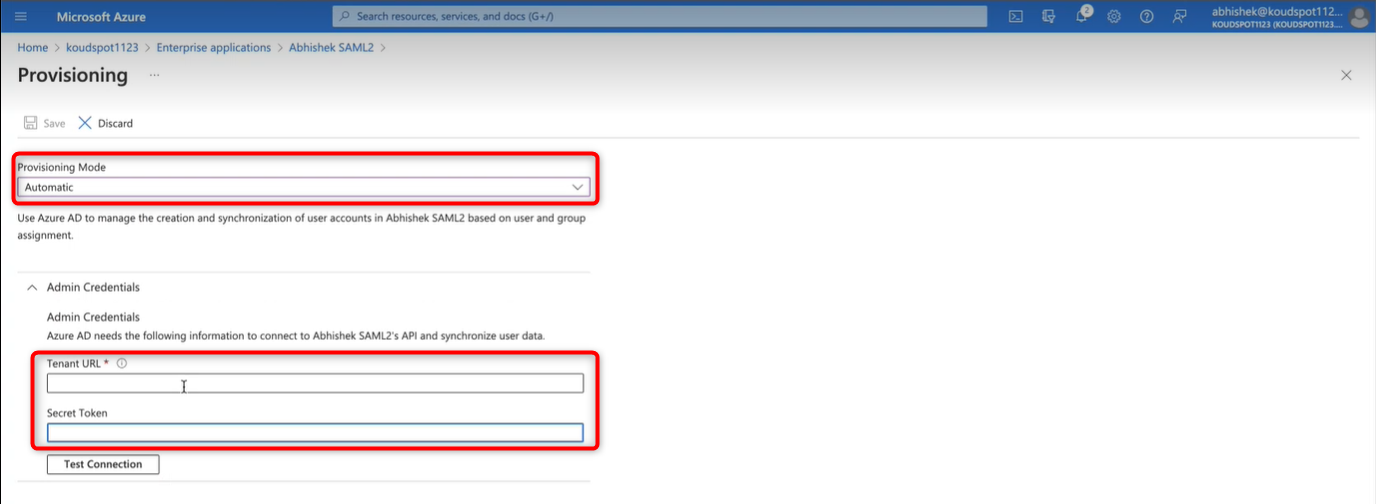
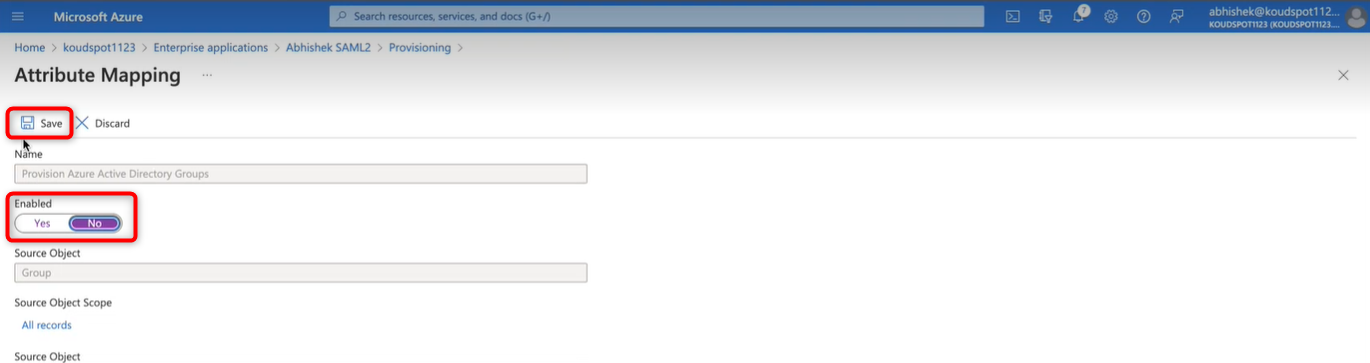
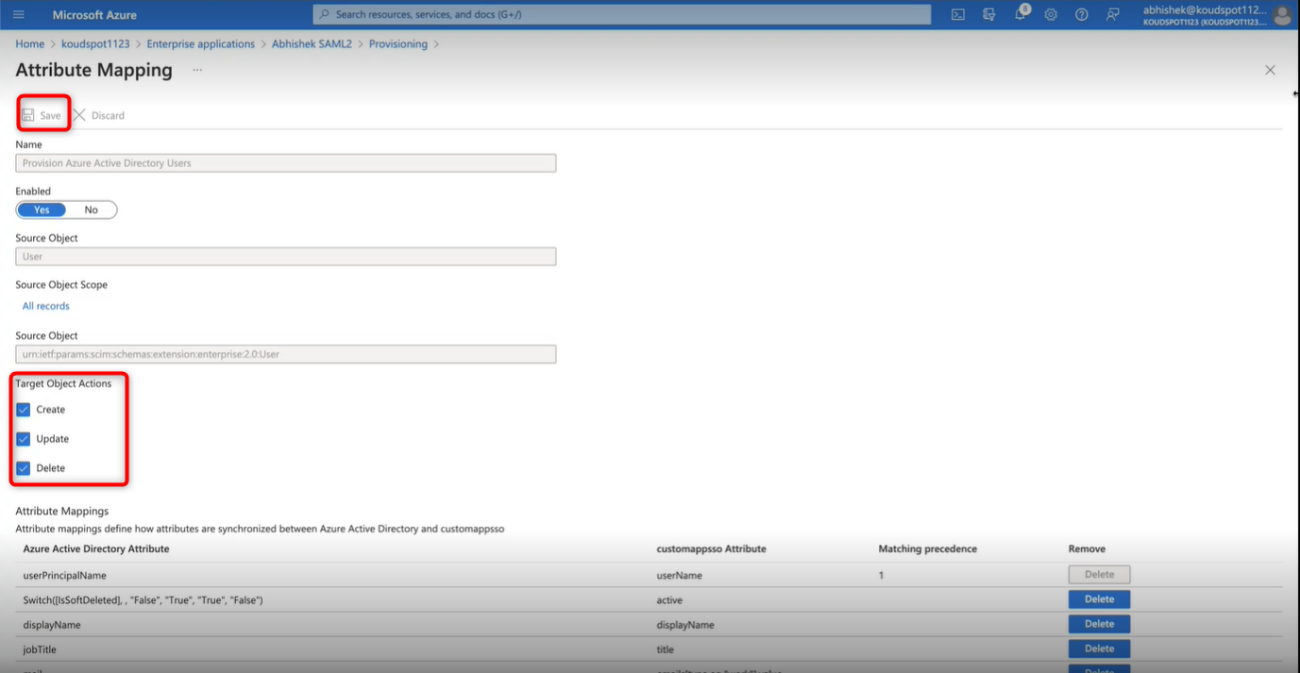
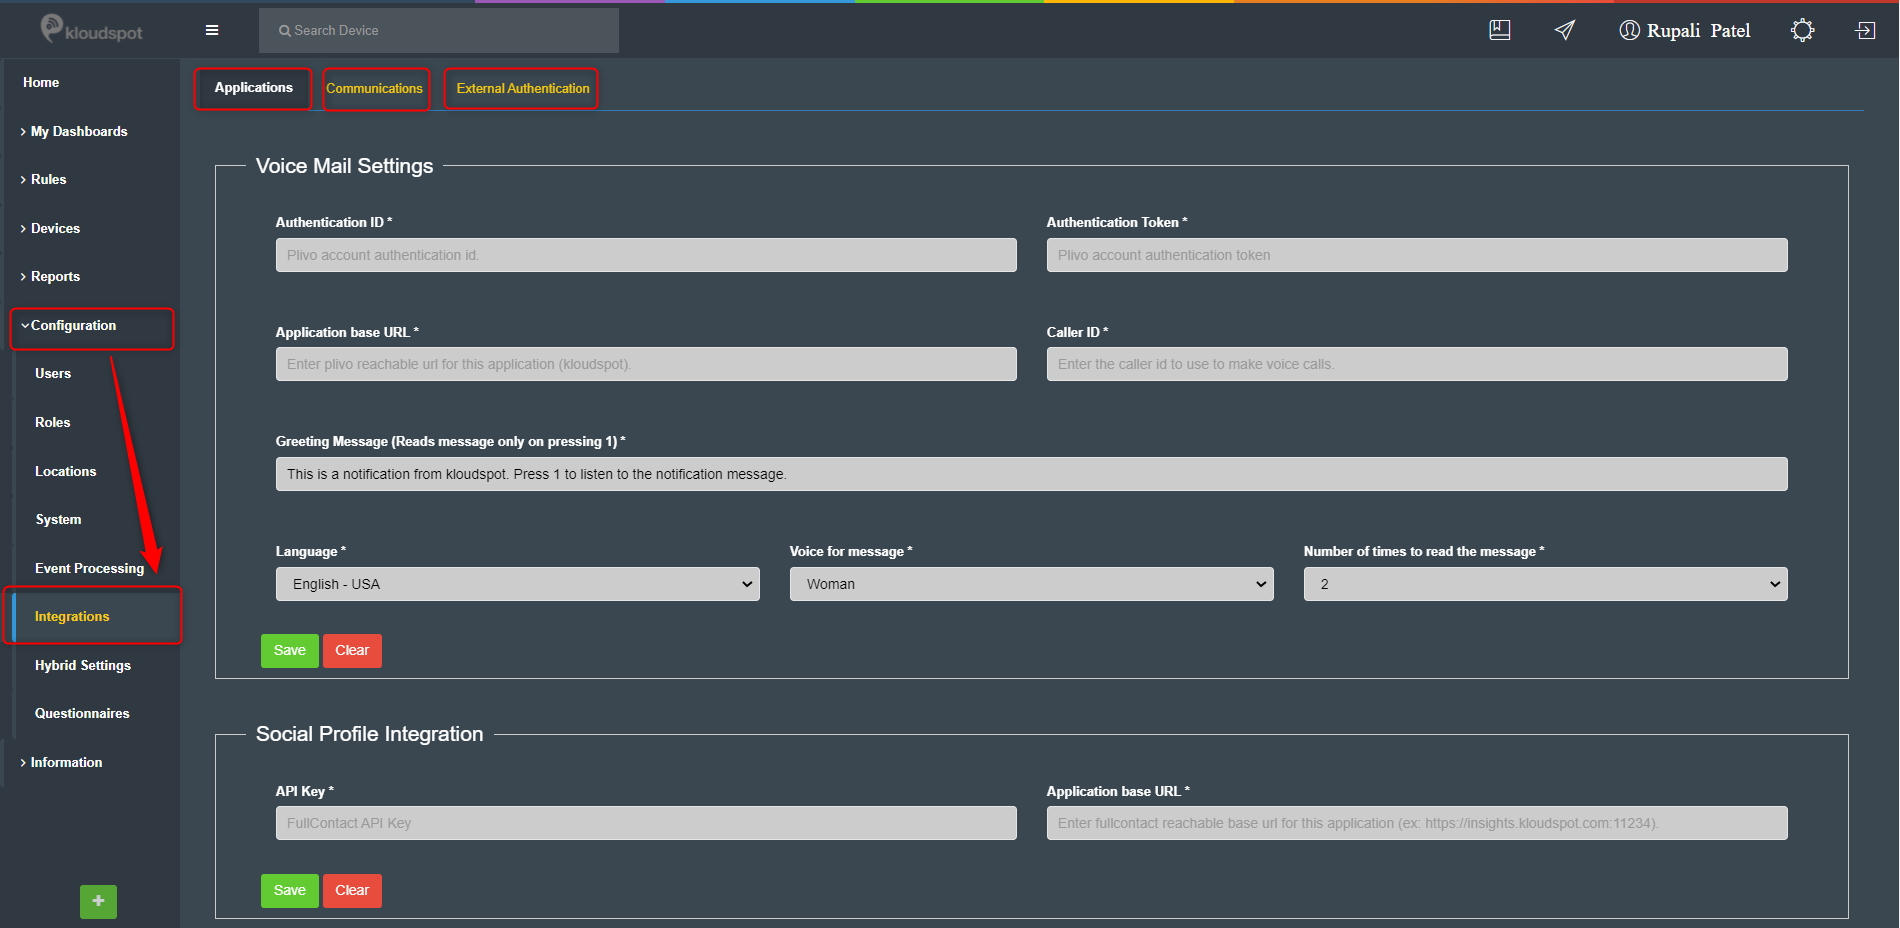
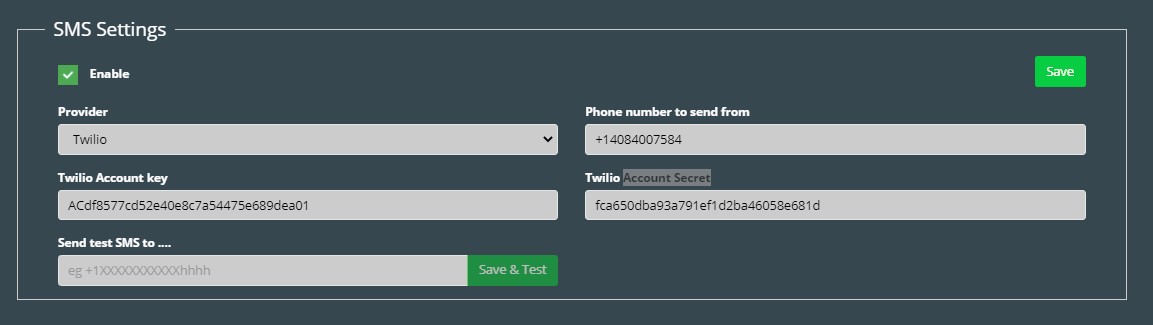
In this Section, we will explore various aspects of establishing connections to your infrastructure, ensuring seamless integration and communication within your systems. We will cover essential topics such as SCIM setup, Microsoft Graph API integration, email (SMTP) setup, SMS setup, application integrations, external authentication, and other valuable integrations. Whether you’re looking to streamline your operations or enhance the functionality of your infrastructure, this section will provide you with the necessary insights and instructions to successfully connect your systems and optimize your workflows.

Table of content

Subsections of Connecting to your Infrastructure

SCIM Setup

  1. SCIM makes user data more secure and simplifies the user experience by automating the user identify lifecycle management process. With the addition of SCIM integration, user identifies can be created directly in a tool such as OKTA or Azure. Since it is a standard, user data is stored in a consistent way and can be communicated between the user management system and KloudHybrid. This enables IT departments to automate the provisioning/deprovisioning process while also having a single system to manage permissions and groups. Since user data is transferred automatically and communicated between the two systems, risk of errors is reduced.

  2. Currently, KloudHybrid supports the following features when integrated with SCIM:

    • Create users: Users in OKTA that are assigned to the KloudHybrid app will automatically be created in KloudHybrid.
    • Update user attributes: Any changes to users in OKTA will automatically be made to the associated KloudHybrid user.
    • Deactivate users: Users deactivated in OKTA or un-assigned from the app will be disabled in KloudHybrid.
  3. Obtain the Provisioning API credentials from KloudHybrid. In the ‘Advanced’ user interface, go to Configuration -> Integrations -> External Authentication. Enable SCIM Provisioning and click save.

NOTE: A random password will be generated by the system. You can either use the default username and password or create your own.

Mentor Meeting
  1. Configure SCIM in either OKTA or Azure, see the sections below for instructions.

Enabling SCIM in OKTA

  1. The System for Cross-domain Identity Management (SCIM) specification is a provisioning protocol to create, retrieve, update, and deactivate users and groups between Okta and Hybrid application.
  2. To enable SCIM in OKTA. Follow the steps below.
  3. Navigate to Advance Settings and then go to Configuration > Integrations > External Authentication.
  4. Make sure OKTA is selected in the provider and SAML 2.0 in the protocol.
Mentor Meeting
  1. Scroll down and enable SCIM provisioning. In the text box that opens, enter Username and Password. And save the changes.

Note: The username and password are decided by you and the Tenant URL and Secret token will be generated accordingly.

Mentor Meeting
  1. After saving the changes. Log out of the Hybrid app and double-check that the single sign on button is functional.
Mentor Meeting
  1. Then log in to your OKTA account.
Mentor Meeting
  1. Click on Applications and from the drop-down select Applications.
image
  1. Select the same application that was created when the single sign-on button was integrated. Refer Configure SAML with OKTA section for more details.
Mentor Meeting
  1. In the window that opens, click on the Provisioning tab. And click Configure API Integration button.
Mentor Meeting
  1. Check the Enable API integration, then in the text box that opens, enter the same username and password that you entered in the Hybrid Advanced settings.

Mentor Meeting Mentor Meeting

  1. Then click on the Test API Credentials button to verify the Application.

  2. Once verified, you will be notified that the application has been verified successfully. If not, double-check the single sign-on configuration.

  3. Refer Configure SAML with OKTA section for more details.

  4. If it is working fine Click Save button.

Mentor Meeting
  1. Then navigate to To App > Edit and check the three check boxes and click Save.

Note: Only the To App option is currently operational. This means that users who add to the OKTA application will also be added to the hybrid application.

  1. SCIM in OKTA is added successfully.

Mentor Meeting Mentor Meeting

Enabling SCIM IN Azure

  1. To enable SCIM in Azure. Follow the steps below.
  2. Navigate to Advance Settings and then go to Configuration > Integrations > External Authentication.
  3. Make sure Microsoft is selected in the provider and SAML V2.0 in the protocol.
Mentor Meeting
  1. Scroll down and enable SCIM provisioning. In the text box that opens, enter Username and Password. And save the changes.

Note: The username and password are decided by you and the Tenant URL and Secret token will be generated accordingly.

Mentor Meeting
  1. After saving the changes. Log out of the Hybrid app and double-check that the single sign on button is functional. If functional continue with steps below. Otherwise refer Configure SAML with Microsoft Azure AD section for configure SAML with Microsoft.
Mentor Meeting
  1. Log in to your Microsoft Azure portal on https://portal.azure.com/

  2. Click on Azure Activity Directory from the Azure services options as shown below.

Mentor Meeting
  1. Locate and click on the Enterprise Applications on the Window.
Mentor Meeting
  1. Select the same application that was created when the single sign-on button was integrated.
Mentor Meeting
  1. Then click on the Get Started button from the Provision User Account.
Mentor Meeting
  1. openAgain, click on Get started button from the window that open.
Mentor Meeting
  1. Select the Automatic provisioning mode from the drop-down list. Then copy and paste the Tenant URL and Secret Token from the Hybrid Advanced settings.

Mentor Meeting Mentor Meeting

  1. Then Click on Test Connection button to authorize the connection.

  2. Once authorized, you will be notified that the credentials have been authorized successfully. If not, double-check the single sign-on configuration. Refer Configure SAML with Microsoft Azure AD for more details.

  3. Click on Save button.

Mentor Meeting
  1. Then navigate to Provisioning > Edit Provisioning > Mappings > Provision Azure Active Directory Groups.

Mentor Meeting Mentor Meeting

  1. Disable it and click Save.

Note: Only newly created user information will be added to the hybrid automatically. No new groups will be added.

Mentor Meeting
  1. Then click on Azure Active Directory Users. Make sure Create, Update and Delete are enabled in the target object actions.

  2. Click on Save button. SCIM in Microsoft Azure is added successfully.

Mentor Meeting

Other Integrations

The “Integrations” page offers a convenient and versatile platform for configuring various aspects of your system. This page allows you to seamlessly integrate and customize applications, and communications. With these powerful features at your disposal, you can optimize your workflow, enhance communication, and ensure secure access to your system.

Table of content:

image

Subsections of Other Integrations

Applications tab

  1. The following 3 options are related to KloudHybrid.
  • Voice Mail Settings: Helps in configuring the Voicemail provider to send messages and notifications to users.

  • Social Profile Integration: Helps to interact with devices connected to the network.

  • Kloudspot Device Management Settings: It helps to integrate the KloudSpot NMS service with KloudHybrid.

Voice Mail Settings

  1. Get the Authentication ID, Authentication Token, Application base URL and Caller ID from the Voice Mail provider and enter it.
  2. Write “Greeting Message” in the text box. The message is read-only when the customer presses 1.
  3. Select “Language”, “Voice” and “Number of times to read the message” from the dropdown menu.
  4. Click the Save button to save the changes.
image

Social Profile Integration

To integrate a social profile, enter the API Key and Application base URL and save the changes.

image

Kloudspot Device Management Settings

  1. To integrate NMS with Hybrid workspace, 3 credentials are required.

    • Portal Base URL
    • API ID
    • API Secret Key
  2. Get these Credentials from the NMS account and past it here.

  3. Then Click on the Save & Test button to save the changes.

image

Communications tab

  1. The following options are available from the Communications tab.

    • Email Settings: Helps in configuring the Email provider to send messages and notifications to users.
    • SMS Settings: Helps in configuring the SMS provider to send messages and notifications to users.
    • Ticketing Settings: N/A
    • System Health Alerts: Helps in the configuration of methods for sending System Health notifications.

Email Settings

  1. Check the enable check box.
  2. Obtain the provider’s Host Name, Port, Username, and Password and enter them.
  3. Then type “from email” and “from the name” into the appropriate fields.
  4. If necessary, an email test can be performed by providing a test email ID.
  5. Click on Save

SMS Settings

  1. To enable SMS settings, check the Enable check box.
  2. Select the provider from the dropdown menu.
  3. Enter the sender’s phone number in the “Phone number to send from” text box.
  4. In the text box, enter the provider’s “Account key” and “Account Secret”.
  5. If necessary, a SMS test can be performed by providing a test phone number.
  6. Click on Save.
image

System Health Alerts

  1. Helps to receive system health-related notifications.
  2. Enable email notifications and add the email ID to receive the notification.
  3. Enable webhook notifications to receive notifications and select the desired webhook type.
  4. Then add a webhook Link.
  5. Click the Save button to save the changes.
image