Microsoft Graph API
-
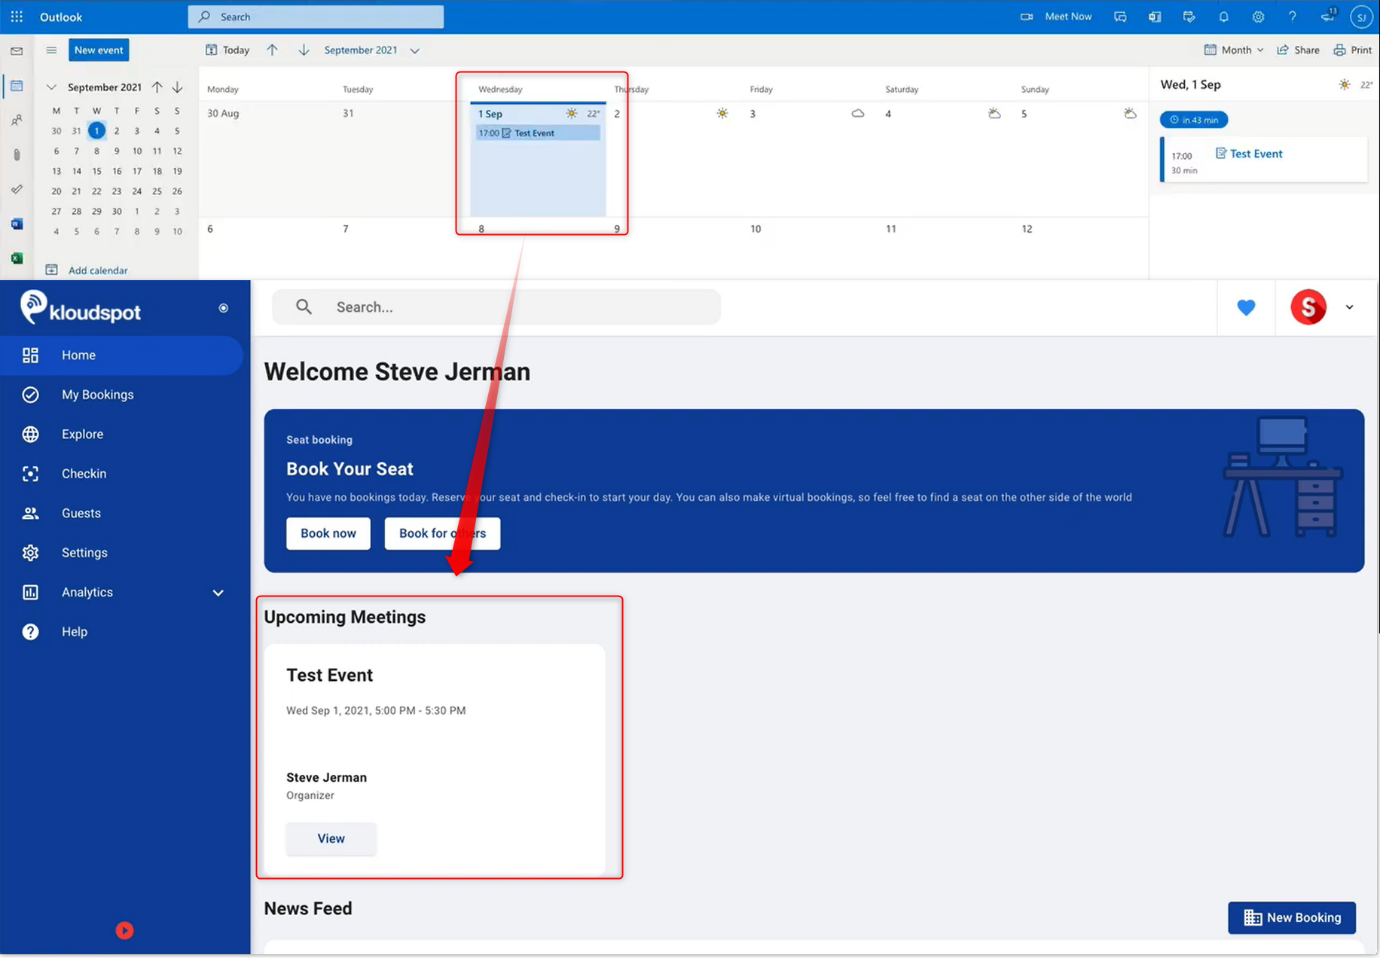
Integration with the Microsoft Graph API is required for integration with user calendars. Without this integration, upcoming user meetings will not show up on the home page, conference room bookings made in ‘Kloudspot Hybrid Work’ will not sync to a user’s Outlook calendar, and vice versa.
-
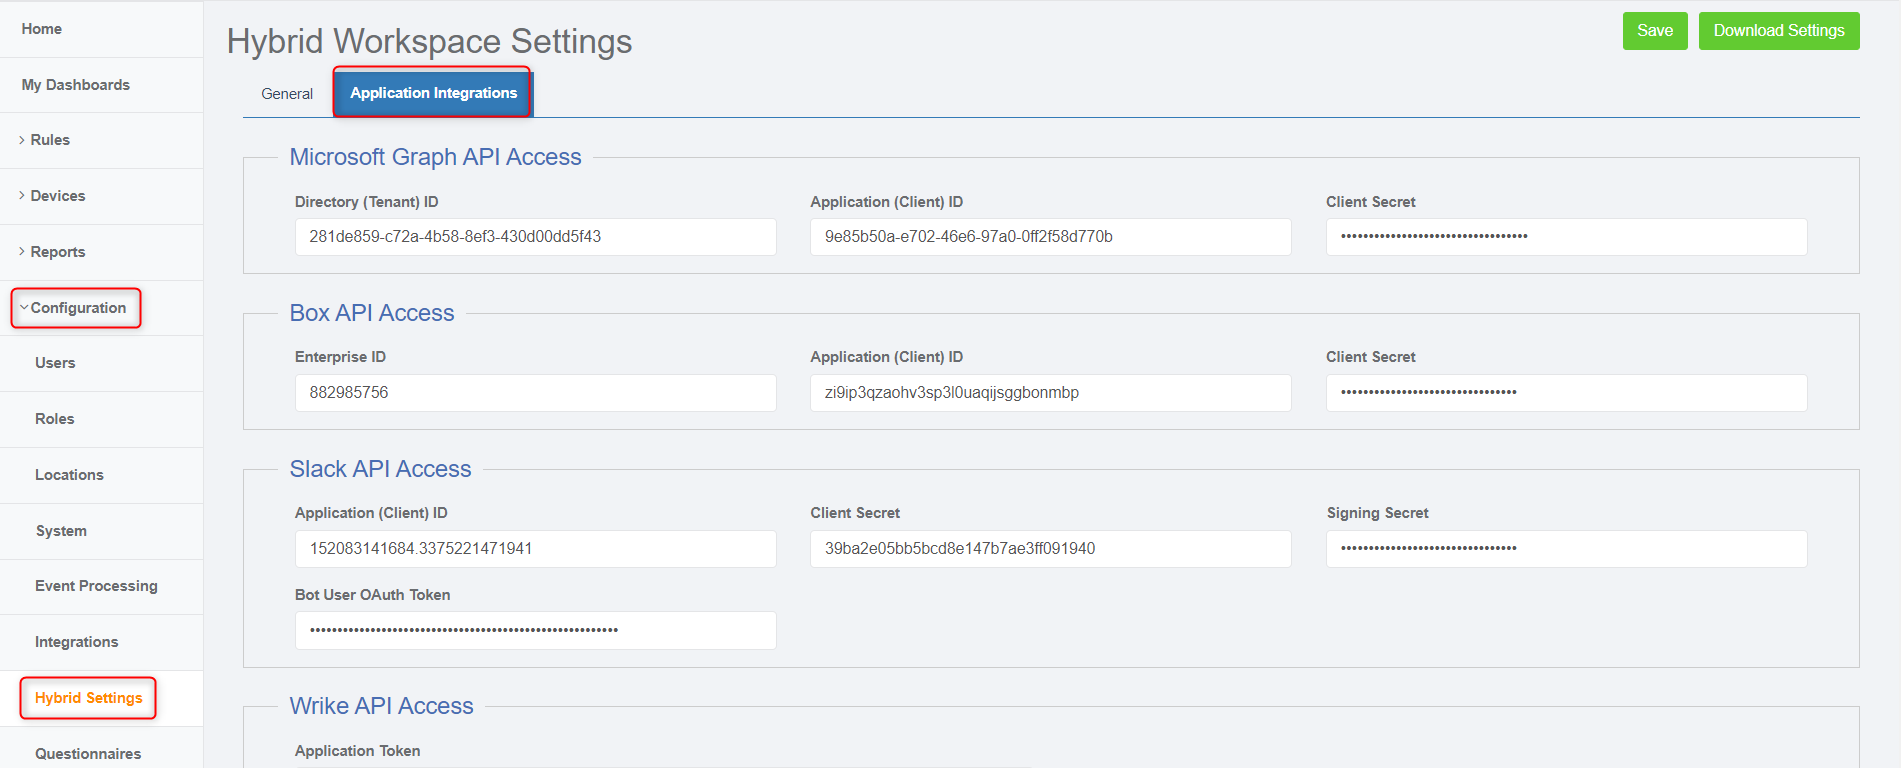
To find the App integration page, navigate to the Advanced Settings Page, then go to Configuration -> Hybrid Settings-> Application Integrations.
Integrating With the Graph API
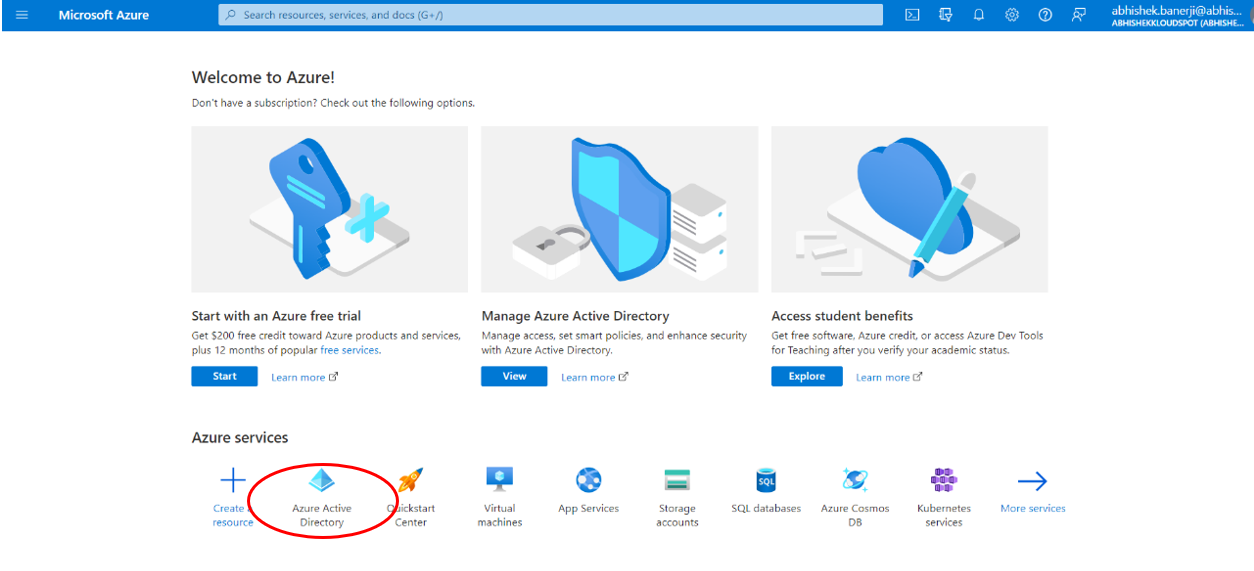
- Log in to your Microsoft Azure portal on https://portal.azure.com/
- Click on Azure Activity Directory from the Azure services options as shown below.
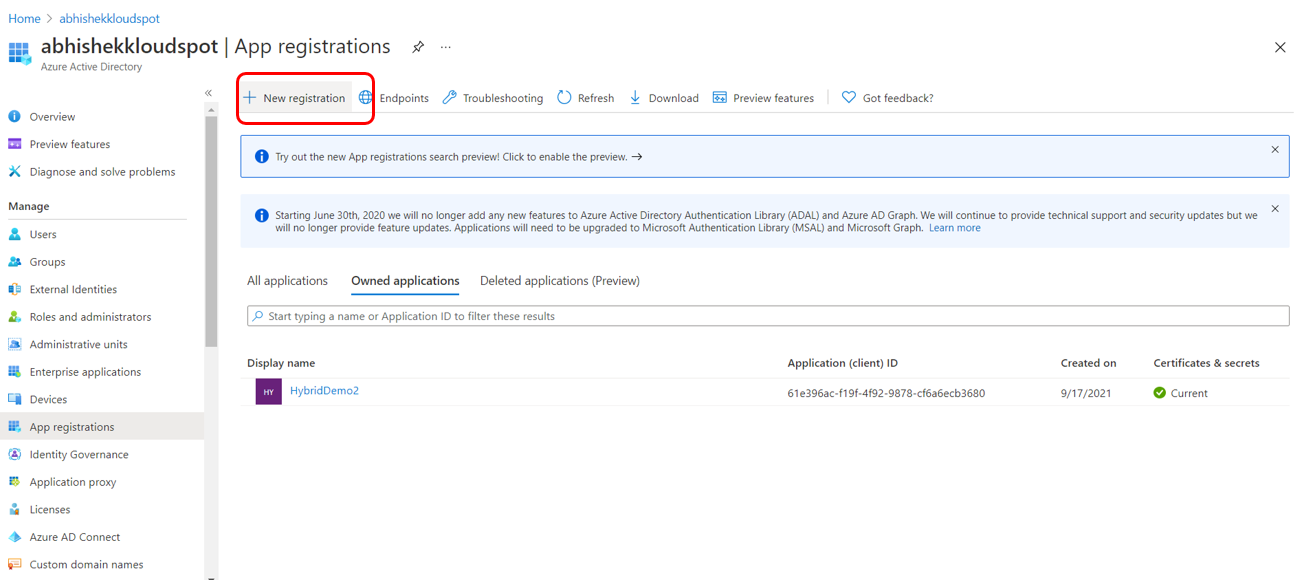
- Locate and click on the App Registration on the menu bar.
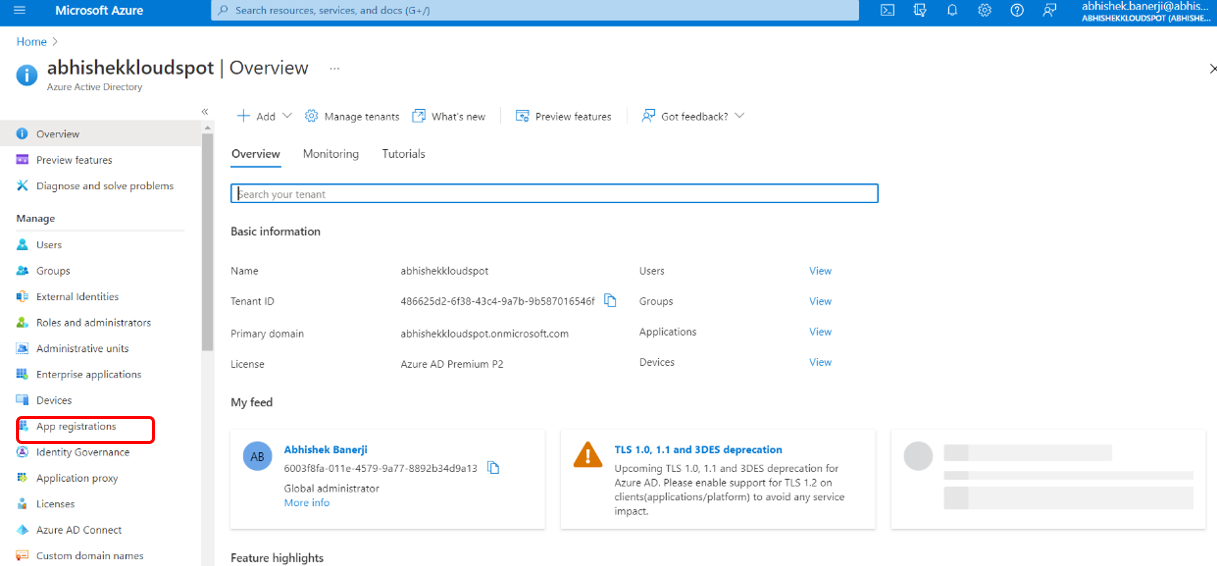
- Click on +New registration on the page.
-
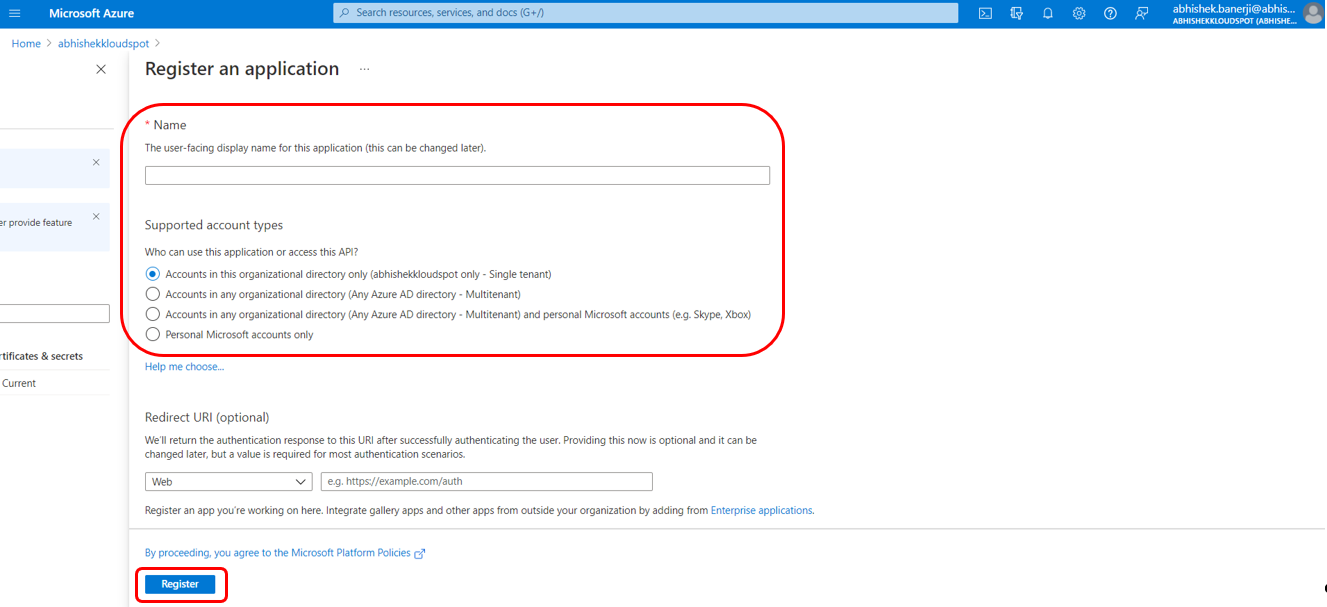
Enter the information in the blanks to create a new registration.
- Name: enter a name for the application.
- Supported account types: Select the option as shown in the figure below.
-
Click on Register.
-
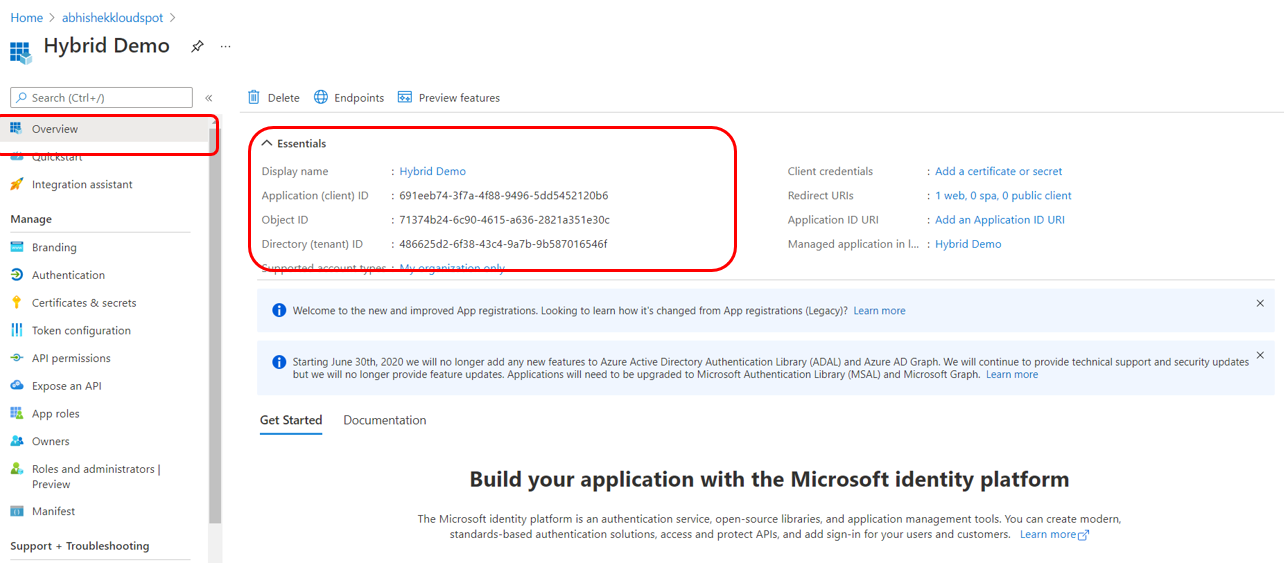
Go back to the home page and click on Overview for login information on the new application created. Copy information from the Essentials and paste it into the KloudHybrid configuration.
- The Directory (Tenant ID) and Application (Client) Id in KloudHybrid will be the same as those on the Azure portal.
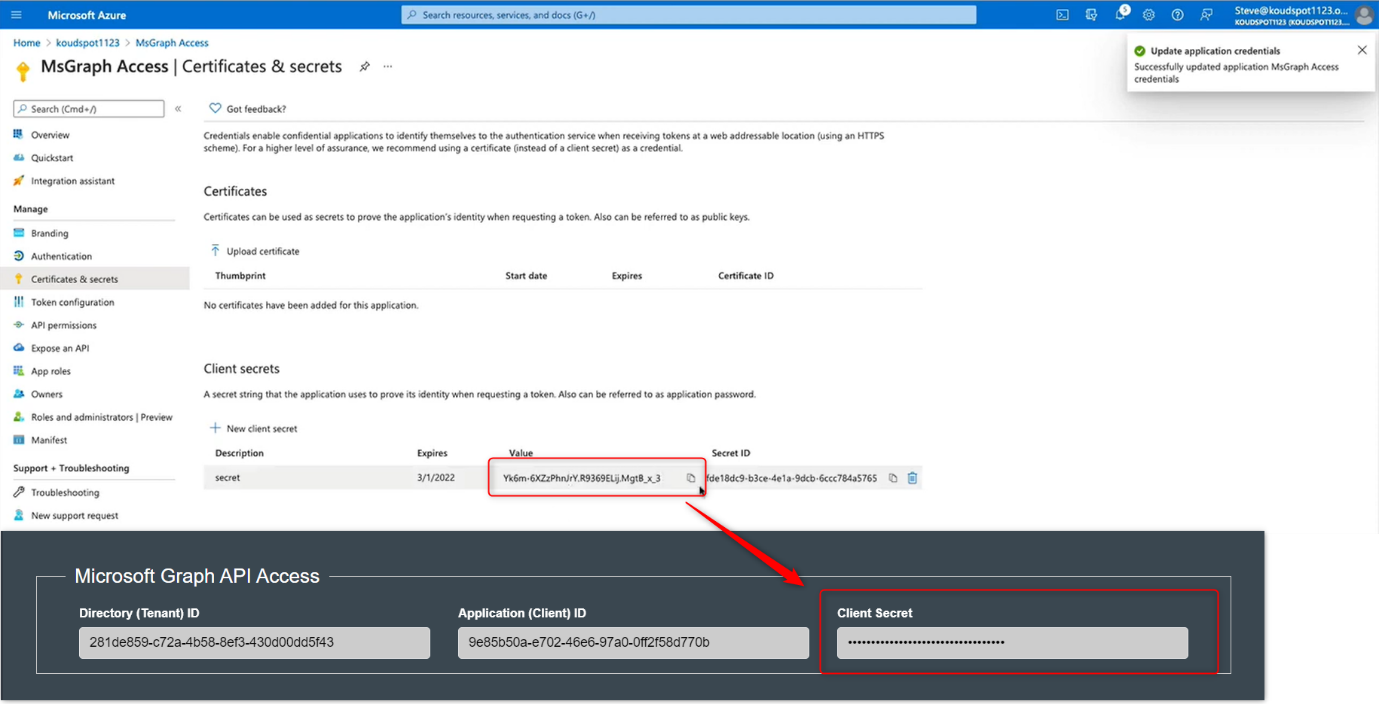
- Next, we will create a client secret in Azure and past that into KloudHybrid.

- To create a Client Secret, go to the Azure portal, click on Certificates & secrets and then click on + New client secret.
- Enter the description and click on Add.
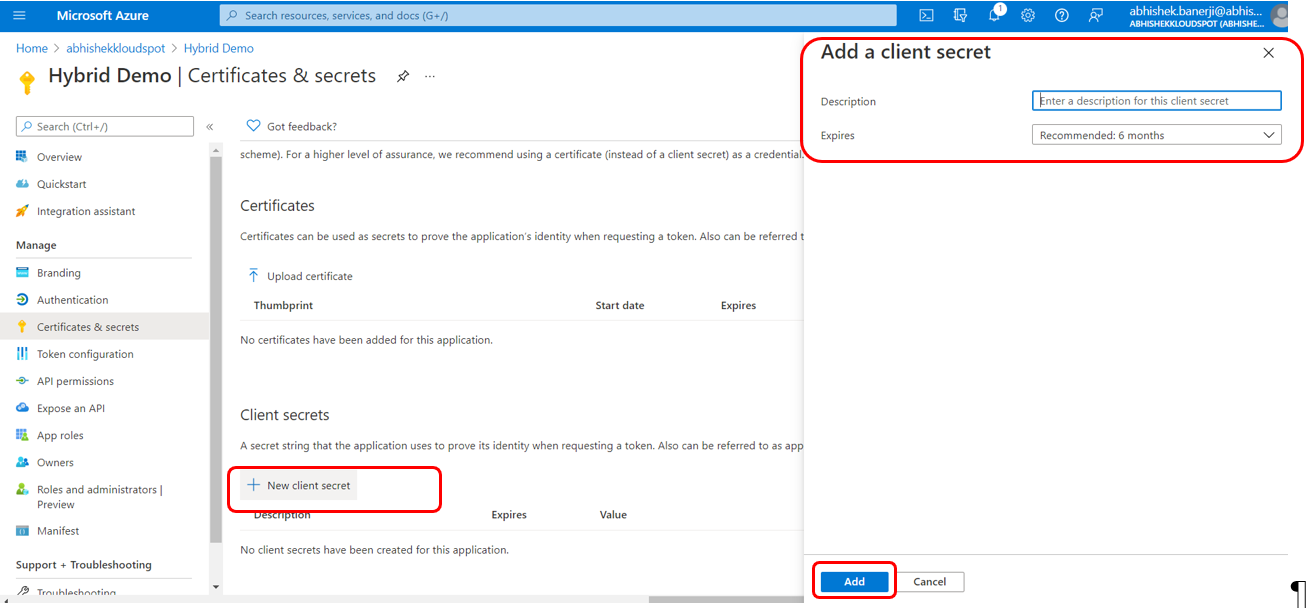
- Copy the Value and paste it into the Client secret section in Microsoft Graph API Access in KloudHybrid.
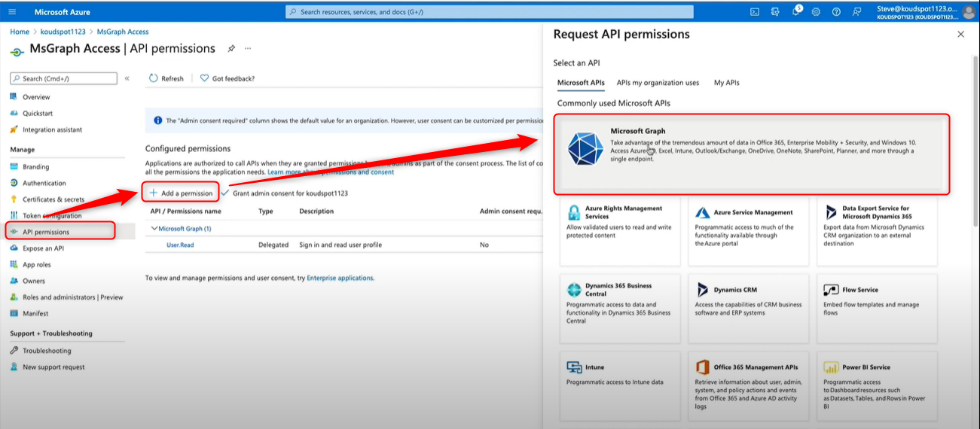
Creating API Permissions
- Go to the Azure portal, click on API Permissions and then click on + Add permission.
- The Request API permissions tab will open. in that, Click on the Microsoft graph button.
-
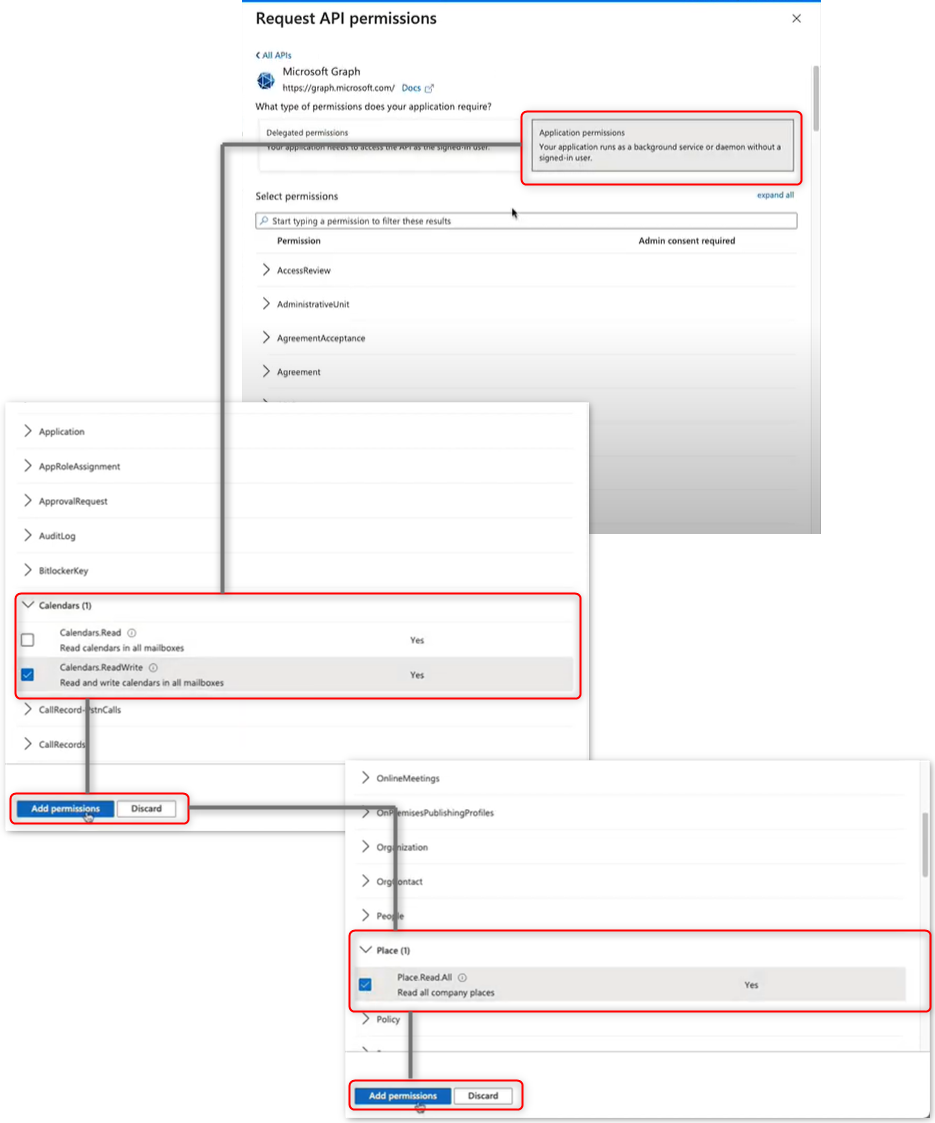
In the window that appears, select the Applications permissions option.
-
A list of permissions will appear. Scroll down and check the calendar ReadWrite option from the calendars dropdown menu.
-
Click on Add permissions button to add calendar permission.
-
Scroll down again and check the Place Read All options in the place dropdown menu.
-
Click on Add permissions button to add place permission.
-
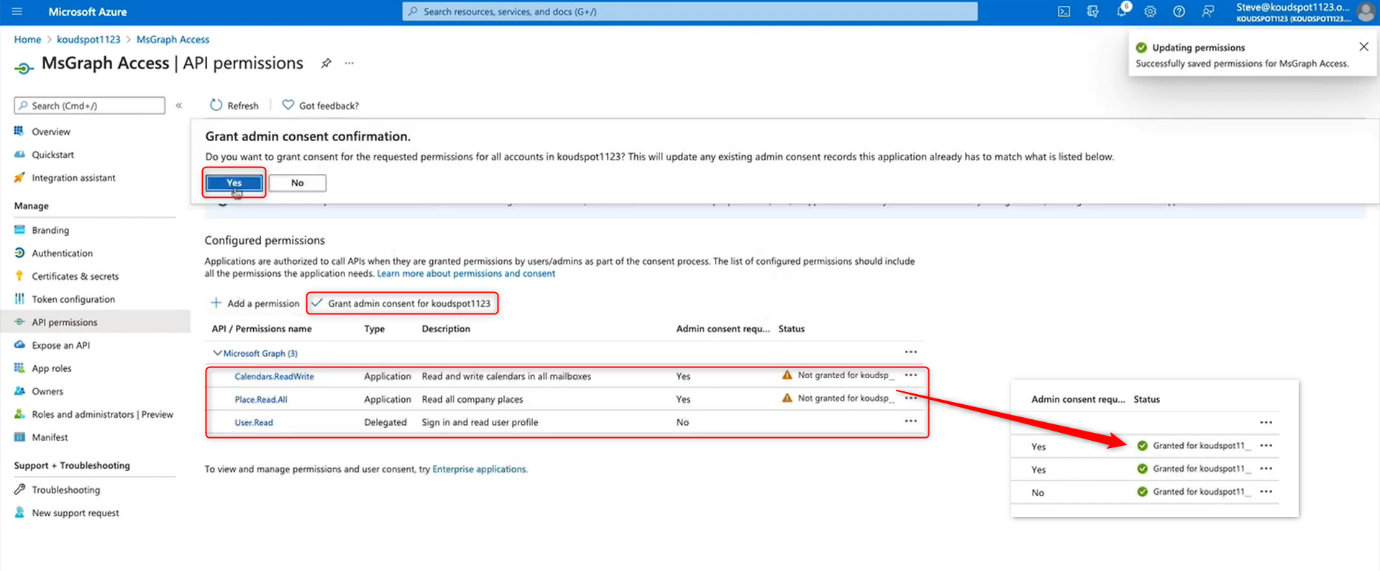
The newly added permissions are visible in the configured permission list. To authorize newly added permissions. Click on the Grant Admin Consent button and click Yes in the popup window that appears.
-
Then the permission status will be changed from not granted to Granted.
-
Calendar has been successfully configured.
- Once the calendar is added. The information that is added to the calendar will be displayed in the KloudHybrid.