In this step, we will guide you through the process of connecting your organization’s calendar to KloudHybrid. By establishing this connection, you can effortlessly synchronize meeting details, ensuring a seamless experience across the KloudHybrid application, including the homepage and My Schedule section.
To begin, it is essential to connect your preferred calendar system to KloudHybrid. Currently, KloudHybrid supports two calendar providers: Microsoft Outlook Calendar and Google Calendar. You can choose the one that suits your organization’s needs best.
Please note that only one calendar can be displayed at a time in KloudHybrid. Carefully consider your requirements and preferences before proceeding with the configuration.
For Microsoft Outlook Calendar integration, refer to the comprehensive Microsoft Graph API document given below. This document contains detailed instructions on how to configure the integration successfully.
Alternatively, if you opt for Google Calendar integration, refer to the dedicated [Google Calendar Integration document(/kloudhybrid/adminguide1/step2/calendarintegration/googlecalendar/)] given below. This guide will walk you through the steps to seamlessly configure the integration.
Subsections of Configuring Calendar Integration with KloudHybrid
Microsoft Graph API
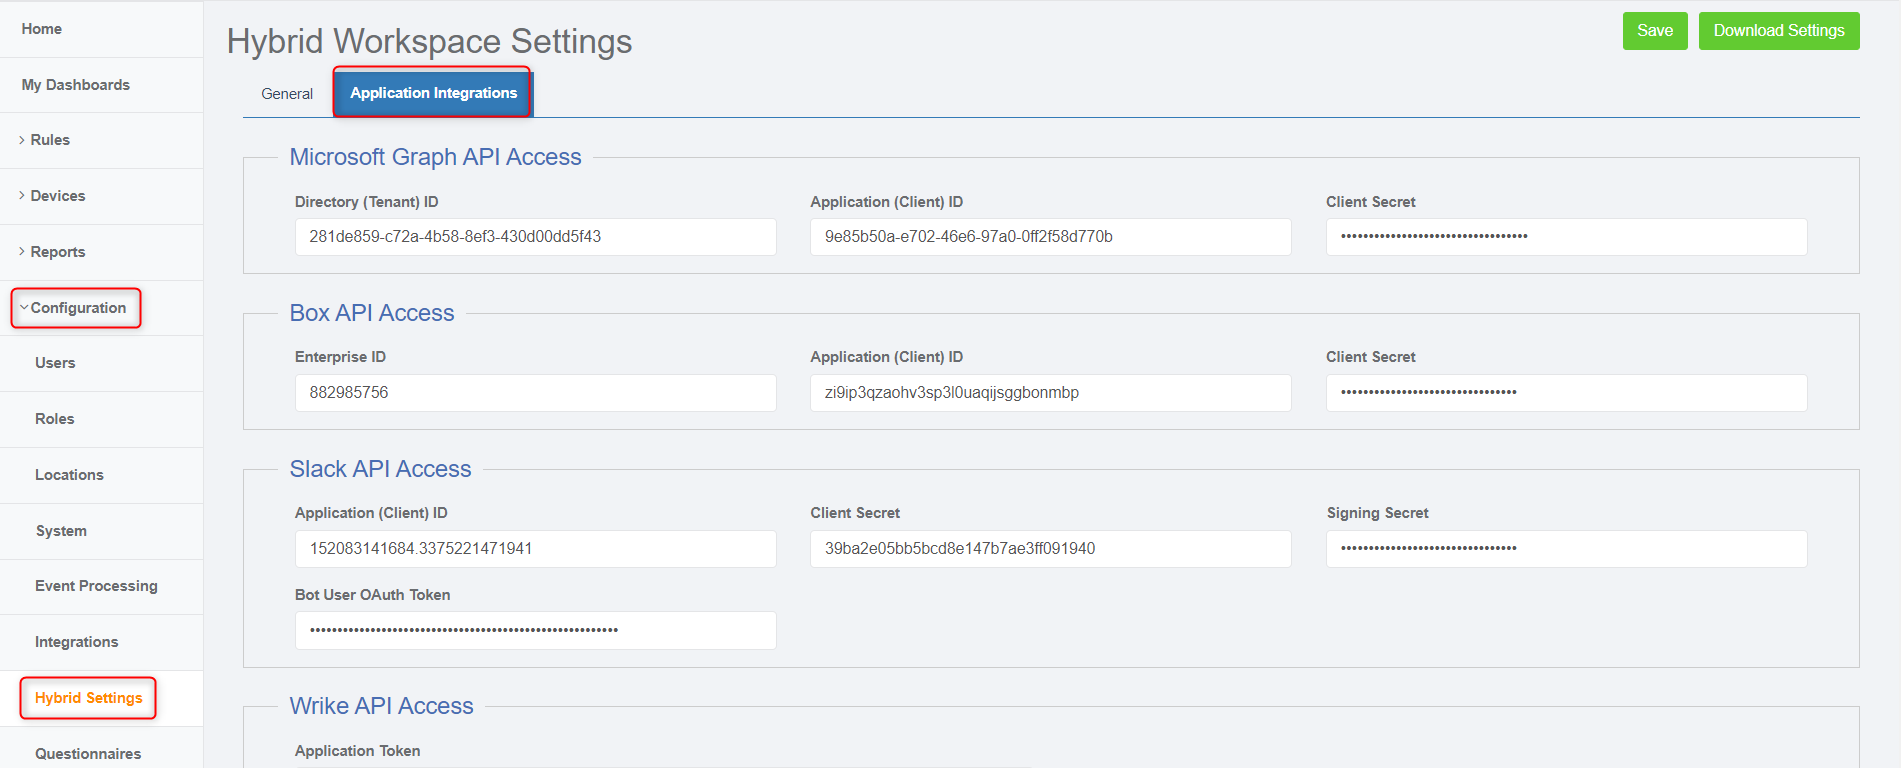
Integration with the Microsoft Graph API is required for integration with user calendars. Without this integration, upcoming user meetings will not show up on the home page, conference room bookings made in ‘Kloudspot Hybrid Work’ will not sync to a user’s Outlook calendar, and vice versa.
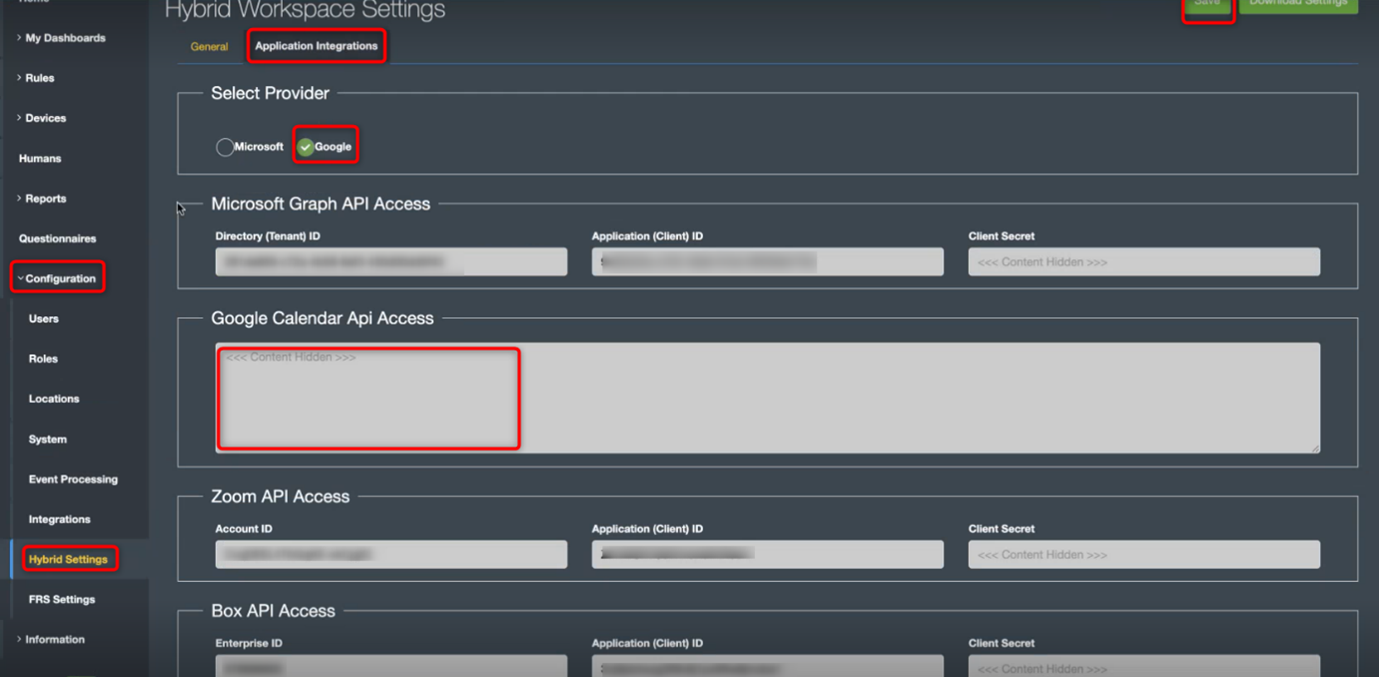
To find the App integration page, navigate to the Advanced Settings Page, then go to Configuration -> Hybrid Settings-> Application Integrations.
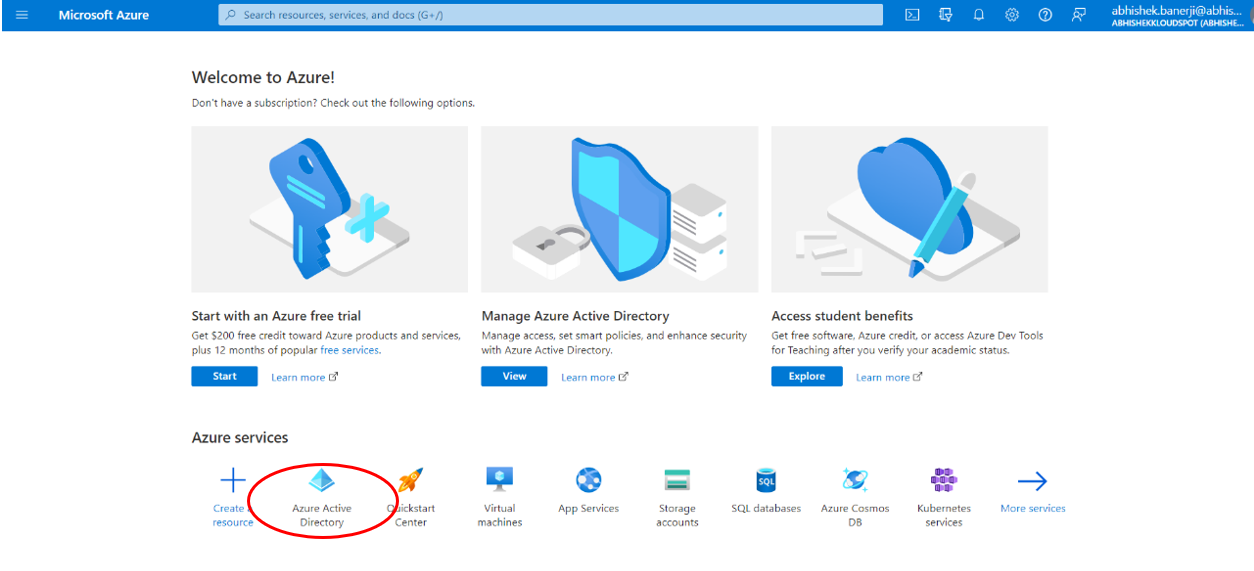
Click on Azure Activity Directory from the Azure services options as shown below.
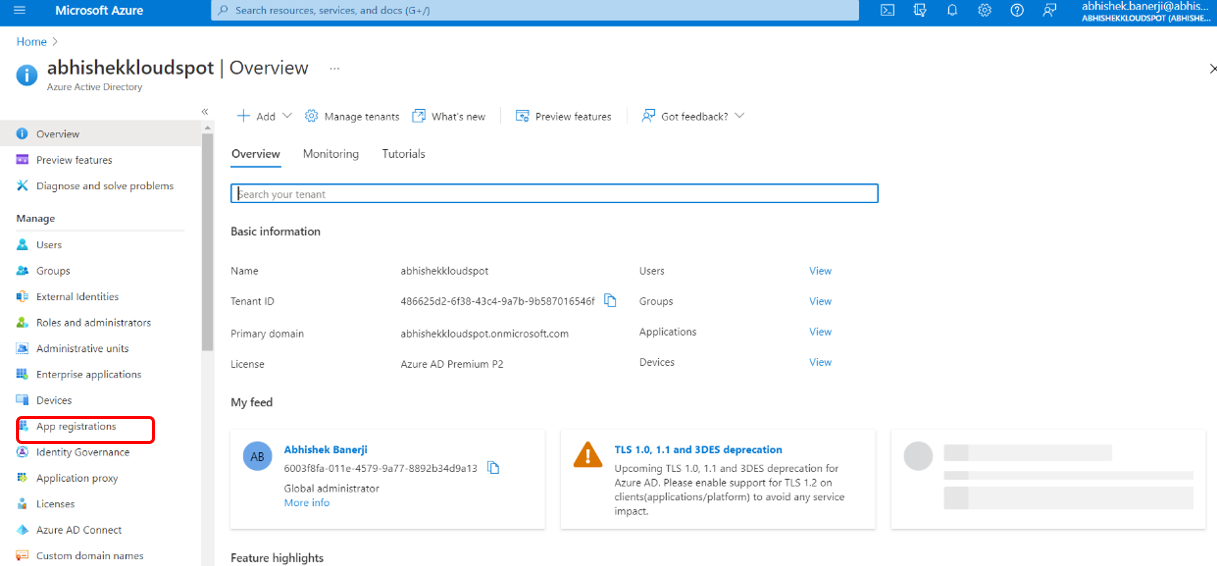
Locate and click on the App Registration on the menu bar.
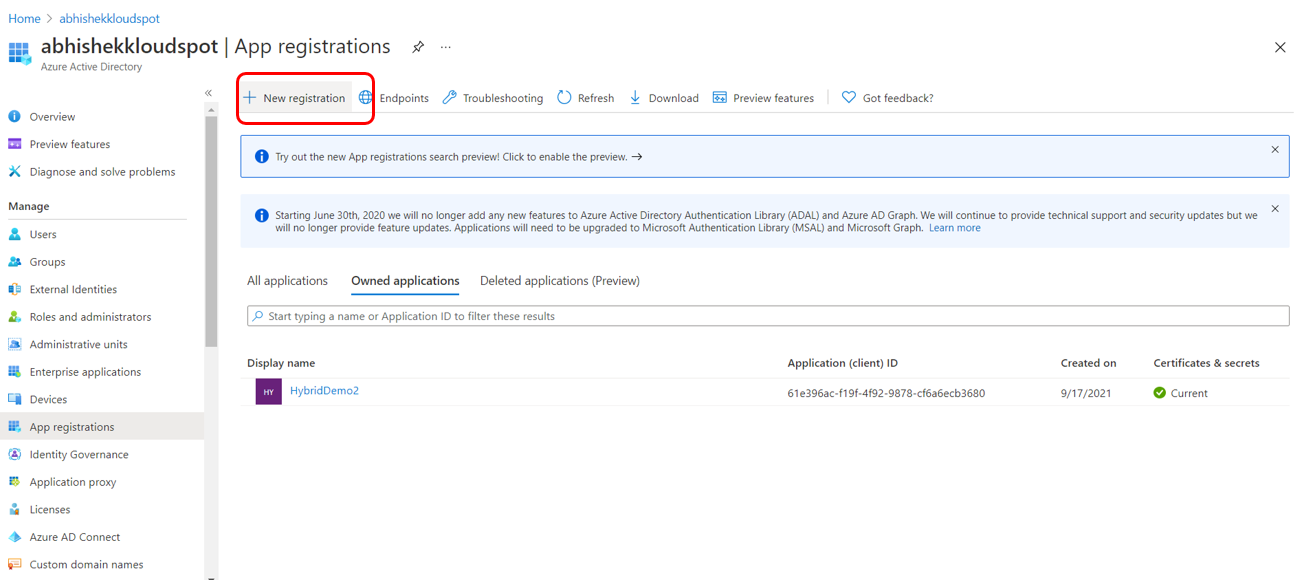
Click on +New registration on the page.
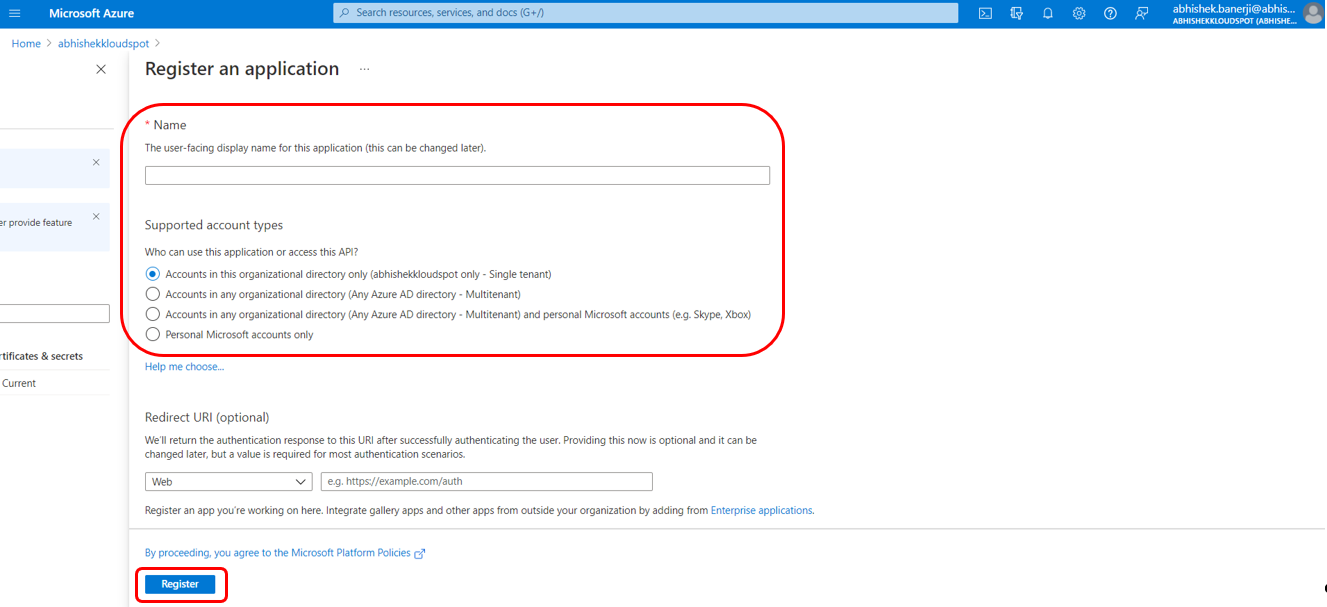
Enter the information in the blanks to create a new registration.
Name: enter a name for the application.
Supported account types: Select the option as shown in the figure below.
Click on Register.
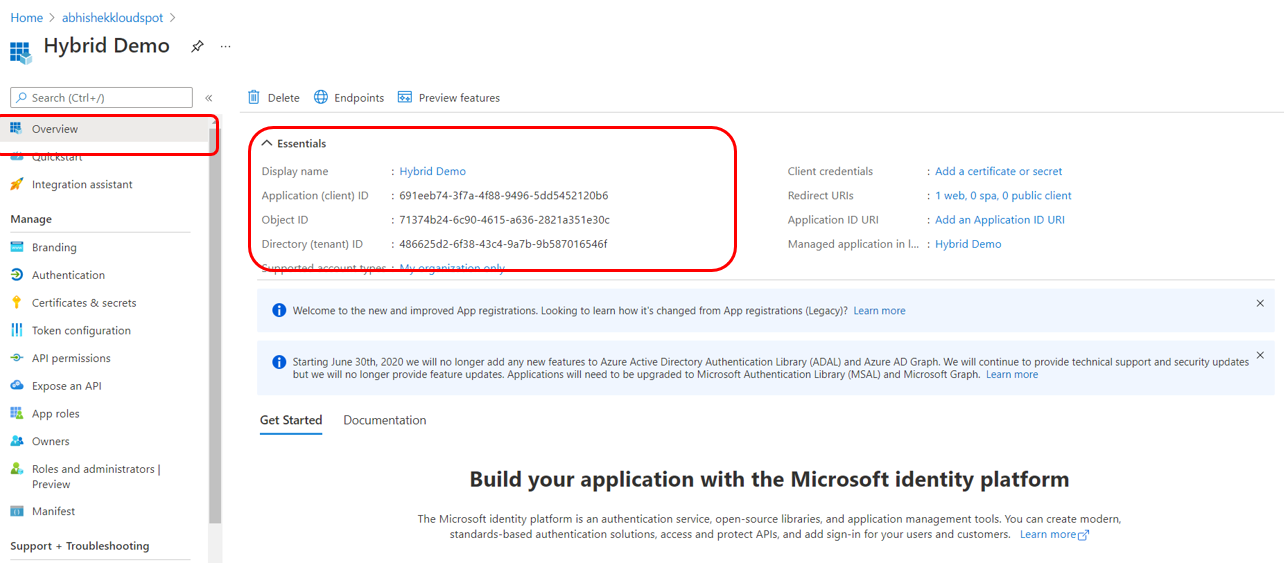
Go back to the home page and click on Overview for login information on the new application created. Copy information from the Essentials and paste it into the KloudHybrid configuration.
The Directory (Tenant ID) and Application (Client) Id in KloudHybrid will be the same as those on the Azure portal.
Next, we will create a client secret in Azure and past that into KloudHybrid.
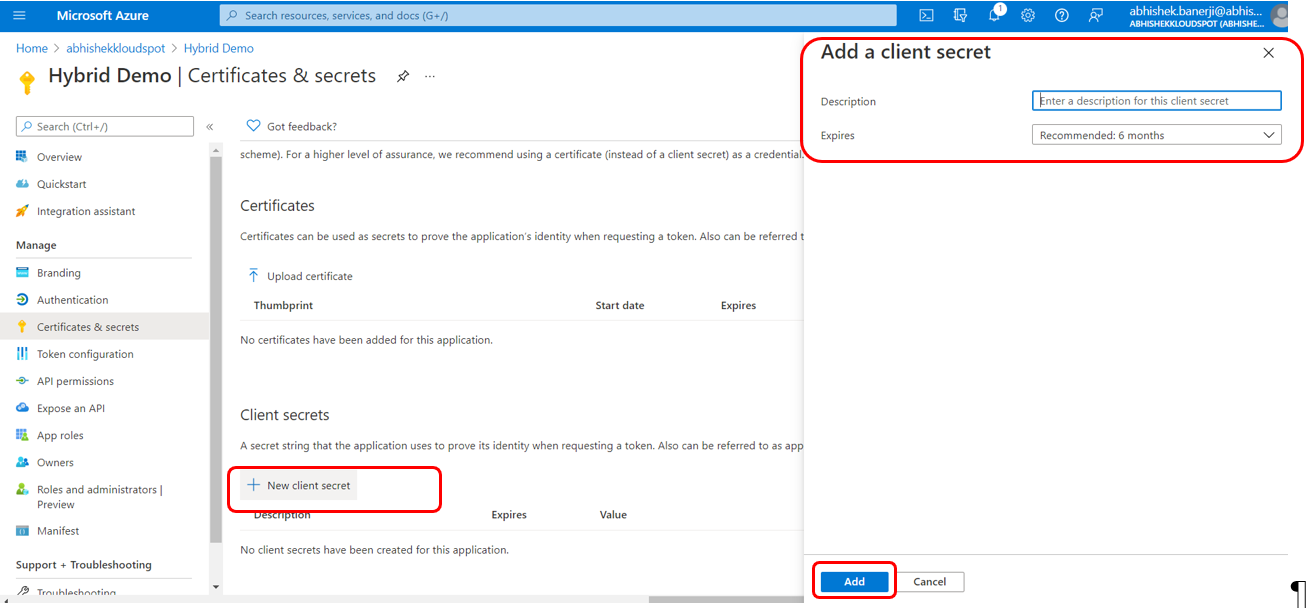
To create a Client Secret, go to the Azure portal, click on Certificates & secrets and then click on + New client secret.
Enter the description and click on Add.
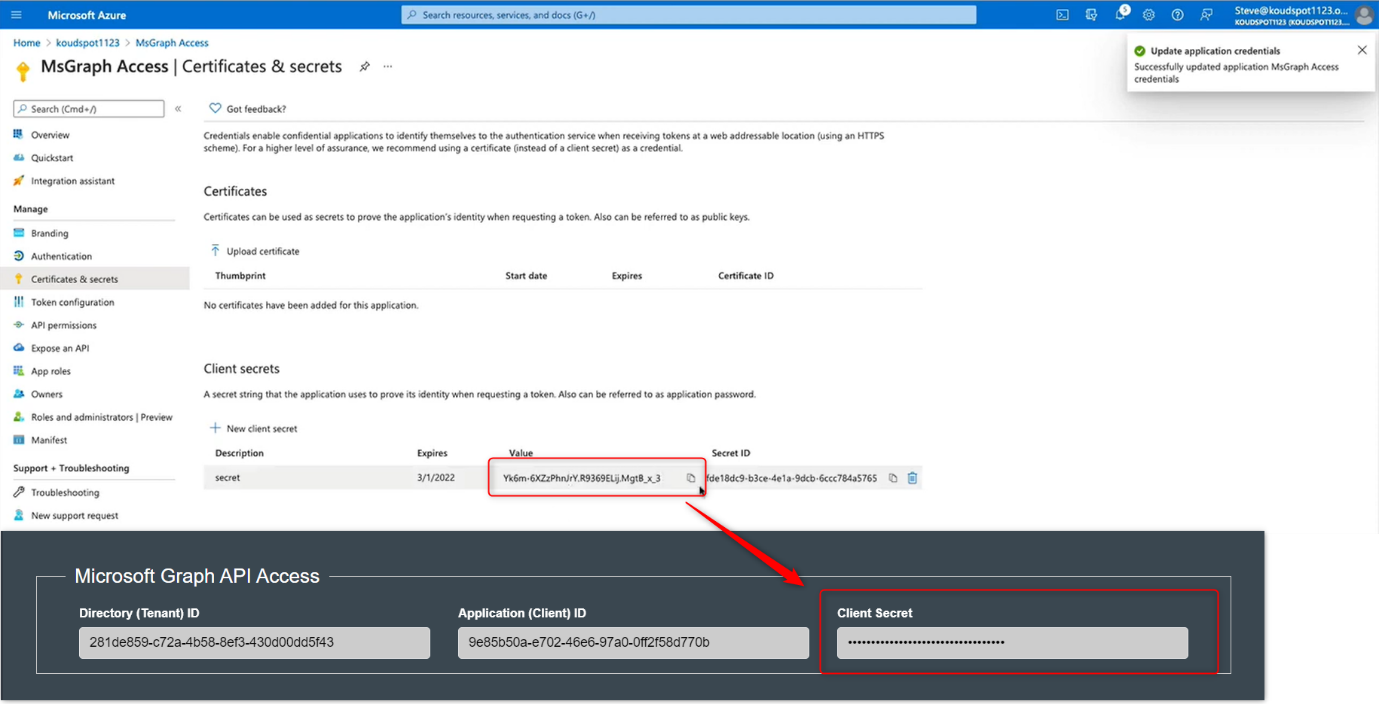
Copy the Value and paste it into the Client secret section in Microsoft Graph API Access in KloudHybrid.
Creating API Permissions
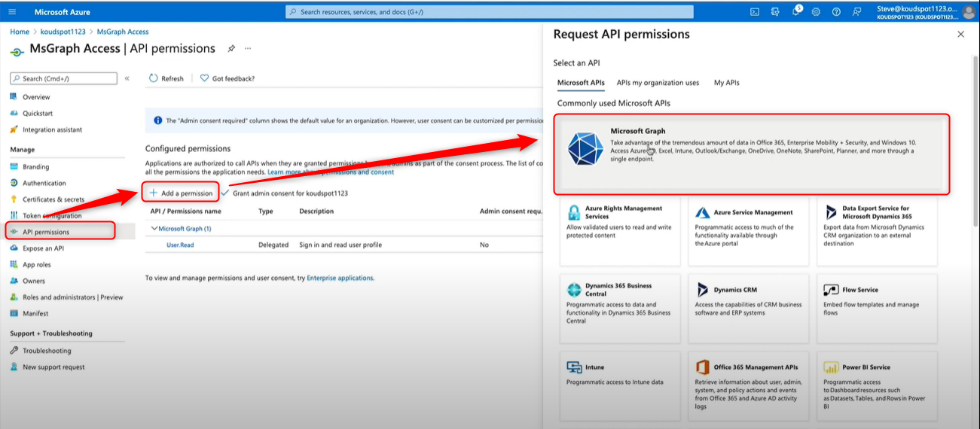
Go to the Azure portal, click on API Permissions and then click on + Add permission.
The Request API permissions tab will open. in that, Click on the Microsoft graph button.
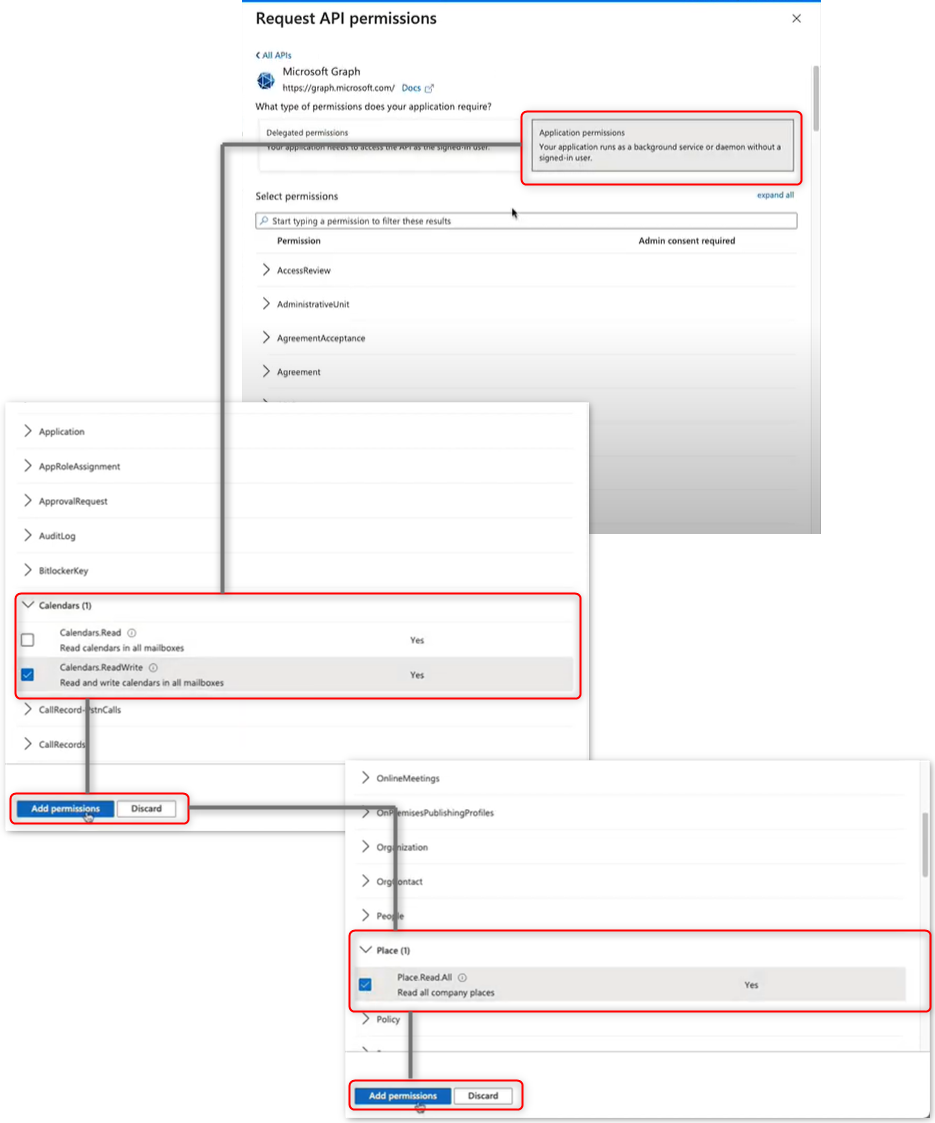
In the window that appears, select the Applications permissions option.
A list of permissions will appear. Scroll down and check the calendar ReadWrite option from the calendars dropdown menu.
Click on Add permissions button to add calendar permission.
Scroll down again and check the Place Read All options in the place dropdown menu.
Click on Add permissions button to add place permission.
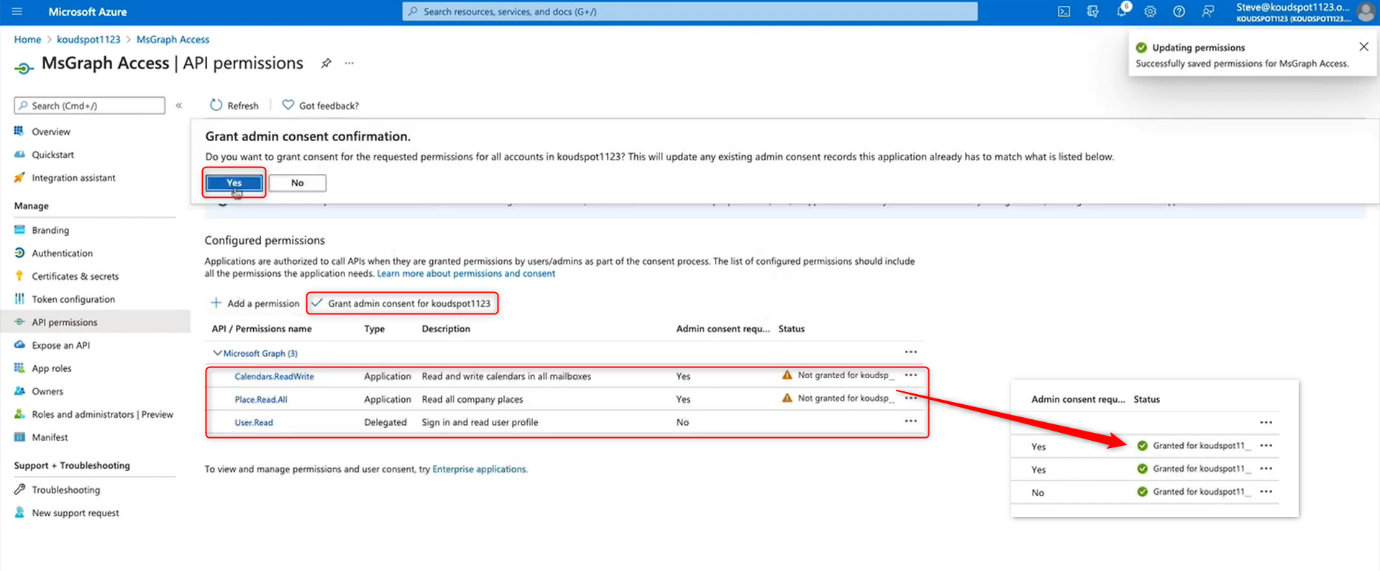
The newly added permissions are visible in the configured permission list. To authorize newly added permissions. Click on the Grant Admin Consent button and click Yes in the popup window that appears.
Then the permission status will be changed from not granted to Granted.
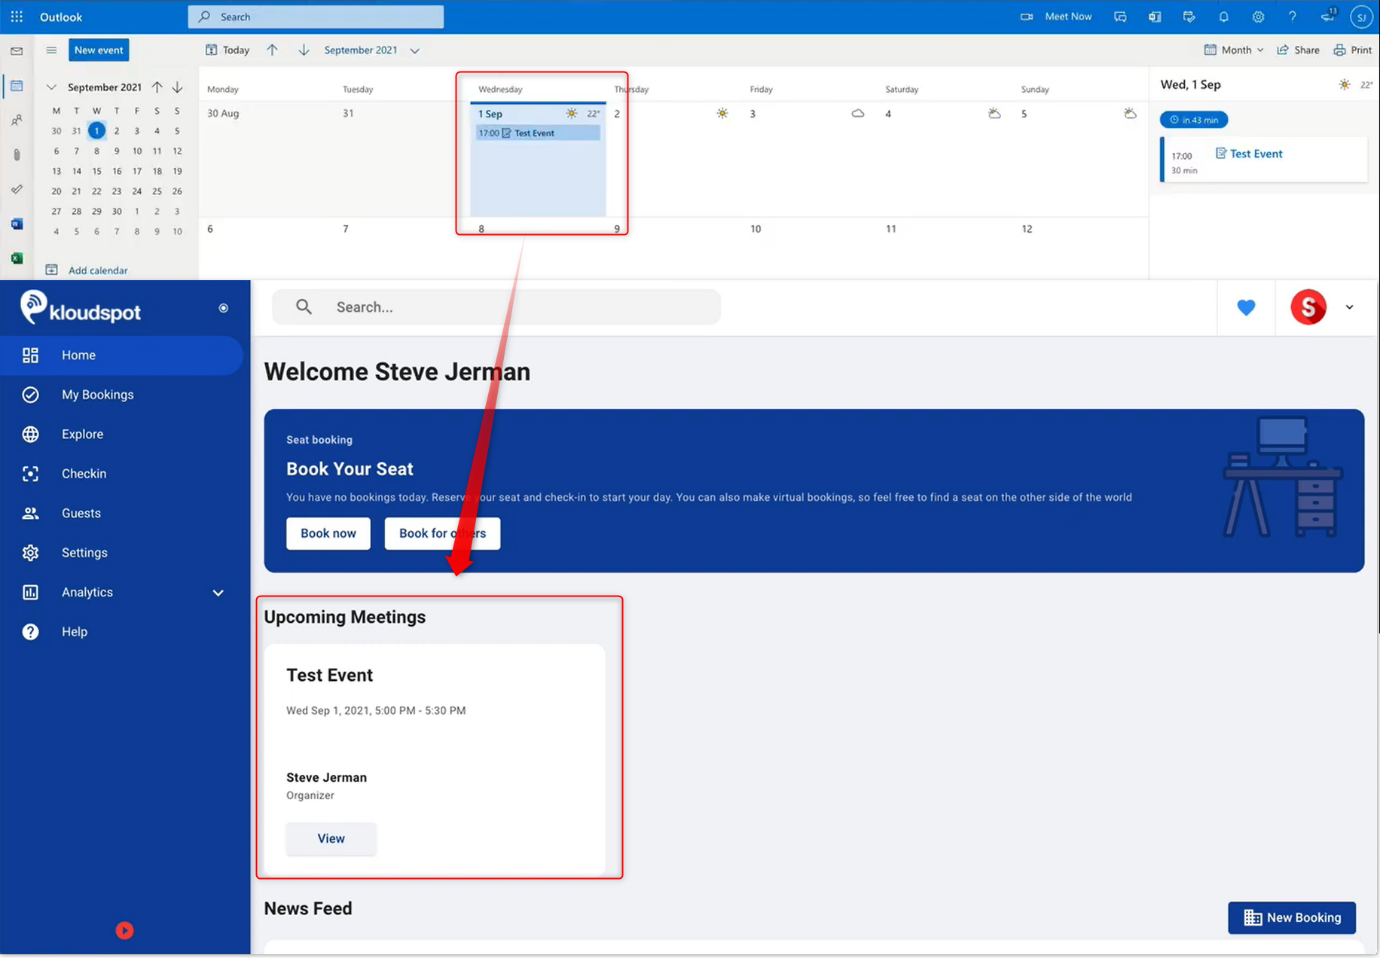
Calendar has been successfully configured.
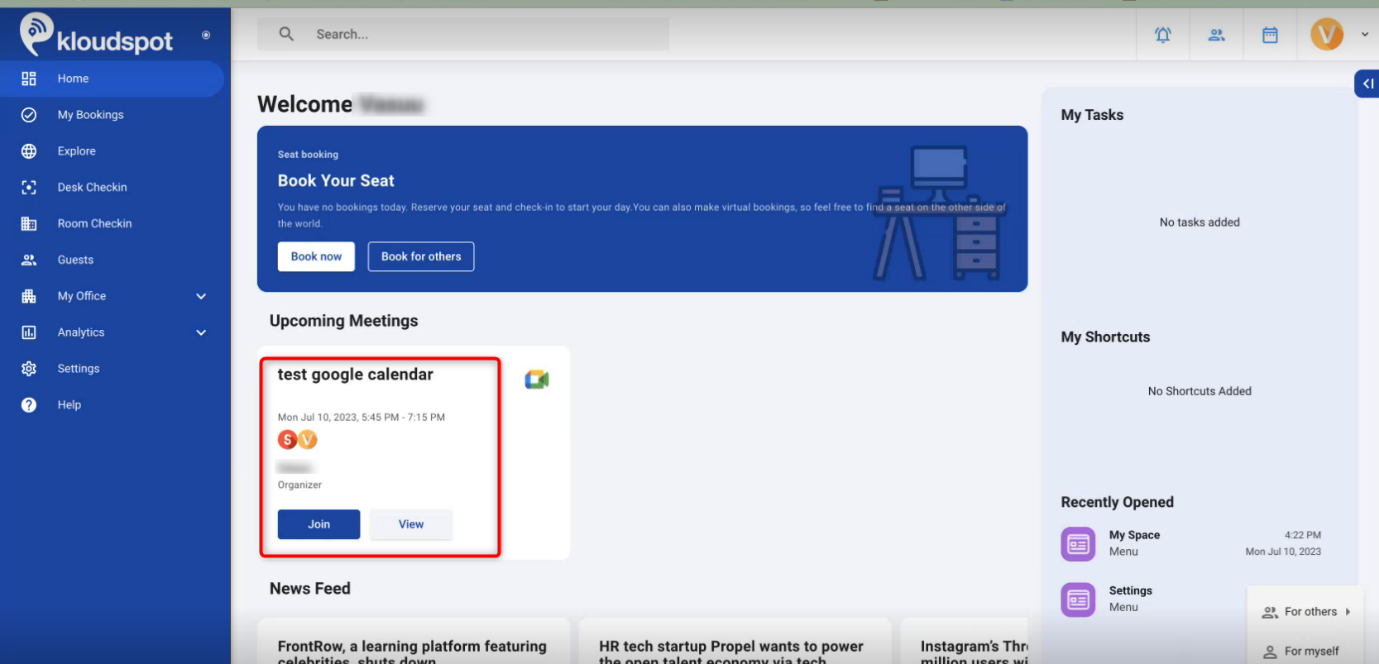
Once the calendar is added. The information that is added to the calendar will be displayed in the KloudHybrid.
Google Calender Integration
Overview:
This comprehensive document serves as a step-by-step guide to seamlessly integrate Google Calendar into the KloudHybrid application. It provides the necessary information on prerequisites and integration steps.
Scope:
The integration focuses on leveraging the powerful features of the Google Calendar API to empower users in accessing, events within the application effortlessly.
Intended Audience:
This documentation is intended for experienced developers and technical personnel who are responsible for integrating the Google Calendar functionality into KloudHybrid. Familiarity with web development and API integration is assumed.
Prerequisites:
Google Workspace Admin Account:
To begin the integration process, you must have administrative access to a Google Workspace account with the necessary permissions to add users and manage settings.
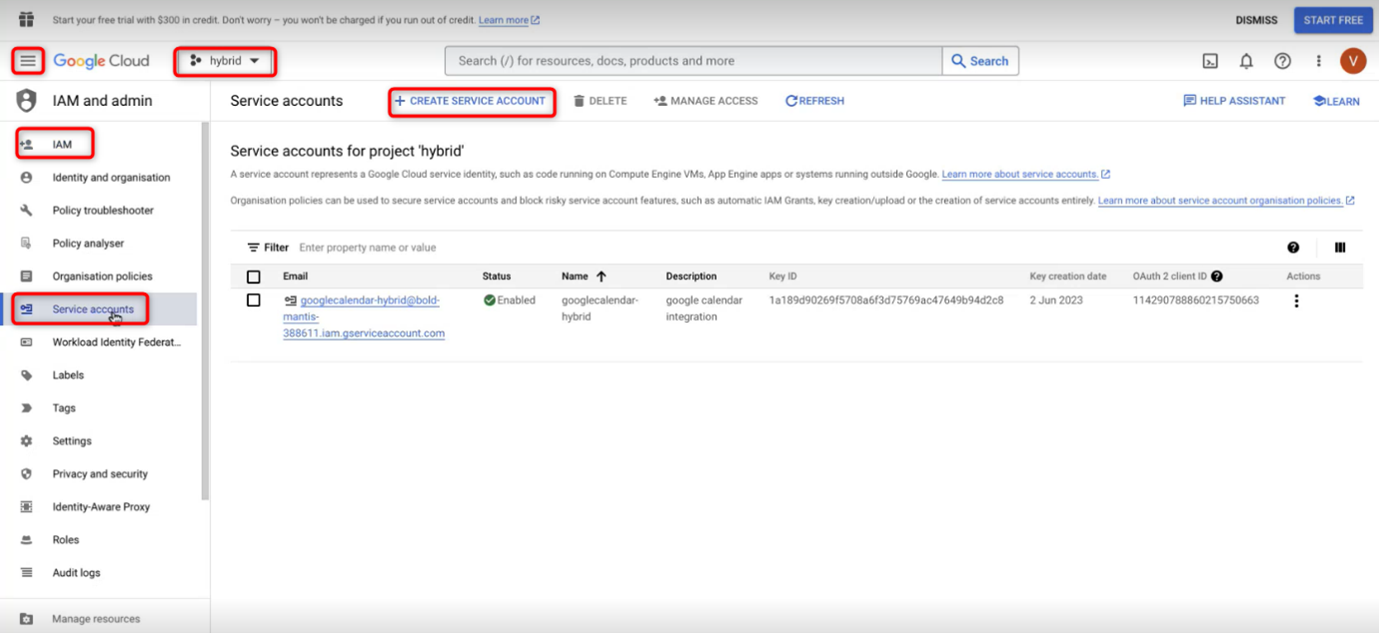
Google Cloud Platform Account:
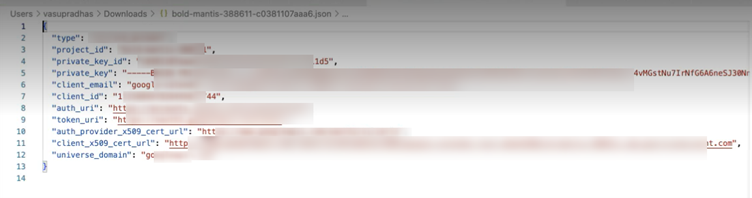
You will need a Google Cloud Platform account to create a project and a service account for accessing the Google Calendar API.
KloudHybrid Admin Account:
Access to the KloudHybrid admin account is required to configure the integration settings and enable the usage of the Google Calendar API within KloudHybrid.
Integration Steps:
Follow the step-by-step instructions below to successfully integrate Google Calendar into KloudHybrid.
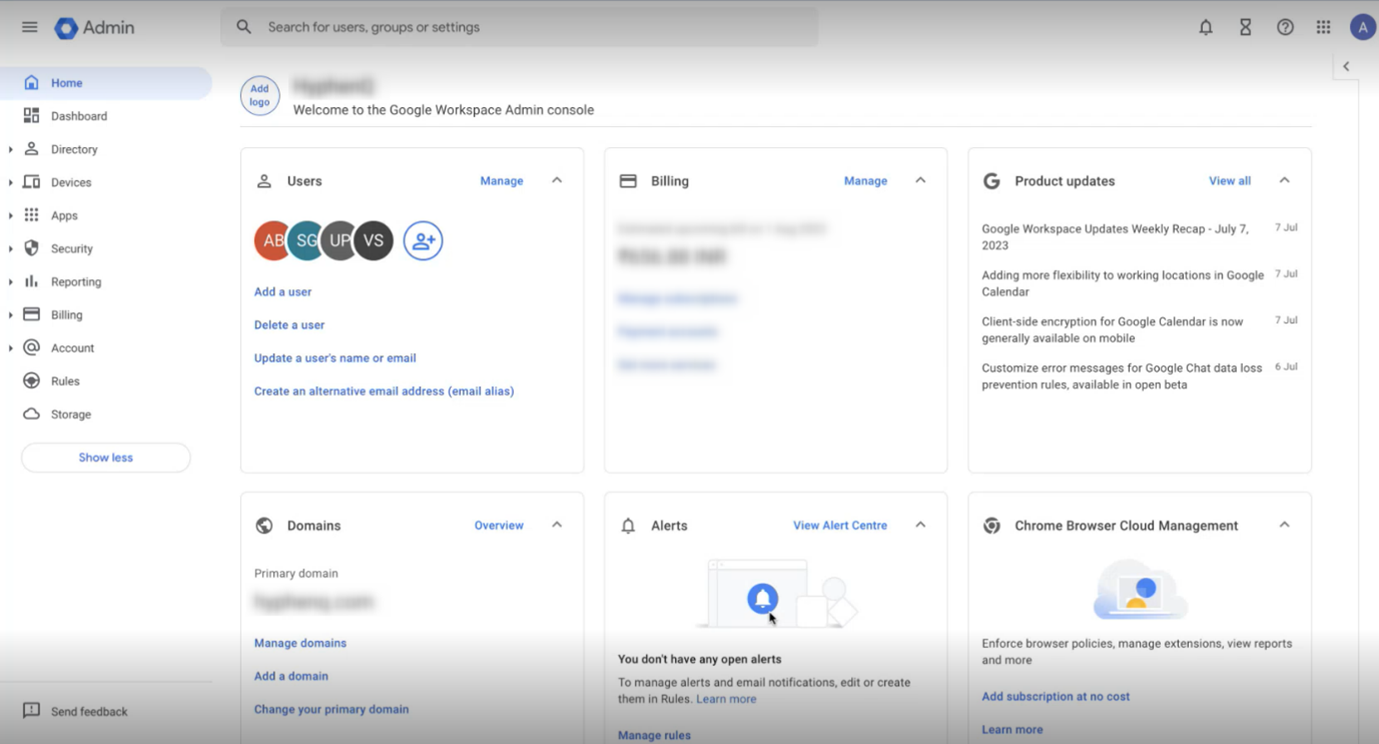
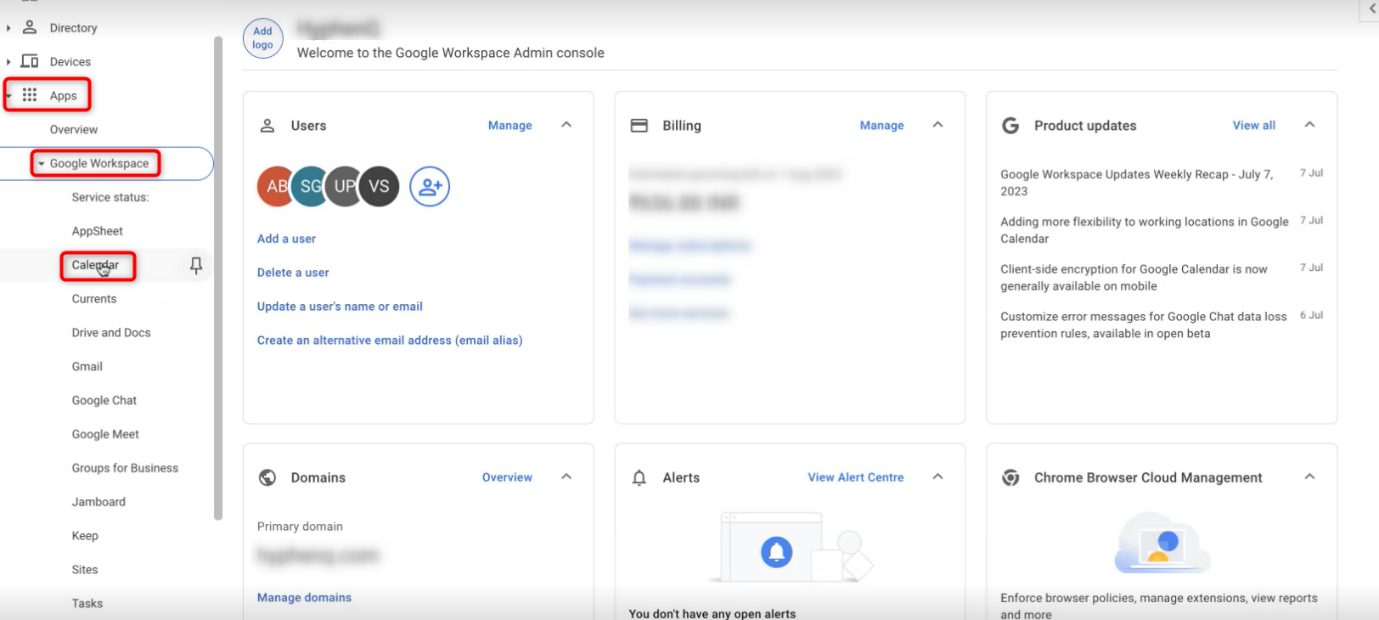
Step 1: Add Users in Google Workspace Admin Console:
To initiate the integration, proceed with adding the required users to the Google Workspace admin console, following these steps:
Access the Google Workspace admin console by navigating to admin.google.com.
Utilize administrative privileges to add the designated users who will utilize the Google Calendar functionality within KloudHybrid.
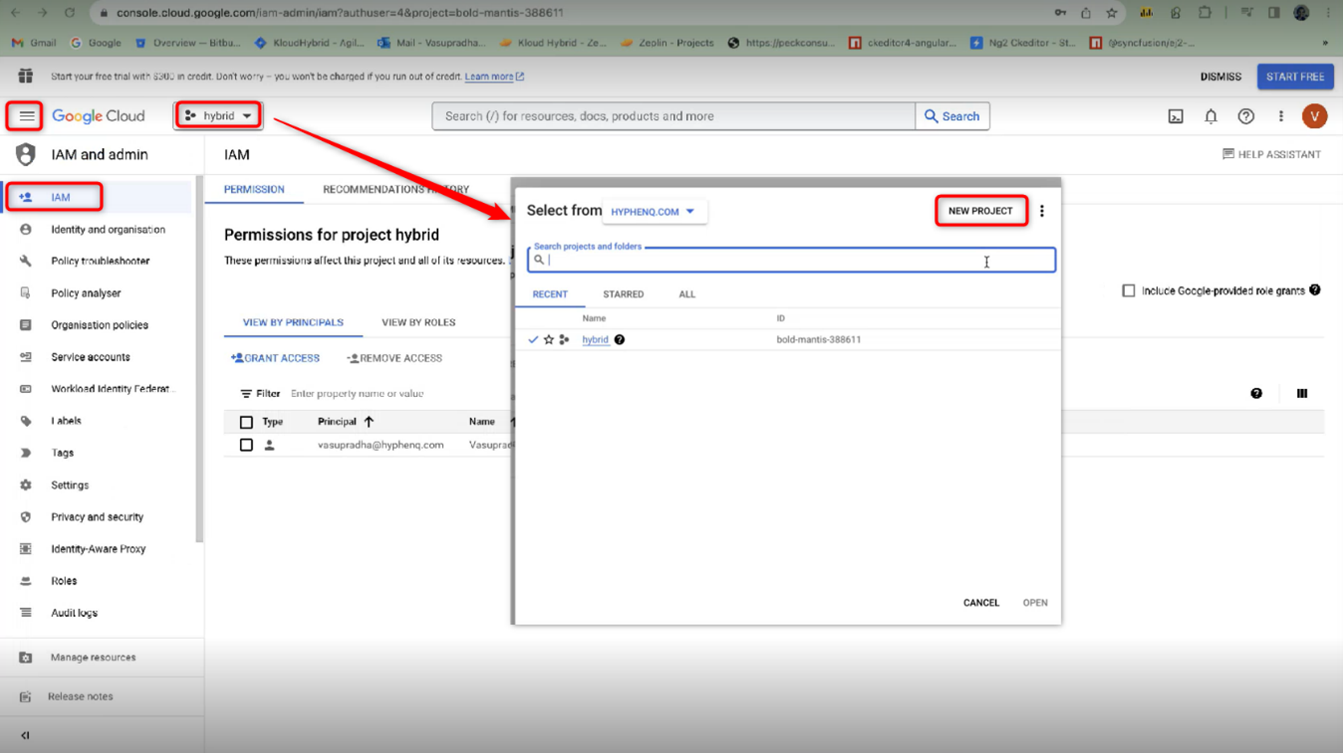
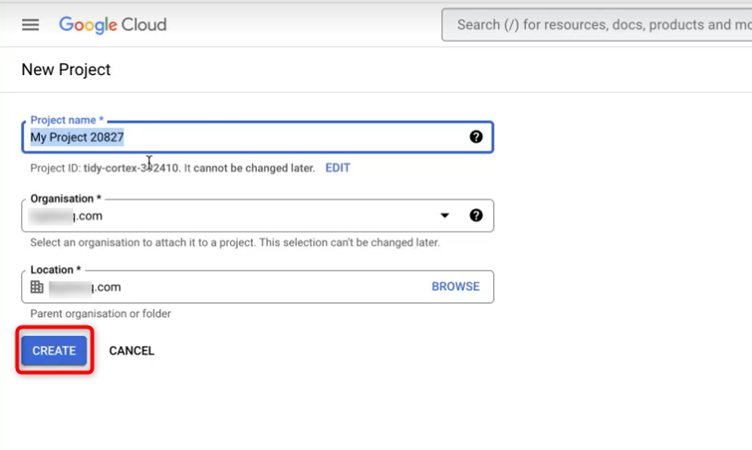
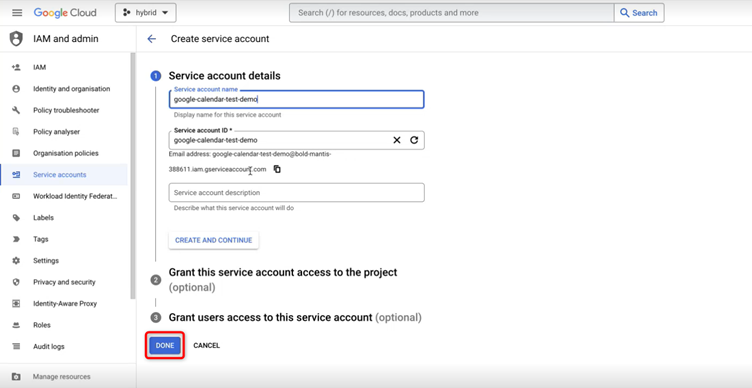
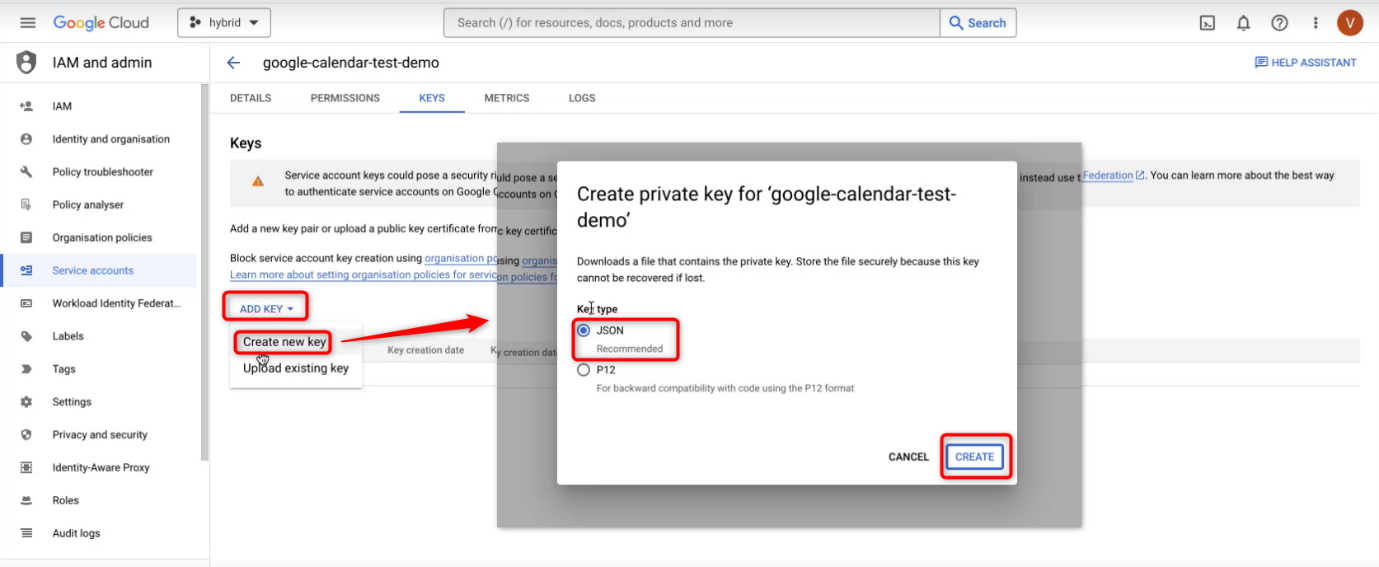
Step 2: Create a Project in Google Cloud Console:
After adding the necessary users, continue with the following steps to create a project in the Google Cloud console: