Google Calender Integration
Overview:
This comprehensive document serves as a step-by-step guide to seamlessly integrate Google Calendar into the KloudHybrid application. It provides the necessary information on prerequisites and integration steps.
Scope:
The integration focuses on leveraging the powerful features of the Google Calendar API to empower users in accessing, events within the application effortlessly.
Intended Audience:
This documentation is intended for experienced developers and technical personnel who are responsible for integrating the Google Calendar functionality into KloudHybrid. Familiarity with web development and API integration is assumed.
Prerequisites:
Google Workspace Admin Account: To begin the integration process, you must have administrative access to a Google Workspace account with the necessary permissions to add users and manage settings.
Google Cloud Platform Account: You will need a Google Cloud Platform account to create a project and a service account for accessing the Google Calendar API. KloudHybrid Admin Account: Access to the KloudHybrid admin account is required to configure the integration settings and enable the usage of the Google Calendar API within KloudHybrid.
Integration Steps:
Follow the step-by-step instructions below to successfully integrate Google Calendar into KloudHybrid.
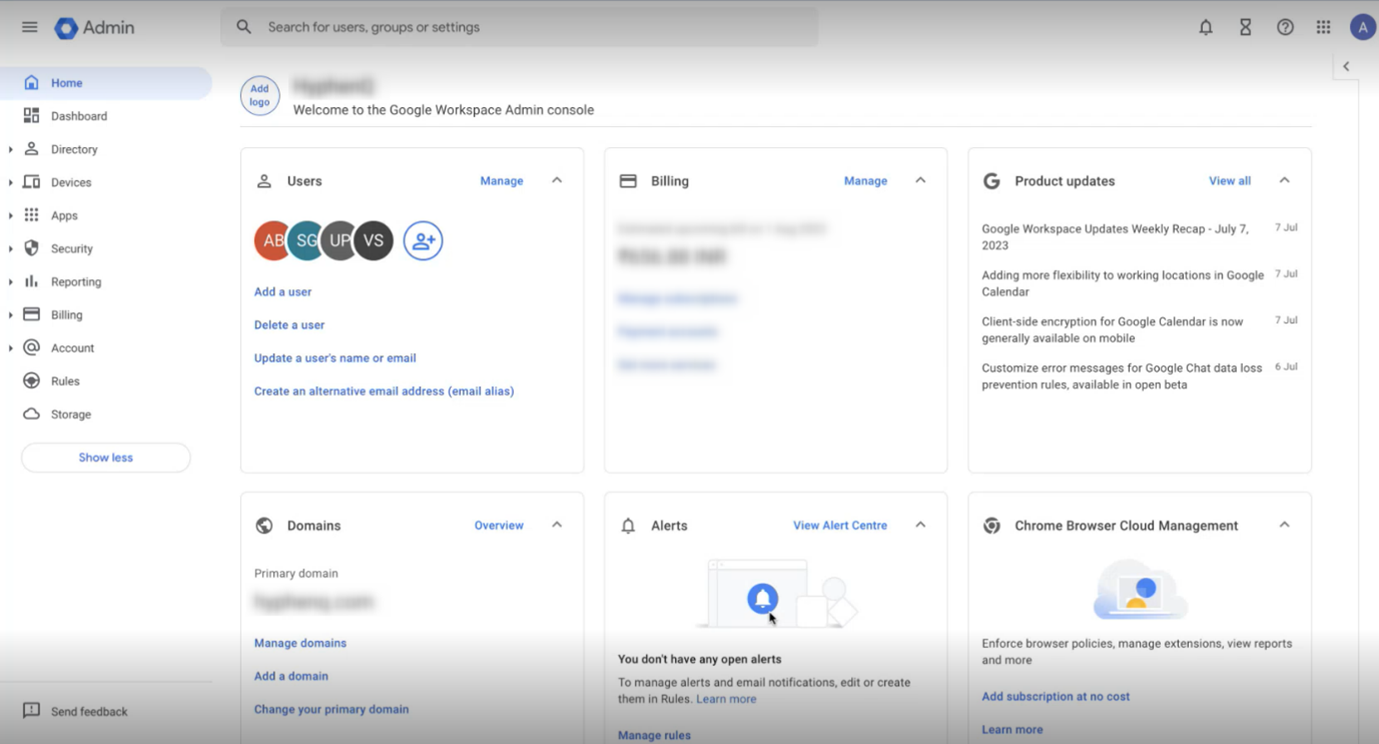
Step 1: Add Users in Google Workspace Admin Console:
To initiate the integration, proceed with adding the required users to the Google Workspace admin console, following these steps:
- Access the Google Workspace admin console by navigating to admin.google.com.
- Utilize administrative privileges to add the designated users who will utilize the Google Calendar functionality within KloudHybrid.
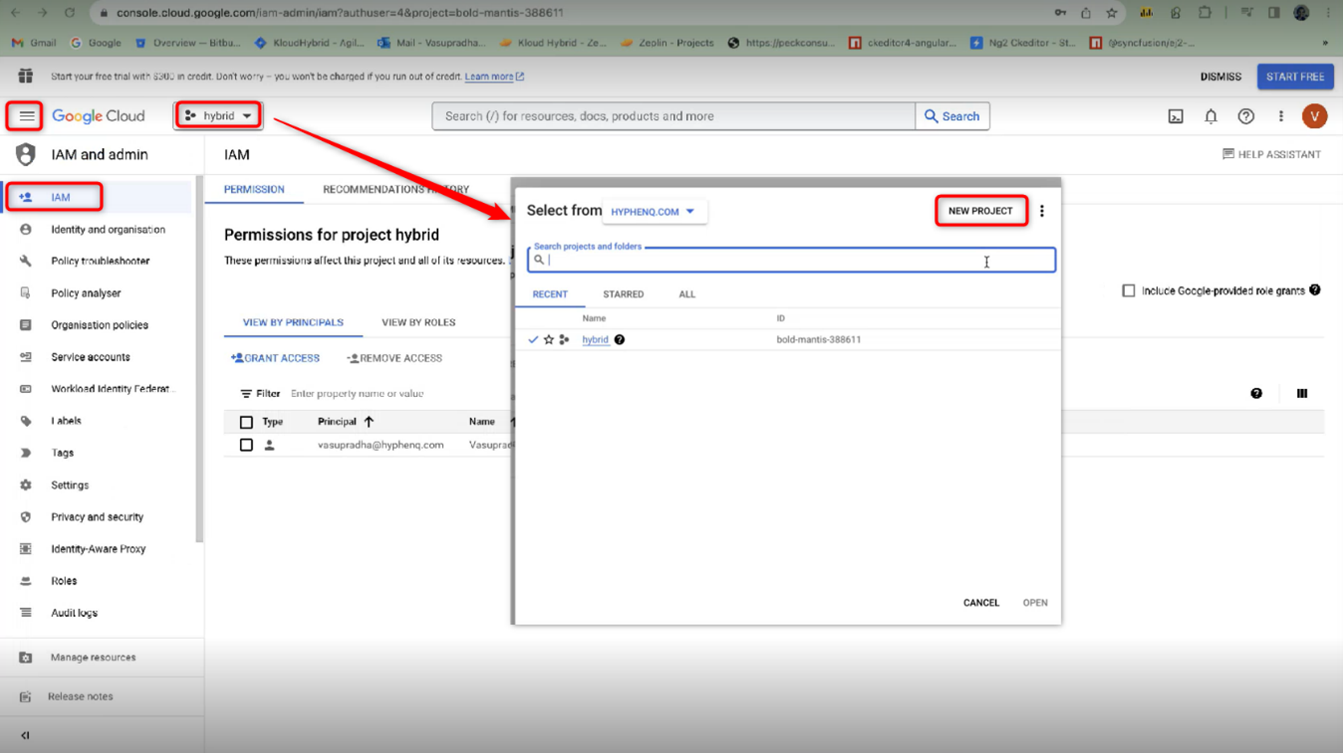
Step 2: Create a Project in Google Cloud Console:
After adding the necessary users, continue with the following steps to create a project in the Google Cloud console:
-
Visit the Google Cloud console at: https://console.cloud.google.com/
-
Click on the menu icon (three horizontal lines) located at the top left corner of the page.
-
Select “IAM and Admin” > Projects > “NEW PROJECT”.
-
Provide a descriptive name for your project in the “Project Name” field.
-
Select “Organisation” from the dropdown list.
-
Click “Browse” in the “Location” field to view the available project locations.
-
Once you have made the necessary selections, click “Create”.
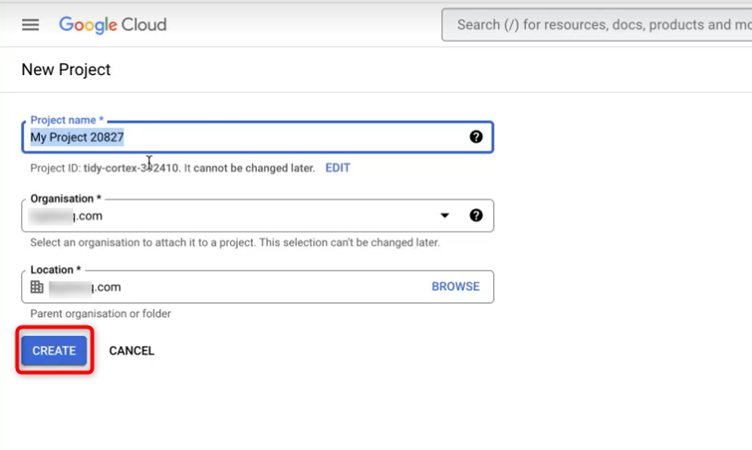
- Your project will be created within a few minutes, and you will be redirected to the project’s Dashboard page.
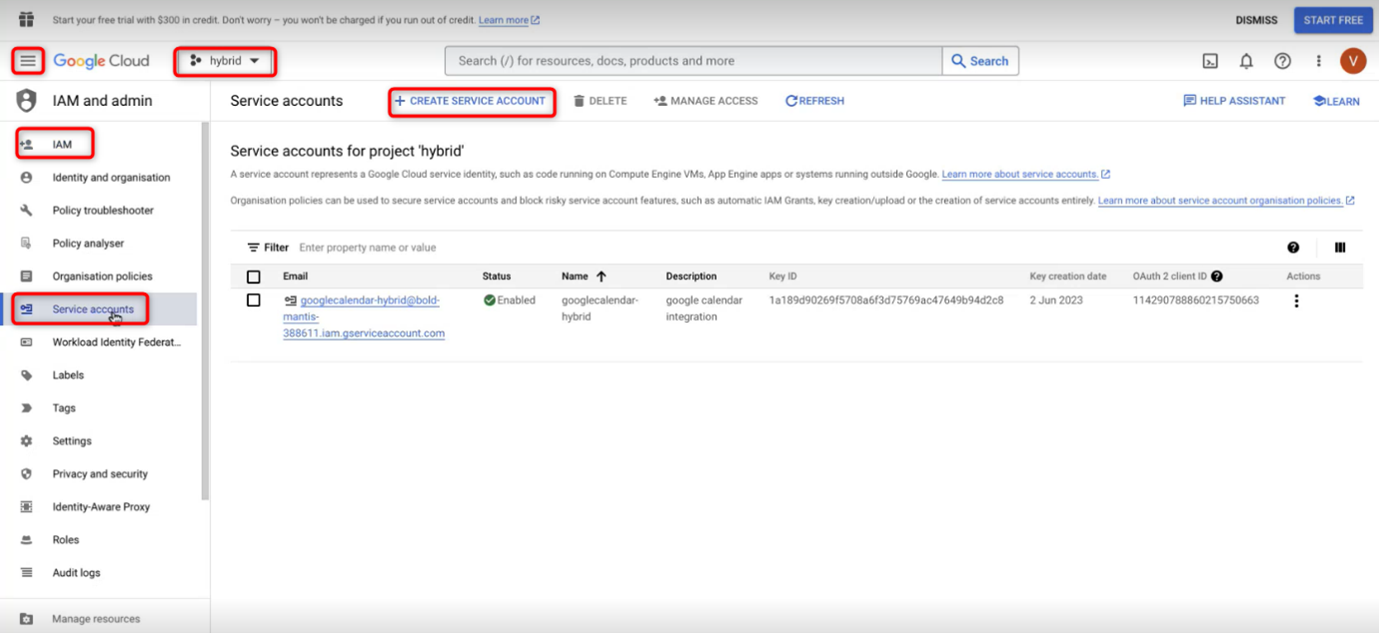
Step 3: Create a Service Account in the Project:
To create a service account within the project, follow these instructions:
-
Select the project in which you want to create the service account.
-
Click on the menu icon (three horizontal lines) located at the top left corner of the page.
-
Choose “IAM & Admin” > “Service accounts”.
-
Click the “Create service account” button.
-
Enter a descriptive name for your service account in the “Service account name” field.
-
Optionally, provide a description of the service account.
-
If you don’t want to configure access controls at this moment, click “Done” to complete the service account creation.
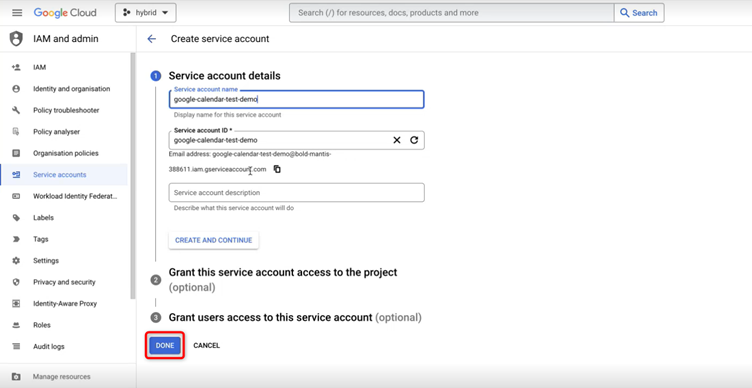
- The service account will be successfully created, and you will be redirected to the Service Accounts page.
Step 4: Create JSON Key File:
To authenticate your access to Google Cloud services, create a JSON key file for the service account using the following instructions:
-
Go to the Service Accounts page.
-
Click on the menu button (three vertical dots) at the right end of the service account name.
-
Select the “Manage key” option from the dropdown list.

-
Click the “Add key” dropdown menu and choose “Create new key”.
-
Select “JSON” as the key type and click “Create”.
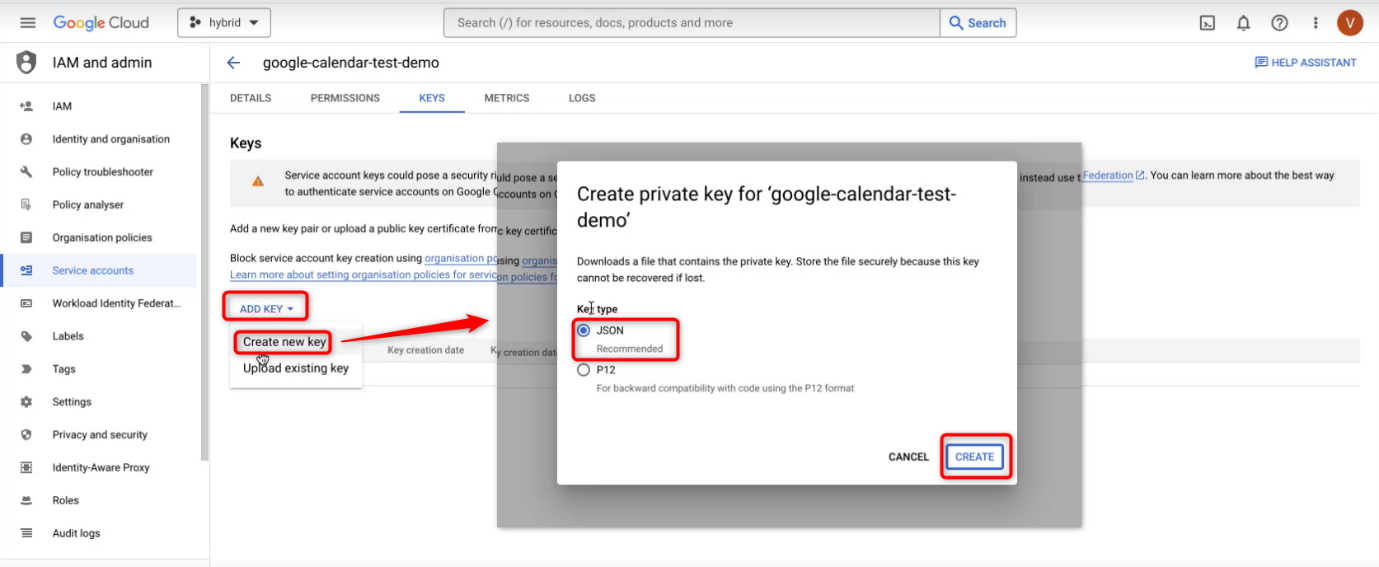
- The JSON key file will be downloaded to your computer.
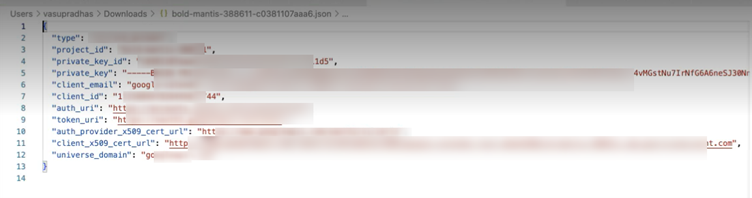
Note: • Treat the JSON key file as sensitive information and store it securely. • Do not share the JSON key file with anyone.
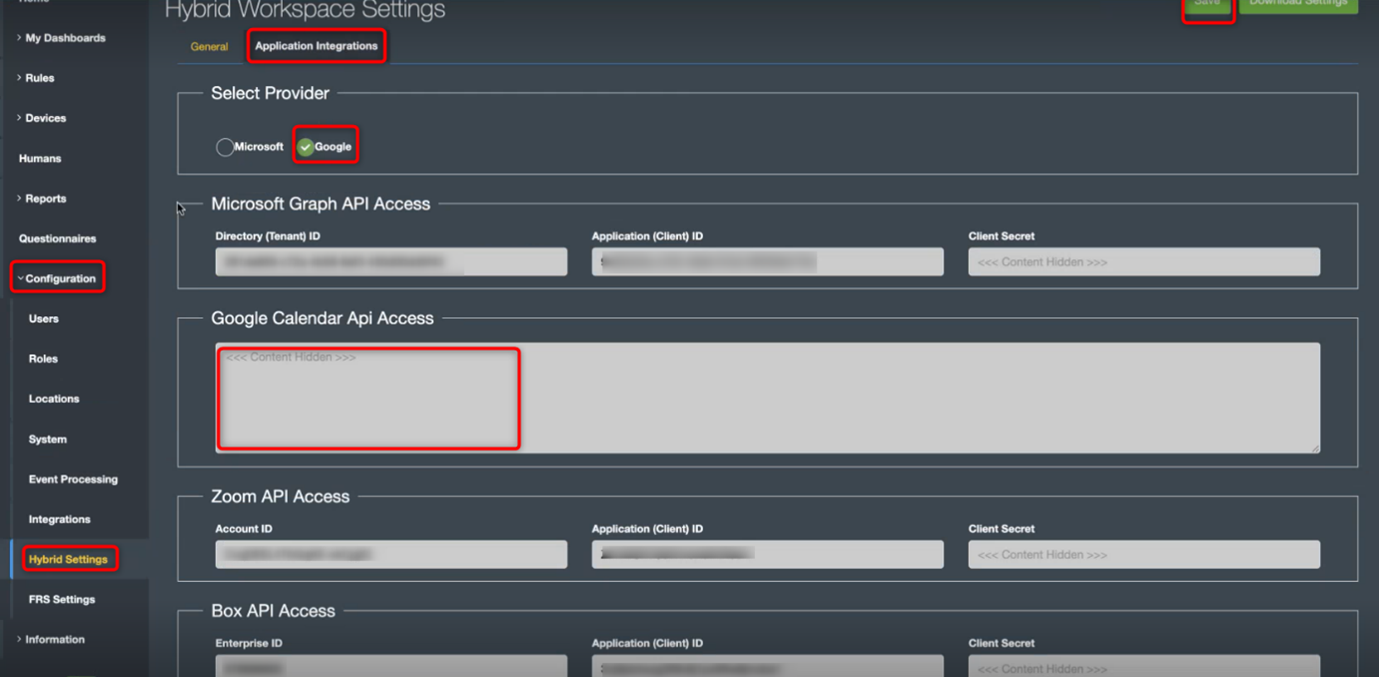
Step 5: Integrate JSON Key File in KloudHybrid:
To integrate the JSON key file into KloudHybrid for Google Calendar integration, follow these steps:
-
Access the KloudHybrid admin account.
-
Navigate to Configuration > Hybrid settings > Application integration.
-
In the window that appears, select “Google” as the service provider.
-
Paste the downloaded JSON key file contents into the “Google Calendar API access” box.
-
Save the changes by clicking the “Save” button.
Enable Required Permissions:
To ensure seamless functionality of the integrated Google Calendar within KloudHybrid, it is necessary to configure the following permissions.
Configure the integration on the admin side.
To further configure the integration on the admin side, follow the steps below:
- Log in to the Google Workspace admin console using the admin account credentials.

- Navigate to “Apps” > “Google Workspace” > “Calendar” to access the Calendar settings.
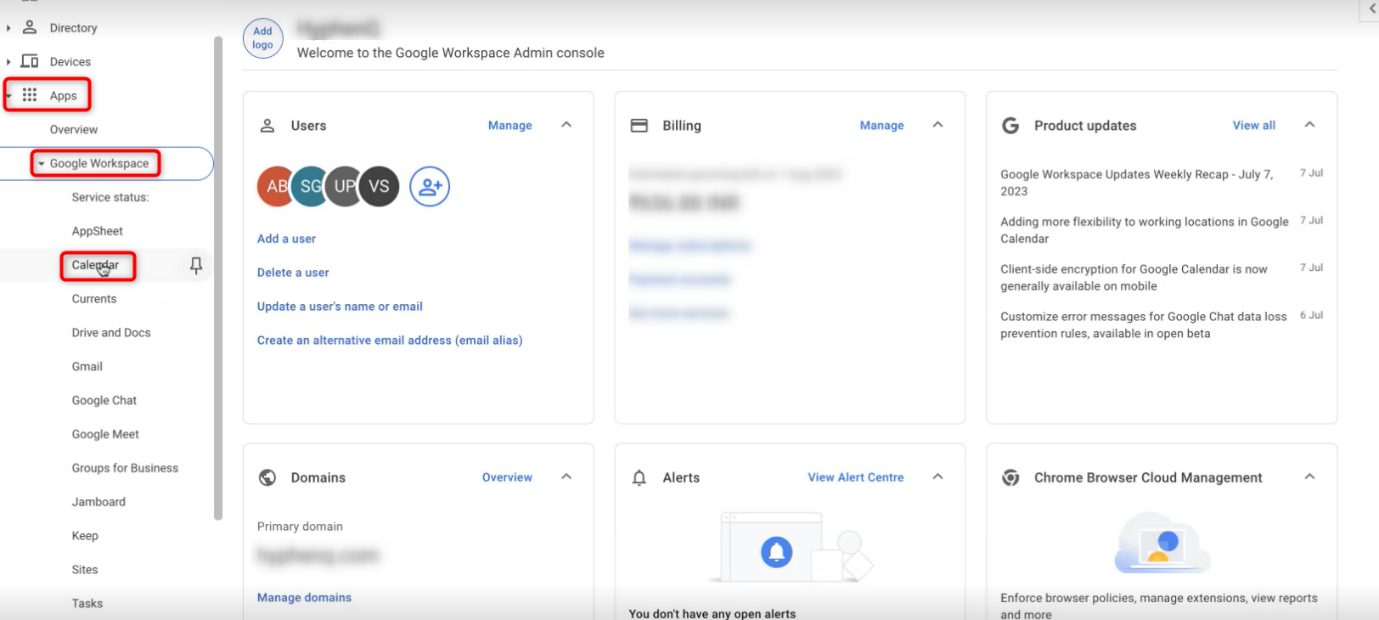
- In the Calendar settings window, locate and click on the “External sharing option for the primary calendars”.
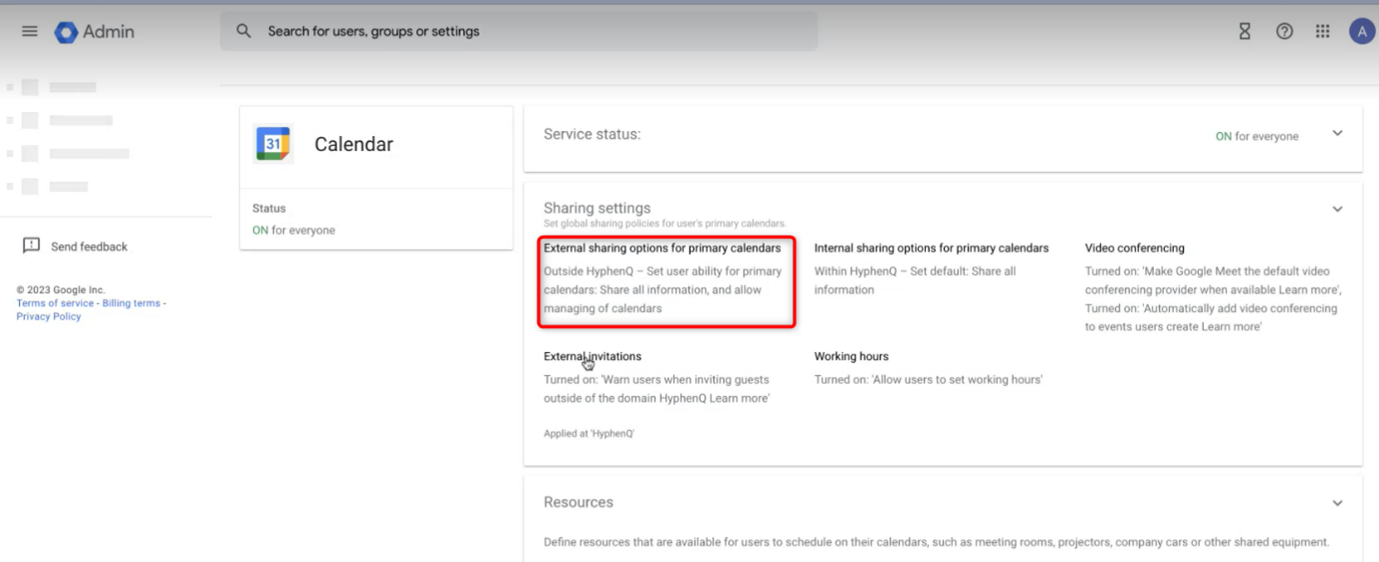
- Configure the sharing settings as shown in the image below:
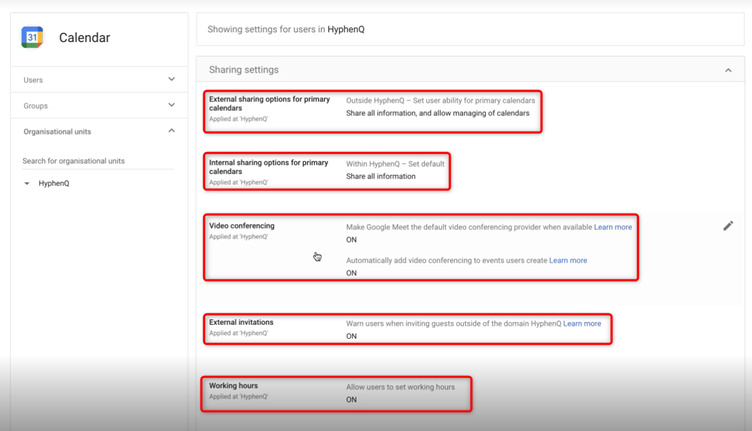
Sharing Settings
-
Next, we need to enter the client ID and scope in the API controls.
-
Navigate to “Security” > “Access and data control” > “API controls”.
-
In the API controls window, click on the “Manage Domain-Wide Delegation” button.
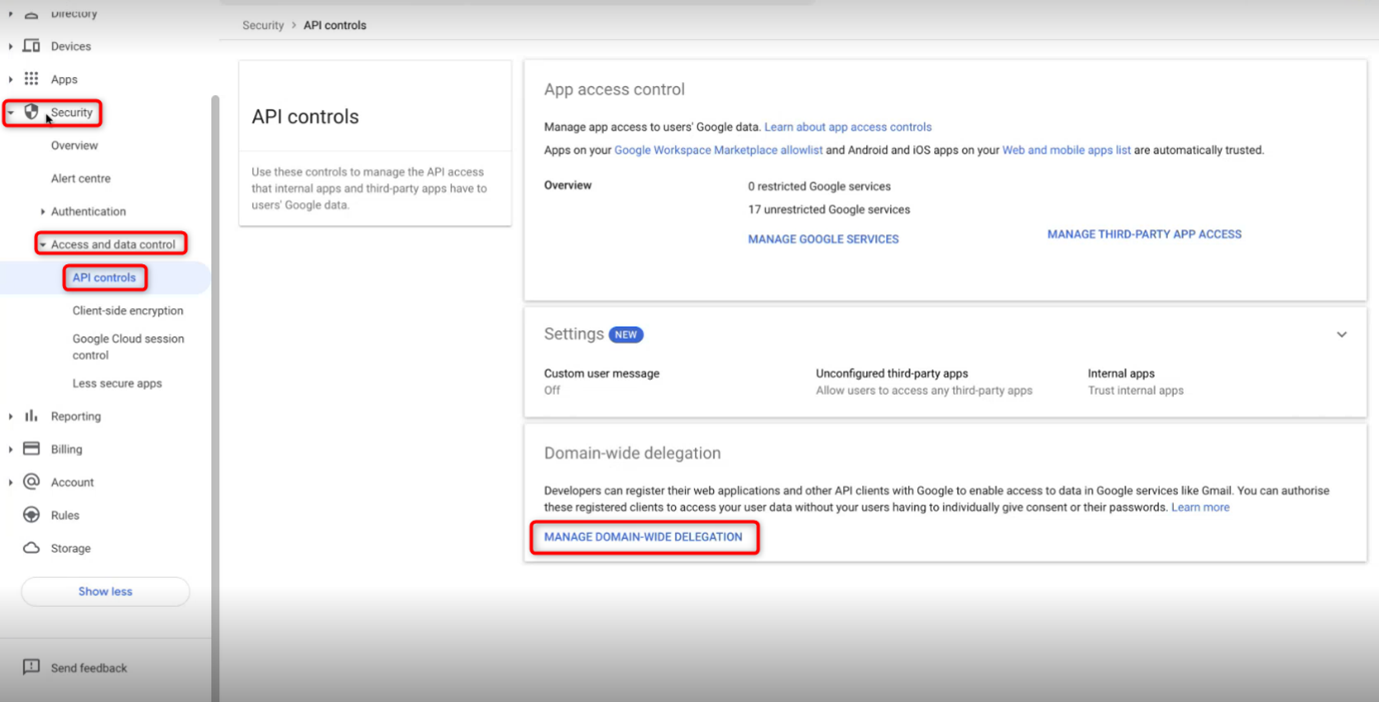
-
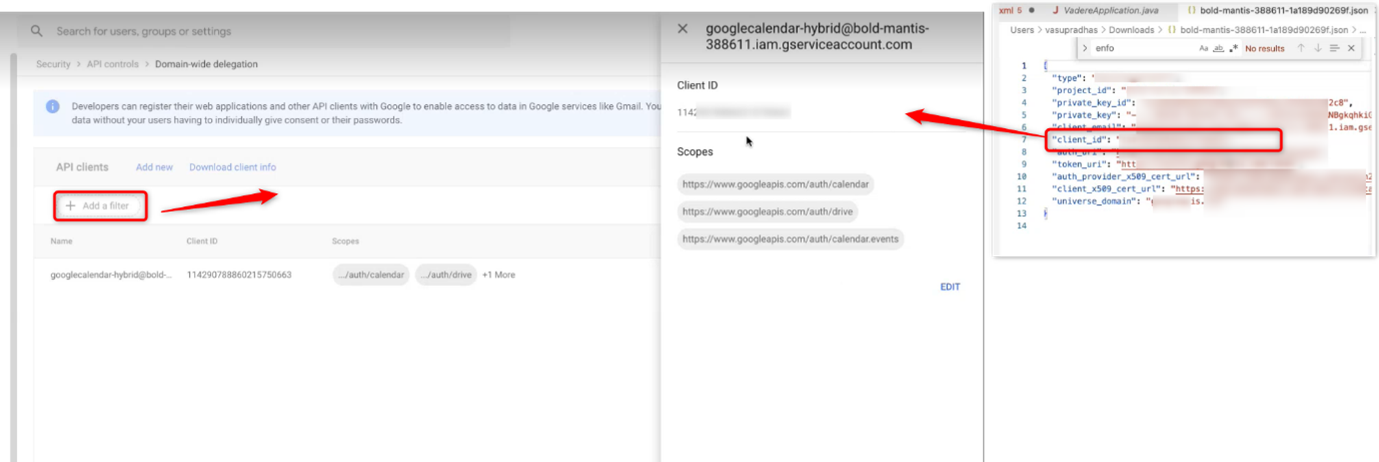
In the Domain-Wide Delegation window, click on the "+ Add a filter” button to add the client ID and scope.
-
Copy the client ID from the JSON key file and paste it into the “Client ID” column.
-
Copy the scopes provided below and paste them in the “Scope” column:
These steps ensure that the necessary configurations are made on the admin side to enable seamless integration of Google Calendar into KloudHybrid.
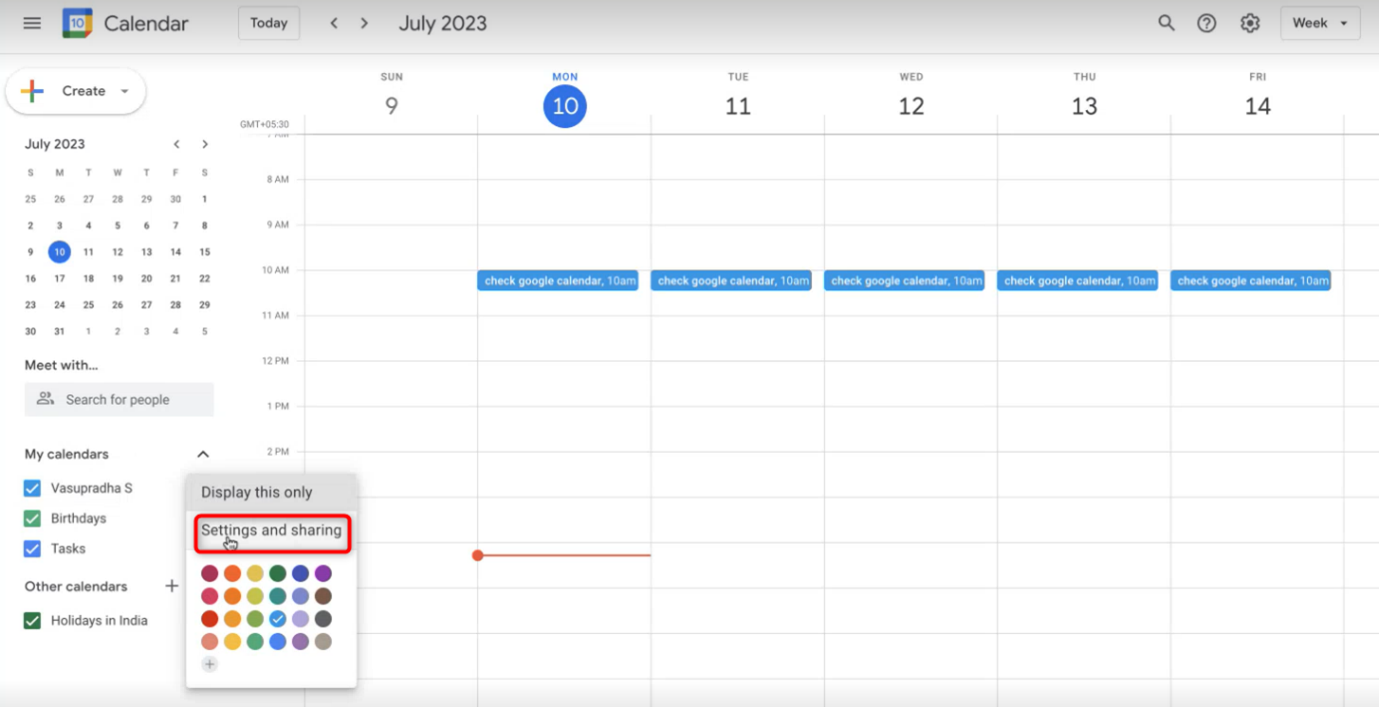
Making a Calendar Available to the Public:
To make a calendar available to the public, follow these steps:
Note: This step is mandatory for all users and admins to complete.
-
Open the Google Calendar.
-
Navigate to “Settings and sharing” from “My Calendar”.
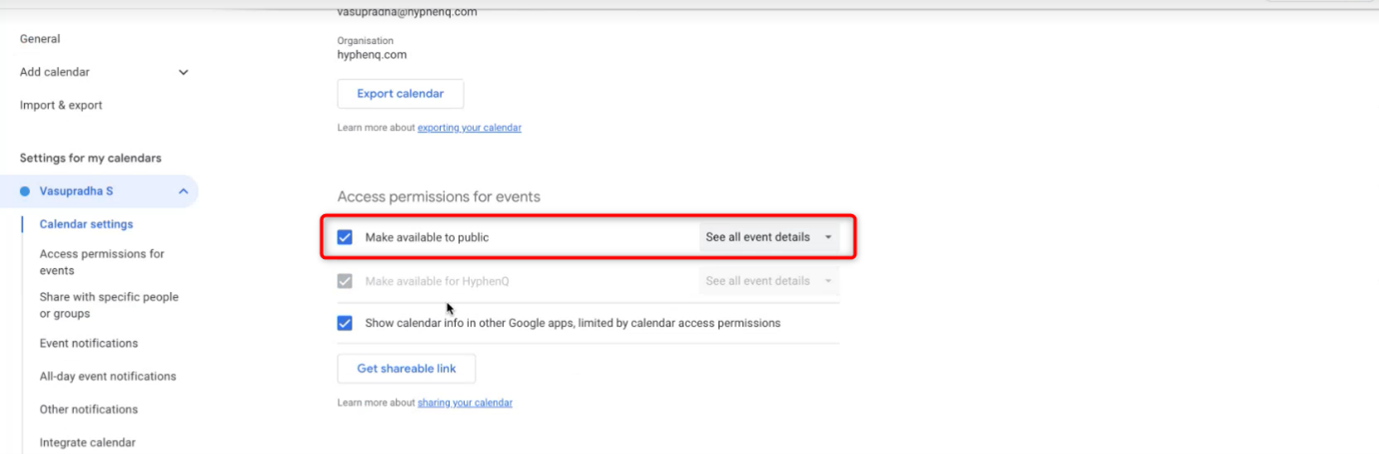
-
In the opened window, select the “Make available to public” option.
-
Choose the desired level of access you wish to grant to the public. For example, selecting “See all event details”.
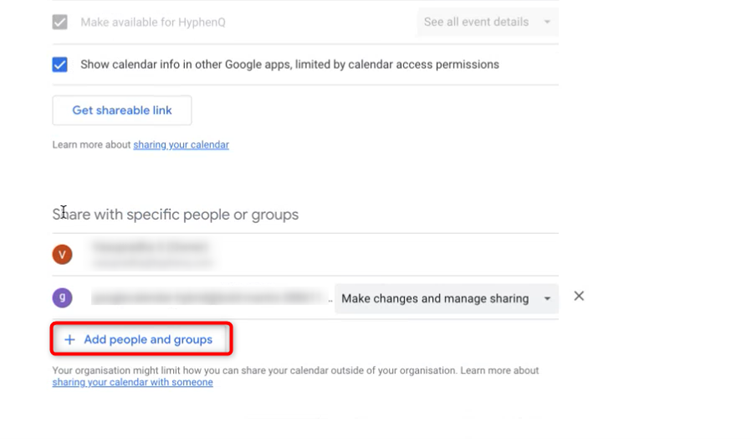
Sharing a Calendar with Specific People or Groups:
To share a calendar with specific individuals or groups, perform the following actions:
- Scroll down and click on the "+ Add people and group" button.
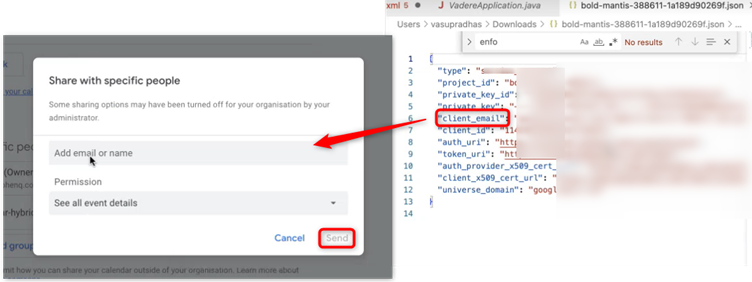
-
In the popup window, copy and paste the client email obtained from the JSON key file into the email column.
-
From the permissions dropdown list, select either “See all event details” or “Make changes and manage sharing”.
-
Click the “Send” button to finalize the sharing process.
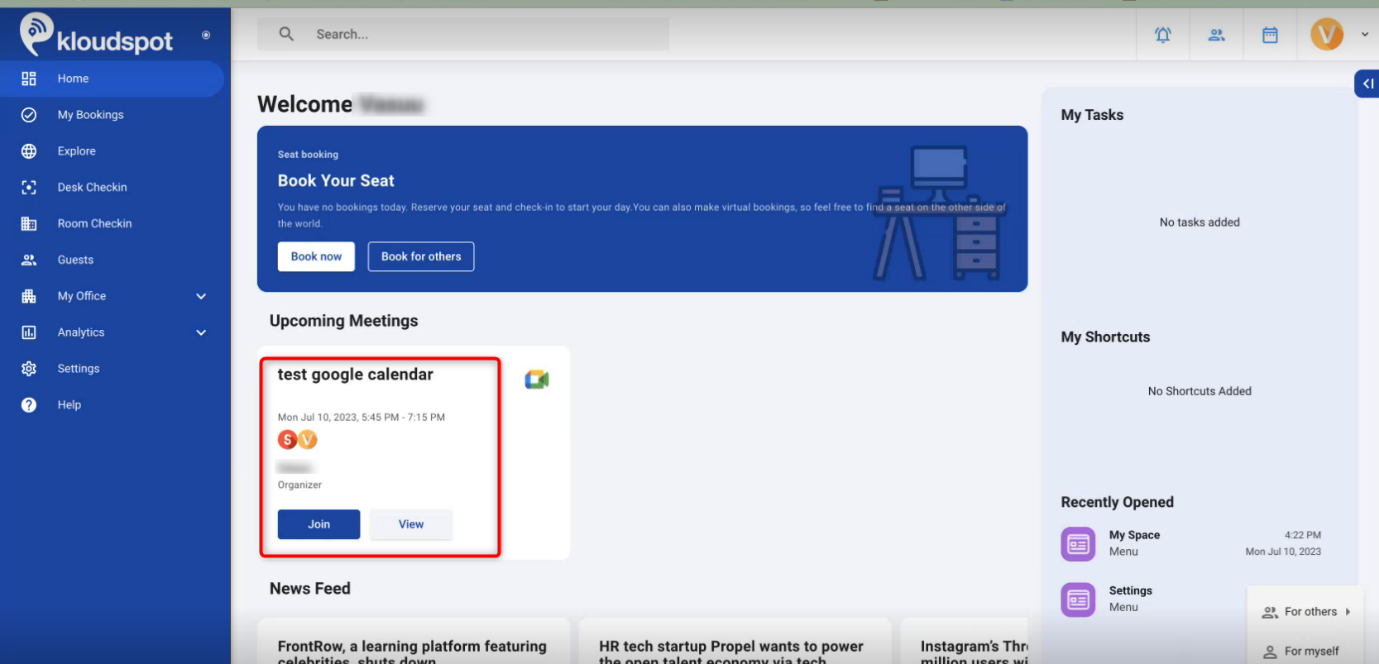
After all these configurations you can see Google calendar events on your Hybrid homepage and calendar page.