Login and Access Advanced Settings
Objective
Before setting up a KloudHybrid workspace, this section examines how to login to it and navigate to the configuration page.
Audience
Technically aware person with right to configure Kloudhybrid.
Prerequisites
- KloudHybrid URL
- Log in credentials
See Installation document to know how to get this.
Login and Access Advanced Settings
This section explains how to log in to the KloudHybrid application and access the Advanced Settings, which are crucial for configuring KloudHybrid according to your organization’s requirements. For detailed information about the browser and system requirements needed for optimal performance, please consult the System Requirements document.
-
If you are using the KloudHybrid app for the first time, use the URL received from Kloudspot to open the login page, this might look something like hybrid.kloudspot.com. If you’re not sure what your KloudHybrid URL is, please contact your Kloudspot representative
-
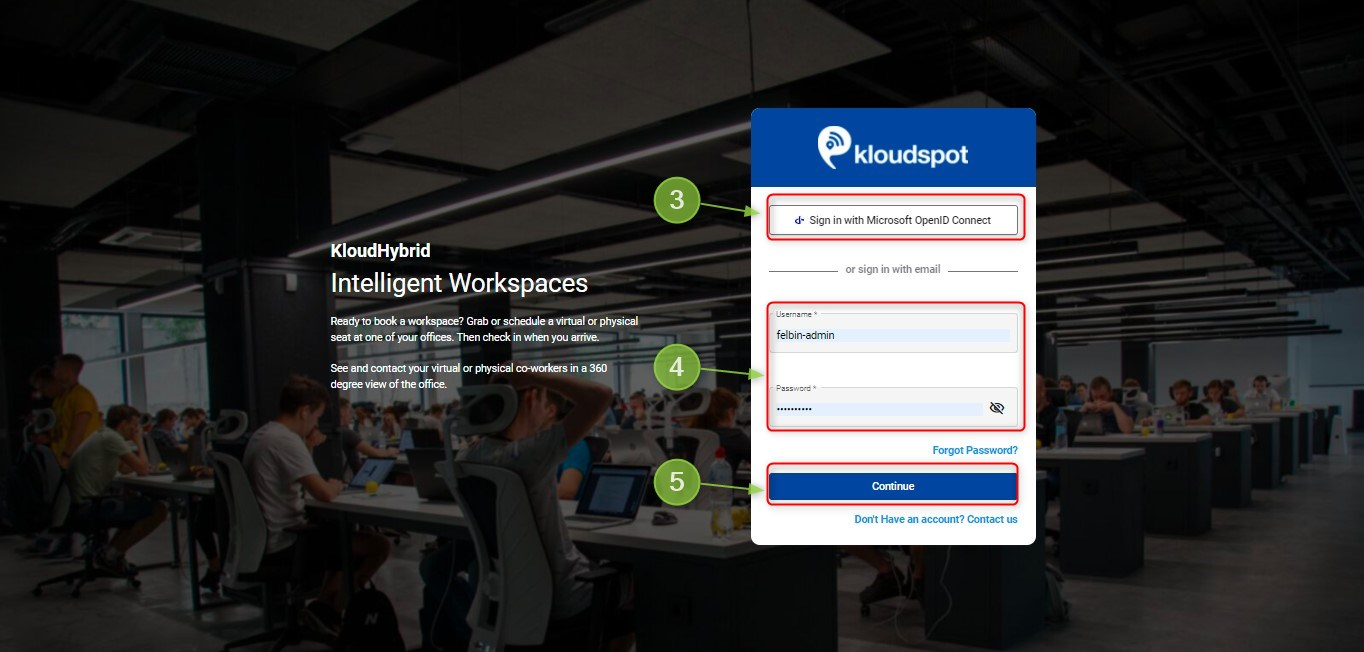
The login page of the KloudHybrid application is shown below on the web browser.
-
Click on the Single sign-on Button, if configured. If SSO is not yet configured, process to step #4 and login with your local admin credentials provided to you by your Kloudspot representative.
Note: If you are accessing KloudHybrid for the first time, you will not be able to log in using the Single Sign-On button. Instead, please use the username and password that you have received to log in.
-
Enter the provided Username and Password in the text box.
-
Click on Continue.
-
If you’re logging in with a local admin account, make sure to change the password after first login.
-
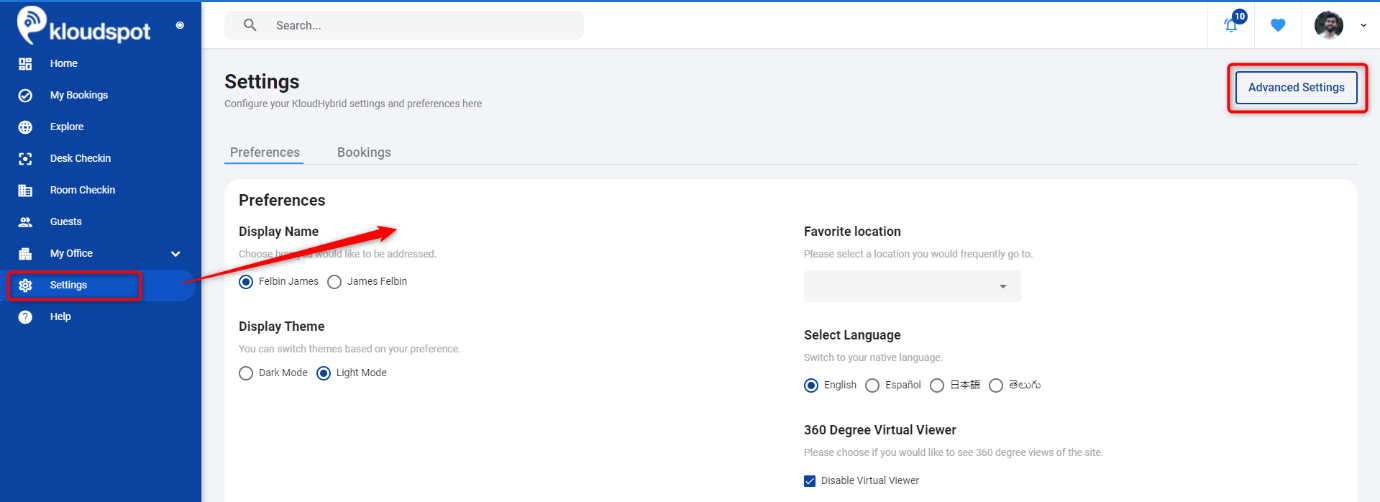
Click the settings menu in the menu bar of the newly opened page.
-
Click on Advanced Settings.
-
This will take you to the system configuration page where you will configure most system settings such as: location, SSO, check-in processes, health questionnaires, etc.
Note: Please note that the Configuration page is displayed when you log in with admin privileges, this button is not visible to users.
Refer to step 2 for instructions on performing additional configurations.