Queue creation
-
To configure queue monitoring on a camera, the initial step involves creating a queue. A complete queue configuration should encompass a lane, server, and gate.
-
The exact copy of the queue you want to configure needs to be created here.
-
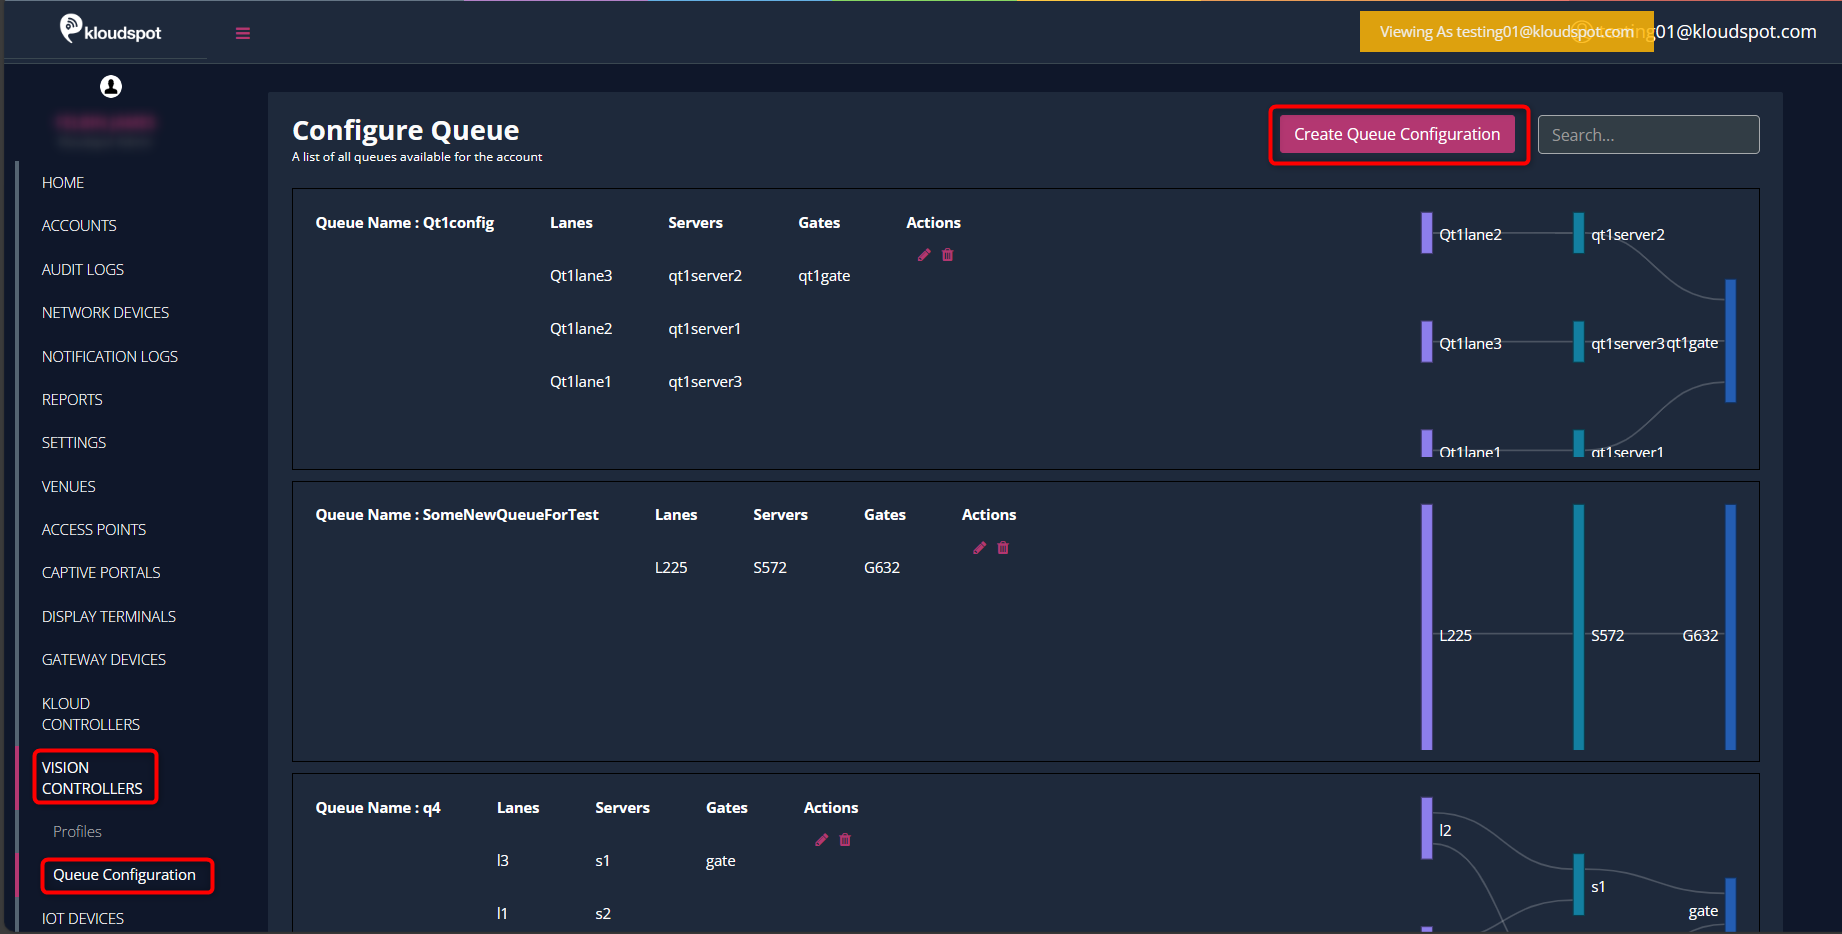
Navigate to the Vision Controller interface.
-
Go to “Queue configuration” to access the queue management settings.
-
Click on “Create queue configuration” to initiate the setup process.
-
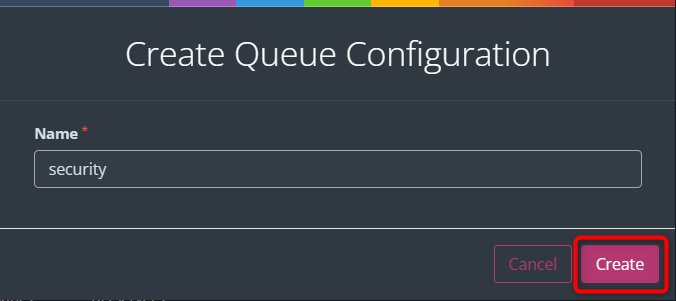
In the opening window, enter the name of the queue.
-
Click the “Create” button to proceed.
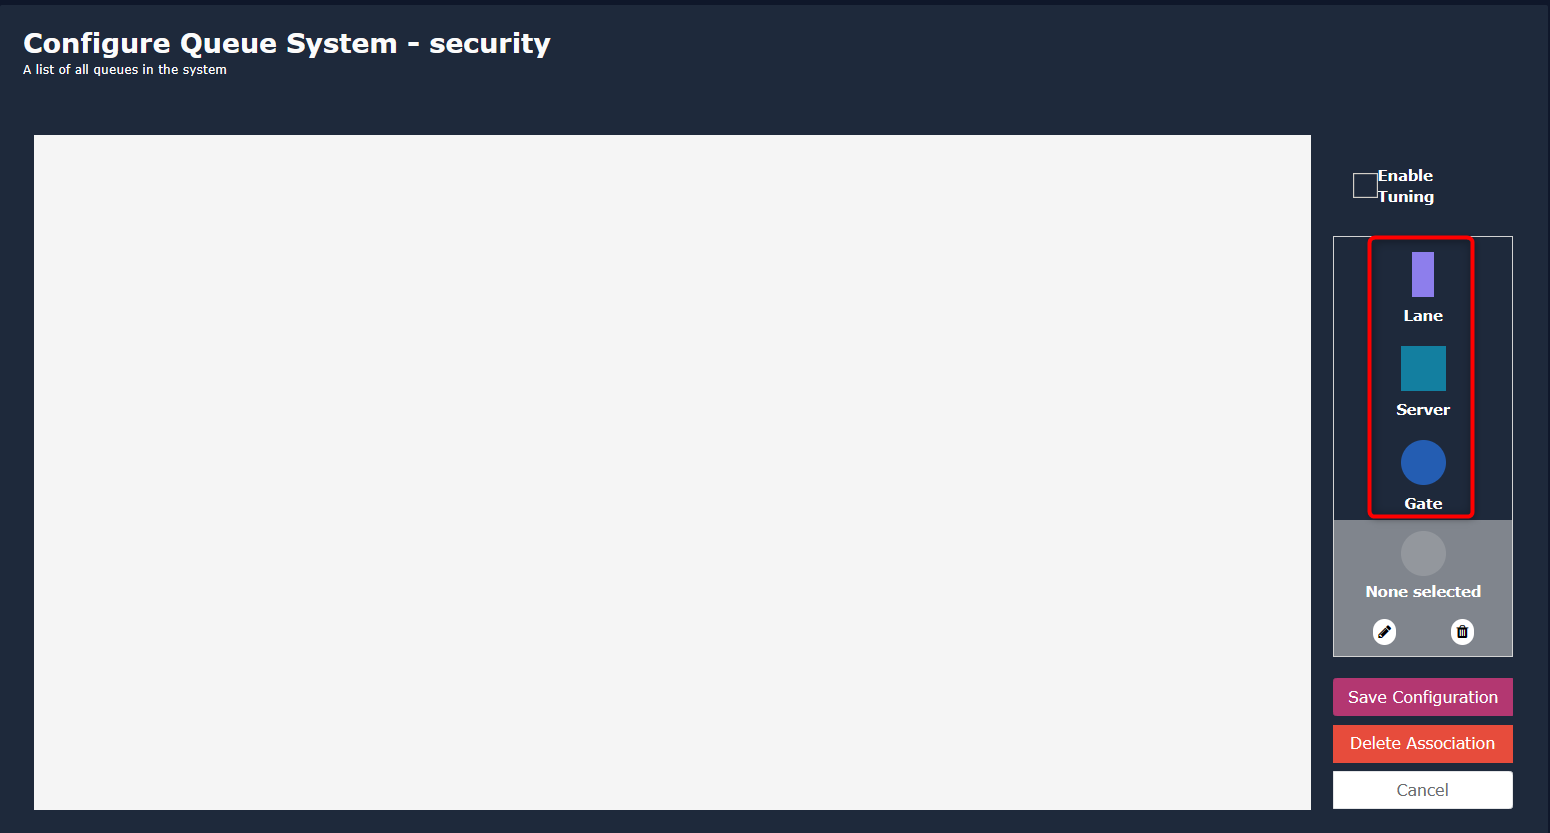
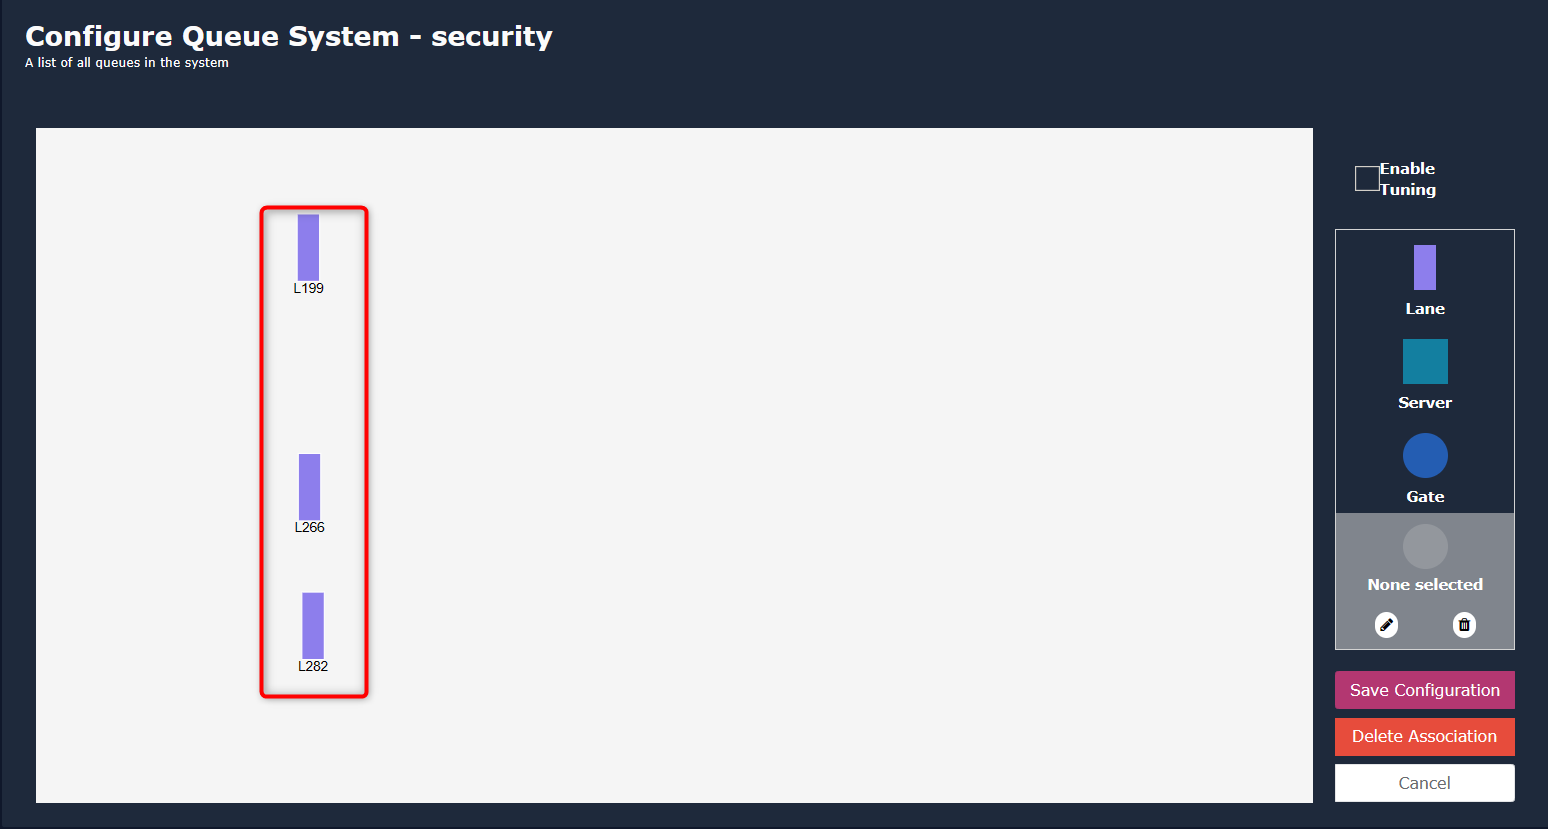
- In the “Configure Queue System” window, you’ll find the Lane, Server, and Gate buttons on the right-hand side.
Add Lanes:
-
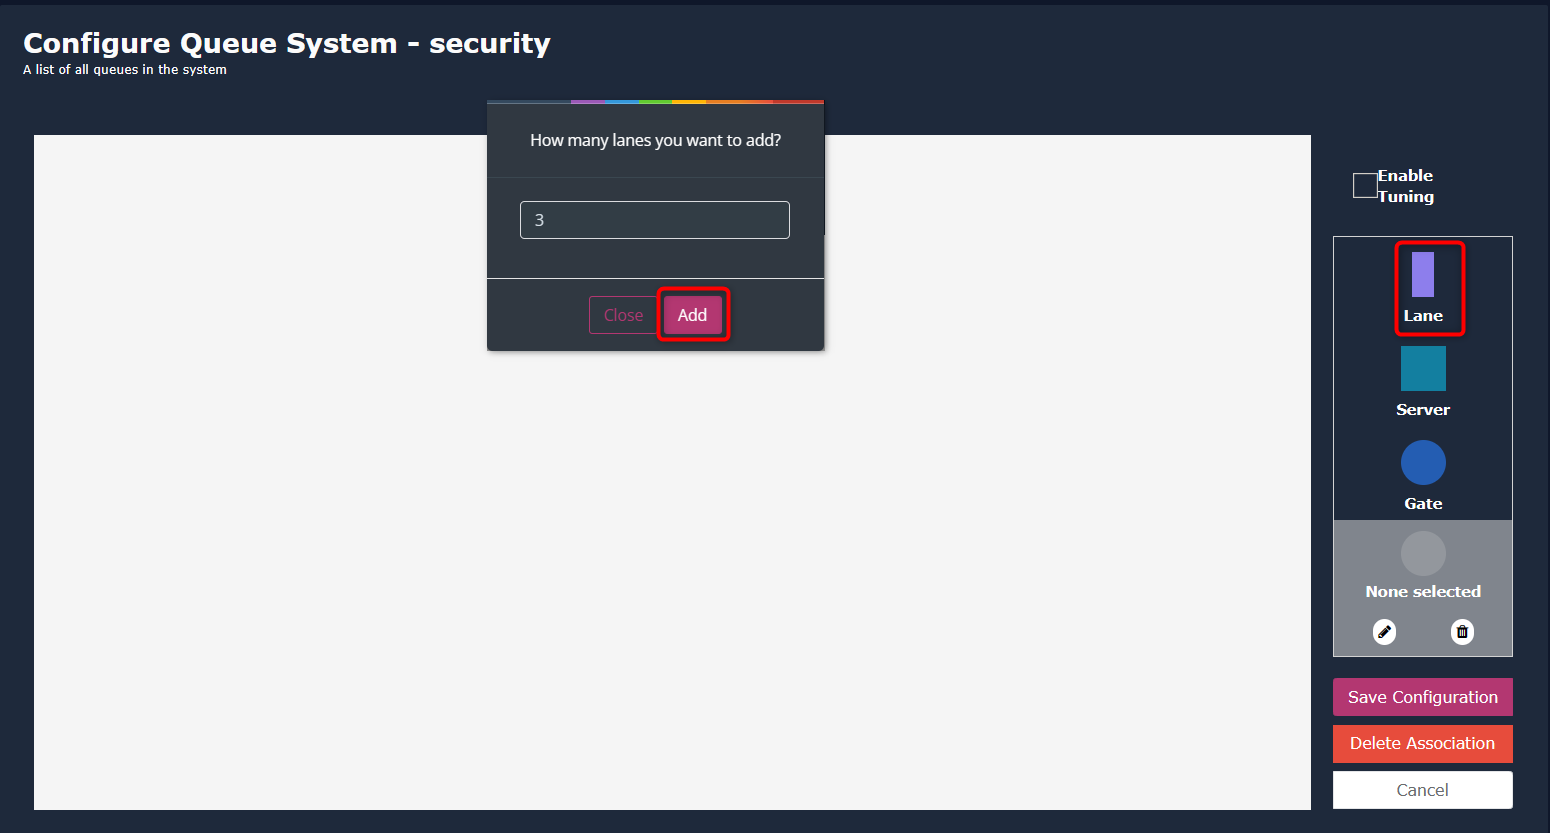
Double-click on the “Lane” button.
-
In the popup window, specify the number of lanes.
-
Click “Add” to add the lanes to the canvas.
- Adjust the lane positions according to your requirements by dragging them.
Add Servers:
-
Double-click on the “Server” button.
-
In the popup window, select the number of servers.
-
Click “Add” to add server gates to the canvas.
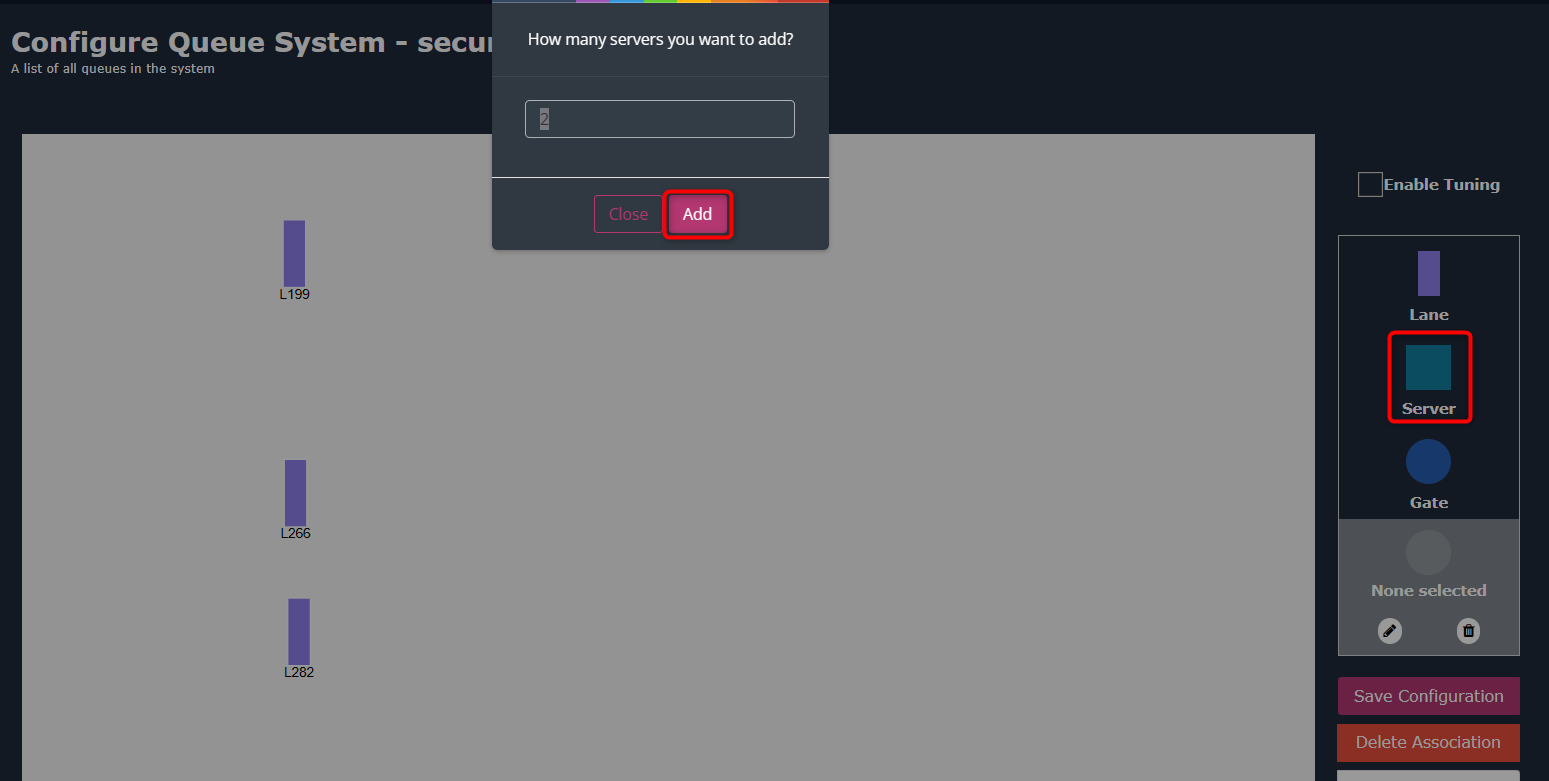
- Adjust the server gate positions as needed.
Add Exit Gates:
-
Double-click on the “Gate” button to add exit gates.
-
In the popup window, specify the number of exit gates.
-
Click “Add” to add exit gates to the canvas.
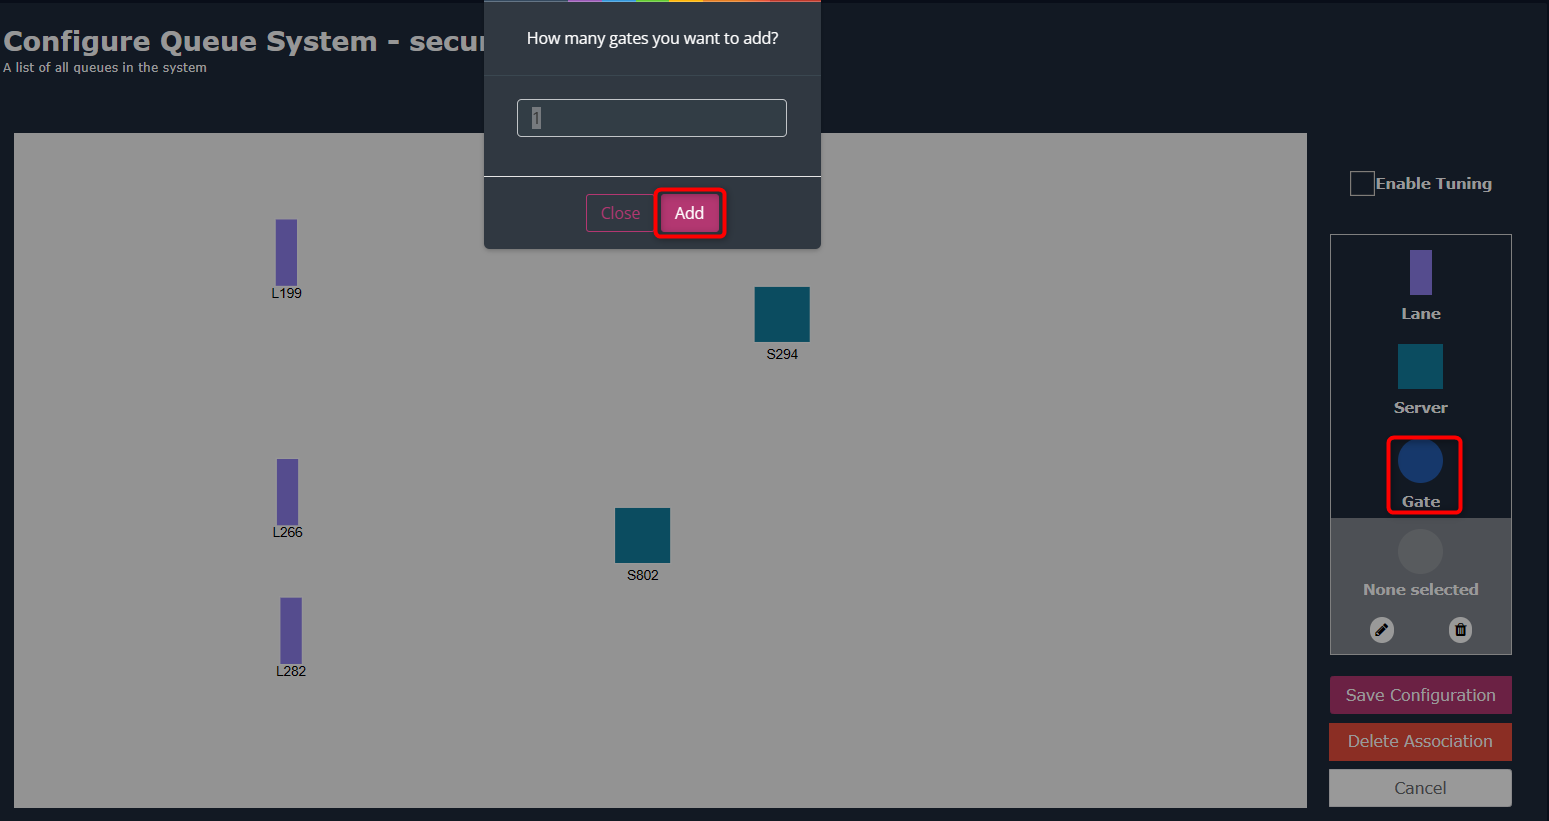
- Adjust the exit gate positions according to your needs.
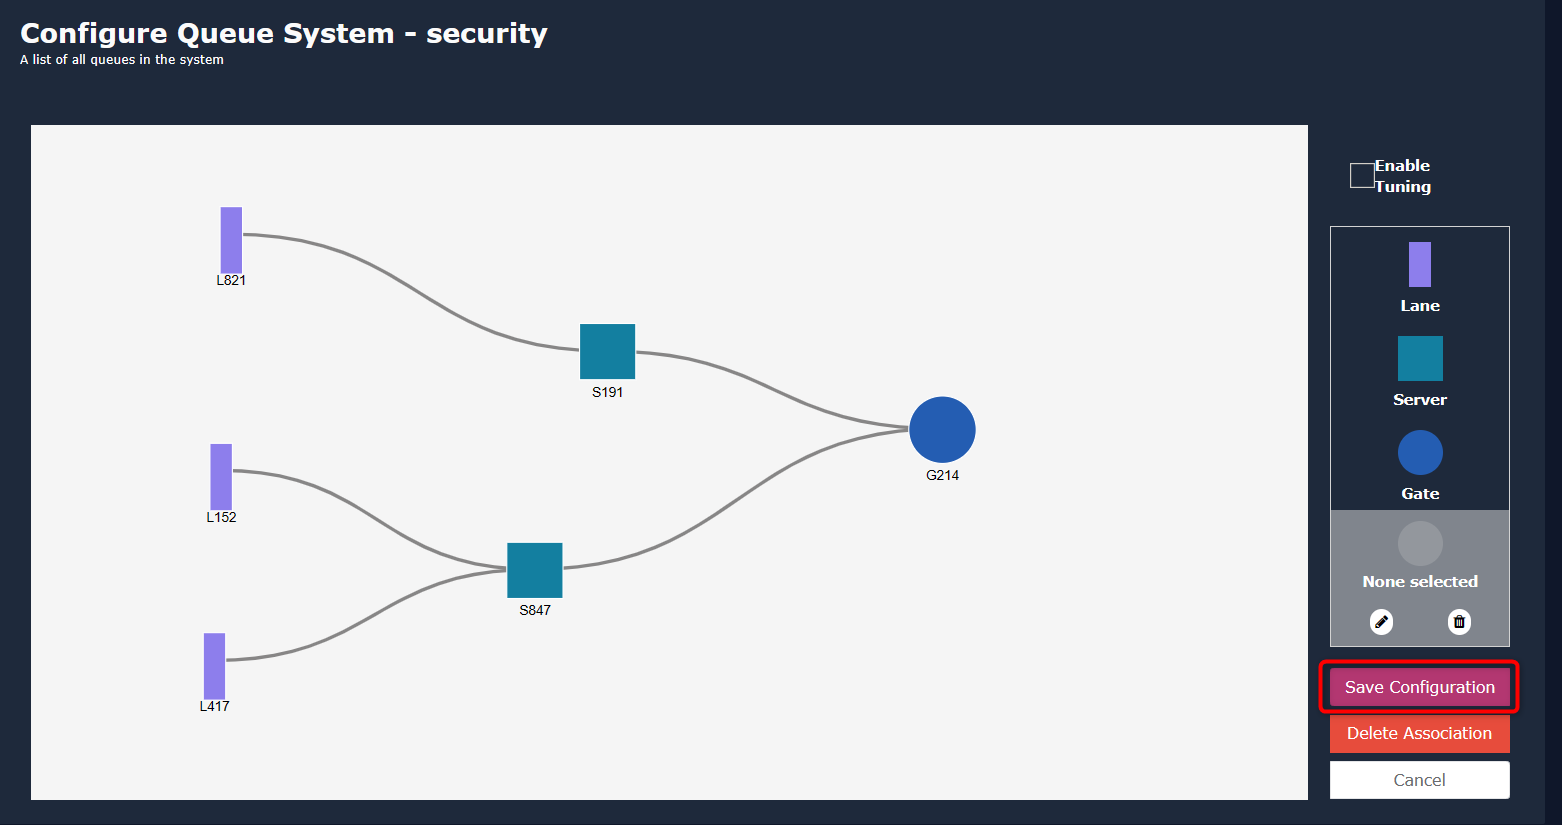
Draw Association Lines:
-
Click on the icon representing the association you want to create.
-
The selected icon’s color will change to yellow.

-
Click on the associated icon to create an association line between them.
-
Repeat the process to create associations between other icons.

Save Configuration:
Click the “Save Configuration” button to save the configured queue.
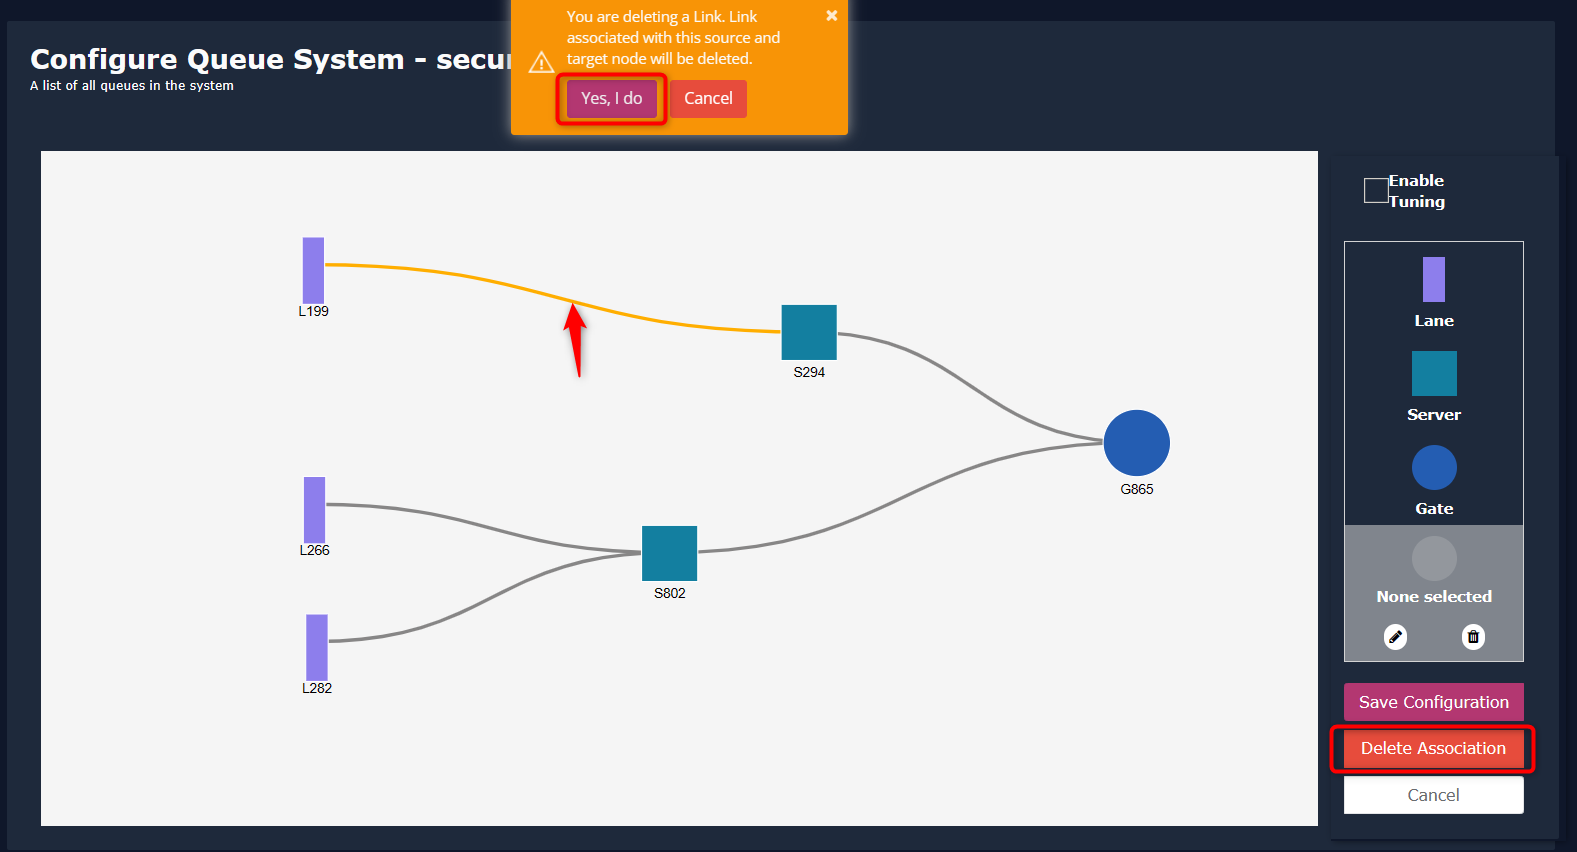
Delete Associations:
-
To delete an association, click on the “Delete association” button.
-
Select the association lane to be deleted.
-
A confirmation window will appear; click “Yes, I do” to confirm the deletion process.
- Finally, click on the Save Configuration button to save the changes.