Vehicle Monitoring
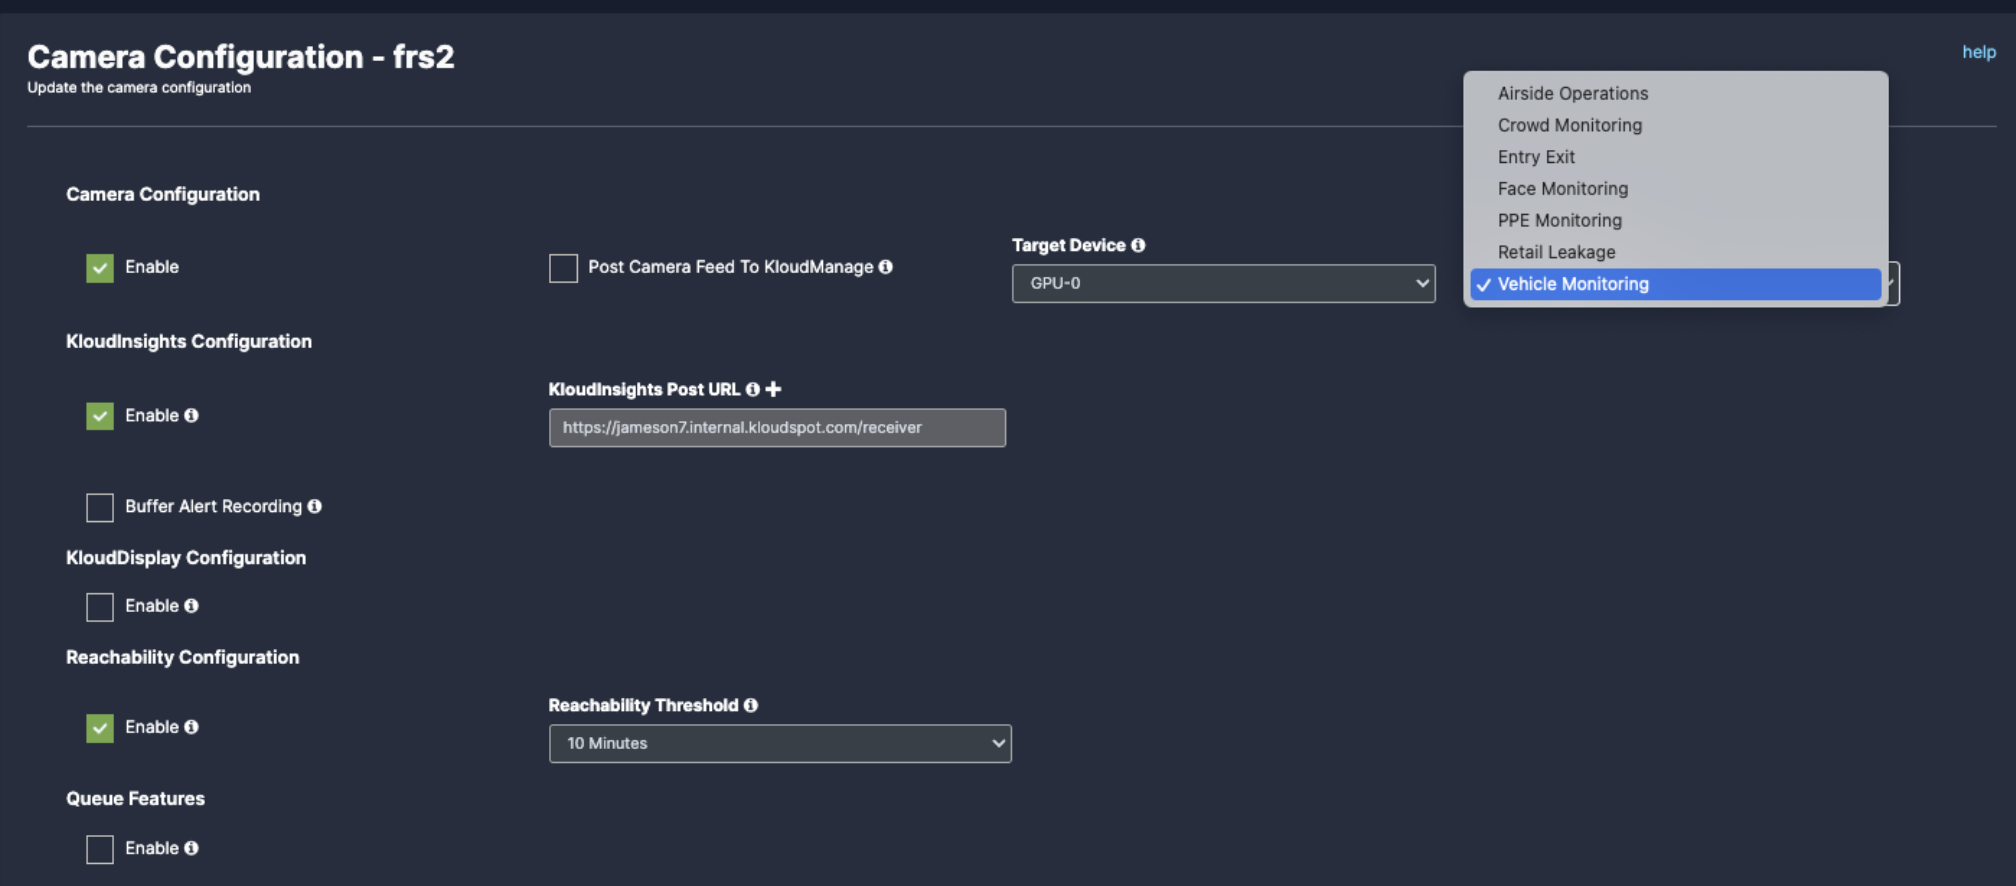
- Before you begin configuring the use cases, you should first configure the camera’s general configuration. Refer to the General Camera Configuration section for instructions.
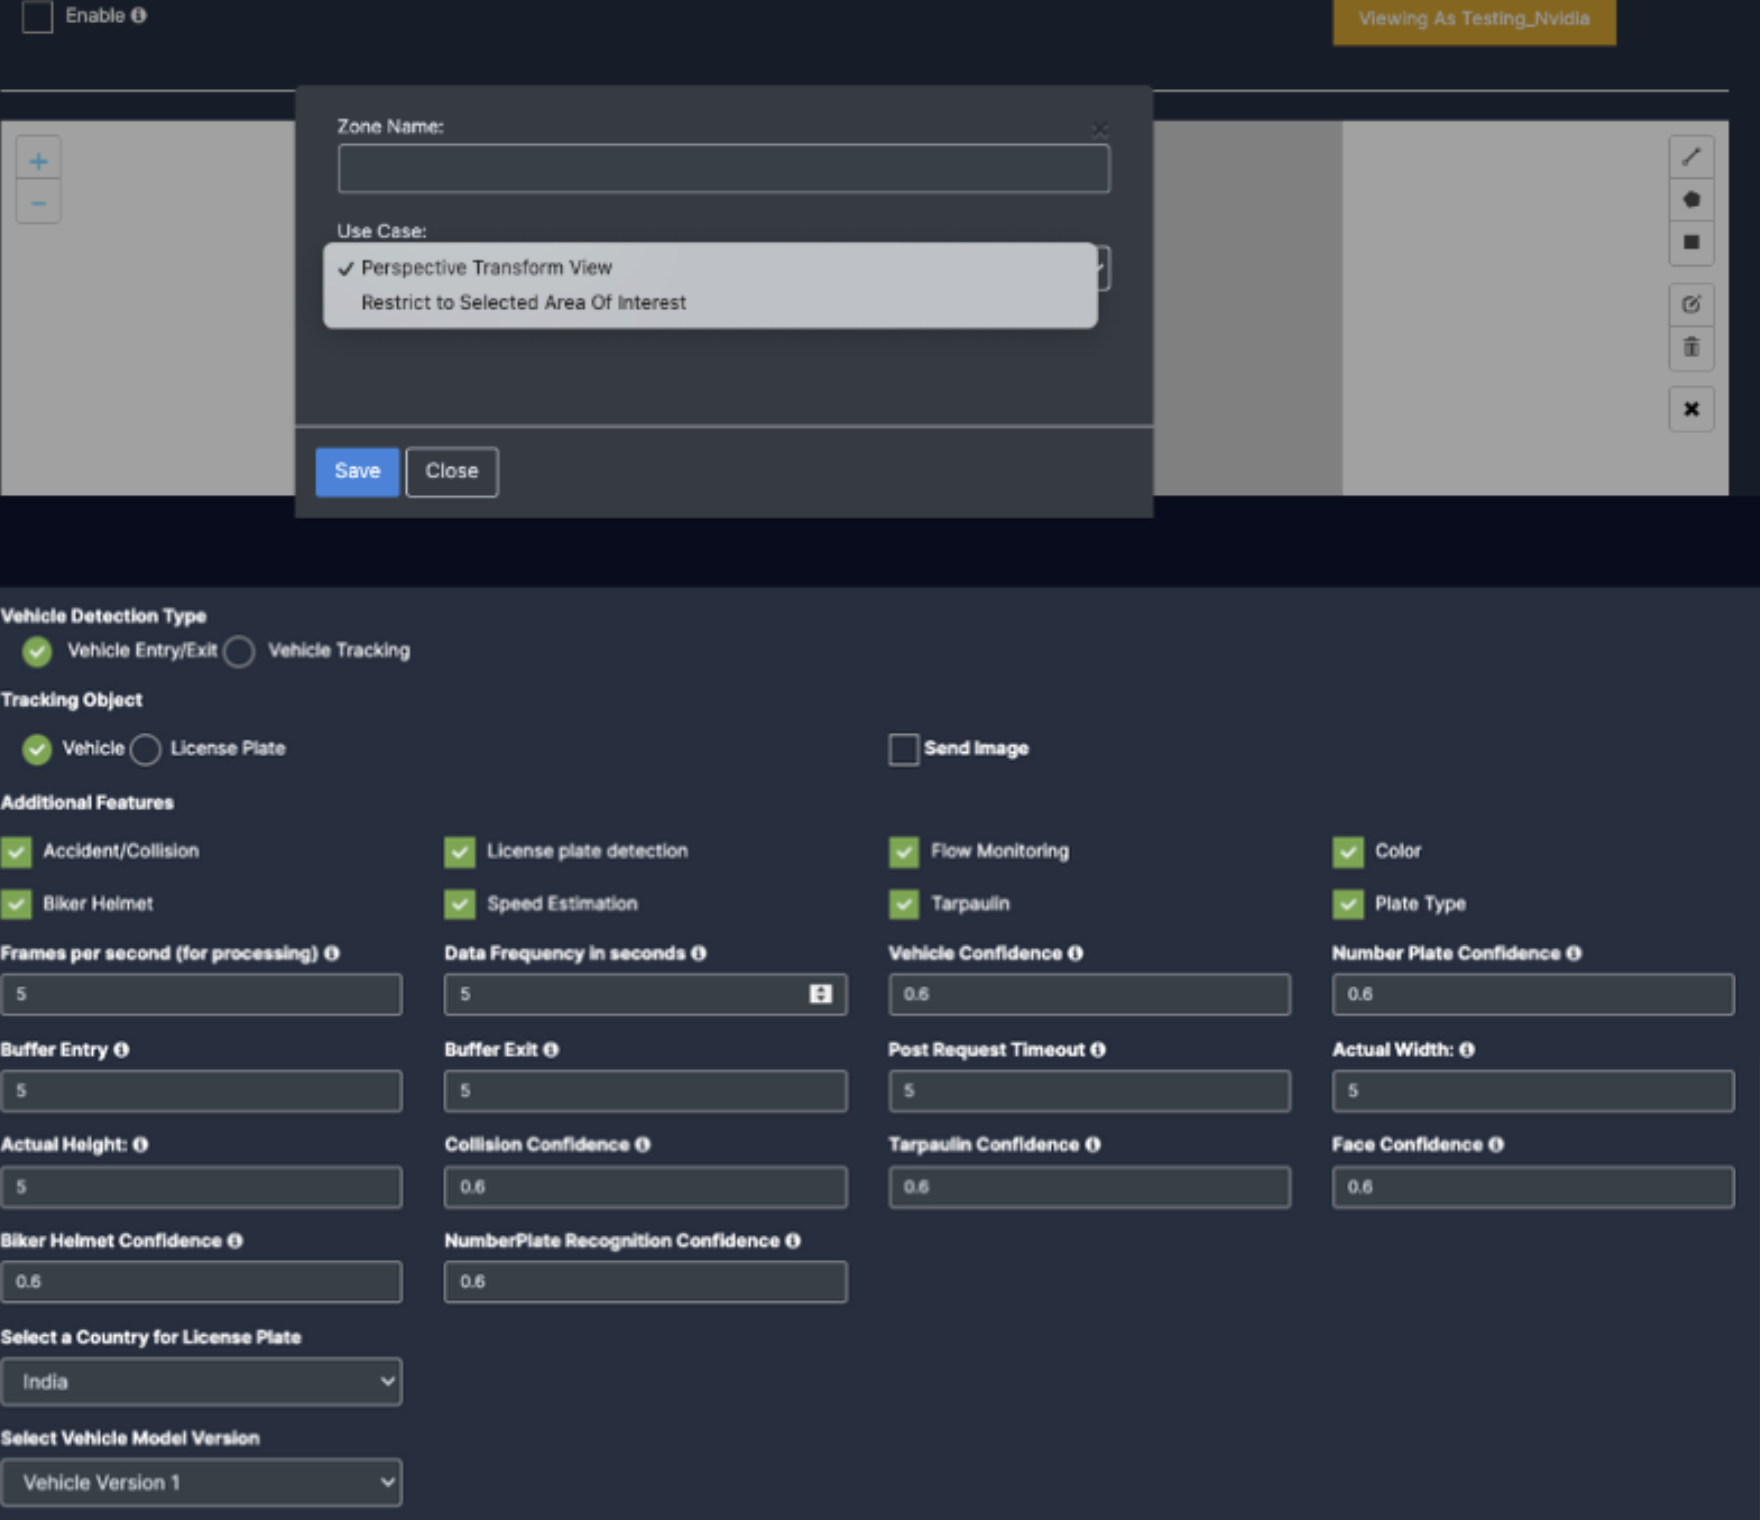
- Then, select the Vehicle monitoring from the dropdown list
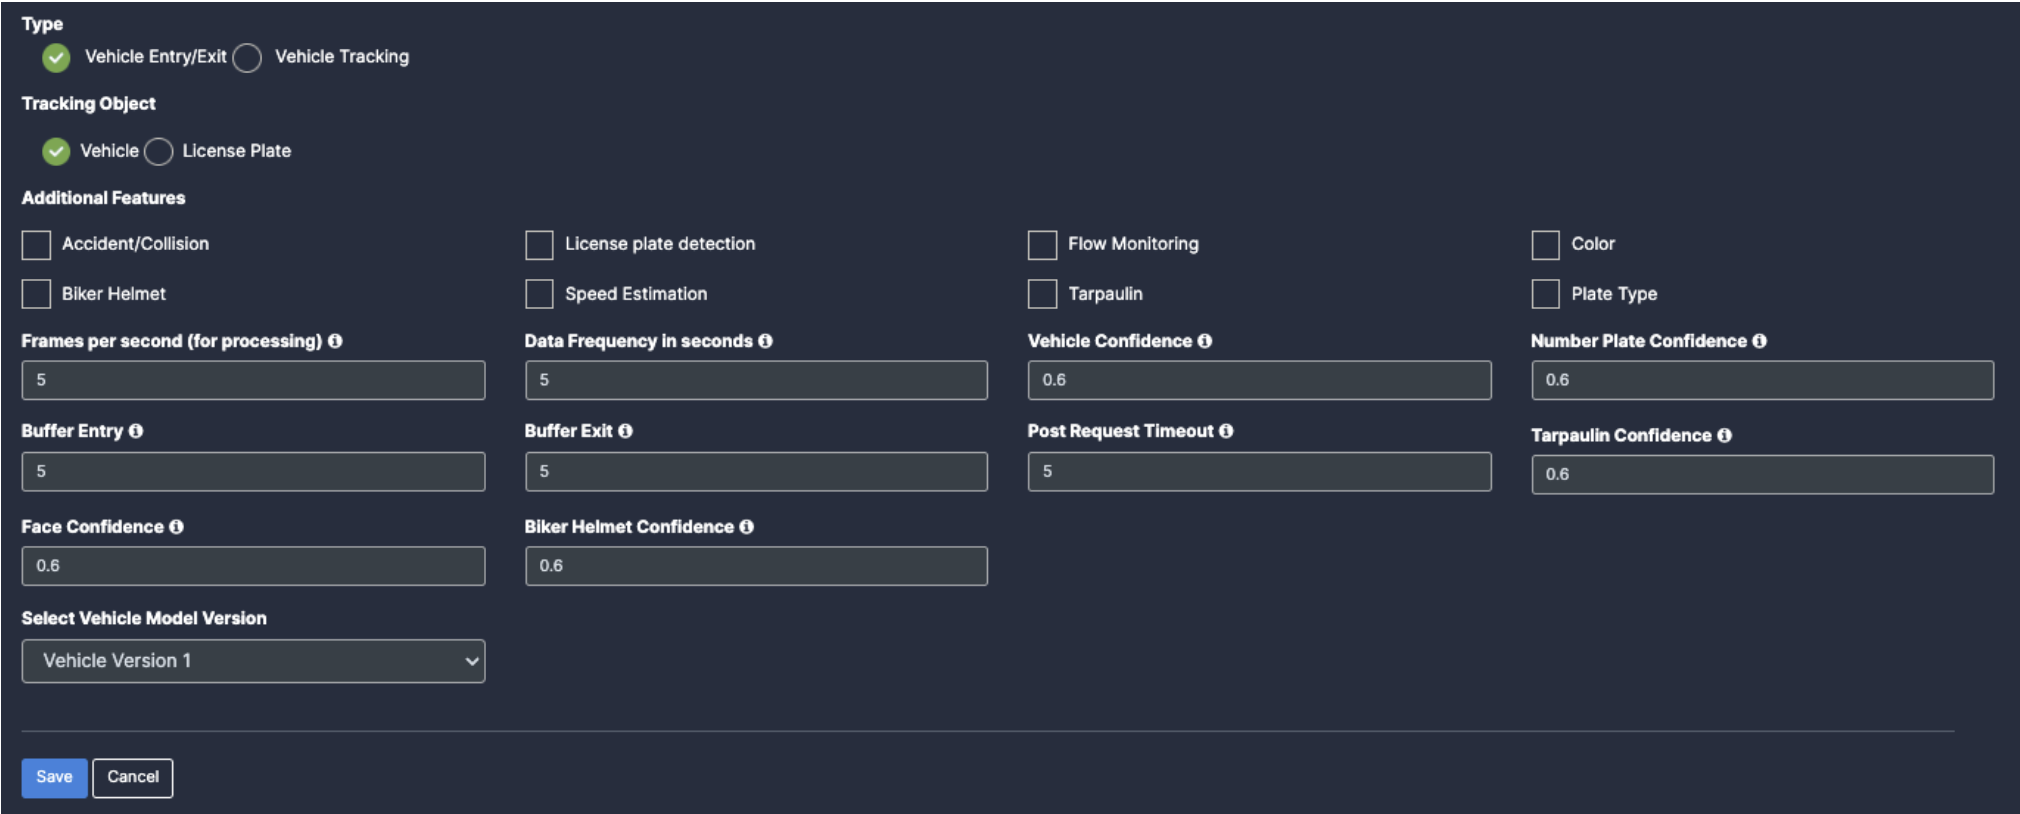
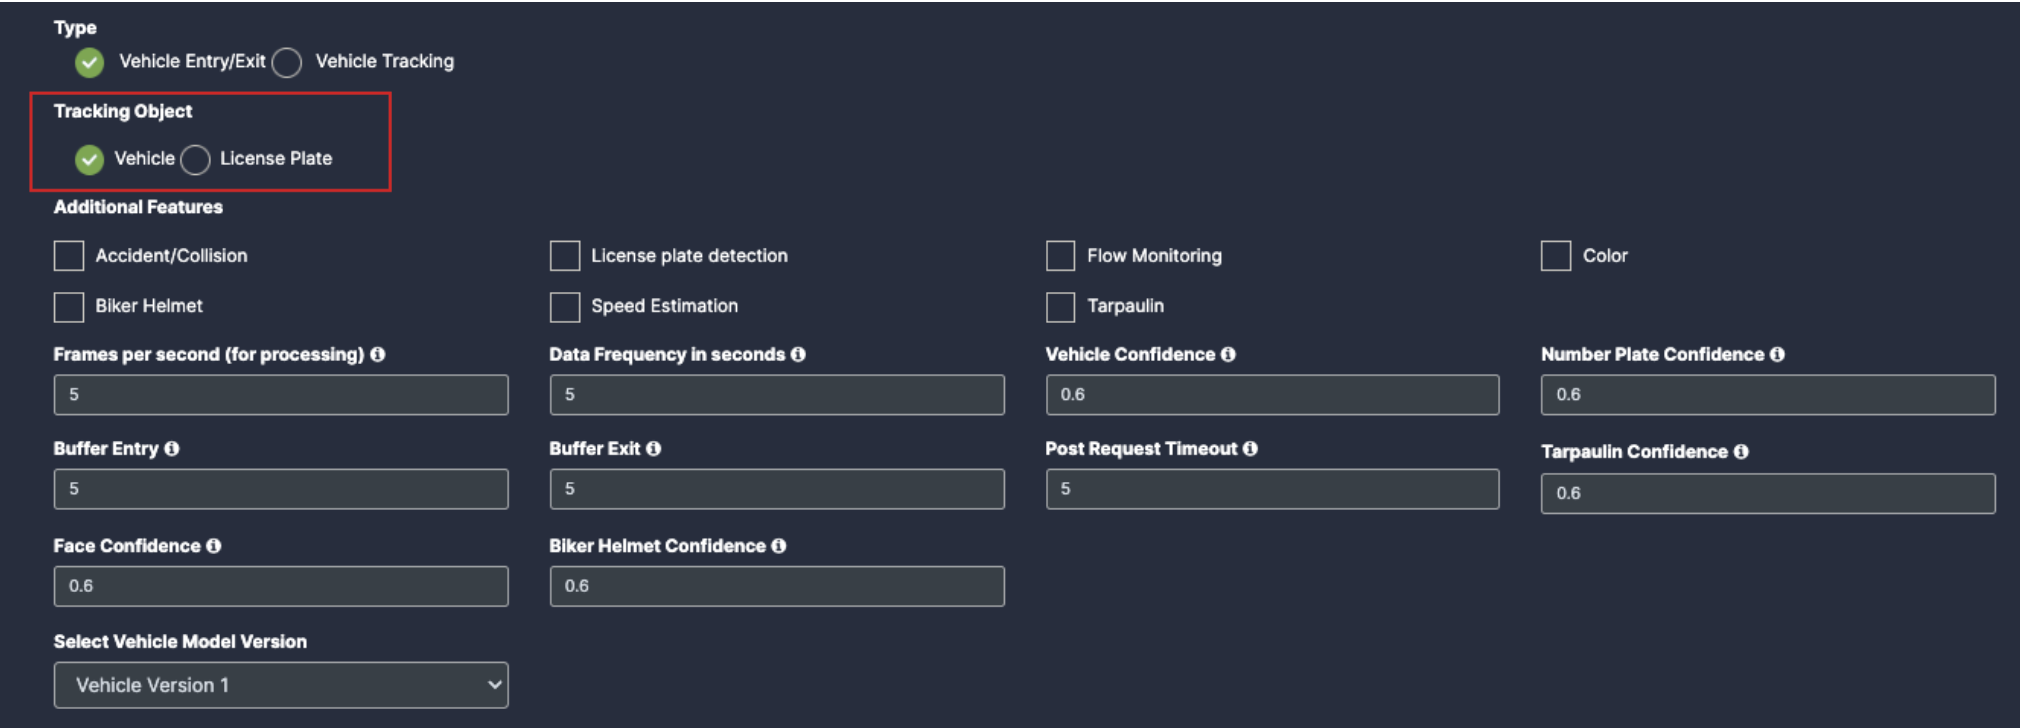
- Vehicle Entry/Exit
- Vehicle Tracking
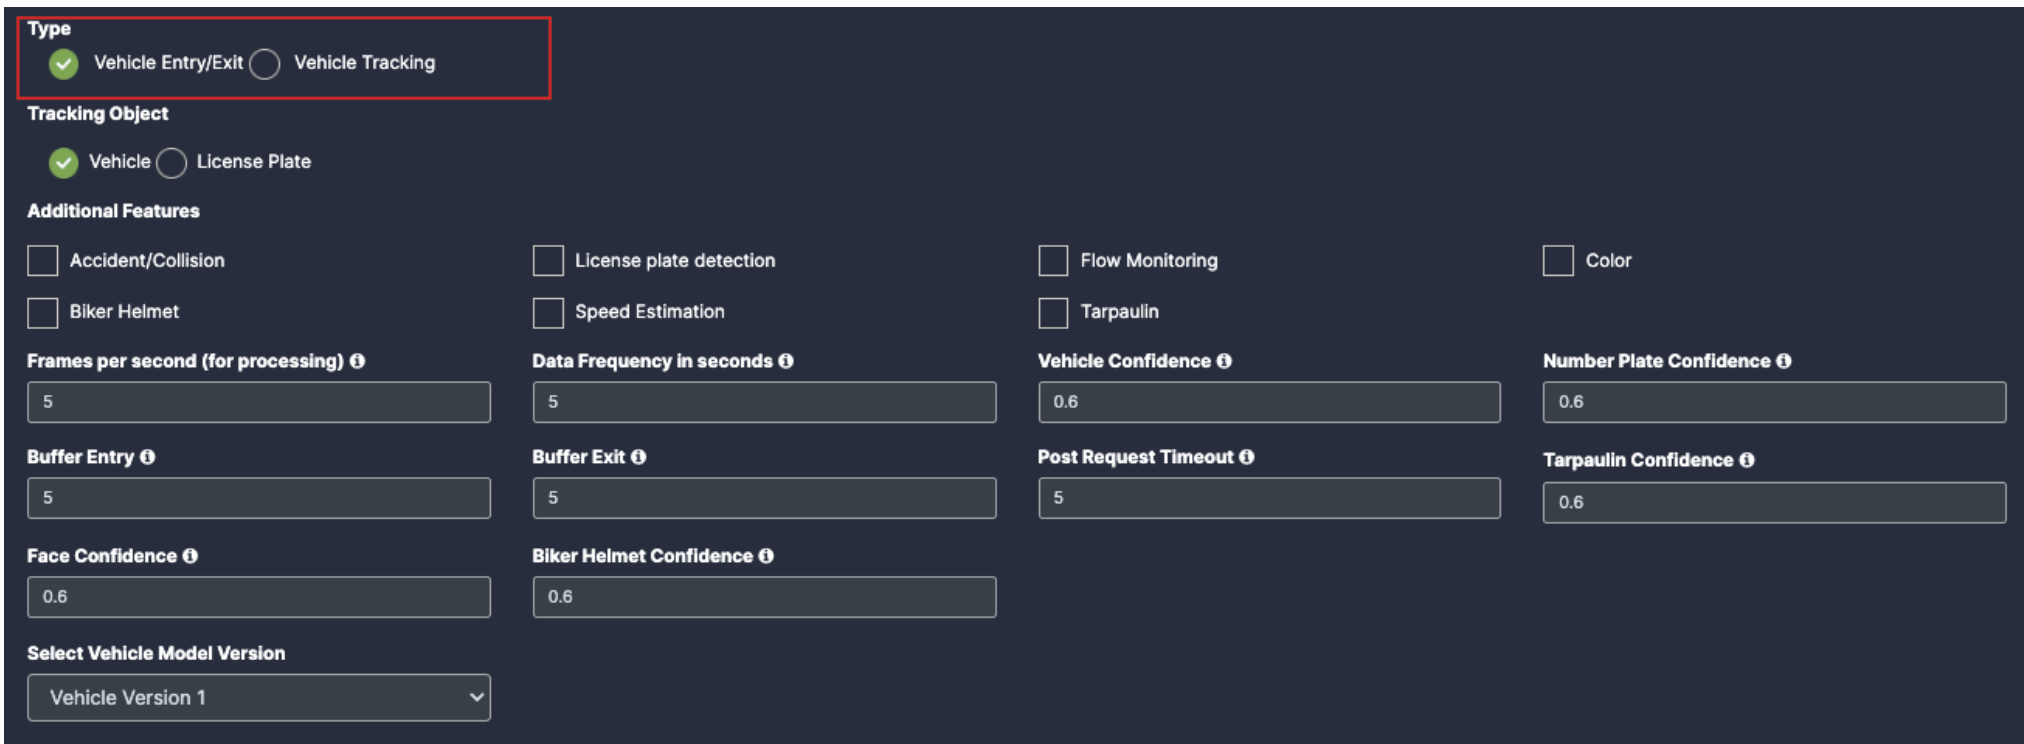
- Vehicle Entry/Exit have 2 type of tracking features, which is Vehicle and License Plate.
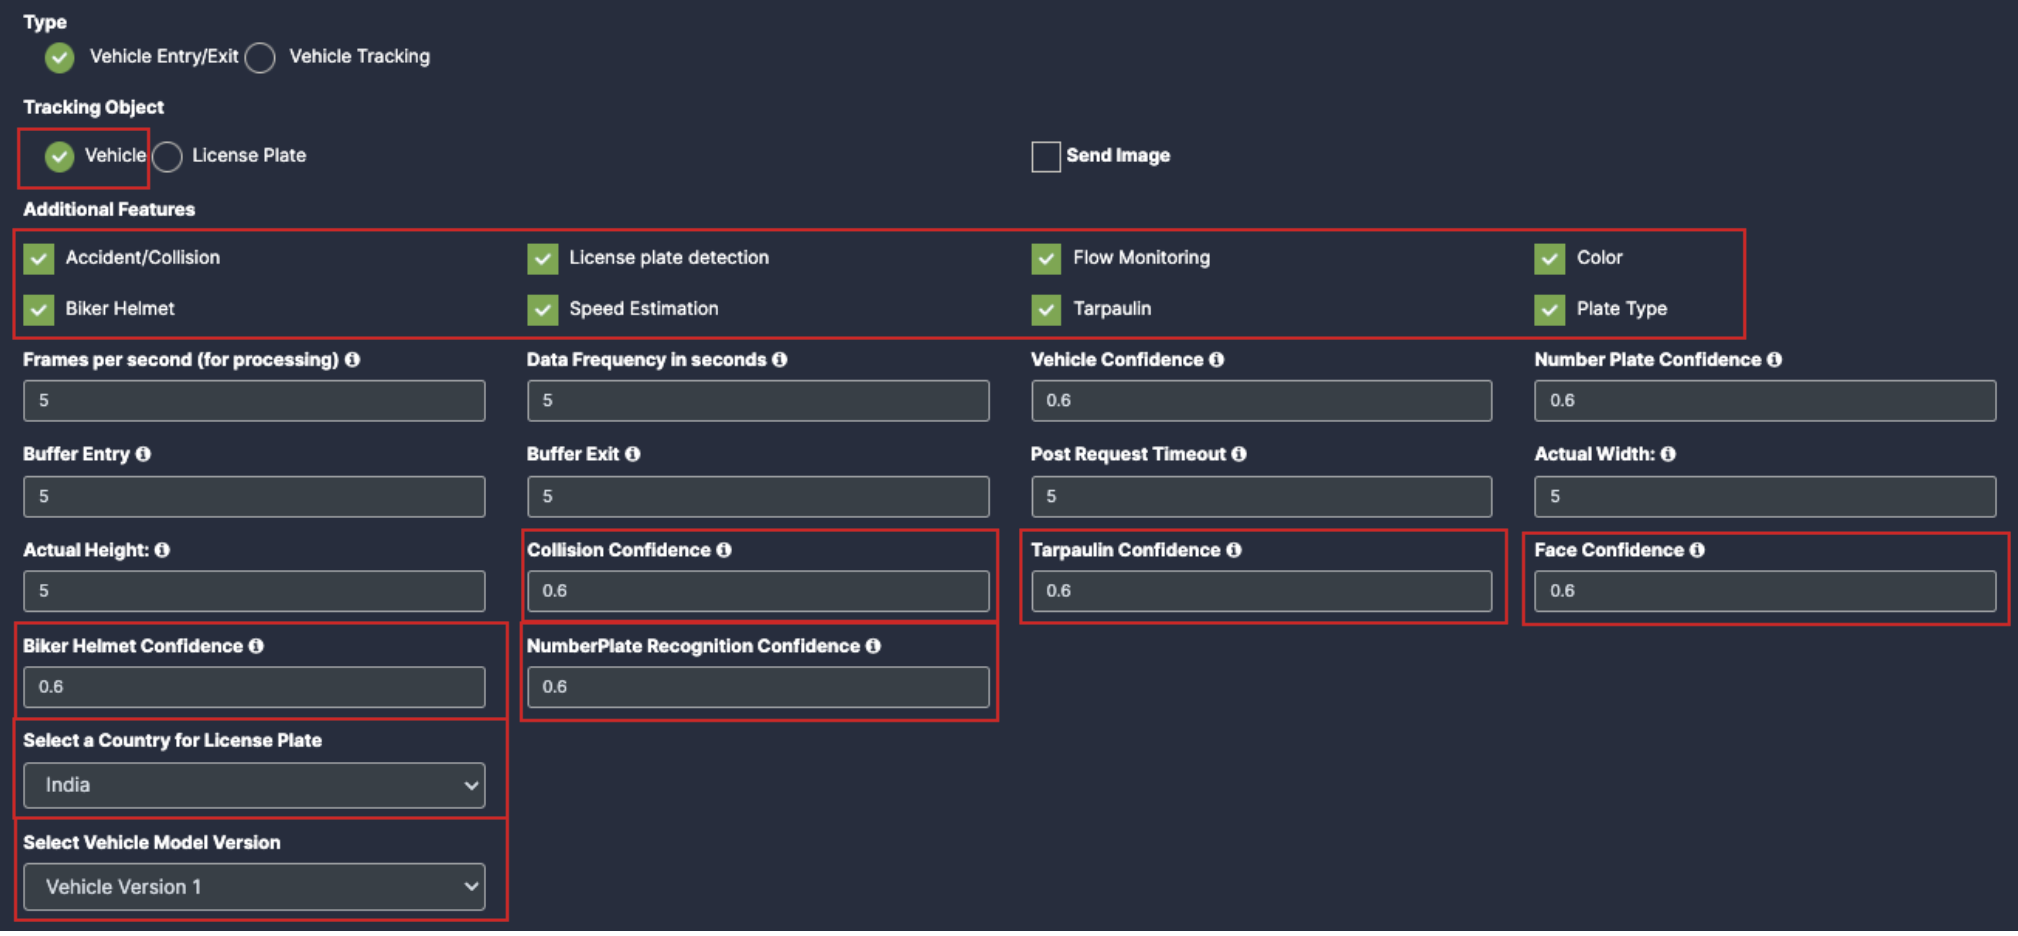
- Accident/Collision: Once you click on the check box of Accident/Collision, their respective dropdowns will be added below for the respective feature detection.
- License plate detection: Once you click on the check box of License plate detection, their respective dropdowns and Plate type check box will be added below for the respective feature detection.
- Flow Monitoring: Once you click on the check box of Flow Monitoring, their respective dropdowns will be added below for the respective feature detection.
- Color: Once you click on the check box of Color, their respective dropdowns will be added below for the respective feature detection.
- Biker Helmet: Once you click on the check box of Biker Helmet, their respective dropdowns will be added below for the respective feature detection.
- Speed Estimation: Once you click on the check box of Speed Estimation, their respective dropdowns will be added below for the respective feature detection.
- Tarpaulin: Once you click on the check box of Tarpaulin, their respective dropdowns will be added below for the respective feature detection.
- Plate type: Enable the check box of plate type for respective detection.
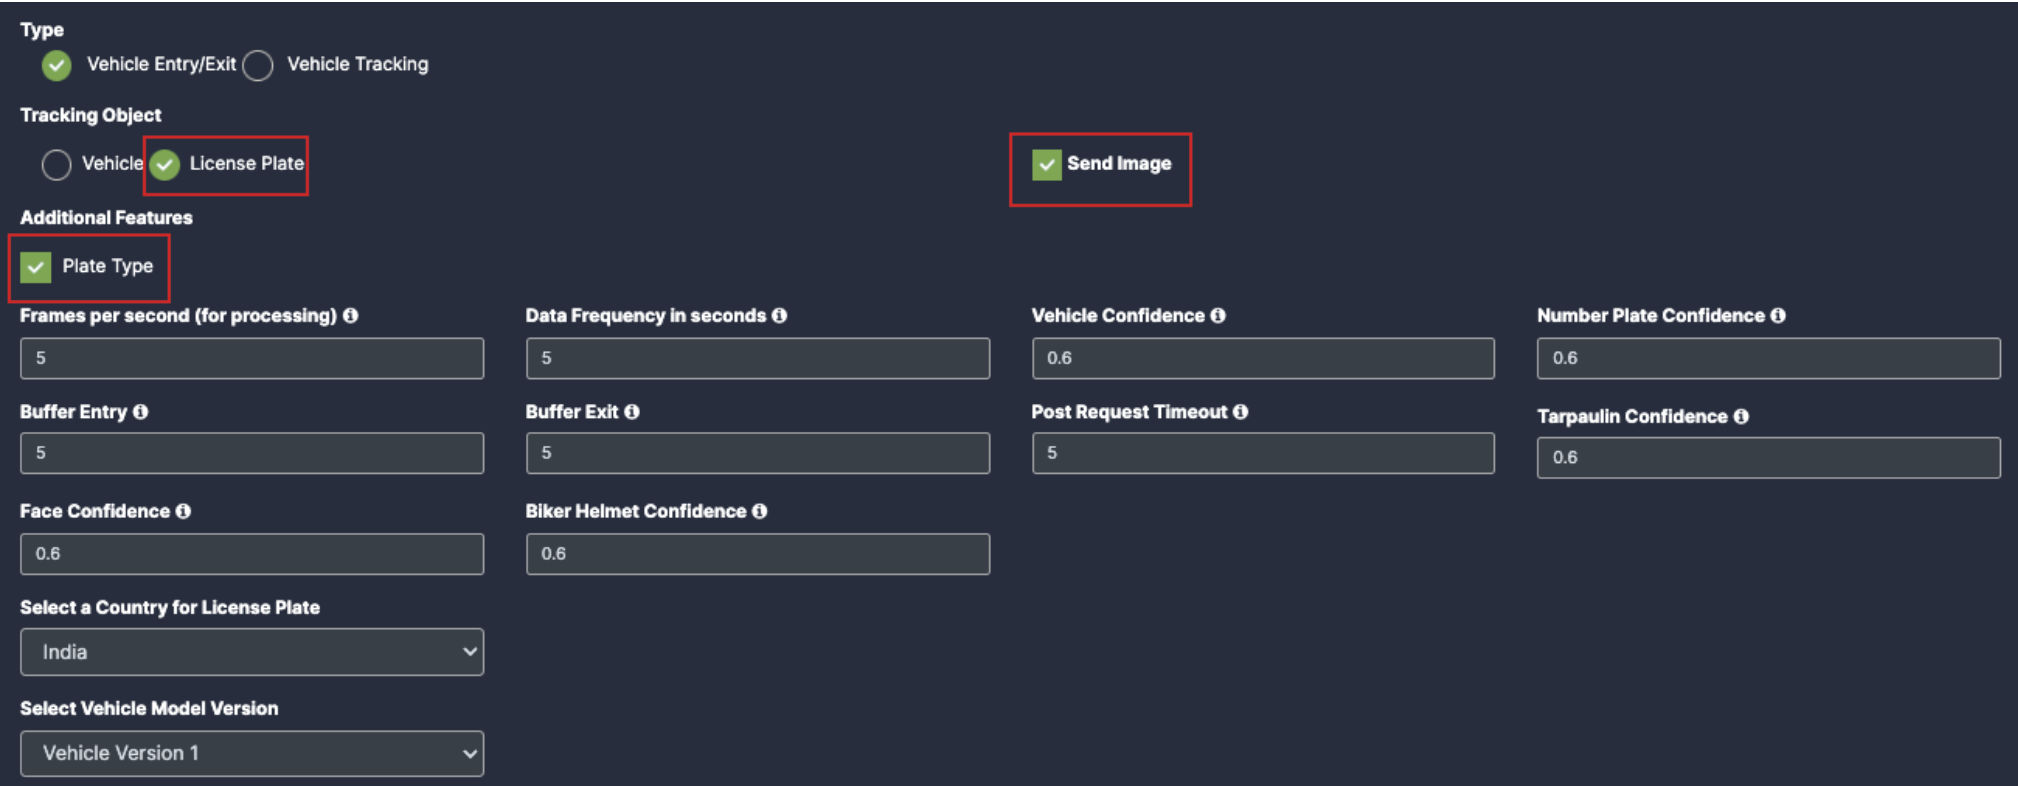
- Plate Type: To detect the License Plate and its Type.
- Send Image: To share the image with the system.
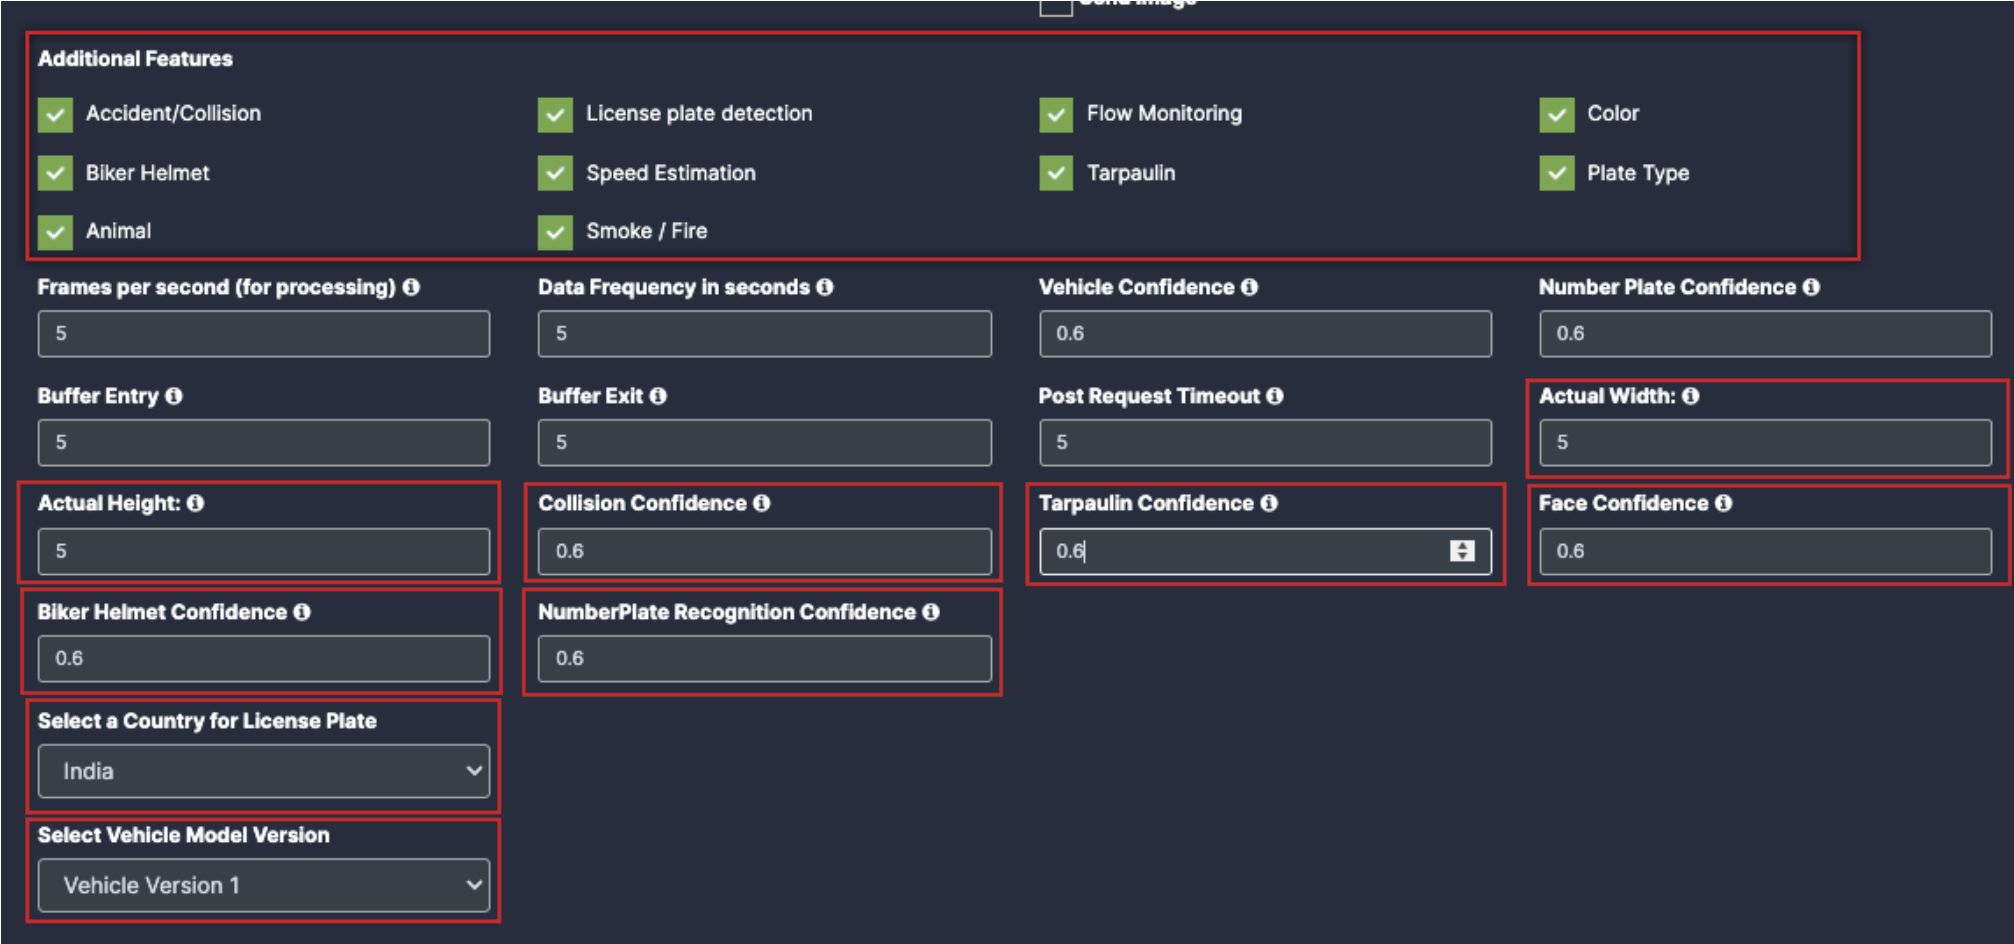
- Accident/Collision: Once you click on the check box of Accident/Collision, their respective dropdowns will be added below for the respective feature detection.
- License plate detection: Once you click on the check box of License plate detection, their respective dropdowns will be added below for the respective feature detection.
- Flow Monitoring: Once you click on the check box of Flow Monitoring, their respective dropdowns will be added below for the respective feature detection.
- Color: Once you click on the check box of Color, their respective dropdowns will be added below for the respective feature detection. Biker Helmet: Once you click on the check box of Biker Helmet, their respective dropdowns will be added below for the respective feature detection.
- Speed Estimation: Once you click on the check box of Speed Estimation, their respective dropdowns will be added below for the respective feature detection.
- Tarpaulin: Once you click on the check box of Tarpaulin, their respective dropdowns will be added below for the respective feature detection.
- Plate Type: Enable the check box of plate type for the respective detection.
- Animal: Enable the check box of Animal for the respective detection Smoke/Fire: Enable the check box of Smoke/Fire for the respective detection.
Draw ROI (region of interest) on the camera frame.
- ROI in camera frames can help to improve efficiency, accuracy, and reduce storage requirements.
- ROI must be added if kiosk mode is enabled. Otherwise, it is optional. If ROI is not added, the model will detect the entire frame.
- For face detection, ROI can be drawn in two ways.
- Using the polygon tool
- Using the rectangle tool.
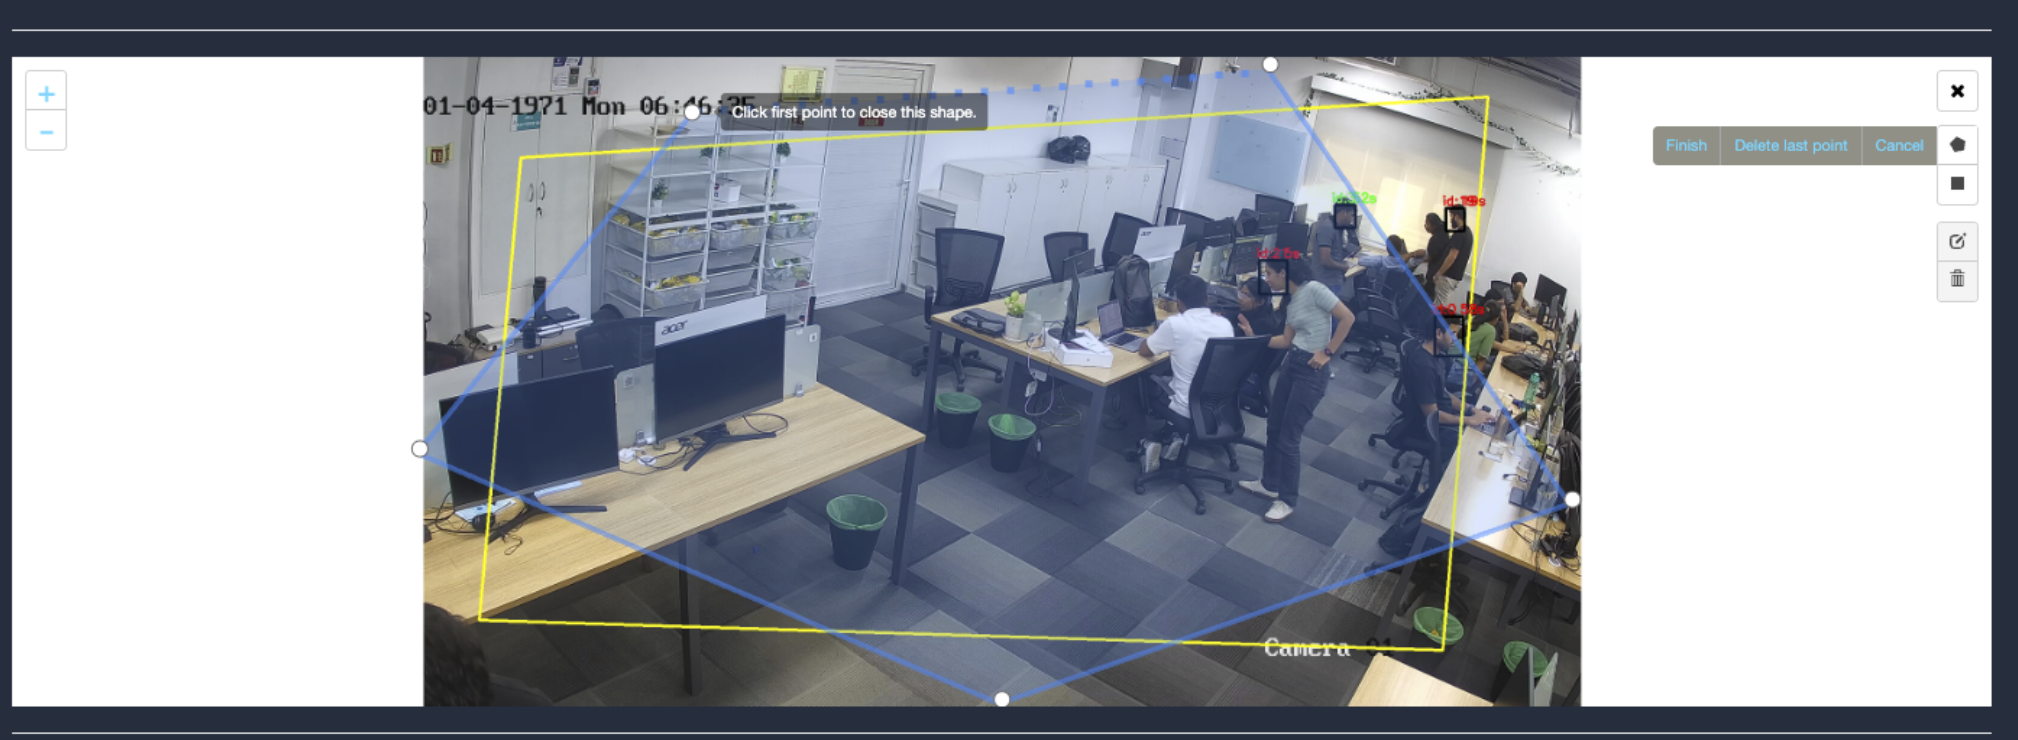
Draw ROI using the Polygon tool.
- Click on the Polygon tool button from the camera frame.
- Then connect the dots and draw the polygon in the space where you want to draw the ROI. It should have more than 2 points.
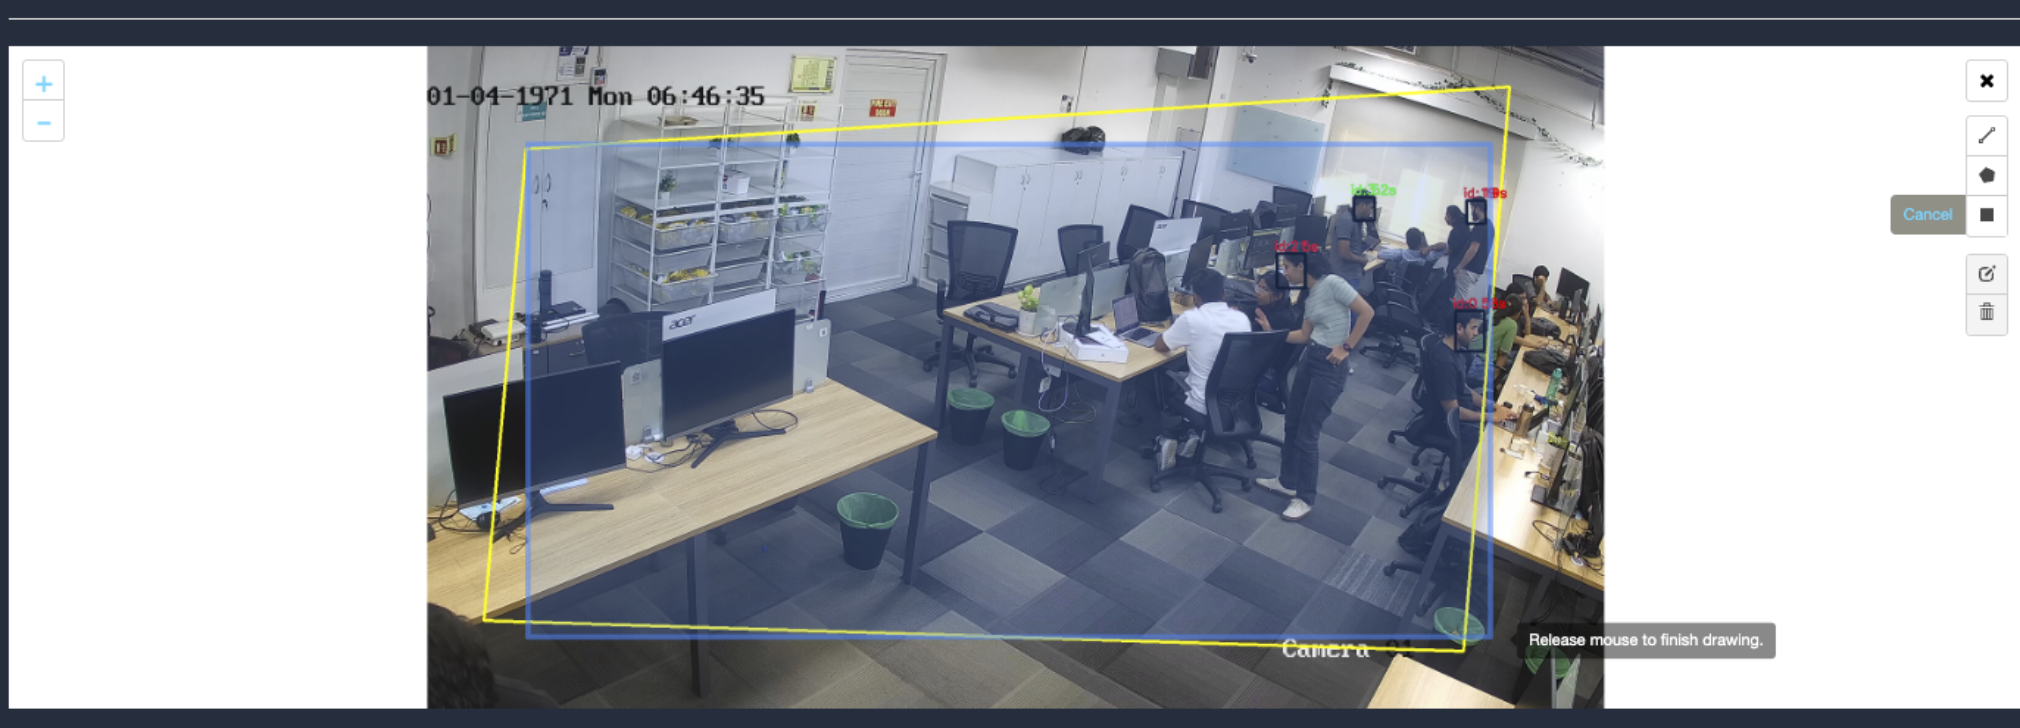
Draw ROI using the rectangle tool.
- Click on the Rectangle tool button from the camera frame.
- Then draw the rectangle where you want to focus the camera.
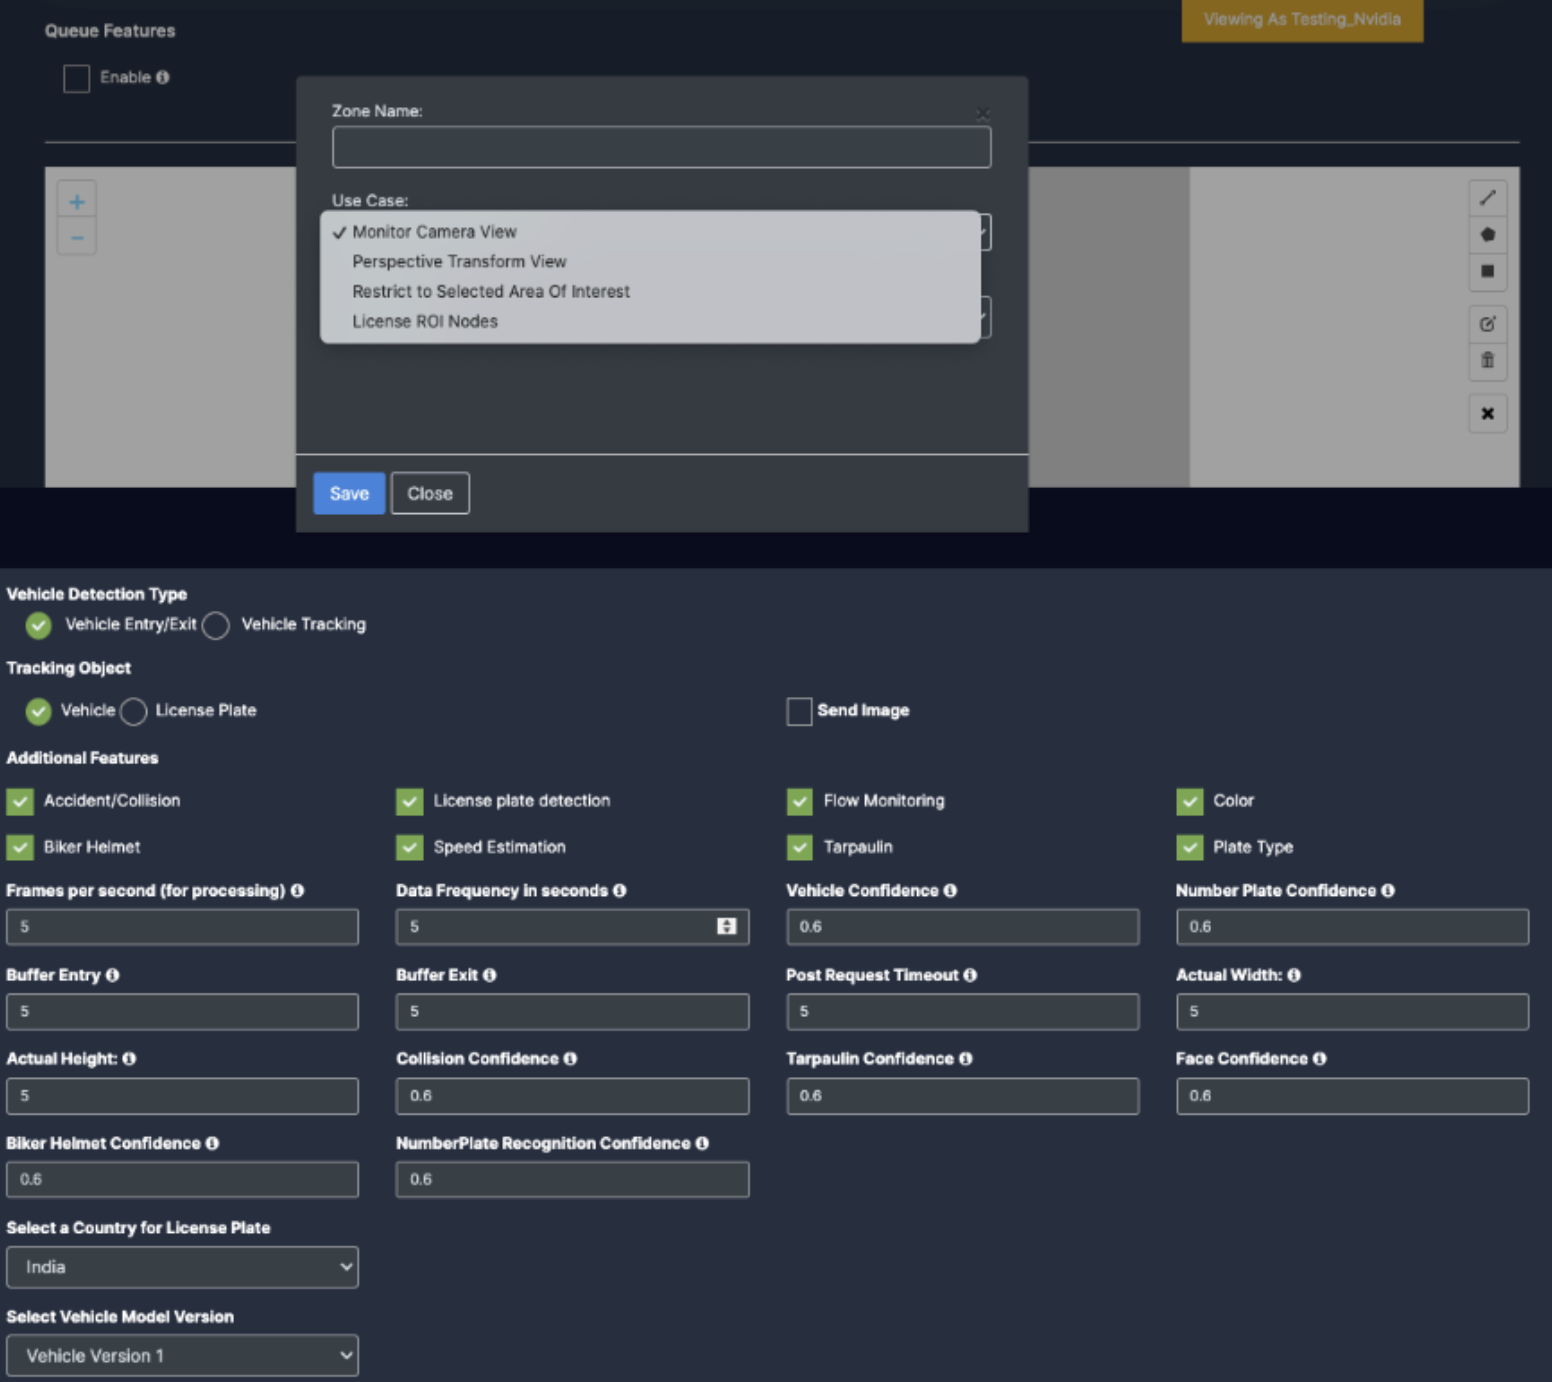
- All Vehicle Detection
- Tracking Object
- Additional Features
- Once the Use case Configuration is done, click on save.
- Your Camera is configured for Vehicle Monitoring.
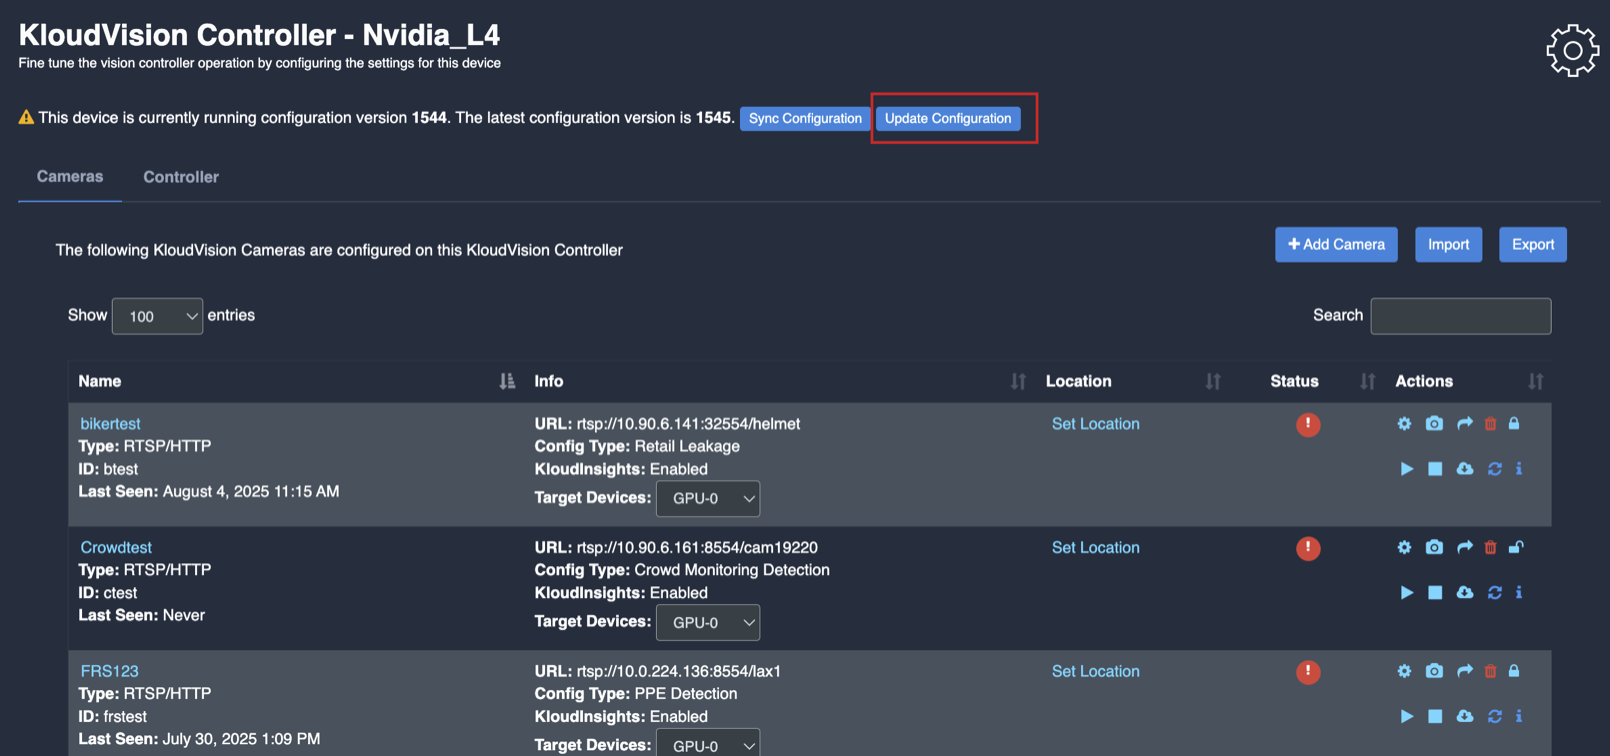
Update/ sync Configuration:
- Once you perform any change in the controller or update any features/ use cases for camera you need to sync it.
- There are 2 types of syncing process:
- Sync the configurations
- Update the Configurations
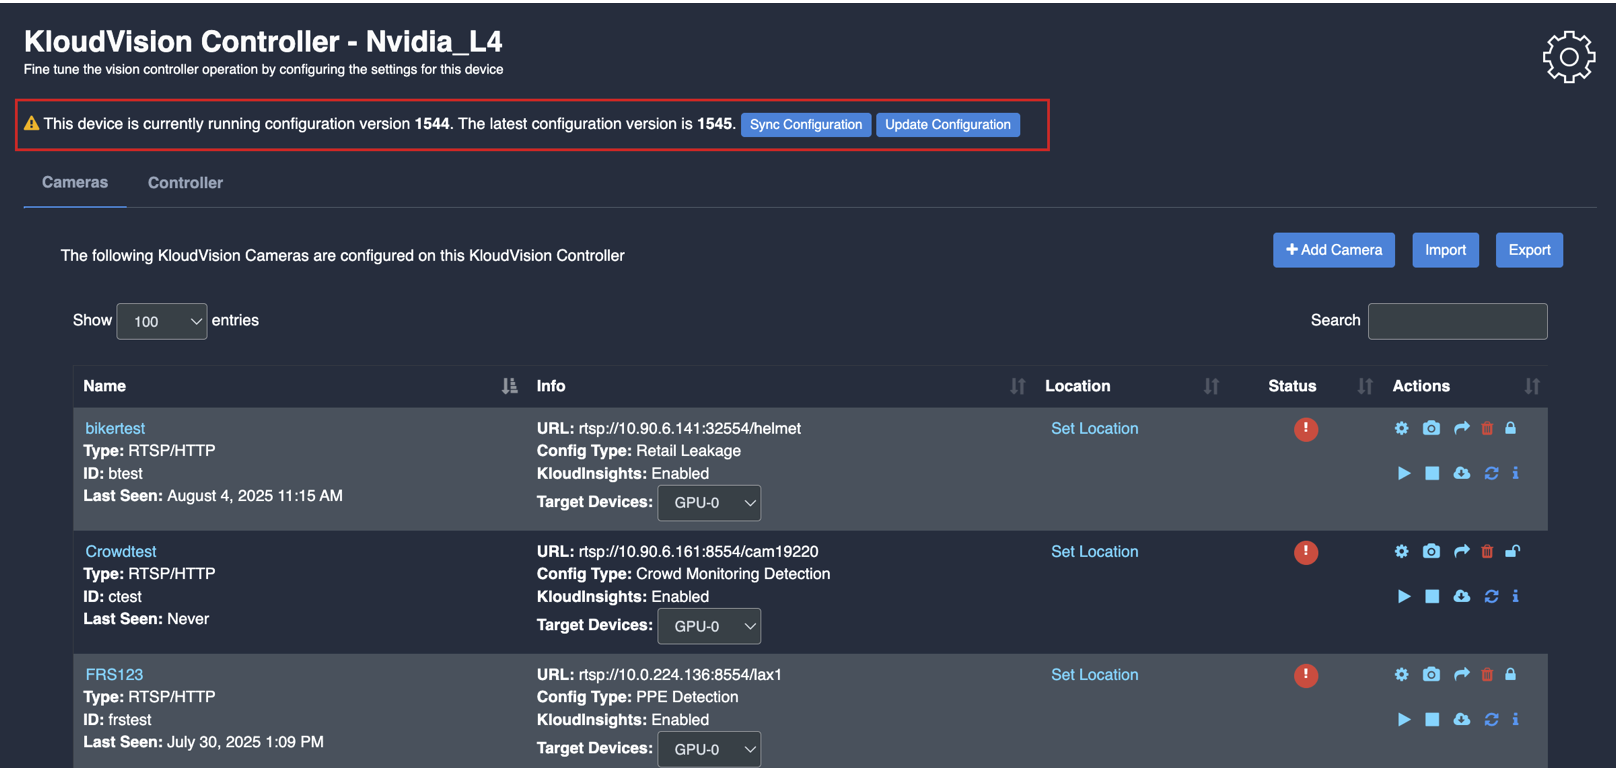
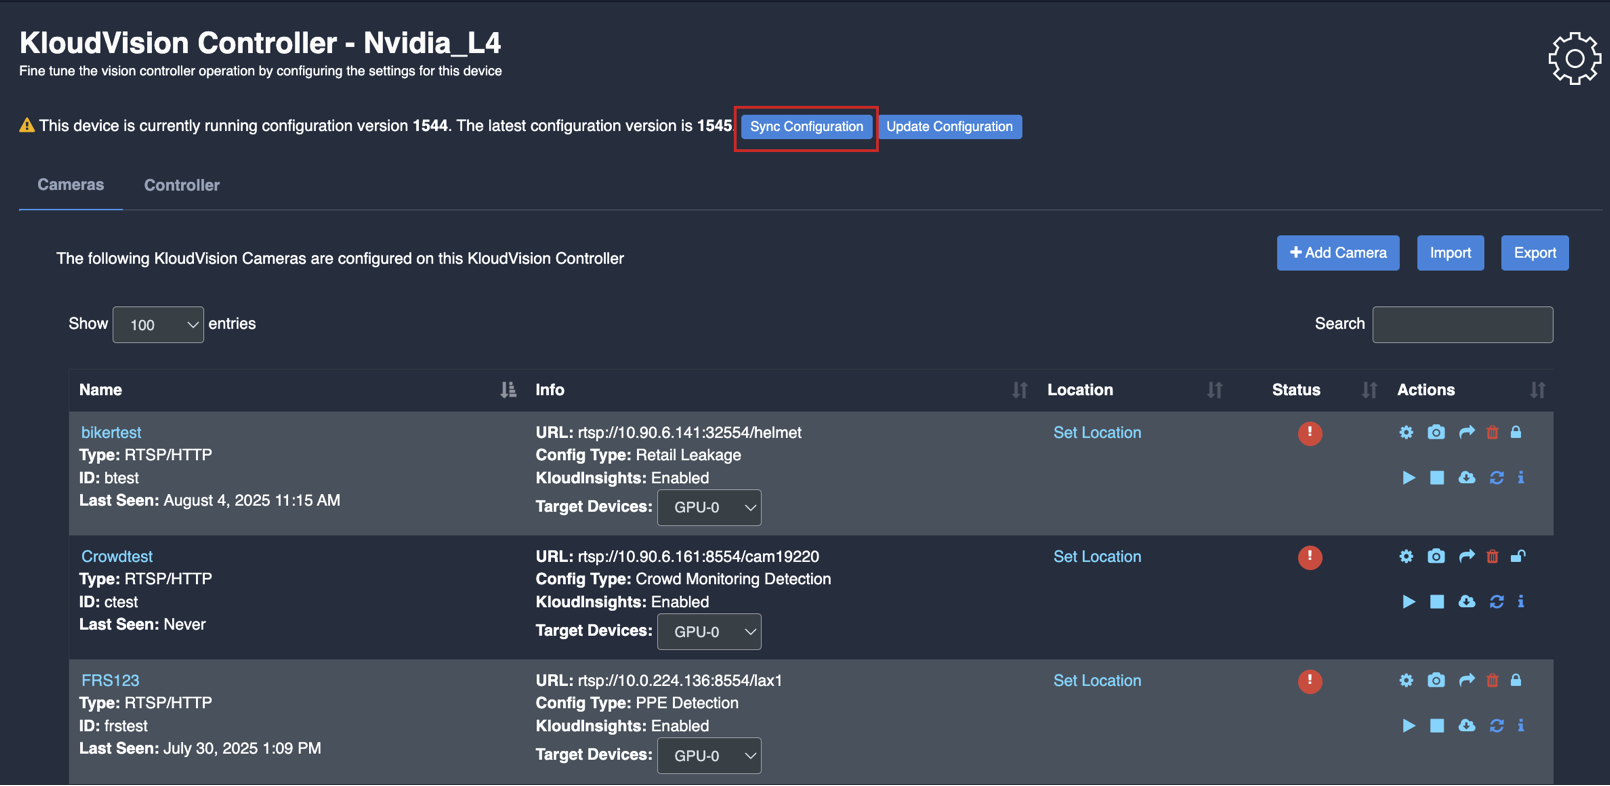
- Click on the update configuration to recent changes in the system without any downtime. (General configuration sync)