General Camera Configuration
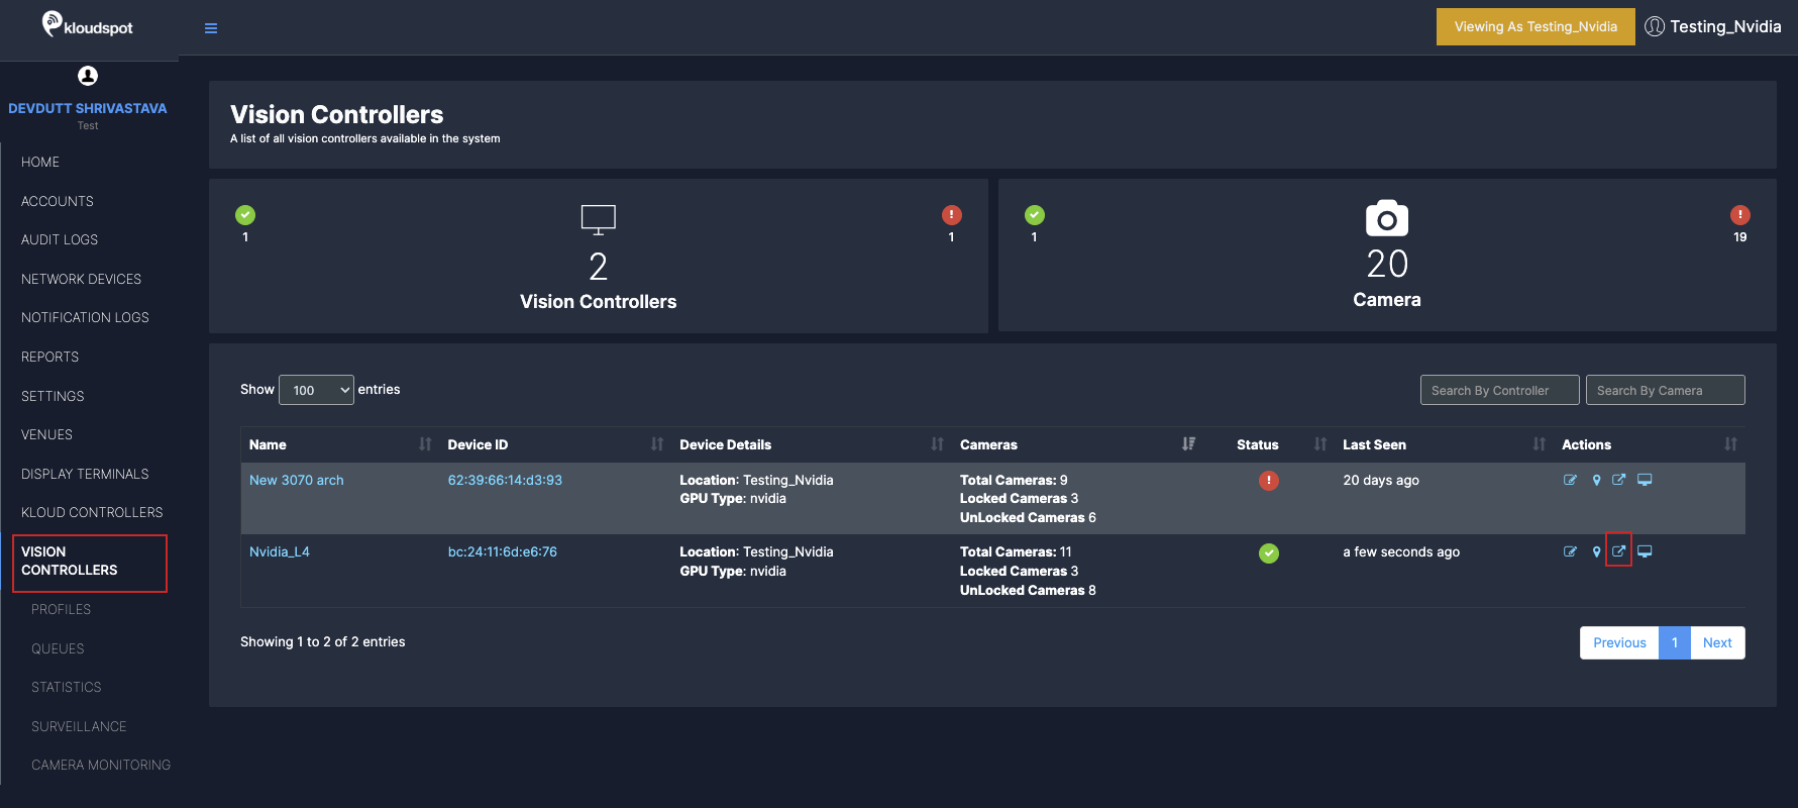
- To configure general camera configuration, navigate to Vision Controller>(Select Controller configuration)
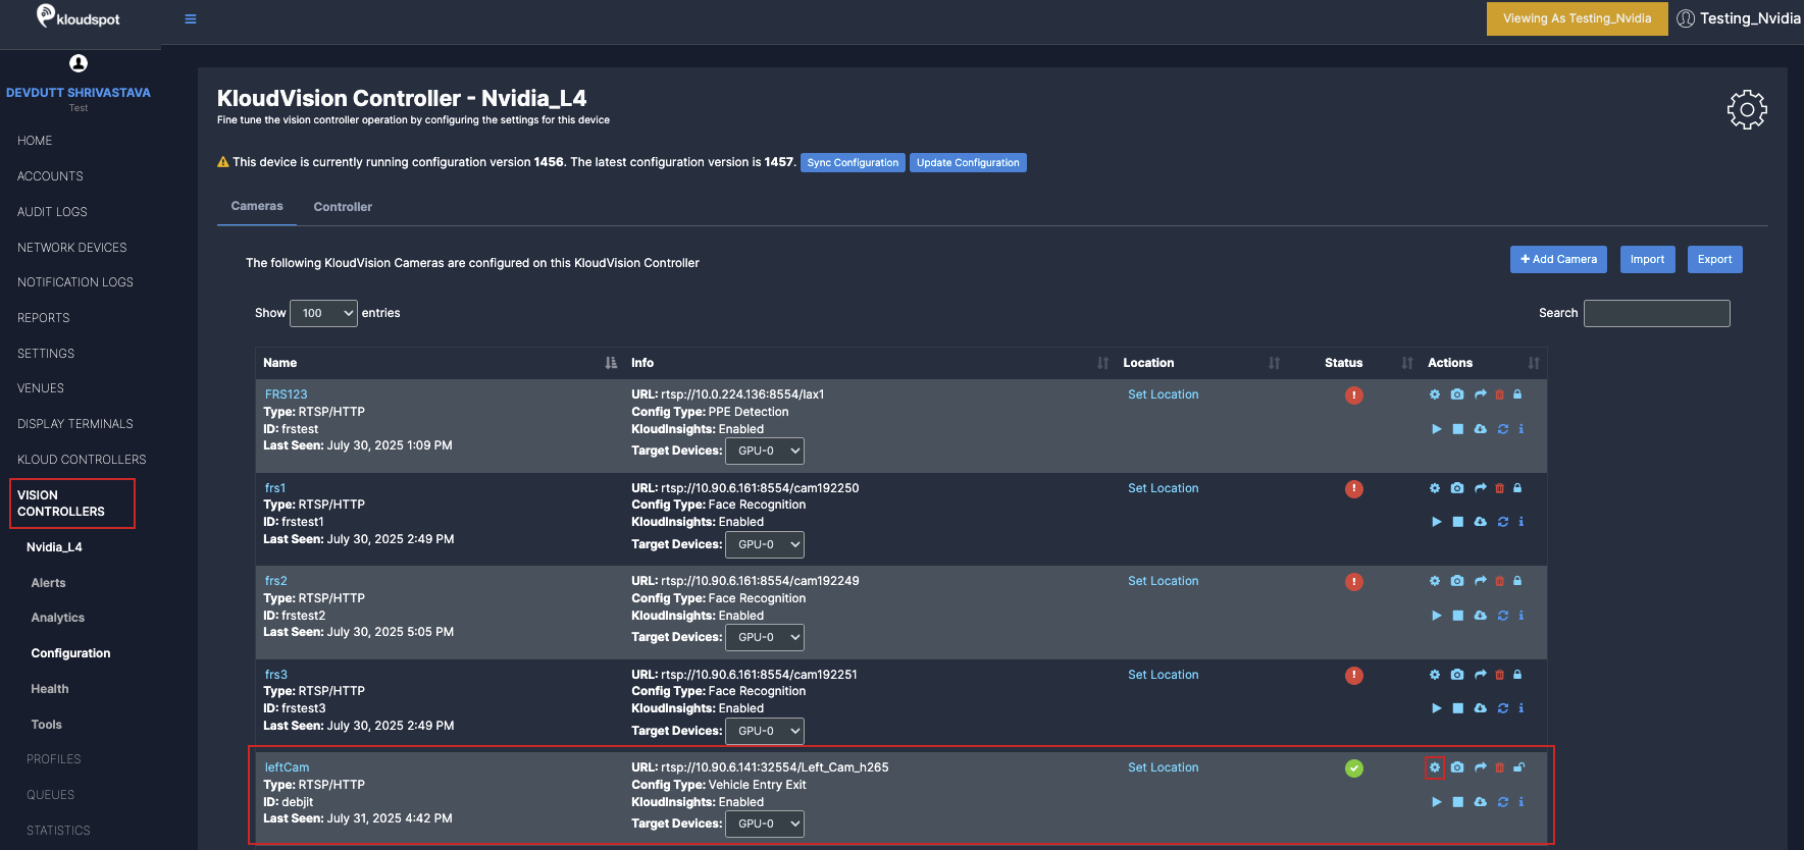
- In the camera list that opens, click on the Configuration button next to the camera you want to configure. Immediately the camera configuration window will open.
-
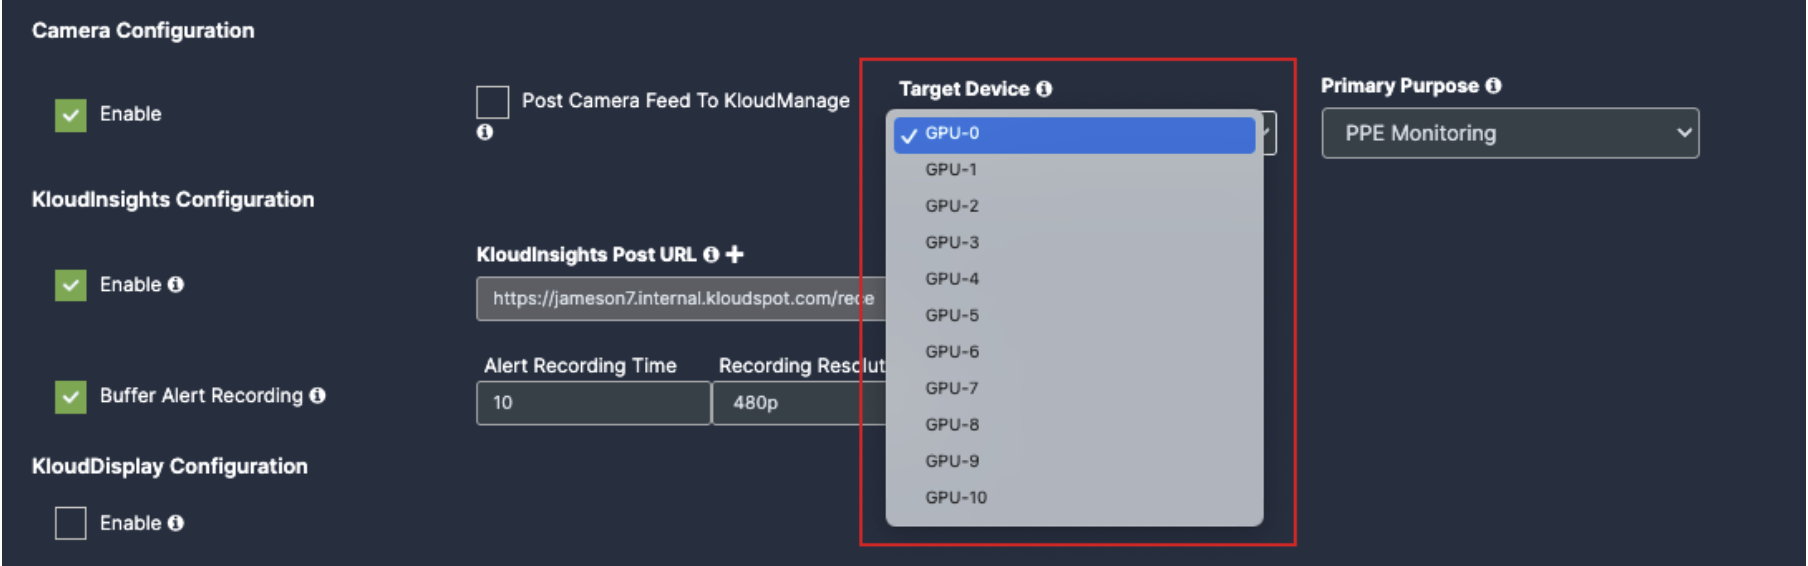
Enable: To activate any camera setup you desire, check enable checkbox.
-
Post Camera Feed: Enable this check box if you want to get camera status in KloudManage application.
-
Target device: Select GPU as per your controller specifications.

-
KloudInsights Post URL: Enter your KloudInsights URL here.
-
Buffer Frame for Recording: Enable if you want a video/ image proof for the incidents happened, should have integration with KloudInsights.


-
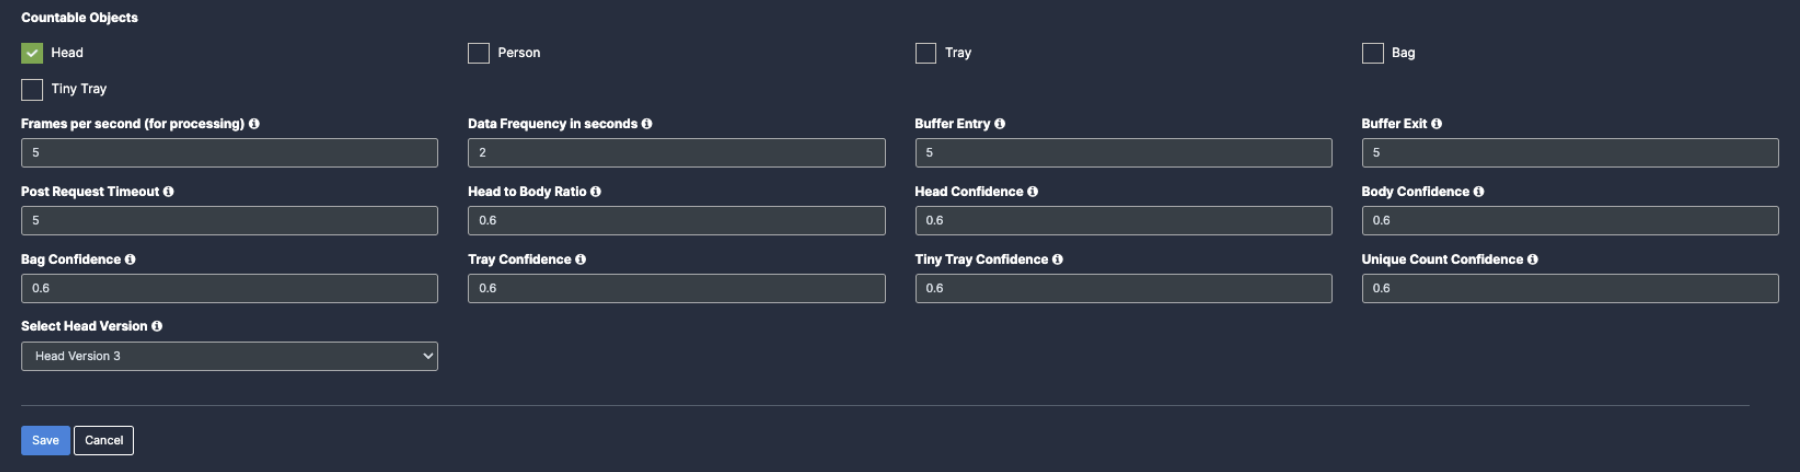
Frames per second (for processing): These are the number of frames used by Vision Controller every second for data processing. KloudVision does not use all the frames emitted from the camera in a second. Higher values provided in this field may increase CPU/GPU usage.
-
Data Frequency in seconds: This value indicates how long Vision controller aggregates data before sending it out to KloudInsights. A lower value may increase the data frequency and result in a faster response. A higher value results in a delayed response. Buffer Entry/Exit:
-
Post Request Timeout (in seconds): This value indicates how long KloudVision waits and retries to send the payloads out to KloudInsights until it reaches the preset timeout period.
-
Head to Body Ratio: Minimum head-to-body ratio required to classify a person as a child. If detected ratio meets/exceeds this value, the model identifies the individual as a child
-
Head Confidence: Minimum confidence score for head detection. Only detections scoring at or above this threshold are considered valid by the model.
-
Body Confidence: Minimum confidence score for person detection. Only detections scoring at or above this threshold are considered valid by the model
-
Bag Confidence: Minimum confidence score for bag detection. Only detections scoring at or above this threshold are considered valid by the model.
-
Tray Confidence: Minimum confidence score for tray detection. Only detections scoring at or above this threshold are considered valid by the model
-
Tiny Tray Confidence: Minimum confidence score for tiny tray detection. Only detections scoring at or above this threshold are considered valid by the model
-
Unique count Confidence: Minimum confidence required for the model to match two person detections as the same individual. Used for accurate unique person counting
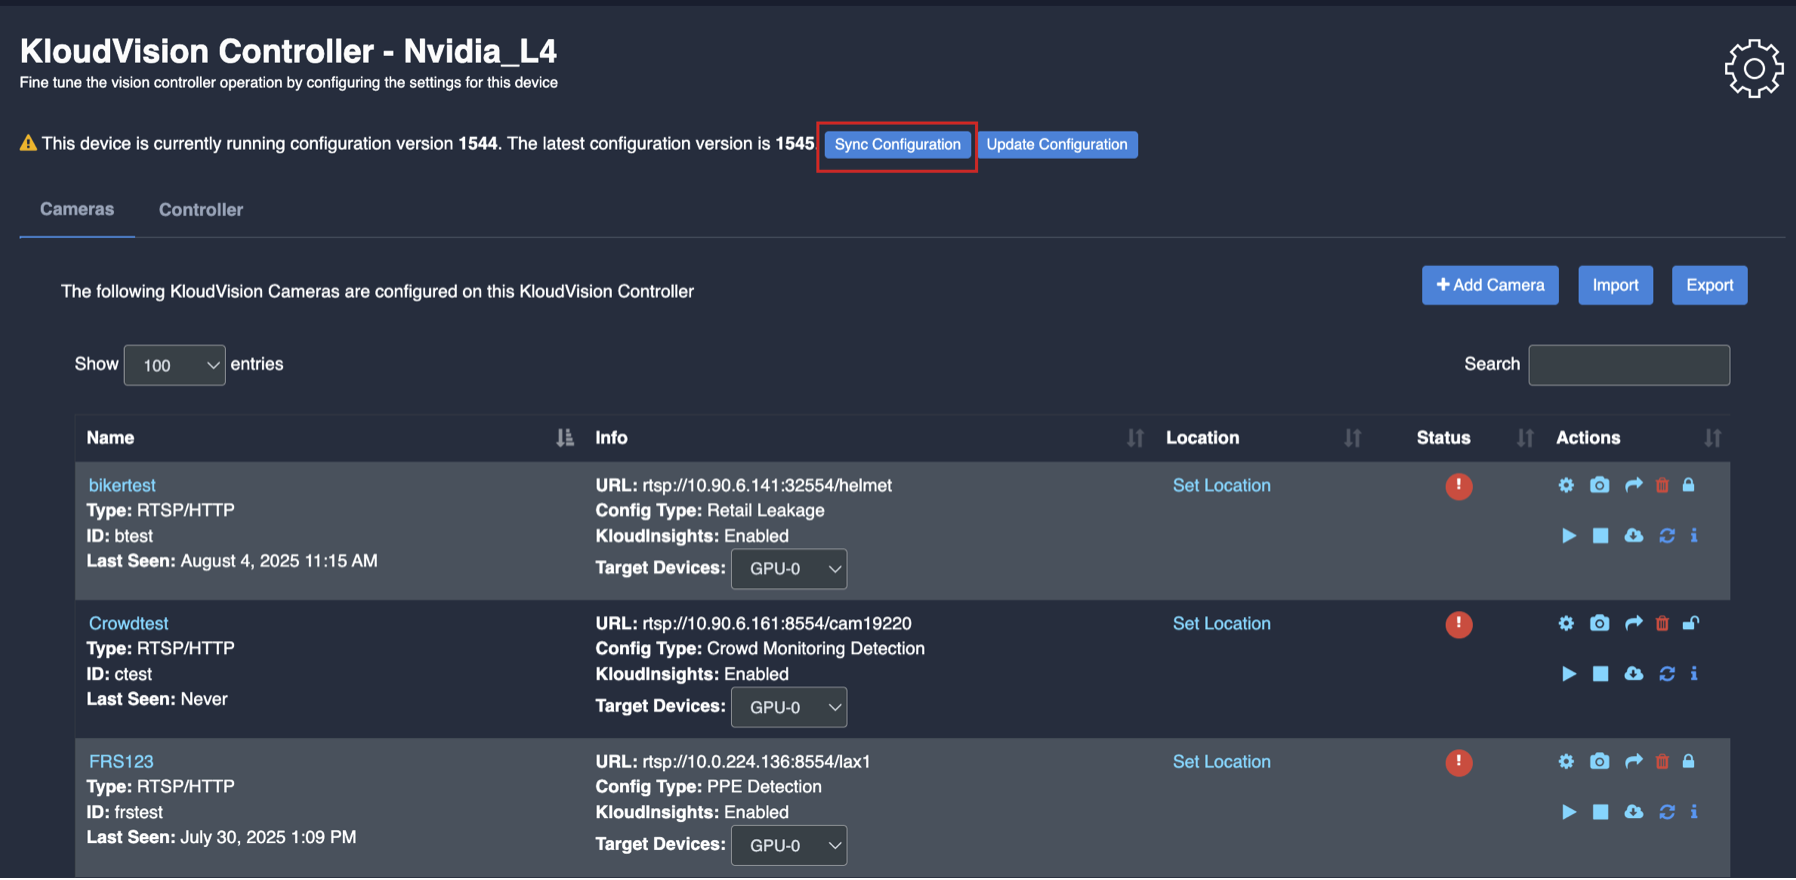
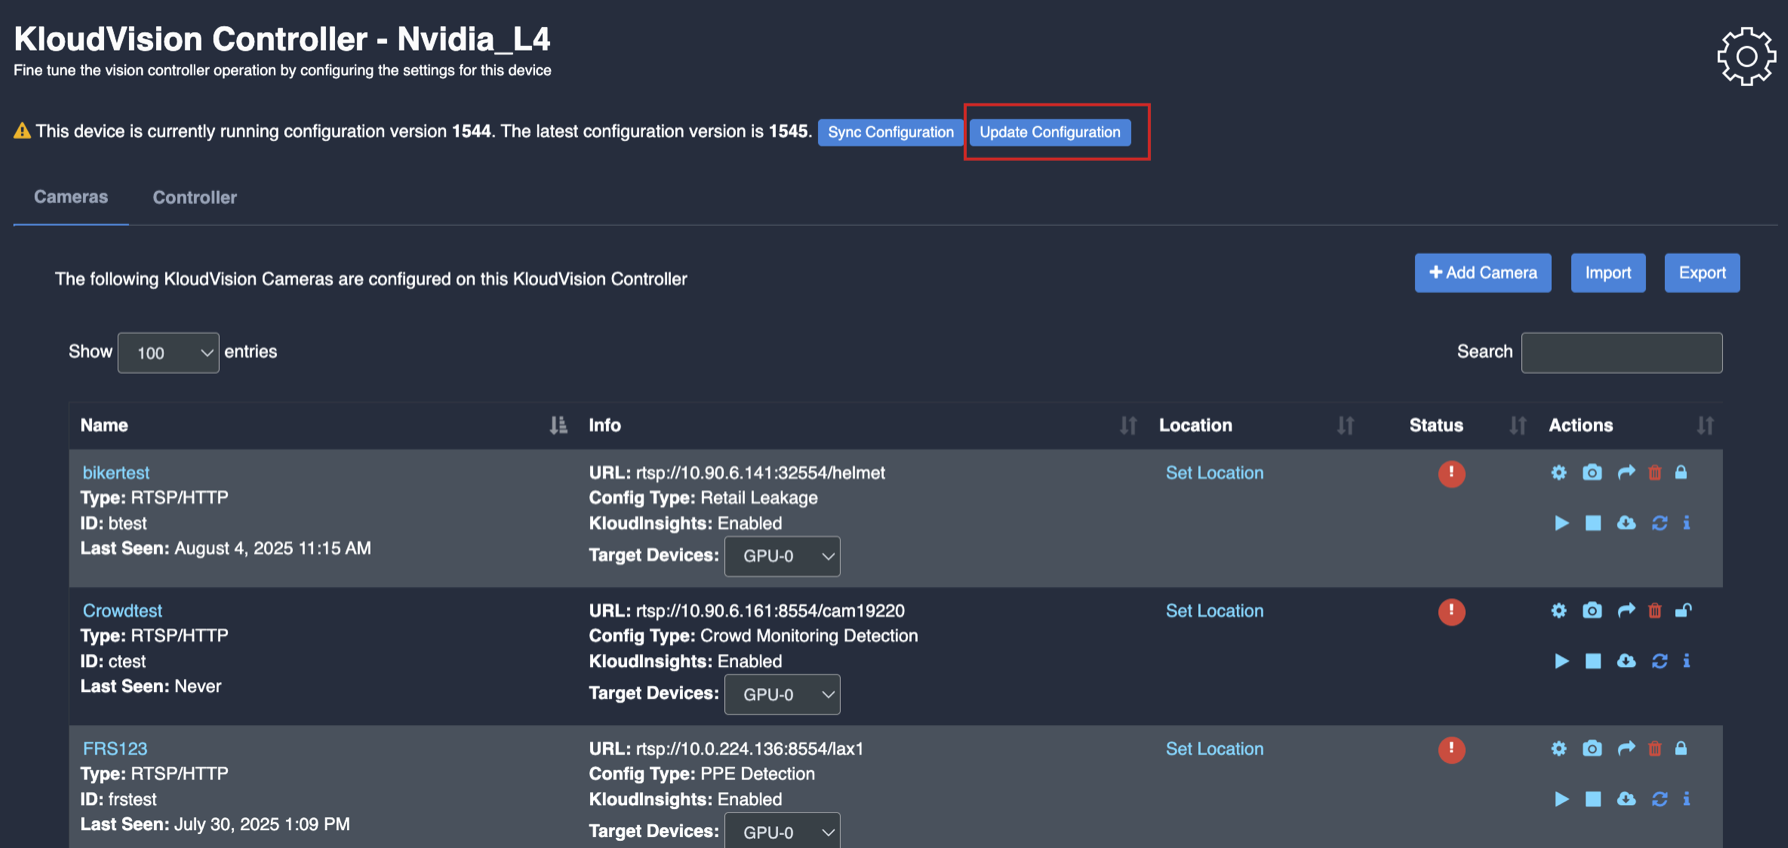
Update/ sync Configuration:
-
Once you perform any change in the controller or update any features/ use cases for camera you need to sync it.
-
There are 2 types of syncing process:
- Sync the configurations
- Update the Configurations

- Click on sync configuration to restart the complete system syncing process. Basically for the initial camera setup and while any controller configuration update. (It will restart the docker and sync all the performed changes)