Entry/Exit Count Configuration
- Before you begin configuring the use cases, you should first configure the camera’s general configuration. Refer to the General Camera Configuration section for instructions.
- Then, select the Entry/ Exit from the dropdown list
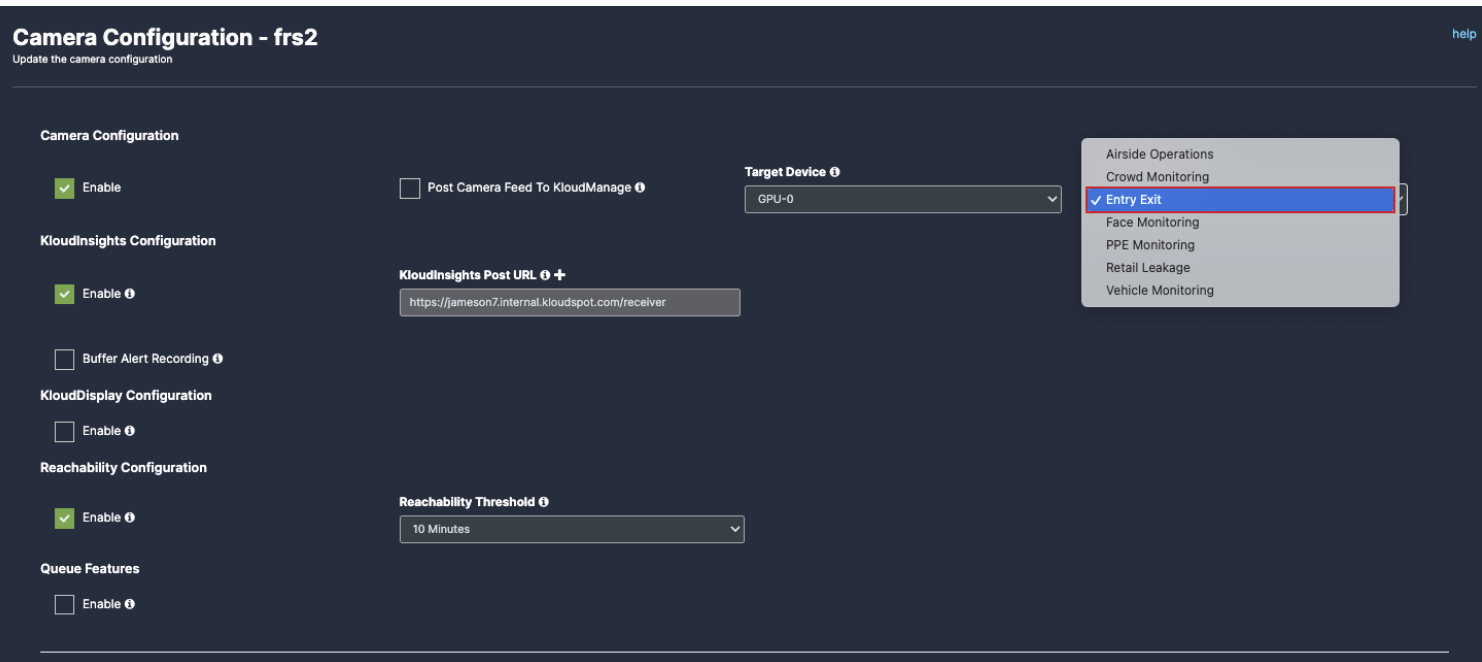
- Scroll down and choose your preferred use cases. You can choose multiple Features.
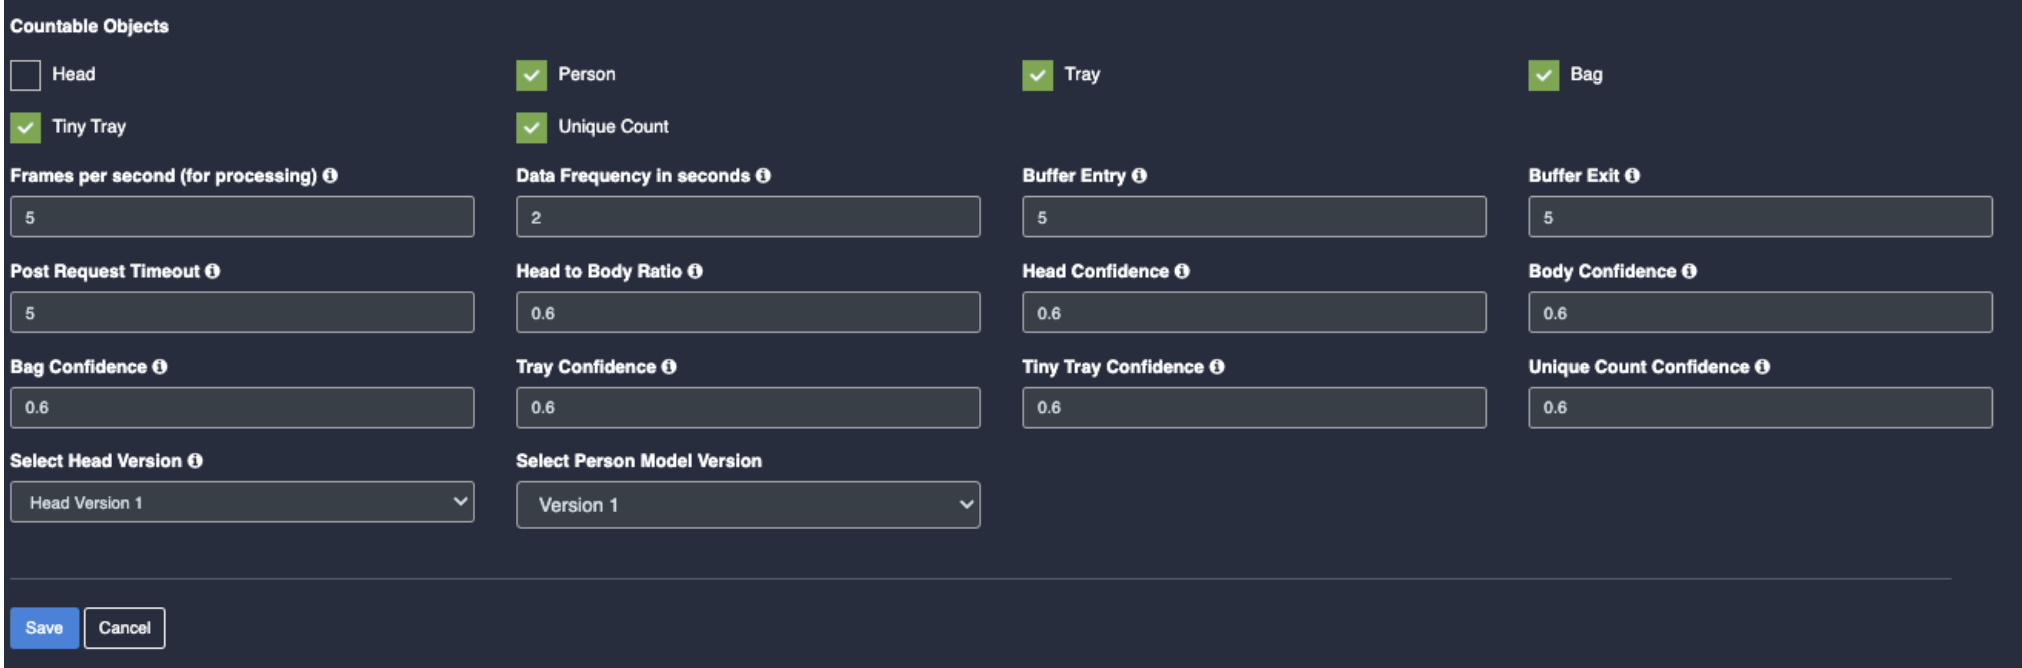
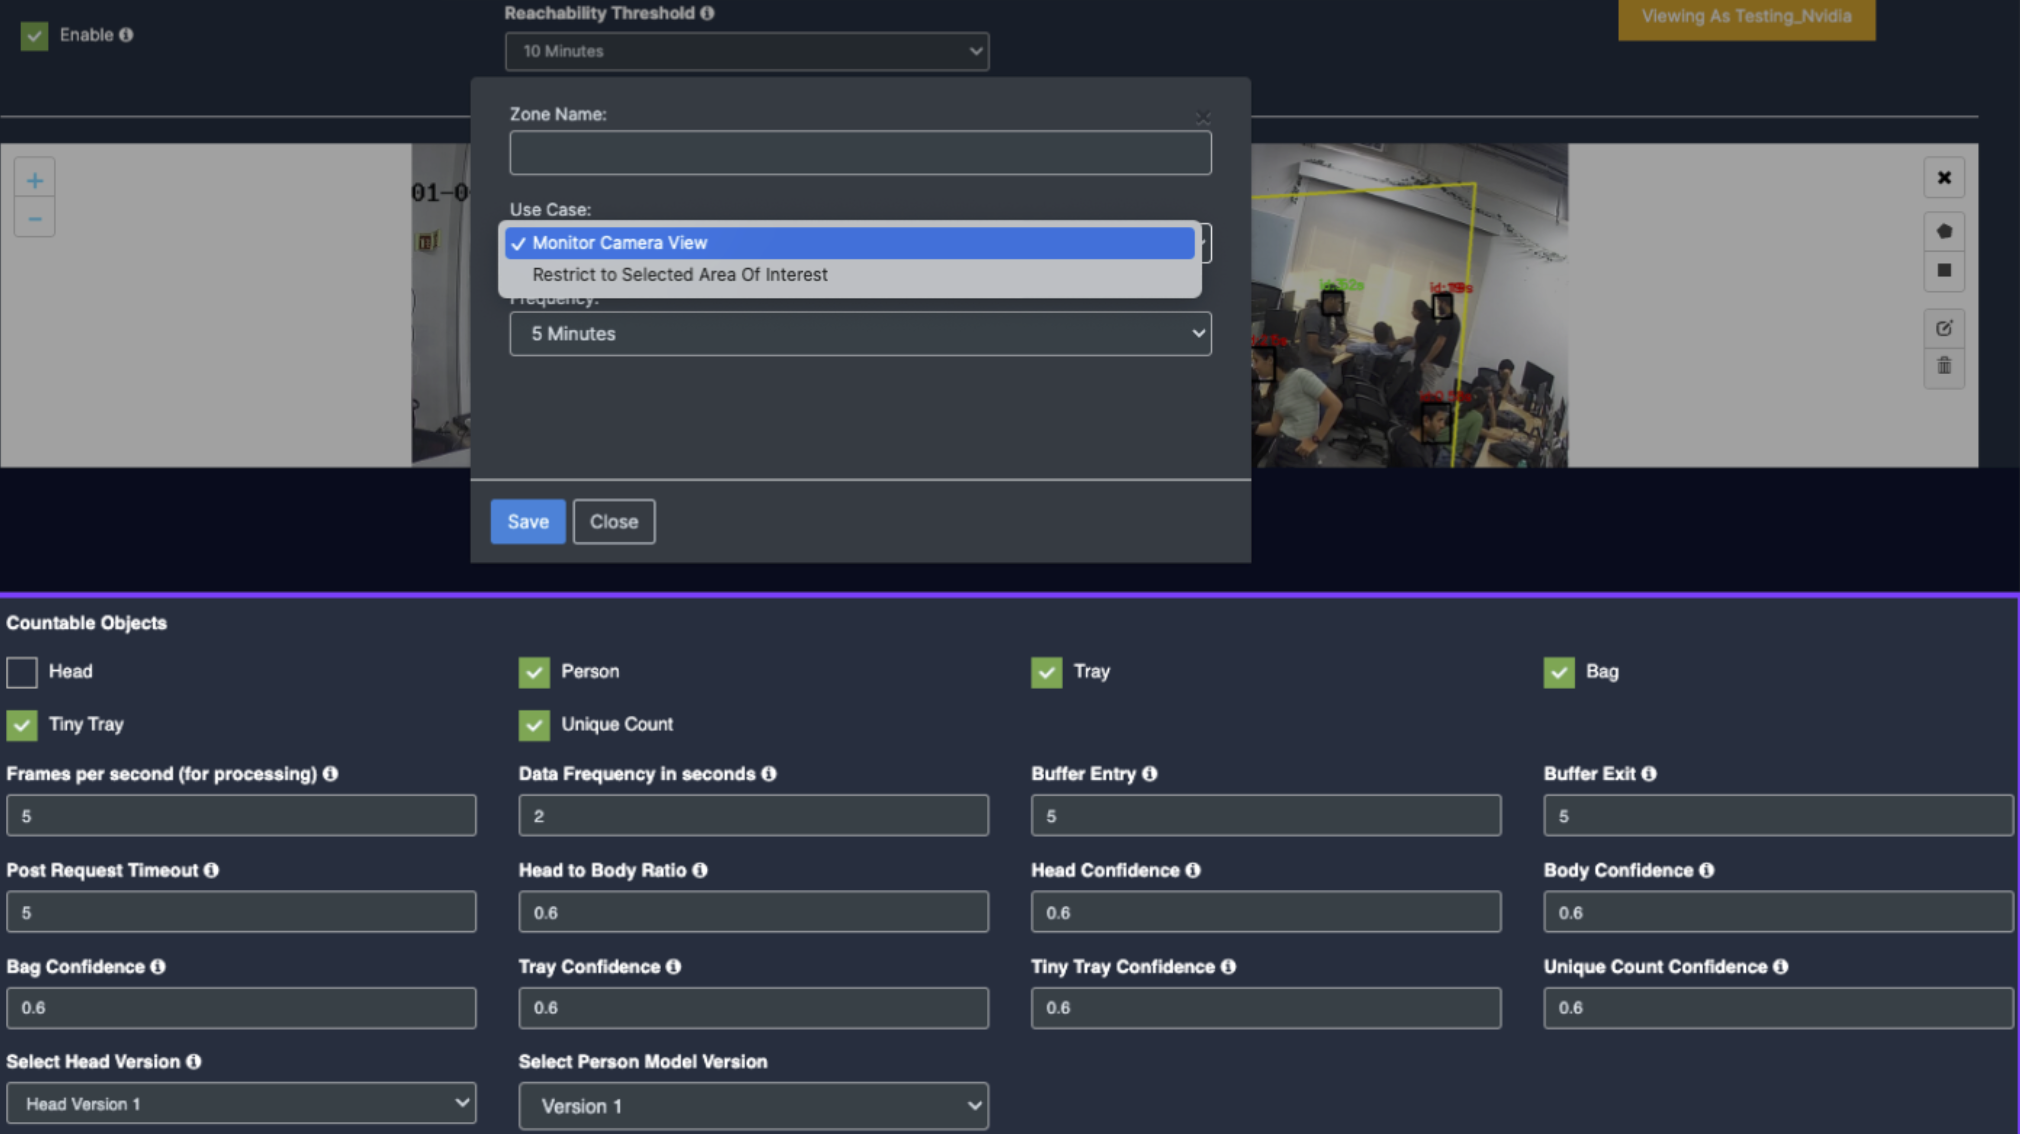
- Countable Objects: (Physical items or entities that can be individually identified and counted)
- Head: Enable the checkbox of Head as per your feature requirement. Person: Once you enable the checkbox of Face mask, their respective dropdowns and Unique count checkbox will be added below for the respective feature detection.
- Tray: Enable the checkbox of Tray as per your feature requirement for the respective feature detection.
- Bag: Enable the checkbox of Bag as per your feature requirement for the respective feature detection.
- Tiny Tray: Enable the checkbox of Tiny Tray as per your feature requirement for the respective feature detection.
- Unique Count: Enable the checkbox of Unique Count as per your feature requirement
Draw ROI (region of interest) on the camera frame.
- ROI in camera frames can help to improve efficiency, accuracy, and reduce storage requirements.
- ROI must be added if kiosk mode is enabled. Otherwise, it is optional. If ROI is not added, the model will detect the entire frame.
- For face detection, ROI can be drawn in two ways.
- Using the Line
- Using the polygon tool
- Using the rectangle tool.
Draw ROI using the line tool.
- Click on the Line tool button from the camera frame.
- Then draw a straight line on the camera feed.
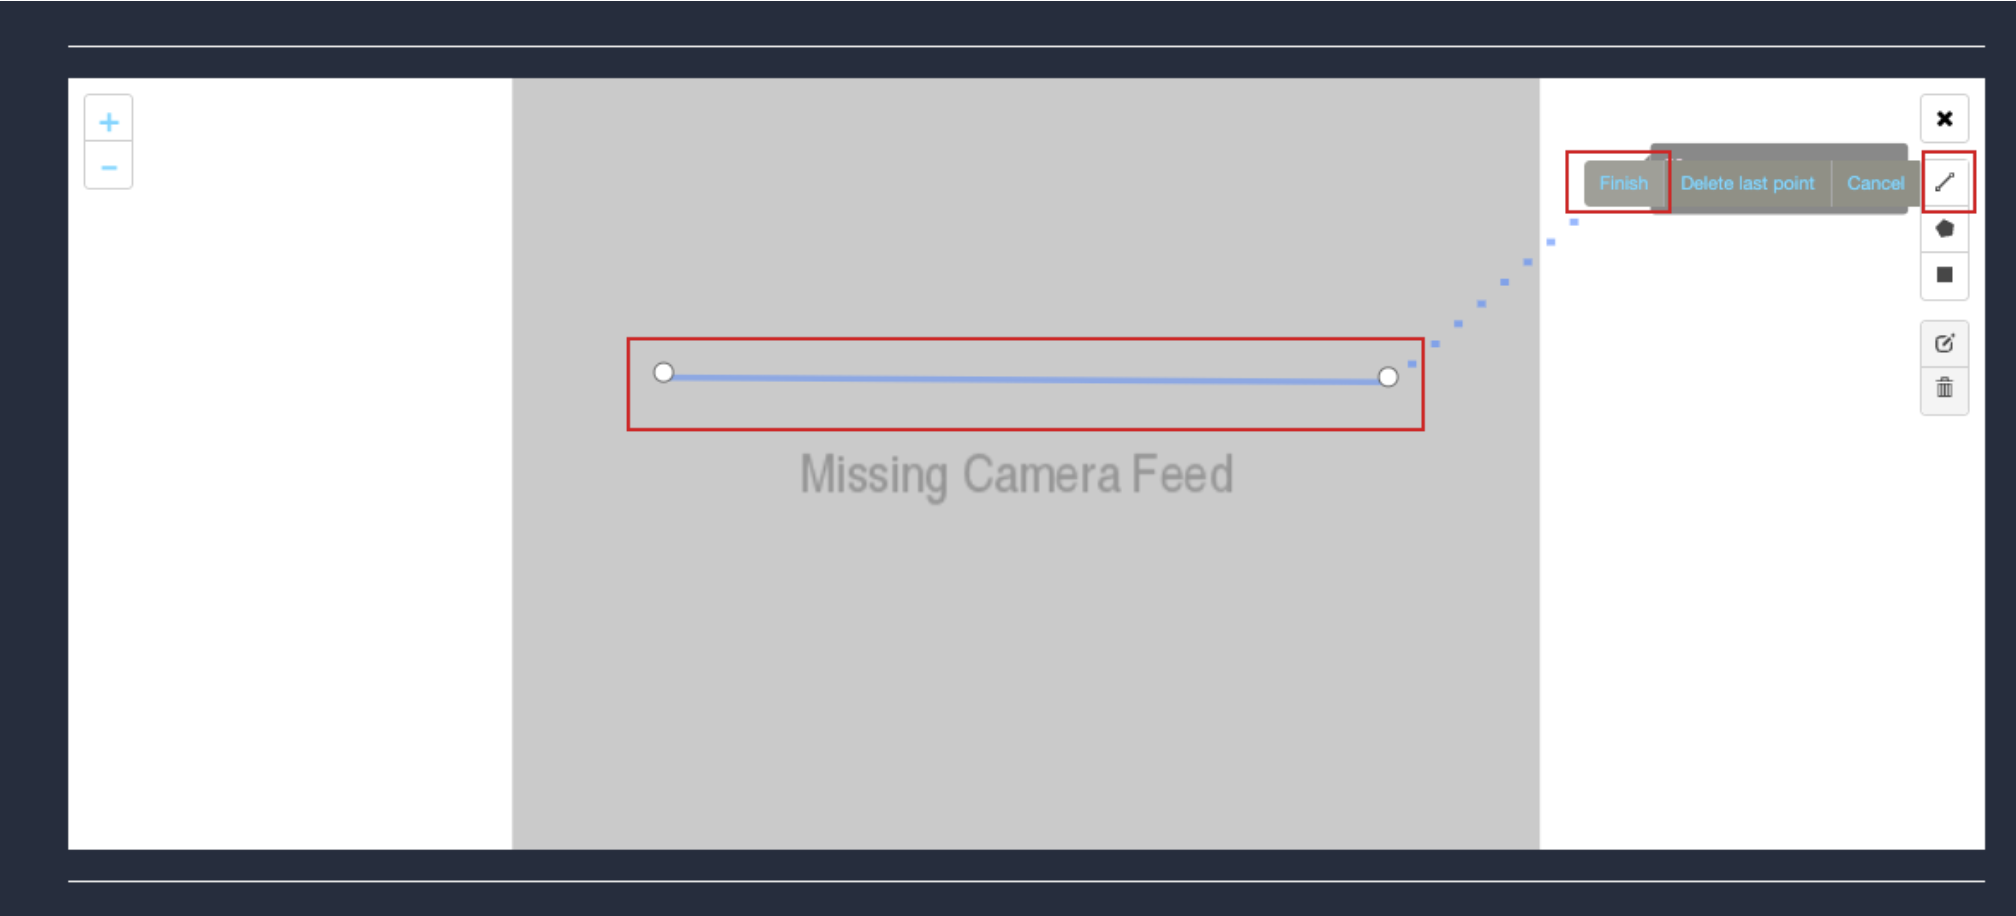
- After drawing, click the Finish button to complete the drawing.
-
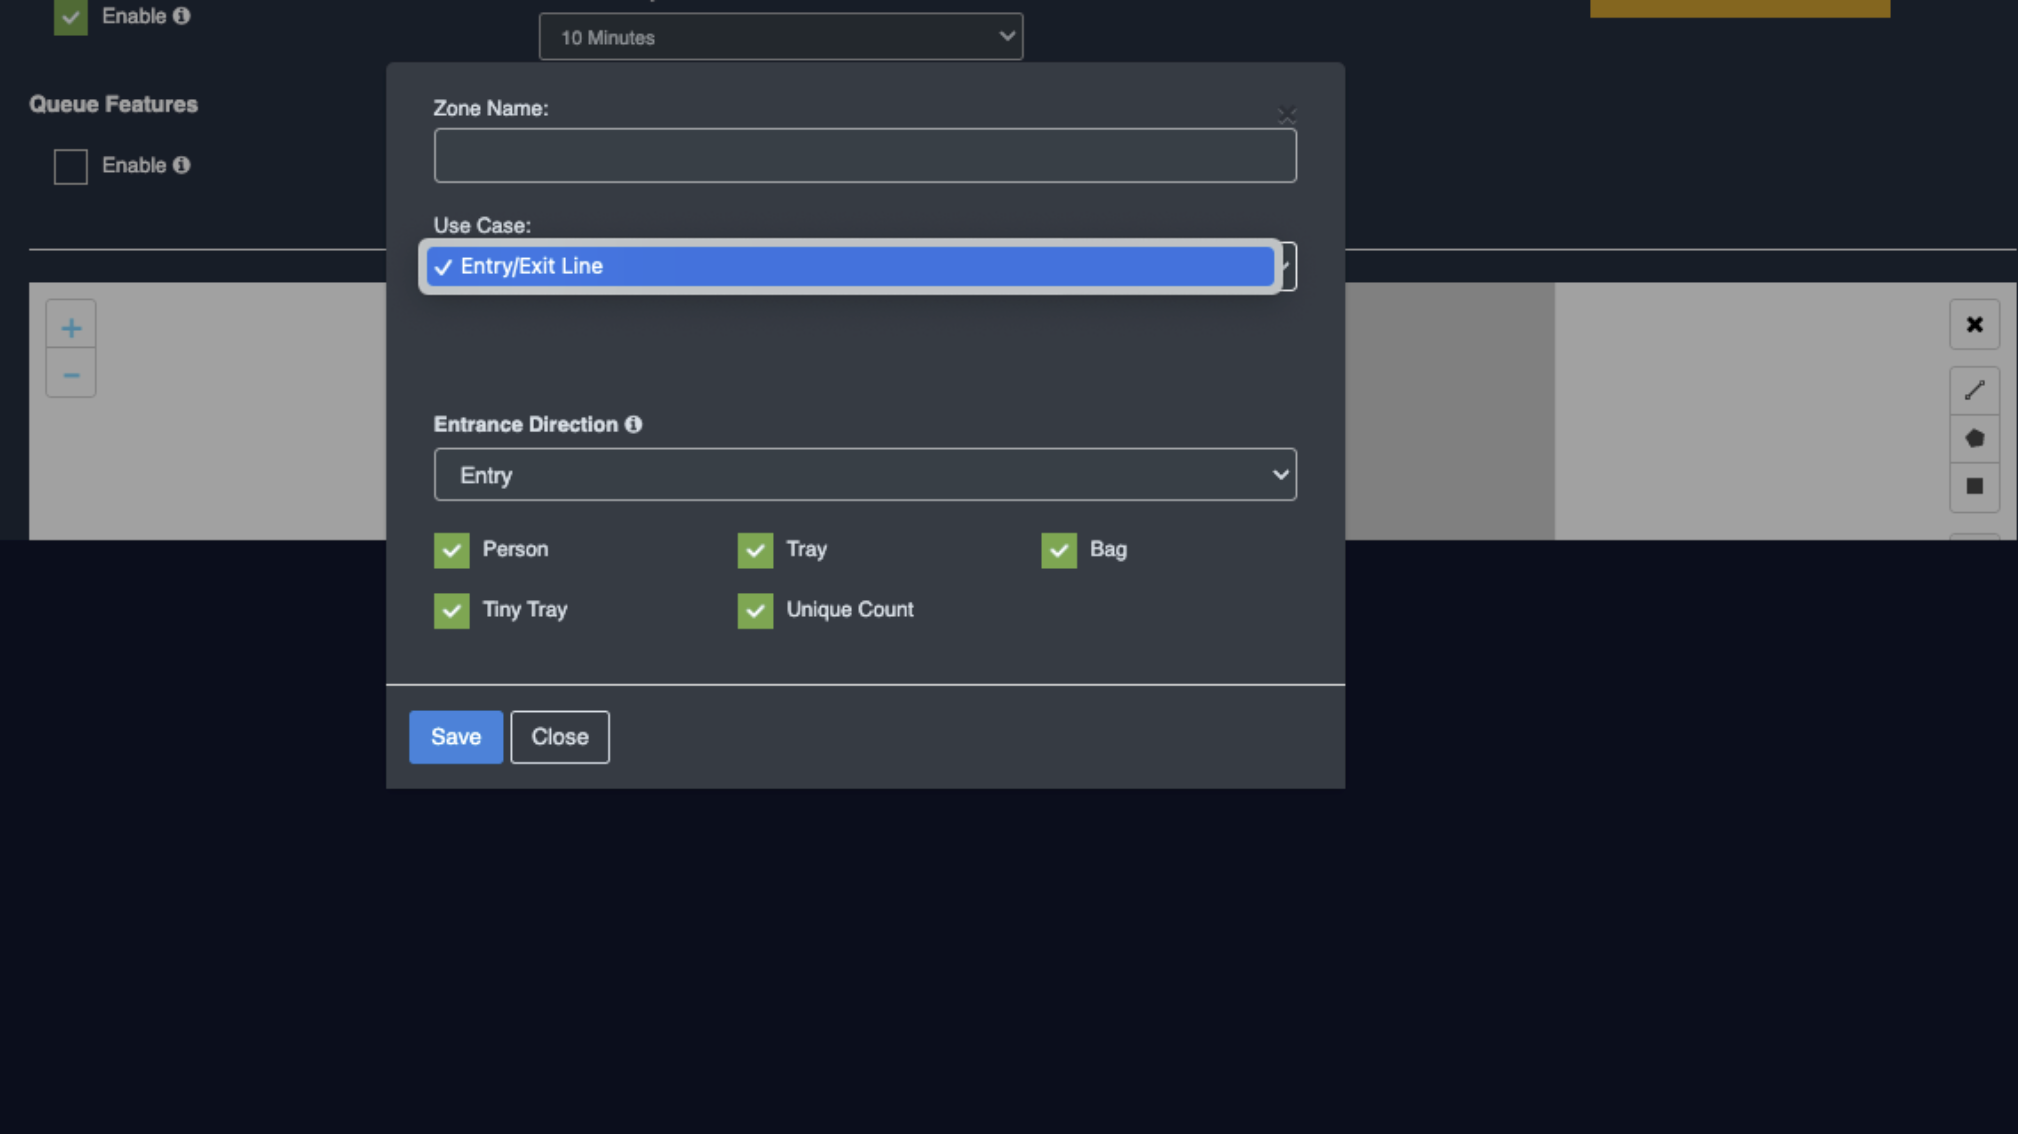
Enter the zone name in the popup window that opens, select the features you want to detect while entry or exit.
-
After selecting click the Save button.
-
New ROI zone added successfully
Draw ROI using the Polygon tool.
- Click on the Polygon tool button from the camera frame.
- Then connect the dots and draw the polygon in the space where you want to draw the ROI. It should have more than 2 points.

- After drawing, click the Finish button to complete the drawing.

- Enter the zone name in the popup window that opens and click the Save button.
- New ROI zone added successfully.
Draw ROI using the rectangle tool.
- Click on the Rectangle tool button from the camera frame.
- Then draw the rectangle where you want to focus the camera.
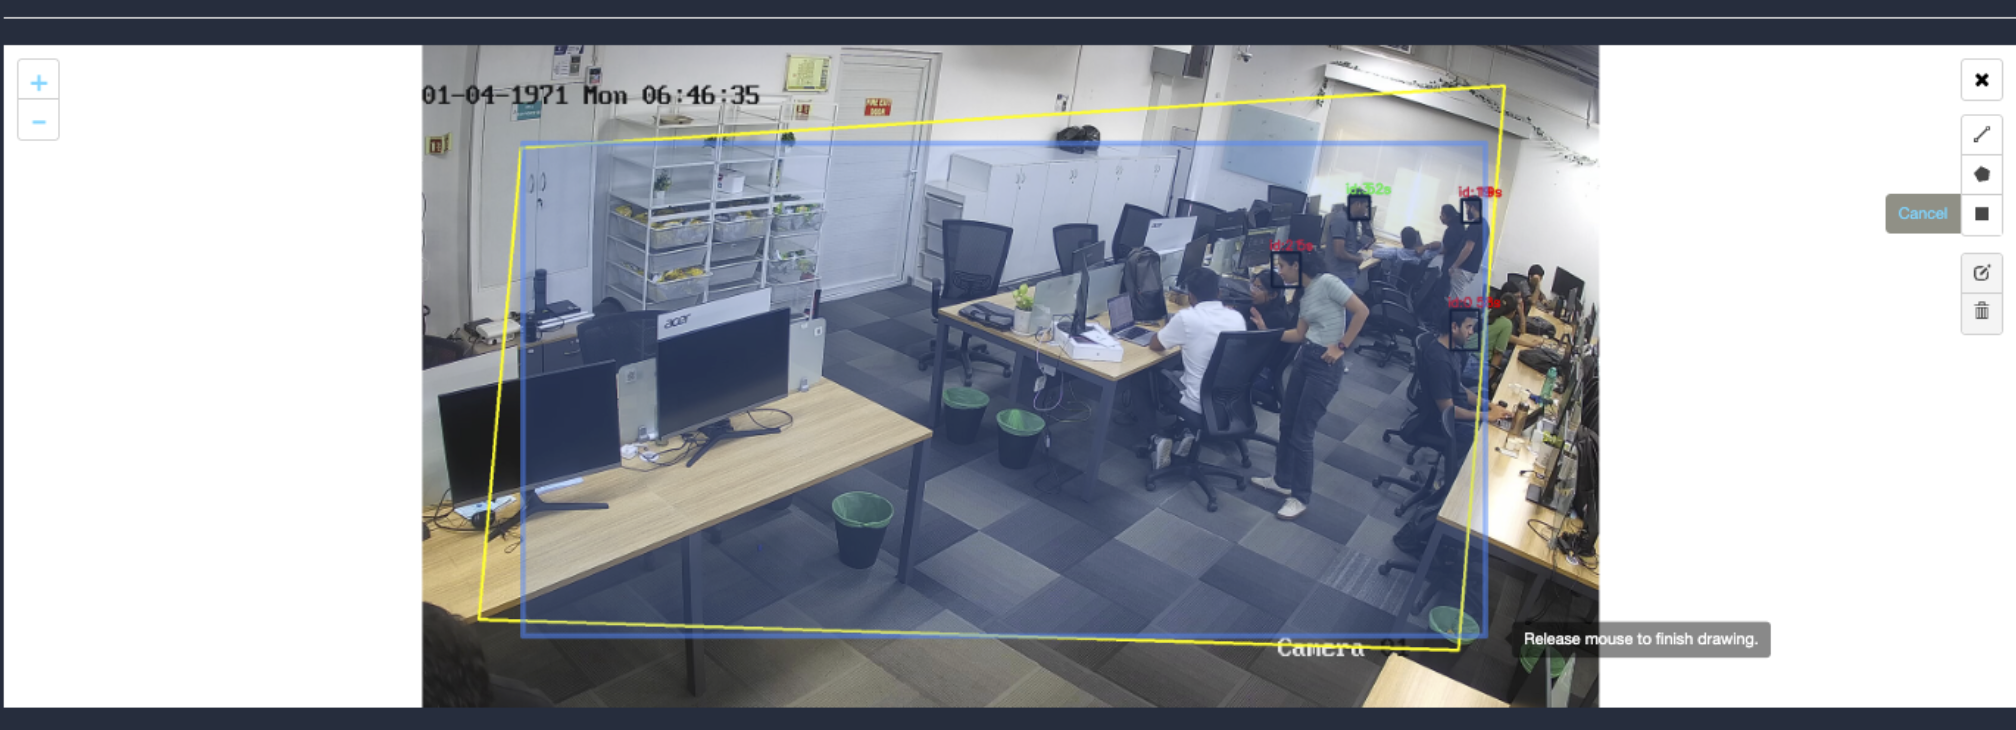
- Detection will only happen when people enter this zone.
- With this ROI you can achieve the below Features:
- Countable Objects
- Once the Use case Configuration is done, click on save.
- Your Camera is configured for Entry/Exit.
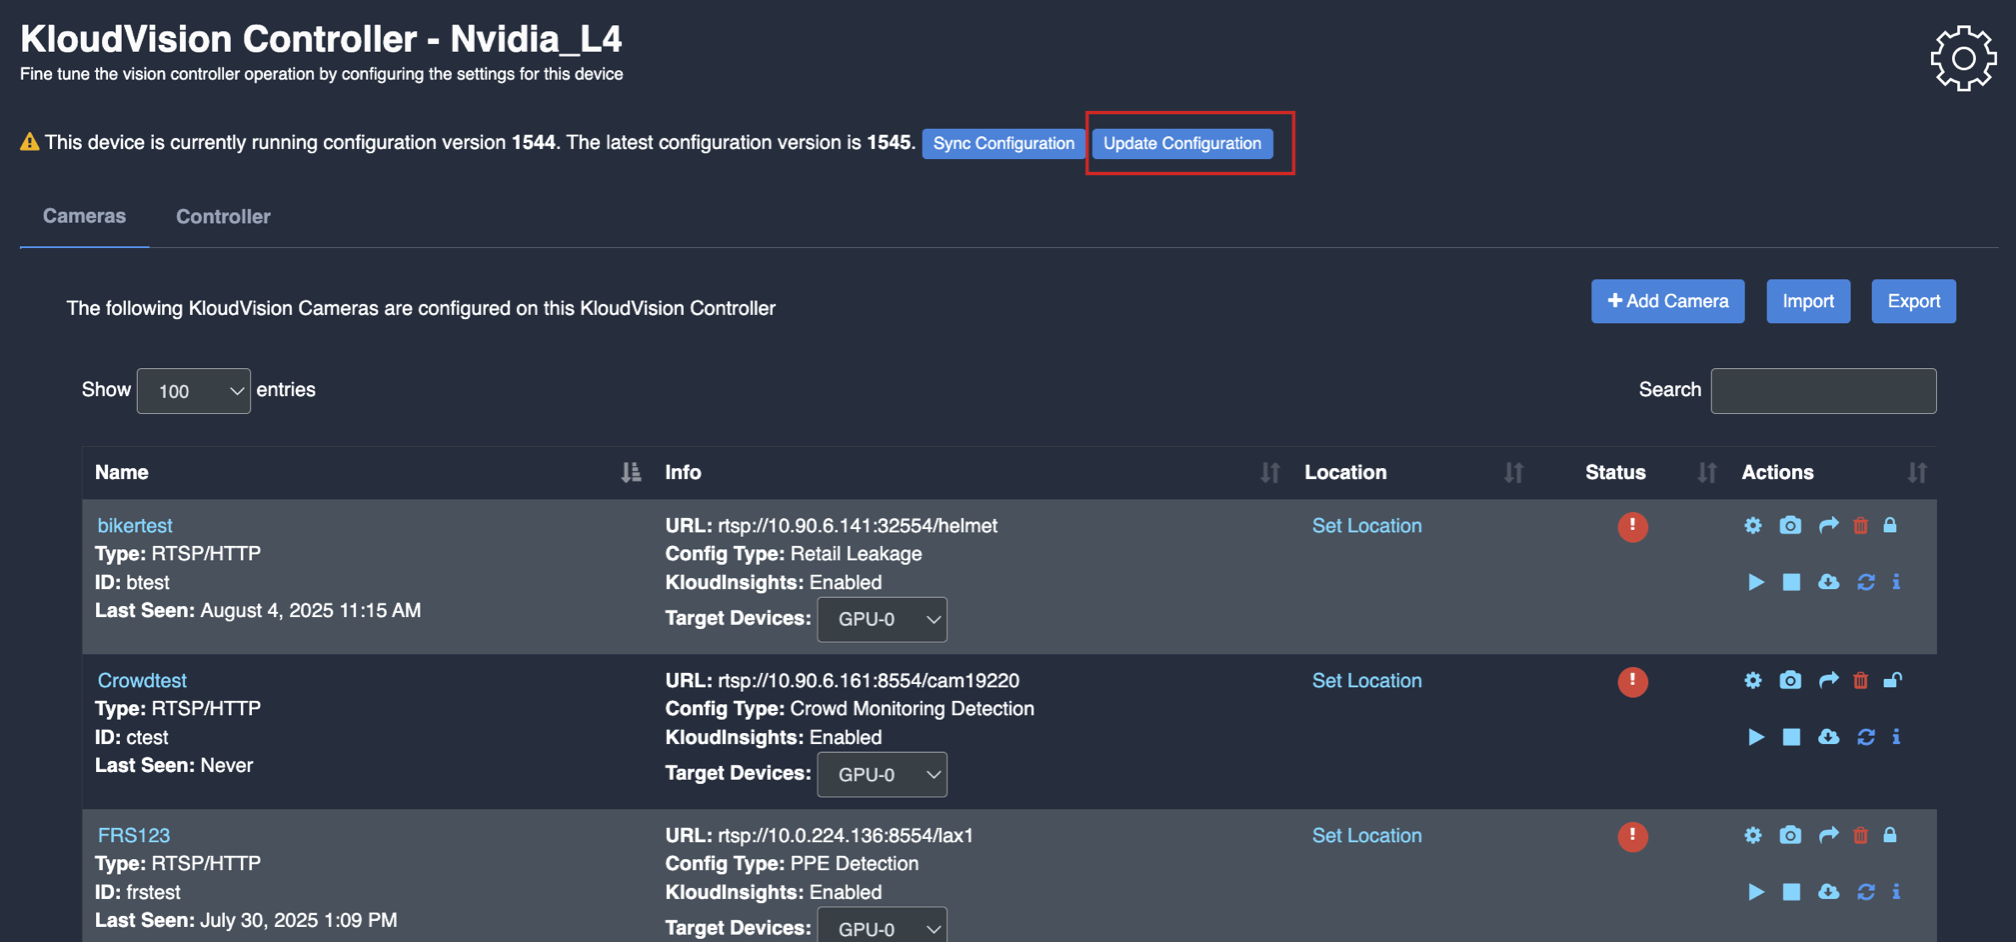
Update/ sync Configuration:
-
Once you perform any change in the controller or update any features/ use cases for camera you need to sync it.
-
There are 2 types of syncing process:
- Sync the configurations
- Update the Configurations
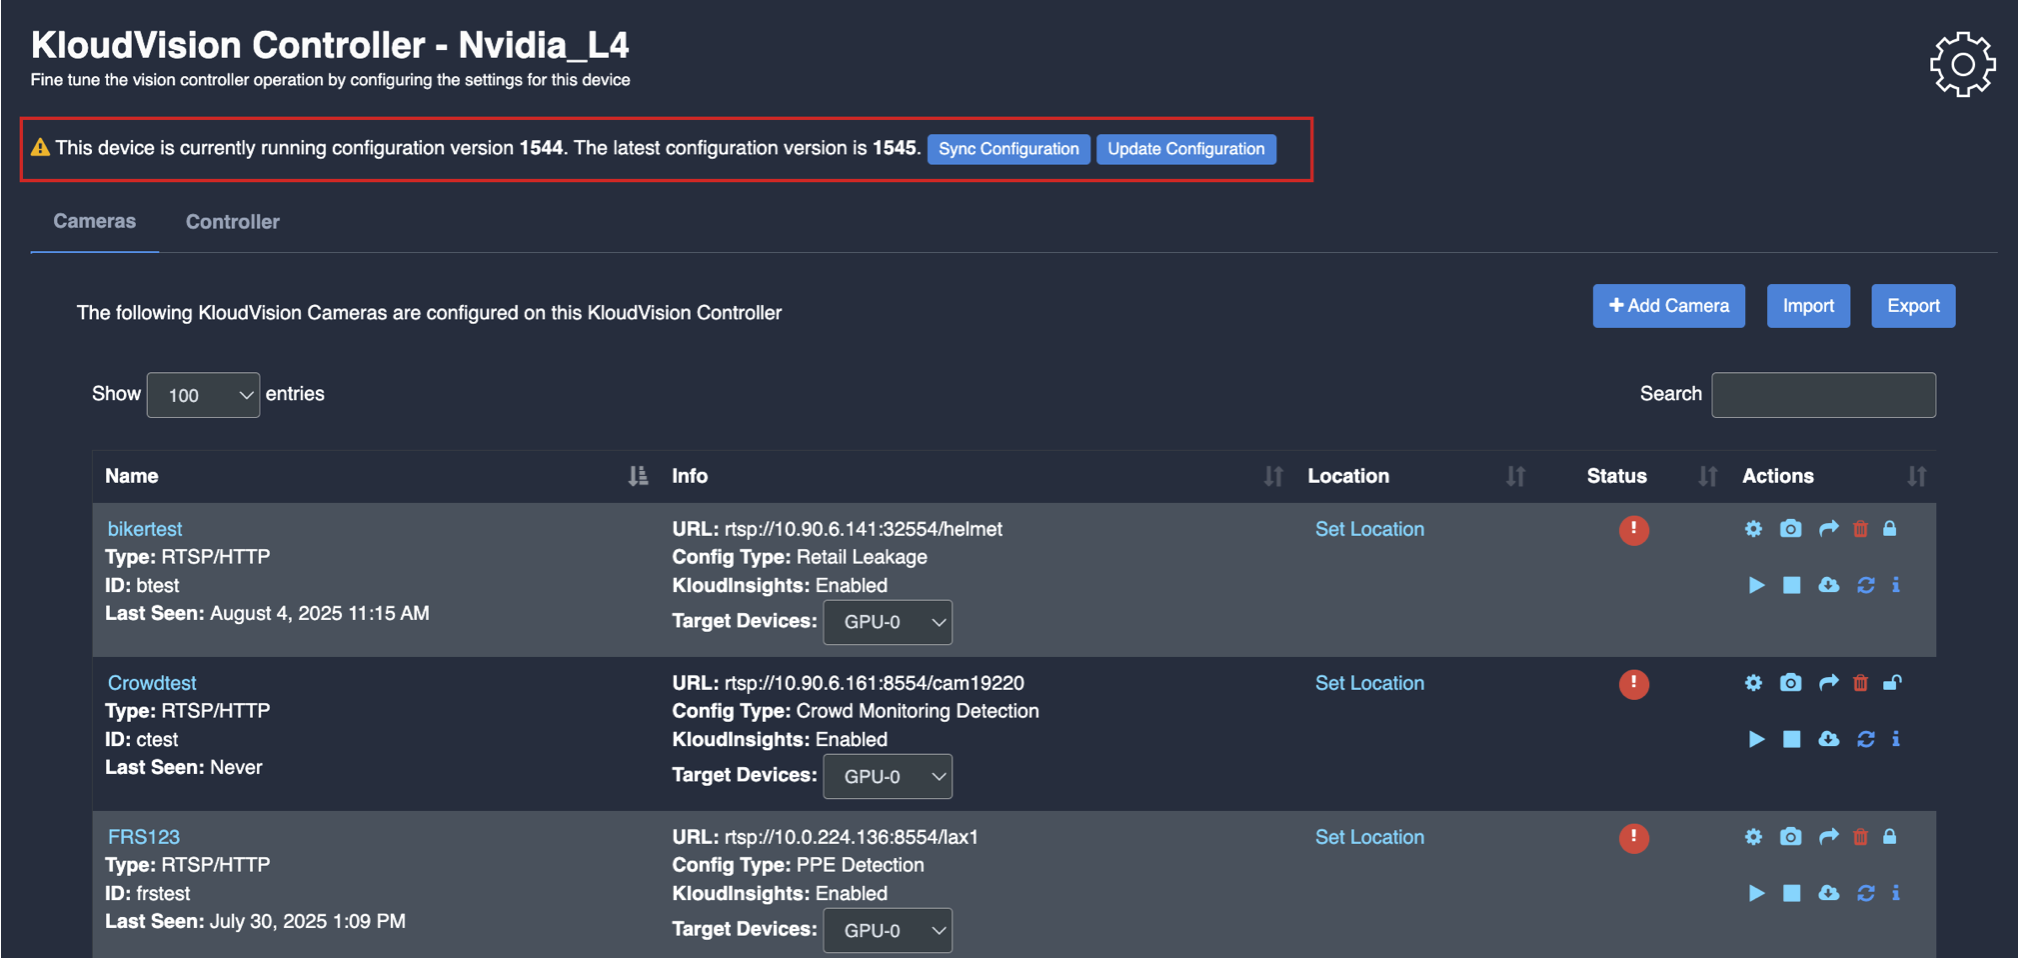
- Click on sync configuration to restart the complete system syncing process. Basically for the initial camera setup and while any controller configuration update. (It will restart the docker and sync all the performed changes)
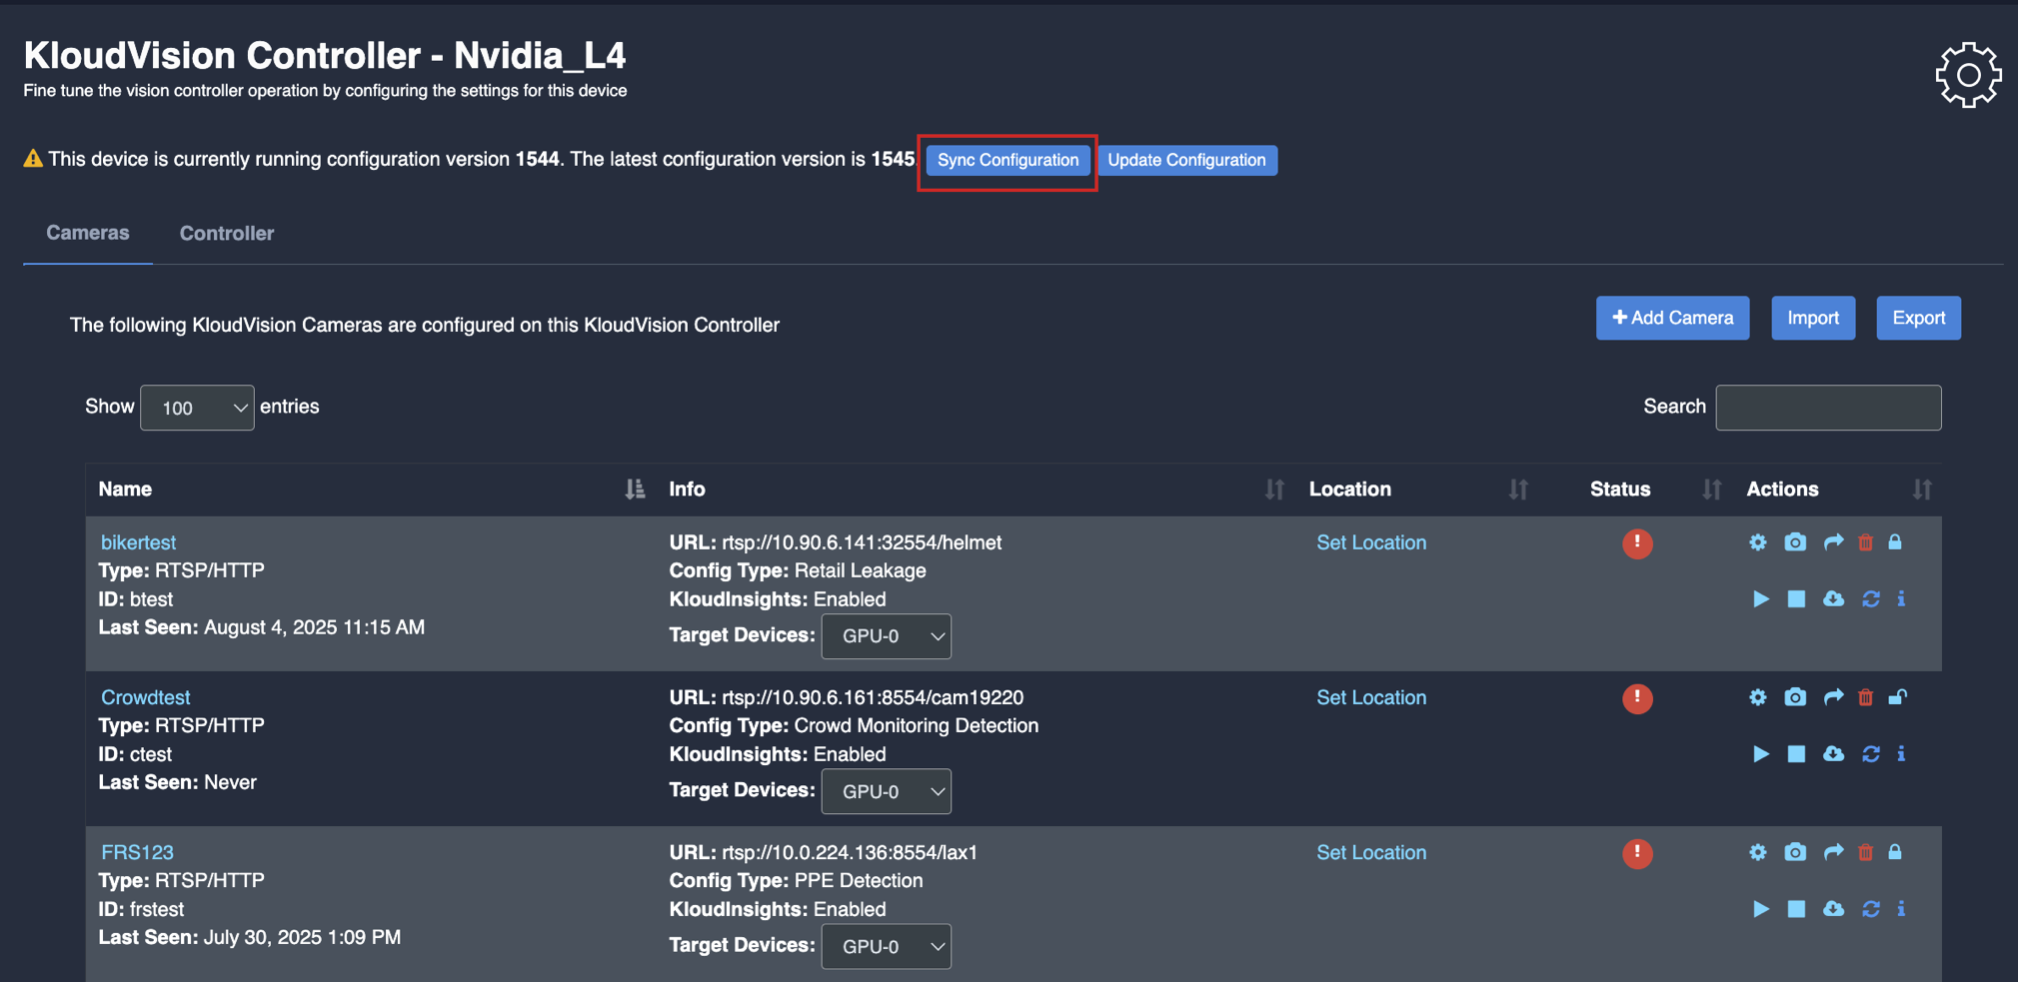
- Click on the update configuration to recent changes in the system without any downtime. (General configuration sync)