Video Surveillance Configuration
- Video surveillance enables you to monitor an event on-site (where the camera is installed) from any location. In addition to kloudVision’s core features, Surveillance comes to you with other security benefits such as,
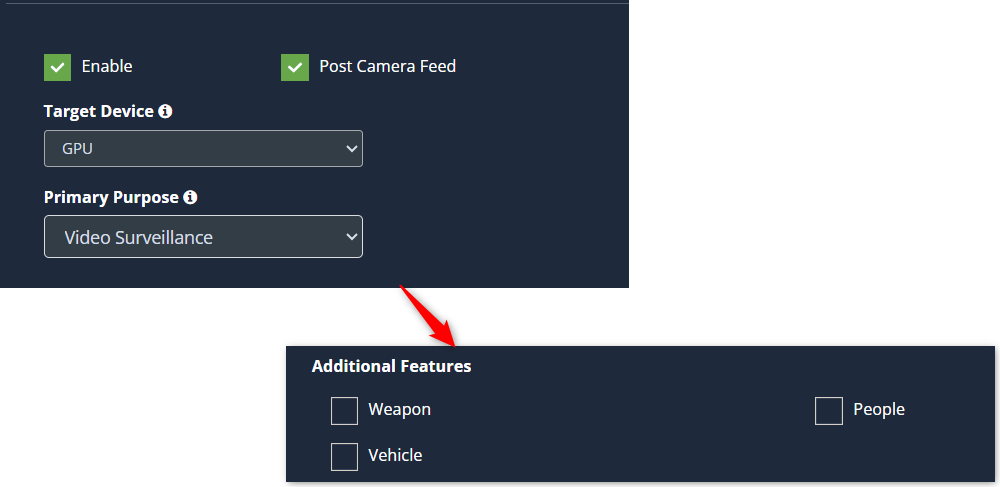
- Weapon detection: If someone walks into a camera location with a weapon, the camera detects it and starts recording the event.
- People detection: If someone passes in front of a camera with camera surveillance activated. The person’s age, gender, and the color of the dress are identified. It records from the time the person comes in front of the camera to the time they disappear from the camera.
- Vehicle detection: When a vehicle enters the camera surveillance, it detects the type of vehicle, its color, and its license plate number. The footage will be recorded during this event.
- Helmet detection : If a biker appears in front of the camera without a helmet, the camera will recognize him or her and record the incident.
-
Its most notable feature is that it only records when the configured event occurs. So, finding video footage is very easy.
-
Follow the steps below to configure ‘Video surveillance’ on your chosen camera.
-
Before you begin configuring the Video surveillance, you should first configure the camera’s general configuration. Refer to the General Camera Configuration section for instructions.
-
Then, select the Video surveillance from the dropdown list and select Additional Features.
-
Here ROI (region of interest) is not mandatory. You can add ROI if you want. Check out the Draw ROI (region of interest) on the camera frame section to learn how to do that.
-
Some use cases require additional values; there will be a default value. If you wish to change it, you can. Refer to the Configuring the video surveillance options section to learn what this is and how to change it.
-
Click the Save button to save the configuration.
Draw ROI (region of interest) on the camera frame.
-
ROI in camera frames can help to improve efficiency, accuracy, and reduce storage requirements.
-
ROI is optional. If ROI is not added, the model will detect the entire frame.
-
For Video Surveillance, ROI can be drawn in two ways.
- Using the polygon tool
- Using the rectangle tool.
- Refer to Draw ROI using the Polygon tool., Draw ROI using the rectangle tool., and Monitor the camera view. Section from the Face Detection for more details.
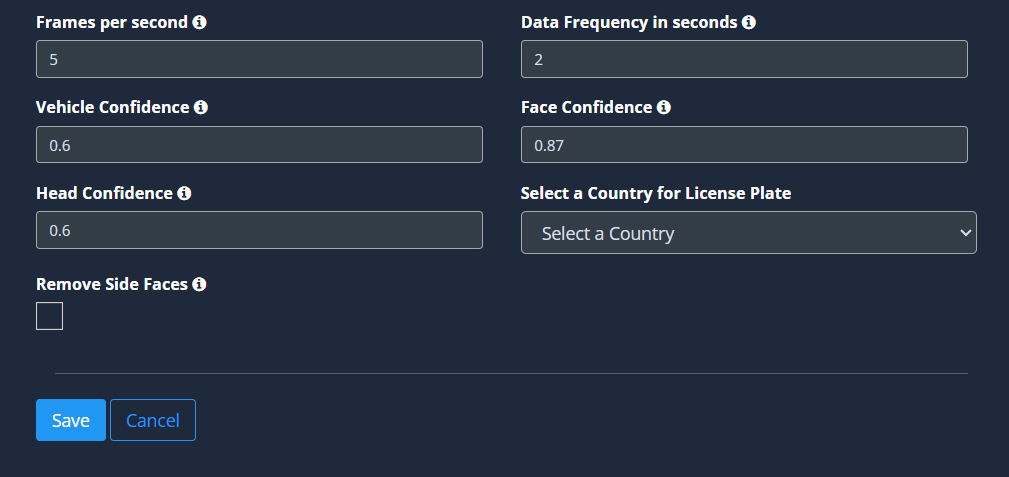
Configuring the video surveillance options:
-
Frames per second, Data Frequency in seconds, and Face Confidence , are common in some use cases. Refer General Configuration for various use cases section to know more about these.
-
Head confidence: This value is the probability that a detected shape on camera is a head. Higher values may fail to detect faces. Lower values may detect objects that are shaped like faces.
-
Select a Country for License Plate: Select which country license plate you want to detect. Currently, license plates of 3 countries can be monitored. India, Saudi Arabia, and Bahrain.
-
Click the Save button to save the changes.
Note: You can disable video surveillance if needed, see the Enable and Setup Video Surveillance section for more information.
Enable and setup Video Surveillance
-
Surveillance is automatically enabled when surveillance is configured on the camera.
-
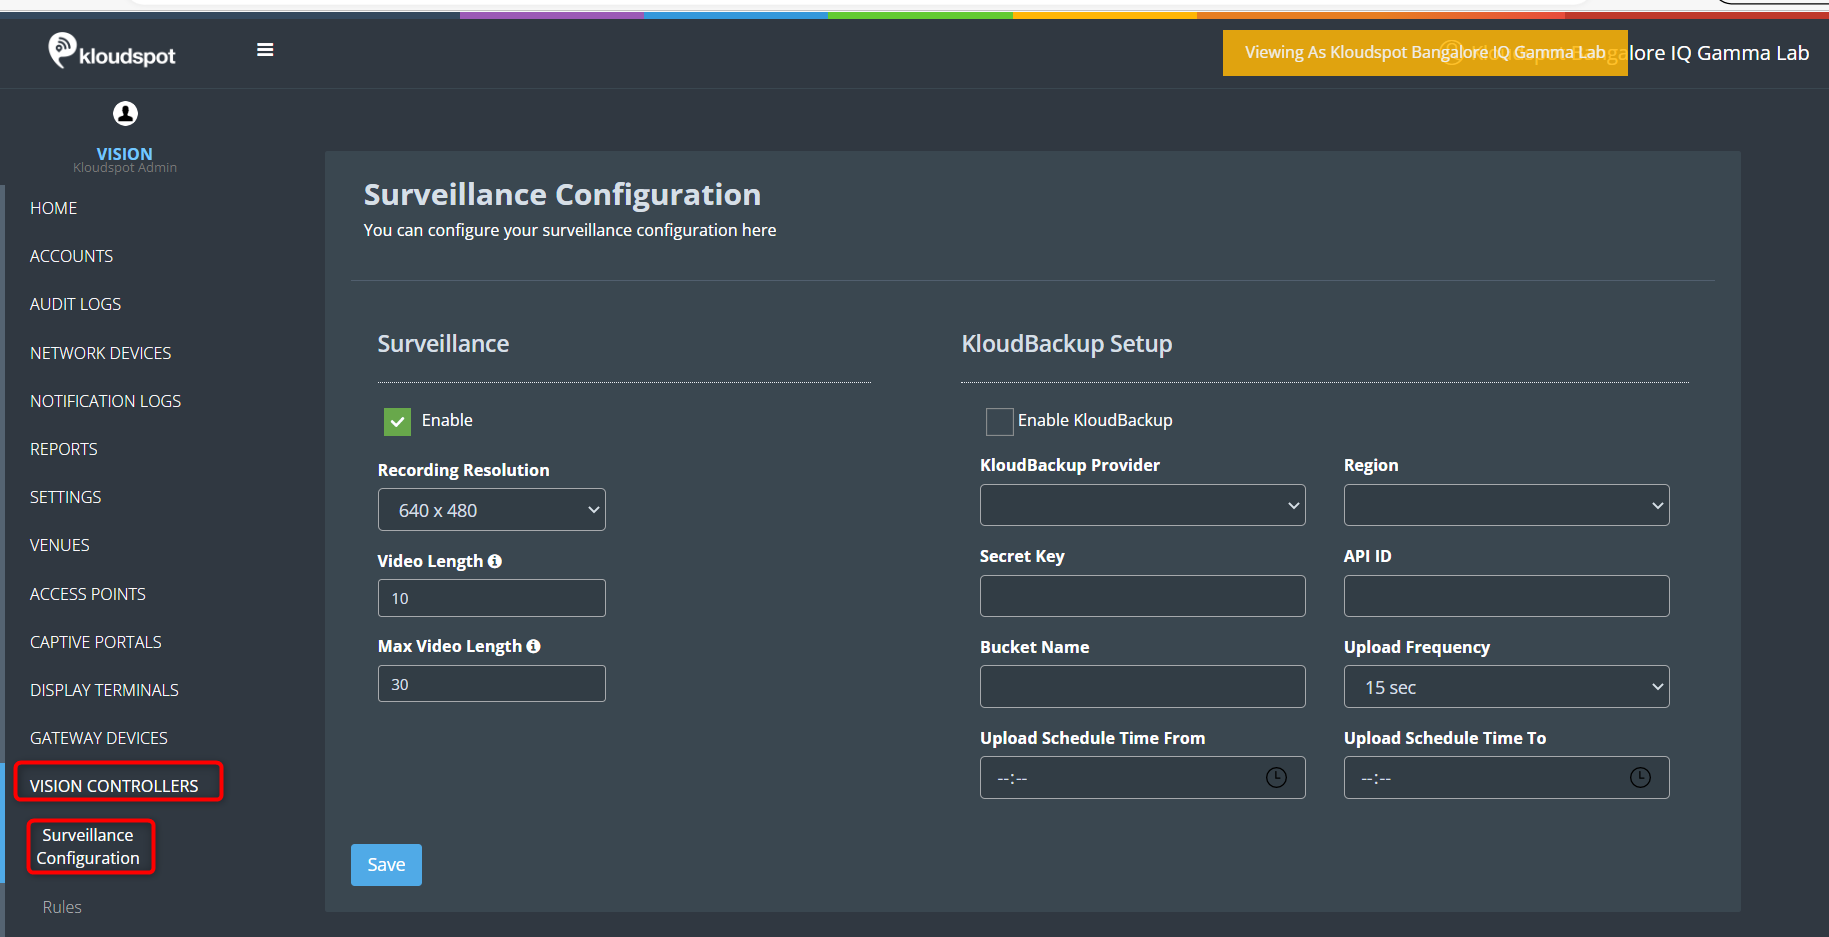
Navigate to VISION CONTROLLERS > Surveillance Configuration.
-
Uncheck the Enable check box and click the Save button to disable Surveillance.
-
Also, if you want to change any of the information given below, you can also change it here.
- Recording resolution: Click on the drop-down and select the resolution.
- Video length (in secs): Set a minimum video length to record an event.
- Max Video Length (in secs): Set a max video length to record a video in case need to monitor multiple events occurring at the same time one after the other.
- If you want to back up your footages every day, check the Enable KloudBackup check box and fill the following details.
- KloudBackup Provider : Select the backup provider name from the list.
- Region: Select the location of the provider.
- Secret Key and API ID: Enter the Secret key and API ID received from the backup provider here.
- Bucket Name: Enter the folder name in which you want to save the backups.
- Upload Frequency: Set your upload Frequency.
- Upload schedule time from/to: Select when to back up every day.
- Click the Save button to save the changes.
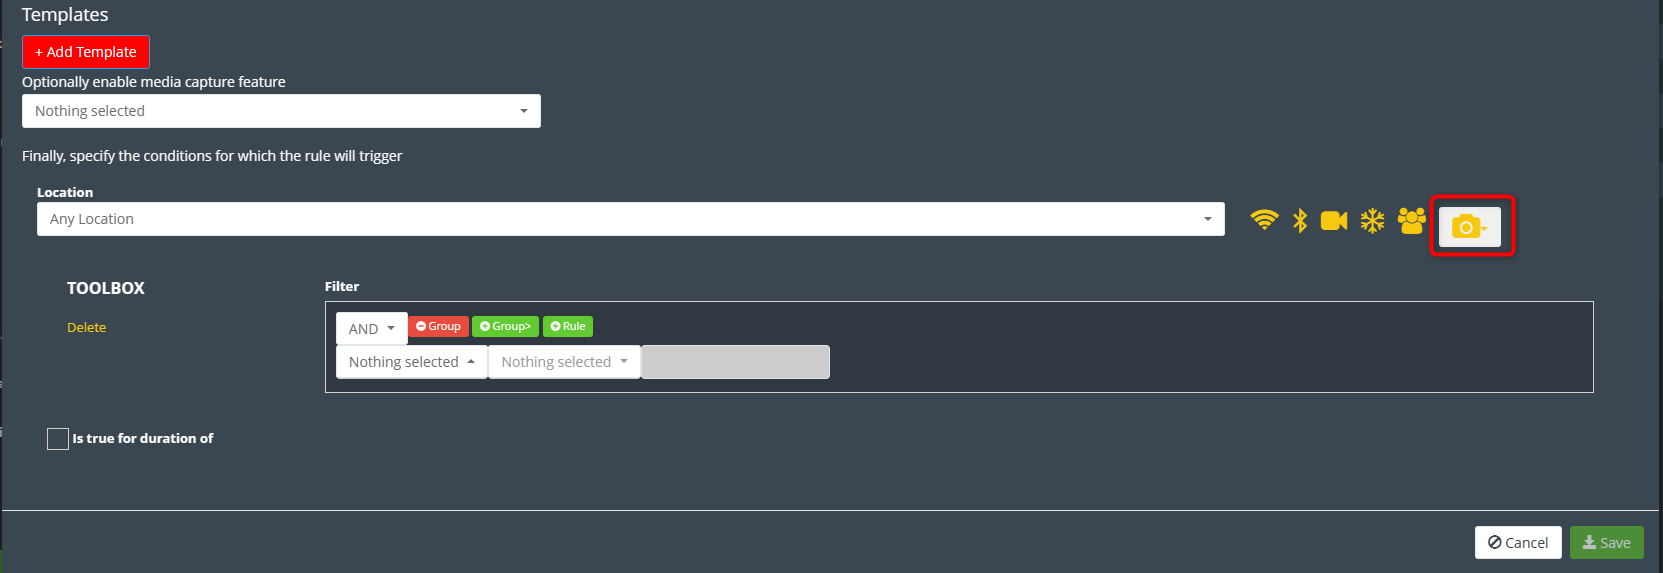
Create surveillance rules
Refer to the KloudInsights “Creating Rules " section to learn how to create a rule. Alternatively, you can use the “Action Templates” section if you want to create an action template.
Use “Add Vision Entity Conditions” button to create vision rules.