Face Detection Configuration
- If you want to configure any of the following use cases on your camera, you can configure it using the Face detection feature.
-
Queue management
-
Detection
-
Duffle Bag tracking
-
Fire Extinguisher tracking
-
Face fingerprint detection
-
Emotion detection
-
Gender detection
-
Pace monitoring
-
Flow monitoring
-
Age detection
-
Face Mask detection
-
Perspective Transform
-
Detecting People with Infant
-
Before you begin configuring the use cases, you should first configure the camera’s general configuration. Refer to the General Camera Configuration section for instructions.
-
Then, select the Face Detection from the dropdown list.
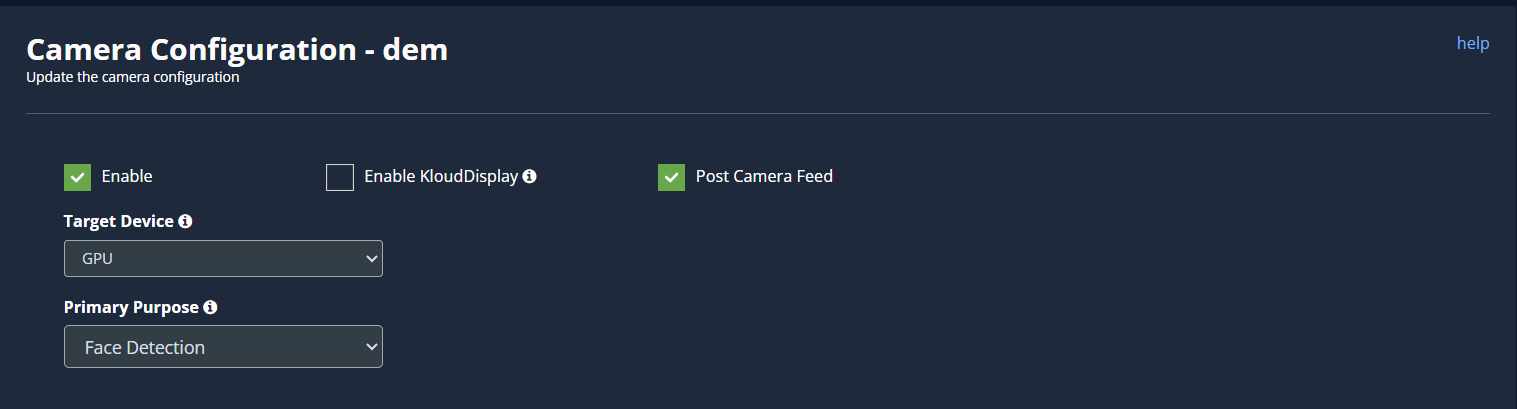
- Next, scroll down and choose your preferred use cases. You can choose multiple use cases.
-
The next step is to plot the ROI on the camera feed. This is necessary for the Queue management feature, as well as in other use cases where Kiosk mode is enabled. Otherwise, it’s optional. Refer to Queue Management section to know how to configure a Queue. Refer to the Draw ROI (region of interest) on the camera frame section to learn how to add an ROI to the camera feed.
-
Kiosk Mode: Kiosk mode is mainly developed for vending machines where we will be displaying contextual advertising based on the demographics of the people and it also has additional options for choosing the detection range and prominent where it will consider the demographics of the first person in a queue.
-
Some use cases require additional values; there will be a default value. If you wish to change it, you can. Refer to the Configuring the Face Detection Parameters section to learn what this is and how to change it.
-
Click the Save button to save the configuration.
Queue management
-
Configuring queue monitoring involves defining Regions of Interest (ROIs) to focus on specific sections of a queue, such as the lane area, server area, and exit gate. This document outlines the steps to configure queue monitoring to a camera for efficient surveillance and monitoring.
-
Ensure that you have already created a queue. Refer to the “Queue Creation " document for instructions on how to create a queue.
Note: It is important to note the specific section that the configured camera is targeting. There are instances where a single camera encompasses all three sections. Alternatively, a queue might require configuration with multiple cameras. The following outlines the process for configuring a lane using a single camera, and this logic can be applied to configure multiple cameras.
-
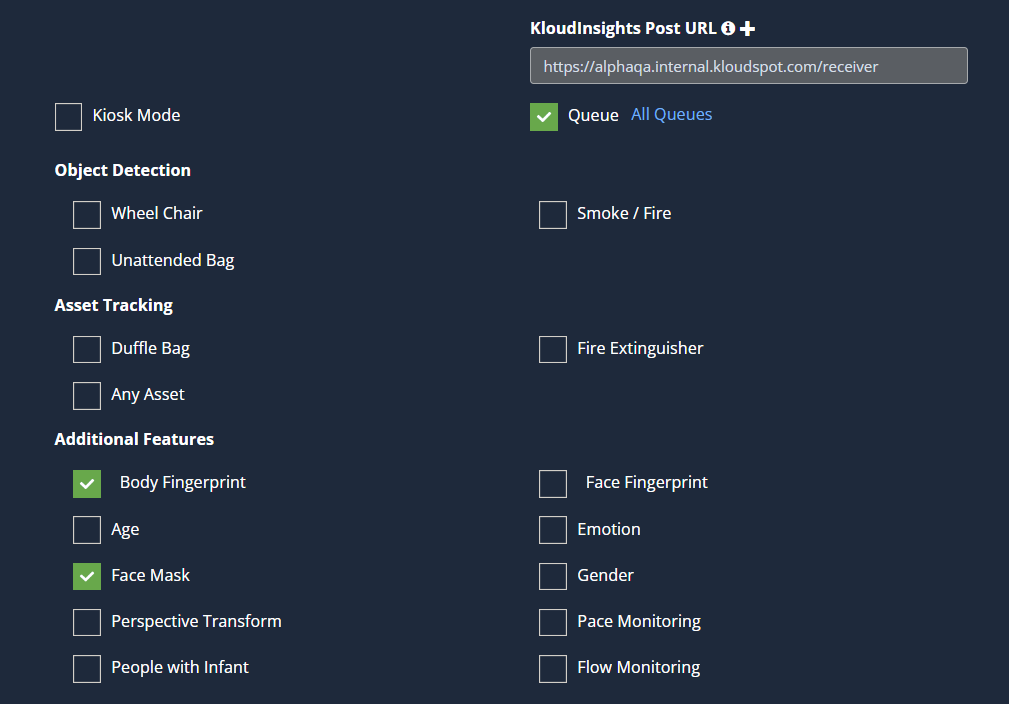
If you want to enable this feature, Check the Queue checkbox.
-
Click All Queues button to view the currently available queues.
- Next, draw the ROI in the camera frame. This is mandatory for Queue management.
Configuration Process
Marking the Lane Area
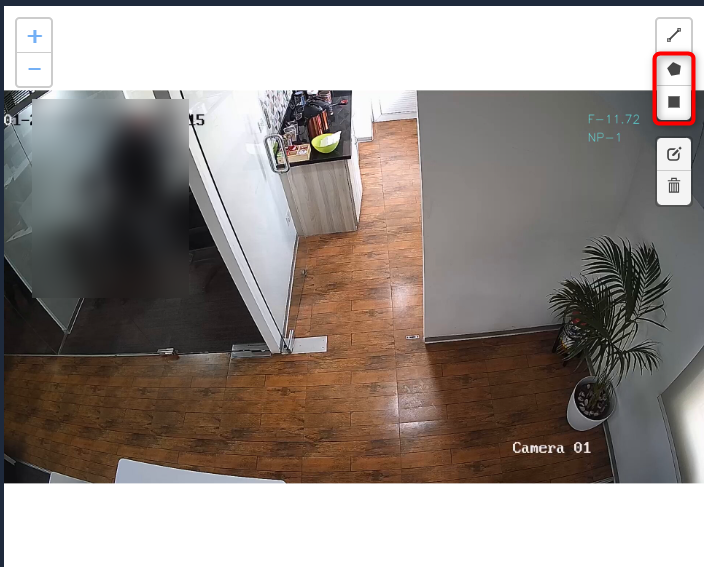
Draw ROI for Lane Area:
- Using a polygon or rectangle tool, draw a Region of Interest (ROI) on the camera feed at the locations corresponding to the lane area of the queue.
Configure Lane Area:
-
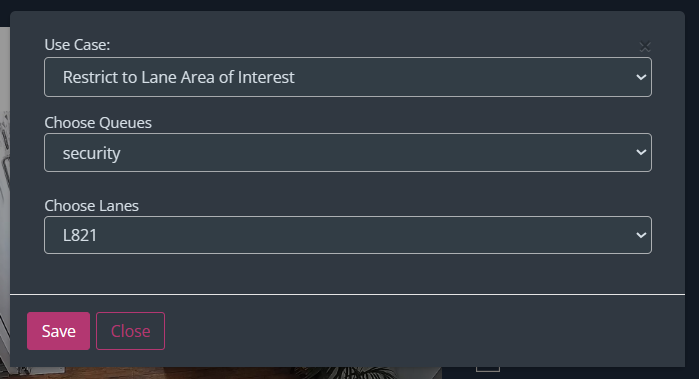
In the popup window that appears after drawing the ROI, navigate to the Use Case column.
-
Select Restrict to Queue Area of Interest from the options.
-
Choose the queue you created earlier from the Choose Queues dropdown list.
-
Select the specific lane you are configuring from the Choose Lanes dropdown list.
-
Click the Save button to save the configuration.
Marking the Server Location
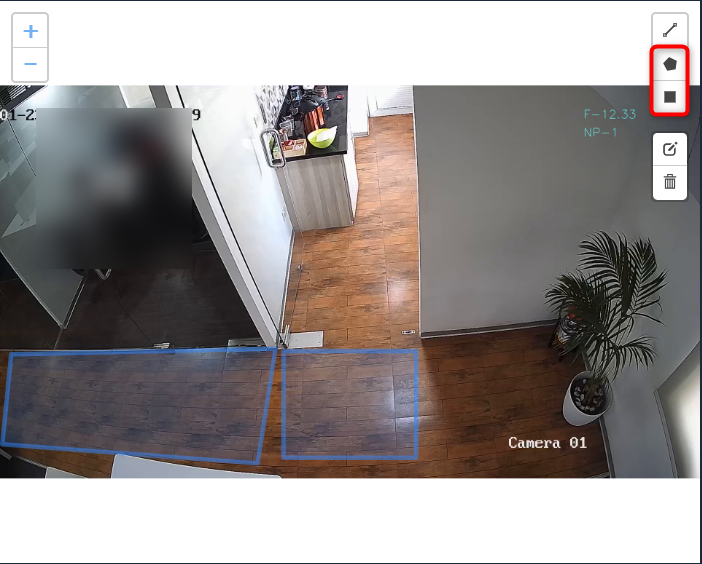
Draw ROI for Server Area:
Draw another ROI using the polygon or rectangle tool at the places where the server area appears in the camera feed.

Configure Server Area:
-
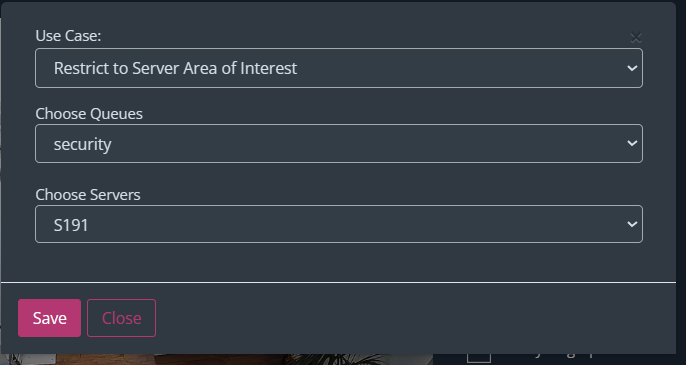
In the popup window, choose Restrict to Server Area of Interest from the Use Case column.
-
Select the queue from the Choose Queues dropdown list.
-
Choose the server area you are configuring from the Choose Servers dropdown list.
-
Click the Save button to save the configuration.
Marking the Exit Gate Location
Draw ROI for Exit Gate Area:
Draw an additional ROI for the exit gate area using the polygon or rectangle tool.
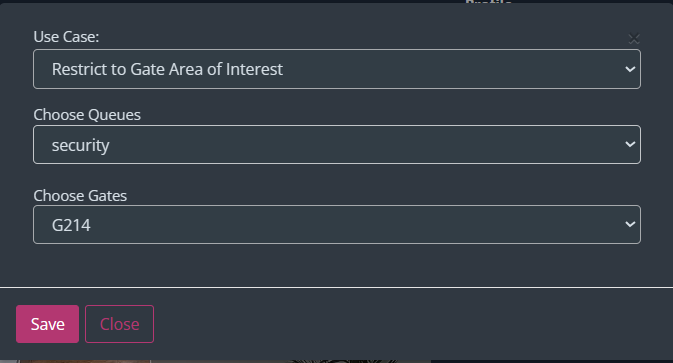
Configure Exit Gate Area:
-
In the popup window, select Restrict to Gate Area of Interest from the Use Case column.
-
Choose the queue from the Choose Queues dropdown list.
-
Select the gate area you are configuring from the Choose Gates dropdown list.
-
Click the Save button to save the configuration.
Save Camera Configuration
-
Scroll down to find the general camera settings.
-
Click the Save button to save the overall camera configuration.
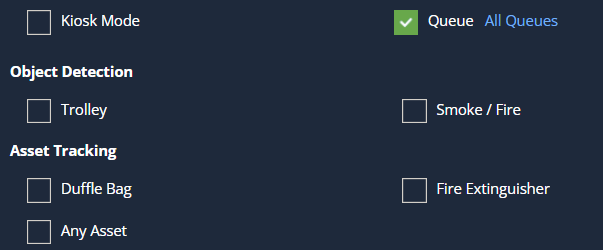
Object Detection
-
It is useful for tracking a Trolly and immediately reporting if its speed is slower than normal.
-
This feature helps determine whether customers are having difficulty using the trolley and assists them if they are.
For example, airports, supermarkets, hospitals, etc.
-
If you want to enable this feature, check the Trolly checkbox.

Asset Tracking
-
Kloudvision asset tracking involves using cameras to monitor the location and movement of valuable assets such as Duffle Bag, Fire Extinguishers, and other assets.
Duffle Bag: It helps in the tracking of duffle bags at any place. It detects and reports duffle bags displacement in real time.
Fire Extinguishers: It helps in the tracking of Fire Extinguishers at any place. It detects and reports Fire Extinguishers displacement in real time.
Any assets: it helps to track small assets. It detects and reports assets displacement in real time.
-
Check the checkbox if you want to enable any of these features.

Draw ROI (region of interest) on the camera frame.
-
ROI in camera frames can help to improve efficiency, accuracy, and reduce storage requirements.
-
ROI must be added if kiosk mode is enabled. Otherwise, it is optional. If ROI is not added, the model will detect the entire frame.
-
For face detection, ROI can be drawn in two ways.
- Using the polygon tool
- Using the rectangle tool.
Draw ROI using the Polygon tool.
-
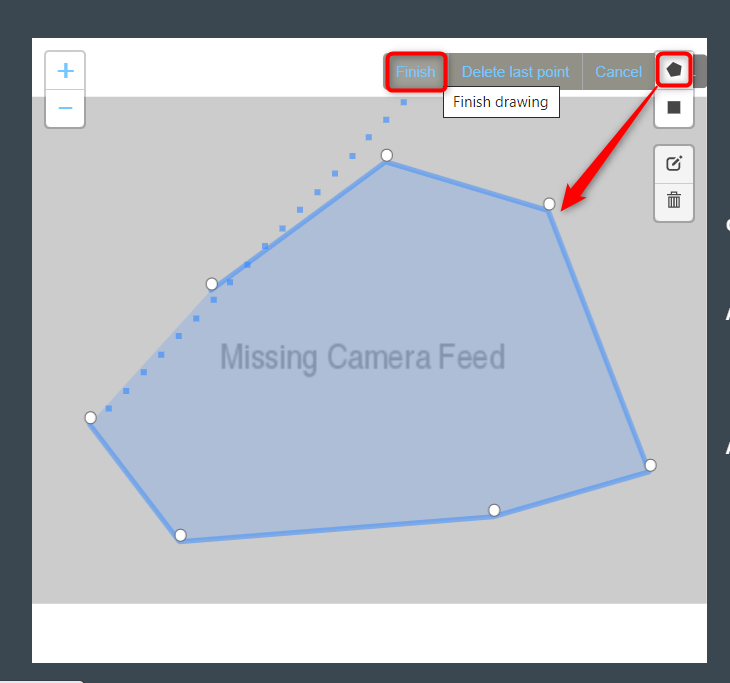
Click on the Polygon tool button from the camera frame.
-
Then connect the dots and draw the polygon in the space where you want to draw the ROI. It should have more than 2 points.
-
After drawing, click the Finish button to complete the drawing.
-
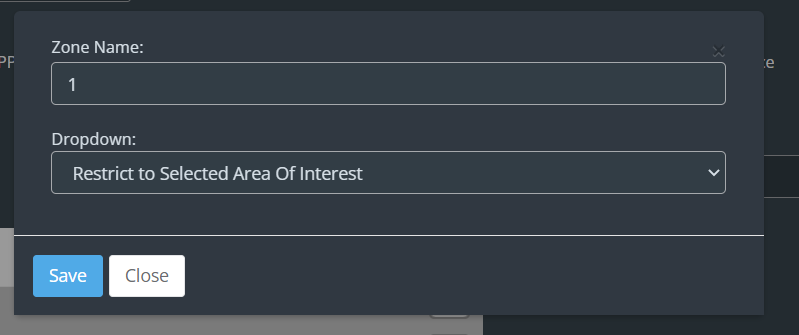
Enter the zone name in the popup window that opens and click the Save button.
-
New ROI zone added successfully. Face detection will only happen when people enter this zone.
Draw ROI using the rectangle tool.
-
Click on the Rectangle tool button from the camera frame.
-
Then draw the rectangle where you want to focus the camera.
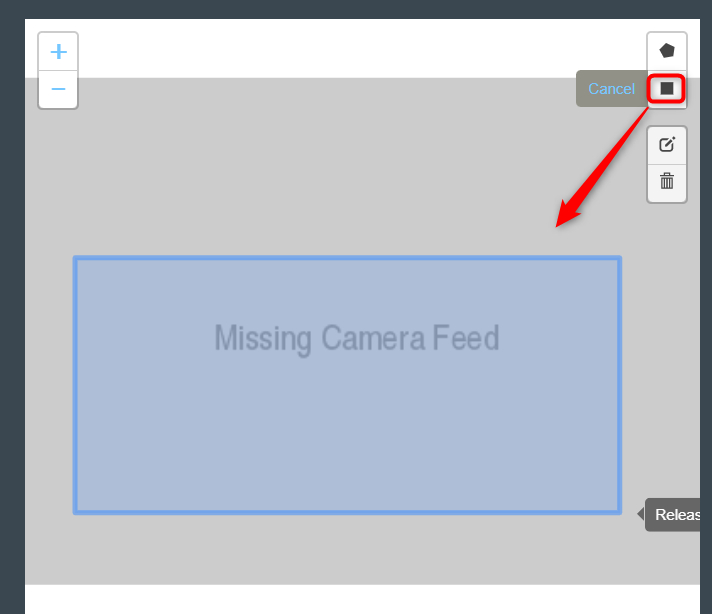
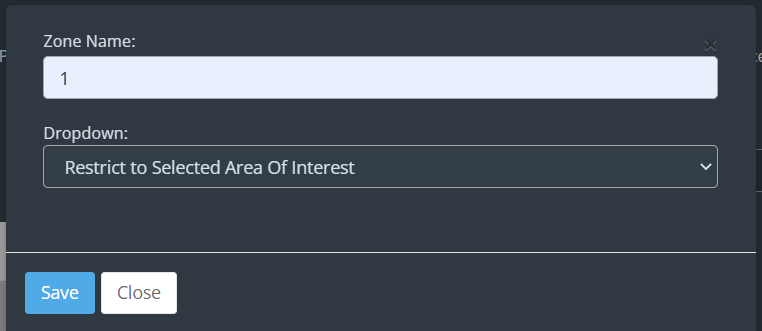
-
Then enter the zone name and select Restrict to selected area of interest option from the dropdown list and click the Save button.
-
Face detection will only happen when people enter this zone.
Monitor camera view.
-
Monitor camera view is used to detect changes in camera angle or position. An ROI needs to be determined for that.
-
To do so, click on the Rectangle tool button from the camera frame.
-
Then draw the rectangle where you want to draw the ROI.
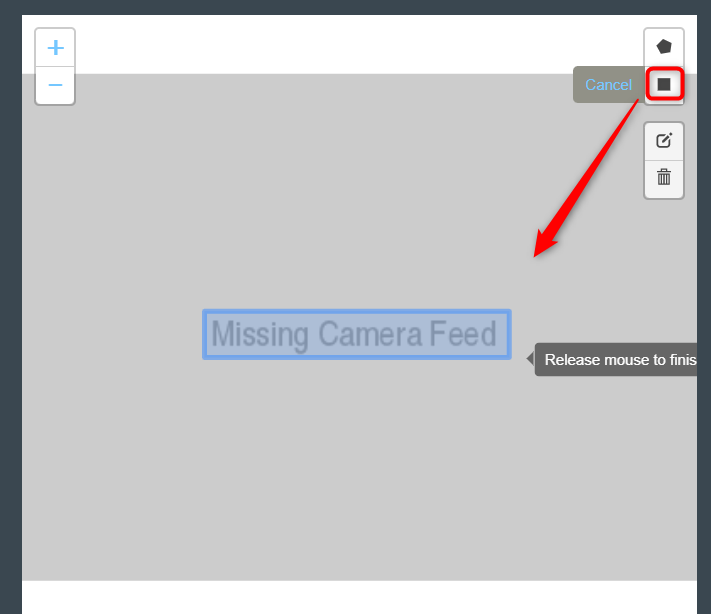
-
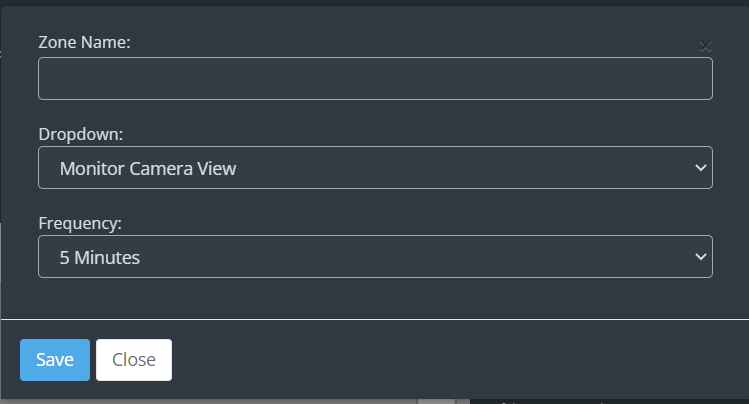
Then enter the zone name and select the Monitor Camera View option from the dropdown list.
-
Then, select how often you want to observe the change in focus from the Frequency dropdown list and click the Save button and click the Save button.
-
Now if the camera moves vertically or horizontally from the focus point, it will detect and show how far it has moved.
Additional features of ‘Face detection’
-
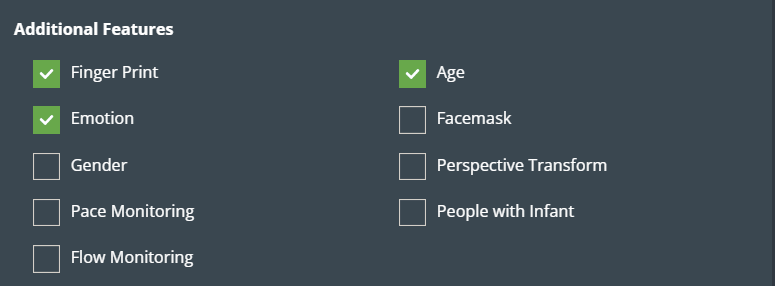
You can enable the features you want in the additional feature section that follows.
-
Age: The age of the person in front of the camera is determined and forwarded to KloudInsights for analysis.
-
Face fingerprint: It helps in the identification of people detected on the camera using characterisations obtained from the database.
-
Emotion: Understanding a person’s emotions with the help of demographics.
-
Facemask: Detects whether the person in front of the camera is wearing a mask or not and, if not, prompts them to wear one.
-
Gender: Identifying a person’s gender depending on the demographics.
-
Arabic Headgear: To detect if a person is wearing Arabic/Emirati Headgear.
Note: This feature only works if Kiosk mode is enabled.
-
Ethnicity: To detect the ethnicity of a person.
Note: This feature only works if Kiosk mode is enabled.
-
Perspective Transform: The coordinates of the person are transformed from a camera perspective to new coordinates based on the perspective ROI and hence used for calculating the actual distance between the person.
-
Pace Monitoring: It helps to assess a person’s speed.
-
People with Infant: It helps to identify those who are traveling with an infant.
-
Flow Monitoring: This helps to detect if someone is breaking the entry/exit flow.
-
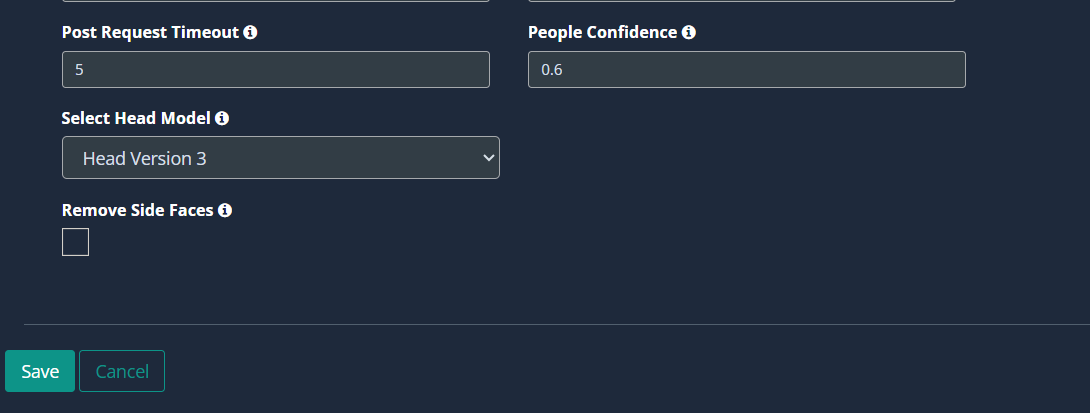
Configuring the Face detection parameters
-
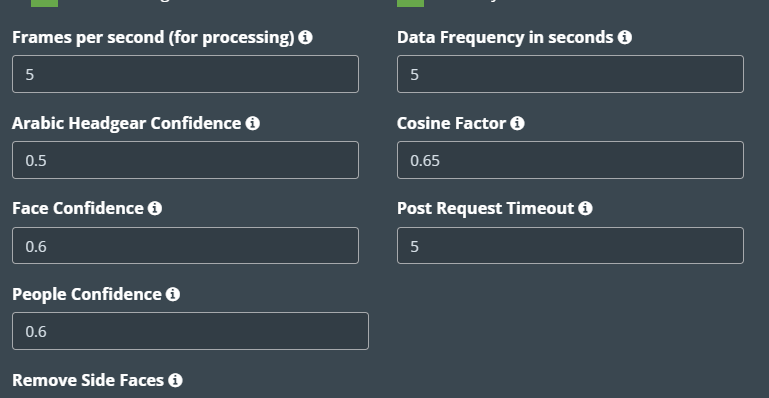
Next, you have to enter the necessary parameters for face detection to work efficiently. For that fill in the details given below.
-
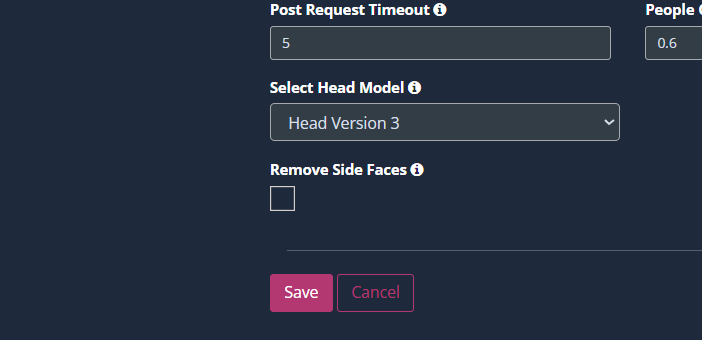
Frames per second, Data Frequency in seconds, Face Confidence, Post Request Timeout, and People Confidence, are common in some use cases. Refer General Configuration section to know more about these.
-
Arabic Headgear confidence: This feature shows the probability of a person wearing an Arabic/Emirati Headgear. It only needs to be configured if the ‘Arabic Head Gear’ option is enabled. The default value of Arabic Head Gear confidence is 0.5.
-
Cosine factor: the Cosine factor determines the uniqueness of faces detected by the cameras. The default value of cosine factor is .65.
-
Select Head Model: The head model can be selected based on the resolution, distance, angle, and available light of the camera used.
Head version 1: Works only on good lighting with any resolution. The maximum distance of the camera can be 15 meters with an angle range of 60°-80°
Head version 2: Works only on good lighting with a resolution of 640 x 480. The maximum distance of the camera can be 70 meters with an angle range of 80°-90°
Head version 3: Works on low and good lighting with a resolution starting from 640 X 480 to 4k. The maximum distance of the camera can be 120 meters with an angle range of 60°-90°
Head version 4: Works on low and good lighting with a resolution starting from 640 X 480 to 4k. The maximum distance of the camera can be 300 meters with an angle only of 90°
- Remove side faces: Eliminates the side profile face of an individual for better accuracy in detecting demographics.
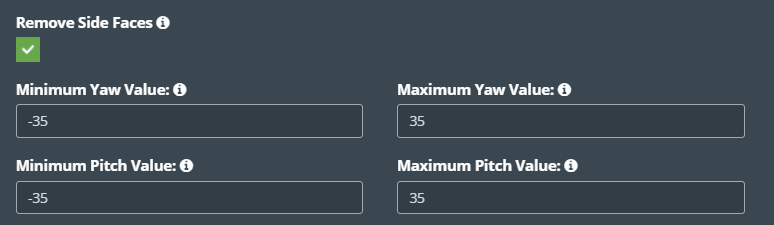
Min Yaw Value and Max Yaw Value: If this limit is set to more than -35 or +35, ignore the detection of faces in the left/right direction.
Min Pitch Value and Max Pitch Value: If this limit is set to more than -35 or +35, ignore the detection of faces in the up/down direction.
- Finally, click the Save button to save the changes.