Entry/Exit Count Configuration
-
If you want to configure any of the following use cases on your camera, you can configure it using the Entry/Exit Count feature.
- Entry/Exit Count
- Fingerprint detection
- Face mask detection
- Gender detection
-
Follow the steps below to configure the ‘Entry/Exit count’ on your chosen camera.
-
Before you begin configuring the use cases, you should first configure the camera’s general configuration. Refer to the General Camera Configuration section for instructions.
-
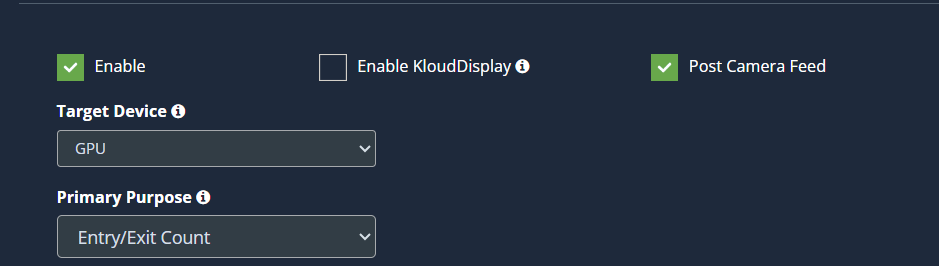
Select Entry/Exit Count from the dropdown list.
-
Then choose whether to count Entry or Exit. Then, based on the option you chose, draw a ROI; for instructions, see the Draw ROI (region of interest) on the camera frame section.
-
Along with the entry/exit count, you can utilize the following functionalities. Check the checkboxes for the features you want to add.
-
Fingerprint: It helps in the identification of people detected on the camera using characterisations obtained from the database.
-
Facemask: KloudVision determines whether people visible to the camera are wearing face masks or not.
-
Age and Gender: The age and gender of the person in front of the camera is determined and forwarded to KloudInsights for analysis.
-
Unique Count: It is useful to assign a unique count to the individual viewed on camera.
-

-
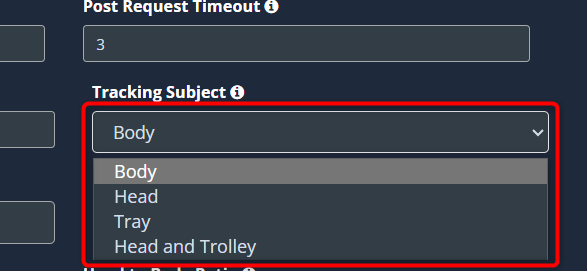
Depending on the camera’s location, you can change the subject being tracked. If the camera is positioned above the head, you can choose Tracking Subject as Head. If it is below the head level, you can choose the body.
-
If you want to track a Tray, select Tray. You can select Head and Trolley and count the number of trolley and humans entering or exiting.
-
You can edit the default parameters to get more accurate entry/exit count. Refer to the Configuring the entry and exit options section to learn what this is and how to change it.
-
Click the Save button to save the configuration.
Draw ROI (region of interest) on the camera frame.
-
ROI in camera frames can help to improve efficiency, accuracy, and reduce storage requirements.
Note: An entry/exit separator is mandatory to calculate the entry/exit count.
-
Two drawings are required for the entry/exit count. Here ROI is optional. If ROI is not added, the model will detect the entire frame.
-
drawings are required for entry/exit count. Here ROI is optional.
- Entry/Exit Separator
- ROI
-
For Entry/Exit count, ROI can be drawn in two ways.
- Using the polygon tool
- Using the rectangle tool.
-
Refer to Draw ROI using the Polygon tool., Draw ROI using the rectangle tool., and Monitor the camera view. Sections from the Configure Face Detection for more details.
Draw an Entry/Exit Separator
-
An entry/exit separator can be drawn using a polyline. It is mandatory for entry exit counting.
-
Entry or exit count is taken based on this line. Entry is determined in two ways.
- Horizontally, top to bottom,
- Vertically, left to right.
-
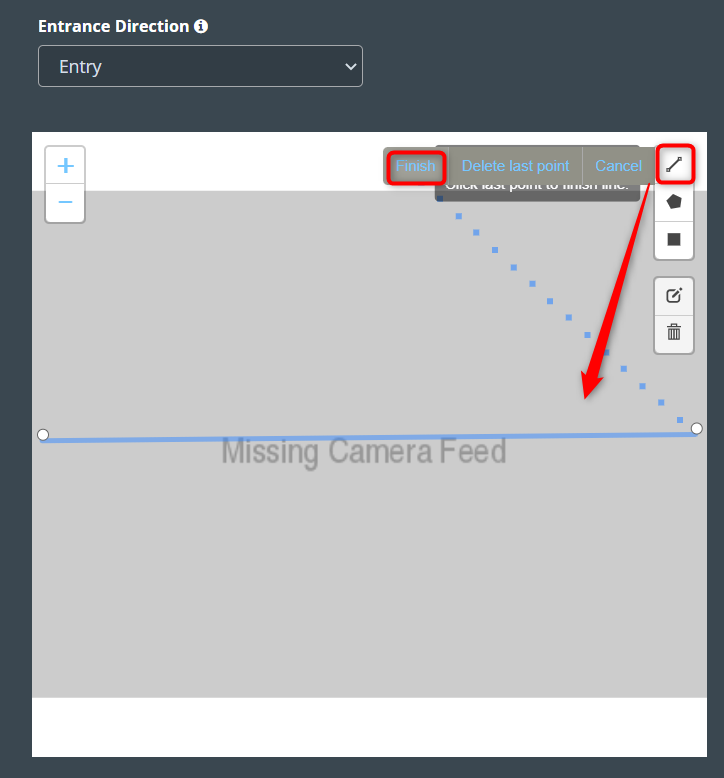
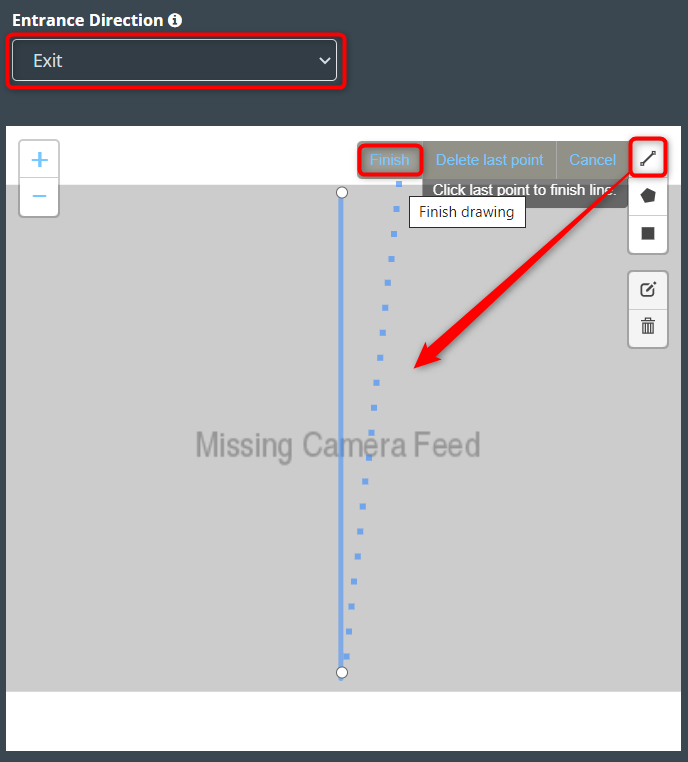
If you want to configure an entry count horizontally, follow the steps below.
- Select the Entry option from the Entrance direction dropdown list.
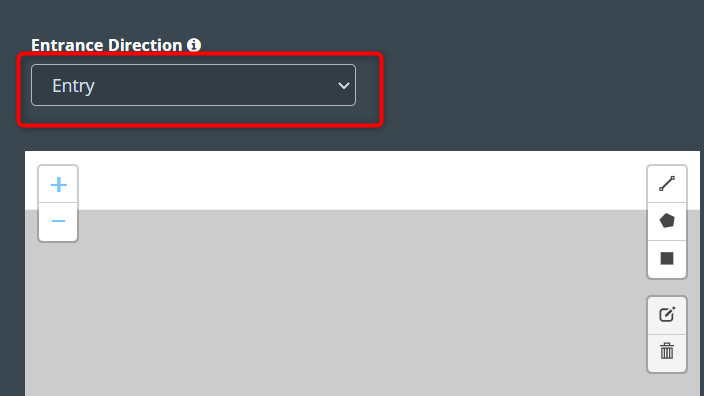
- Then, draw a horizontal line using a polyline tool. This line should have only two points.
- After drawing click the Finish button.
-
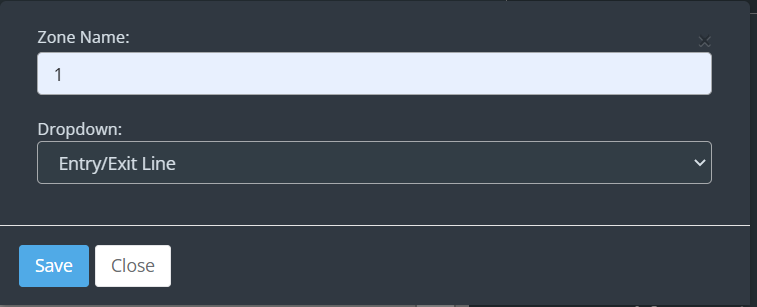
Then enter the zone name in the popup window that opens and click the Save button.
Note: In this scenario, an entry is recorded if an object crosses the entry/exit separator from top to bottom.

-
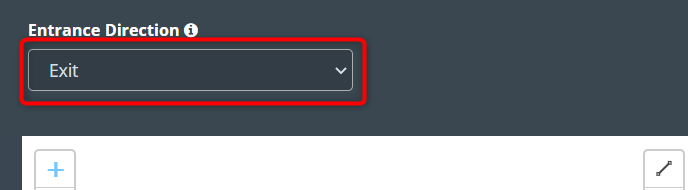
If you want to configure an Exit count horizontally, follow the steps below.
- Select the Exit option from the Entrance direction dropdown list.
- Then, draw a horizontal line using a polyline tool. This line should have only two points.
- After drawing click the Finish button.
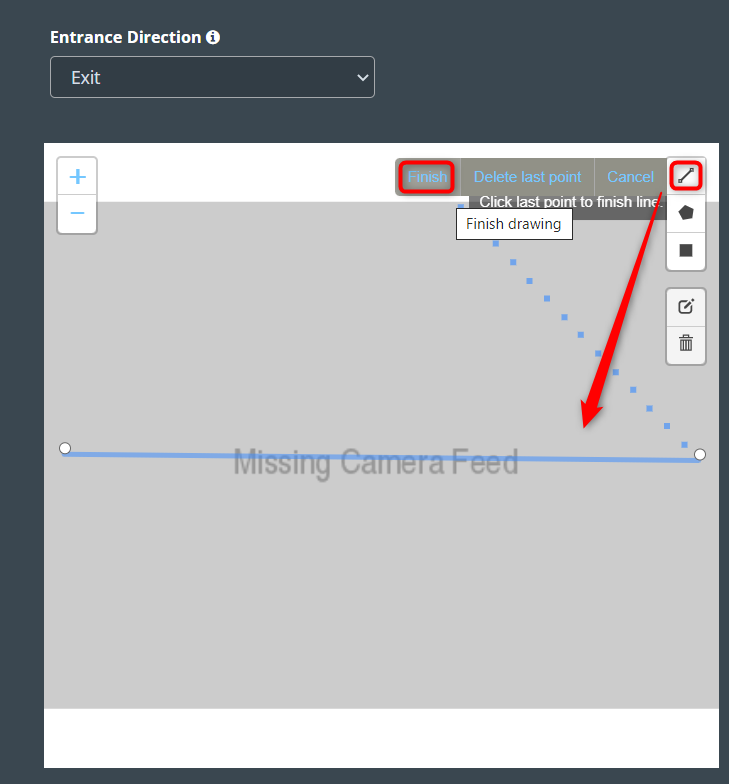
- Then enter the zone name in the popup window that opens and click the Save button.
Note: In this scenario, an Exit is recorded if an object crosses the entry/exit separator from top to bottom.

-
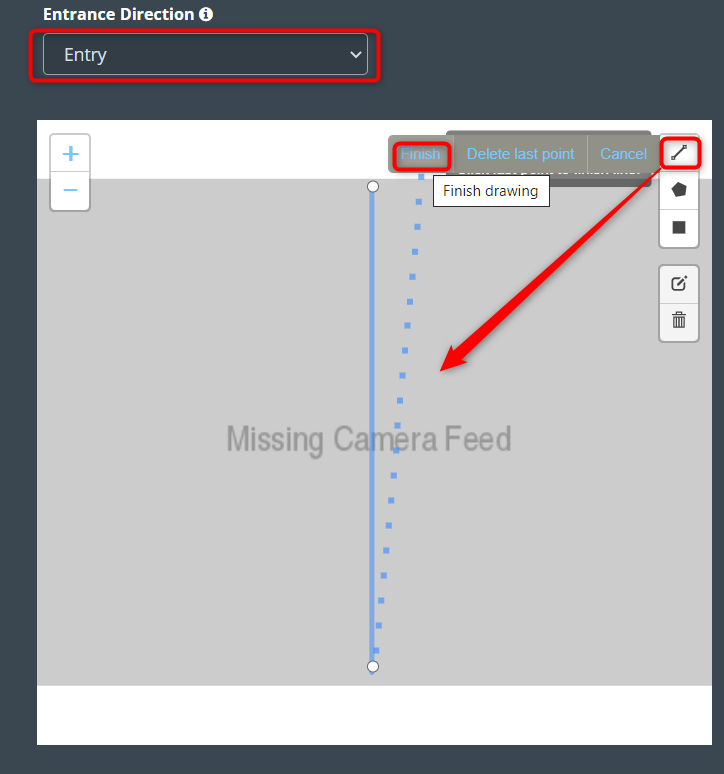
If you want to configure an entry count vertically, follow the steps below.
- Select the Entry option from the Entrance direction dropdown list.
- Then, draw a vertical line using a polyline tool. This line should have only two points.
- After drawing click the Finish button.
-
Then enter the zone name in the popup window that opens and click the Save button.
Note: In this scenario, an entry is recorded if an object crosses the entry/exit separator from left to right.

-
If you want to configure an Exit count vertically, follow the steps below.
- Select the Exit option from the Entrance direction dropdown list.
- Then, draw a horizontal line using a polyline tool. This line should have only two points.
- After drawing click the Finish button.
-
Then enter the zone name in the popup window that opens and click the Save button.
Note: In this scenario, an Exit is recorded if an object crosses the entry/exit separator from left to right.
Configuring the entry and exit options:
-
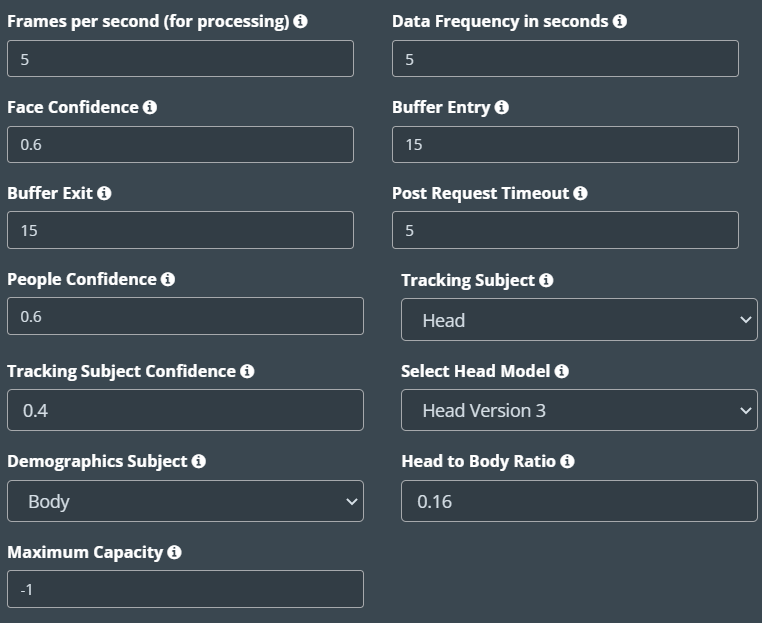
Buffer entry: This is an upside Pixel distance from middle line.
-
Buffer Exit: This is a downside Pixel distance from the middle line.
-
Tracking Subject: When tracking the camera, it decides whether to track the body or the head. When body tracking is occluded in crowded areas, head tracking can be used.
-
Boady: Entry/exit count is taken by full body tracking.
-
Head: Entry/exit count is taken by head tracking.
-
Tray: Counting the number of trays using the tracking tray. It can be used in places like Airports.
-
-
Tracking Subject Confidence: This value is the probability for the tracking subject chosen.
-
Select Head Model: The head model can be selected based on the resolution, distance, angle and available light of the camera used.
-
Head version 1: Works only on good lighting with any resolution. The maximum distance of the camera can be 15 meters with an angle range of 60°-80°
-
Head version 2: Works only on good lighting with a resolution of 640 x 480. The maximum distance of the camera can be 70 meters with an angle range of 80°-90°
-
Head version 3: Works on low and good lighting with a resolution starting from 640 X 480 to 4k. The maximum distance of the camera can be 120 meters with an angle range of 60°-90°
-
Head version 4: Works on low and good lighting with a resolution starting from 640 X 480 to 4k. The maximum distance of the camera can be 300 meters with an angle only of 90°
-
-
Demographics Subject: Helps to calculate the gender and age of the person entering, using their body and face.
-
Head to Body Ratio: This value can be used to determine whether the person entering is an adult or a child. If the ratio is greater than 0.16, the person is considered an adult; if it is less than 0.16, the person is considered a child.
-
Maximum Capacity: It helps determine the maximum number of people a zone can accommodate.
- Remove side faces: Eliminates the side profile face of an individual for better accuracy in detecting demographics.
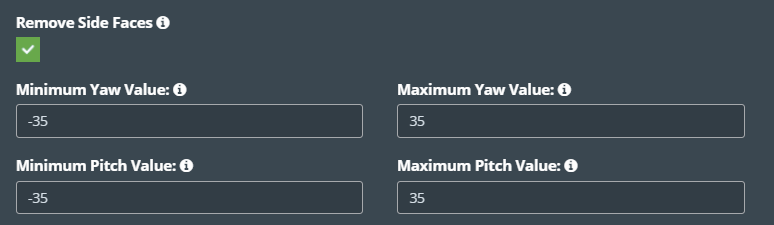
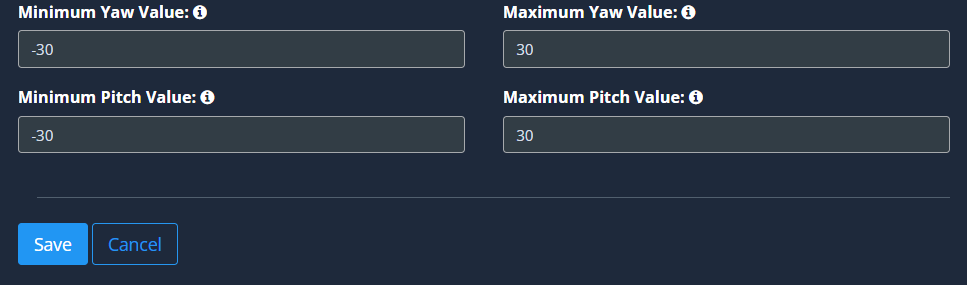
- Min Yaw Value and Max Yaw Value: If this limit is set to more than -35 or +35, ignore the detection of faces in the left/right direction.
- Min Pitch Value and Max Pitch Value: If this limit is set to more than -35 or +35, ignore the detection of faces in the up/down direction.
-
Frames per second, Data Frequency in seconds, Face Confidence, Post Request Timeout, and People Confidence, are common in some use cases. Refer General Configuration section to know more about these.
-
Click the Save button to save the changes.