Add a Controller to KloudManage software
Onboarding a KloudController
-
Once Installation is complete, we can proceed to the next step, which involves adding the KloudController to Kloud Manage Application.
-
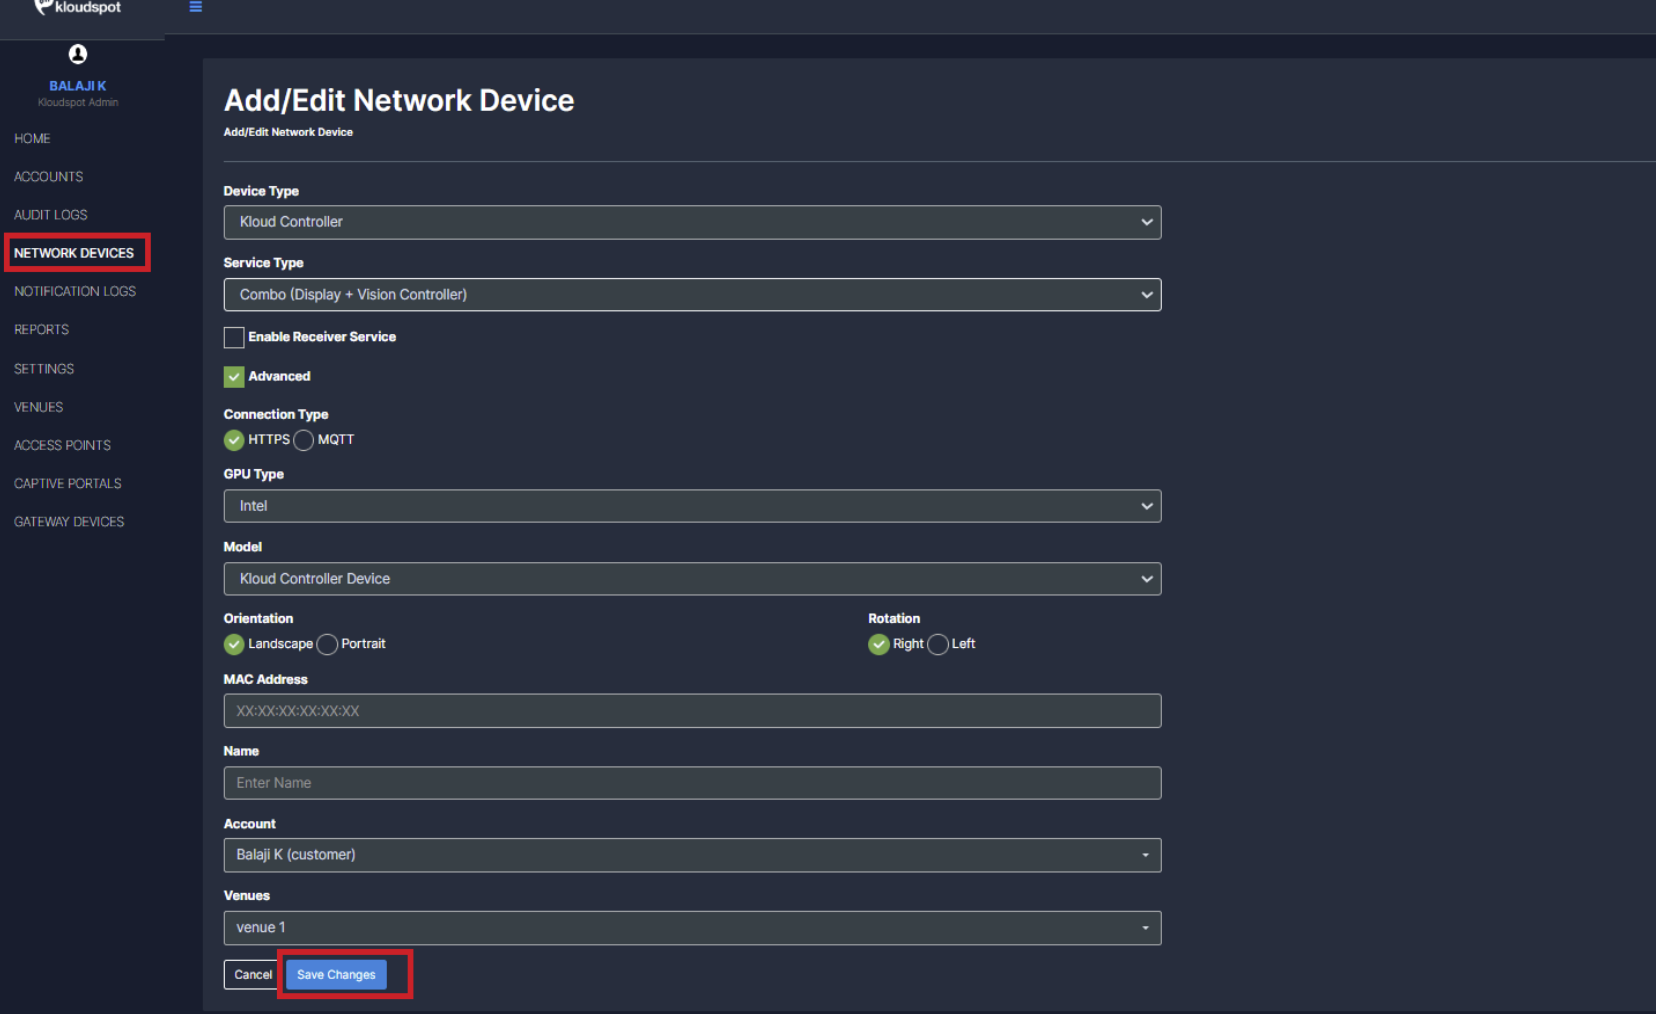
For that login to the Kloud Manage Application. Navigate to NETWORK DEVICES > Add Network Devices.

• Enter the following in the window that opens and click the Save Changes button.
-
Device Type: Select Kloud Controller from the dropdown list.
-
Service Type: Select Vision if only Vision Service is required Select Display if only Display Service is required Combo device (Display + Vision controller) from the dropdown list if both Display and Vision is required
NOTE: If you’re unsure about the specific service, select “Combo device.” If you add the device as “Vision” and later need to enable “Display,” you will have to delete and re-add the device, which may result in data loss.
• Connection Type: Select your connection type HTTPS – Use HTTPS for a secure, encrypted connection over port 443. MQTT – Choose MQTT for low-latency real-time communication
• GPU Type: Select your GPU Type KloudController supports both Intel and NVIDIA GPUs. we can select the appropriate GPU type based on their hardware configuration.
• Orientation: If you selected combo device then select Display Orientation.
KloudController supports both Landscape (Wider Width) and Portrait (Taller Height) orientations. we can choose the preferred orientation based on their display setup and requirements.
• Rotation: Select Rotation type.
    Rotate Left (Counterclockwise 90°) → Switches from Landscape to Portrait (Left).
    Rotate Right (Clockwise 90°) → Switches from Landscape to Portrait (Right).
• MAC address: Enter the MAC address of your controller. (To find correct MAC Address refer to Section: 5.3 post-installation setup)
• Name: Give a name for the controller.
• Account: Choose the appropriate account where the KloudController needs to be added.
• Venues: Choose the appropriate Venue where the KloudController needs to be added.
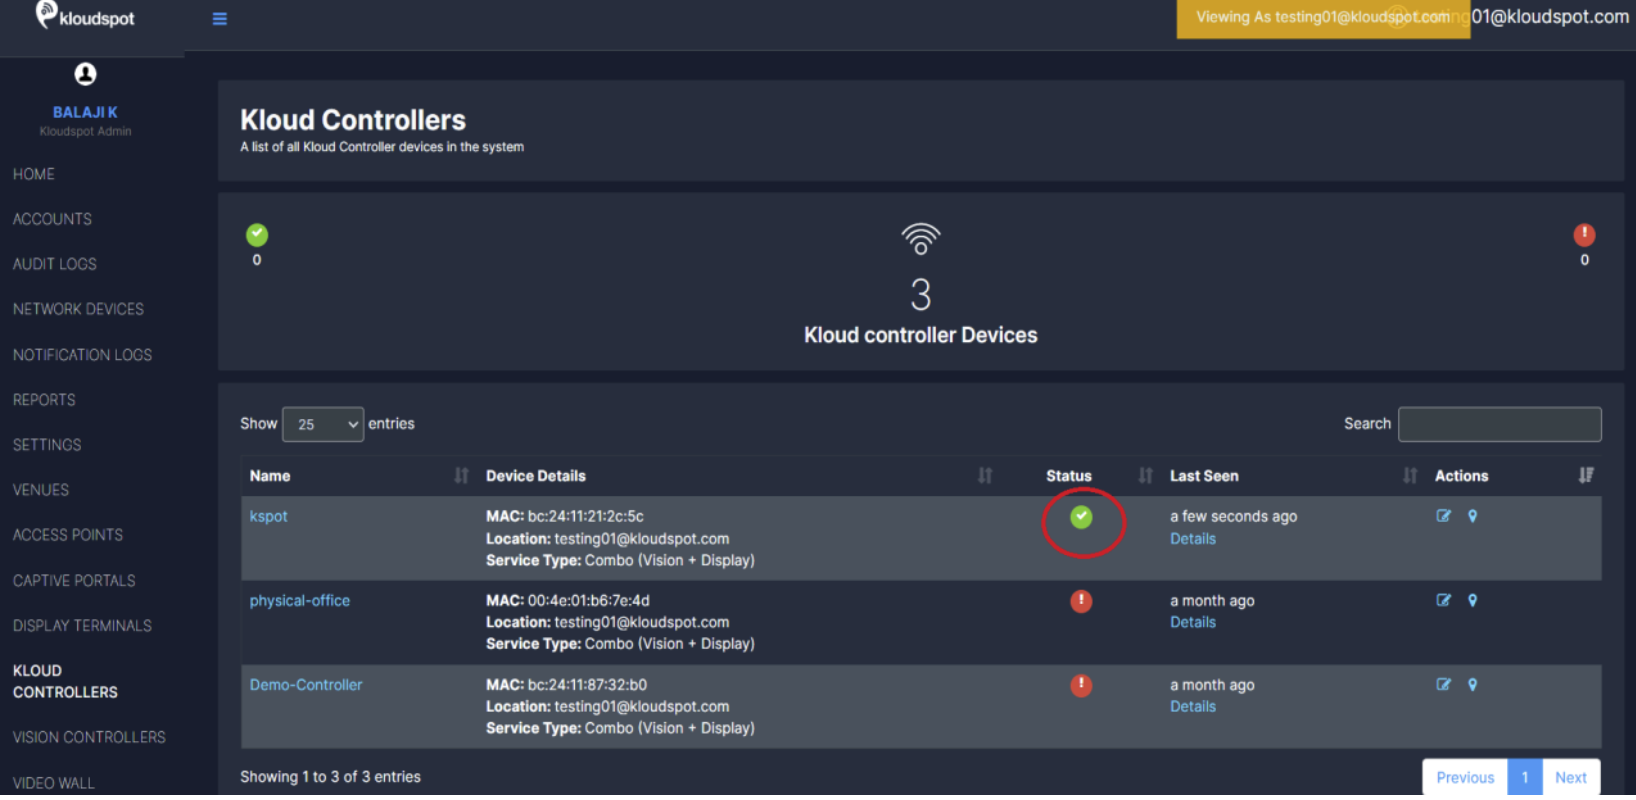
• Once the KloudController is onboarded, the required licenses must be provided by the Kloudspot Team to enable communication with the Kloud Manage Application.
- The Kloudspot Team requires the MAC Address of the controller for license provisioning.
- After the license is provisioned, users can check the connectivity status:
Green Status → Controller is Online.
Red Status → Controller is Offline.