With a clear understanding of the system requirements for deploying the KloudVision video analytics platform, the next step is to begin the installation. This section outlines the step-by-step process to install KloudVision on the designated controller—the central hub that manages camera integration, data processing, and the user interface. The installation covers everything from obtaining the necessary software components to configuring the platform on the controller.
Pre-Installation Checklist
Before installing KloudController OS, ensure the following prerequisites are met:
Hardware Compatibility:
• Verify that the hardware meets the supported requirements. Refer to the Supported Hardware section for details.
Download the OS Image:
• If you are using an NVIDIA GPU-based controller, please contact Kloudspot team to obtain the appropriate Kloud Controller OS image based on the NVIDIA driver available in controller
• If you are using an intel GPU-based controller, Download the latest version of the KloudController OS image from the below provided
link:https://registry.kloudspot.com/repository/files/isos/kloudcontroller-x86_64.iso
• Ensure you download the latest version for improved functionality and updates.
Prepare the Bootable USB:
• Use one of the following tools to create a bootable USB drive:
(We recommend using Balena Etcher for smooth installation)
Balena Etcher (for mac / Linux / windows): Link to tool
Download the Balen Etcher and ISO file
Install Balen Etcher (if not already installed
Plugin the flash drive in the same system
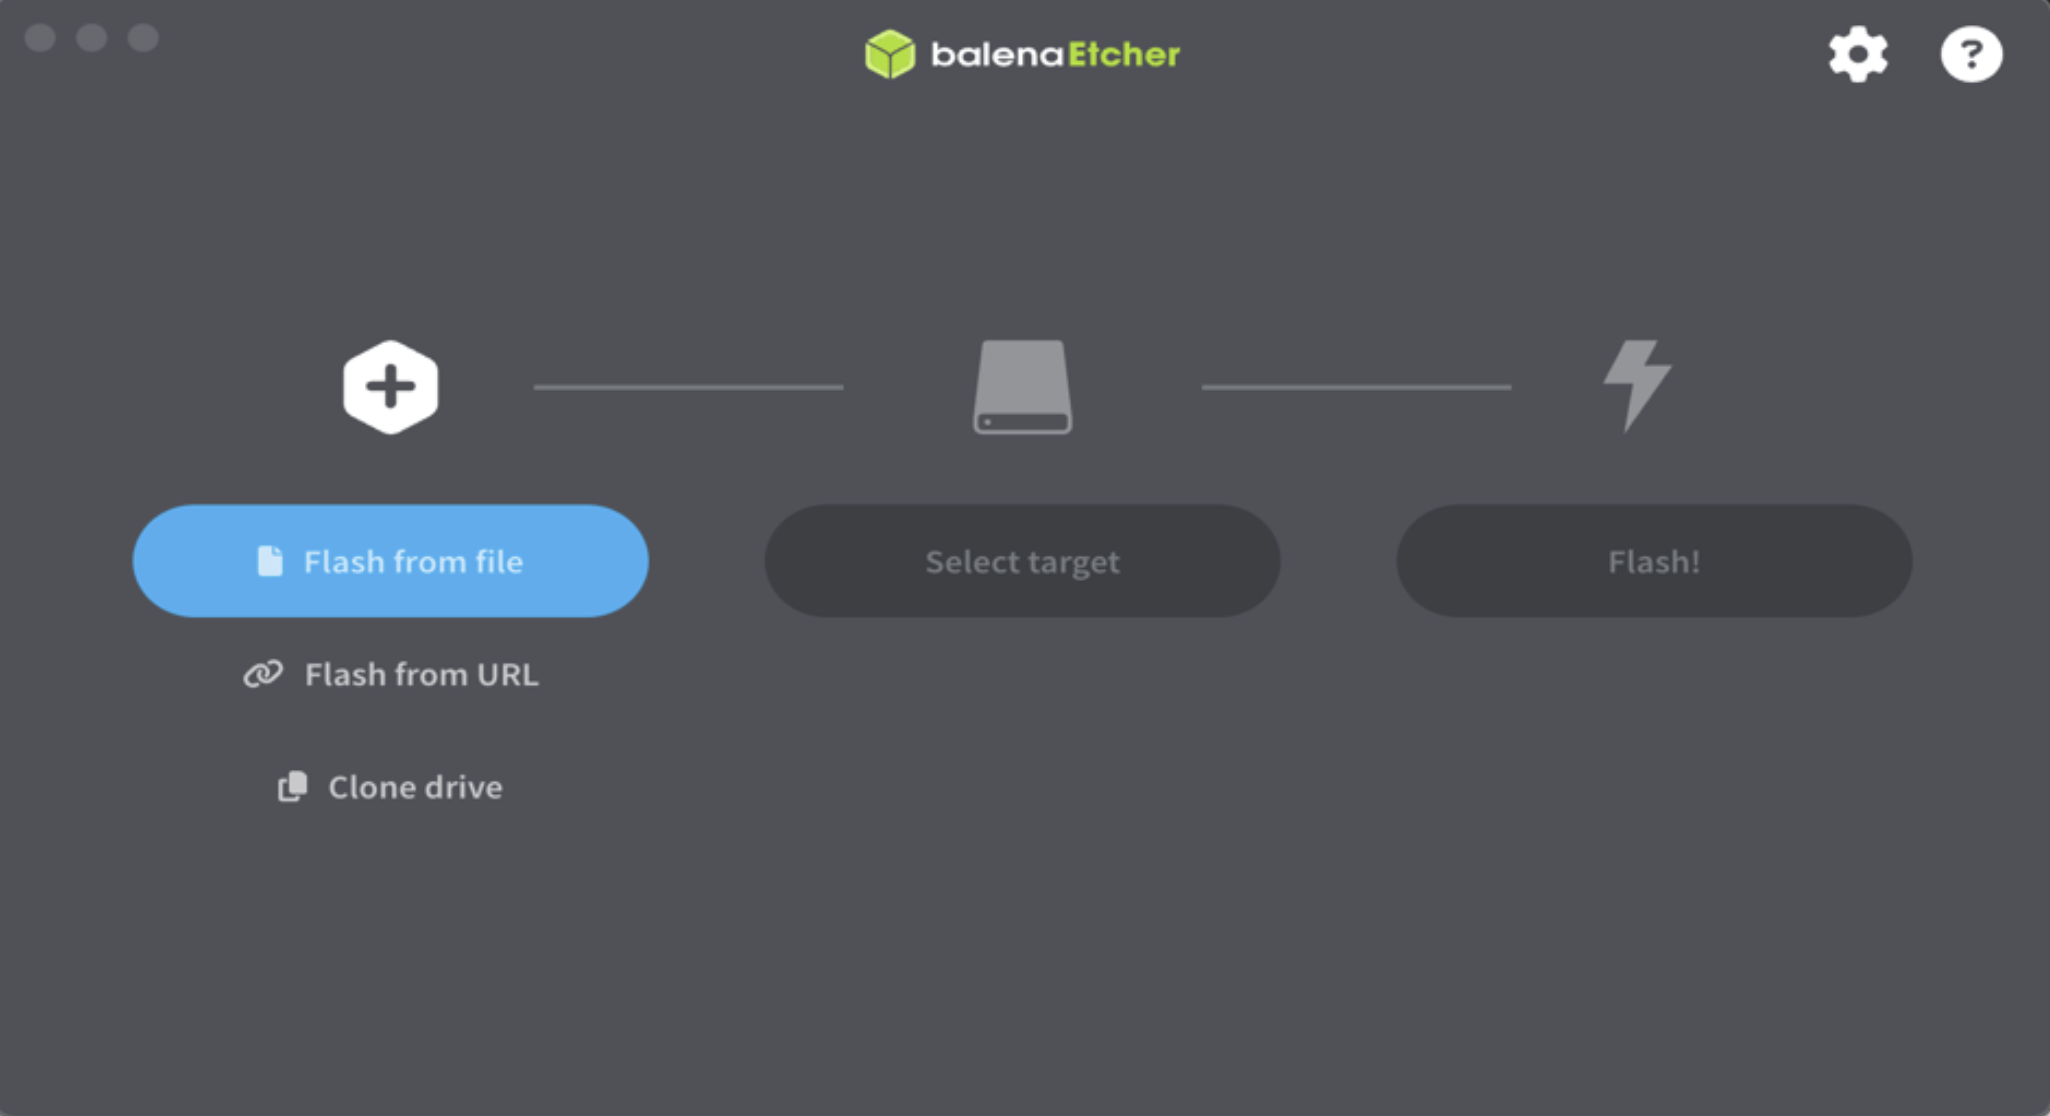
Open Balen Etcher application
Click on “Flash from file
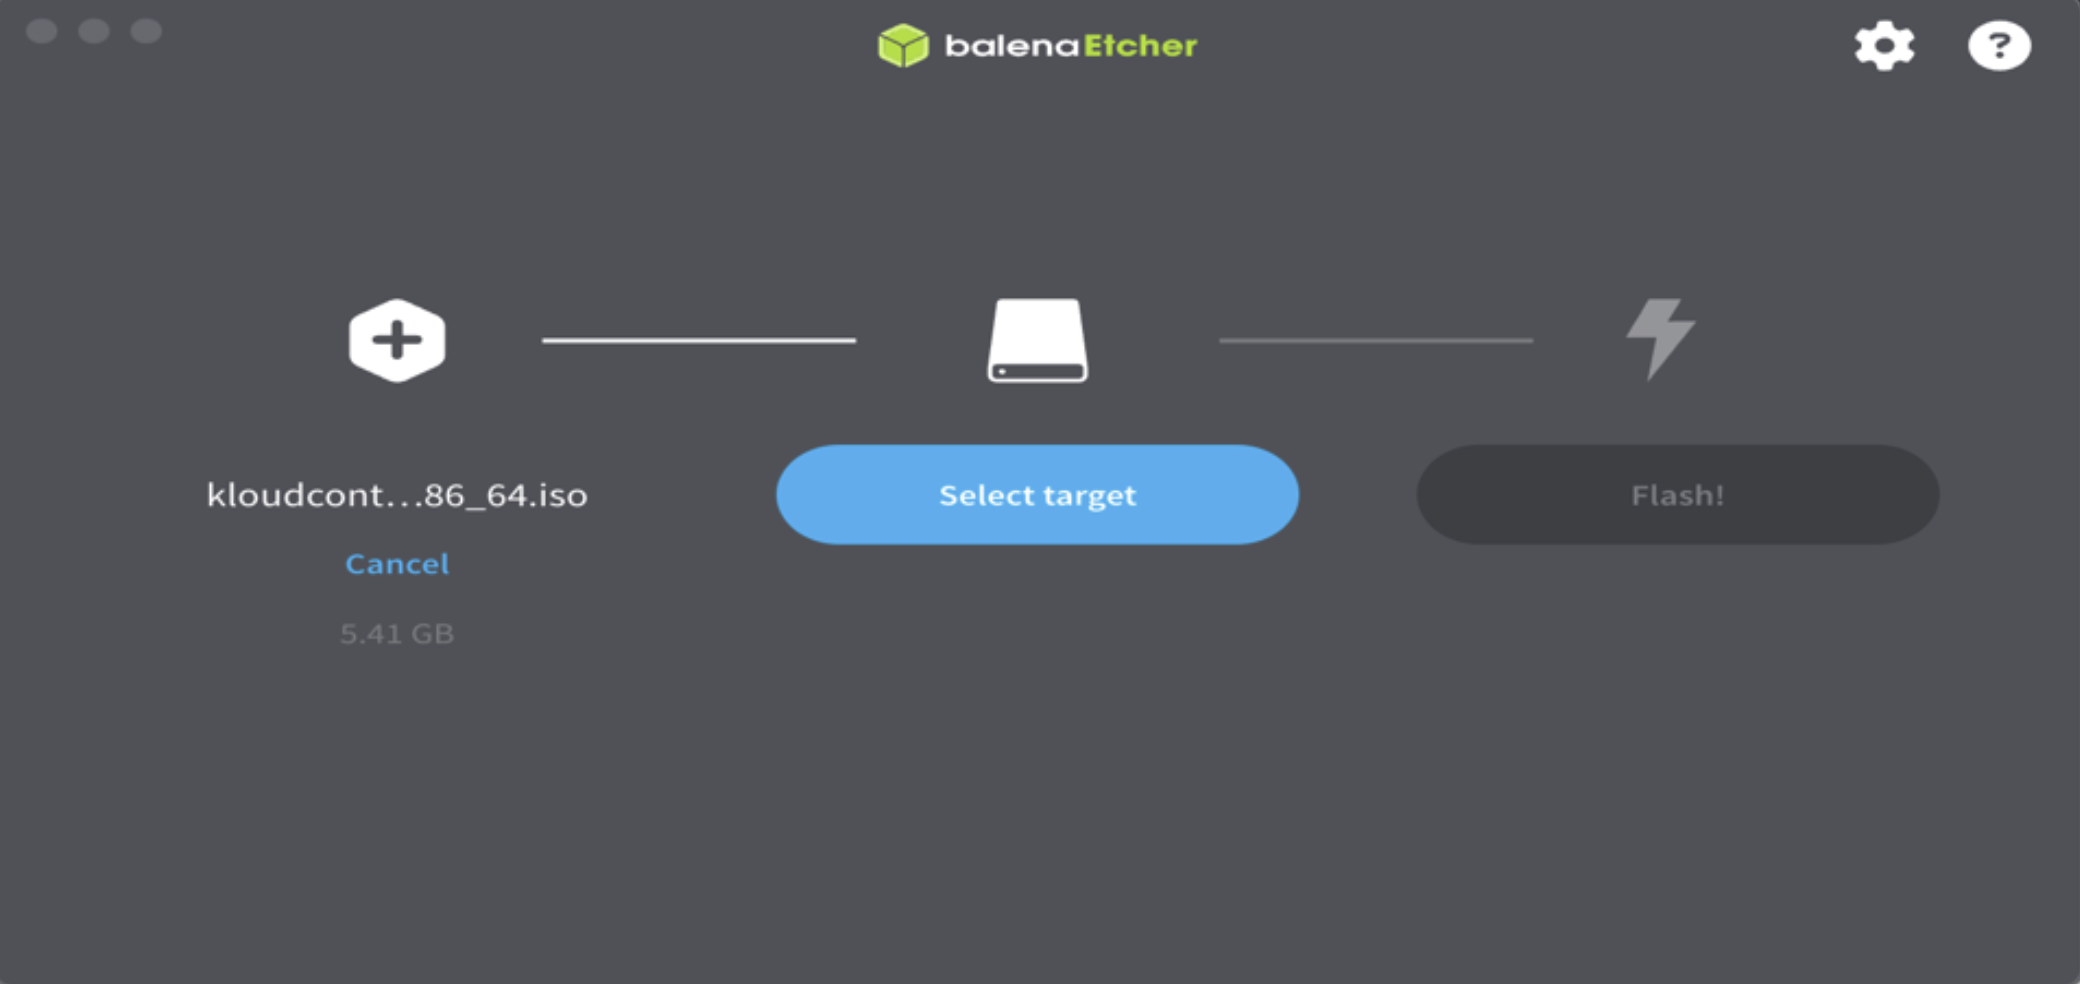
Select the Downloaded ISO file and press open
Now click on “Select Target”
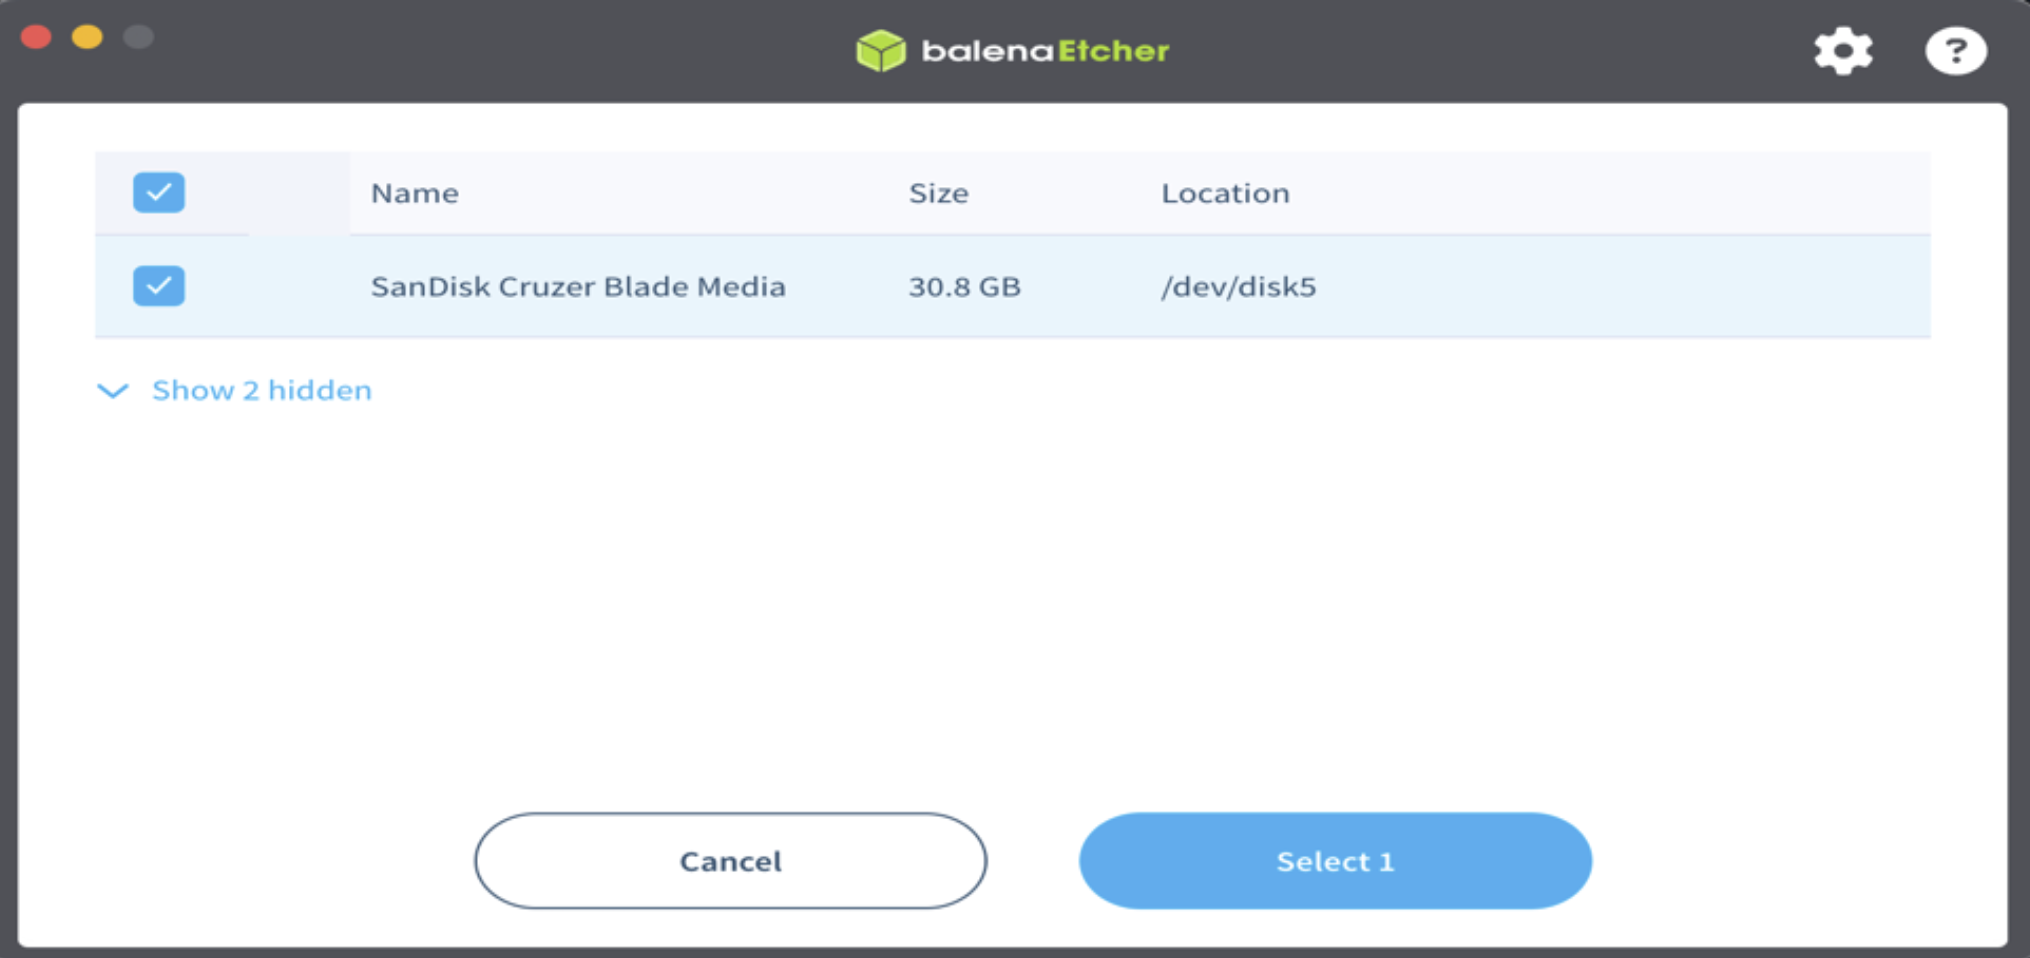
Select the Pen drive you plugged-in.
Note: (Here we are using SanDisk 32GB pen drive.)
[*Your Pen drive/USB drive will be formatted now. Please do take backup of any files before proceeding to the next steps]
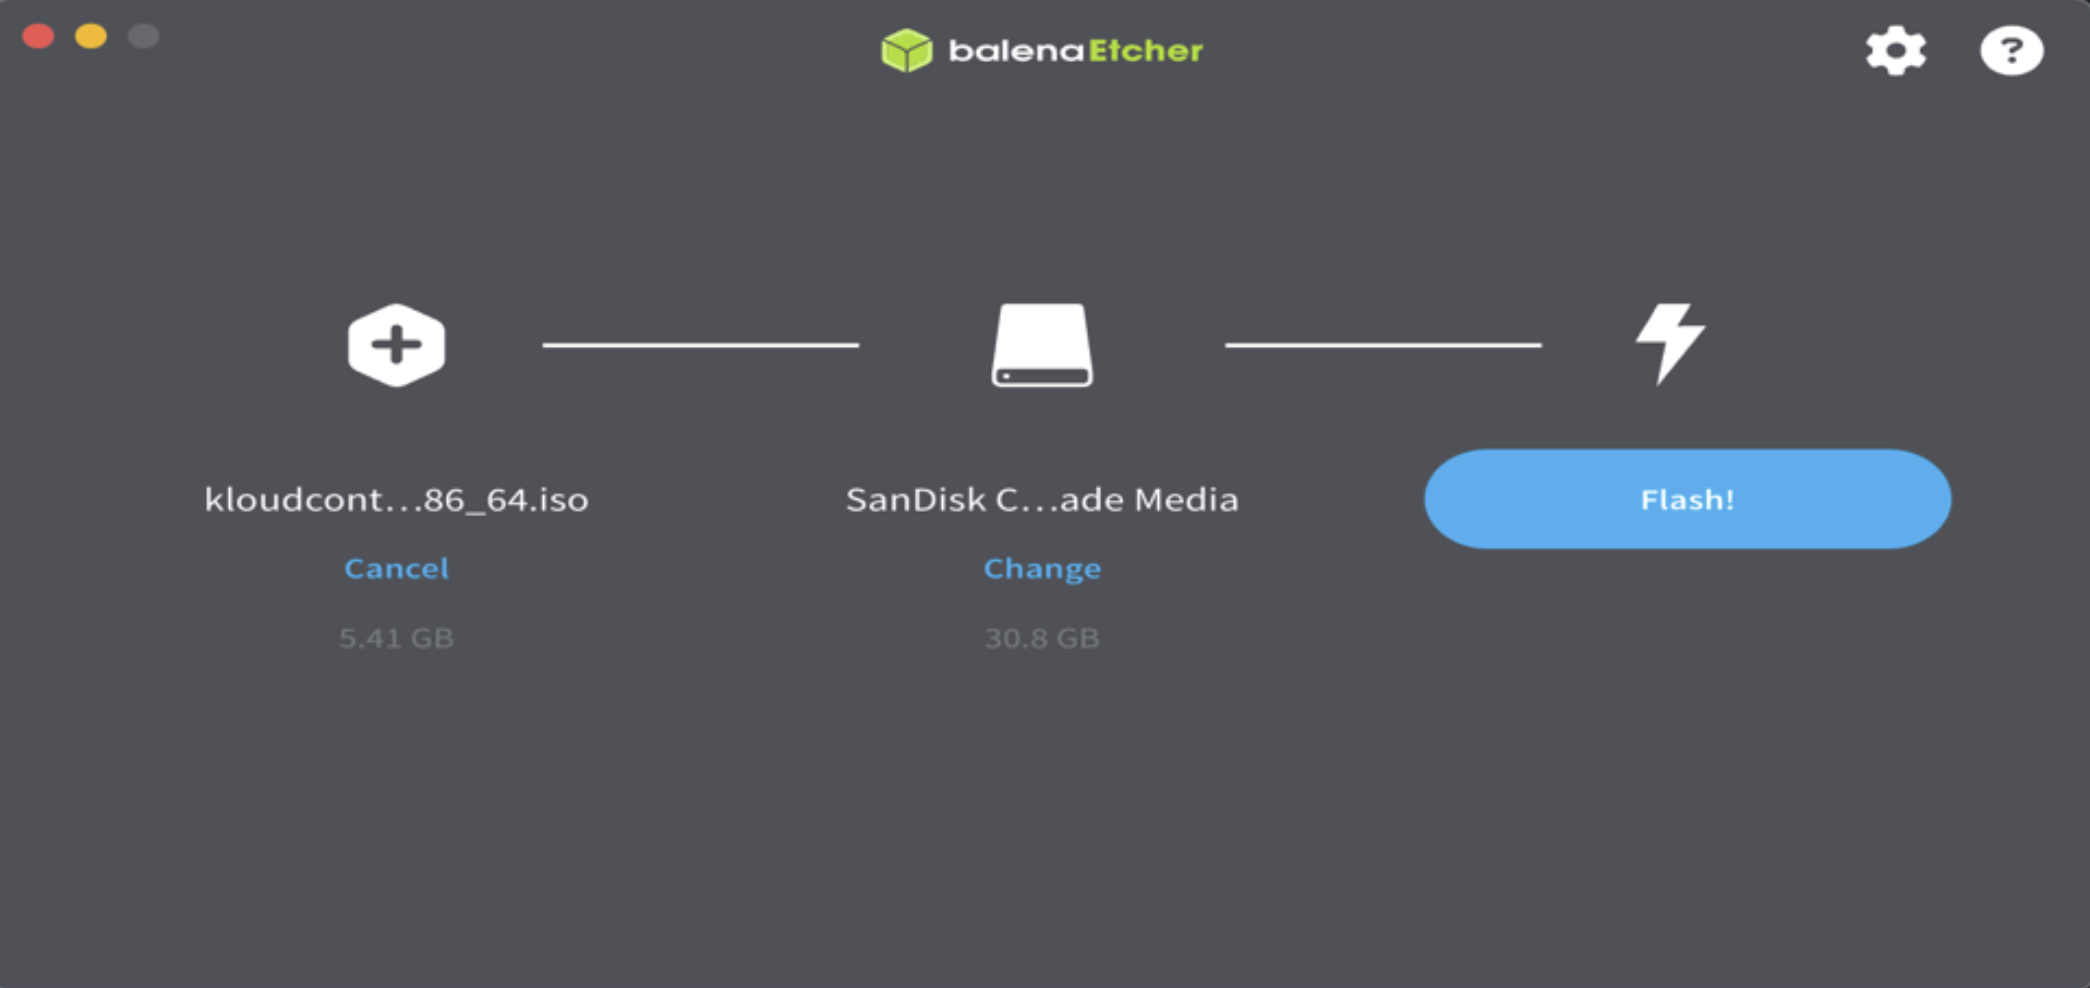
9. Now click on “Flash” button
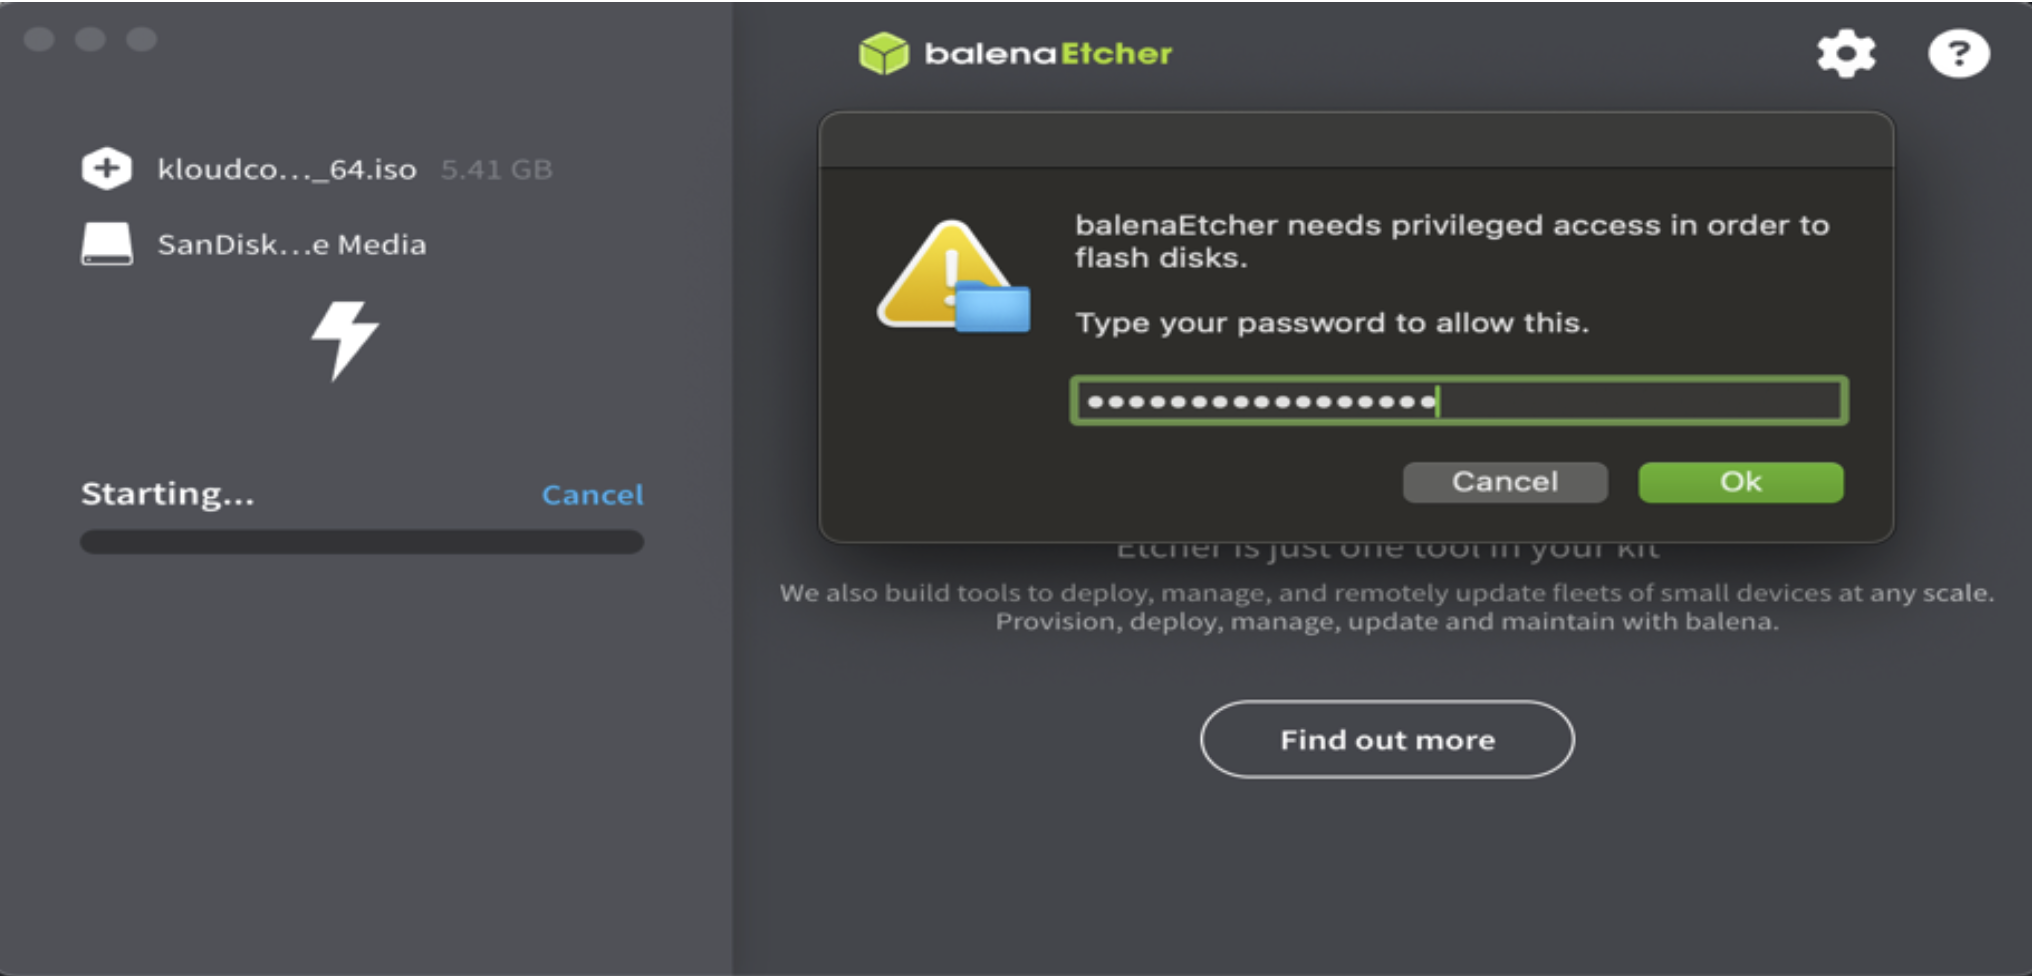
10. Based on the OS you are using, it will ask for Administrative Permissions / Elevated Privileges.
Note: (If we are using MAC Book, we need to provide MAC Book laptop password or
if we are using windows allow administrative access)
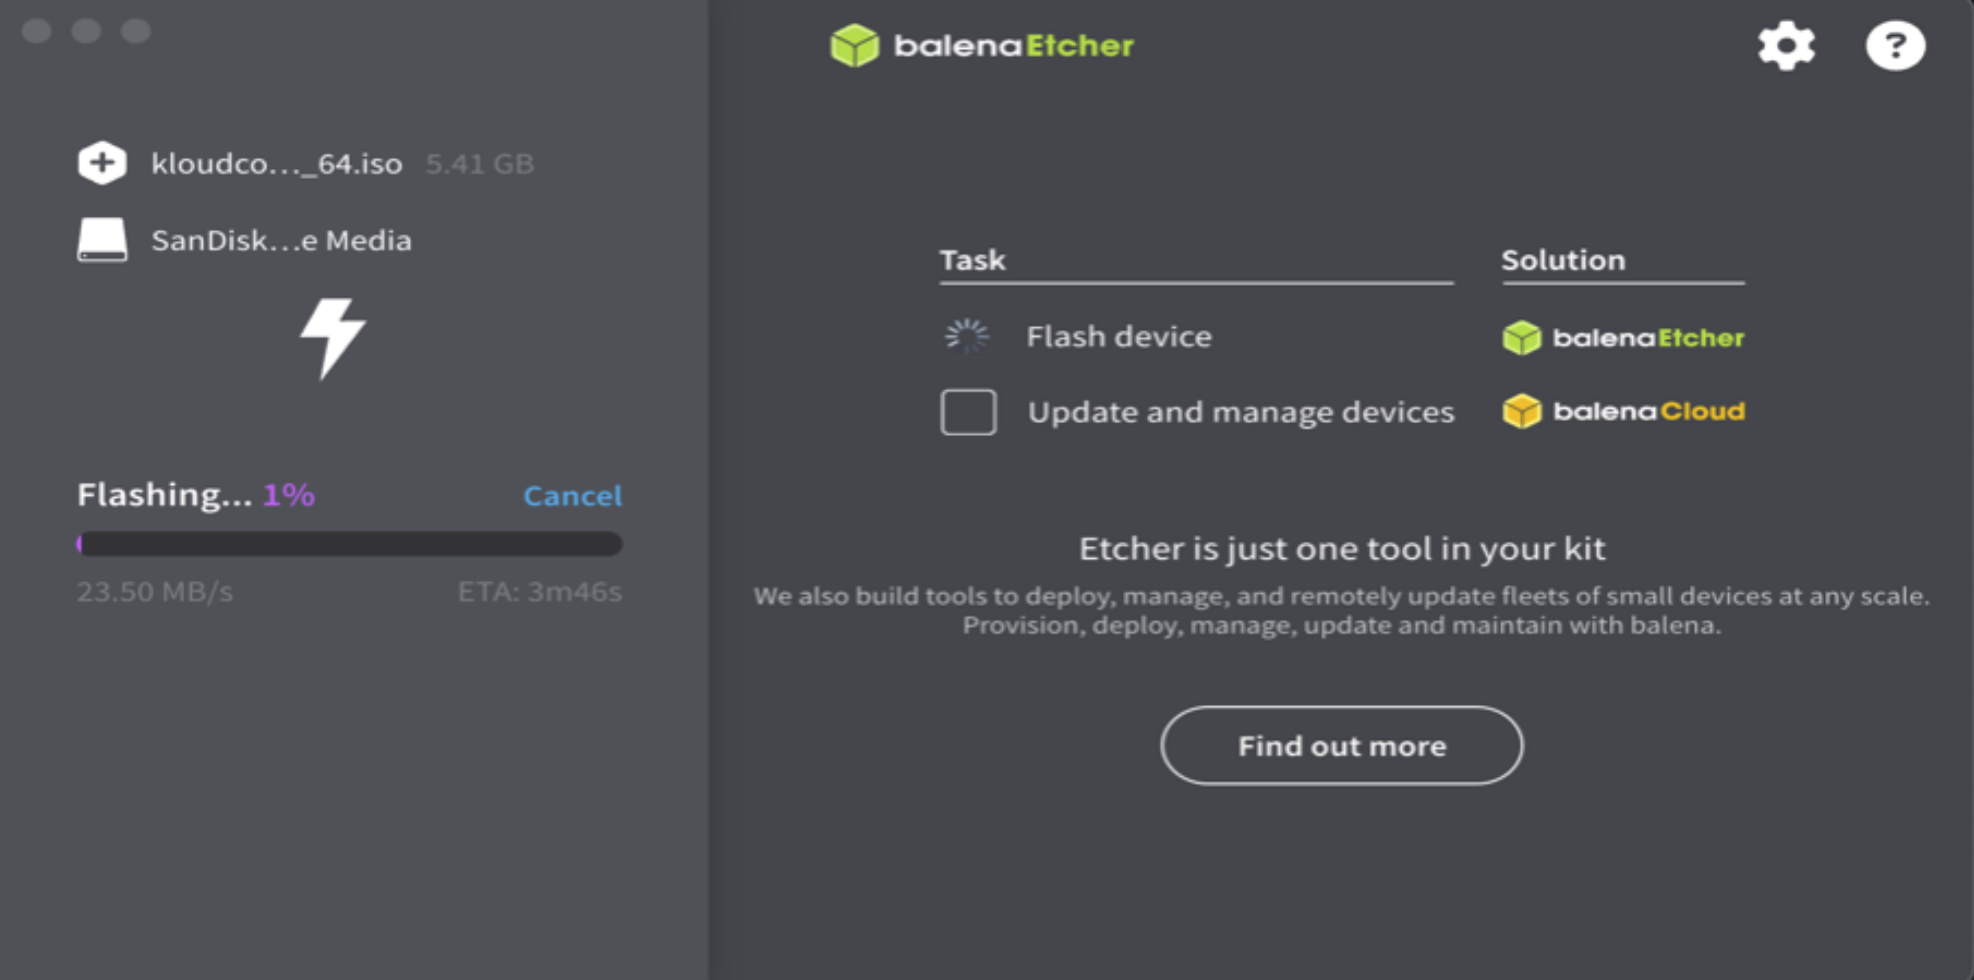
12. Once done, the flashing will start, and a progress will be shown.
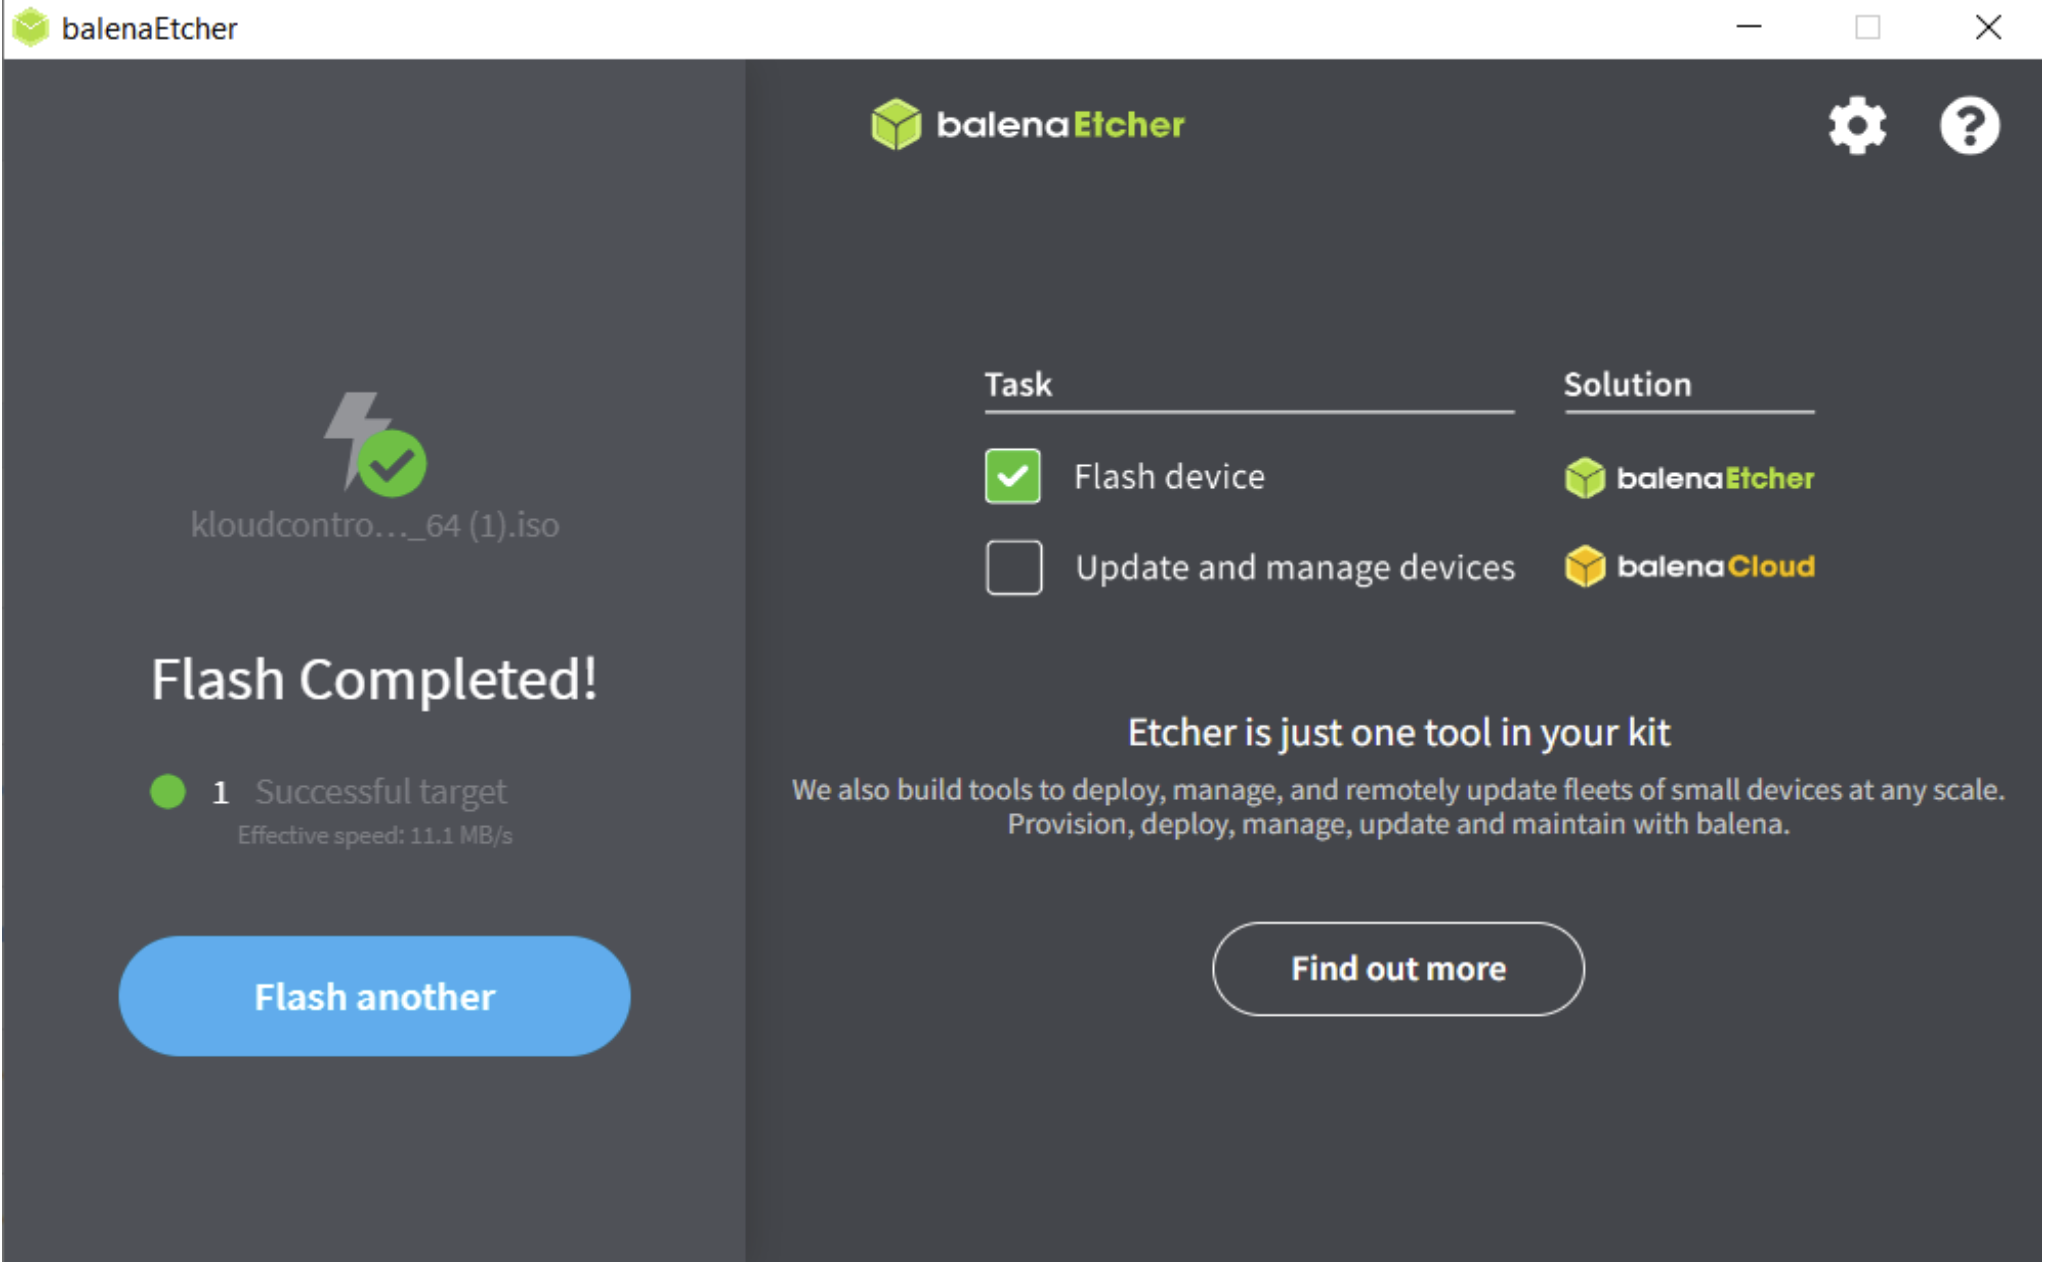
13. Once the flashing is completed it will Validate the ISO
We are now ready to use this flash drive to install the KloudController OS.
Installation Procedure
• Disable Secure Boot:
We must connect a Keyboard, display and insert flash drive (Pen drive) to the controller to install KloudController ISO
For Disabling Secure Boot, we need to go to device BIOS menu
The BIOS key is typically F2 or Delete, but this may vary based on the hardware make and model.
try pressing F2 during startup of controller.
Navigate to Secure Boot Menu -> By Default, Attempt Secure Boot [ ] , Turn Attempt secure Boot to [X]
Refer to the device BIOS manual for instructions on disabling secure boot as it may vary from Hardware to Hardware.
Flashing Instruction:
• Preparation:
Disconnect the internet cables from the system before flashing the ISO.
Plug in the prepared flash drive (pen drive) to the target controller / system.
Make sure to Disable secure boot from the Boot menu. (Screenshots shown above)
• Boot From Flash Drive
• For Loading the Boot Menu press F12(depends on BIOS firmware. Please check manual or internet for right key) during startup of controller.
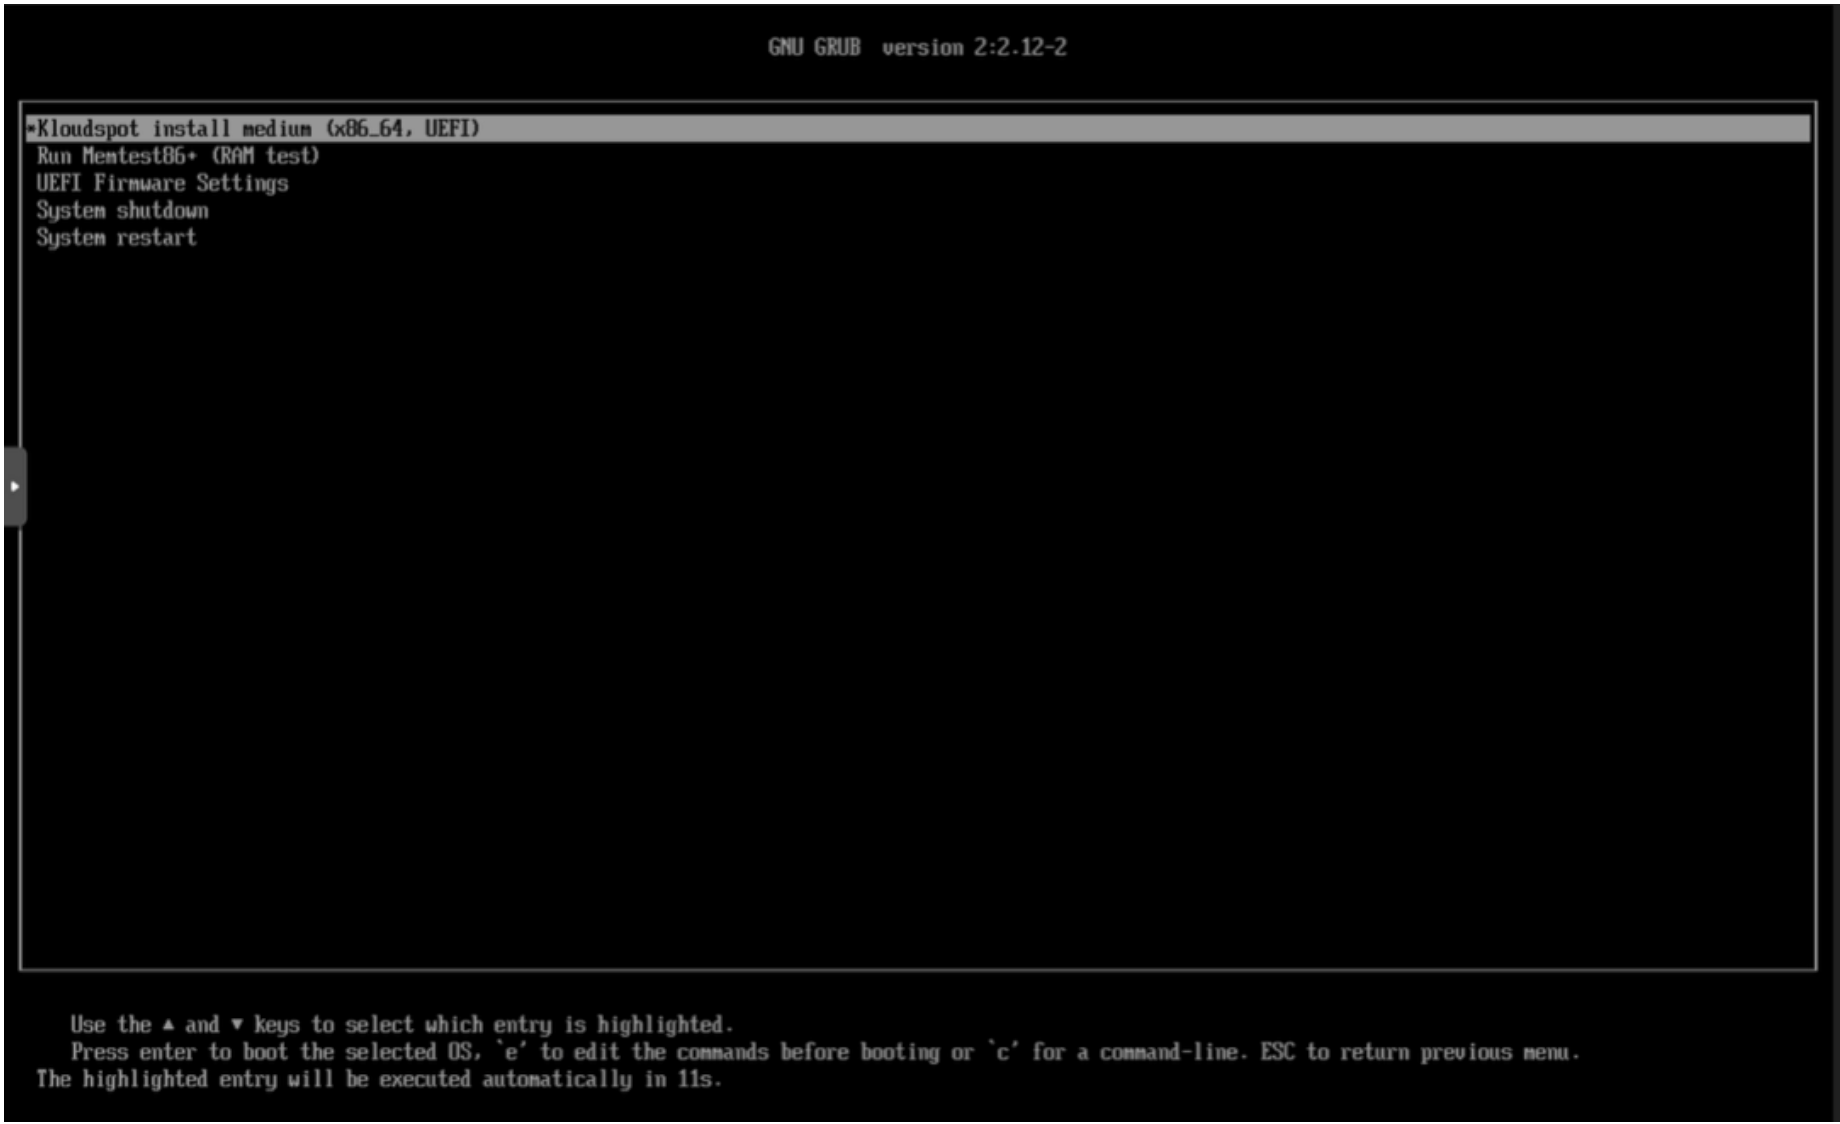
• Boot the system from the flash drive, and you will see a screen with several options
Choose “Kloudspot install medium (x86.64, UEFI)”
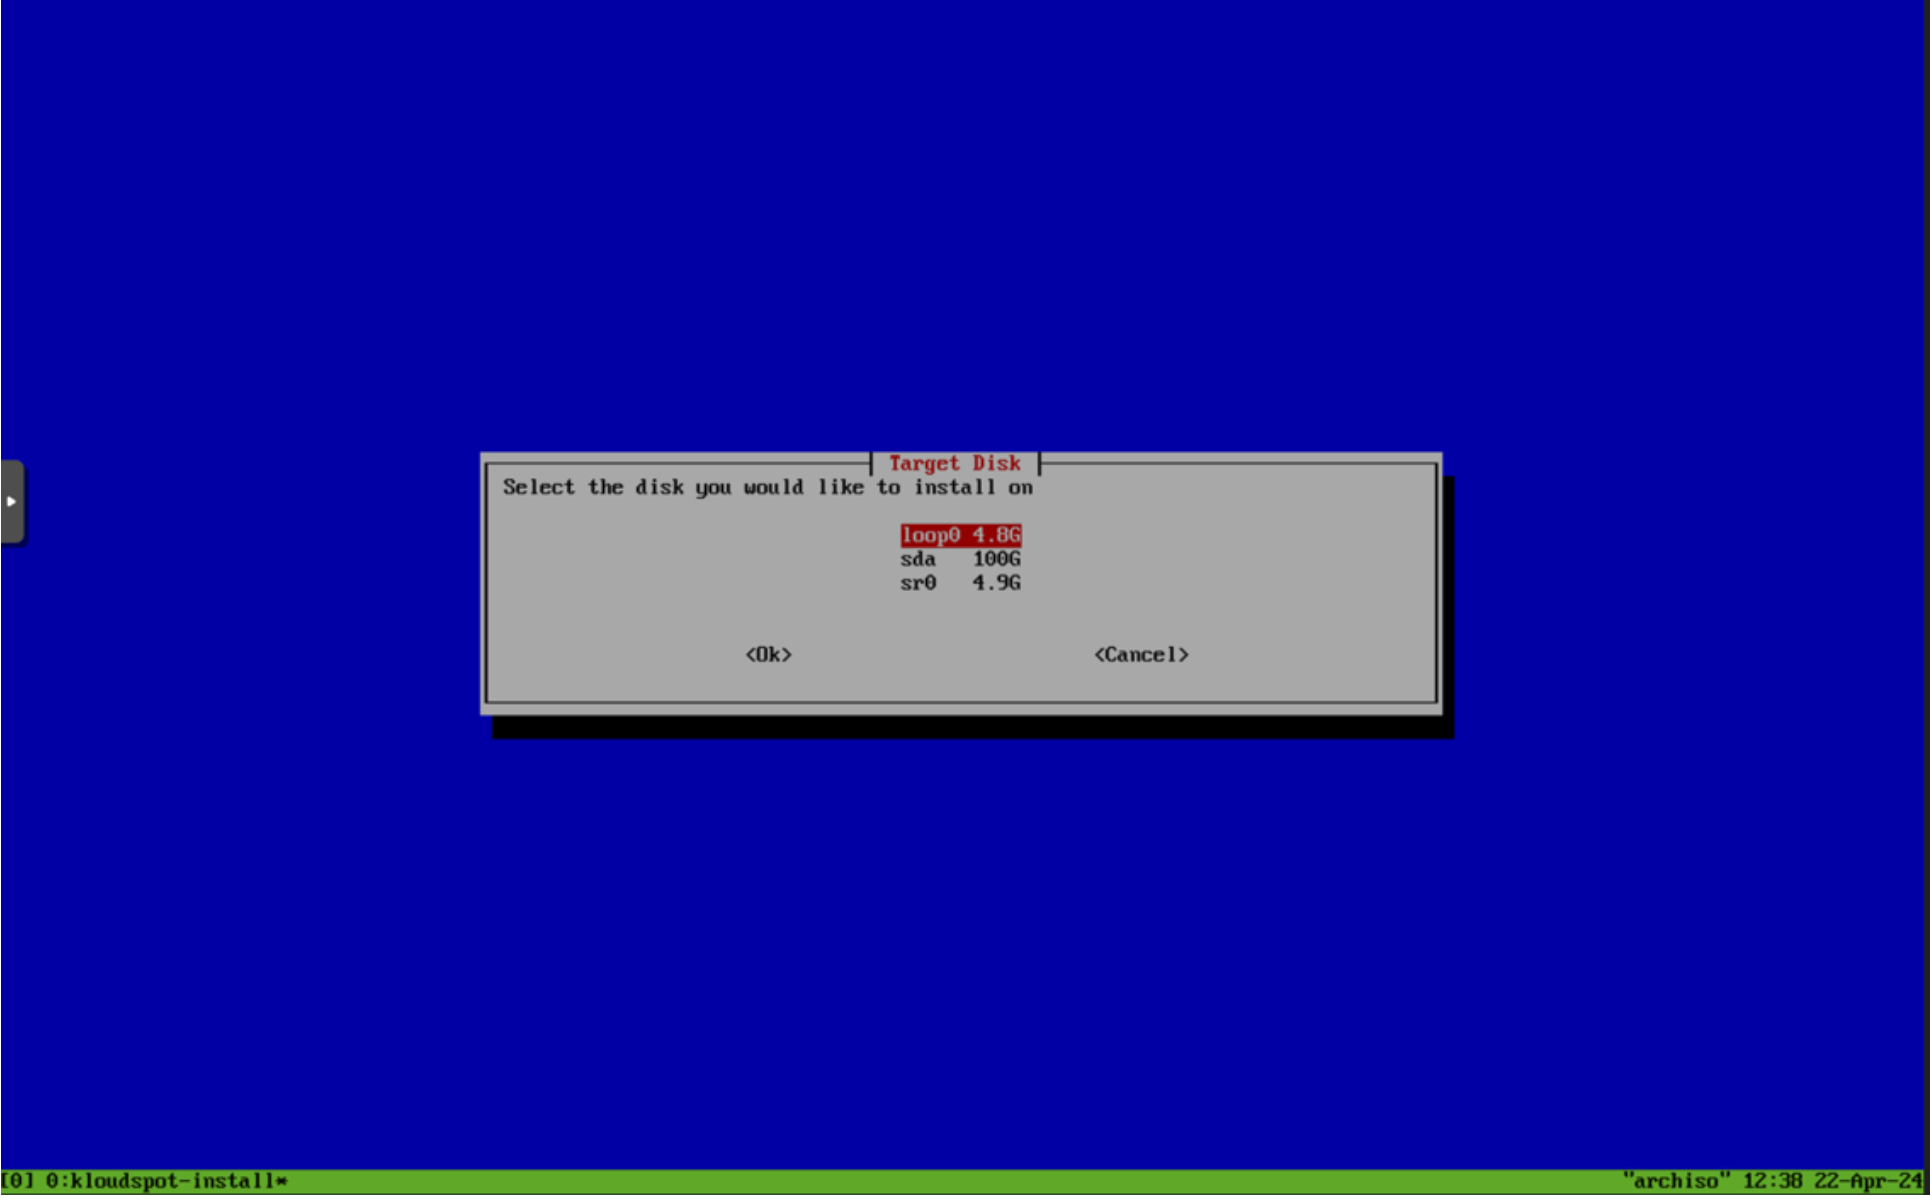
• Installation
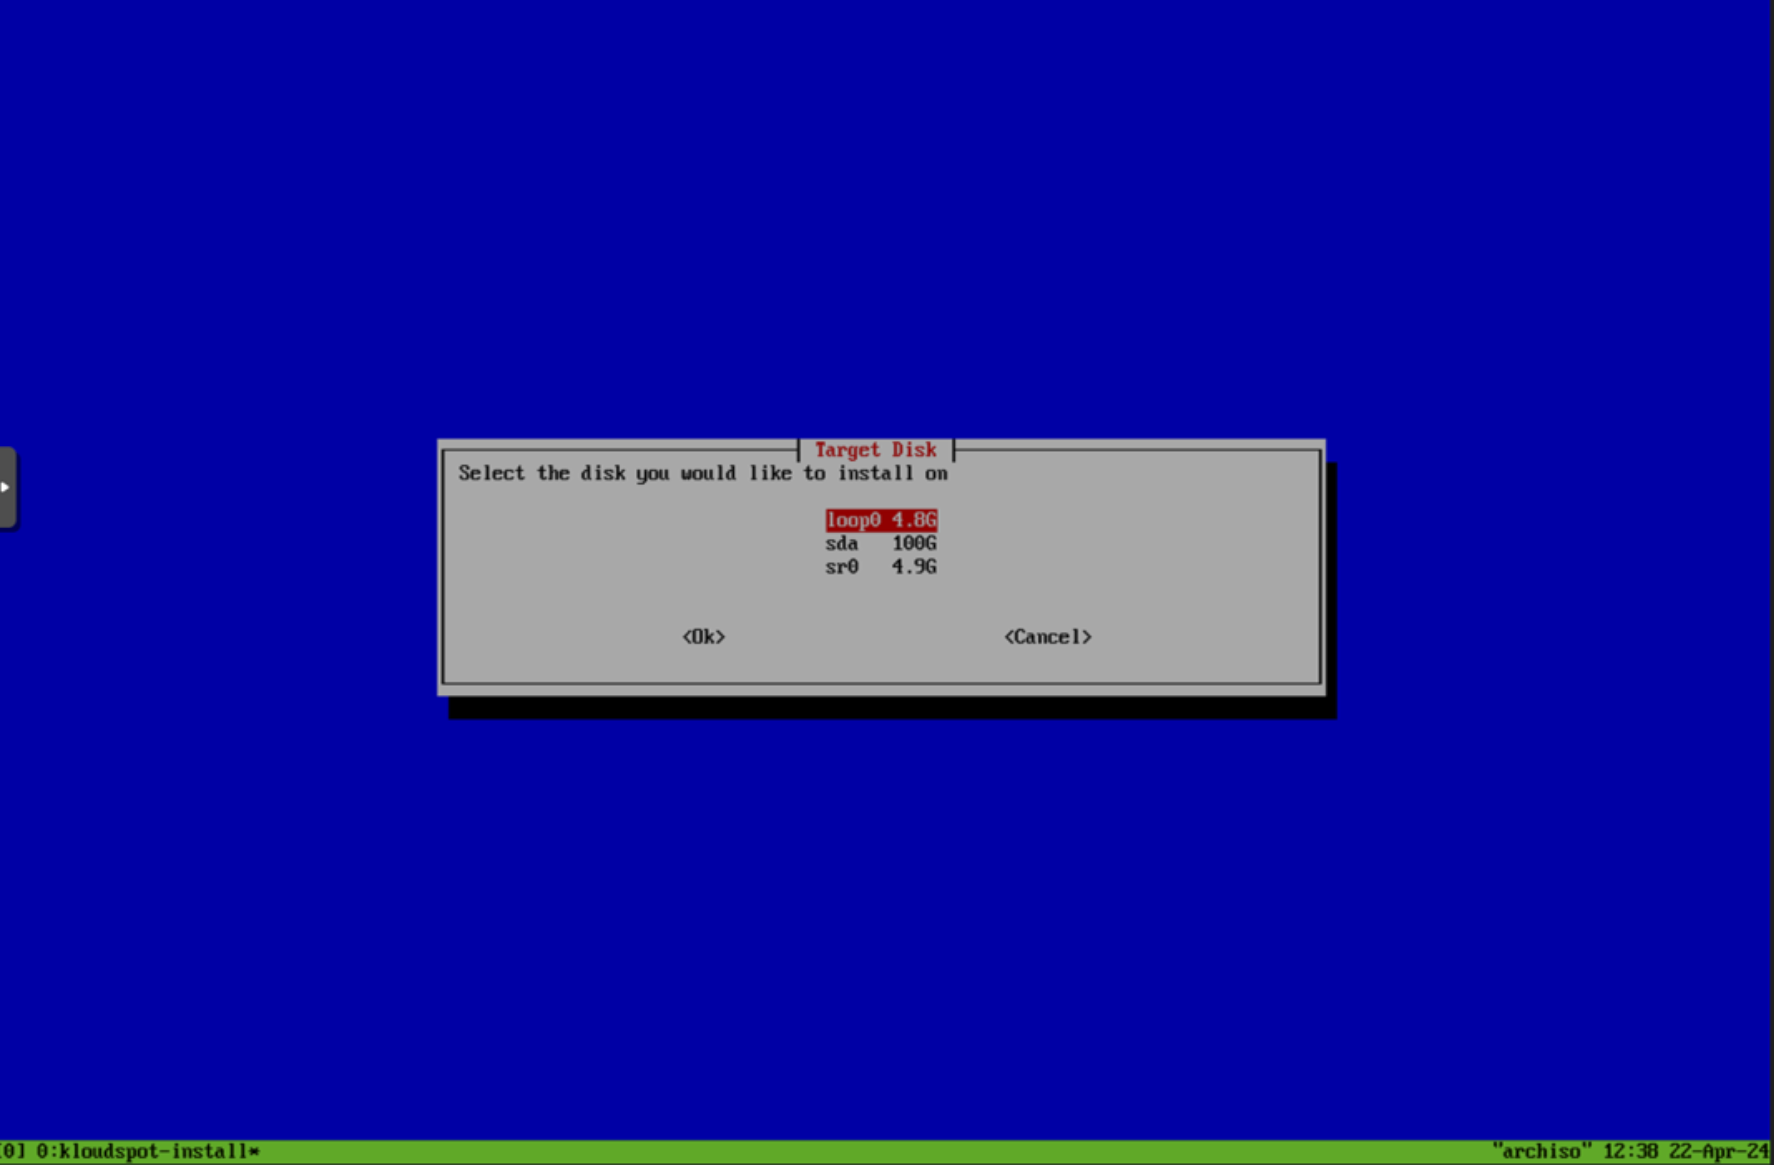
• First screen lets you select the drive where you want to install. Select the appropriate SSD or HDD based on your system’s storage size. For example, we are using a 100GB SSD, so we select option 2. [Please do not Select “loop0” or “sr0” Since they are the flash-drive and CD drive respectively. ]
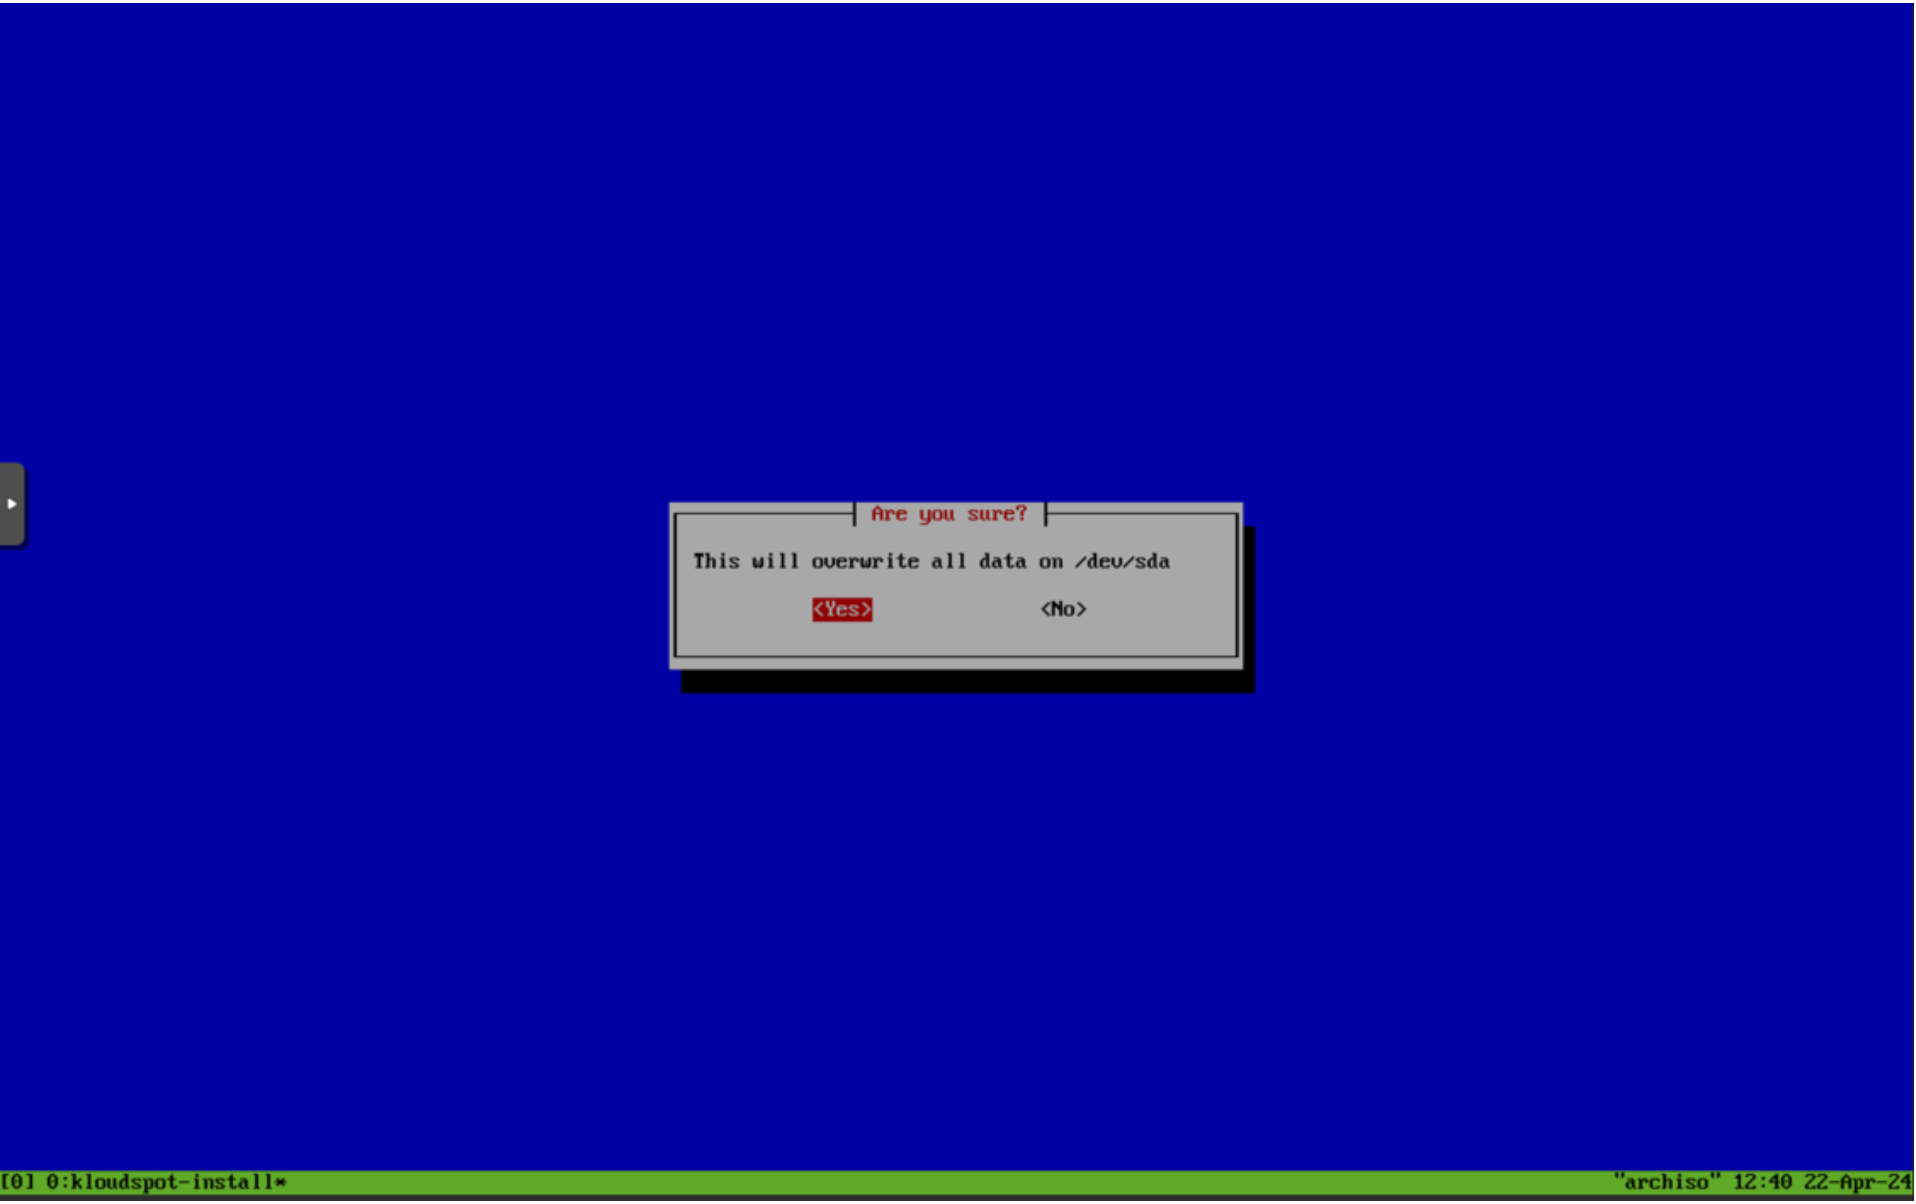
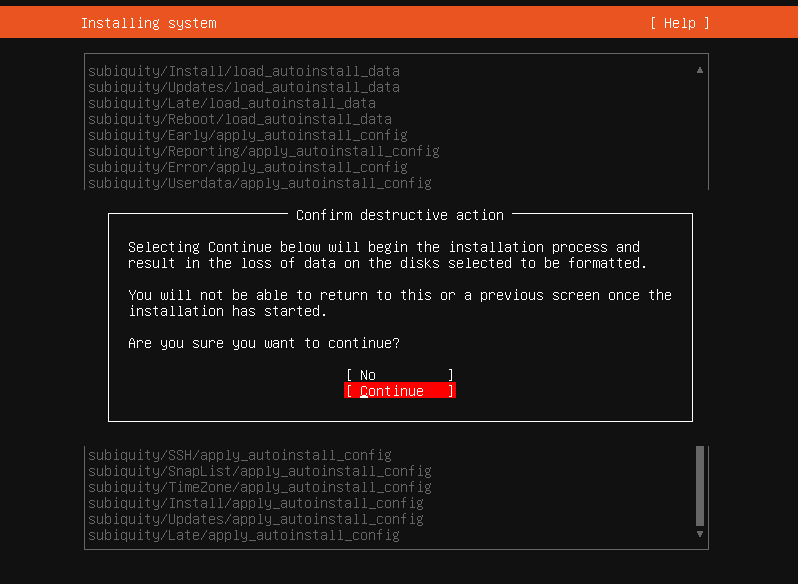
• Confirm the selected drive.
NOTE: This will delete all your data in the Disk, including any OS installed on this controller, please take a backup if it’s necessary
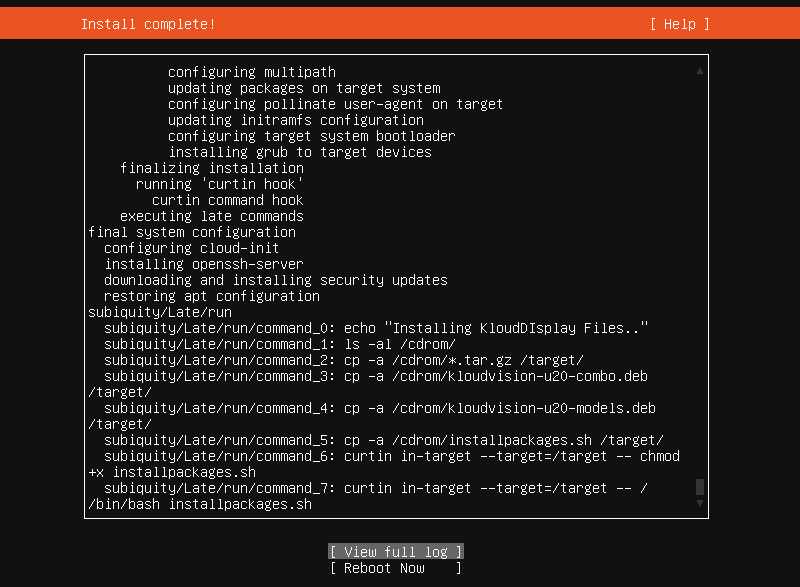
After this step, the Installation Procedure Starts. It installs a bunch of packages and drivers. Some of the step might take a lot of time.
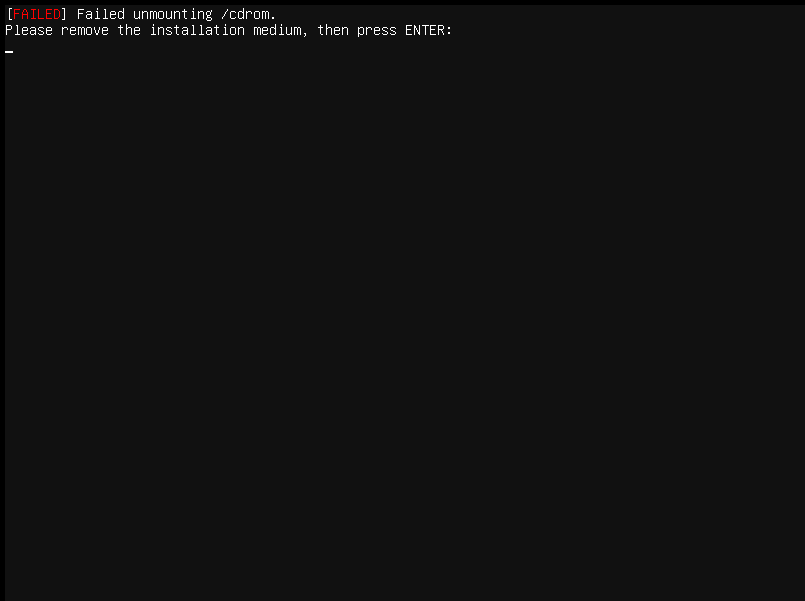
Monitor the installation progress and remove the pen drive while controller is getting rebooting
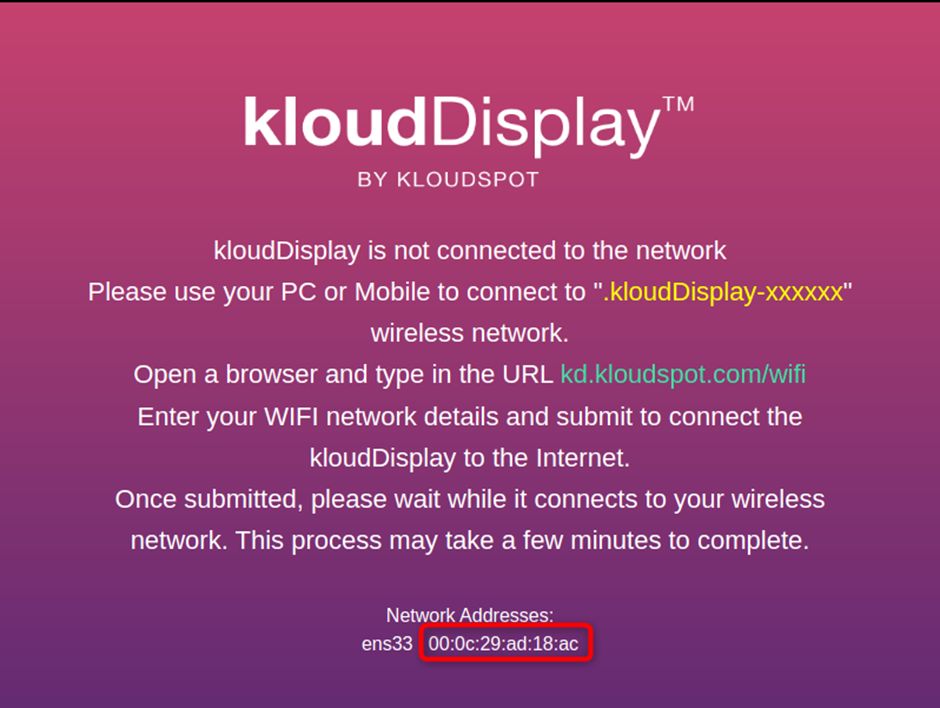
Once the installation is successful, the system boots into the KloudController Software and the display will be as below.
Now we can connect the internet cale to the controller for further setup
Troubleshooting Installation Issues:
• Unable to Detect Bootable Device
If the USB is not recognized, try re-flashing the ISO - - using the steps mentioned above.
Ensure the USB drive is properly inserted and recognized in the BIOS.
Check if the boot order is set correctly to prioritize USB.
• Unable to Load BIOS and Disable Secure Boot
Refer to the device BIOS manual for instructions on disabling secure boot as it may vary from Hardware to Hardware.
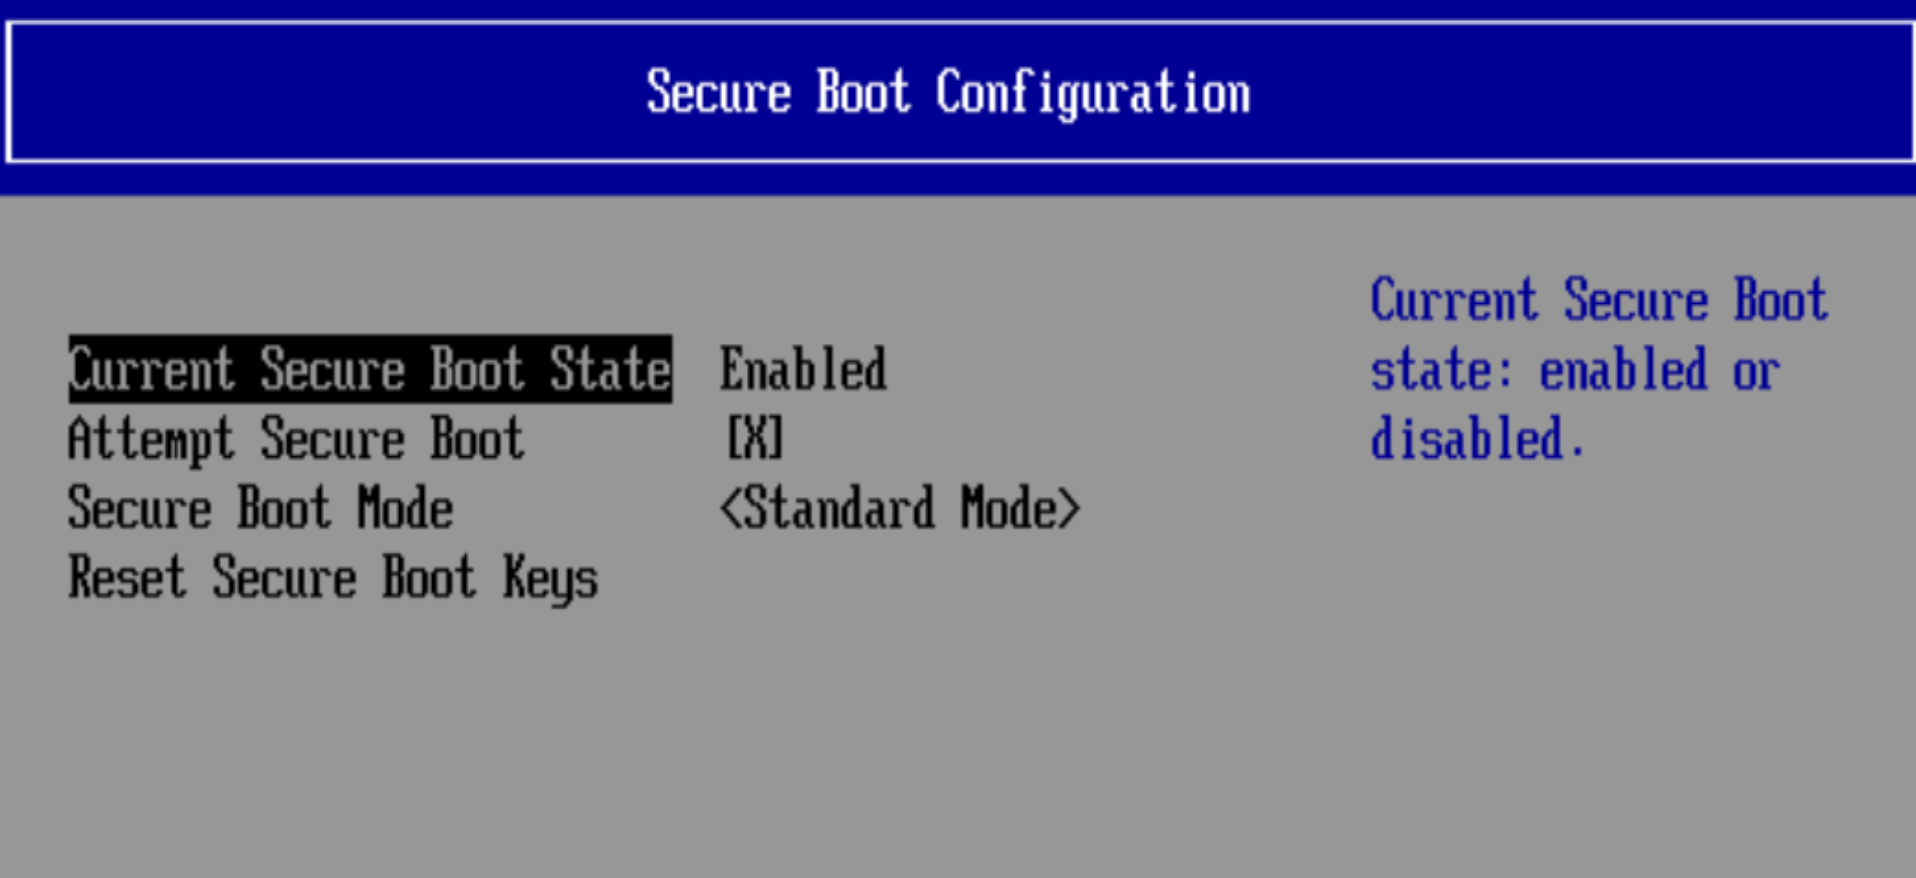
By Default, Attempt Secure Boot [ ]Turn Attempt secure Boot to [X]
Below is the screenshot for a VM on disabling the secure Boot
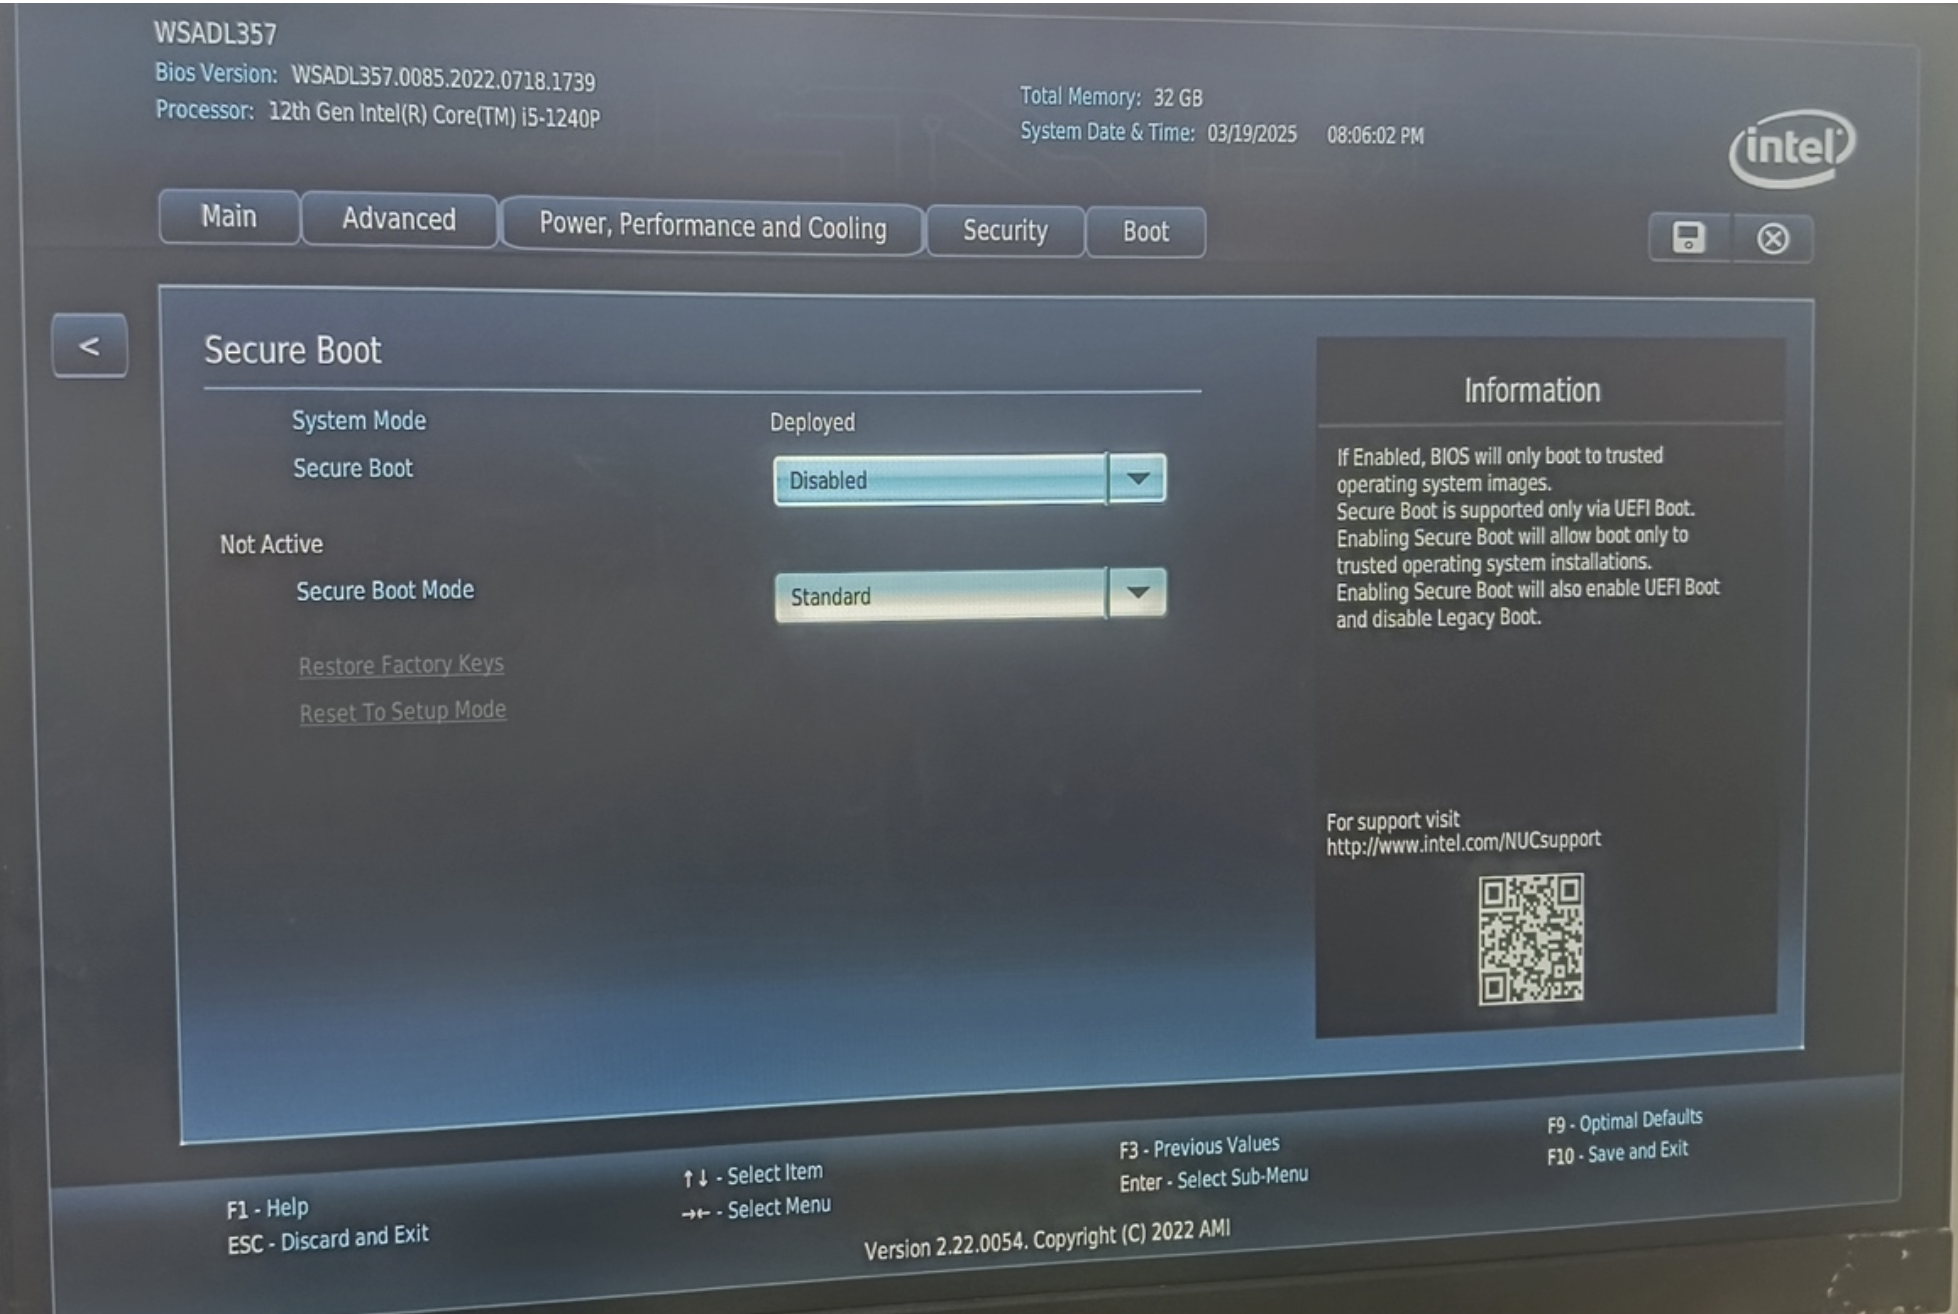
Below is the screenshot for a NUC box on disabling the secure boot
The BIOS key is typically F2 or Del, but this may vary based on the hardware make and model.
If unable to access BIOS, try pressing Esc, F1, F10, or F12 during startup.
• Unable to Boot into KloudController After Successful Installation
If the KloudController fails to boot after a successful ISO installation, try the following steps:
Check Boot Order: Ensure the correct boot device is selected in the BIOS.
Disable Secure Boot: Some systems may require Secure Boot to be disabled in the BIOS.
Verify Installation Media: Reinstall using a verified KloudController ISO
Reconnect Storage Device: If using an external drive, ensure it is properly connected.
Check for Error Messages: Note any on-screen errors for further troubleshooting.
Ensure that you do not select loop0 or sr0 as the - installation target. Instead, Select the appropriate SSD or HDD based on your system’s storage size.
• Things to remember while doing bootable USB
If you are using the Rufus tool to create a bootable USB, ensure the following settings:
(We recommend using Balena Etcher for smooth installation)
Partition Scheme: Select GPT
Target System: Choose UEFI
• Use a Stable Power Source: Prevent interruptions by ensuring the system has a stable power supply during installation.
Post-Installation Setup
Post installation network configurations can be performed by logging into TTY (Terminal).
Steps to Access TTY:
Press ALT + Ctrl + F5 to switch to TTY5.
Enter the following credentials
Username: kloudspot
Password: kloudspot123
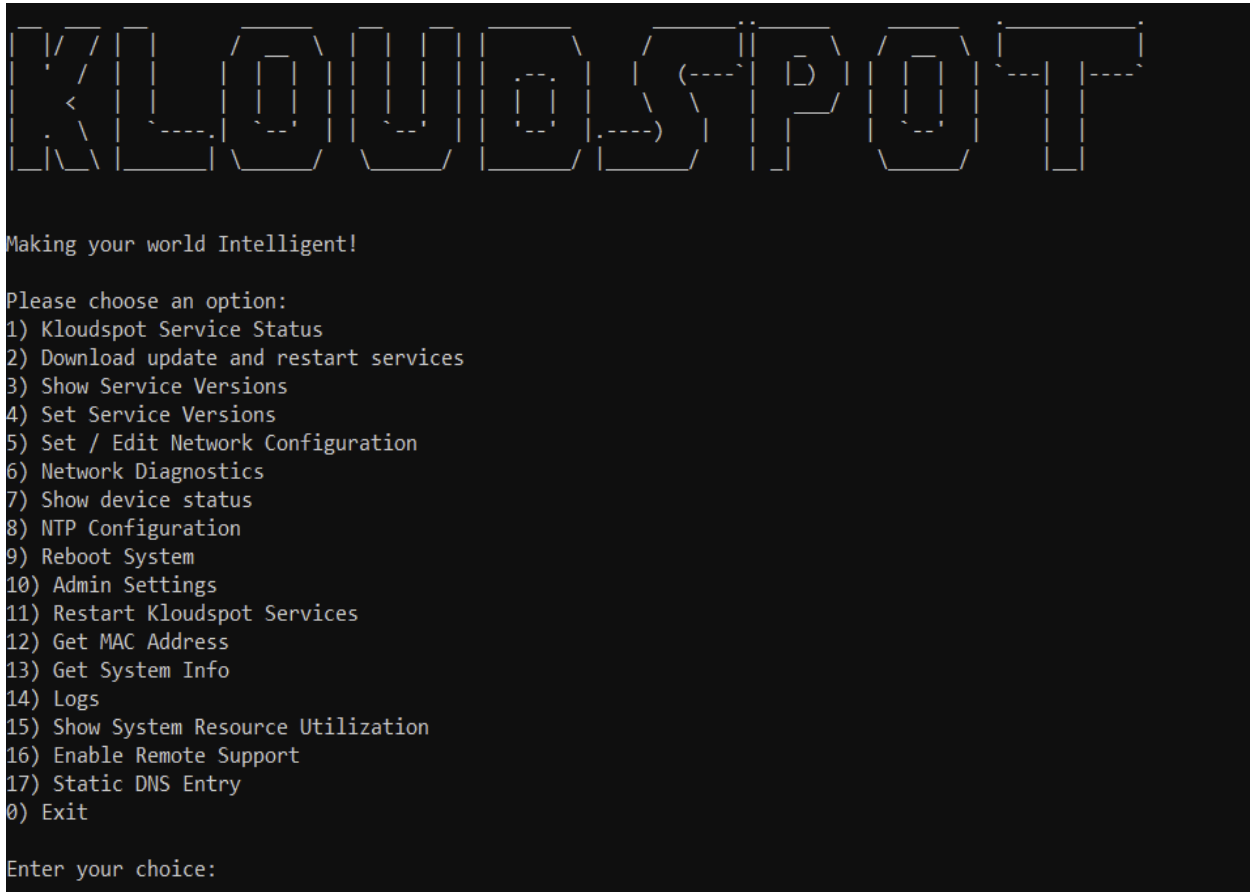
After successful Login we will be able to see below options
Setting up Network Configurations
By default, the DHCP Client is enabled on the device. If your infrastructure supports automatic network configuration via DHCP, you can skip the next steps.
Manual Network Configuration:
Choose Option 5 – Set / Edit Network Configuration
2. Choose Option 2 – Create New Network Configuration to manually configure network settings.
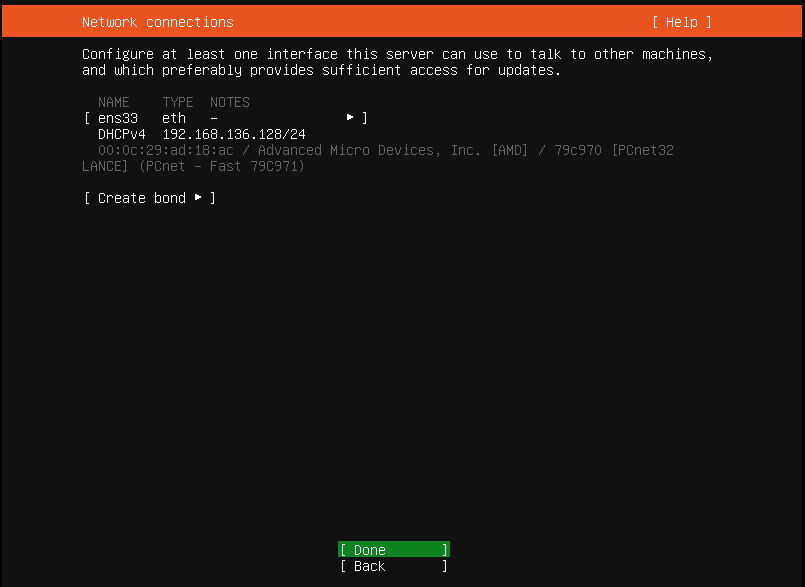
Depending on the available network interfaces, the system may prompt you to enter the name of the connected interface during configuration.
Next, based on your infrastructure, choose between DHCP or Static IP configuration.
DHCP: Automatically assigns network settings.
Static IP: Manually enter IP Address, Subnet Mask, Gateway, and DNS.
Choose Option 3 – Show IP Addresses to view the current IP configuration and MAC details of the device.
Note: Please use the MAC Address of the eth0 port to add this device to Kloudspot platform