Subsections of Kloud Sensors
Installation
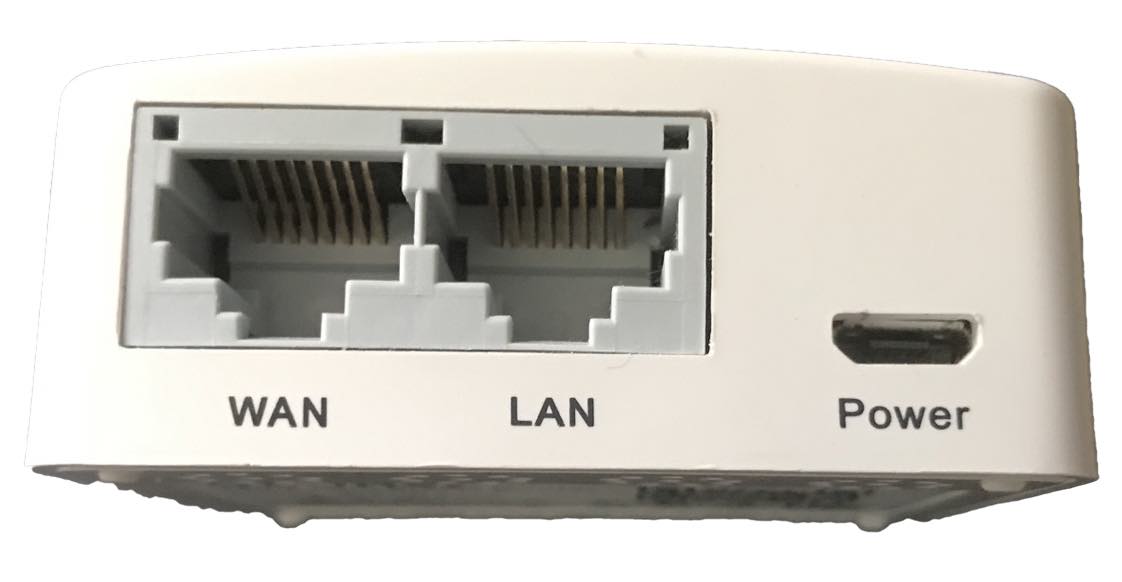 The KloudSensor is very easy to install. There are three connectors:
- WAN : Use to supply ethernet and, optionally, PoE power to the unit.
- LAN : Optionally used to connect to other network devices.
- Power : Optionally used to supply power via a USB connector.
If using a USB power supply, the unit will draw a maximum of 1 Amp.
The sensor can use either PoE or USB power. If you are unsure if the ethernet cable you are using will supply PoE power, plug it in first and see if the green light shows on the sensor. If there are no lights you can attach a USB cable.
Make sure not to connect both PoE and USB power sources to the device. You will damage the device if you do this. There may also be a slight smell of burning.
The sensor can also be used via wireless network. It will still need to be connected to wired network for a bootstrap configuration . So connect as above.
Configuration
All configuration of the unit is done in the Edge Device Management platform .
First plug in and power the device, next check that the device shows up in your Access Point list. Click on ‘Access Points’ and the screen below should be shown.
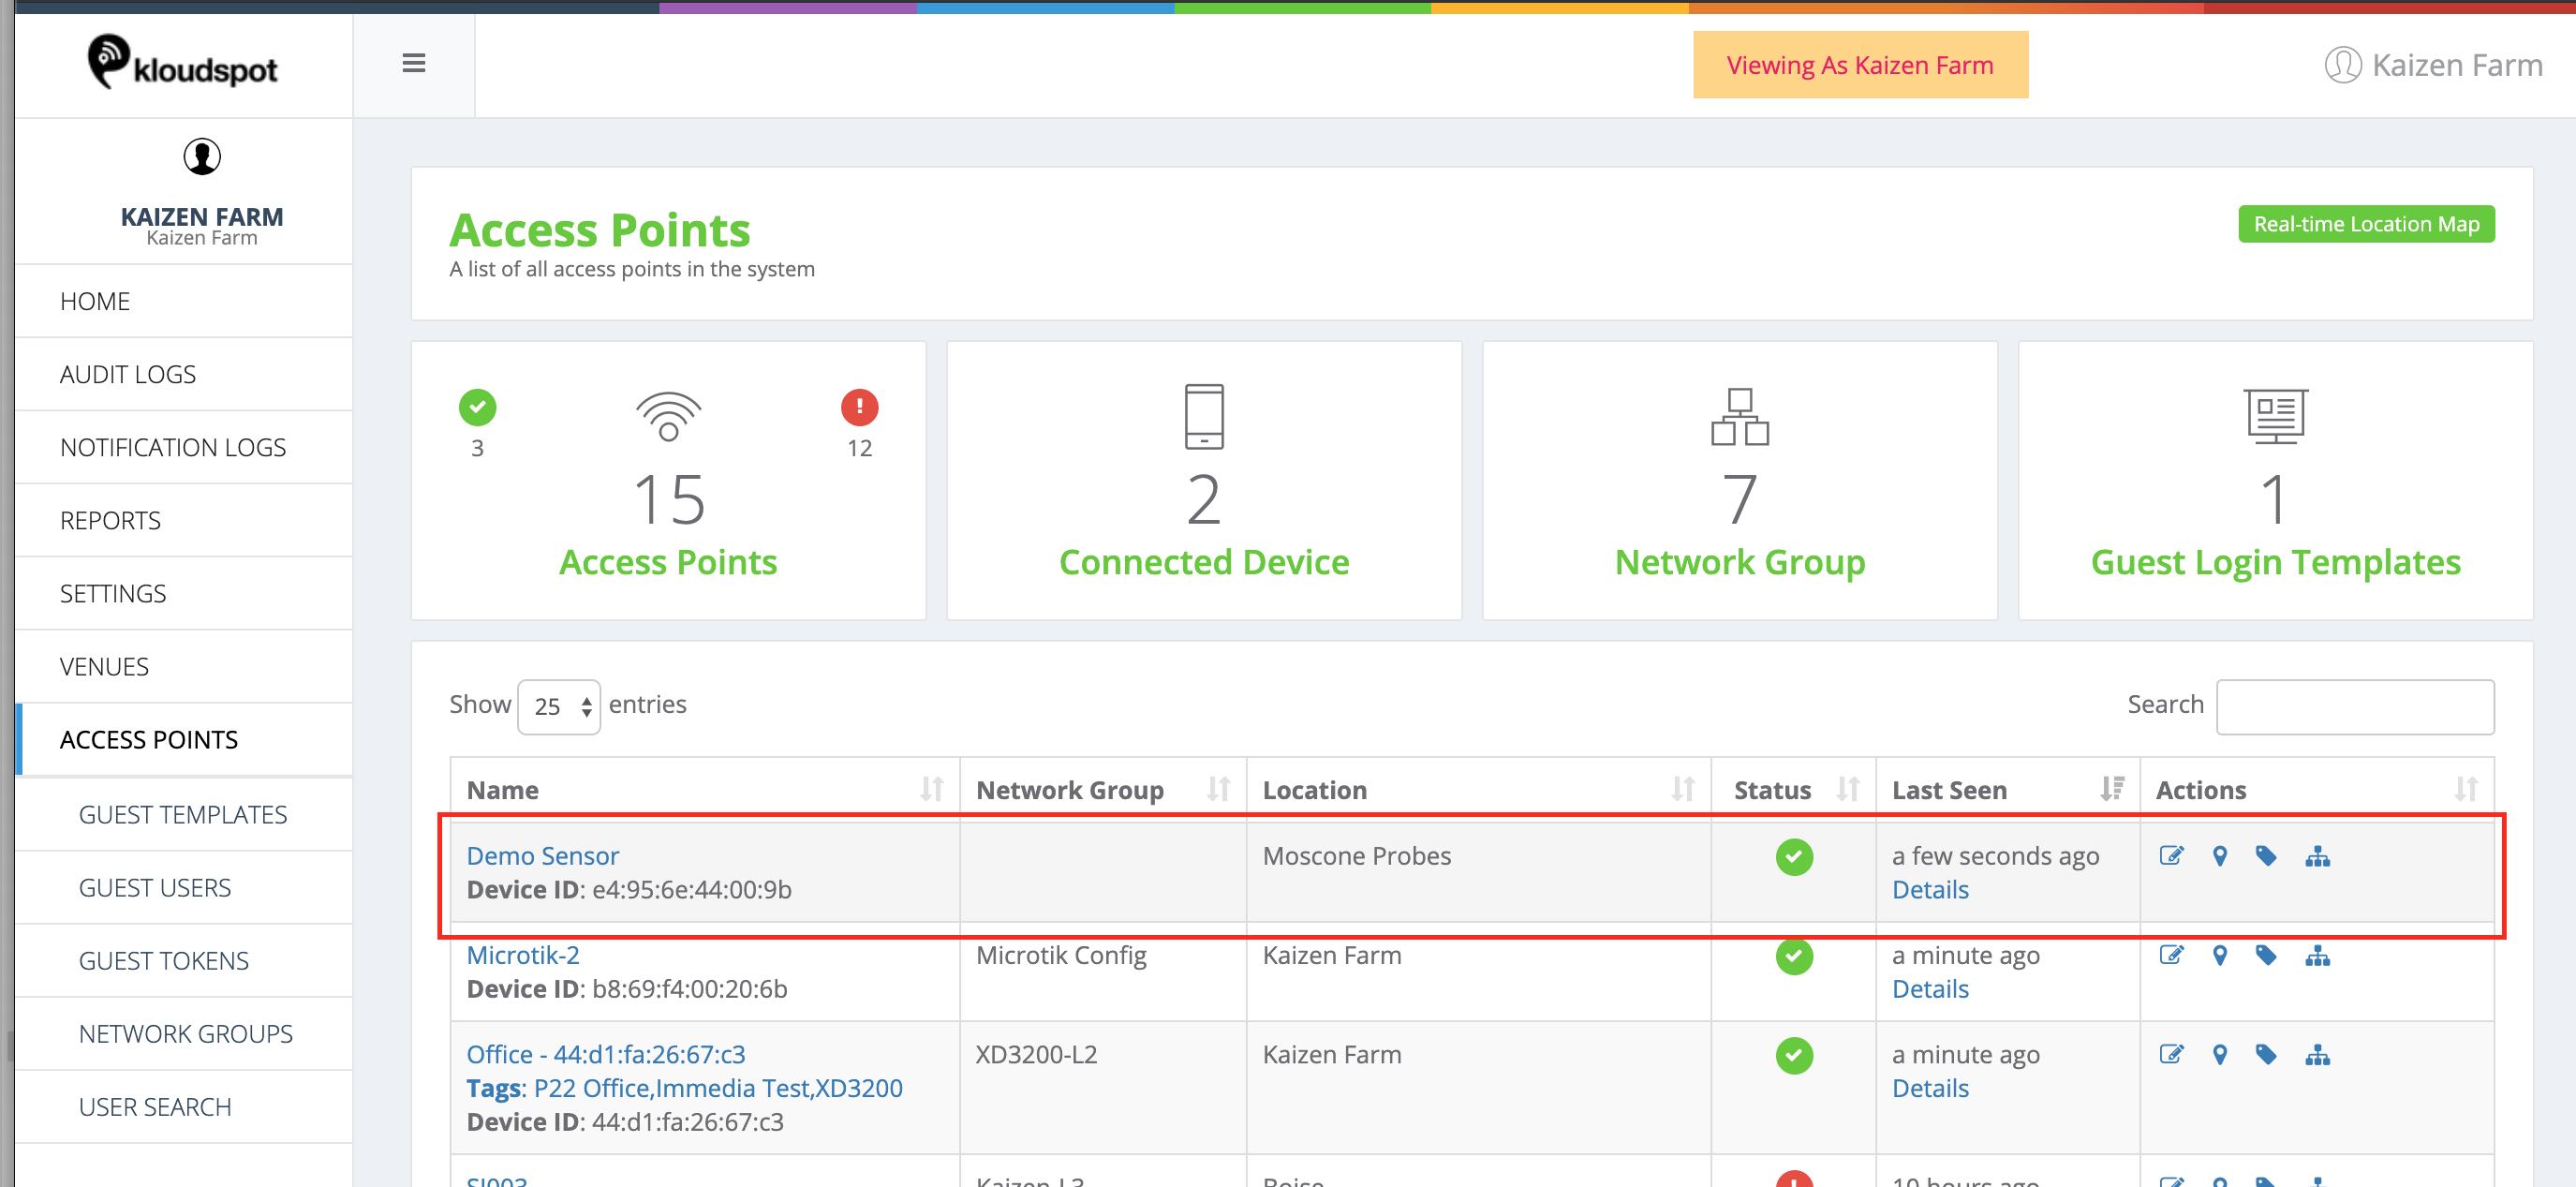 In order for you to manage the sensor, it will need to be allocated to your
account. Please talk to your distributor/reseller if the
sensor doesn’t appear in the list shown above.
In order for you to manage the sensor, it will need to be allocated to your
account. Please talk to your distributor/reseller if the
sensor doesn’t appear in the list shown above.
If the sensor is in the list but showing as Bad status, make sure that it is able to access the network and obtain a DHCP address.
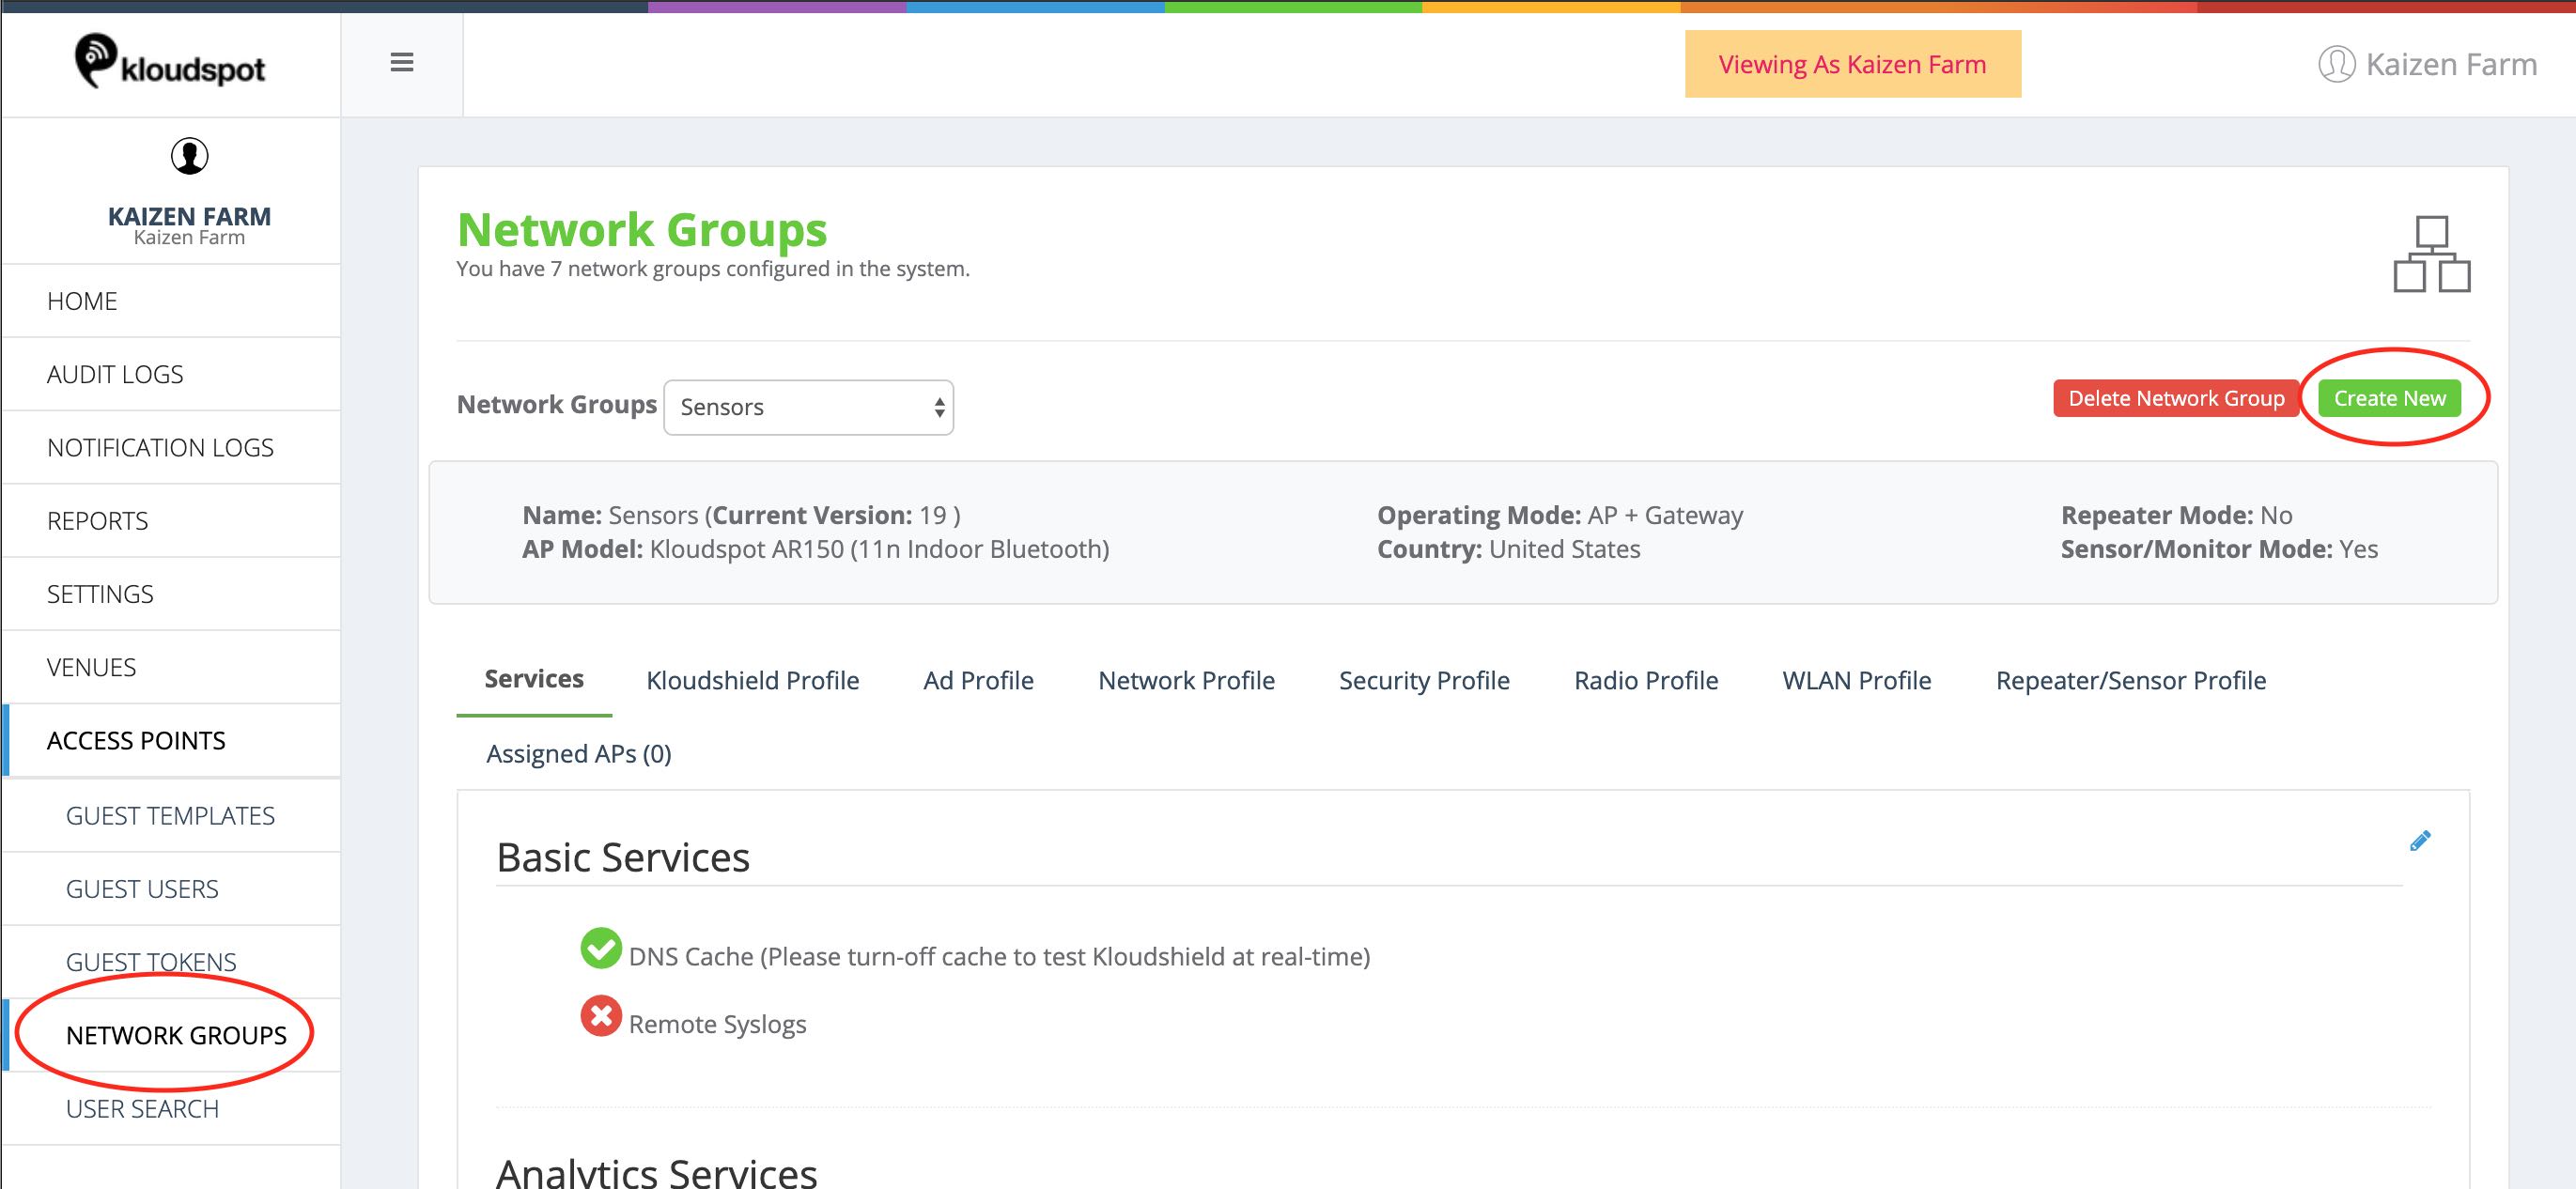
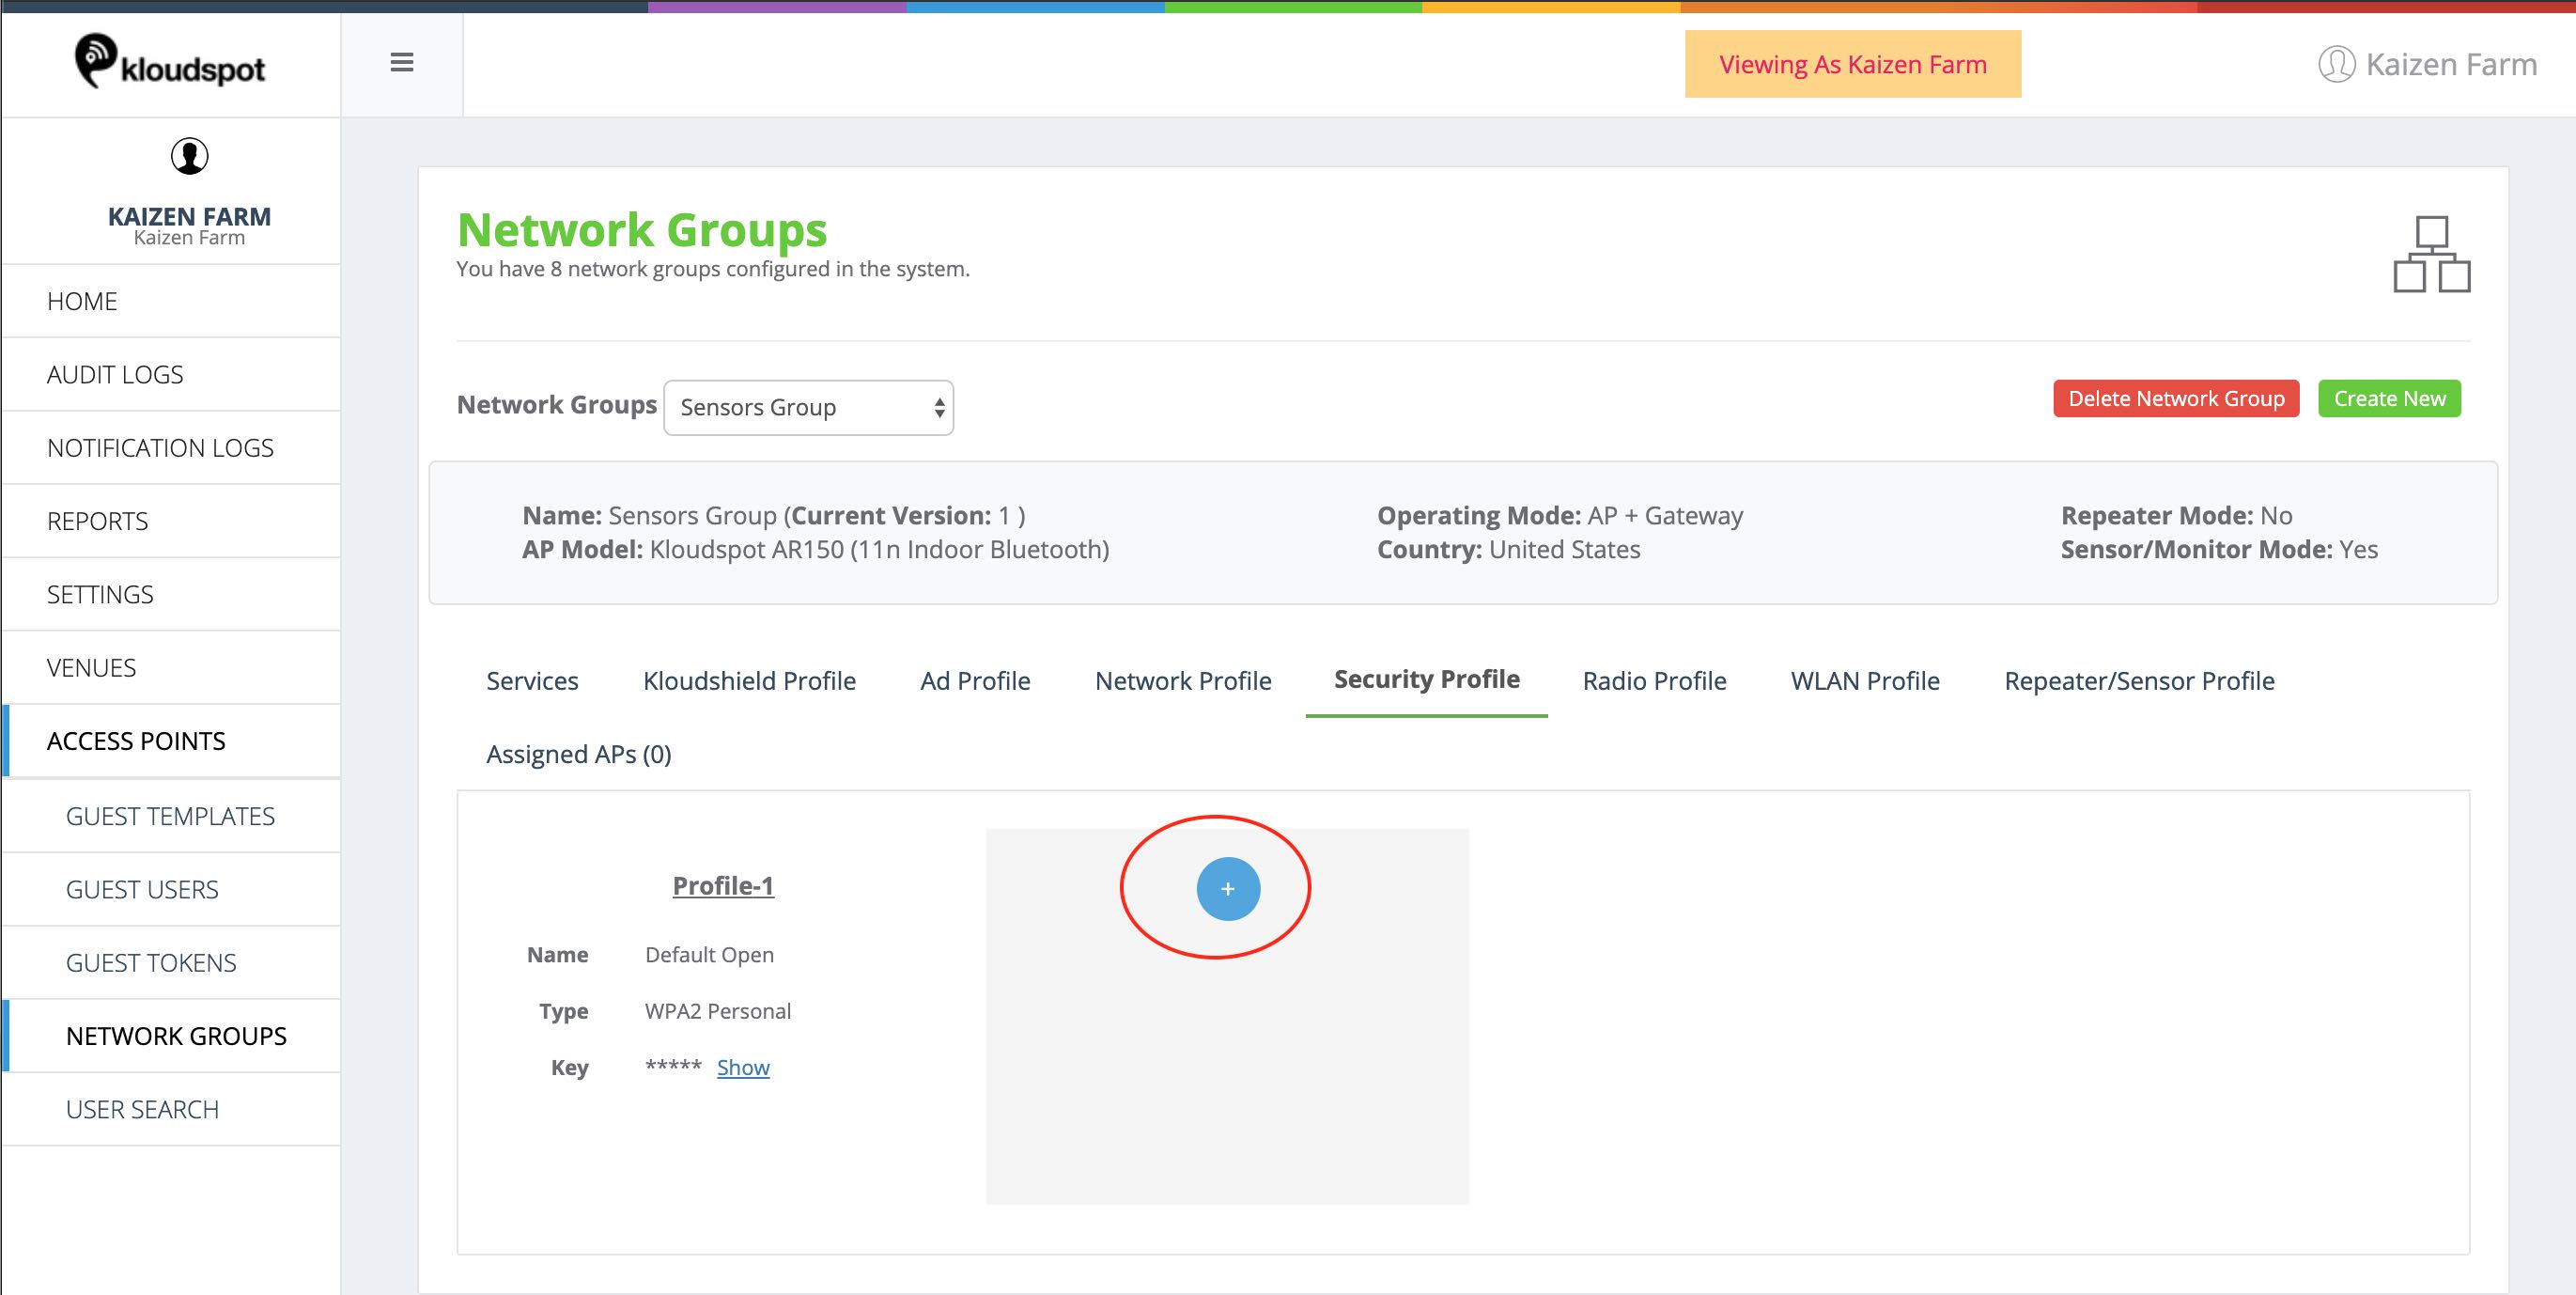
The next stage is to allocate this sensor to an existing or new network group.
The sensor can be used for either wired or wireless operation, different network group configurations are required for both modes of operation.
Prior to creating the network group, set up the account connection to the analytics platform.
Wired Connection.
To create a Network Group for wired operation, follow the following steps:
1 Click on Network Groups
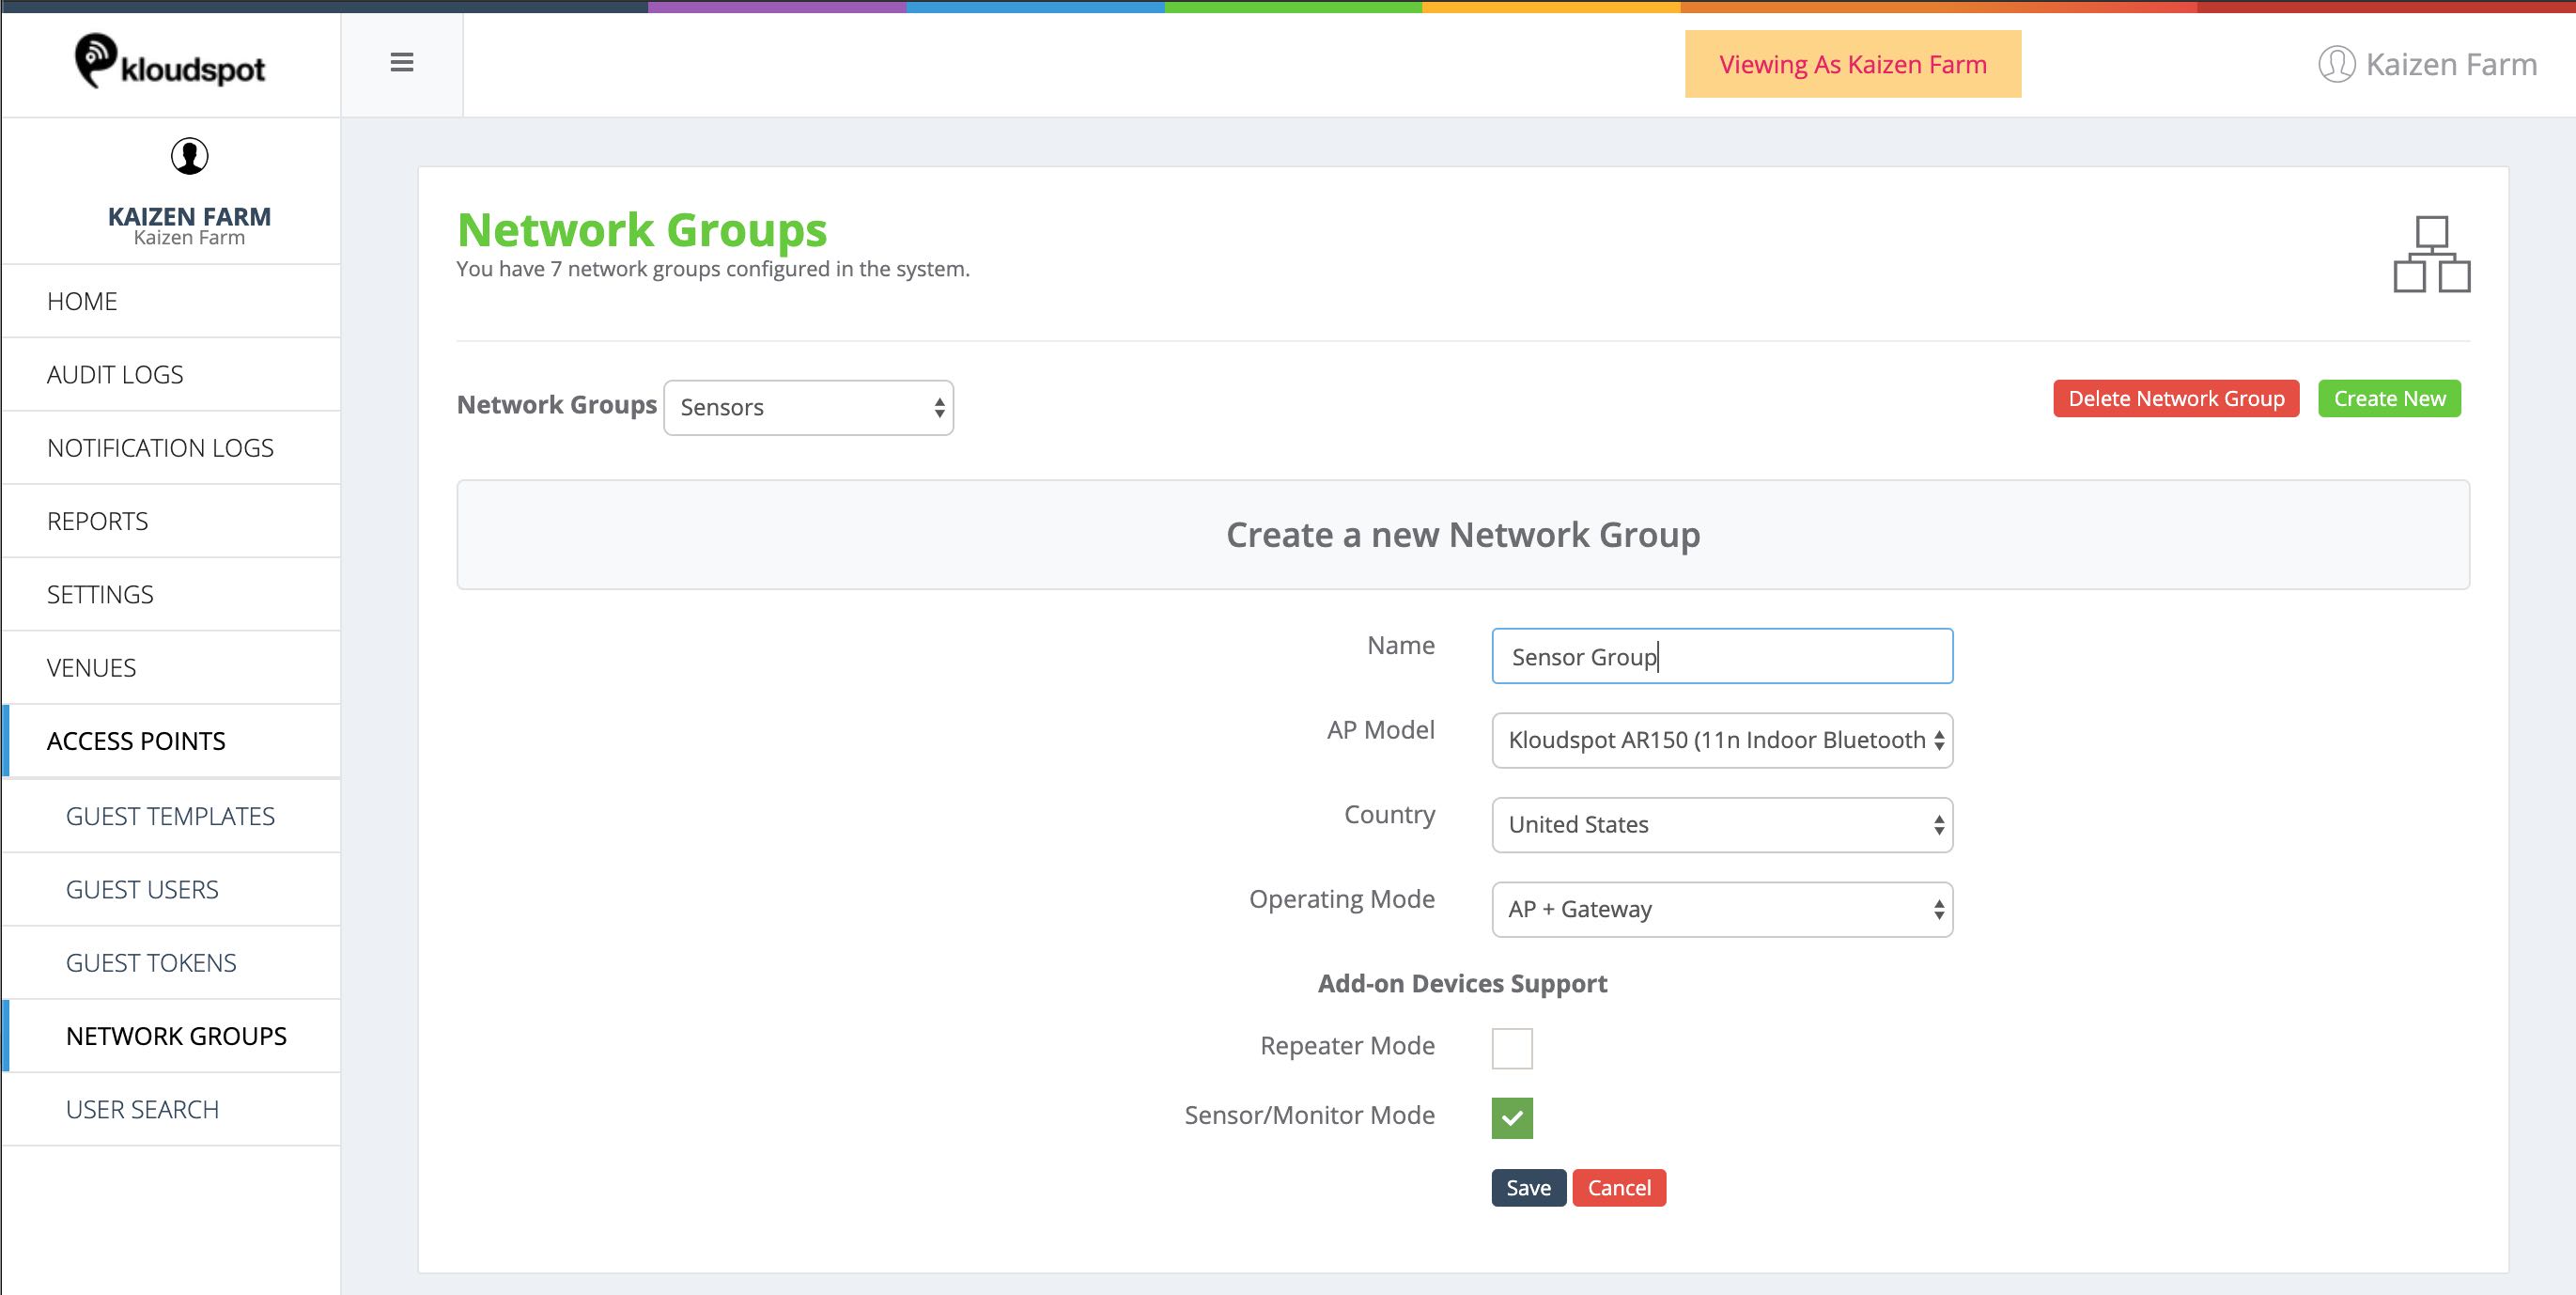
- Enter a name
- Select the KS150 sensor in the AP Model drop down.
- Select the appropriate country.
- Select ‘Sensor/Monitor Mode’.
- Click ‘save’
3 The Network Group will be properly configured for operation, we just need to assign the AP to it.
- Select the Network Group you just created in the dropdown
- Go to the Assigned APs tab and assign the sensor to this Network Group.
Then ‘Update the network configuration’ for the sensor.
Wireless Connection
The procedure for creating a Network Group for wireless operation is very similar, with just a few more steps.
To create a Network Group for wireless operation, follow the following steps:
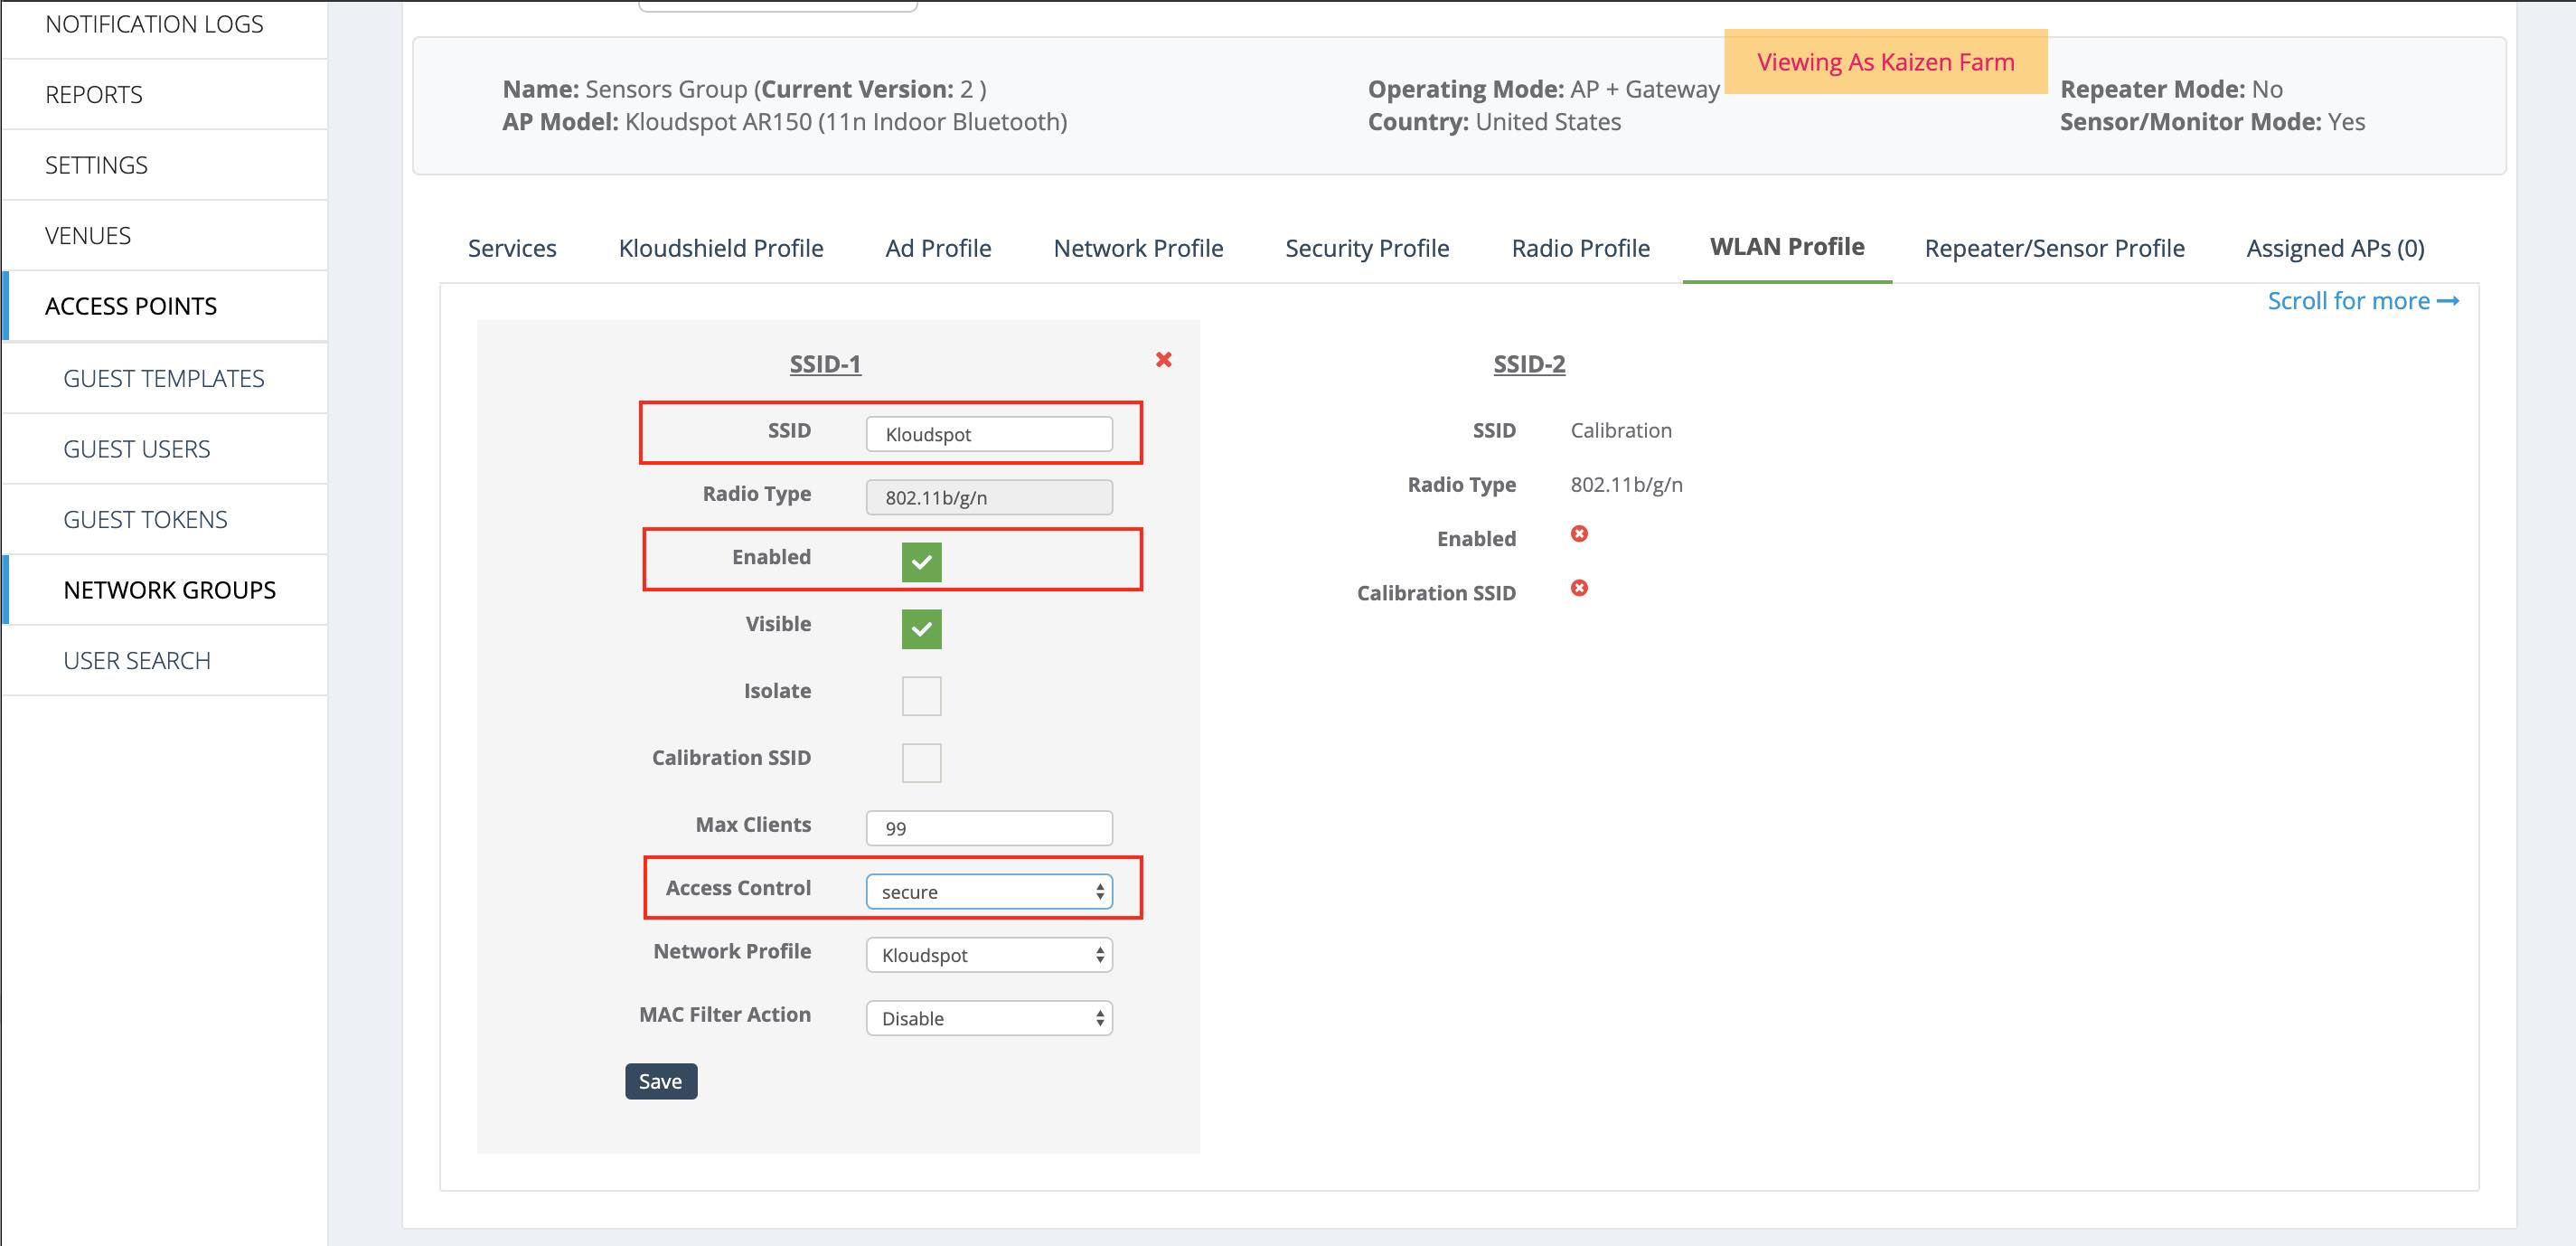
- First follow steps #1 and #2 above to create the group. and then edit the Network Group as follows:
- Obtain a SSID with a WPA2 secret key.

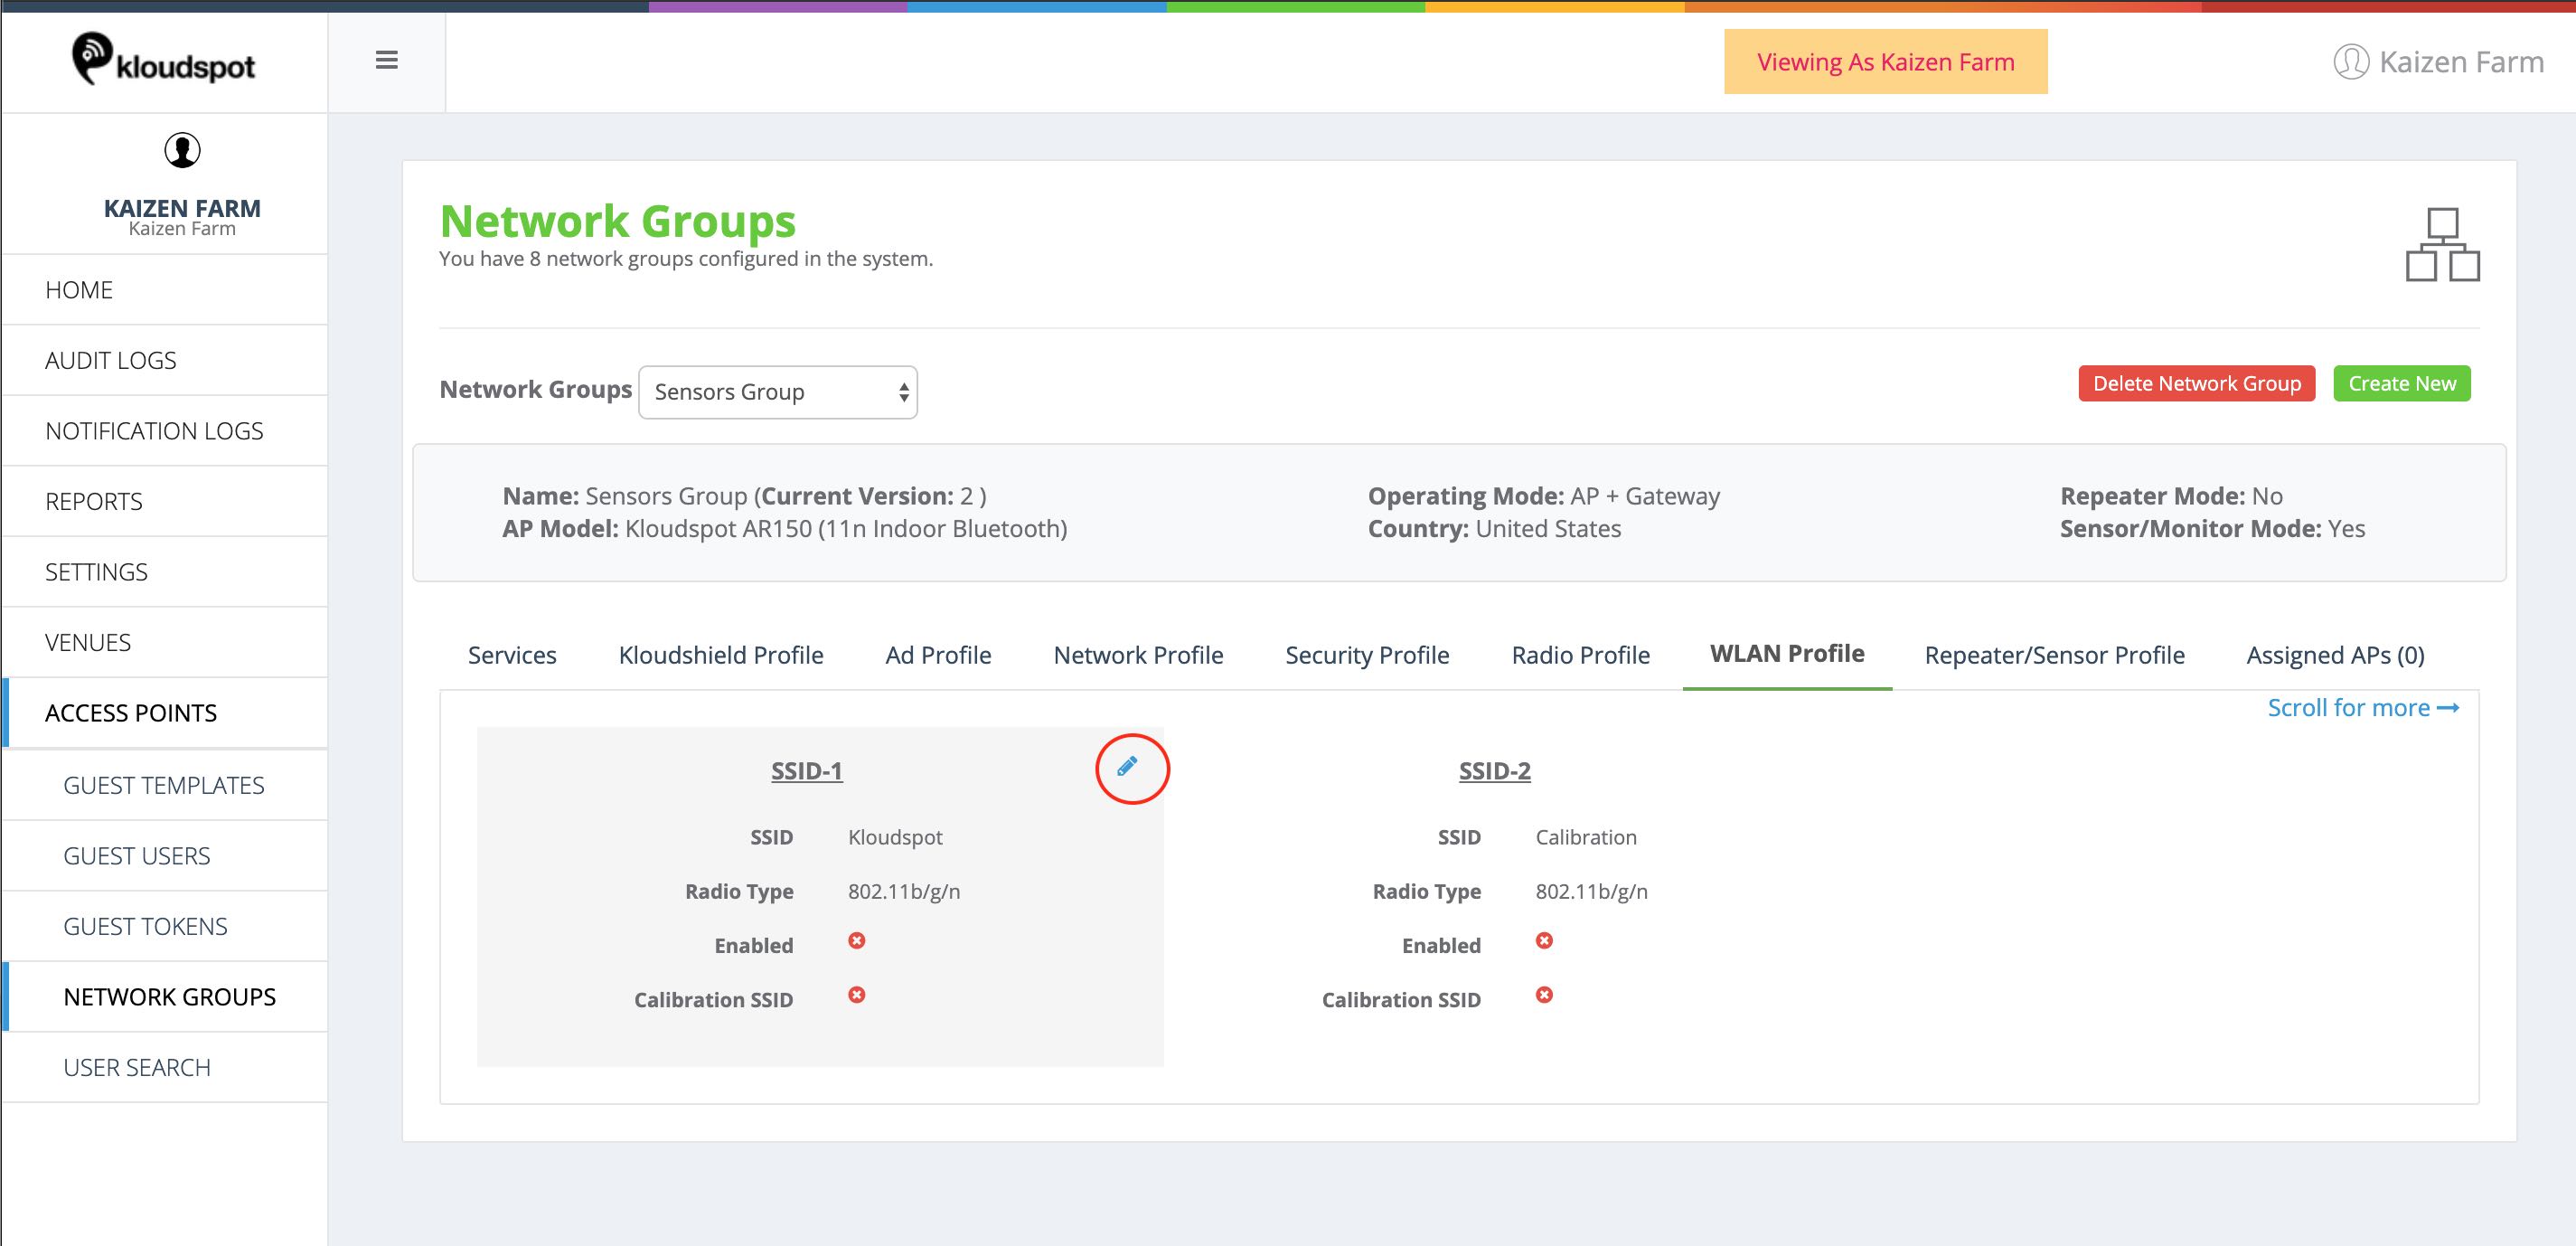 _ Set the following:
_ Enter your SSID
_ Enable the WLAN
_ Set the Security Profile you created earlier.
_ Set the following:
_ Enter your SSID
_ Enable the WLAN
_ Set the Security Profile you created earlier.
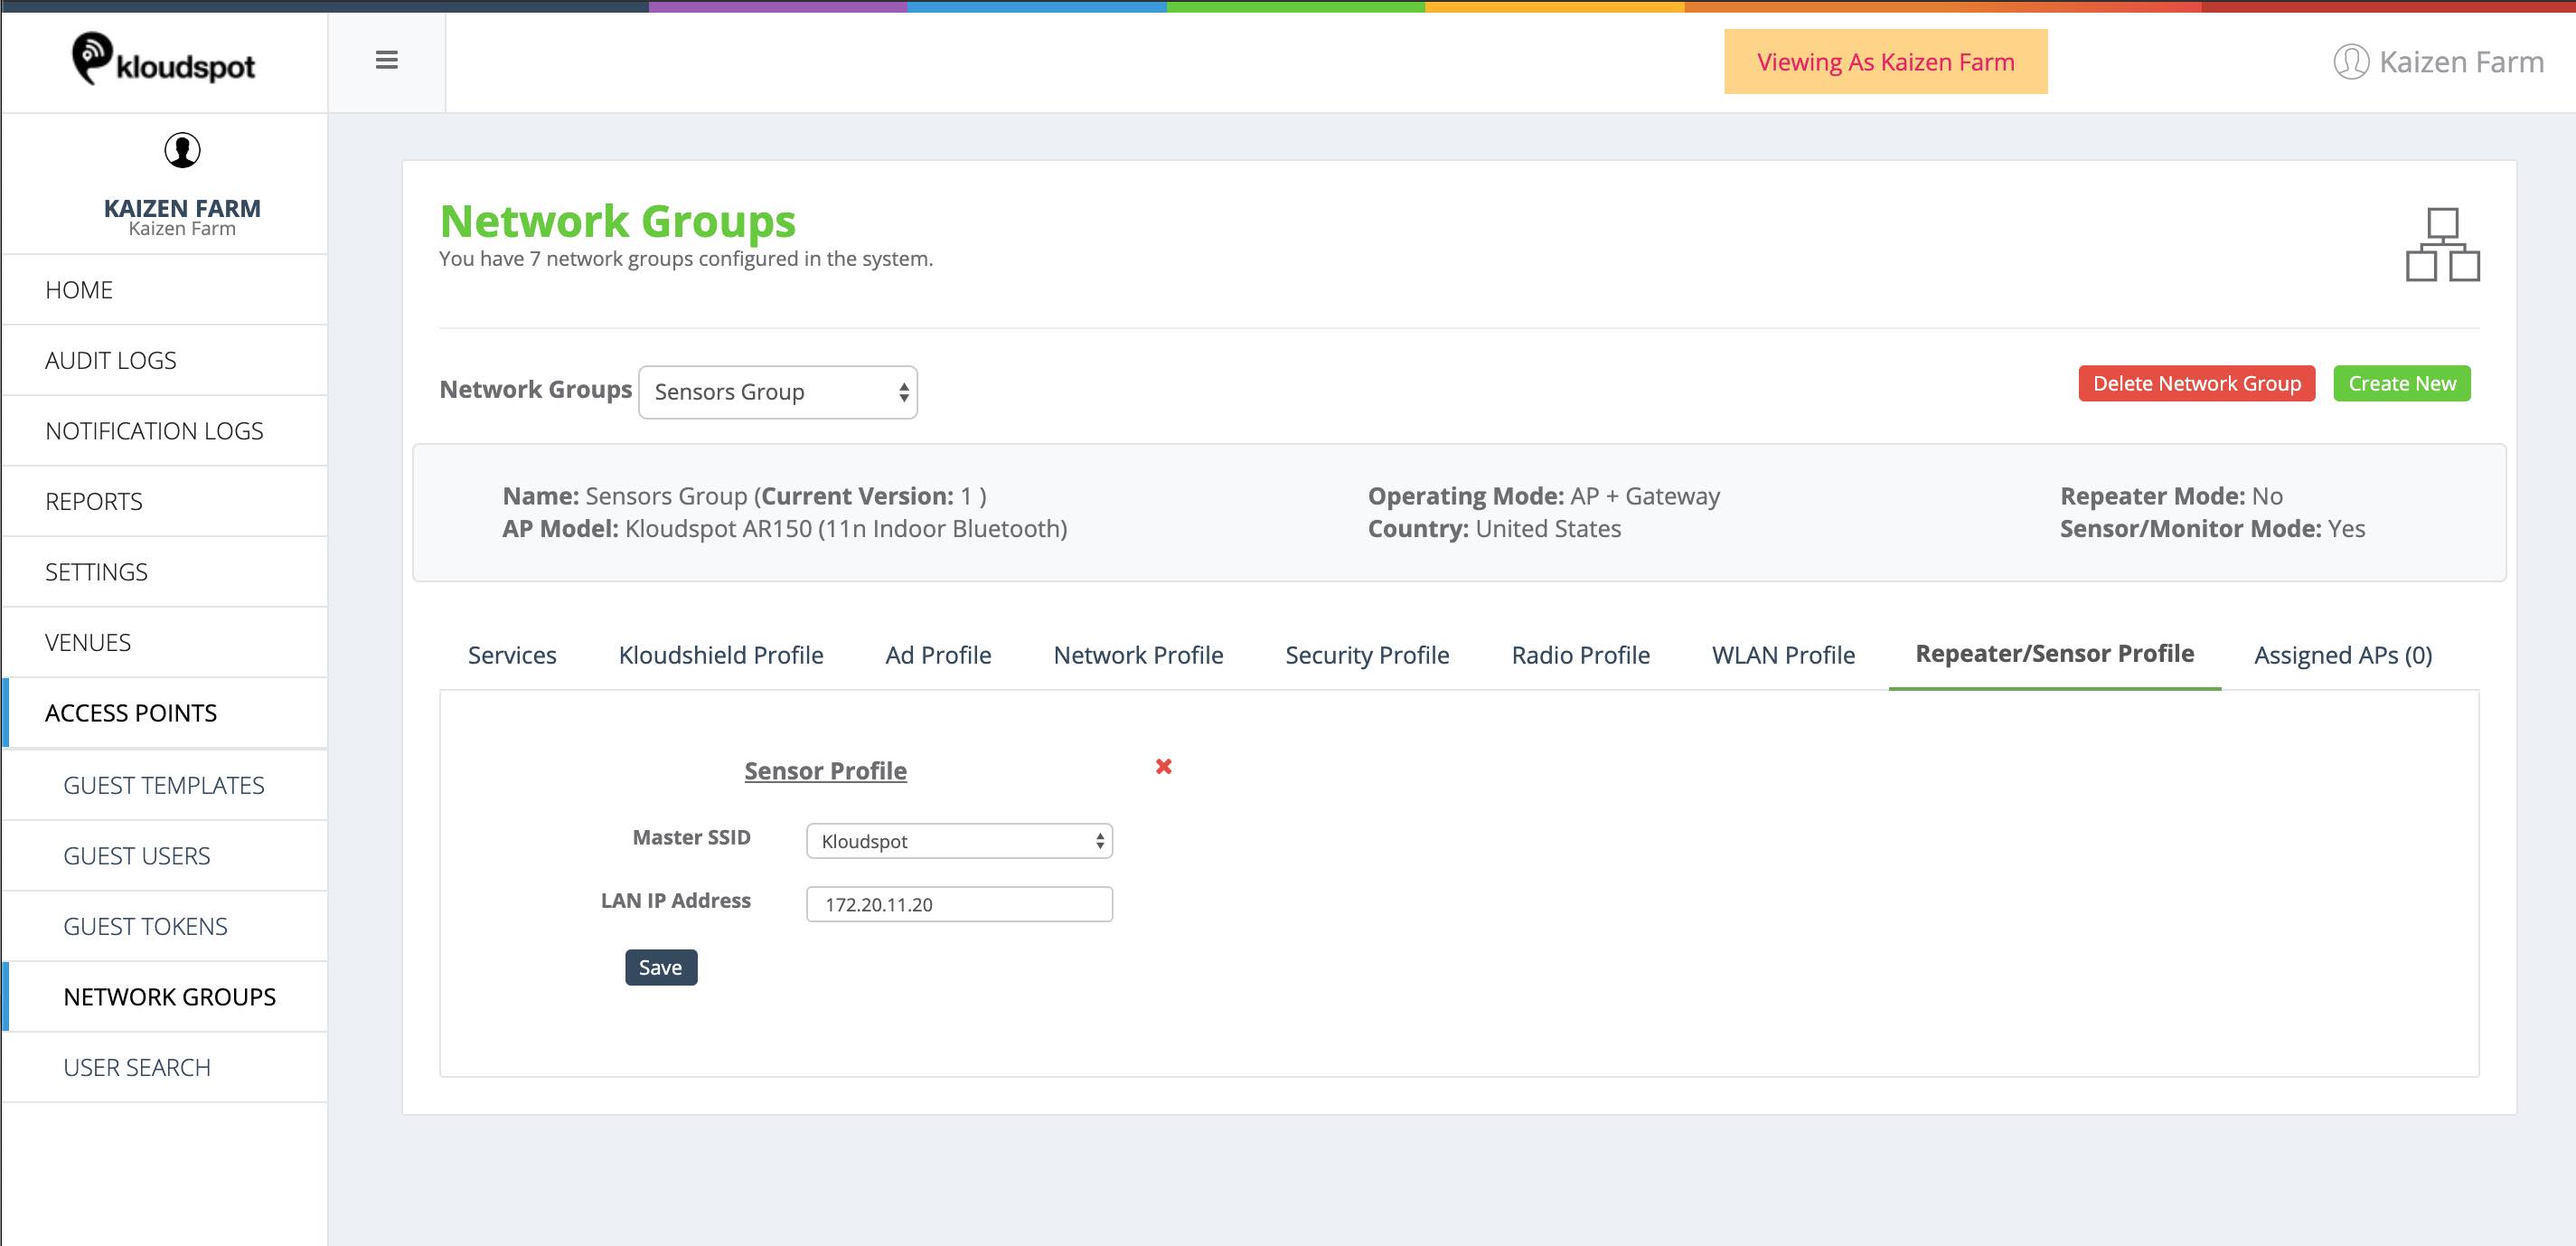
 _ Finally go to the Sensor/Repeater Profile tab:
_ Set the ‘master SSID’ to the WLAN you edited earlier. * Set the IP Address to an IP address that will not be used ‘upstream’ from the sensor.
_ Finally go to the Sensor/Repeater Profile tab:
_ Set the ‘master SSID’ to the WLAN you edited earlier. * Set the IP Address to an IP address that will not be used ‘upstream’ from the sensor.
 The sensor requires two IP addresses - since it has two interfaces. One to act
as a client and one for its internal network. It obtains one via DHCP, however
the other needs to be specified and needs to not clash with any upstream
address. Since there will be no connection to the device only one IP is needed
for the Netwok Group. If you are unsure what address will work for your
situation, try using a ‘private’ IP address such as 192.168.20.10
The sensor requires two IP addresses - since it has two interfaces. One to act
as a client and one for its internal network. It obtains one via DHCP, however
the other needs to be specified and needs to not clash with any upstream
address. Since there will be no connection to the device only one IP is needed
for the Netwok Group. If you are unsure what address will work for your
situation, try using a ‘private’ IP address such as 192.168.20.10
Proceed with step #3 above for Wireless Operation. Once the sensor has had the configuration properly updated, the sensor can be disconnected from the network. When it is next powered on using USB power, it will connect to the SSID you configured and start sending sensor data.
Analytics Integration
There are a few steps needed to start seeing Kloudspot Sensor data in the Kloudspot Analytics platform.
- Set the Platform Probe URL in the Account Settings screen.
The sensor will need to have an updated configuration in order to get this setting.
- Enable the Kloudspot Receiver in the Analytics platform.
- Add the Sensor to the Location Hierarchy.