Network Groups
Network groups define most of the functionality for Access Points (or access
point like devices such as Sensors).
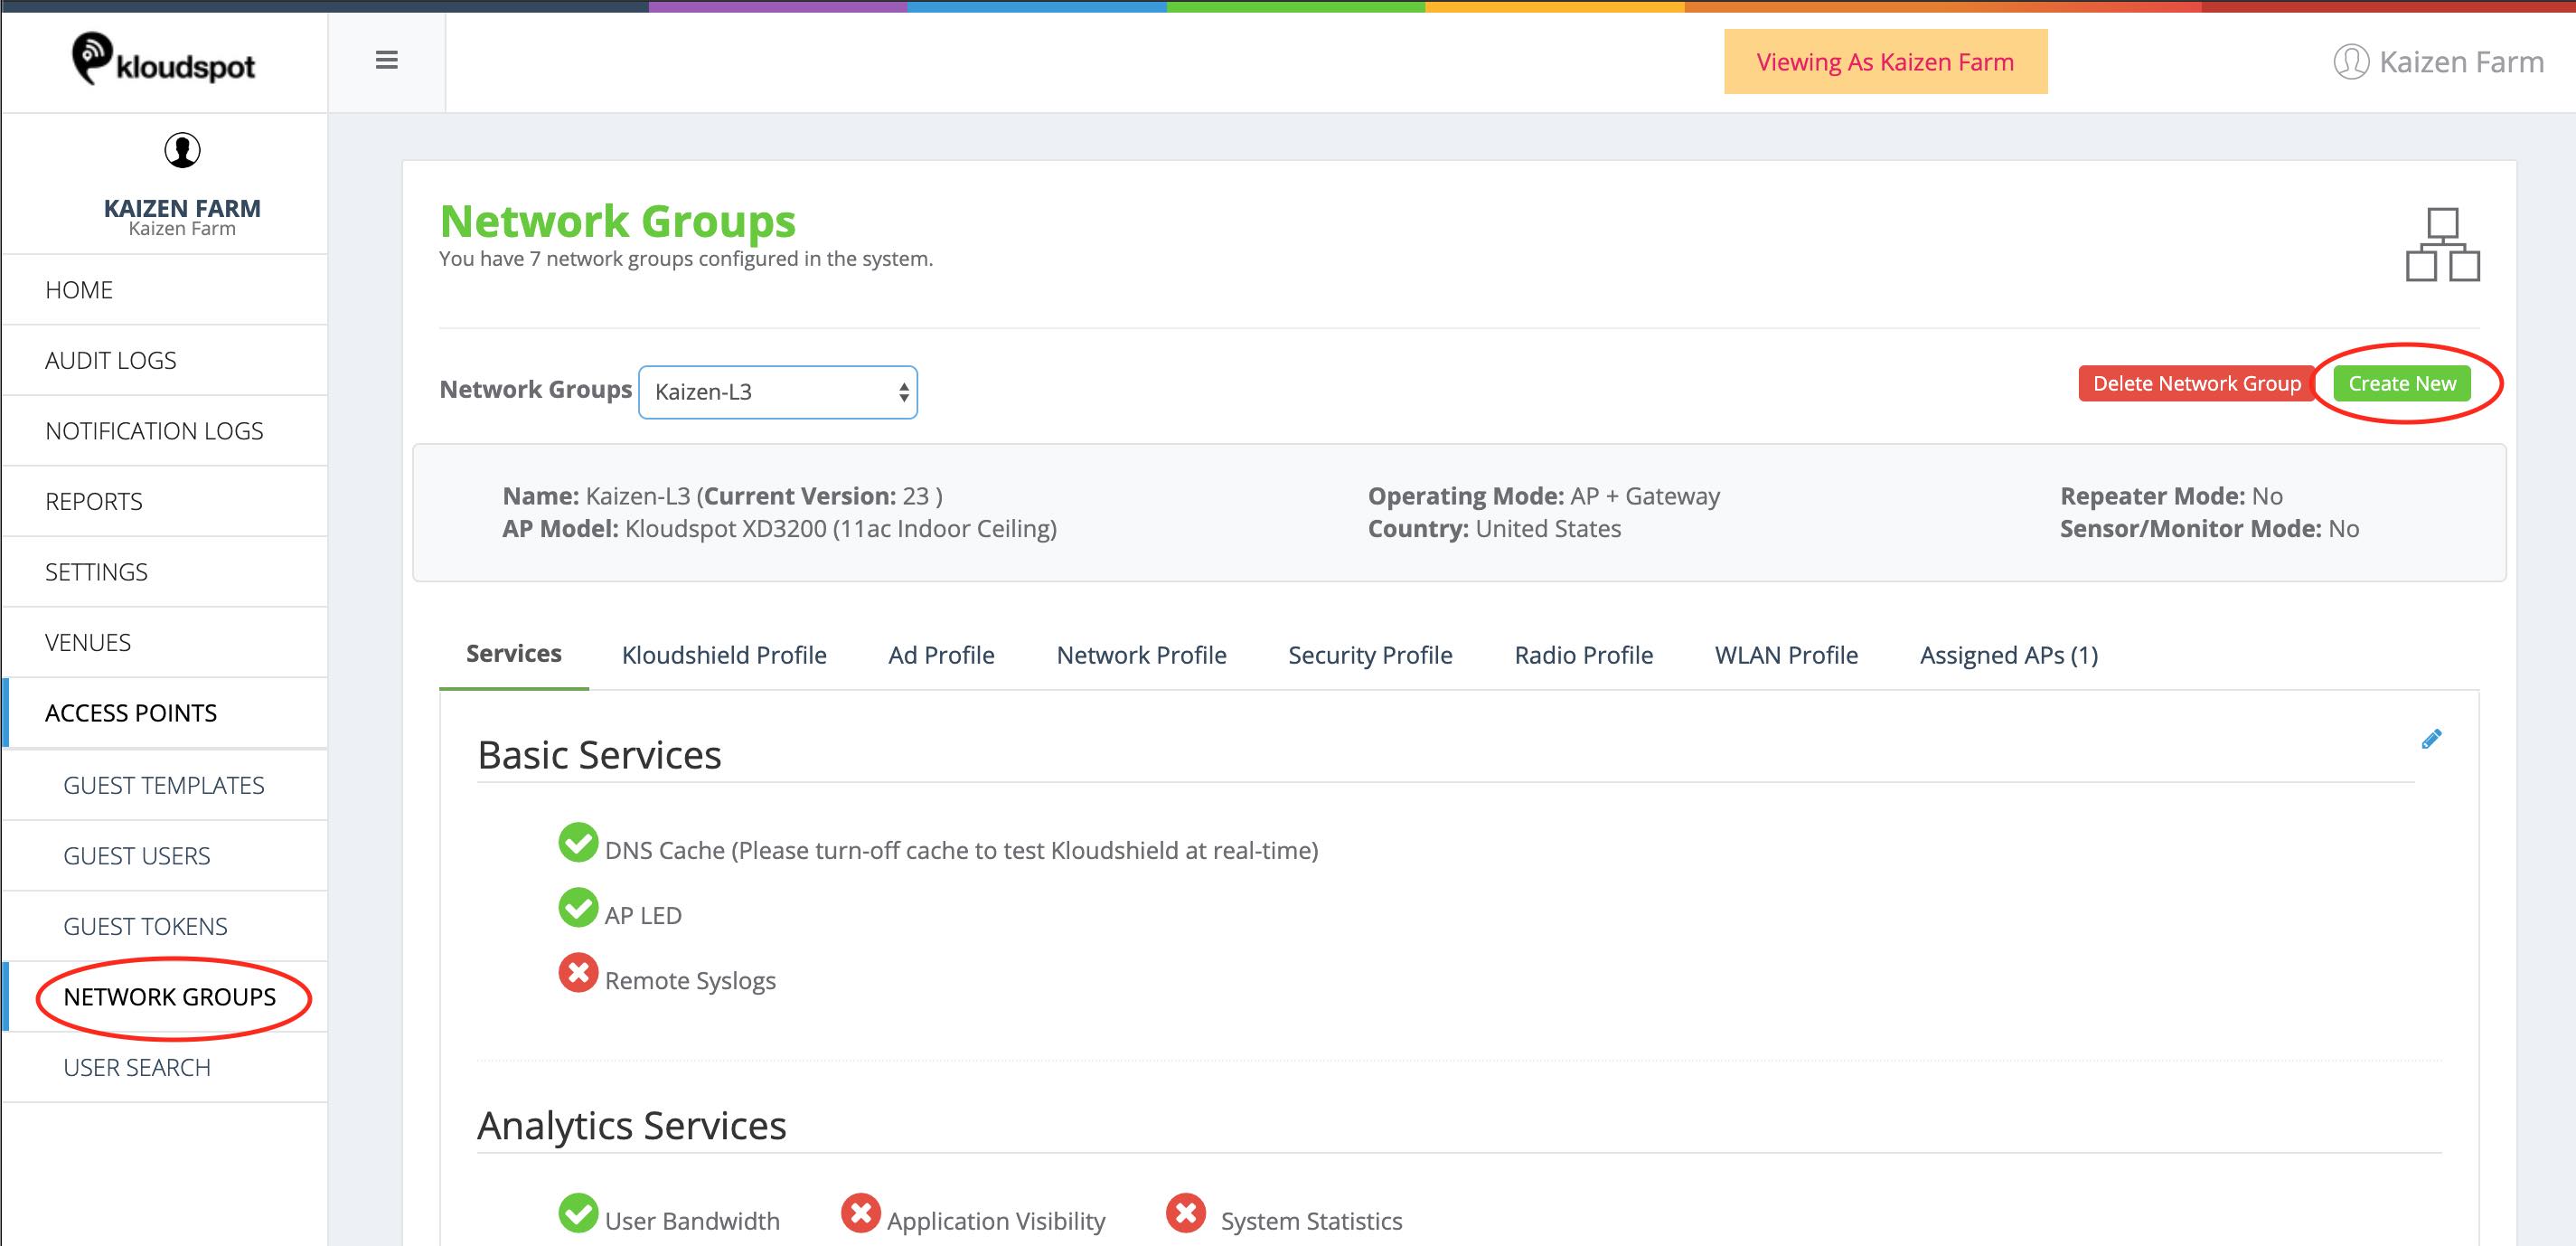 To create or modify network groups, click on the ‘Network Groups’ menu item
and then click the save button.
To create or modify network groups, click on the ‘Network Groups’ menu item
and then click the save button.
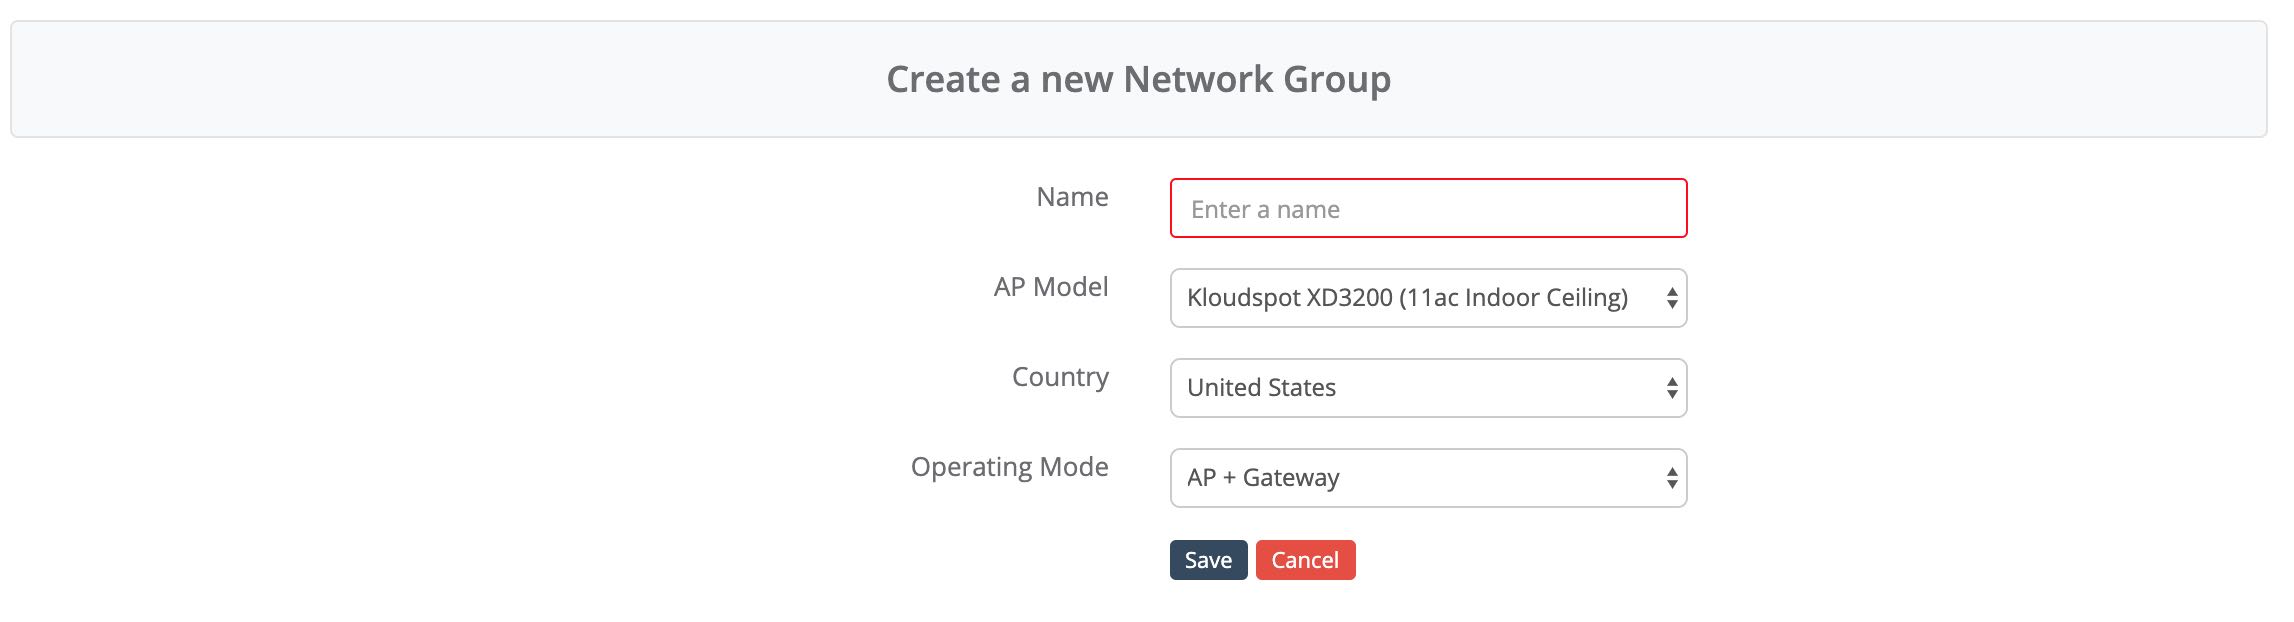 When you click ‘Create New’, you will get a definitions screen where you need
to enter the following:
When you click ‘Create New’, you will get a definitions screen where you need
to enter the following:
- A name for the group.
- The Access Point model. All APs in the same group must be the same model.
- The country of operation. Different countries have different rules for radio operation.
- The mode of operation. The available choices will will depend on the
The network Groups configuration screen consists of the following tabbed
sections:
Table of content:
- Services : Configuration of the available management services.
- Kloudshield Profile : Configuration of DNS based content filtering.
- Ad Profile : Configuration of Guest Portal and advertising.
- Network Profile : Networking configuration. Each WlAN can make use of a different network configuration.
- Security Profile : WLAN security profiles.
- Radio Profile : Access Point Radio configuration (e.g power level)
- WLAN Profile : WLAN configurations. The Access Points support multiple SSIDs on multiple radios.
- Assigned APs : Access Point assignments for this Network Group.
Subsections of Network Groups
Management Services
The Services menu enables control over the network control and monitoring
features of the access point.
Basic Services:
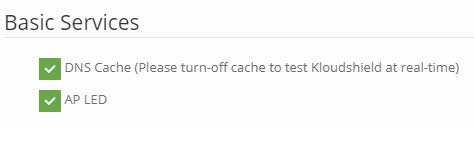
- DNS Cache: Enable this to store the DNS resolution for domain names within the AP DNS Server. Enabling this helps improving the performance of the AP
- AP LED: Enable this to switch ON the LED light on the access point. Disabling this switches OFF the LED light on the access point
- Remote Syslog: forward syslogs to a remote server.
Analytics Services:
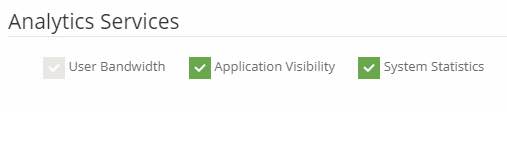
- User Bandwidth: Helps to view the overall (inward & outward network traffic) bandwidth consumption of all the users of the access point. This service cannot be disabled.
- Application Visibility: Enable this to view the list of applications/domains visited by the users of the access point
- System Statistics: Enable this to view system statistics like CPU utilization, memory consumption, ping statistics etc. for the access point
Probing Services:

- Guest Probing: Enable this to capture information from guests who are in the vicinity of the access point but not connected to it
- Rogue AP Probing: Enable this to identify & capture information about Rogue Access Points in the vicinity of the access point
Situational Awareness/Proximity Awareness:
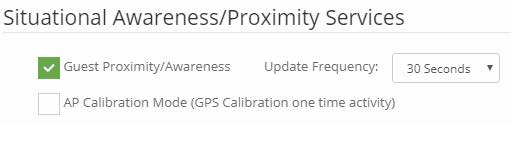
- Guest Proximity/Awareness: This works in conjunction with Kloudspot advanced Analytics platform. Enable this and set the Update Frequency to send data of all the guests to the Analytics platform
- AP Calibration Mode: Enable this to combine access point data along with GPS coordinates and calibrate the system algorithm to provide better trilateration location/position
Management Services:
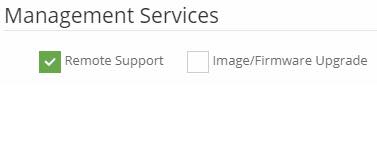
- Remote Support: This is always enabled and is used to remotely troubleshoot the access point from the cloud controller
- Image/Firmware Upgrade: Enable this for any latest image to be automatically installed from the cloud when the access point reboots
Self Organized Network:
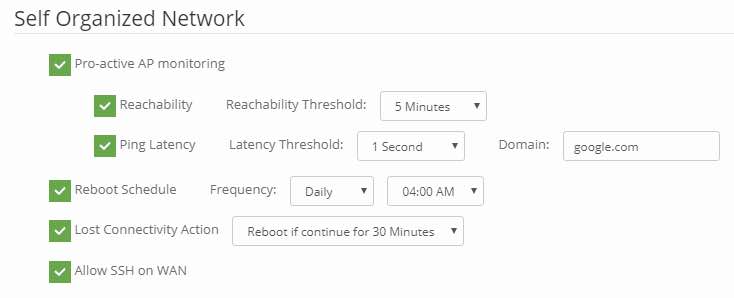
- Pro-active AP Monitoring: Enable this to automatically monitor the access point from the cloud controller. Alert notifications are sent under any of the following conditions:
- Reachability: This is enabled and the cloud controller is not able to reach the access point for a duration of Time as defined in the Reachability Threshold
- Ping Latency: This is enabled and the average of ping latencies of 10 consecutive pings for a defined Domain is more than the duration set in the Latency Threshold
- Reboot Schedule: Enable this to reboot the access point at specified frequencies
- Lost Connectivity Action: Enable this for the access point to automatically reboot when it loses connectivity to the cloud controller for a duration greater than the specified duration
- Allow SSH on WAN: Enable this to allow remote SSH connectivity on WAN
Persistence Services:
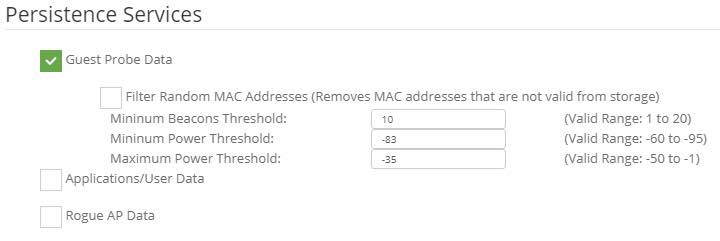
- Guest Probe Data: Enable this to persist the data of guest beacon probes. Settings are available to specify the condition under which the guest probe data shall be persisted.
- Filter Random MAC Addresses: Enable this to discard random MAC addresses from being persisted
- Minimum Beacons Threshold: Set the minimum number of beacons to be received by an access point from a guest for its data to be persisted
- Minimum Power Threshold: Set the minimum power threshold value to be received from the user device by the access point below which the data of a guest beacon probes are not persisted
- Maximum Power Threshold: Set the maximum power threshold value to be received from the user device by the access point beyond which the data of a guest beacon probes are not persisted
- Applications/User Data: Enable this to persist users data & the list of domains visited by the users
- Rogue AP Data: Enable this to persist the data of Rogue Access Points
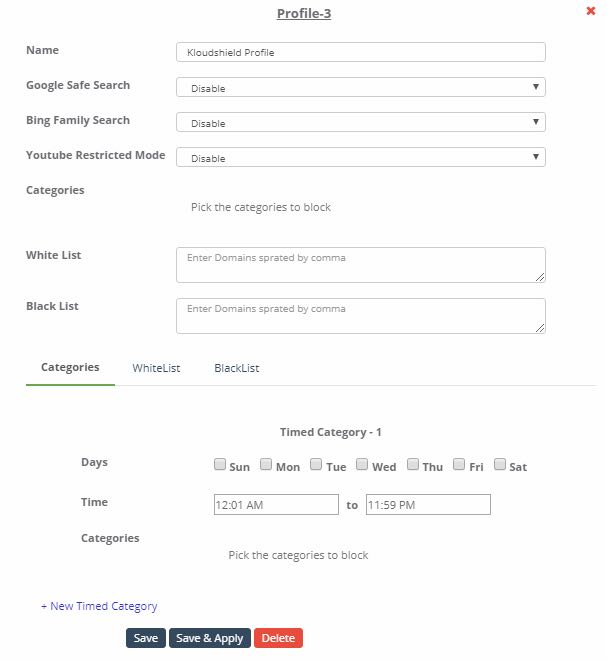
Kloudshield
KloudShield is a content filtering service to provide fast, secure browsing
experience.
 KloudShield features include:
- Controlling guest activity on search engines and social media websites
- Blocking content based on categories (More than 8.5 million domains categorized in 59 categories and growing)
- Blacklisting and Whitelisting of Domains
- Supports day/time-based content blocking, Blacklisting and Whitelisting
Some of the benefits provided by Kloudshield are:
- Automatically blocking malware and ad servers at the router level thereby protecting all the devices in one go.
- Reduce data consumption by blocking unwanted content
- Provide better experience as unwanted content is blocked
- Multiple content categories can be blocked with a single click in real-time
- Keeps up-to date with latest/greatest content & network threats
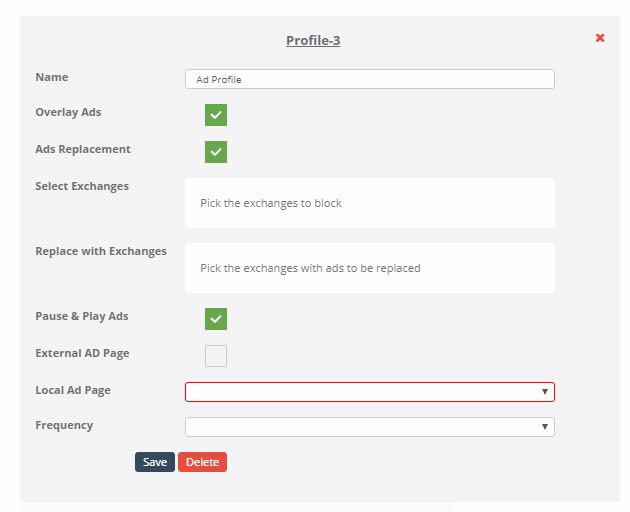
Advertising
This tab allows advertising based monetization offerings to be configured for
a network interface.
 To set the Ad Profile configurations, follow the below steps:
- Click Network Groups
- Click Ad Profile menu
- Click + icon
- Click Edit icon
- Enter the name for the Ad Profile
- Select the desired Ad Profile configurations
3 distinct advertisement mechanisms are supported Kloudspot Access Points.
- Overlay Ads: Select this option to overlay advertisements on web pages. Kloudspot supports different types of advertisements like logos, sliders, tickers, modal with Video etc.
- Ads Replacement: Select this option to replace an exchange ad with another ad of same size.
- Pause & Play Ads: Select this option to block internet on a device after a predefined interval of Time and redirect the user to an Ad page. User must watch the ads before regaining internet access.
Overlay Ads and Ad Replacement are supported for HTTP connections only. Pause
& Play Ads will work on HTTP and HTTPS.
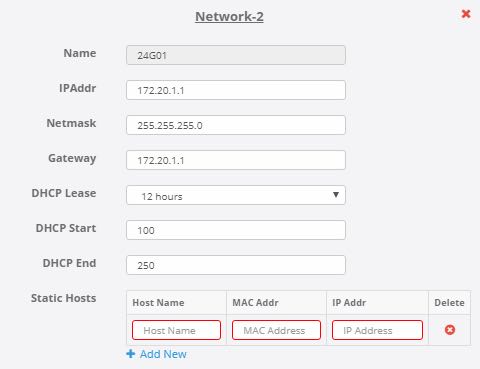
Network Profile
The Network Profile tab provides configuration for the different
interfaces of the Access Point. Some of the Network Profile configurations are
automatically set based on the Access Point hardware and cannot be changed
while others can be configured as desired.
Below is a brief description of various configurations under the Network
Profile menu.
-
Name: This is a unique name for the network interface. This is automatically set, disabled and cannot be modified.
-
IP Addr: This is the IP address to be assigned for the network interface. This is pre-populated but can be changed as desired.
-
Netmask: This is the network mask of the network interface. This is defaulted to 255.255.255.0 but can be changed as desired.
-
Gateway: This is the Default Gateway for the network interace. This is defaulted to the IP address of the network interface but can be changed as desired.
-
DCHP Lease: This is the period of Time for which the DHCP Server leases IP addresses to devices. This is defaulted to 12 hours but can be changed to any value available in the dropdown.
-
DHCP Start: This is the offset from the network (IP) address of the underlying interface and detrermines the start range of the IP addresses for the devices. This is defaulted to 100 but can be changed as desired. For example, DHCP Start = 100 will mean that for IP address 192.168.1.x, the starting IP address will be 192.168.1.100
-
DHCP End: This indicates the last IP address that can be assigned to a device connected to this network interface. It also helps to determine the size of the IP address pool. This is defaulted to 250 but can be changed as desired. For example, DHCP End = 250 will mean that for IP address 192.168.1.x, the last IP address will be 192.168.1.250
-
Static Hosts: Devices whose IP addresses should not change (for example network printers) can be assigned static IP addresses so that their IP address is not reset. To assign static IP address for a device, click on + Add New link and then enter the Host Name, MAC address and the desired static IP address.
-
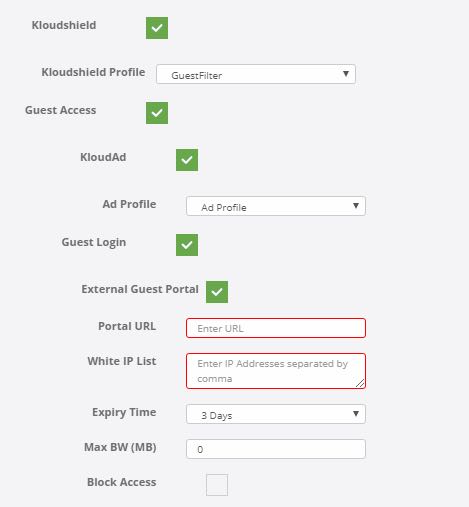
Kloudshield: To enable Kloudshield content filtering service on the network interface, select the Kloudshield check box and choose the desired Kloushield Profile from the dropdown.
-
Guest Access: Enabling Guest Access check box allows to configure the desired settings for this network interface with respect to the advertisements to run and the guest portal behavior.
-
KloudAd: To render advertisements on devices connected to this network interface, select the KloudAd check box and then select the desired advertisment profile from the AdProfile dropdown
-
Guest Login: To render guest captive portal on devices connected to this network interface, select the Guest Login check box. Kloudspot supports both internal & external guest captive portals.
-
To set the internal guest captive portal, follow the below steps:
- Ensure that the External Guest Portal check box is Not selected
- Select the desired Guest Template from the Guest Template dropdown
- Set the desired Expiry Time from the Expiry Time dropdown ( Expiry Time is the Time after which the device will be logged-off automatically. Options for Expiry Time range from from 30 minutes to 7 days. Never option will not logoff the device automatically, but can be invalidated manually from the user list)
- Max BW (MB): Set the Max BW in Mega Bytes after which the device will be logged off automatically ( Max BW (MB) is the maximum allowed badnwidth in Mega Bytes that a device can utilise before getting logged off automatically. For unlimited bandwidth, set it to 0).
-
Note that when both the Expiry Time and the Max BW(MB) are set, the device gets logged off automatically after any one those 2 conditions are met.
-
Select the Block Access check box if the device needs to be blocked for the rest of the day(till midnight) once the device has exceeded the set Expiry Time or the Maximum Bandwidth allowed. (If the Block Access check box is not selected, then the device is permitted to again access the network after being automatically logged off).
-
To set the external guest captive portal, follow the below steps:
- Select the External Guest Portal check box
- Specify the URL of the external guest page in the Portal URL field
- Specify the comma separated list of IP addresses to be white walled
- Set the desired Expiry Time from the Expiry Time dropdown ( Expiry Time is the Time after which the device will be logged-off automatically. Options for Expiry Time range from from 30 minutes to 7 days. Never option will not logoff the device automatically, but can be invalidated manually from the user list)
- Max BW (MB): Set the Max BW in Mega Bytes after which the device will be logged off automatically ( Max BW (MB) is the maximum allowed badnwidth in Mega Bytes that a device can utilise before getting logged off automatically. For unlimited bandwidth, set it to 0).
-
Note that when both the Expiry Time and the Max BW(MB) are set, the device gets logged off automatically after any one those 2 conditions are met.
-
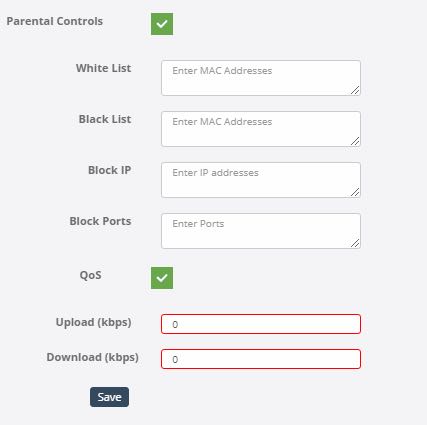
Parental Controls: Selecting the Parental Controls check box provides a set of options that allow/deny network access to devices, block traffic to & from specified IP addresses and block specified ports.
-
White List: Any device that needs to access the network without going through any guest portal restrictions must have its MAC addresses specified in this field. Multiple MAC addresses can be entered by using commas.
-
Black List: Any device that needs to be denied access to the network must have its MAC addresses specified in this field. Multiple MAC addresses can be entered by using commas.
-
Block IP: If traffic to any IP addresses are to be blocked, specify those IP addresses in this field. Multiple IP addresses can be entered by using commas.
-
Block Ports: If outgoing traffic through any ports are to be blocked, specify those ports in this field. Multiple ports can be entered by using commas.
-
QOS: Select this check box to specify upload and download data speeds in Kilobits per Second.
Security Profile
 The Security Profile tab defines Security Profiles that can be used by
SSID’s on the Access Point.
The Security Profile tab defines Security Profiles that can be used by
SSID’s on the Access Point.
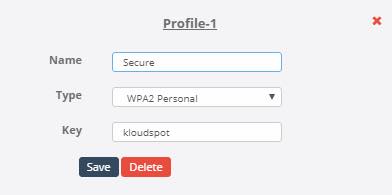
- Name: This is a unique name given to a security policy. This name will be listed in the Access Control dropdown of the WLAN Profile menu to associate with the SSID.
- Type: Kloudspot currently supports 2 types of security policies - Open & WPA2 Personal
- Open: A SSID with this provide is open and devices connecting to the SSID will not be prompted for a password.
- WPA2 Personal: A SSID with this profile acts as a secure network and connecting devices will be prompted for the password.
Radio Profile
The Radio Profile tab provides a mechanism to configure the Radio
attributes of the Access Point. The number of Radio Profiles for an Access
Point depends on the number of Radios that an Access Point has.
-
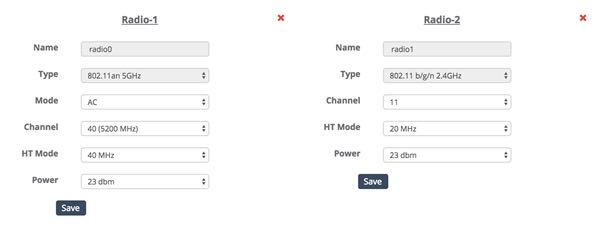
Name: A unique name for a radio of an Access Point. This is pre-populated and cannot be changed.
-
Type: Specifies the type of the radio. This is pre-populated and cannot be changed.
-
Mode: If a radio of an Access Point is of type 11a, Mode can be either AC or N provided they are supported by the underlying hardware. If a radio of an Access Point is of type b/g/n, then the radio mode is internally defaulted to N and the same is not displayed on the UI.
-
Channel: Indicates the channel on which the Access Point will broadcast SSID’s. Select the desired Channel from the dropdown.
-
HT Mode: Indicates the width of the channel. Higher the width of the channel, greater is the throughput but the downsize is the higher probability of conflicts with adjacent channels.
-
Power: Indicates the power of the Radio. Greater the power, higher is the range of the WiFi(SSID) signal.
WLAN Profile
WLAN Profile menu provides configurations for the SSIDs of the Access
Point. Based on the number of SSIDs that an access point supports, WLAN
Profile menu automatically creates that many WLAN Profiles with some default
settings for each of them.
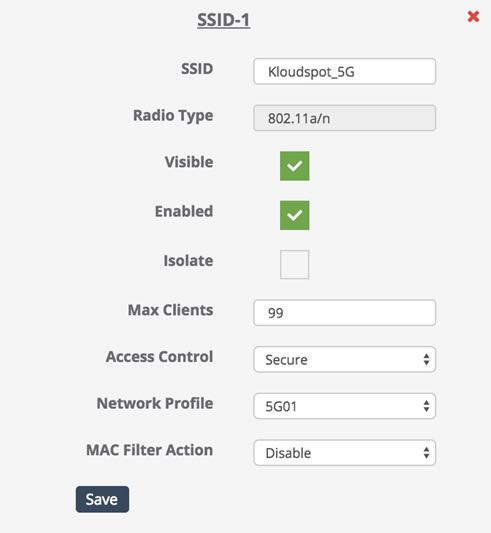
- SSID: The name of the SSID to be broadcasted.
- Radio Type: The Radio on which the SSID is to be broadcasted.
- Visible: Select Visible check box if the SSID is to be visible to the devices on normal scanning.
- Enabled: Select Enabled checkbox to enable the SSID. If this check box is not selected, then the SSID is not available.
- Isolate: Select this check box to isolate the traffic between connected devices to the SSID/interface and to ensure that the devices cannot talk to each other.
- Max Clients: Indicates the maximum number of devices that can concurrently connections to the SSID.
- Access Control: Indicates the Security Policy to be applied to the SSID/interface. Select the desired policy from the dropdown. Note that the Security Policy is created using the Security Profile menu.
- Network Profile: Indicates the Network Policy to be applied to the SSID/interface. Select the desired policy from the dropdown. Note that the Network Policy is created using the Network Profile menu.
- MAC Filter Action: Provides options to restrict access to the SSID(network) based on MAC Addresses. Available options are Allow, Deny and Disable. By default it is set to Disable.
- If MAC Filter Action is set to Disable , then all MAC addresses are allowed access to the network through this SSID.
- If MAC Filter Action is set to Allow , then ONLY those devices whose MAC address is entered in the Allow MAC List will be able to access the network through this SSID . Note that if no MAC address is entered in the Allow MAC List , then NO device can connect to the network through this SSID.
- If MAC Filter Action is set to Deny , then ALL devices whose MAC address is entered in the Deny MAC List will NOT be able to access the network through this SSID . Note that if no MAC address is entered in the Allow MAC List , then ALL devices can connect to the network through this SSID.
Assigning APs
Assigned APs menu provides options to assign or un-assign Access Points to
available Network Groups. It also provides a mechanism to push all the network
configurations and the Services menu configurations from the cloud to the
Access Point.
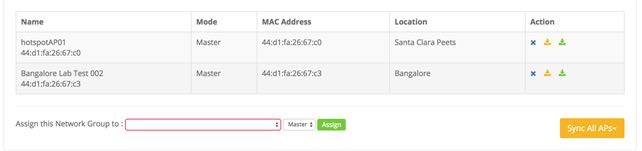 Any Access Point that has been already assigned to a Network Group will be
displayed under this menu.
Any Access Point that has been already assigned to a Network Group will be
displayed under this menu.
- To un-assign an access point from a Network Group, click on the X icon of the corresponding access point.
- The Access Points that are not assigned to any Network Group are listed under the Assign this Network Group to: dropdown. To assign a non assigned Access Point to the selected Network Group, select the Access Point from the dropdown and choose the Mode. (Mode can be Master, Repeater or Sensor).
After assigning Access Points to the Network Group, the configurations under
the Services menu or of the entire Network Group can be synchronized to
all the Access Points by clicking on the Sync All APs dropdown and
selecting Services or Network respectively.
- To update Network Group or Services menu configuration changes to specific Access Points, click on the corresponding icons of the Access Point.